
Folytassuk a munkát ezen az oldalon.
Let's continue working on this page.

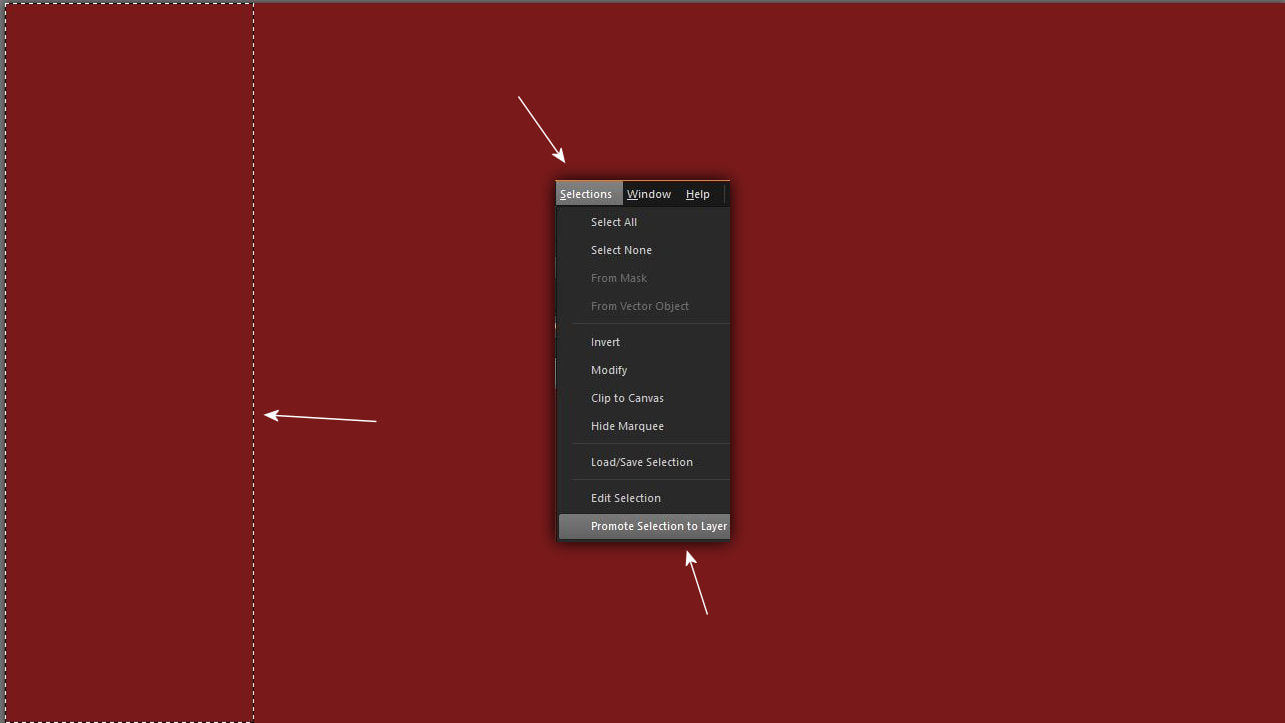
1. Mielött a Pro Show Producer programban dolgoznánk tovább még egy érdekes dekoráció készítést szeretnék megmutatni néhány lépeésben. Önts ki egy üres lapot a megfelelö színnel amelyik passzol a háttered színeihez. Jelölj ki egy csíkot és promótáld azt.
Before we continue working in the Pro Show Producer program, I would like to show you one more interesting decoration creation in a few steps. Fill out a blank card with the appropriate color that matches the colors of your background. Select a strip and promote it.
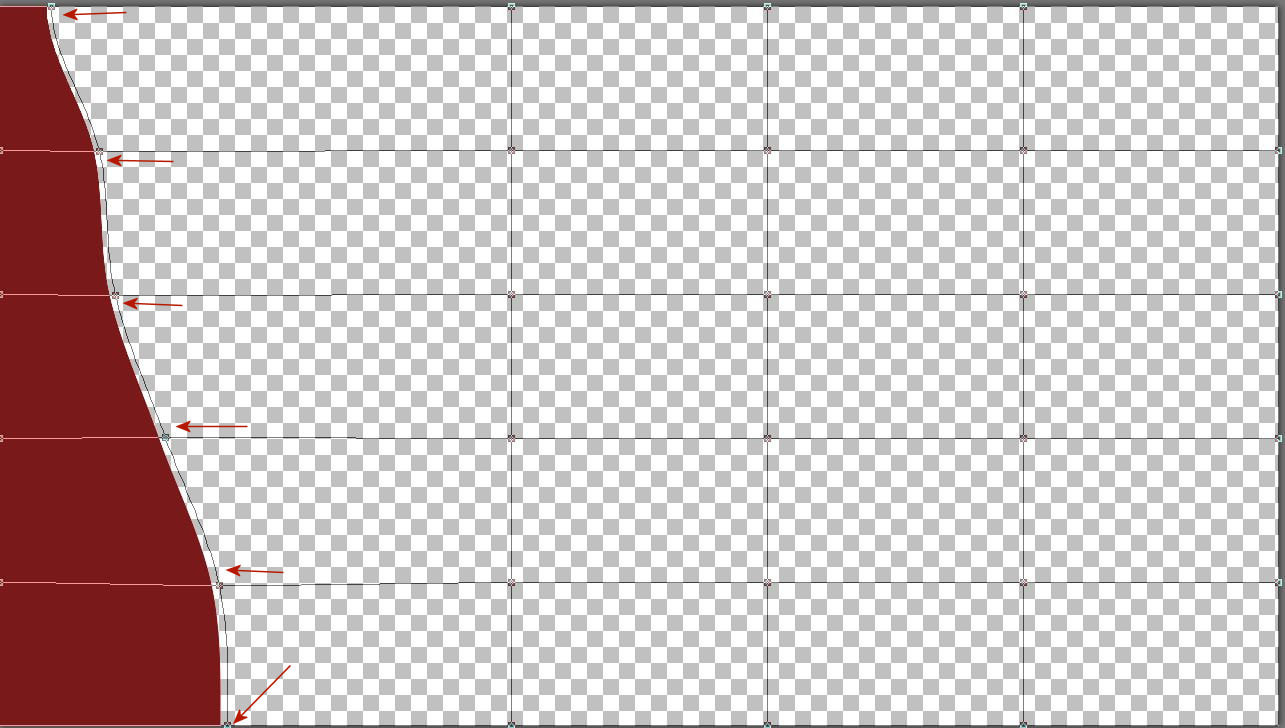
2. Állj a promótált rétegre és az eszközöknél kapcsold be a Mesh Wrap tool-t. A megjelent négyzetrácson levö jobboldali fogó gombokkal dolgozunk azokat mozgatjuk egyenesen balra.
Stay on the promoted layer and turn on the Mesh Wrap tool. We work with the right grip points on the square grid that appears, moving them straight to the left.

3. Próbálj csinálni egy ilyen alakzatot. A pontok mozgatásánál ne csúszkálj le vagy fel csak egyenesen mozgass!!!
Try to make such a shape. When moving the points, do not slide down or up, just move straight!!!
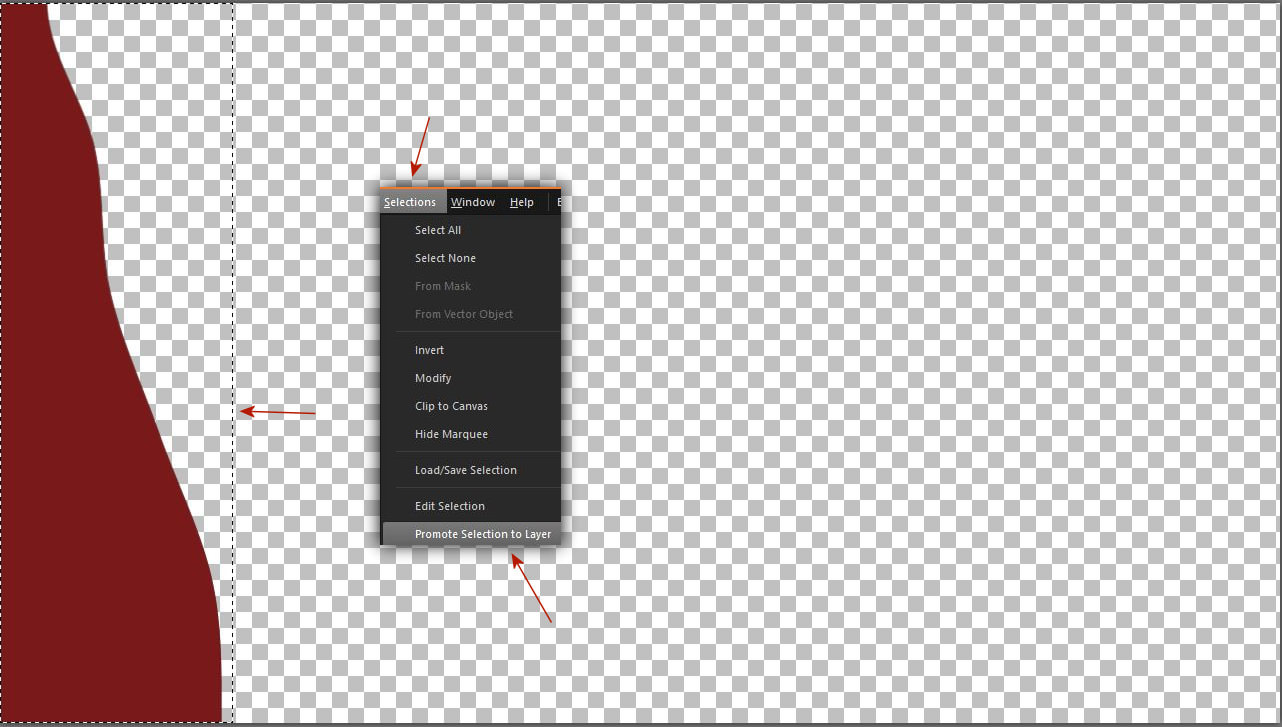
4. Amikor készen vagy jelöld ki az alakzatodat és prómótáld új rétegként.
When you are ready, select your shape and promote it as a new layer.
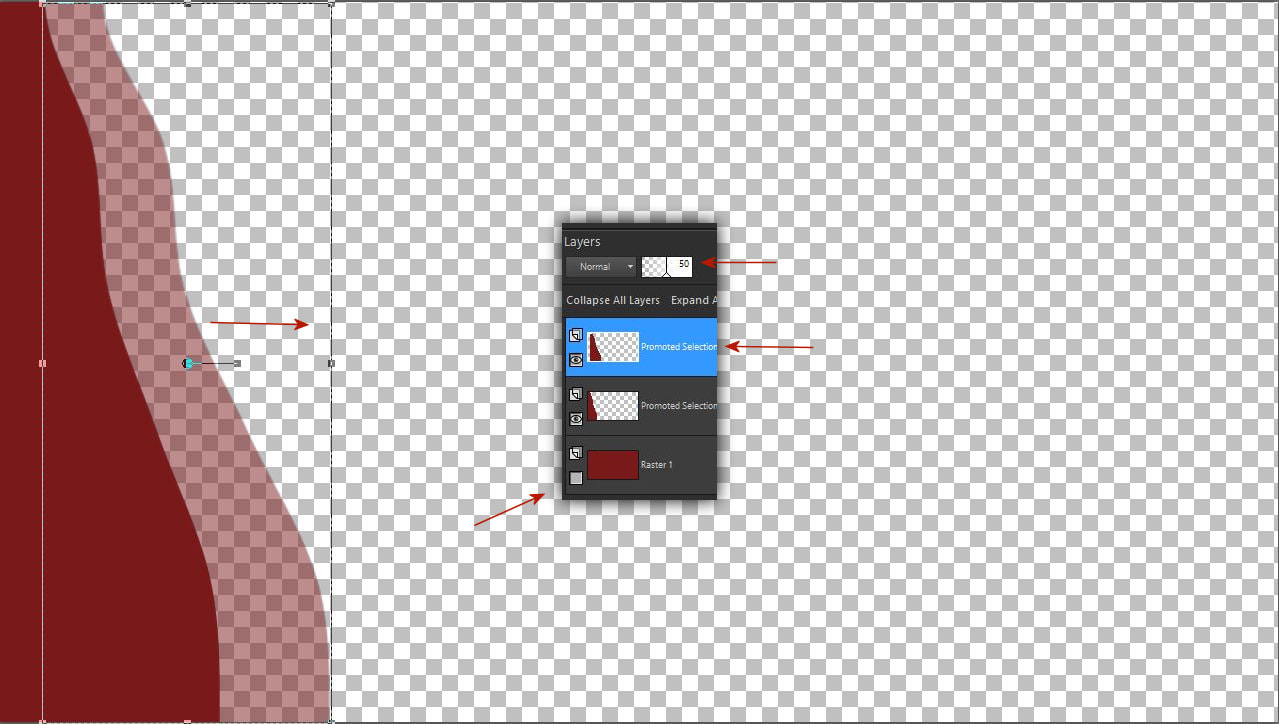
5. Igy most 3 réteged van a felsöt vidd jobbra egy kicsit és az opacity-t tedd 50%-ra.
So now you have 3 layers, move the top one a little to the right and set the
opacity to 50%.
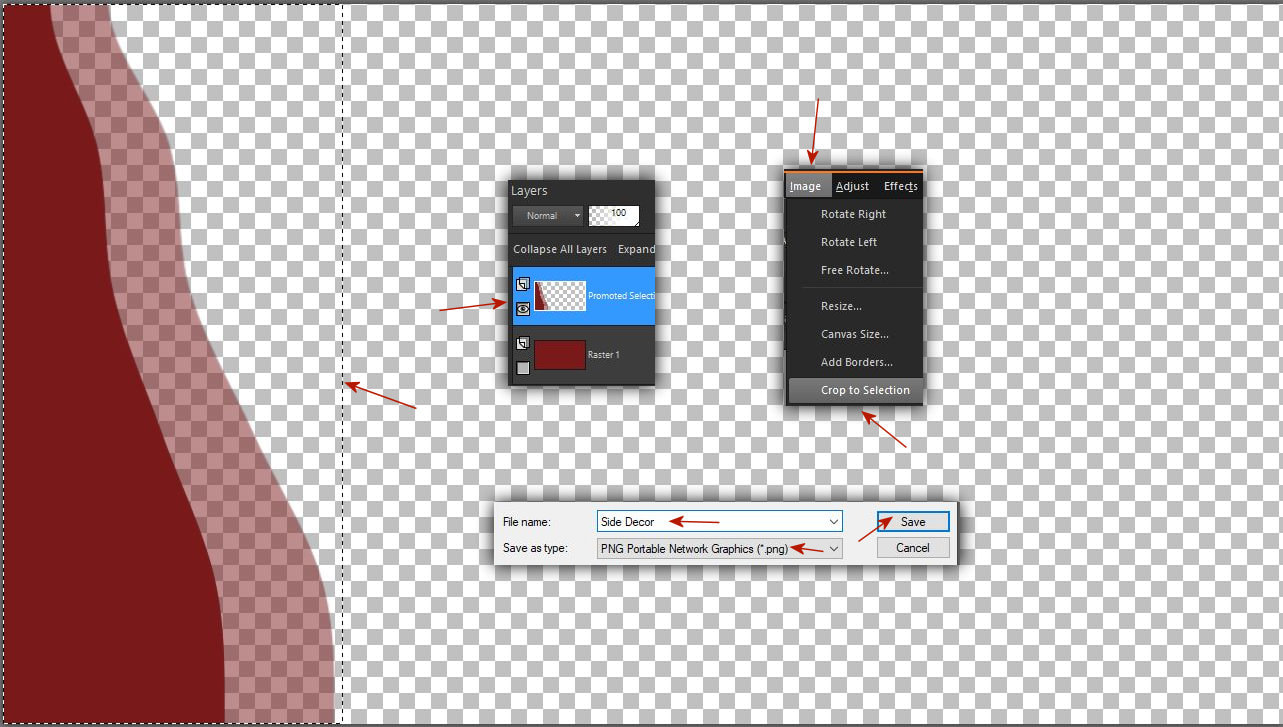
6. Add össze a rétegeket vágd ki a dekorodat és mentsd el png formátumban.
Merge down the layers, cut out your decor and save in png format.
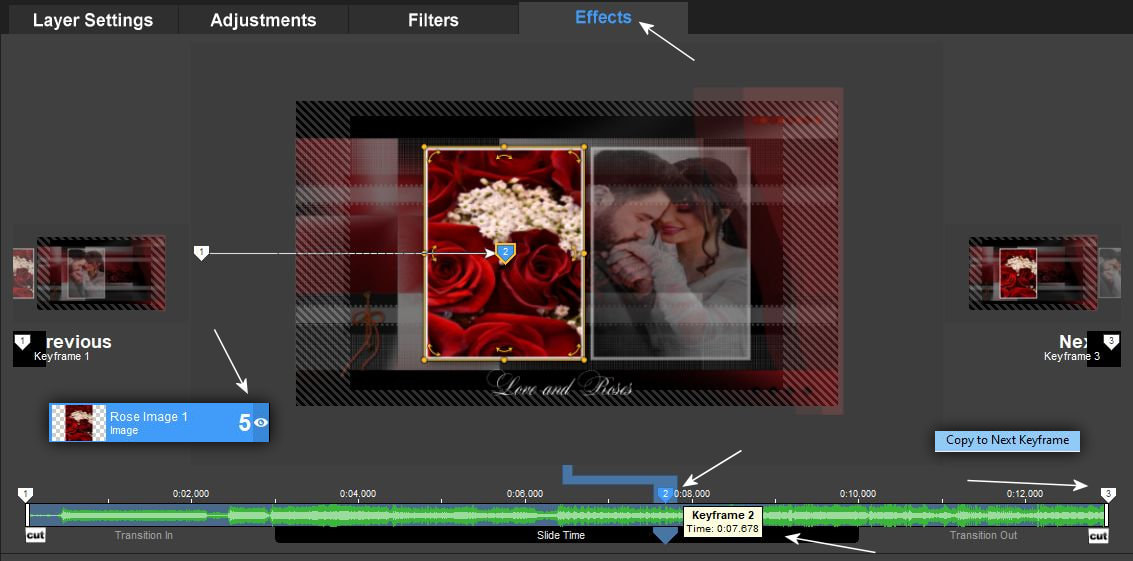
7. Kezdjük hasznosítani a munkánkat a Pro Show Producerben. A fotózáson már az én készülö saját videómból láttok részletet.Nekünk ezért nekünk csak a 4. 5.6.réteg a fontos az effecteléshez. A 1-es rétegen az én logómvan a 2-esen egy gomb decor a 3-ason pedig a fentiekben látott dekoráció amelyek nincsenek mozgatva. A slide-ok 7 és 3 másodpercen állnak.
Let's start using our work in Pro Show Producer. In the photo shoot, you can already see a detail from my own video. For us, therefore, only the 4th, 5th.6th layer is important for the effects. On layer 1 is my logo, on layer 2 there is a button decor, and on layer 3 are the decorations seen and made above, which have not been moved. The slides are at 7 and 3 seconds.
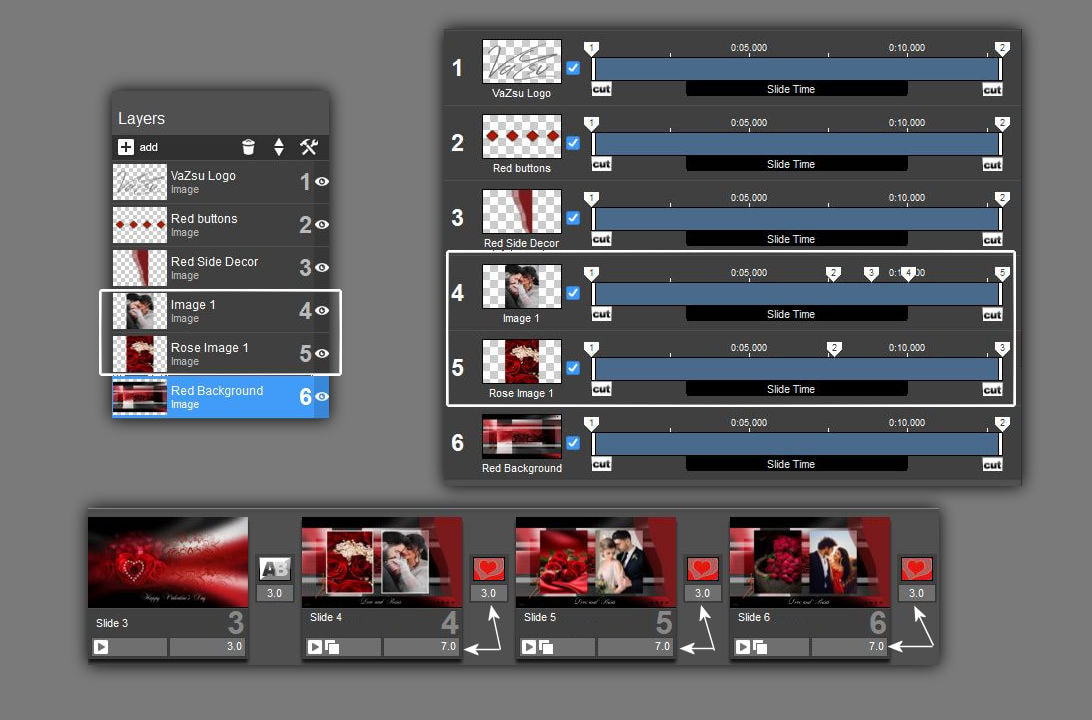
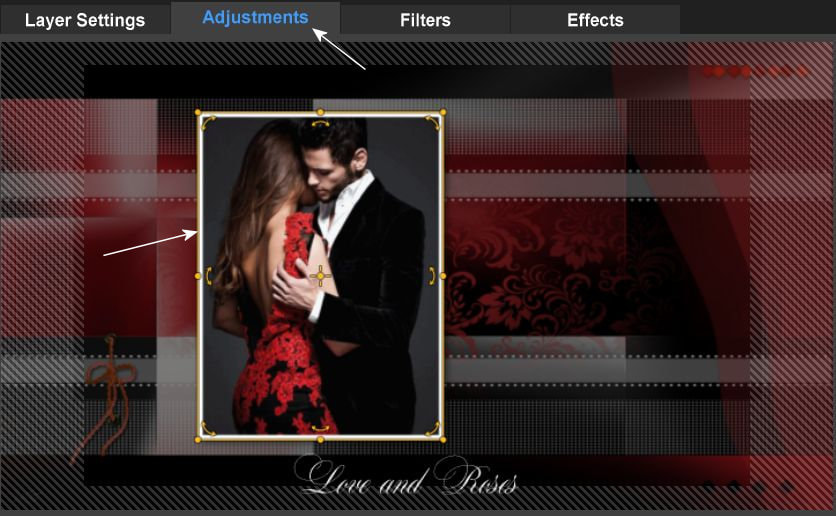
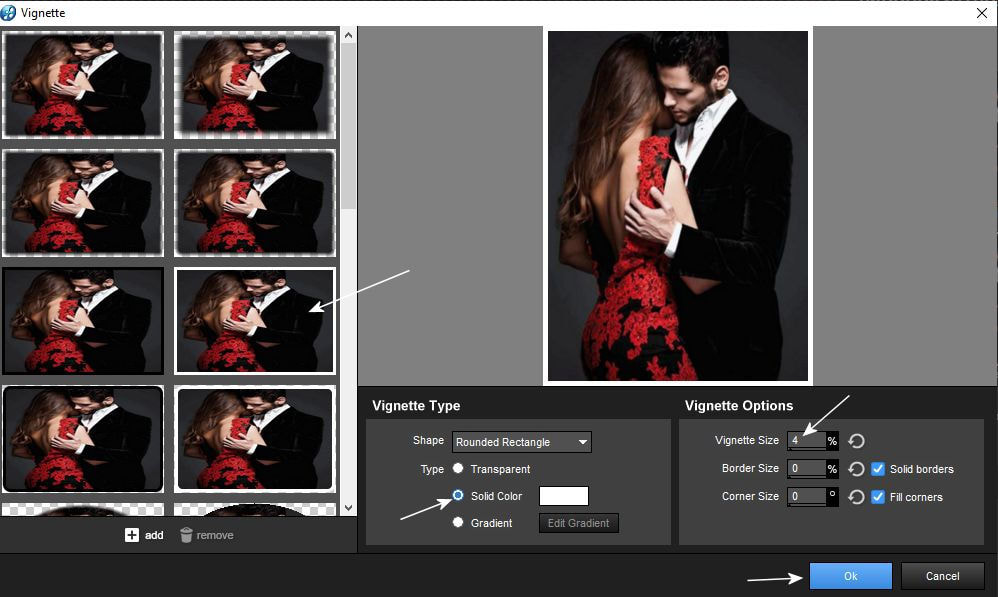
8. A képek mérete 720 x 960 ehhez az alaphoz. A keretezésük az adjustmentben történik.
Images are 720 x 960 for this base. They are framed in the adjustment menü.

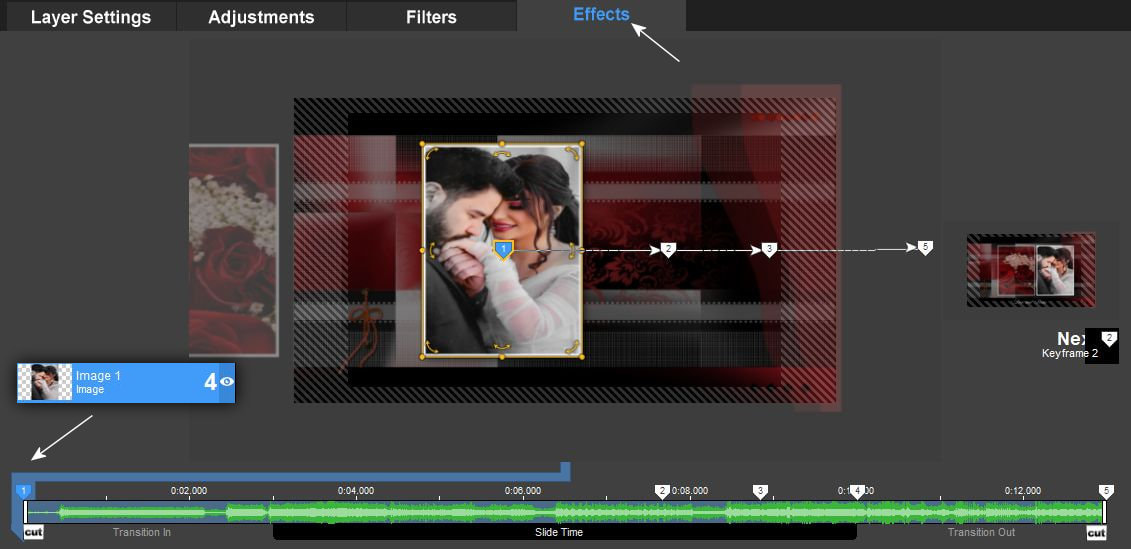
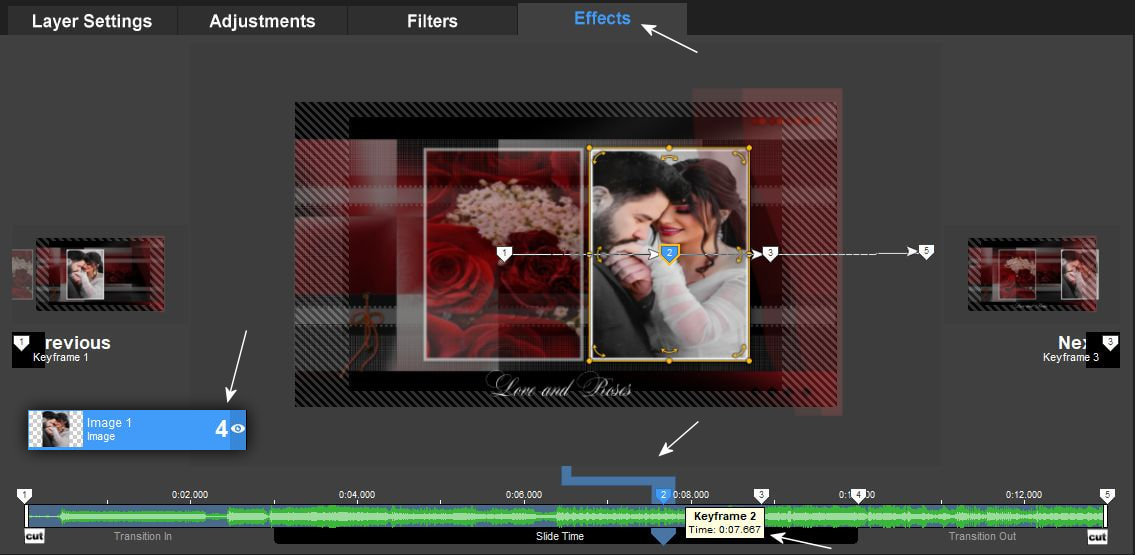
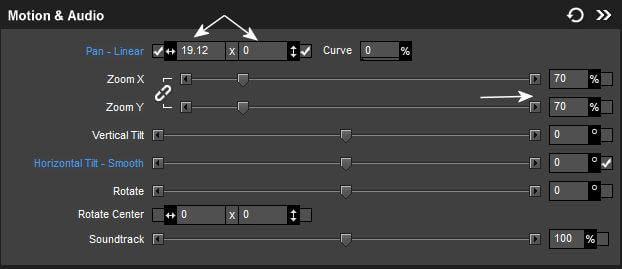
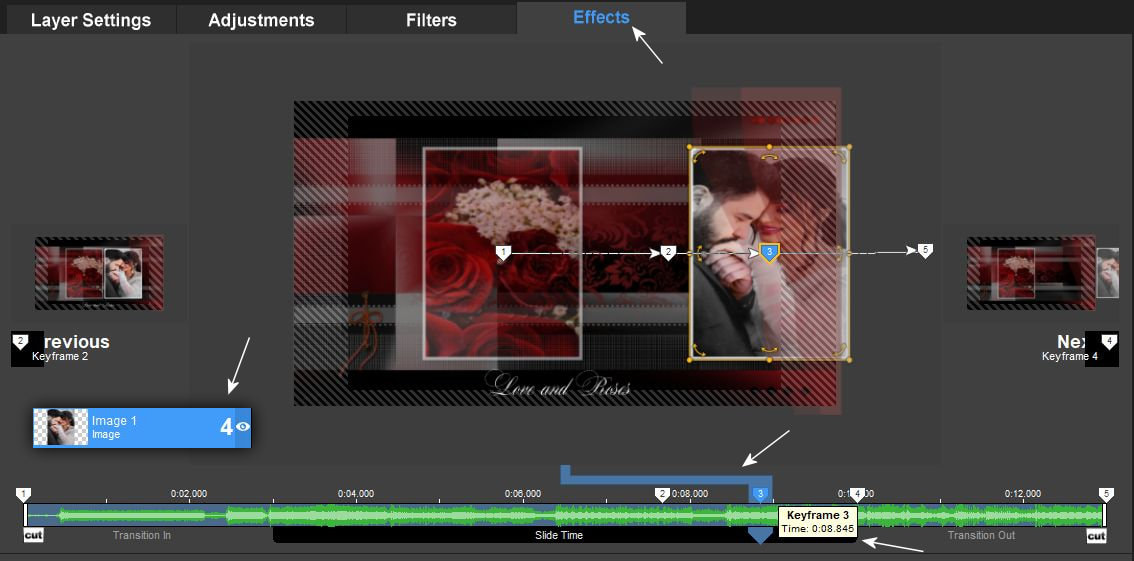
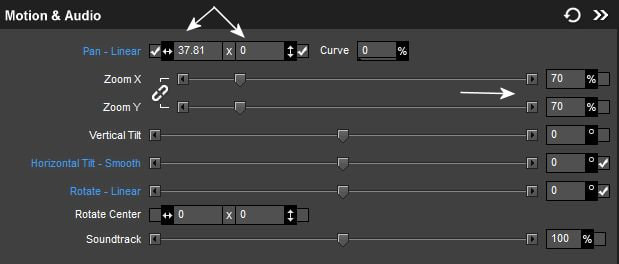
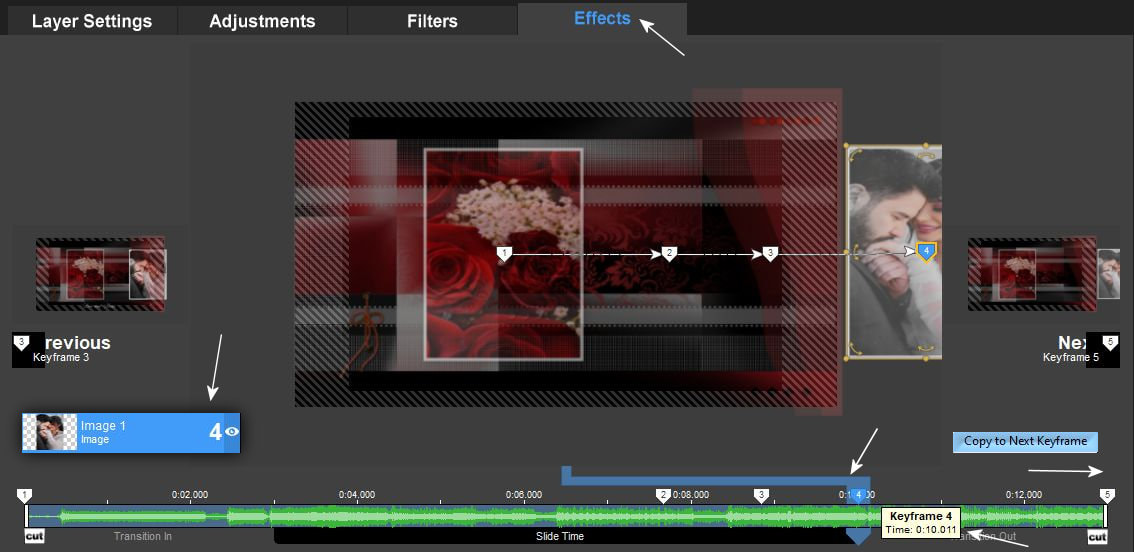
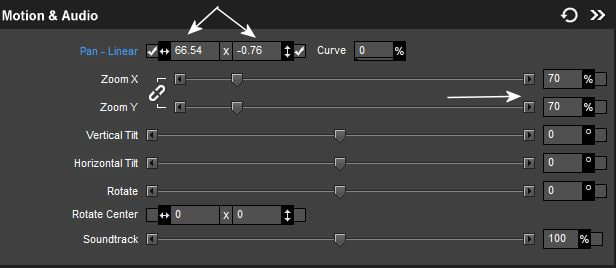
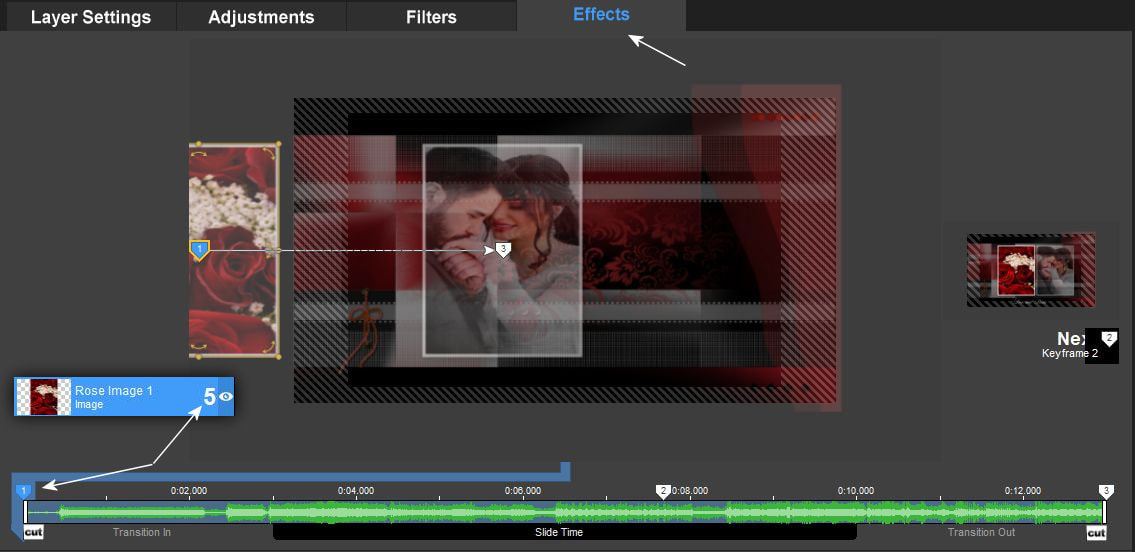
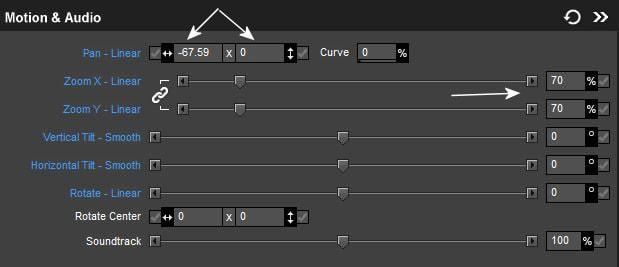
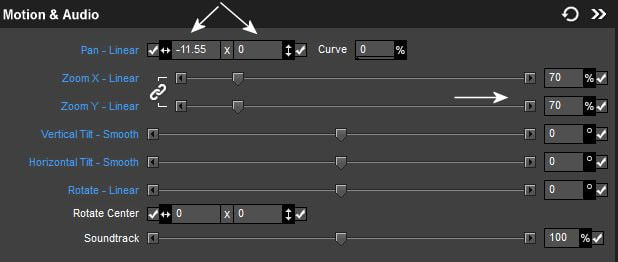
9. Az effect methódusnál két kép mozog be a képernyöre majd a hátsó kép kissé meglöki az elsöt amely kifut a képböl amíg a hátsó kép állva marad. Amikor egy videóban készítünk egy nagyon szép hátteret akkor nem kell bonyolult effecteket alkalmazni mert a látványterved jobban érvényesül a képek és a zene harmóniájával. Tehát kövesd a beállításokat a képeken látható értékek szerint.
With the effect method, two images move onto the screen, then the rear image slightly pushes the first one, which runs out of the image while the rear image stay. When we create a very beautiful background in a video, there is no need to use complicated effects because your visual design is more effective with the harmony of images and music. So follow the settings according to the values shown in the pictures.

10.
11.
12.
13.
14.
Lássuk hogyan is néz ki ez az effect egy rövid video részletben amelyet ebben a tutorialban készítettünk el. A tudatunkban a szerelmes videóknál a piros színekre asszociálunk. De szeretném megmutatni azt is, hogy a videózásban ha megvan a színharmónia és ahhoz a megfelelö zene a vizuális hatást ugyanúgy meg teremti abban a témakörben más színekben is. Igy most használom azokat a háttereket is amelyeket itt a bemutatóban is használtam.
Let's see what this effect looks like in a short video clip that we made in this tutorial. In our minds, we associate love videos with the color red. But I also want to show that in videography, if there is color harmony and the appropriate music, the visual effect is created in the same way in other colors in that topic. So now I'm using the same backgrounds that I used in the presentation.
Sárga Verzió - Yellow Version
Kék Verzió - Blue Version
Piros Verzió - Red Version
A rövid bemutatókban látható transition tutorialját az alábiakban találod meg itt a weblapon.
You can find the transition tutorial shown in the short presentations below on this website.
