Egy igen kellemes látványt nyújtó áttünést készítünk el ebben a bemutatóban. Az üveghatású áttünések és a hozzájuk tartozó vékony csíkok azok amelyek elegánssá teszik ezeket a megoldásokat. Ezért igyekszem olyan áttünéseket csinálni amelyek a fentiekben említett jellemzökre épülnek. Ez itt most a bal oldali áttünés leírása. De ennek a legördülö menüjében van a jobb oldali áttünés leírása. Itt nagyon részletesen írok le mindent amelyet a másik lapon már nem teszek tehát elképzelhetö hogy bizonyos lépéseket ahhoz is itt kell majd megnéznetek.
In this presentation, we create a transition that provides a very pleasant sight. The glass-like transparent and the associated thin strips are what make these solutions elegant. That's why I try to make transitions that are based on the characteristics mentioned above. This is the description of the transition on the left. But in the drop-down menu of this, there is a description of the transition on the right. Here I describe in great detail everything that I don't do on the other page, so you can imagine that you will have to look at certain steps here as well.

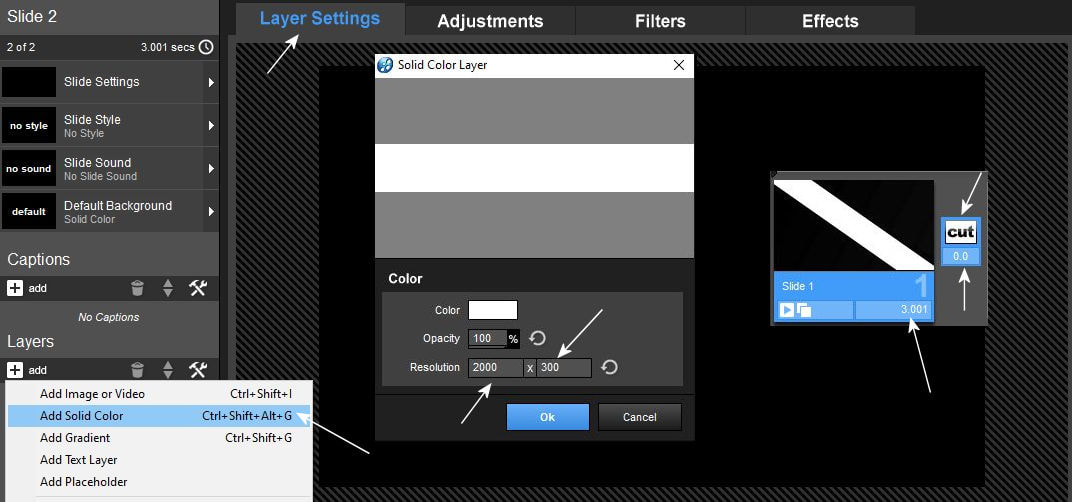
1. Kezdjük el a rétegek kialakítását.
Let's start creating the layers.
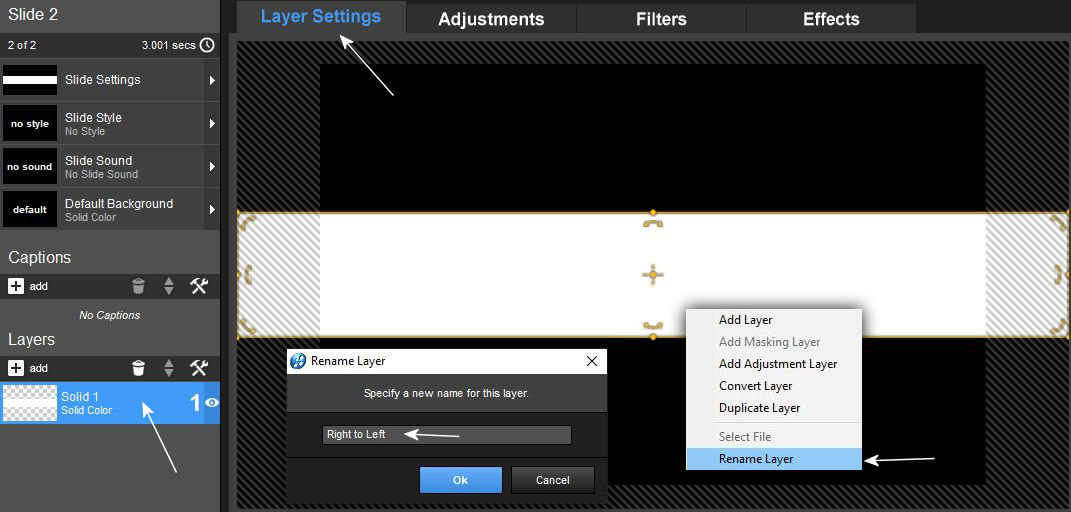
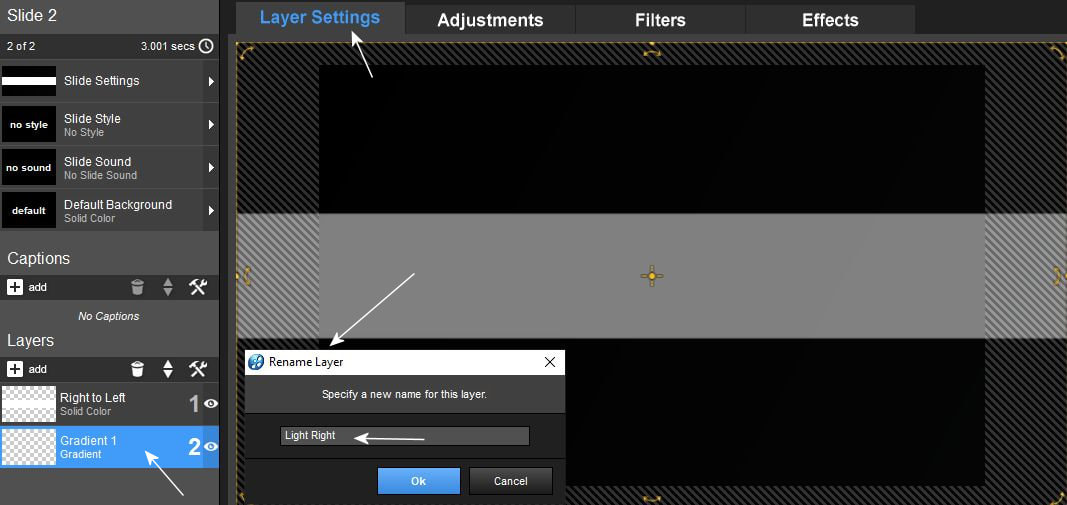
2. Nevezd át ezt a réteget. Szinte minden rétegen lesznek átnevezések ezért nagyon oda kell figyelned erre.
Rename this layer. Almost every layer will have renames, so you have to pay close attention to this.
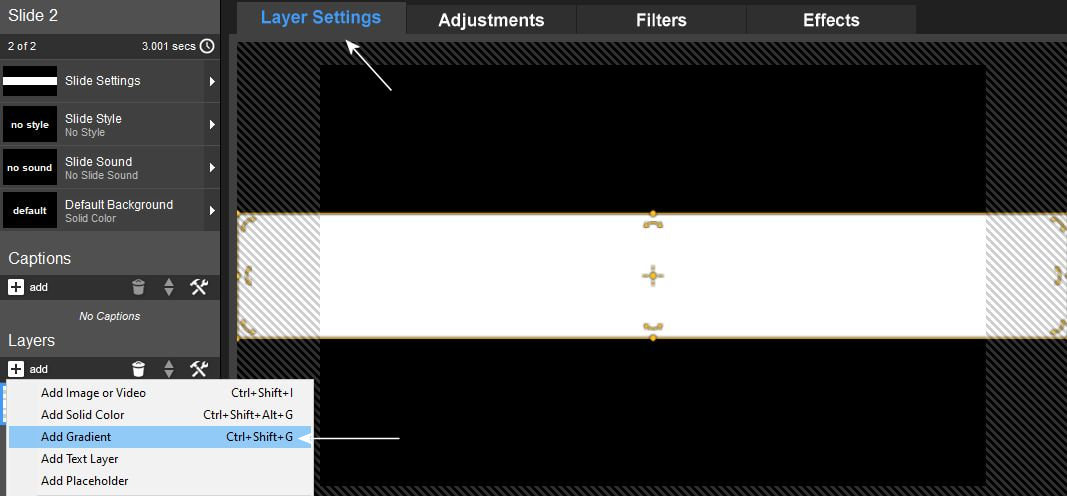
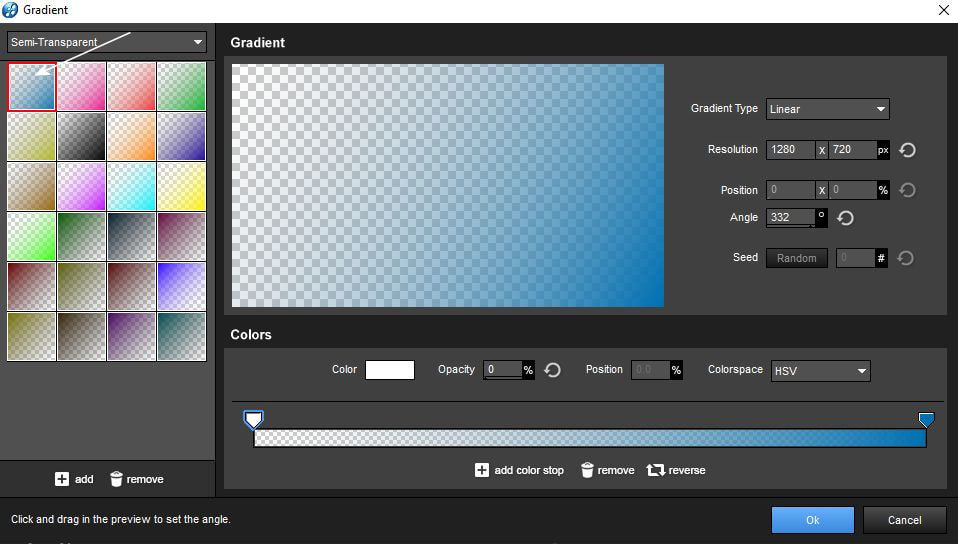
3. Most szükségünk lesz egy teljesen áttetszö gradient rétegre ennek az elkészítési folyamatát látjátok itt pár lépésben. Ezekre a lépésekre szükségetek lesz majd a jobb oldalas áttünés elkészítésénél is.
Now we will need a completely transparent gradient layer, you can see the process of creating this in a few steps here. You will also need these steps when making the right-side transition.
4. Válaszd a semi transparent menüt
Choose the semi transparent menu

5. Kattints az elsö kockára és válaszd ki azt a gradientet
Click on the first cube and select that gradient
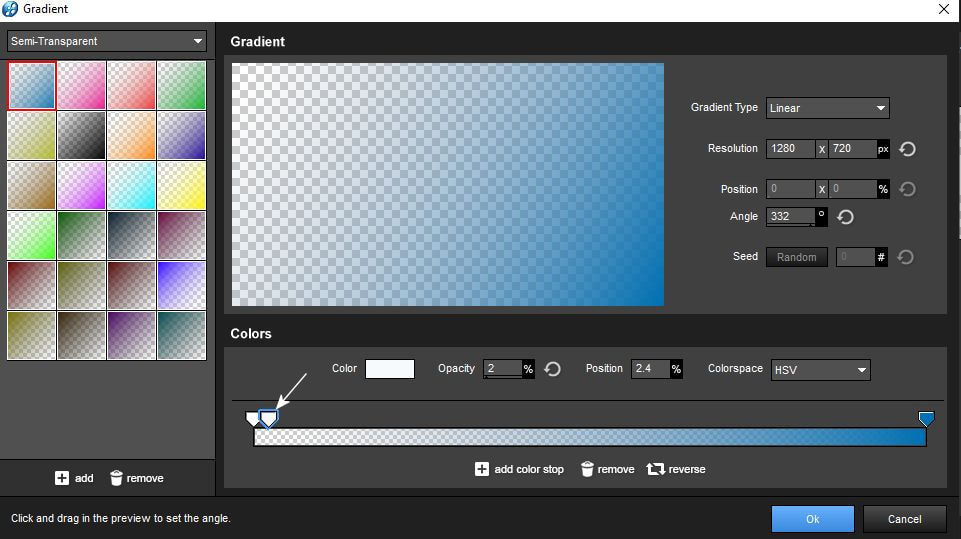
6. A lehetö legközelebb az elsö ponthoz kattints a lécre hogy legyen egy másik pont amivel tovább dolgozol.
Click on the bar as close as possible to the first point so that there is another point to continue working with.
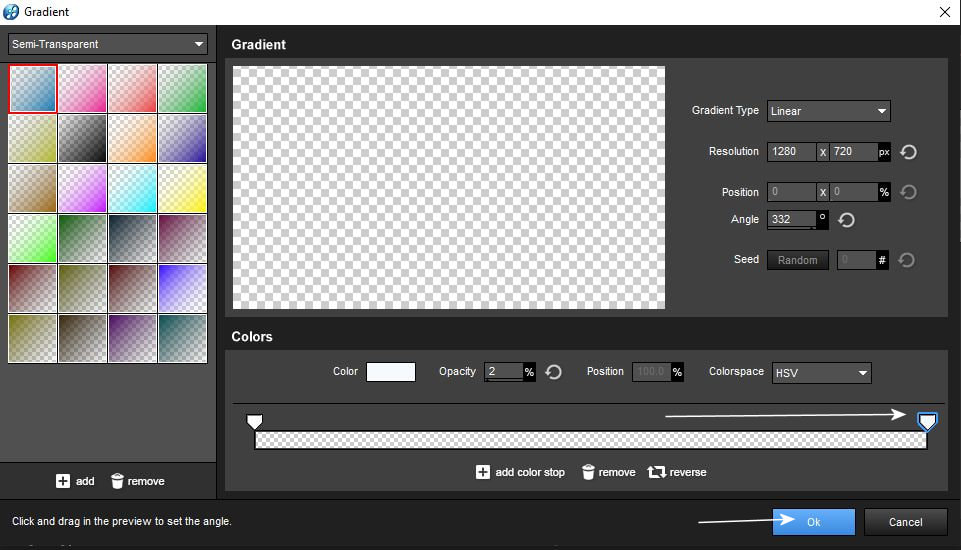
7. Húzd el ezt a pontot a legvégére a lécnek, hogy ne legyen szín sehol és egy teljesen átlátszó gradientet kapjunk.
Drag this point to the very end of the bar so that there is no color anywhere and we get a completely transparent gradient.
8. Itt is kezdödik a réteg átnevezése használd a képen látható neveket.
The renaming of the layer also starts here, use the names shown in the picture.
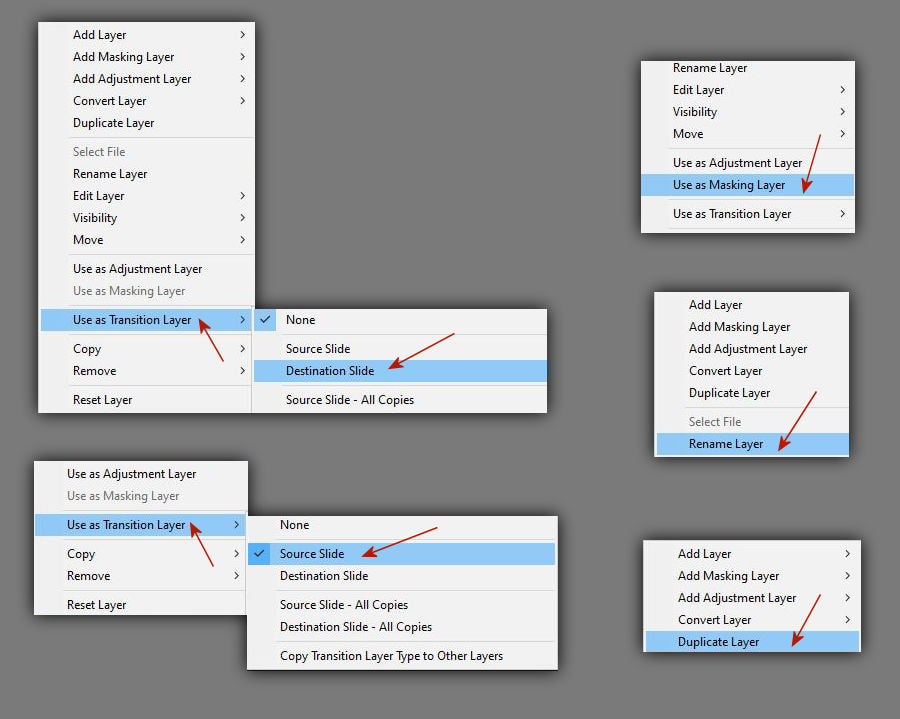
9. Ezeket a menüpontokat kell hogy használd a rétegek átnevezésére vagy arra, hogy éppen mikor mit kell a rétegekkel csinálni. Ezt az összeállítás után kell meg tenned nagyon figyelve arra hogy majd mit látsz a következö képen.
You should use these menu items to rename the layers or to determine what to do with the layers. You have to do this after assembly, paying close attention to what you see in the next picture.
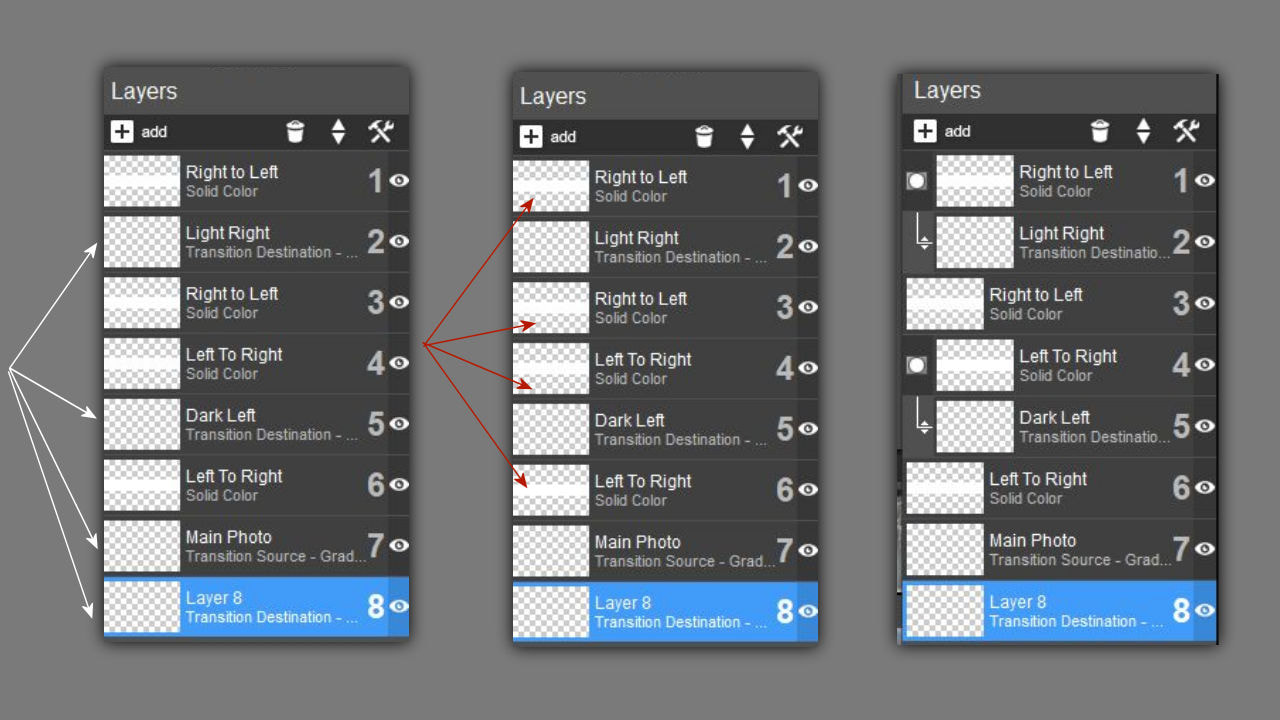
10. A fehér és a piros nyilakkal jelzett rétegek duplázással jöttek létre. Az elsö két táblán azt látod hogy mely rétegeket hova kell elhelyezni a sorban. Az utolsó táblán azt is látod melyek lesznek a maszkok. A legfontosabb dolog pedig a rétegek nevei amelyet átnevezéssel tudsz megoldani valamint a nevek alatt levö feliratokra is ügyelned kell. Addig ne menj tovább amíg ezek a feliratok nálad nem így néznek ki.!!! Minden feliratot a rétegekre jobb füllel kattintásra megjelenö menüsorban tudod megoldani.
The layers marked with white and red arrows were created by duplicate. On the first two tables you can see which layers should be placed where in the row. On the last board, you can also see what the masks will be. The most important thing is the names of the layers, which you can solve by renaming them, and you also have to pay attention to the inscriptions under the names. Do not continue until these inscriptions look like this.!!! You can solve all captions in the menu bar that appears when you right-click on the layers.
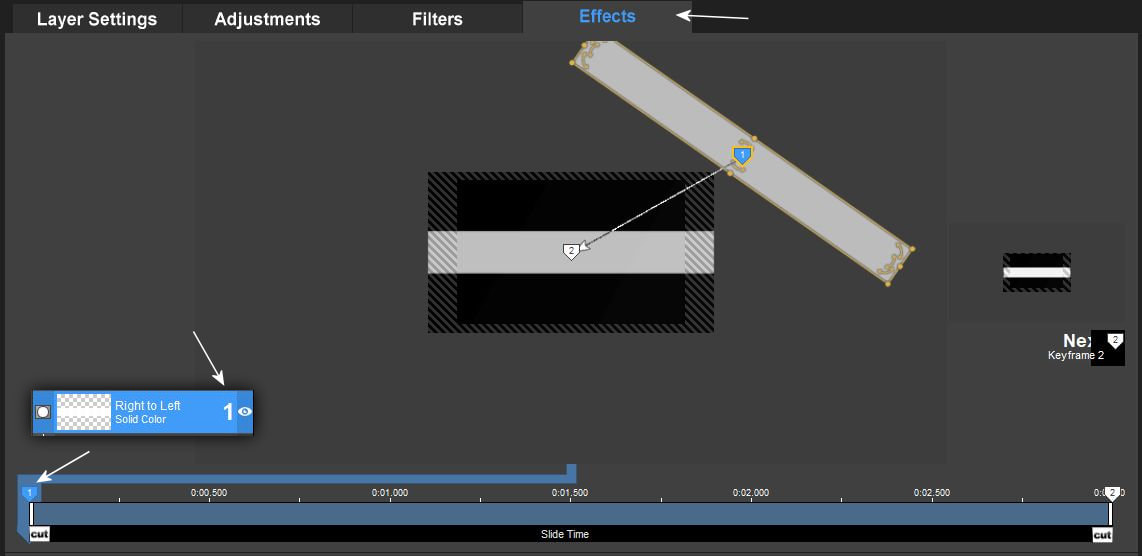
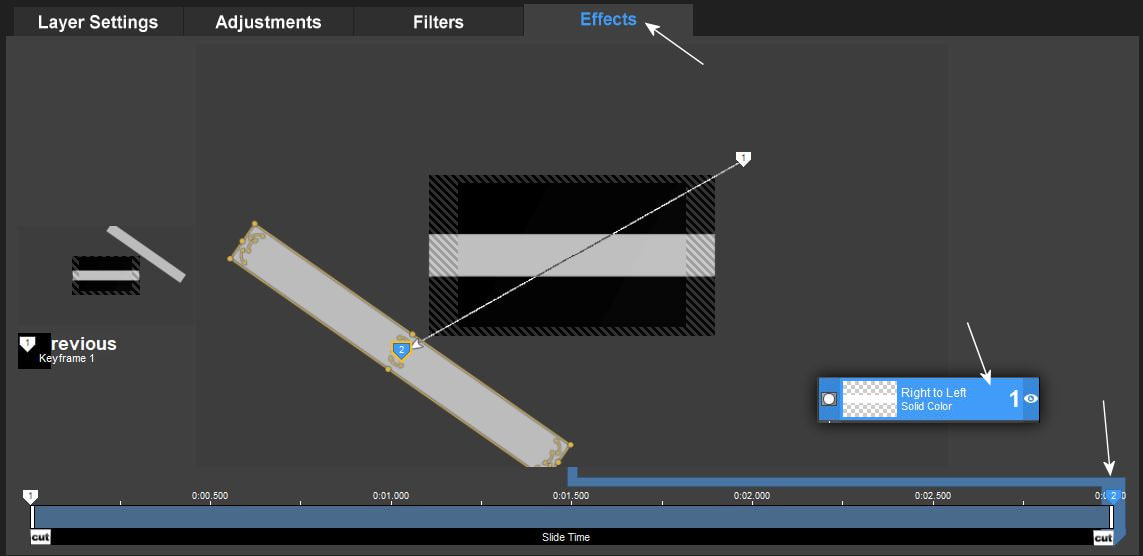
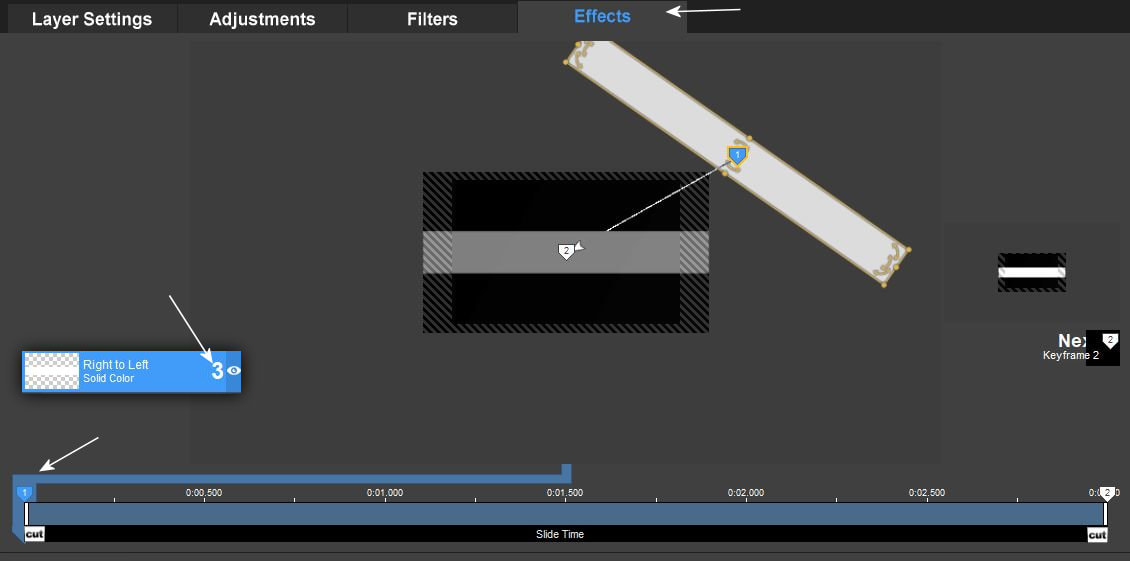
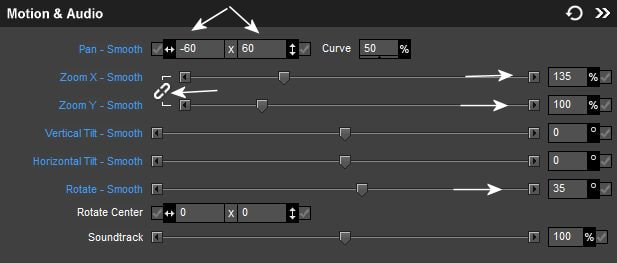
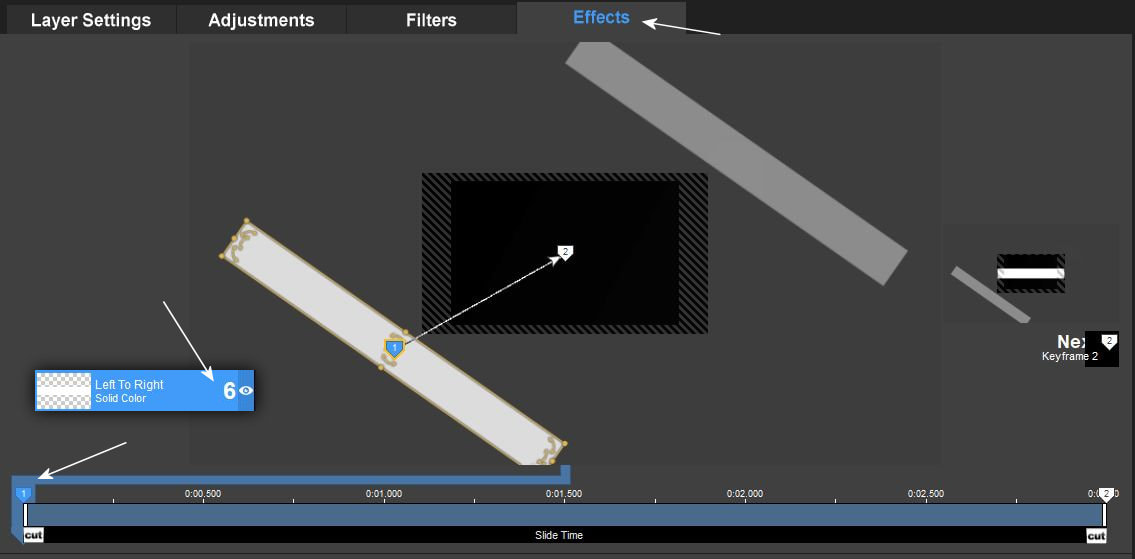
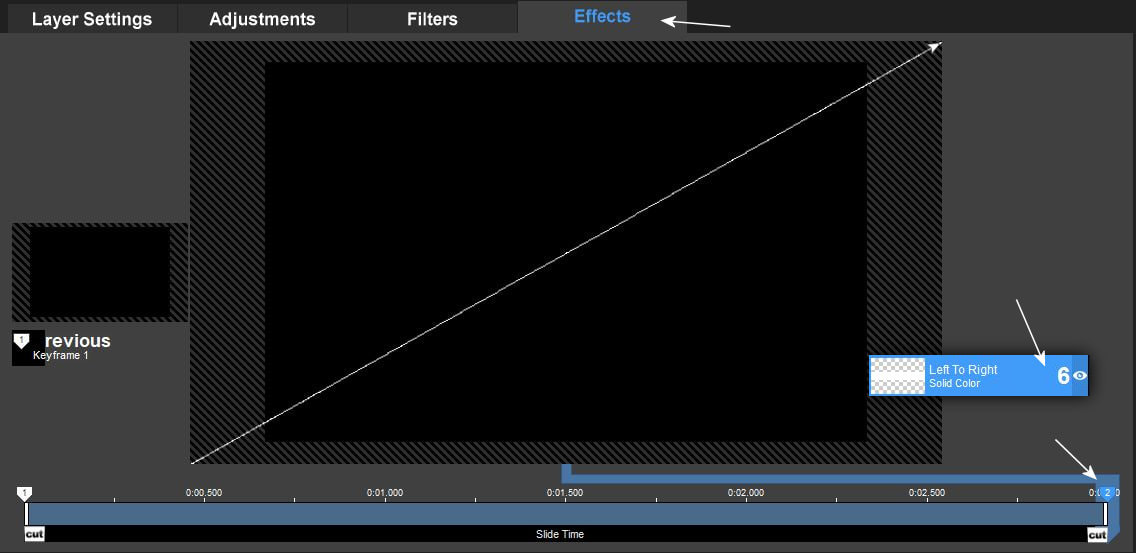
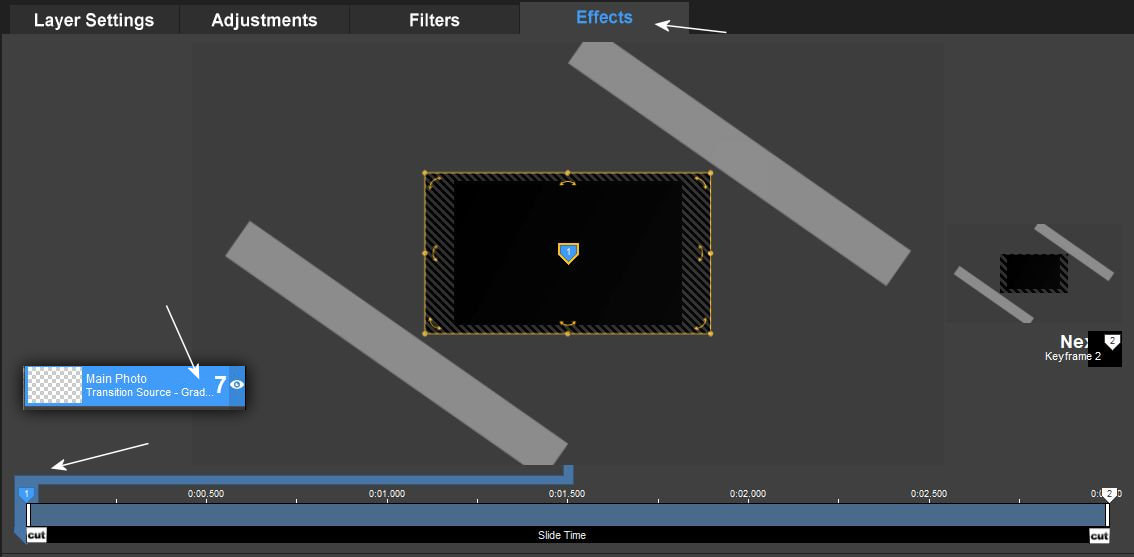
11. Ha biztos vagy benne, hogy minden a helyén van és minden rétegnek helyesen van a neve akkor kezdheted a munkát a keyframe pontokon. Kövesd a képeken látottakat.
If you are sure that everything is in place and that each layer has the correct name, you can start working on the keyframe points. Follow what you see in the pictures.
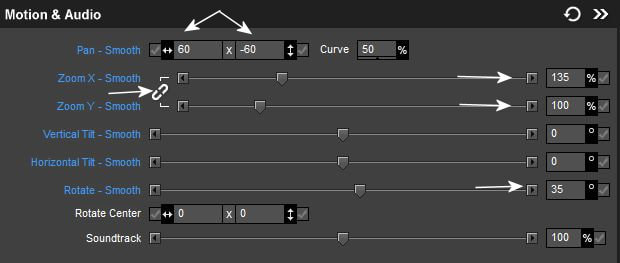
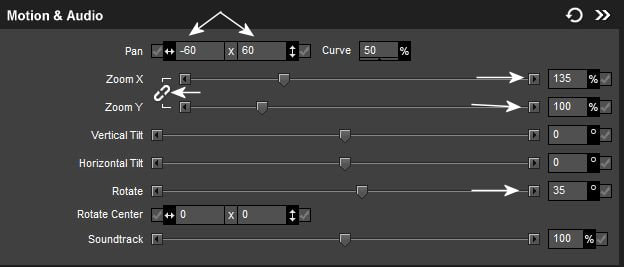
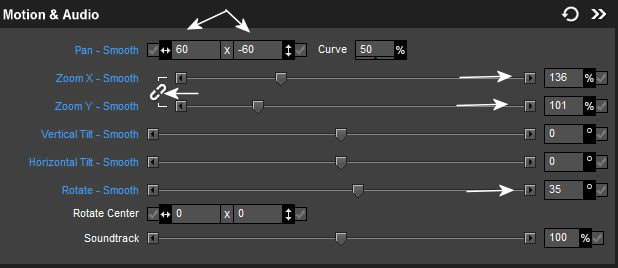
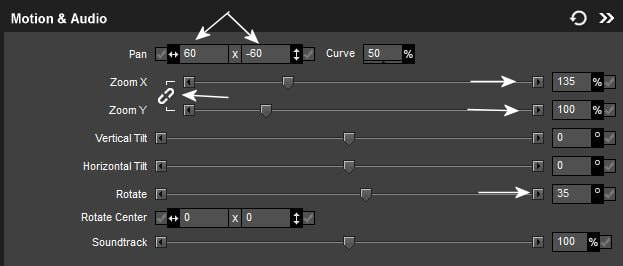
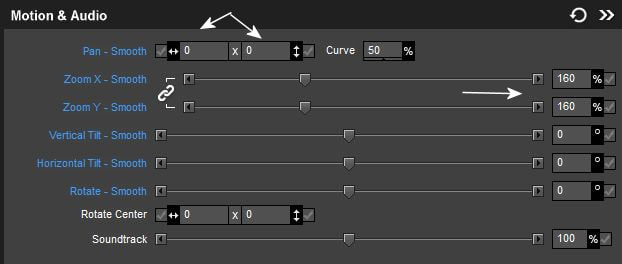
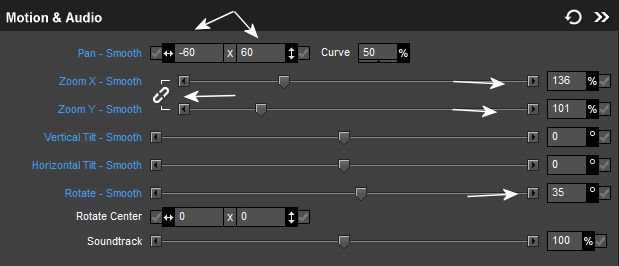
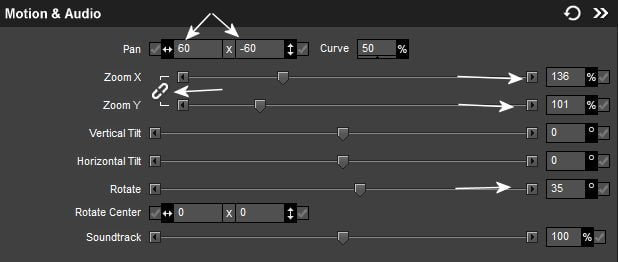
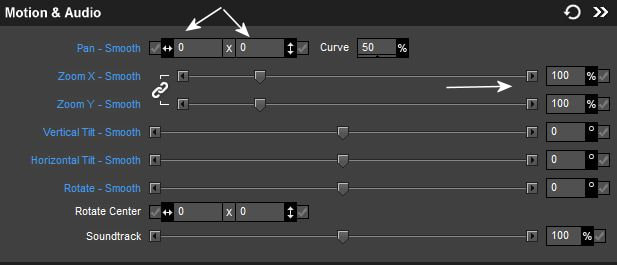
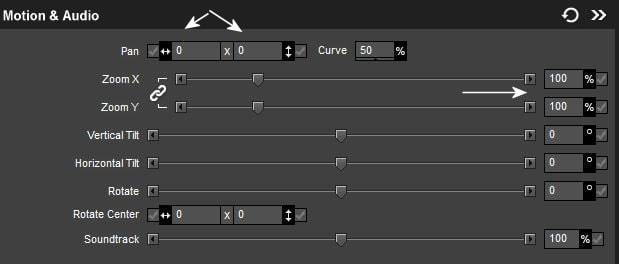
Figyelem, ahhoz hogy a zoom-hoz különbözö értékeket tudj írni mindig rá kell
kattintani a sor elején látható láncszem ikonra.!!!
Attention, in order to be able to write different values for the zoom, you must always click on the chain icon at the beginning of the row.!!!
12.
13.
14.
15.
16.

17.
18.
19.
20.
21.
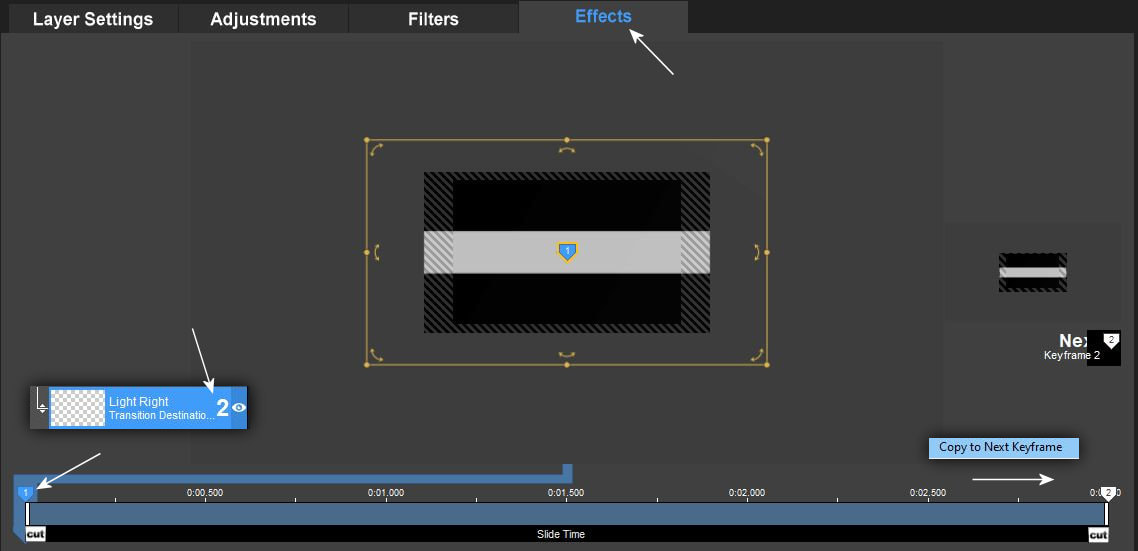
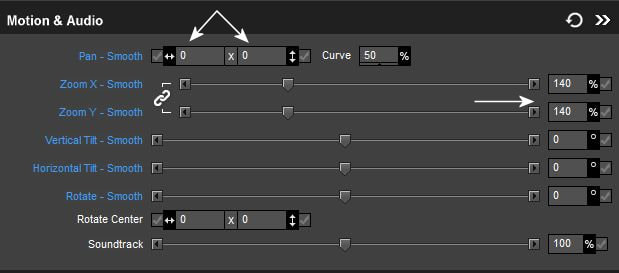
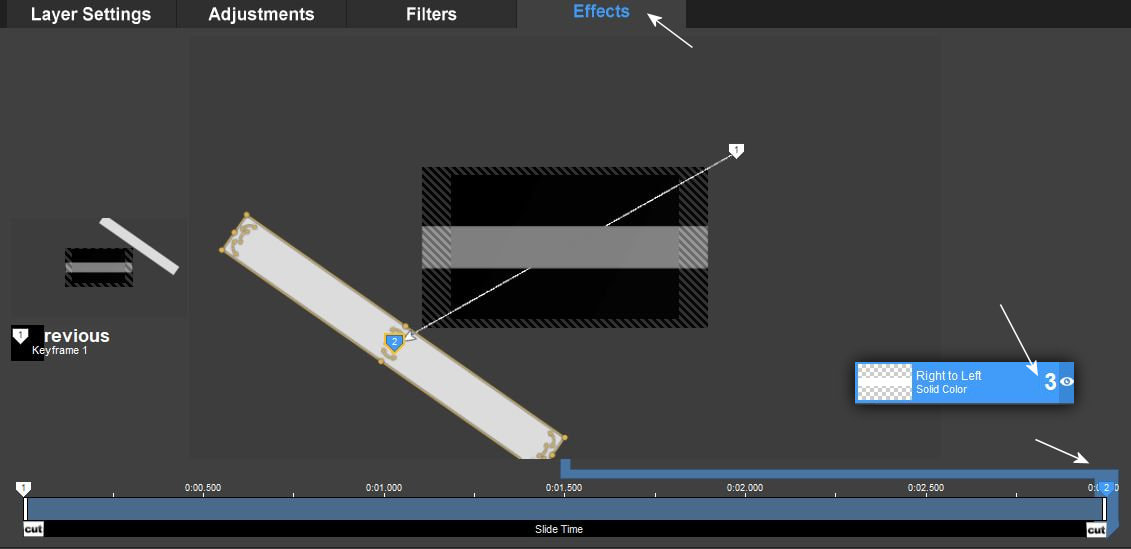
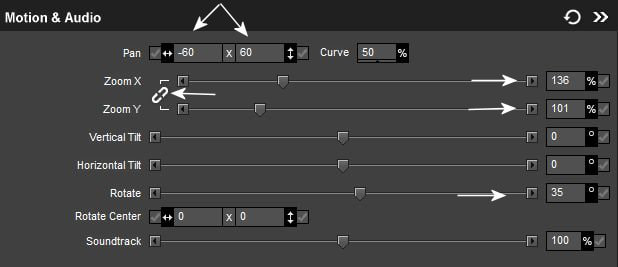
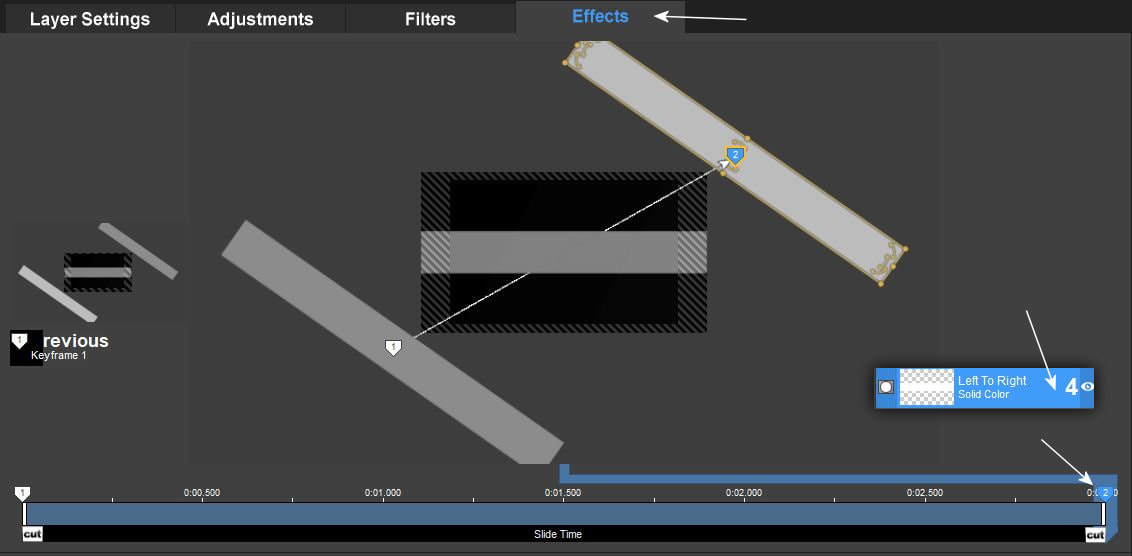
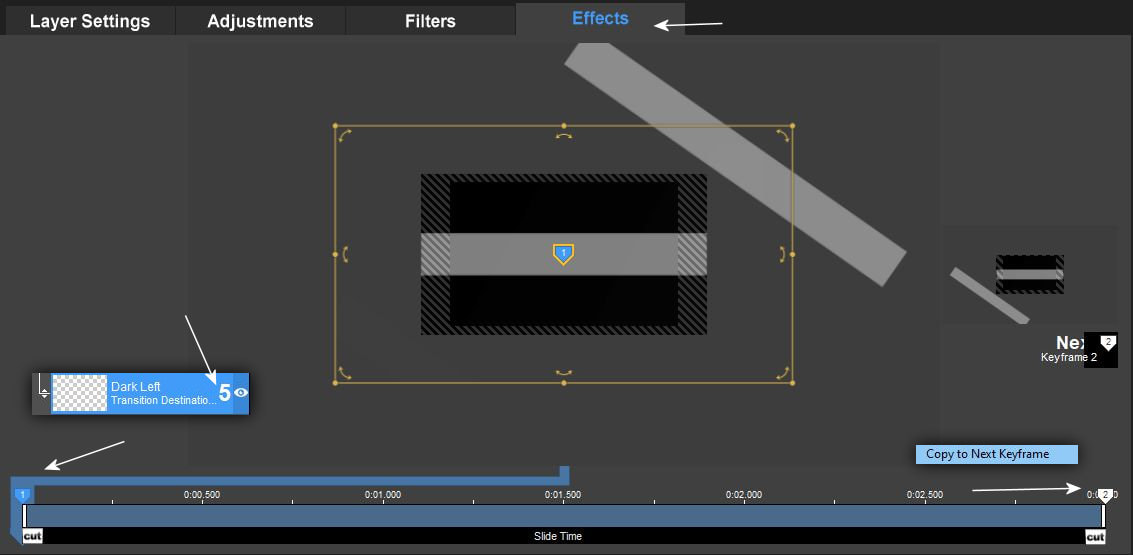
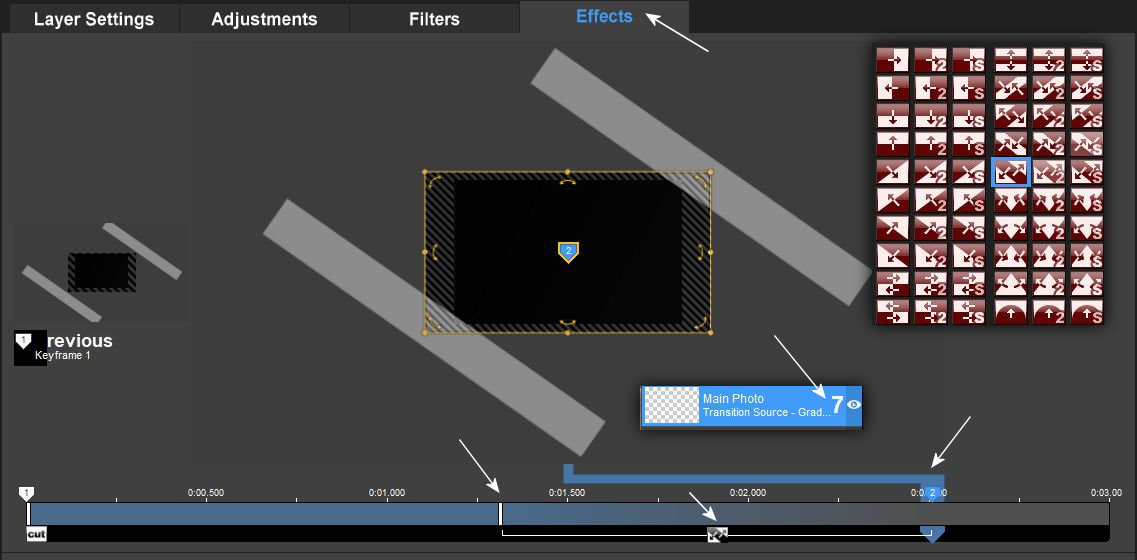
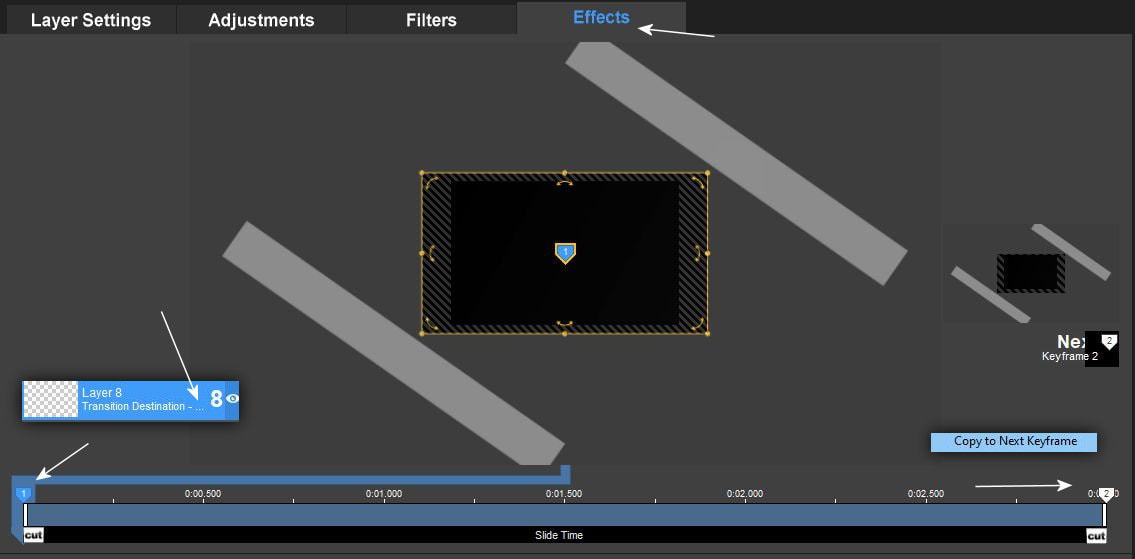
22. Ezen a képen nagyon sok információ van, figyelj meg mindent alaposan különösen a képen látható transition típust, hogy mit kell a 2-es keyframe pontra tenned.
There is a lot of information in this picture, pay close attention to everything, especially the transition type shown in the picture, what you need to do at keyframe point 2.
23.
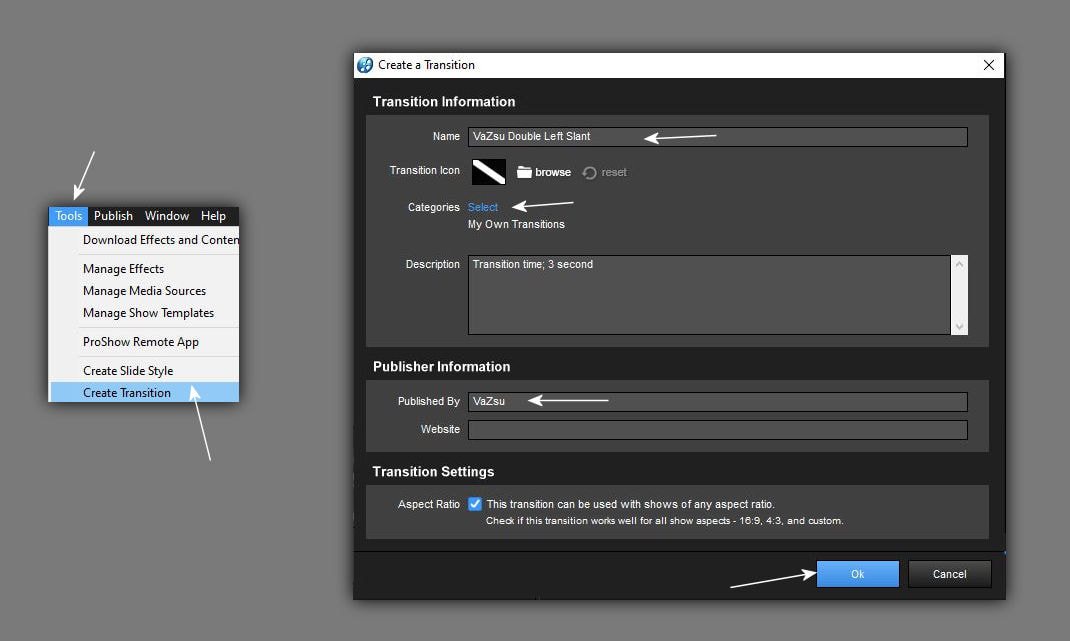
24. Nevezd el a transitionodat úgy hogy a saját beceneved is elötte legyen valamint a Published By sorba is írd be a saját neved.
Name your transition so that your own nickname is in front of it and enter your own name in the Published By line.