Egy nagyon érdekes effectet mutatok be ebben a bemutatóban. A neve Kaleidoszkóp effect. Remélem lesz olyan felhasználó akinek ez a fajta szerkesztés is megnyeri a tetszését.
I present a very interesting effect in this presentation. Its name is Kaleidoscope effect. I hope there will be a user who likes this kind of editing.

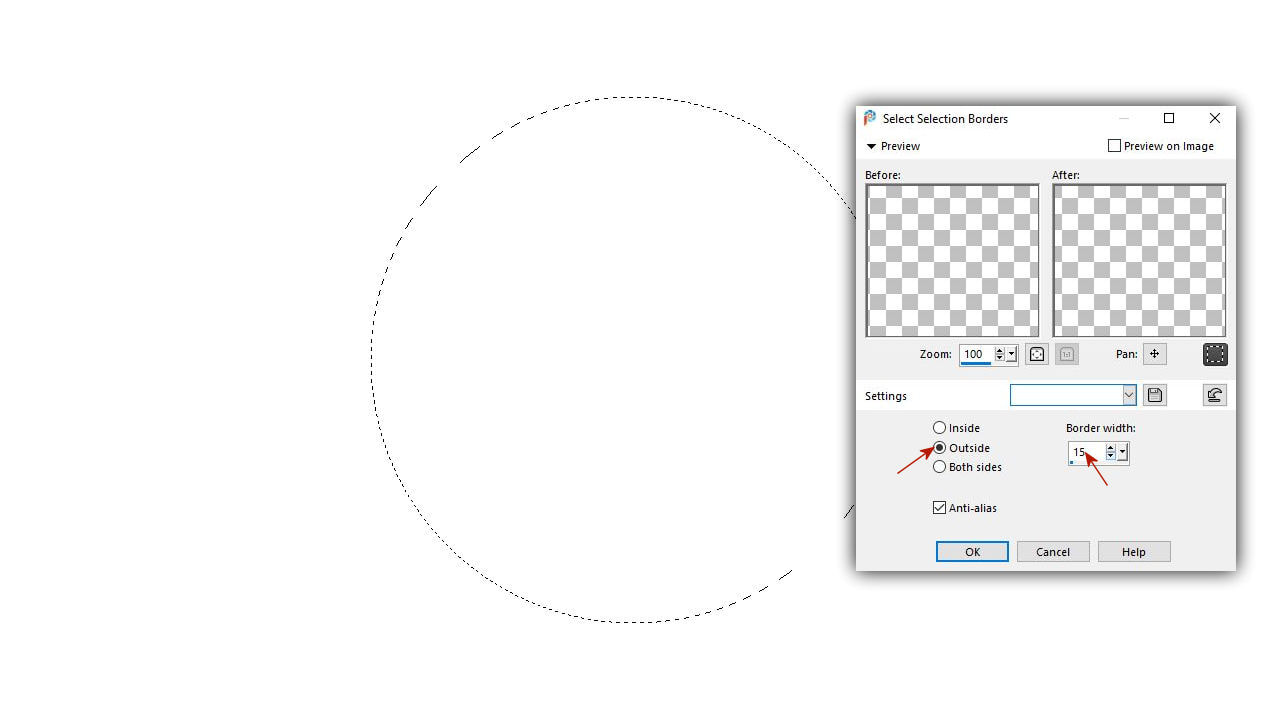
1. A folyamatot most is egy photoshop programban kezdjük elökészületi munkákkal. Én a corel programot használom erre. Egy fehér alapon jelölj ki egy kör alakot majd használd ezt a menüt. Selection - Modify- Select Selection Borders
We start the process in a Photo Shop program with preparatory work. I use the corel program for this. Select a circle shape on a white background and use this menu. Selection - Modify - Select Selection Borders
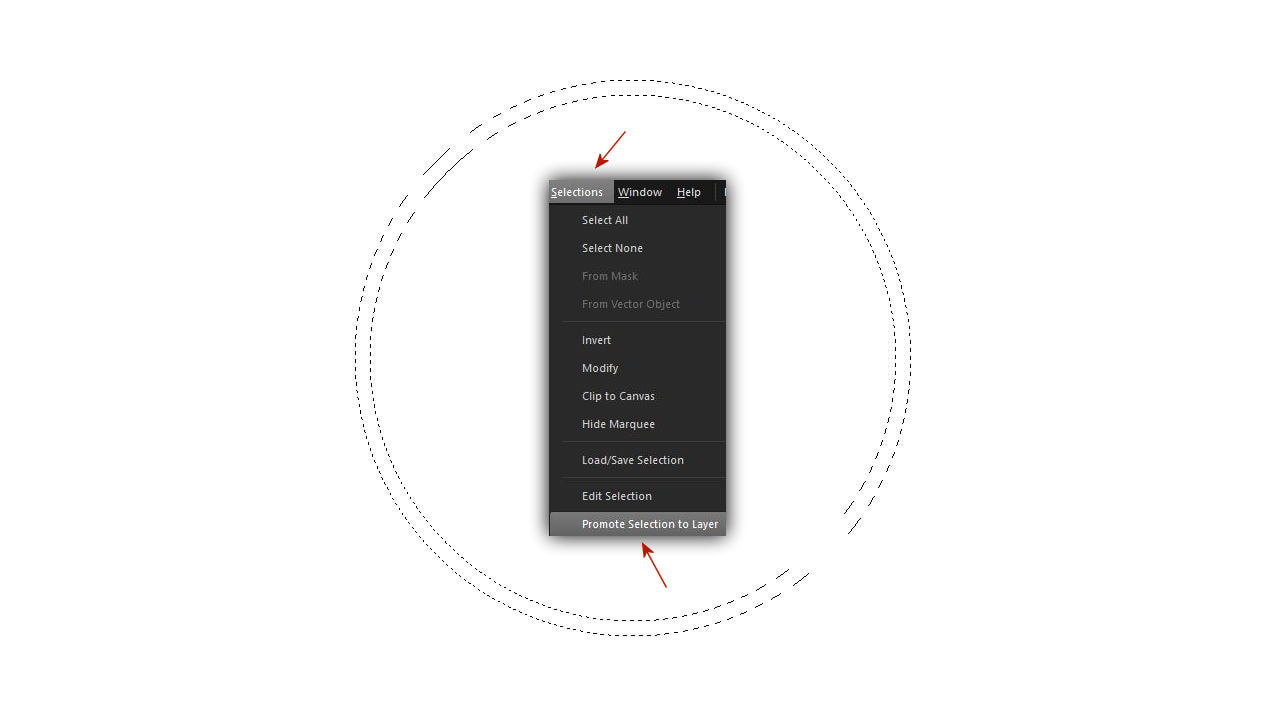
2. Promótáld a kör alakú keretedet egy külön rétegnek.
Promote your circular frame to a separate layer.
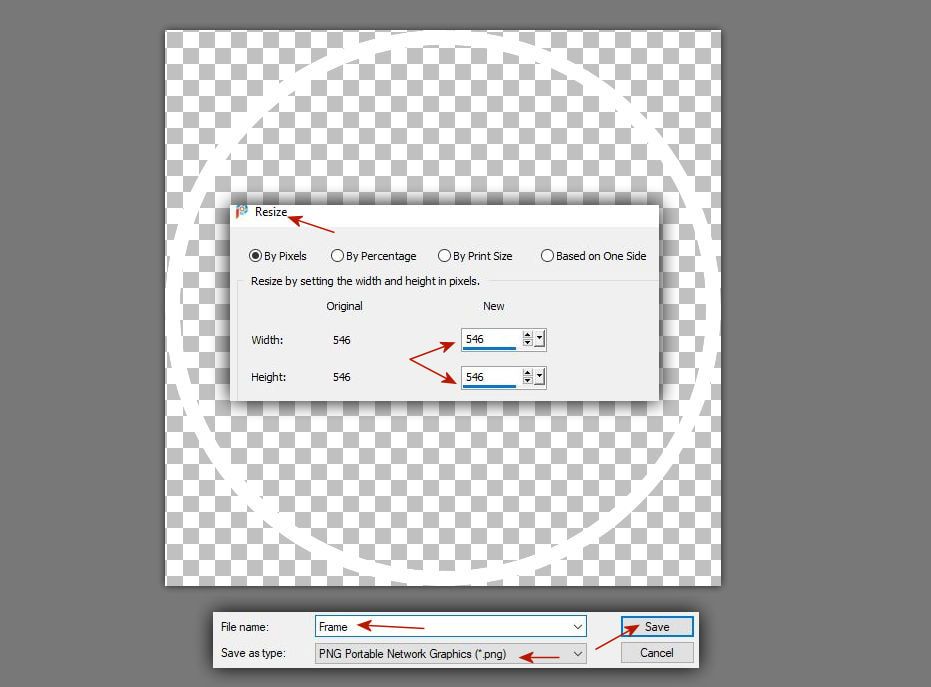
3. Jelöld ki a kört vágd ki és méretezd át. Majd mentsd el png formában.
Select the circle, cut it out and resize it.
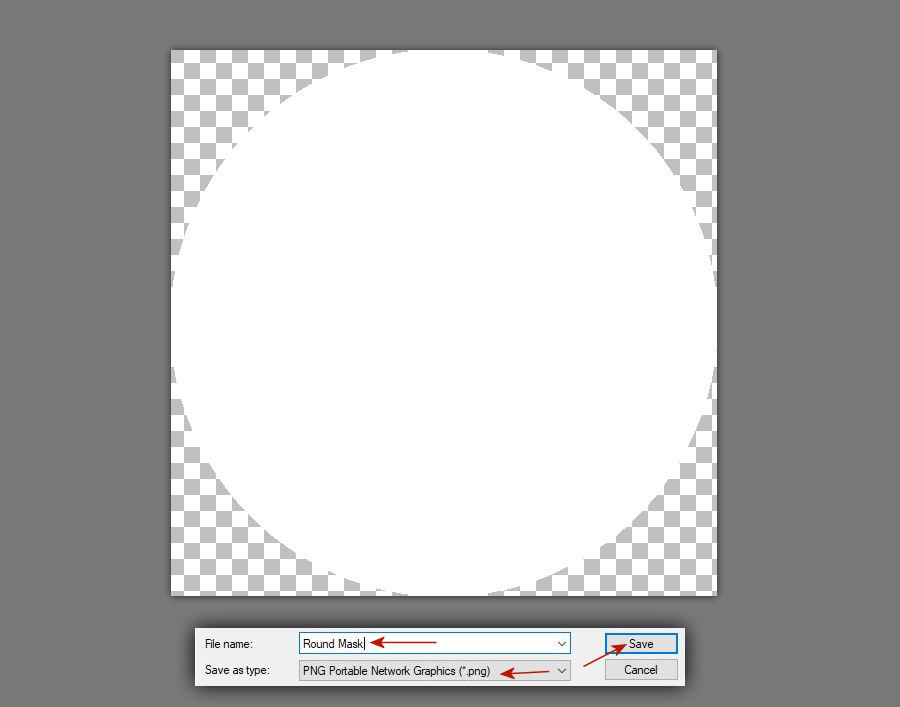
4. Majd pontosan öntsd ke ezt a kört mindenhol fehérrel és mentsd el szintén png formában maszknak.
Then fill this circle with white everywhere and save it as a mask in png format.
5. Keress magadnak egy hátteret vagy önts ki egyet valamilyen színnel. Csinálj ilyen kijelöléseket a bal oldalon mint ahogy azt itt látod.
Find a background or fill up one sheet with some color. Make such selections on the left side as you see here.

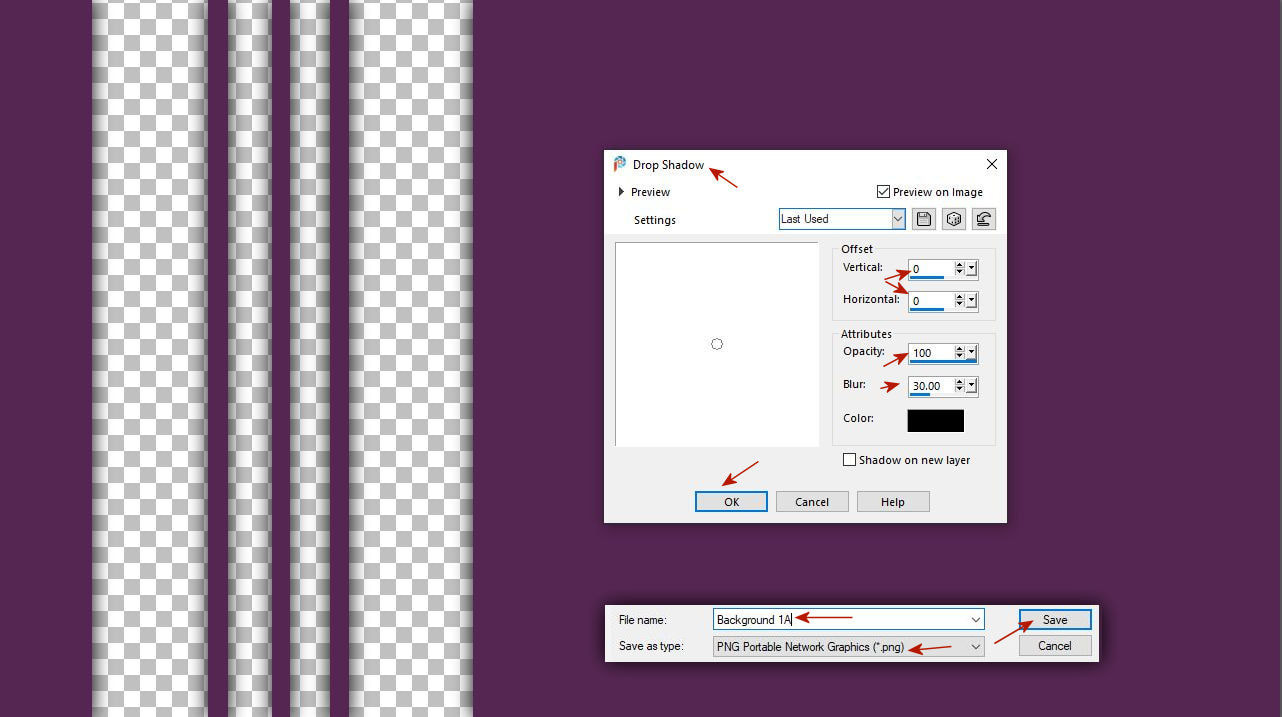
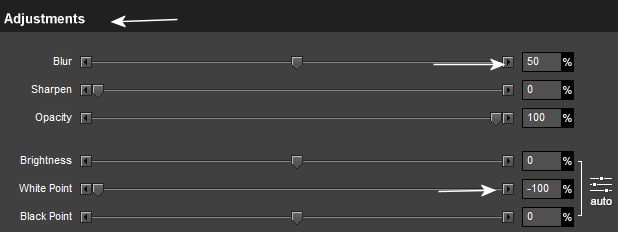
6. Nyomd meg a klaviatúrádon a delete gombot majd adj a lapnak árnyékot és mentsd el png formátumban mint háttér.
Press the delete button on your keyboard, then give the page a shadow and save it in png format as a background.
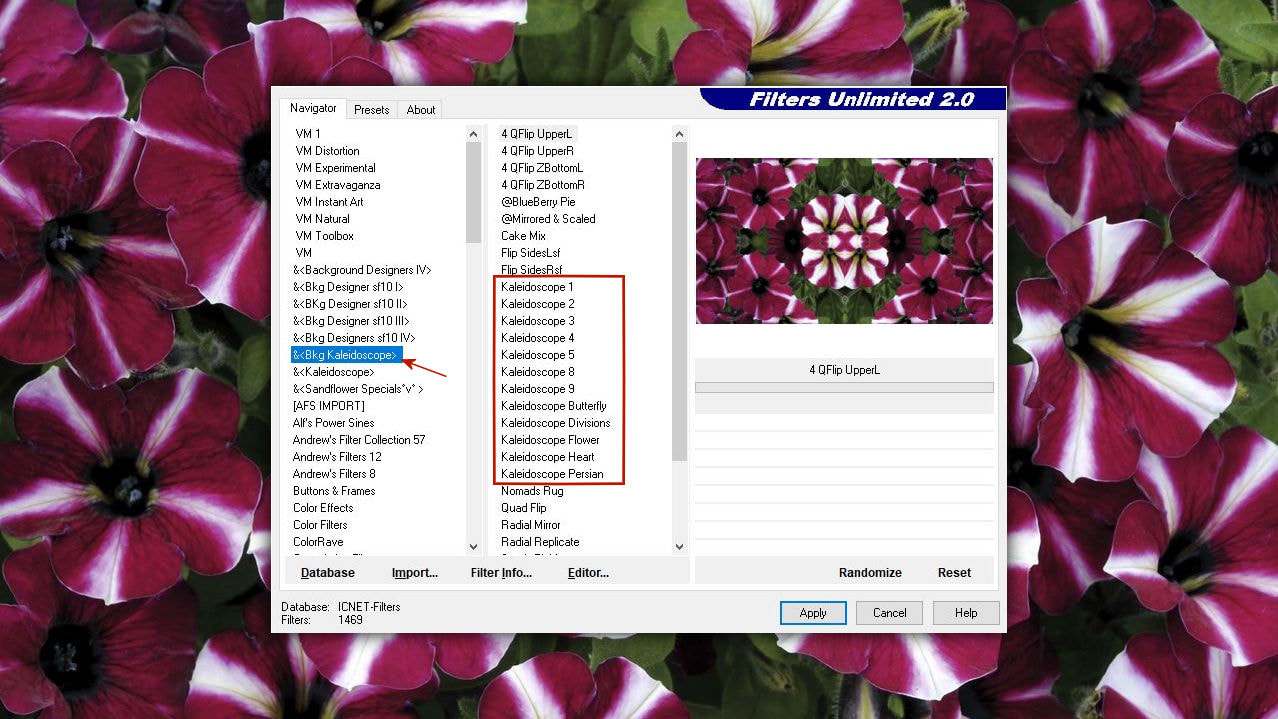
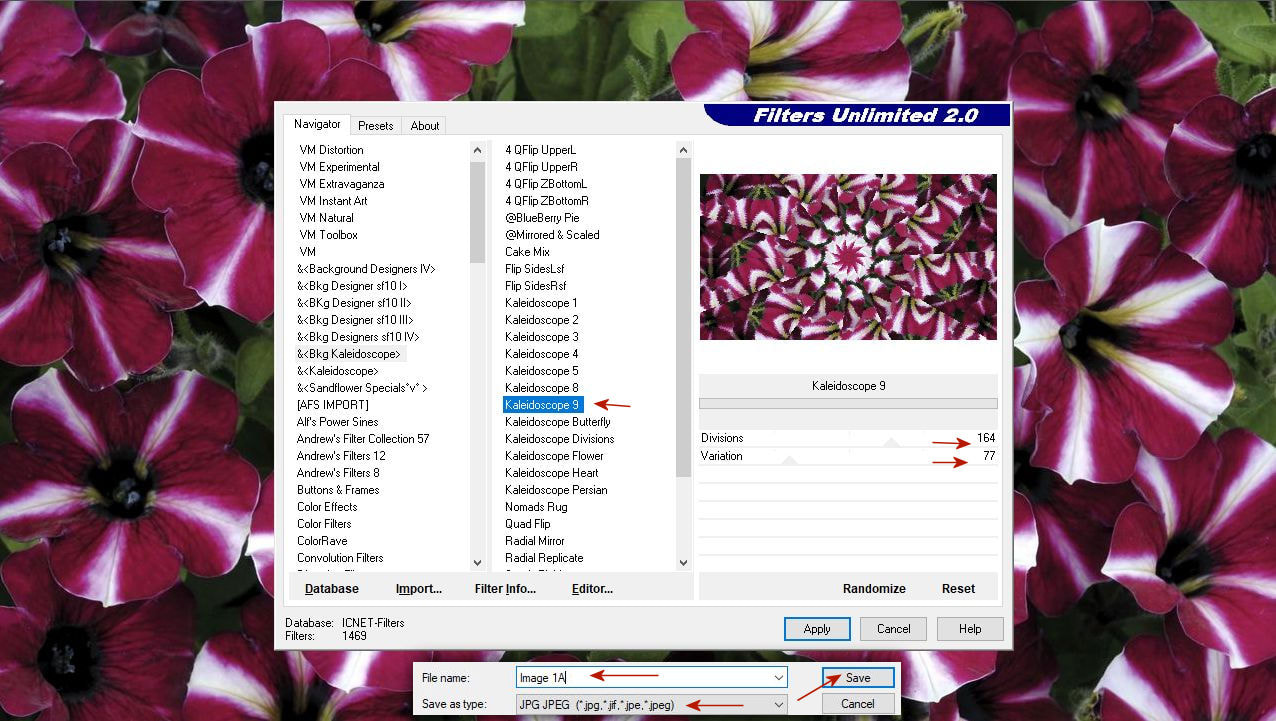
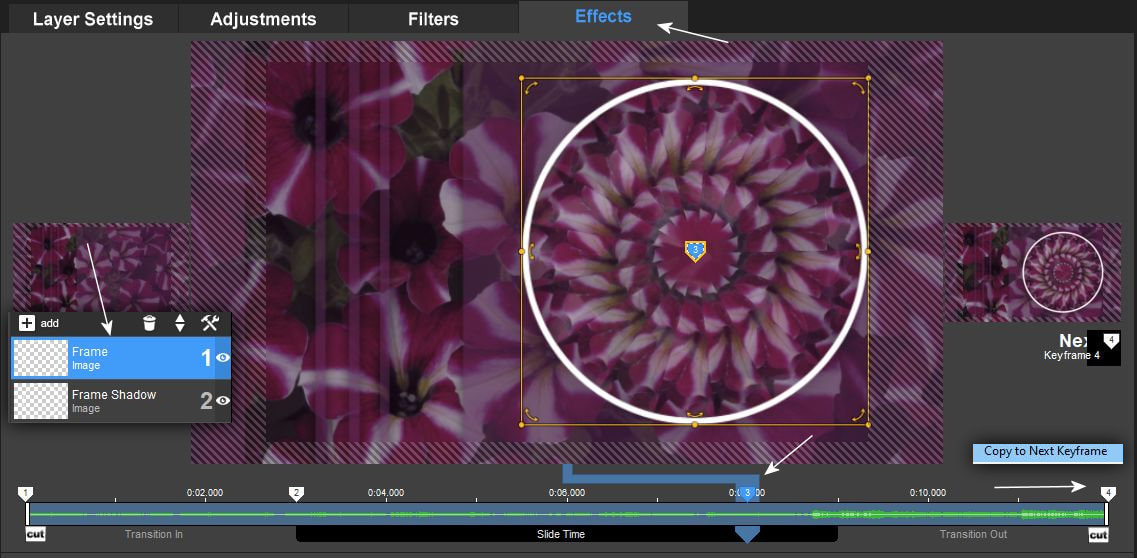
7. Hozd be a témádhoz gyüjtött 1280x720-as képed valamelyikét majd keresd meg ezt a plugint.
Effects - Filters Unlimited - Bkg Kaleidoszkóp. Ezekböl a szürökböl válogathatsz itt.
Load in one of your 1280x720 images collected for your theme and search for this plugin. Effects - Filters Unlimited - Bkg Kaleidoscope. You can choose from these plugins here.
8. Én ezzel a pluginnal dolgoztam a videómban. Minden esetben sokat állítgattam az értékeket amíg egy nekem tetszö alakzat ki nem alakult. Amikor tetszett amit látok elmentettem a képemet jpg formában úgy hogy ne irjam felül az eredetit.
I worked with this plugin in my video. In each case, I adjusted the values a lot until a shape I liked was formed.When I liked what I saw, I saved my picture in jpg format so as not to overwrite the original.
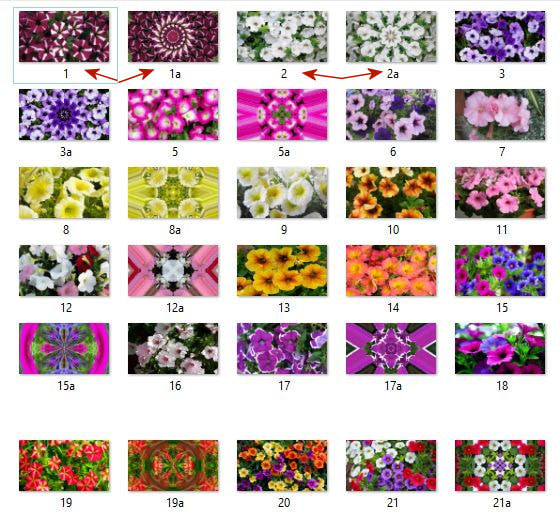
9. Igy folytattam a munkát amíg a képeket tartalmazó könyvtáramban minden képnek meg lett a kaleidoszkop pluginnak elkészült párja.
I continued working like this until every image in my library containing images had a ready-made counterpart to the kaleidoscope plugin.
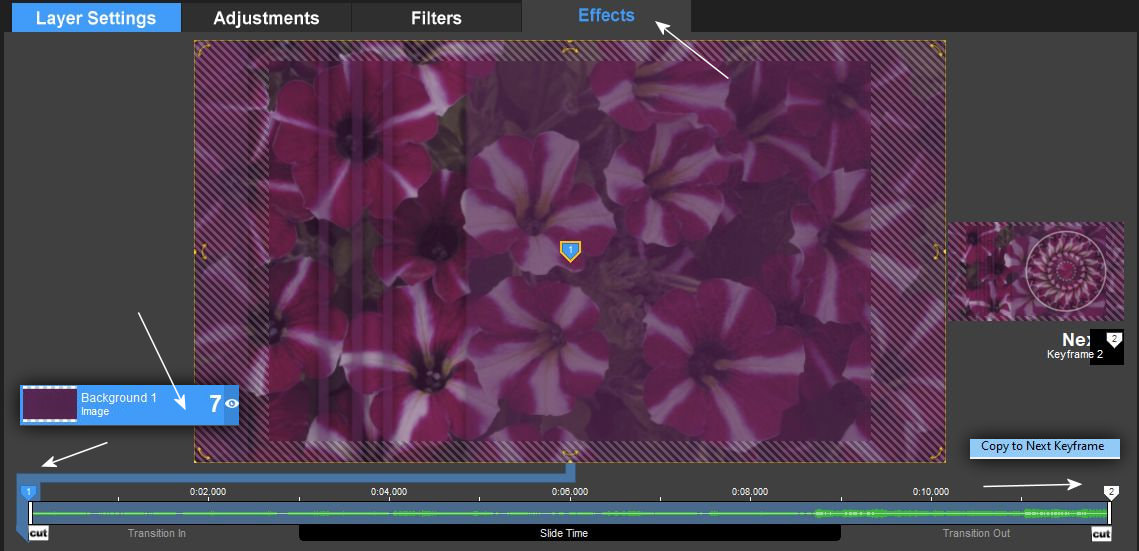
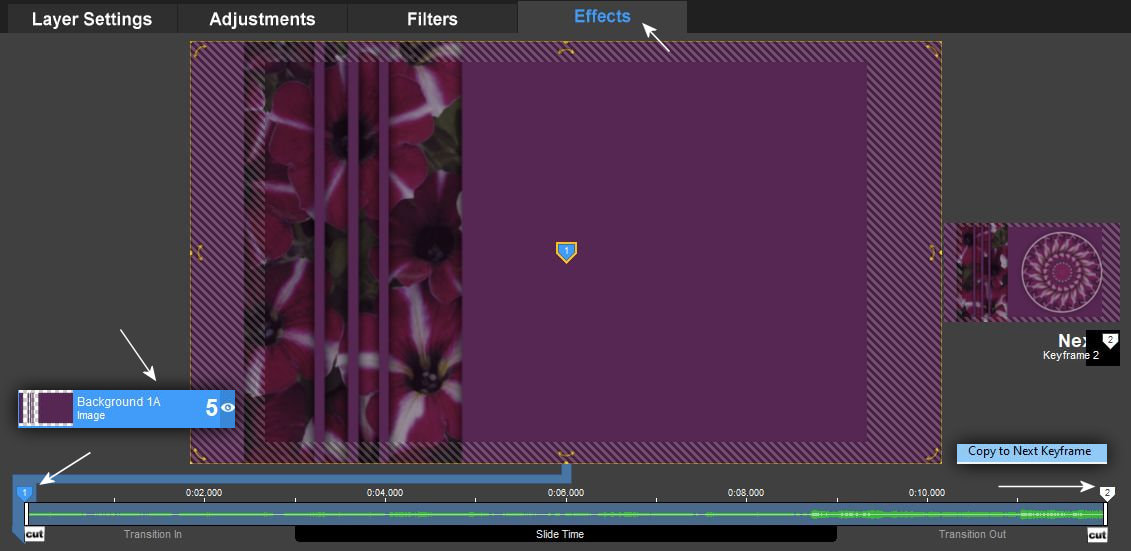
10. Aztán a munkát folytattam a pro Show-ban.
Then I continued working in the pro Show.
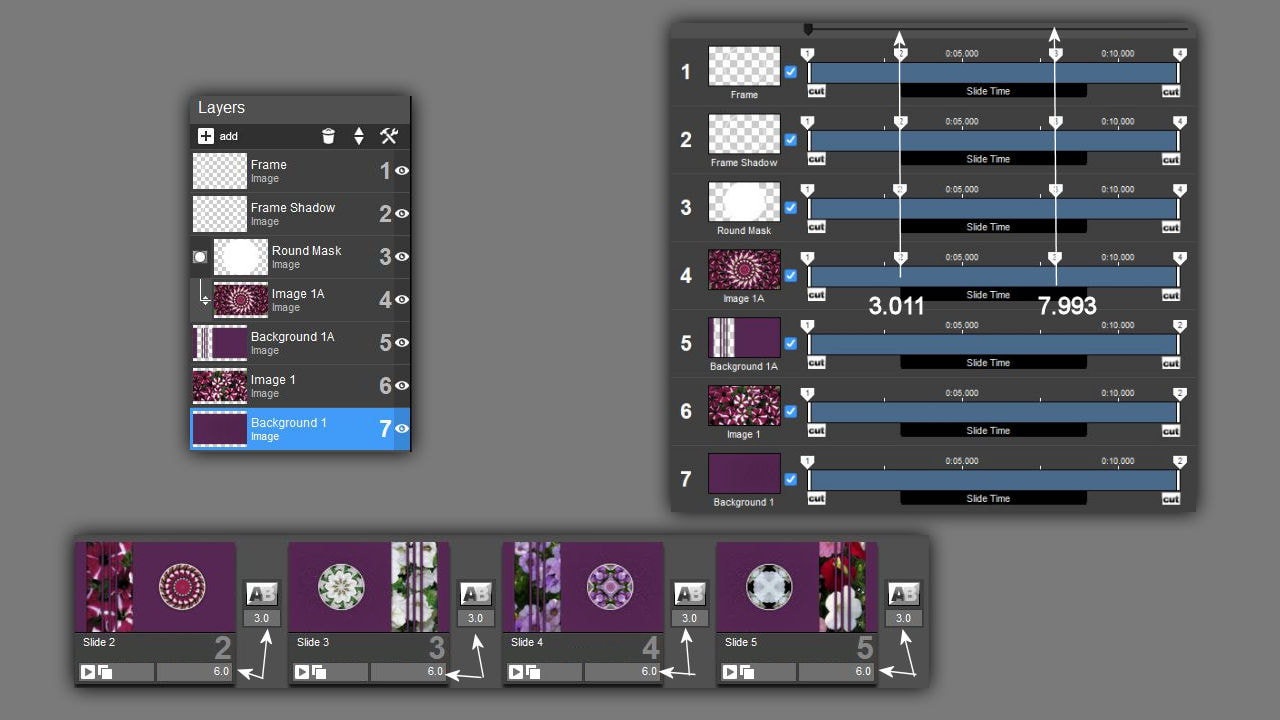
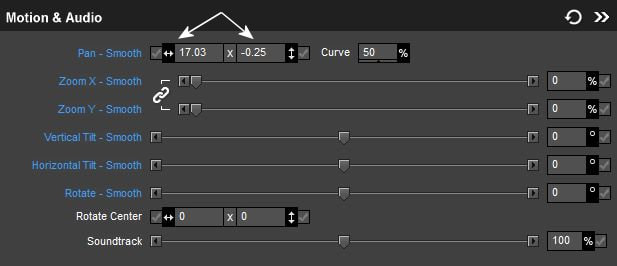
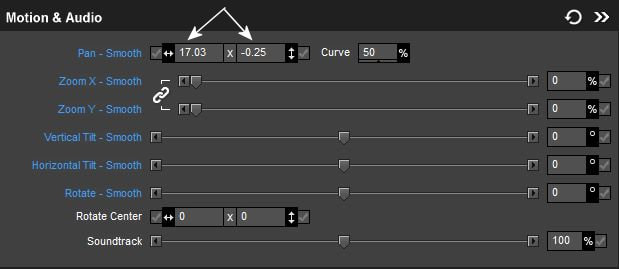
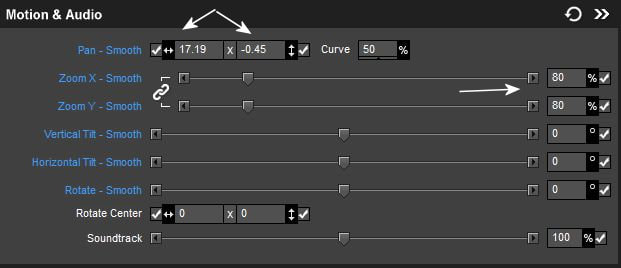
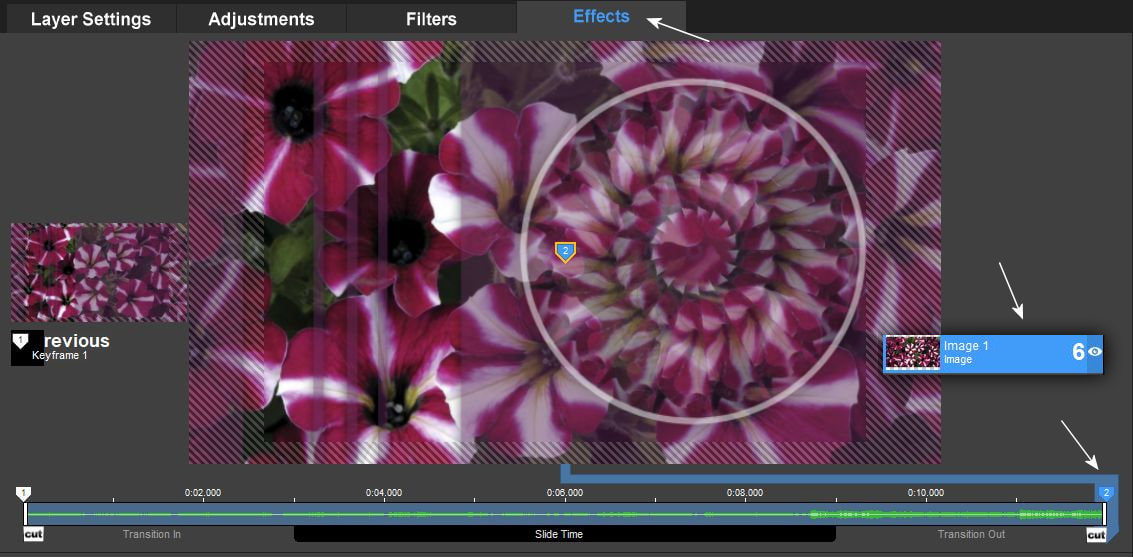
11. Ezen a két rétegen azonos értékek vannak csak a másodikra árnyékot is kell tenni.
These two layers have the same values, only the second layer needs to be shaded.
12.
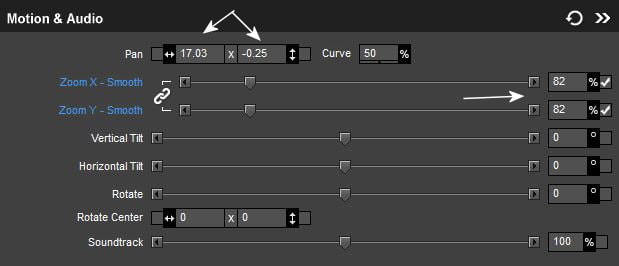
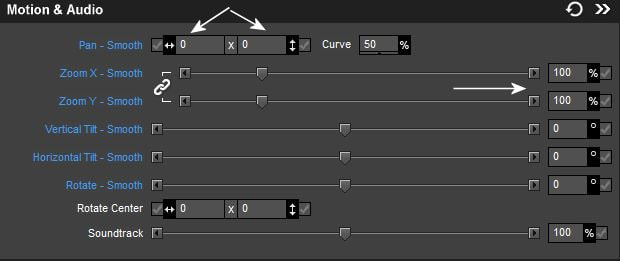
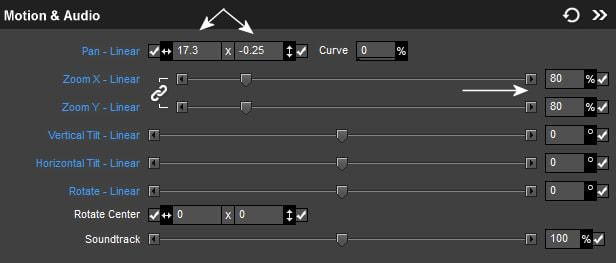
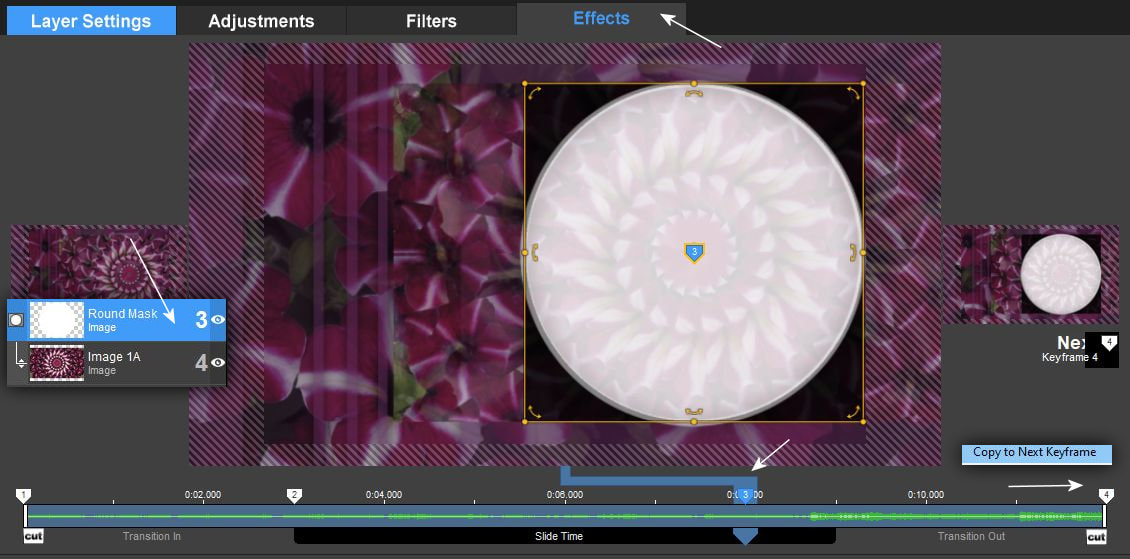
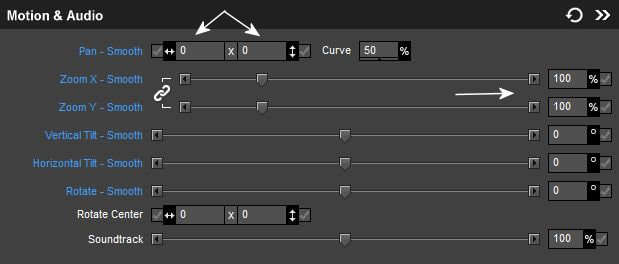
13. A hármas és négyes rétegen levö értékek ugyanazok.
The values on layers three and four are the same.
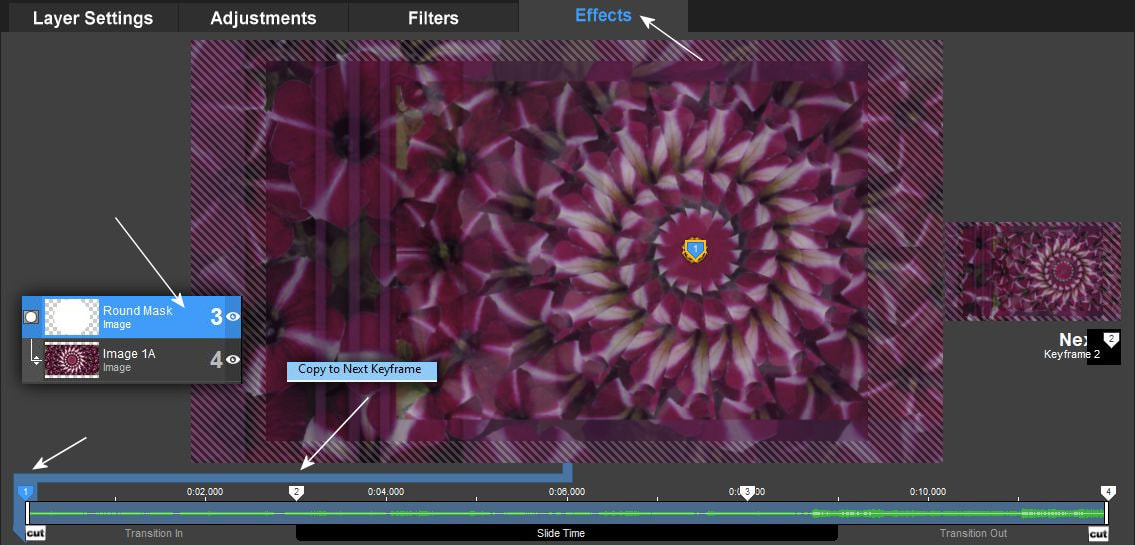
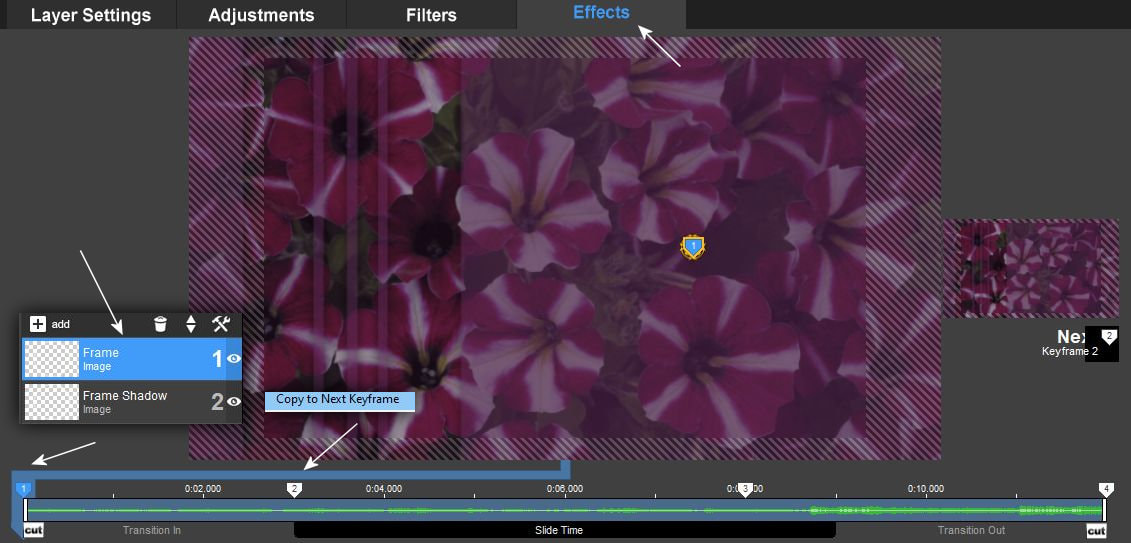
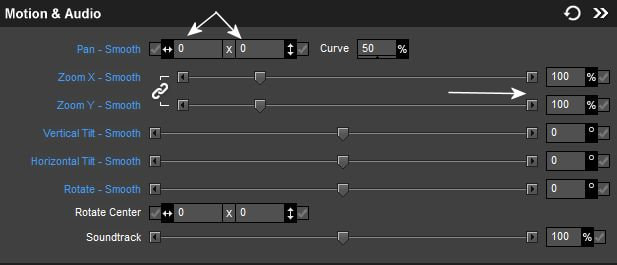
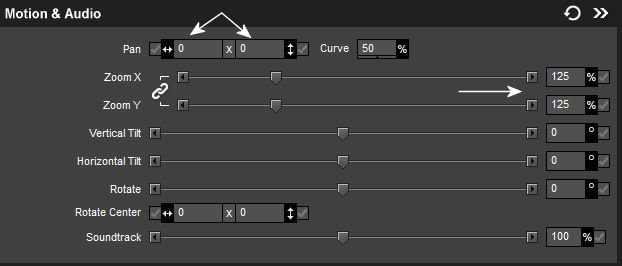
14. Kivéve a 4-es réteg kettes keyframe pont értékét így javitsd át.
Except for the value of the second keyframe point of layer 4, correct it like this.
15.
16.
17.

18.
19.