Ebben a bemutatóban egy rendkívül érdekes de hétköznapi dolgot tanulunk meg elkészíteni. Egy olyan tárggyal foglalkozunk amely mindig körülvesz bennünket. Ez pedig az óra. Egy müködö órát fogunk készíteni. Elsö hallásra elég bonyolult a gondolat hiszen a nagymutató egyszer járja körbe a számlapot egy óra alatt a kicsi pedig csak egy órányi vagyis csak 12-ed részt halad elöre. A két mozgás sebessége az ami eltér ezért érezzük úgy hogy ezt megoldani nehéz. De ha rájövünk az idöelosztásra a számlapon és ahhoz mérten dolgozunk akkor nem is lesz annyira nehéz. Ezt mutatom meg most ebben a bemutatóban, hogy egy szép újévi videónak megfelelö kelléke lehessen az óra.
In this presentation, we will learn to make an extremely interesting but ordinary thing. We are dealing with an object that always surrounds us. And this is the wall clock. We are going to make a working clock. At first glance, the idea is quite complicated, since the large hand goes around the dial once in an hour, while the small hand moves forward only one hour, i.e. only 12ths. The speed of the two movements is what differs, which is why we feel that this is difficult to solve. But if we figure out the time allocation on the clock face and work accordingly, it won't be that difficult. This is what I am showing in this presentation so that the watch can be a suitable prop for a nice New Year's video.

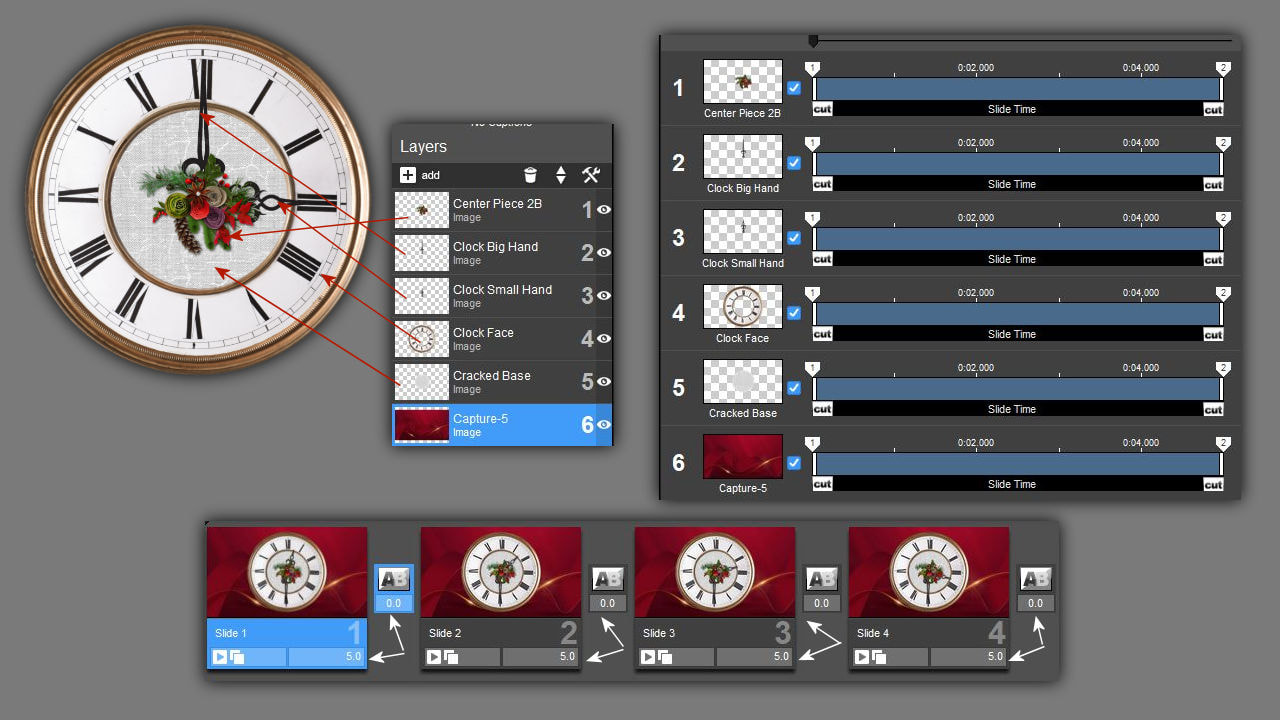
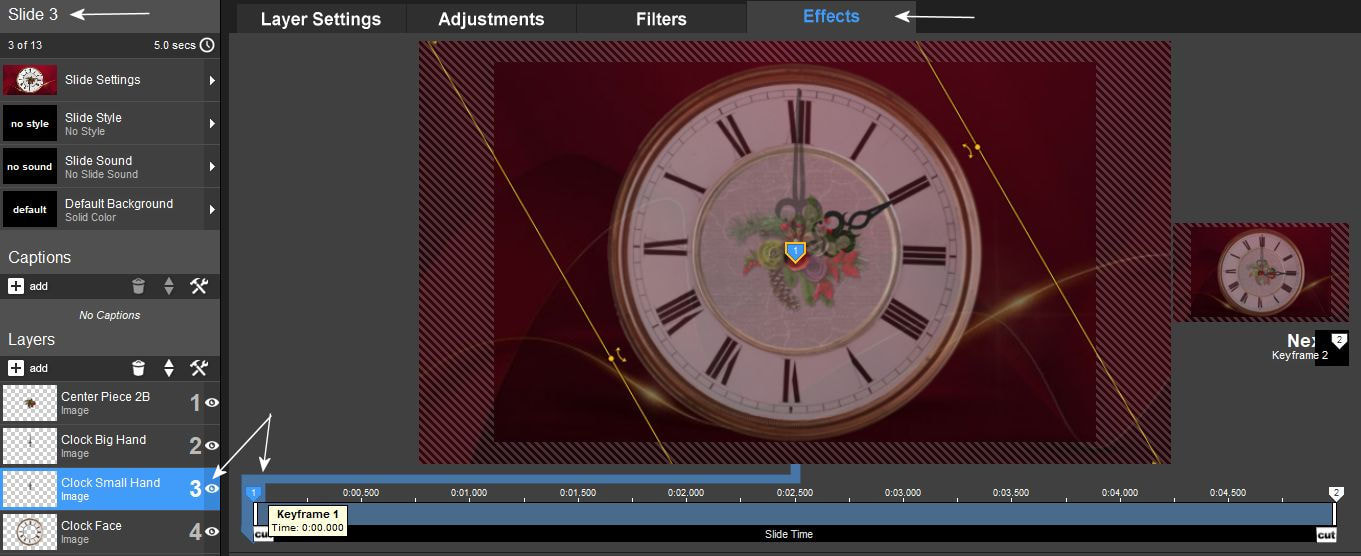
1. Ehhez a feladathoz minimum 4 rétegre van szügséged png formában. Nekem itt több van de ez változó lehet mindenkinél. Kell egy számlap egy kismutató egy nagymutató és egy középsö rész ami takarja a mutatók alsó végeit. Ez lehet egy gomb is. Nincs szükség extra keyframe pontokra. Az a legegyszerübb ha a slide-okat vagy csempéket ki hogy nevezi 5 és 0 másodpercre állítjátok. Csak 4 db csempe van fotózva ami azt jelenti, hogy négy órahossz az amit ezeken elkészítünk. Utánna át kell másolni a négy slide-ot és folytatni az forgás beállítást.
For this task, you need at least 4 layers in png format. I have more here, but it can vary for everyone. You need a clock face, a small hand, a large hand and a central part that covers the lower ends of the hands. It can also be a button. No extra keyframe points are needed. The easiest way is to set the slides or tiles to 5 and 0 seconds. Only 4 tiles are photographed, which means that we will make four hours on them. After that, you have to copy the four slides and continue with the rotation setting.
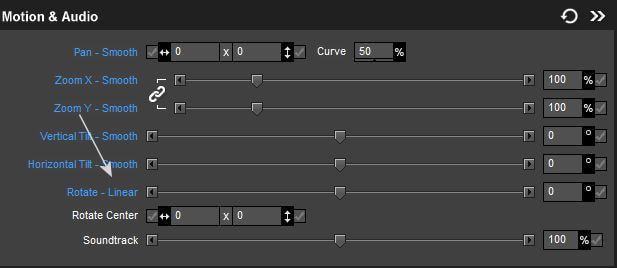
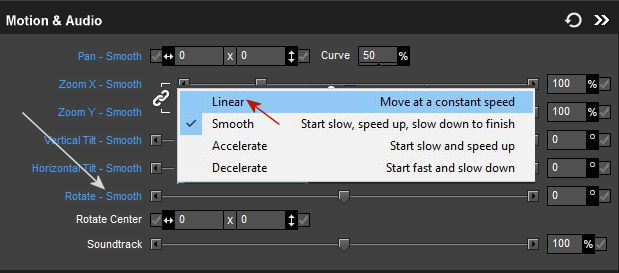
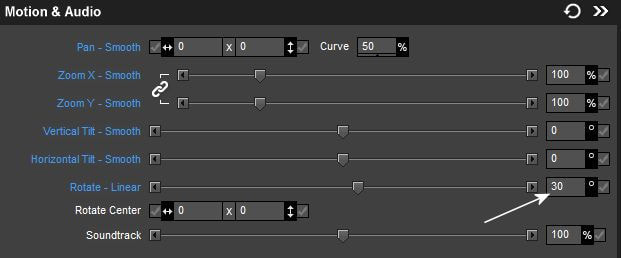
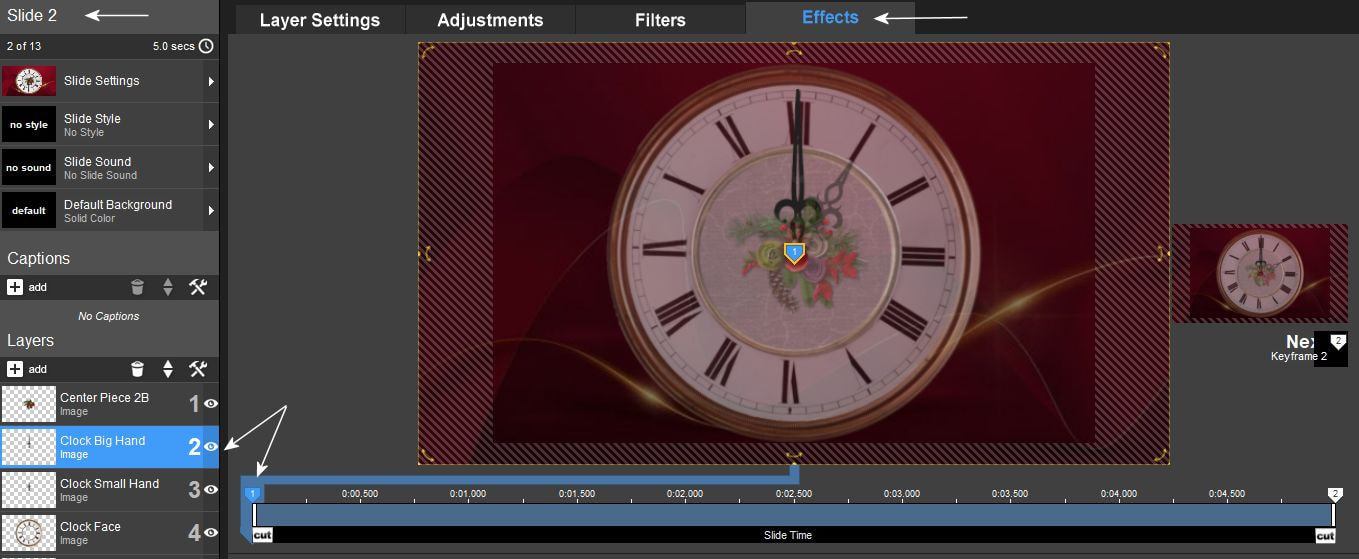
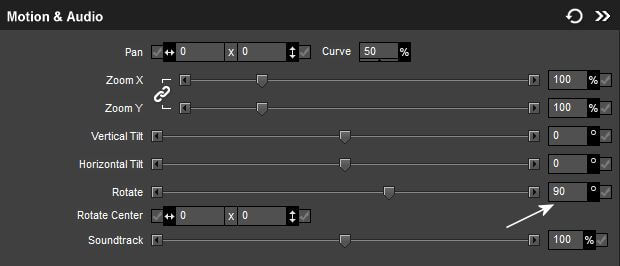
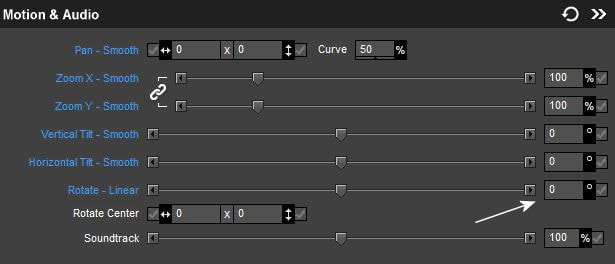
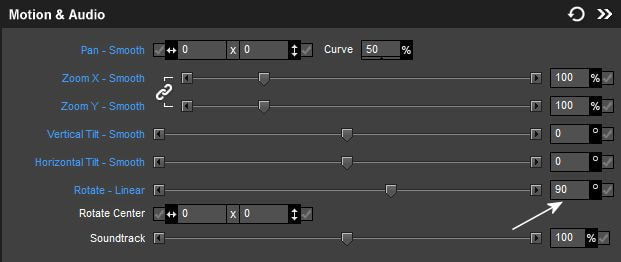
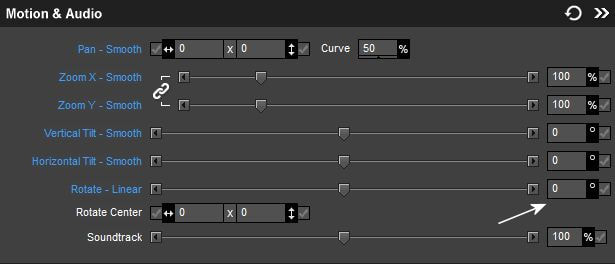
2. Mindig csak az órának a kismutató és nagymutató rétegén kell dolgozni az értékekkel. Elöször a Rotate Smooth-ot át kell állítani linear-ra katt a kék smooth feliratra és válaszd a linear menüt. Itt nincs rotate állítva az egyes keyframe ponton 0.
You should always work with the values only on the small hand and large hand layers of the clock. First, Rotate Smooth must be changed to linear, click on the blue smooth text and select the linear menu. Here, no rotate is set at the individual keyframe point 0.
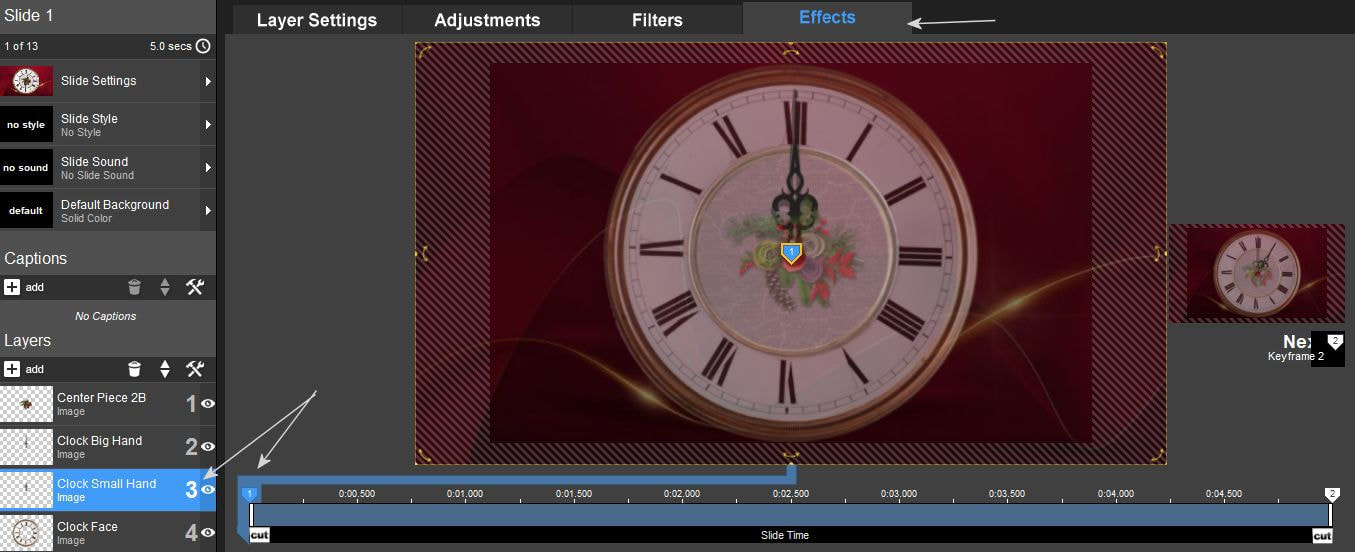
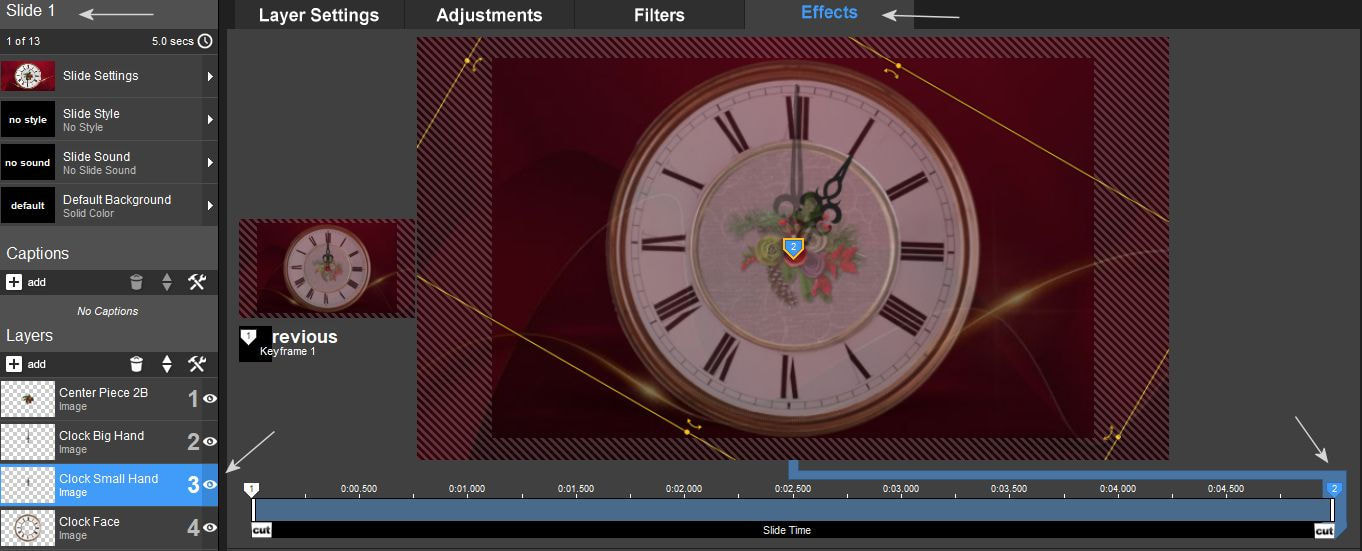
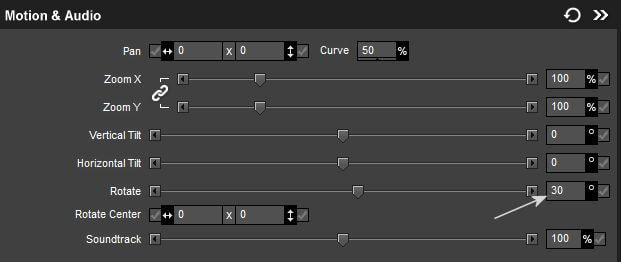
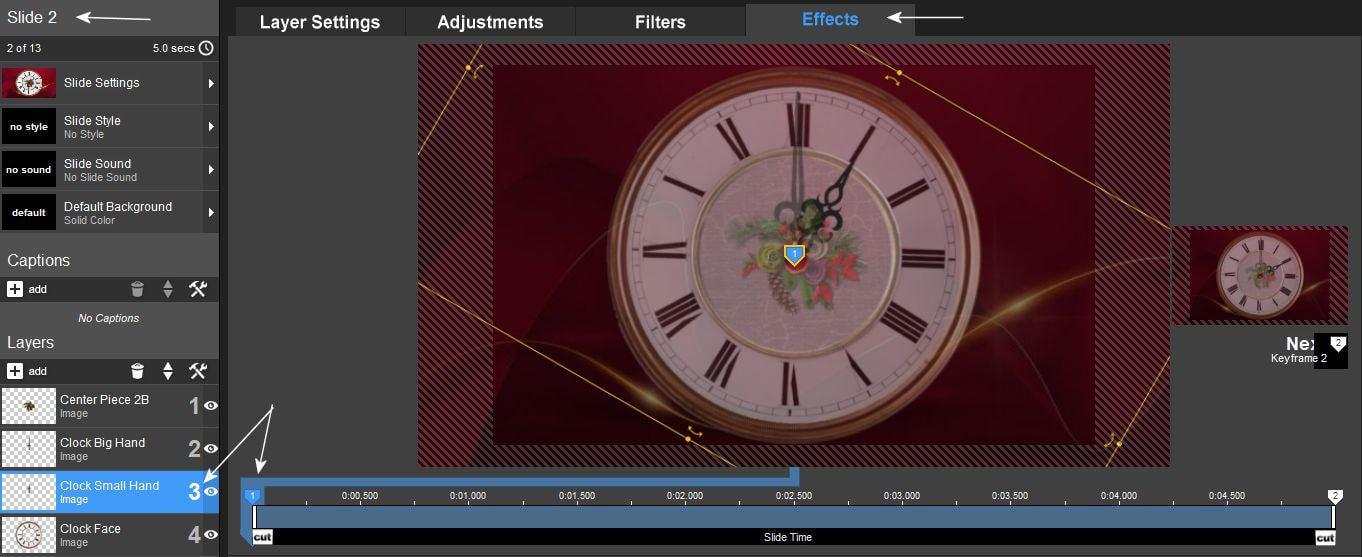
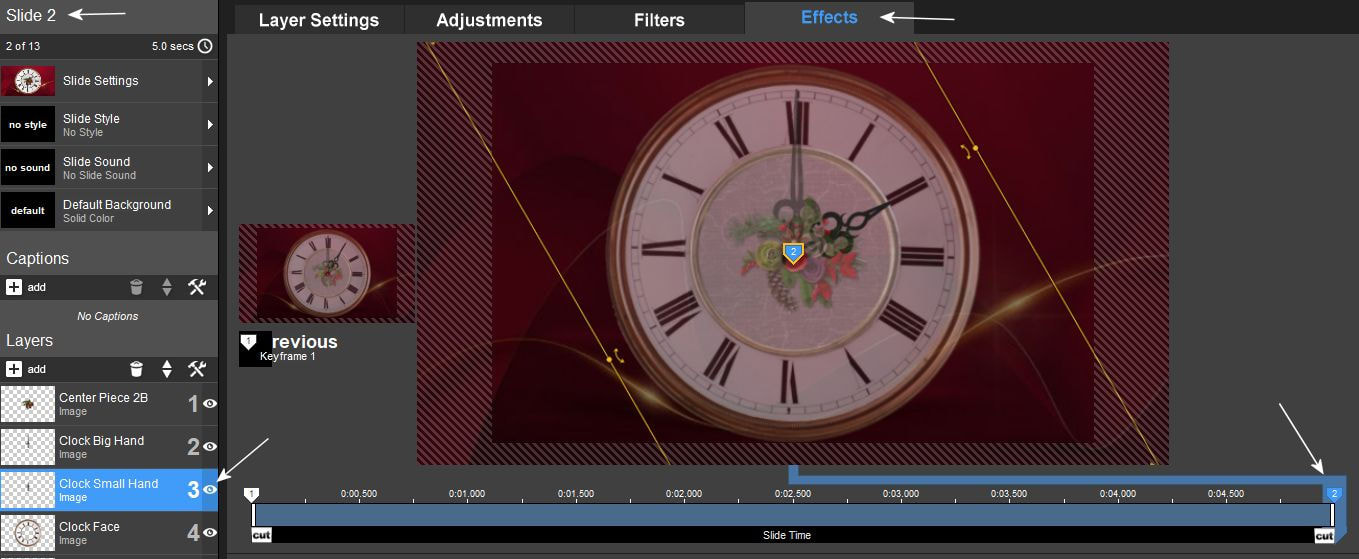
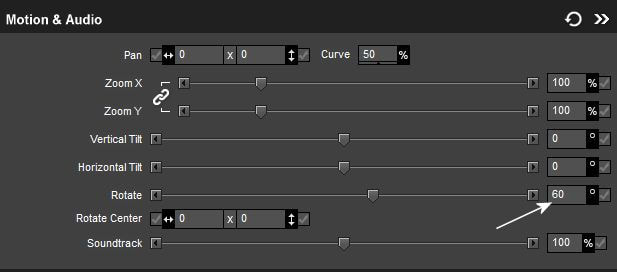
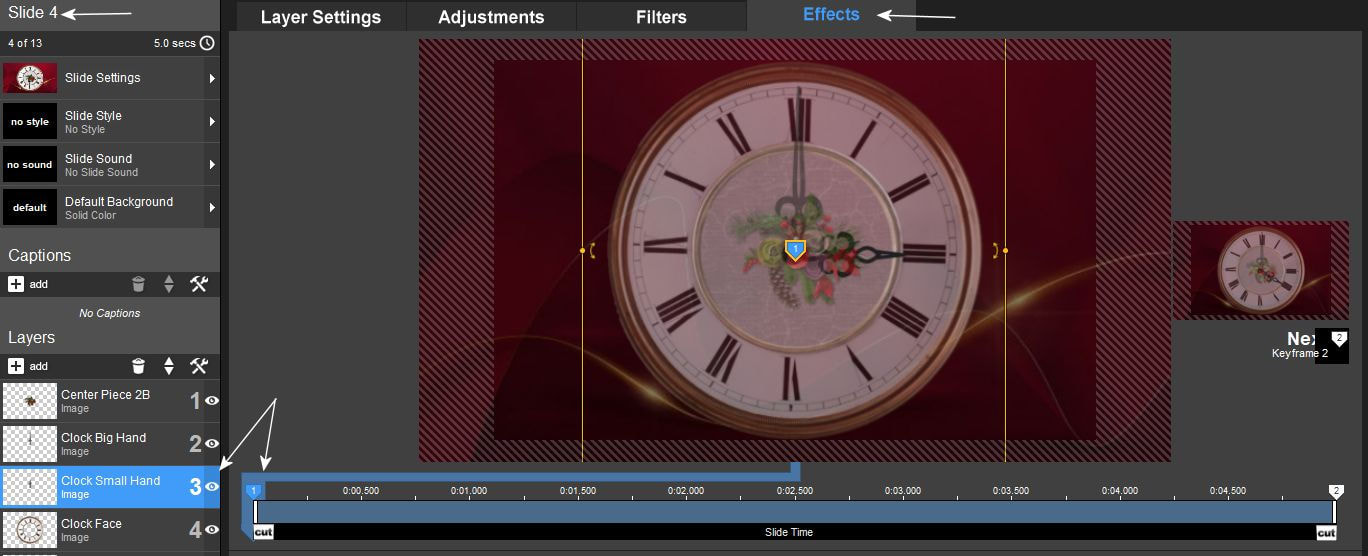
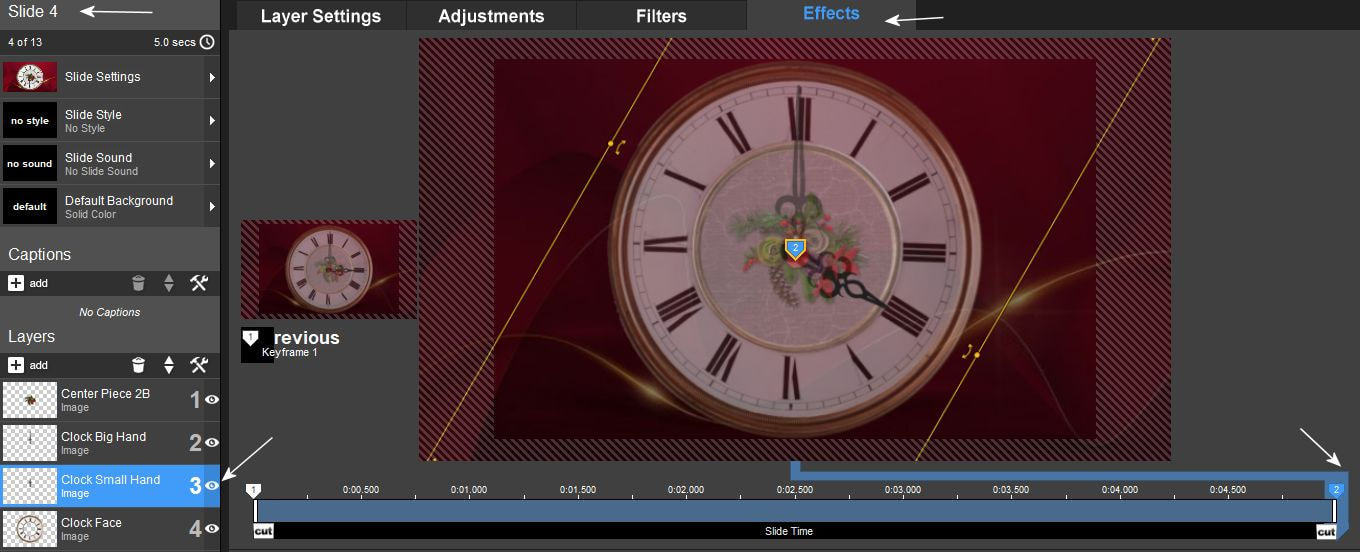
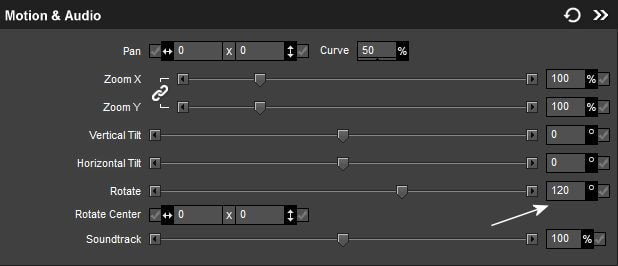
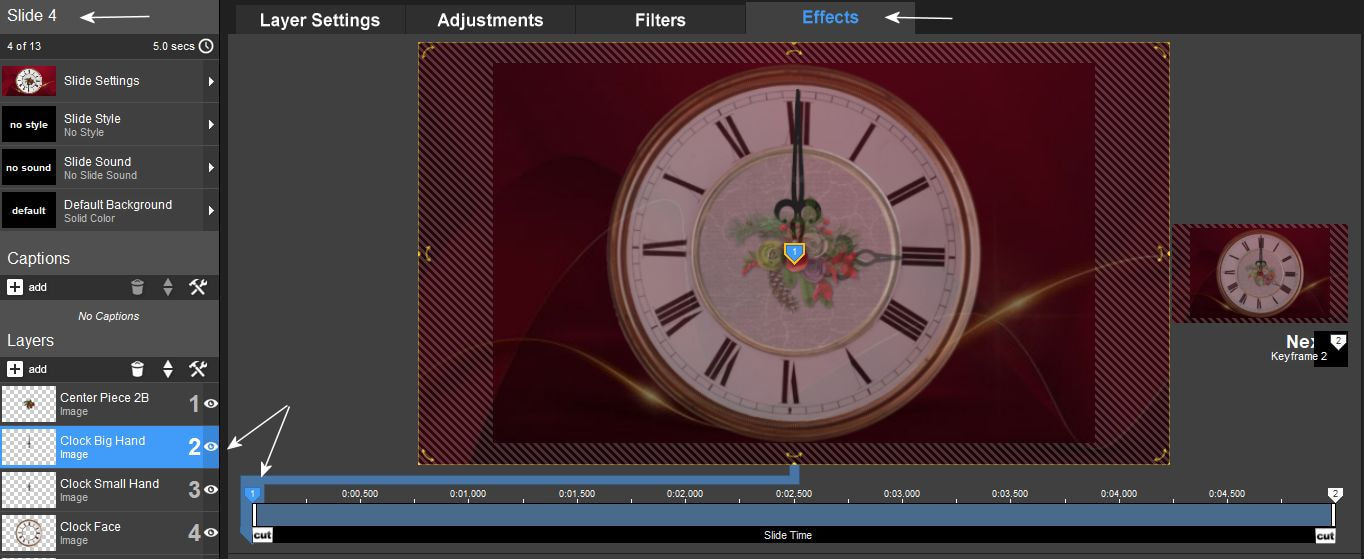
3. A 2-es keyframe ponton a rotate 30. Mindig nagyon figyeld meg a képeket és azokon a nyilakat. Most az elsö slide-on vagyunk. Azt is figyeld a bal felsö sarokban mikor melyik slide-on vagyunk. Tehát kövesd a képeken látottakat.
At keyframe point 2, the rotate is 30. Always pay close attention to the pictures and the arrows on them. We are now on the first slide. Also pay attention to which slide we are on in the upper left corner. So follow what you see in the pictures.
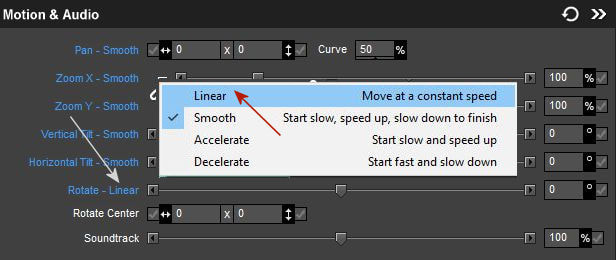
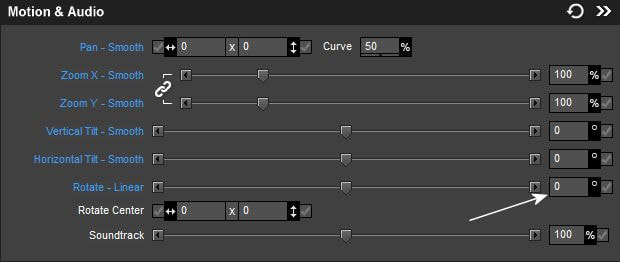
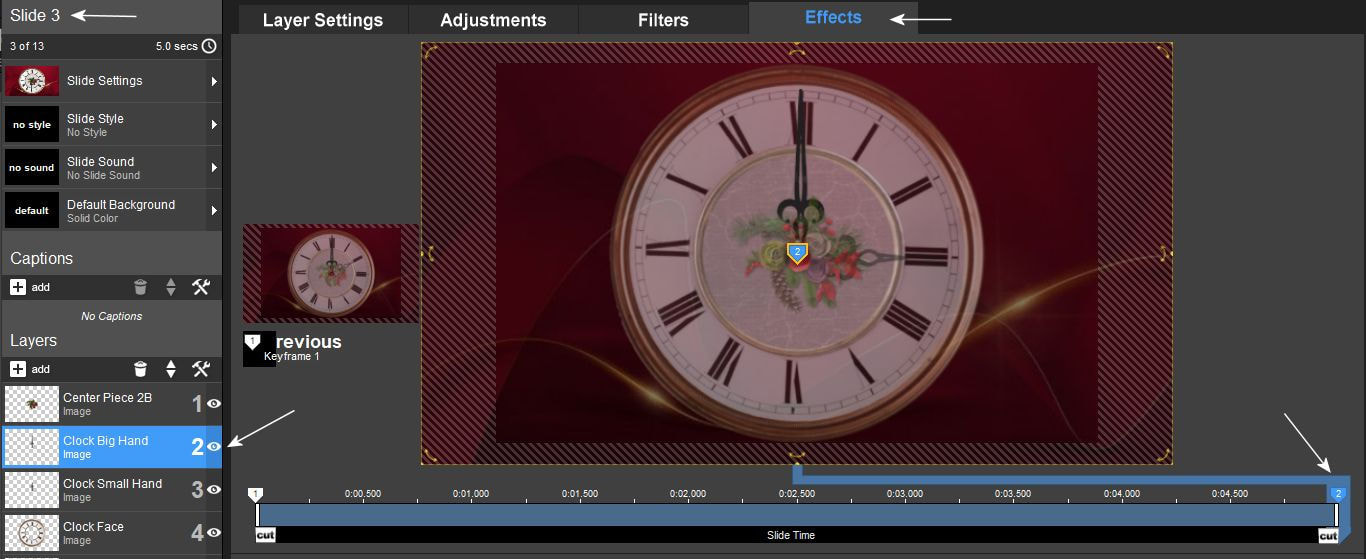
4. Most a nagymutató rétegére mentünk. Itt is át kell állítanod a Rotate Smooth-ot linear-raa. a rotate itt 0.
Now we've gone to the big hand layer. Here, too, you need to change Rotate Smooth to linear. the rotate here is 0.

5. Mostmár csak kövesd a képeket nagyon figyelmesen, minden fehér nyilat amit látsz. Ha nem vagy figyelmes akkor könnyen elronthatod és a hibát nehéz megtalálni.
Now just follow the pictures very carefully, every white arrow you see. If you are not careful, you can easily mess it up and it is difficult to find the fault.

6.
7.
8.
9.

10.

11.

12.

13.
14.
15.
16.
17.

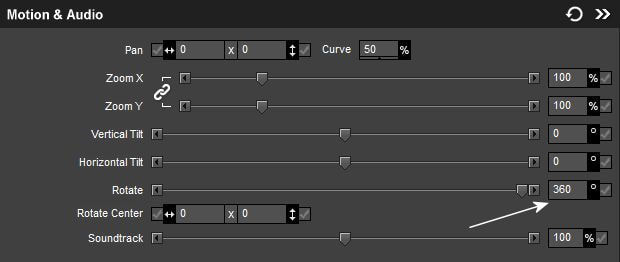
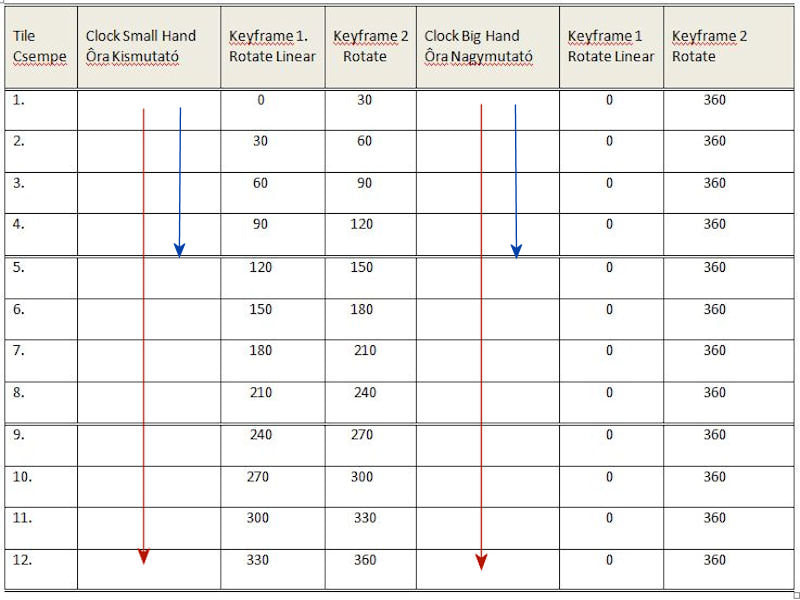
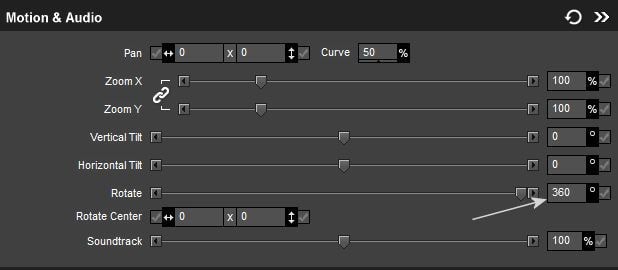
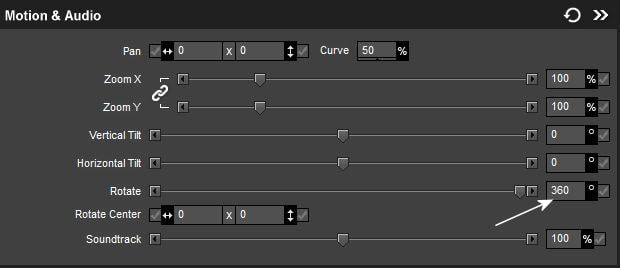
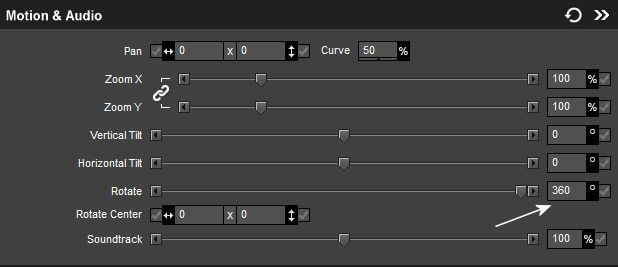
18. Ez a táblázat megmutatja neked mi a teendö ha a kész 4 slide-ot átmásolod és hogyan folytasd az órád mutatóinak a mozgását valamint a keyframe pontokon milyen értékeket kell állítanod a folyamatos mozgáshoz. Ezen a képen látod azt is, hogy a kék nyillal jelölt rész már készen van addig van a feladat fotózva. Azt is látni, hogy a nagy mutató minden órában 360 fokos fordulattal körbe megy.A kicsi mutatónak 12 órárára van szüksége amíg a 0-tól 360 fokig fordul vagyis 12 slide alatt teszi ezt meg. Itt ezen az órán déli 12-töl megy az idö éjfélig. A továbbiakban dolgozz eszerint.
This table shows you what to do if you copy the finished 4 slides and how to continue the movement of the hands of your clock, as well as what values you need to set at the keyframe points for continuous movement. In this picture you can also see that the part marked with the blue arrow is already, the task is photographed until then. You can also see that the large hand rotates 360 degrees every hour. The small hand needs 12 hours to turn from 0 to 360 degrees, i.e. it does so in 12 slides. Here, in this clock, the time goes from 12 noon to midnight. From now on, work accordingly.