Ebben a bemutatóban a dupla maszkolásról lesz szó a lehetö legegyszerübb formában.
Ez nem jelenti azt, hogy egyszerübb ezzel a módszerrel elegáns videót készíteni. Amikor egy nagyon egyszerü képmozgatást alkalmazunk akkor azt valami más módon kell érdekessé, látványossá tenni. Ilyenkor kell a látvány terven és a dekorációkon vagy a maszkhoz egy érdekesebb különleges maszkkal dolgoznunk.
Vagyis dupla maszkolunk. Ha remekül csináljuk meg a látványtervet a videónkhoz akkor az egyszerü mozgatás is nagyon szép tud lenni.Itt most egy speciális dekorkészítéssel is foglalkozunk.
This tutorial will cover double masking in its simplest form. This does not mean that it is easier to make an elegant video using this method. When we use a very simple image movement, it must be made interesting and spectacular in some other way. This is when we have to work on the visual design and decorations or with a more interesting special double mask. If we make a great visual design for our video, even simple movement can be very beautiful. Here we are also dealing with a special decor creation.

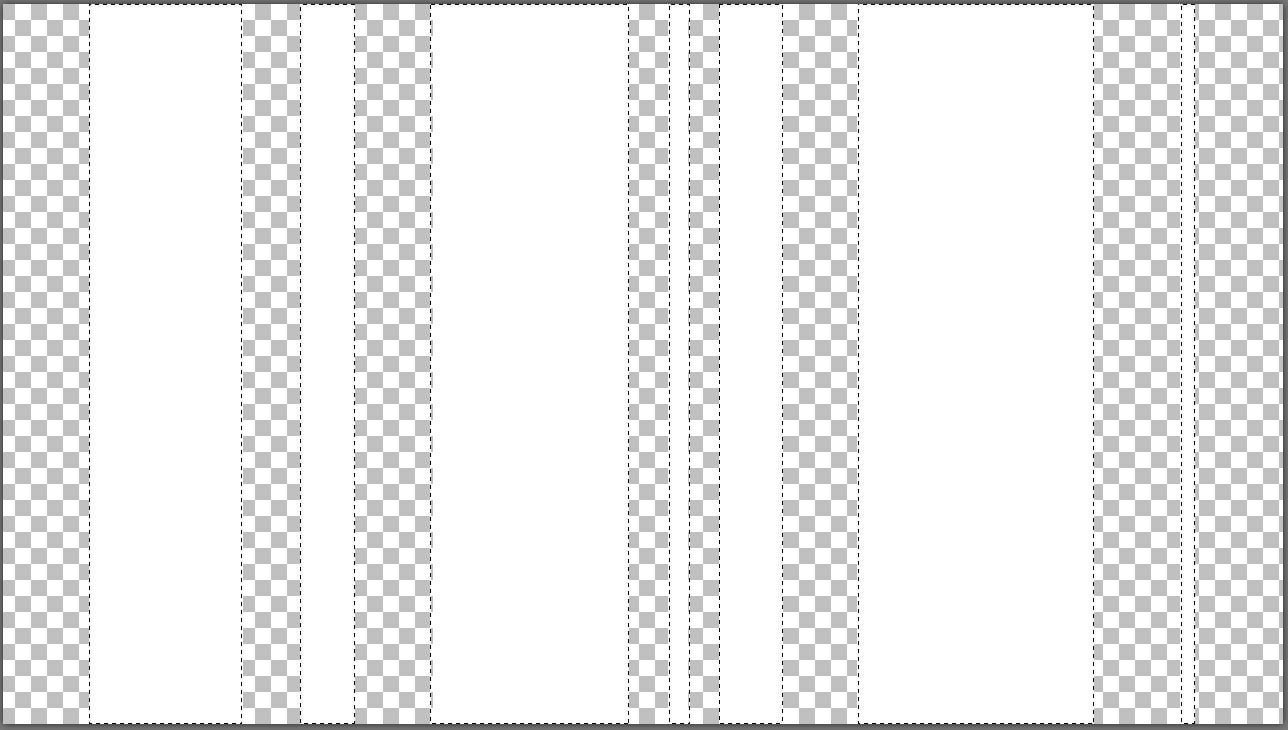
1. Az elsö dolog, hogy készíts egy speciális maszkot is a másik mellé, hogy duplán tudjunk maszkolni. Én itt különbözö csíkokat jelöltem ki a Corel Photoshop programban amelyeket aztán fehér színnel töltöttem fel, majd png formátumban
és 1280 x 720 méretben mentettem el.
The first thing is to make a special mask next to the other so that we can double mask. Here, I selected different stripes in the Corel Photoshop program, which I then filled with white, then saved in png format and 1280 x 720 size.
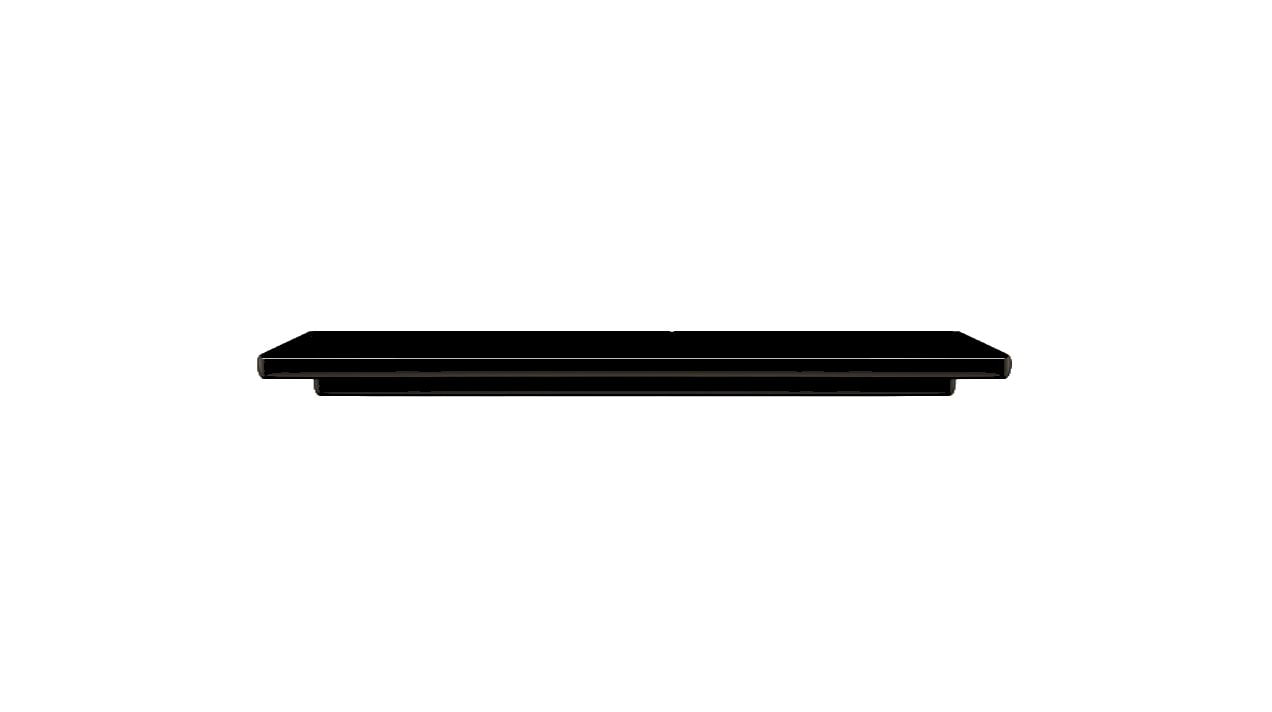
2. Azután egy speciális dekorációt kezdtem csinálni nevezetesen a videóm címét egy fadíszen készítettem el a videómban szintén dekorációként szereplö polcra. Ehhez elöbb elkészítettem egy maszkot. Ezt egyébként csak ötletként tettem ide.
Then I started making a special decoration. I made the title of my video on a wooden ornament on the shelf that is also used as a decoration in my video. For this, I made a mask first.

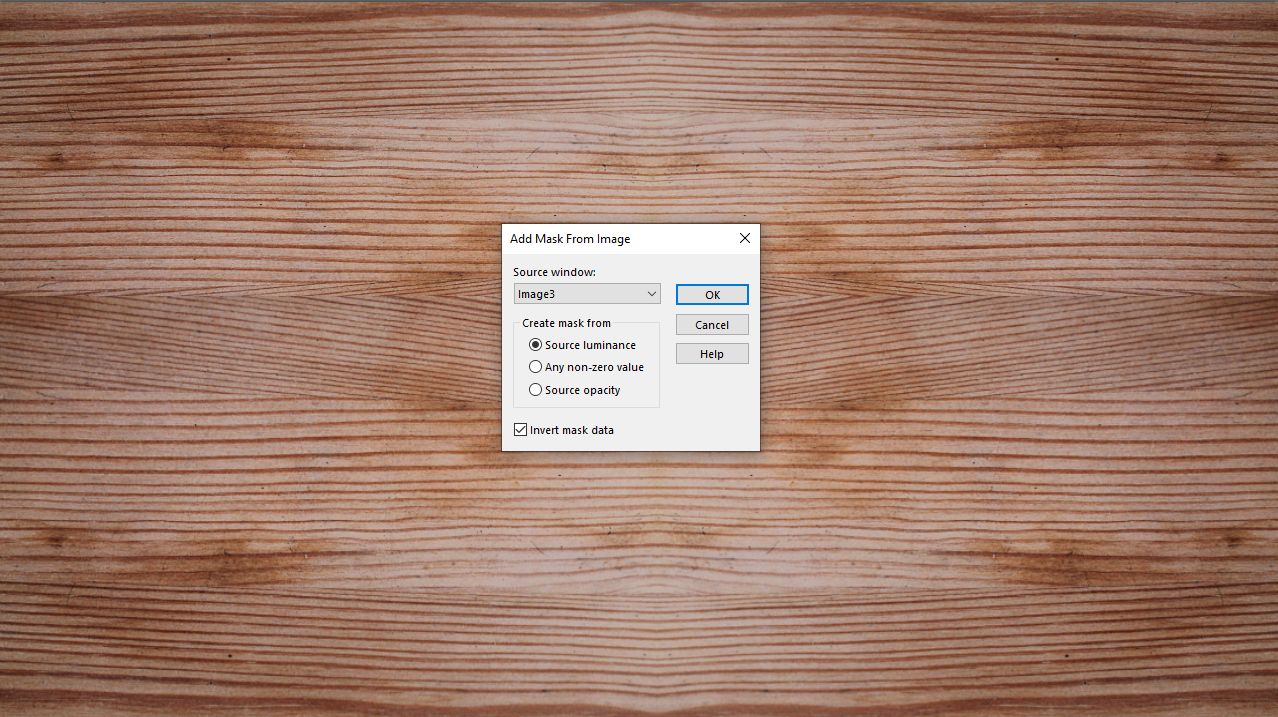
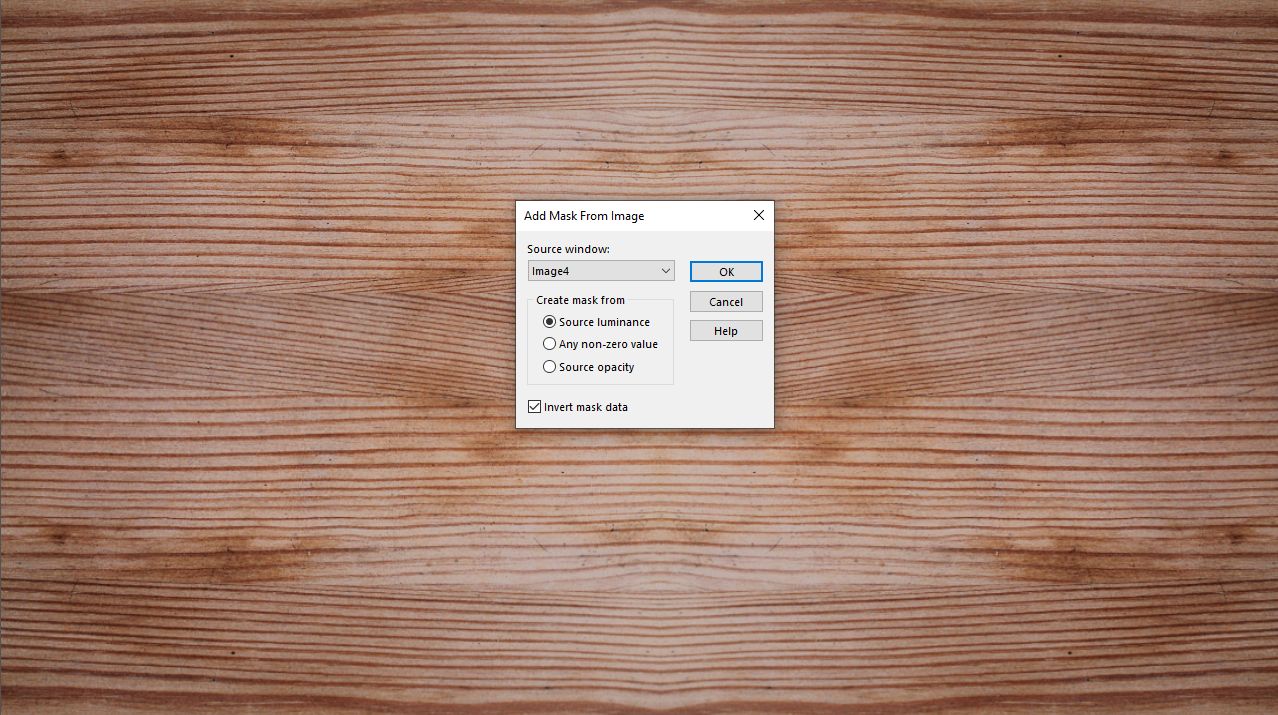
3. Behoztam egy fa háttér fotót és arra maszkoltam rá a feliratomat.
I loaded in a photo of a wooden background and masked my inscription on it.
Layers - New Mask Layer - From Image
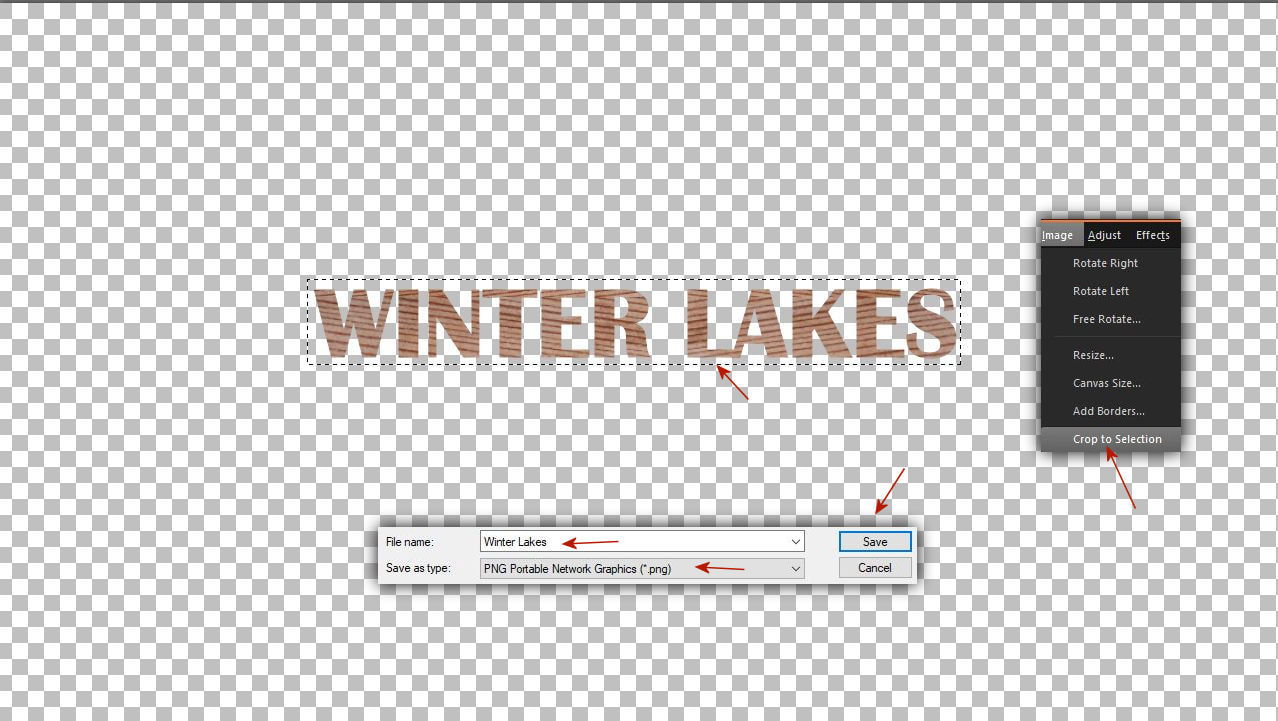
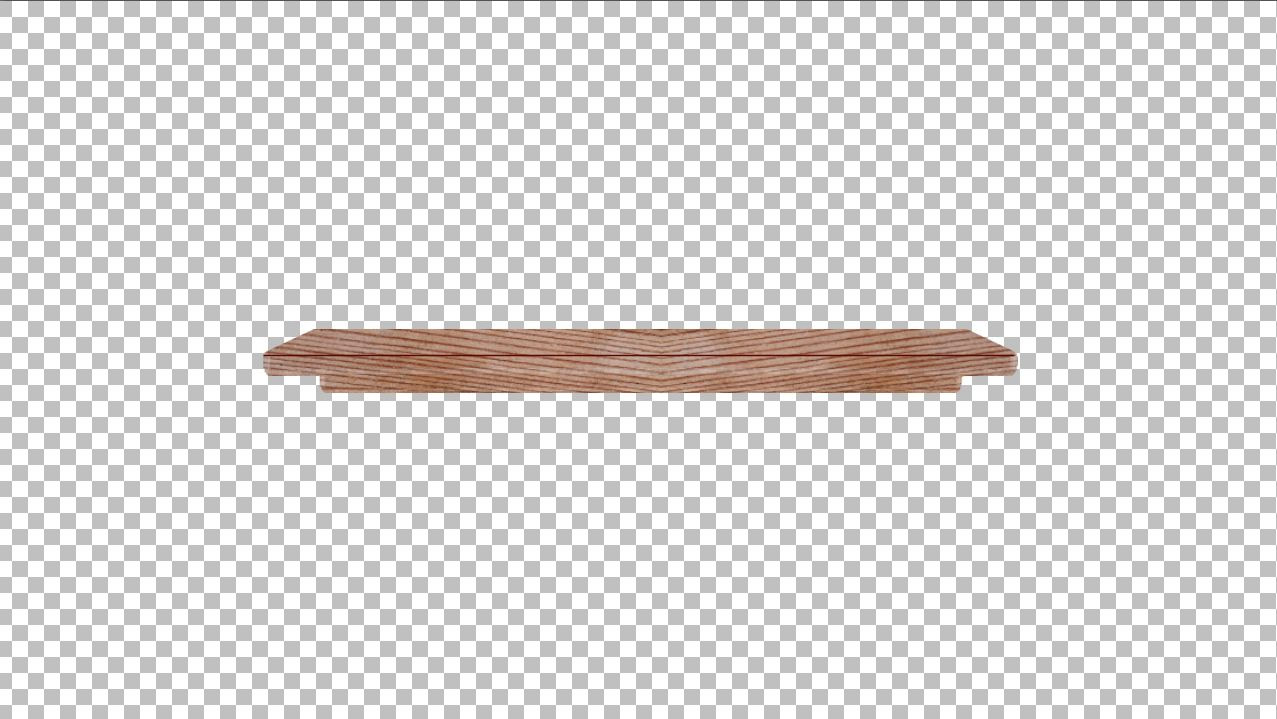
4. Körbevágtam a feliratomat és png formátumban elmentettem.
I cropped my caption and saved it in png format.
5. Egy újabb maszkra volt szükségem amelyen amelyen feliratom fog állni.
I needed another mask on which my lettering decor will stand.
6. Ismét a fa foto háttérre maszkoltam
I masked it again on the wooden photo background
8.
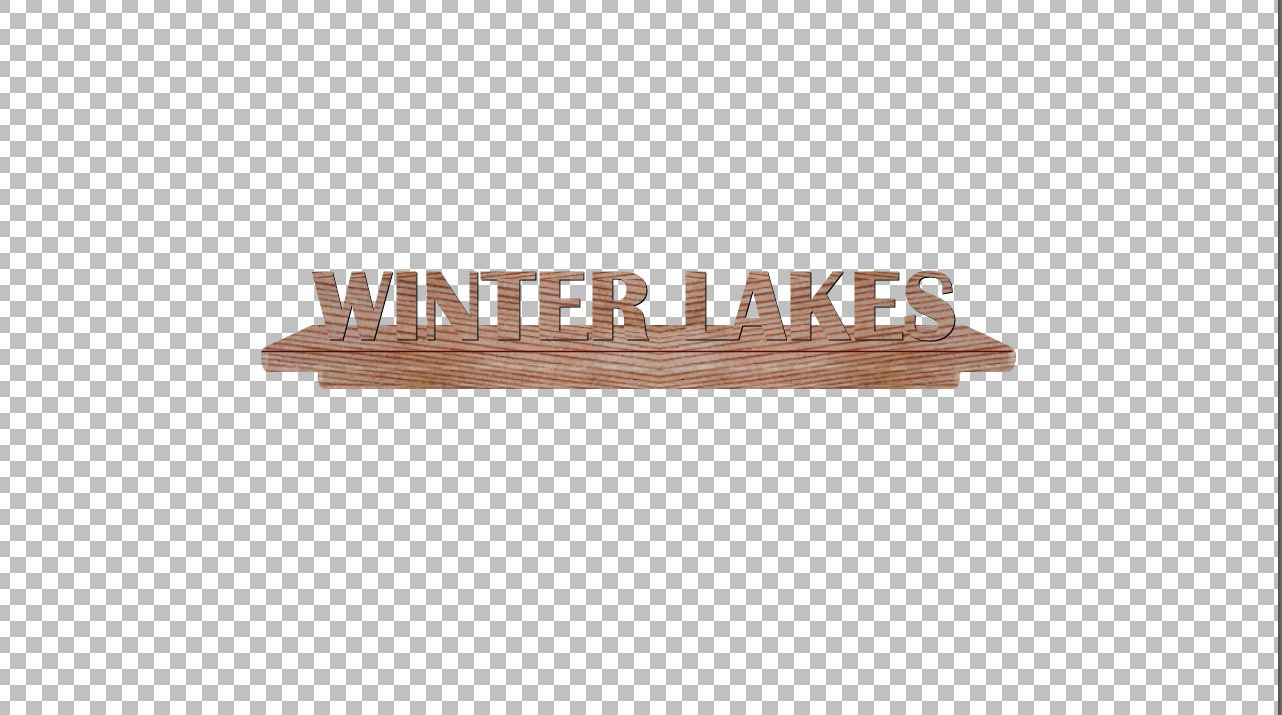
9. Szépen alakul a dekorációm. Behoztam az elmentett feliratomat és a tartó polcra helyeztem új rétegként.
My decoration is coming along nicely. I imported my saved caption and placed it on the support shelf as a new layer.
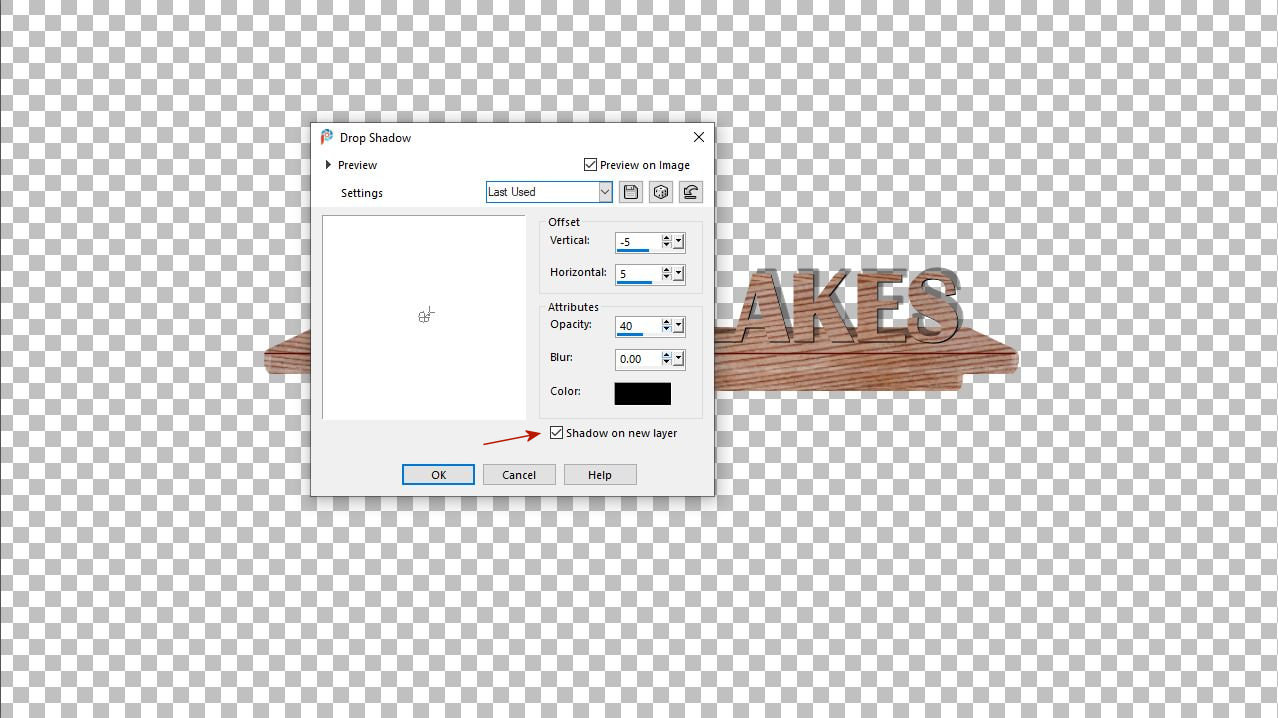
10. Egy különleges dölt árnyékolást akartam csinálni neki. Ezért a drop shadow ablakban ki kell pipálni hogy az árnyék külön rétegen legyen.
Csak így lehet az árnyékot külön mozgatni.
I wanted to make a special slanted shading for it. Therefore, in the drop shadow window, you must uncheck the box so that the shadow is on a separate layer. This is the only way to move the shadow separately.
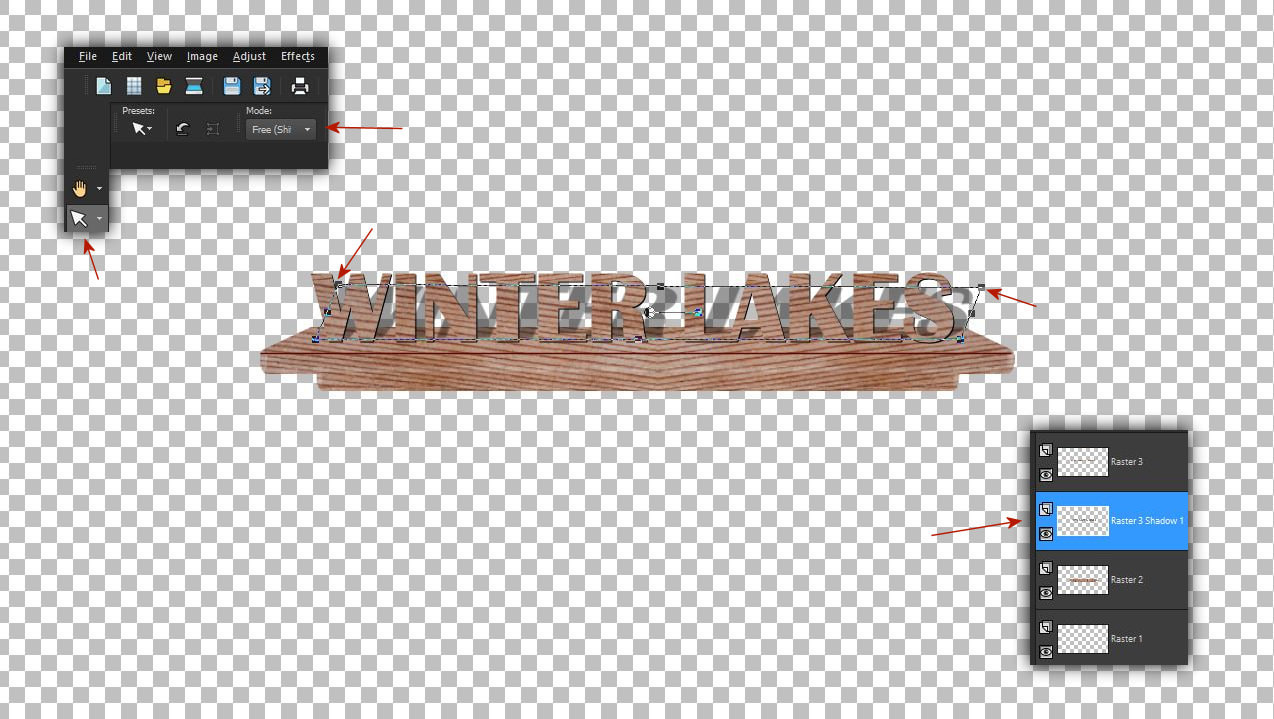
11. Állj az árnyék rétegedre és az eszközöknél a pick tool-t állítsd free módra.
Majd a felirat árnyék bal és jobb felsö sarkait egyformán húzd kicsit jobbra.
Ha készen vagy add össze a rétegeket.
Stay on your shadow layer and set the pick tool to free mode in the tools.
Then drag the upper left and right corners of the shadow to the right equally.
When you are ready, merge the layers down.
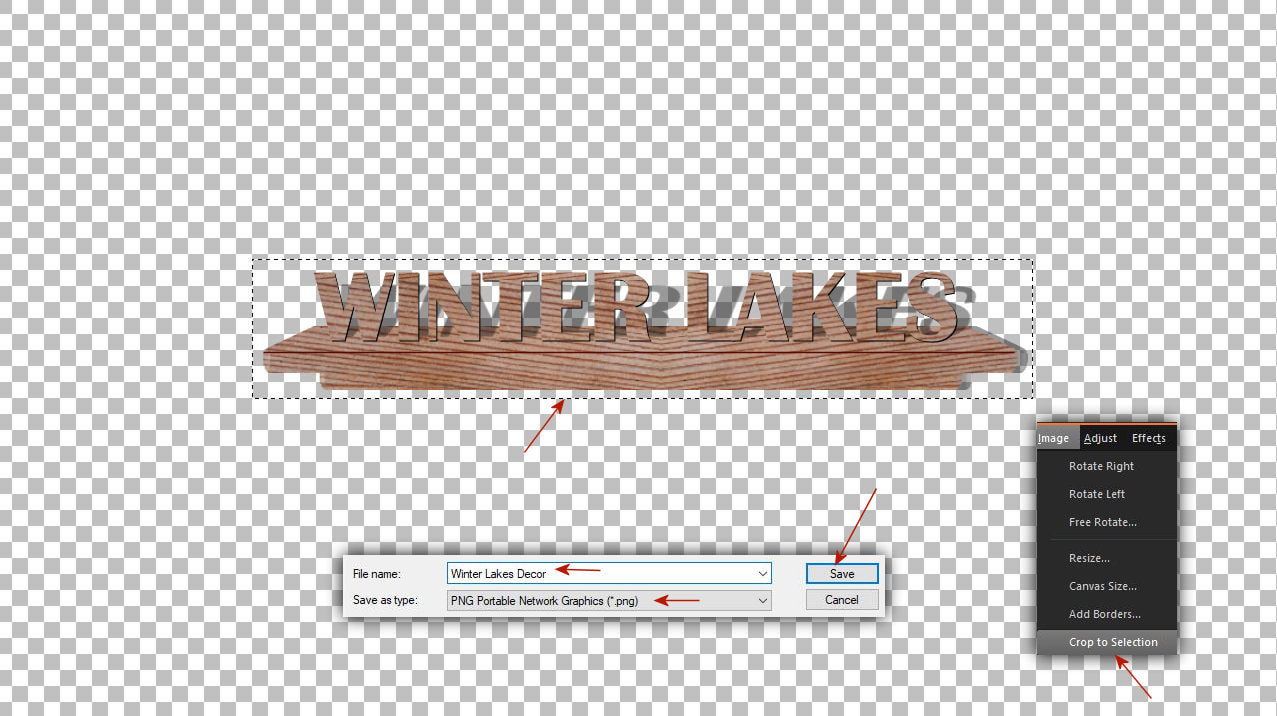
12. Vágd körbe a dekorodat és mentsd el png formában.
Cut around your decor and save in png format.
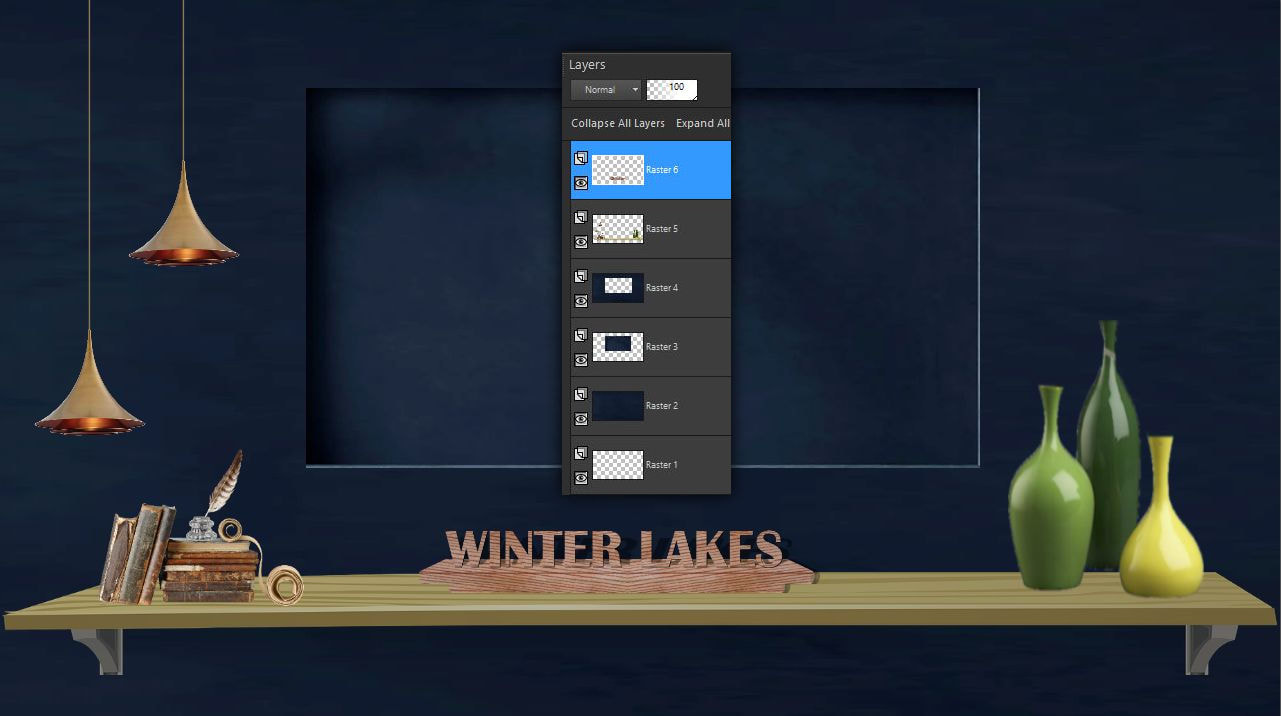
13. Ezután megterveztem a teljes látványtervemet rétegröl rétegre a Corelban. Remekül mutat a videóm címét jelentö fa deokáráció is a többi között a látványtervemben. Majd egyenként elmentettem a rétegeket a Pro Show Producerben való munkához.
I then designed my entire visual design layer by layer in Corel. The wood decoration representing the title of my video looks great among the others in my visual design. Then I saved the layers one by one to work with in Pro Show Producer.
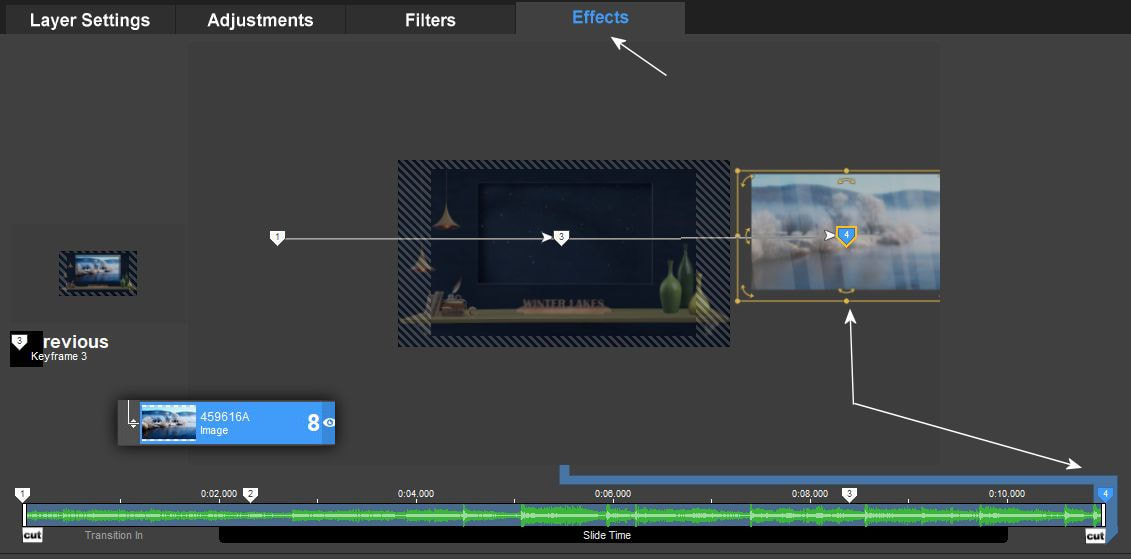
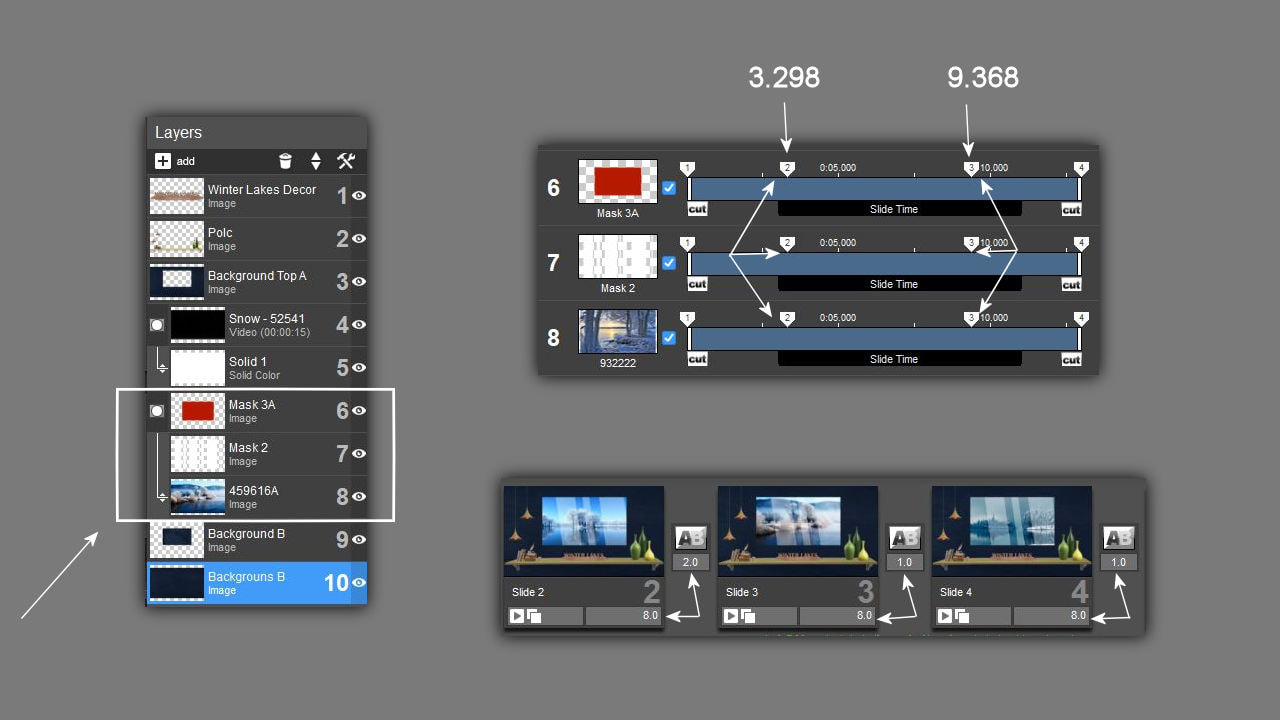
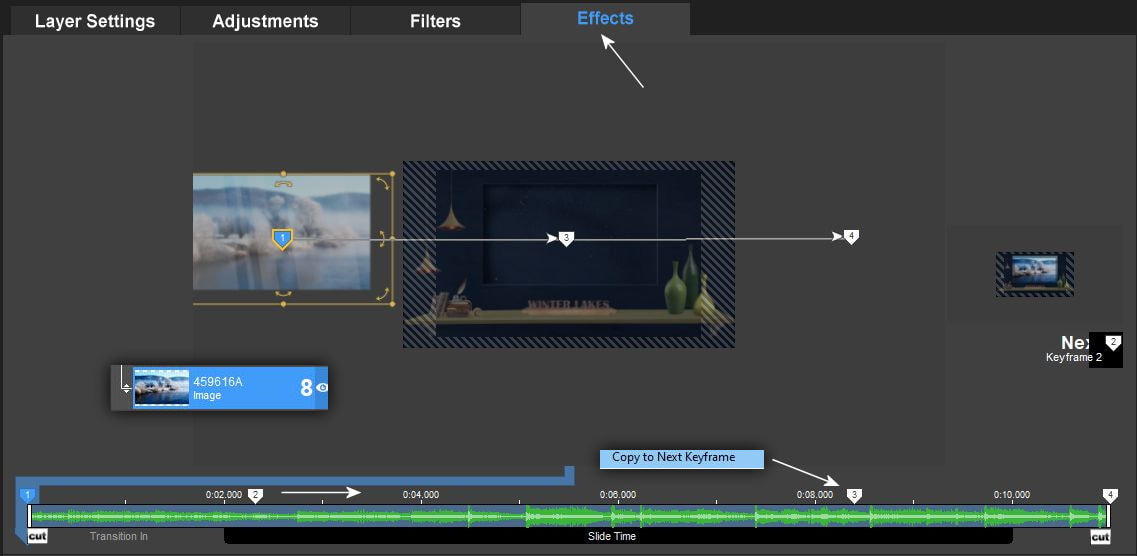
14. Mivel a mozgatás nagyon egyszerü mindössze 3 réteget kell fotóznom mert a többi réteg a saját látvány tervem rétegei. Ez mindenkinél más lehet ki hogyan képzeli el a videója témáját. Itt két mask réteget láttok egy képhez. ez az ami miatt ez a bemutató készült vagyis a dupla maszkolás lényege. Azt is látjátok, hogy mekkora csempeidökkel dolgozz és a keyframe pontok, hogyan helyezkednek el ennél a 3 rétegnél.
Since the movement is very simple, I only have to photograph 3 layers because the other layers are the layers of my own visual design. It can be different for everyone, how you imagine the topic of your video. Here you see two mask layers for one image. this is what this presentation was made for, that is, the essence of double masking. You can also see the time of the tiles you are working with and how the keyframe points are located on these 3 layers.
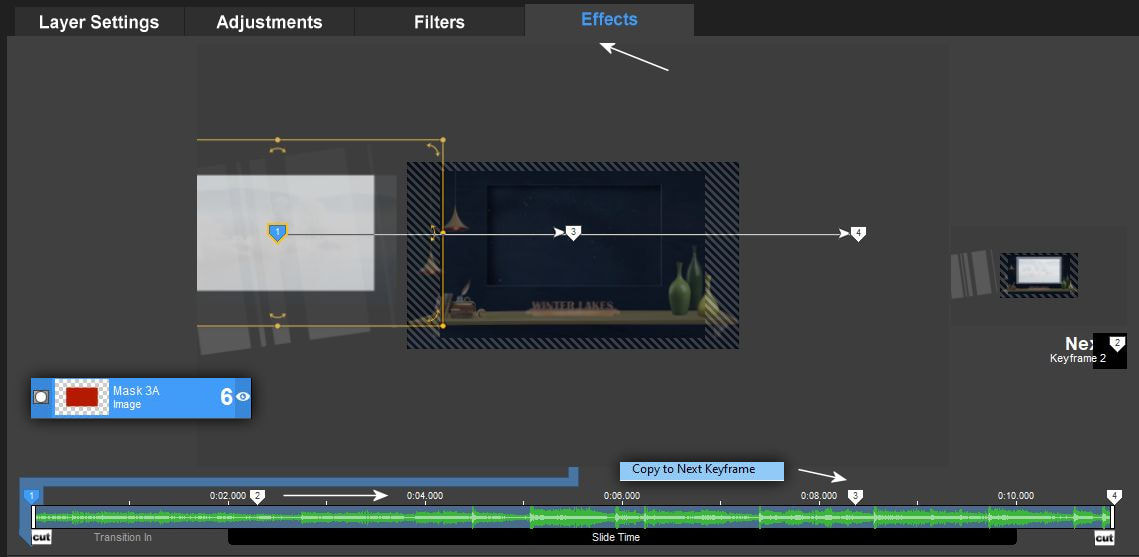
15. Az alap maskod a képernyön kívülröl indul az egyes keyframe ponton. a 2-esen bemegy középre, majd megáll a 3-ason. A 2-es keyframe pontot a 3-asra kell másolnod.
Your base mask starts off-screen at each keyframe point. it goes into the middle on the 2nd, then stops on the 3rd. You have to copy keyframe point 2 to keyframe 3.
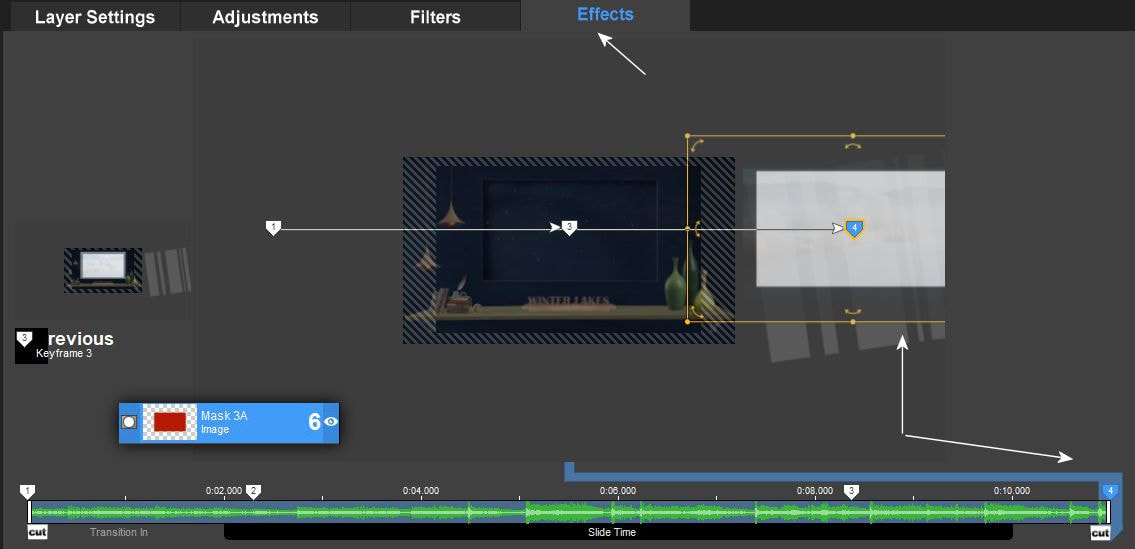
16. A 4-es pontot fogd meg a maskodon és vidd ki a képernyön kívülre.
Grab point 4 on your mask and take it outside of the screen.
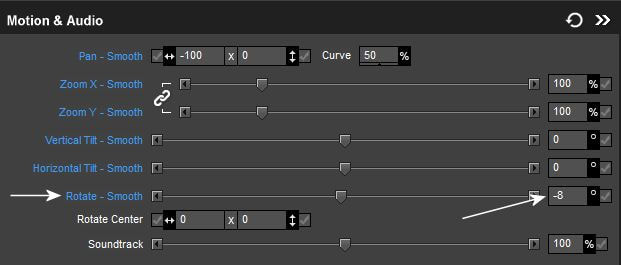
17. A dekor maszkoddal is úgyanúgy kell dolgoznod csak, hogy látványosabb legyen a mozgás a képen keresztül használd a rotate-ot is -8-al. Itt az elsö 3 keyframe ponton ugyanazok az értékek vannak kivéve a 4-esen. Ott a pozició minusz 100 helyett 100. Az adjustmentben az opacity-t állítsd 35-re hogy ne legyen túl fehér.
You also have to work with your decor mask in the same way, just to make the movement more visible through the image, use rotate with -8. Here, the first 3 keyframe points have the same values, except for the 4th. There, the position is 100 instead of minus 100. In the adjustment, set the opacity to 35 so that it is not too white.

18. A képeden is ugyanaz a beállítás mint az alap piros maszkodon.
The settings in your picture are the same as your basic red mask.
19. A 4-es pontot fogd meg a maskodon és vidd ki a képernyön kívülre.
Grab point 4 on your mask and take it outside of the screen.