Folytassuk a munkát a ProShow Producer Programban.
Let's continue working in the ProShow Producer Program.

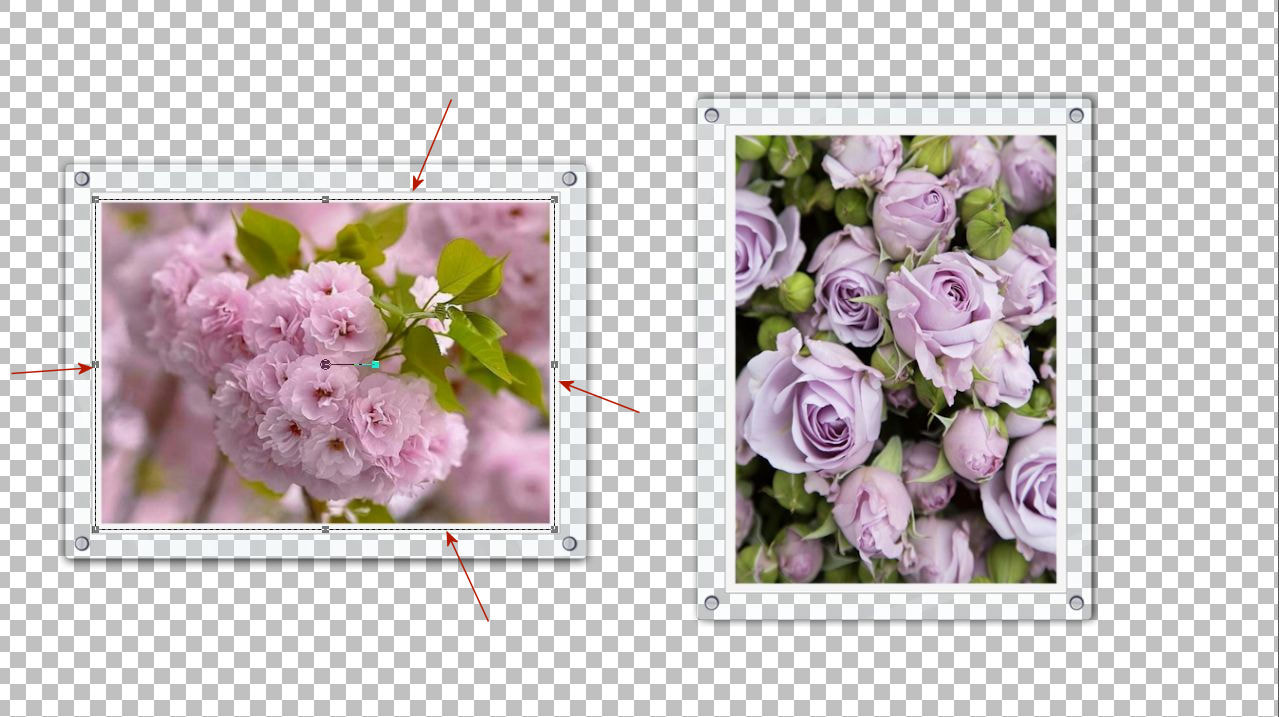
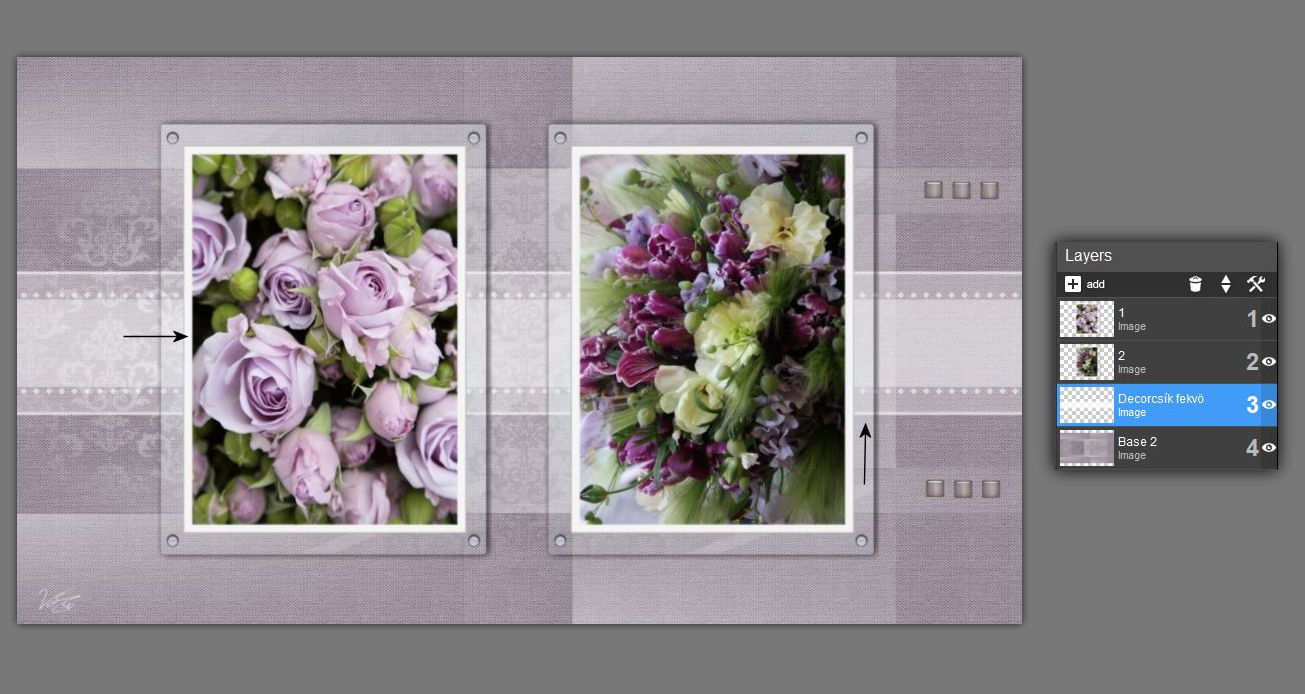
1.Mielött bármit is csinálsz az általad készített keret mérete határozza meg a képek méreteit amelyeket a témádhoz gyüjtesz a netröl. Be kell vinned mind az álló és fekvö képeidet a keretekkel együtt egy külön lapra. A képeket nagyon pontosan az üvegkereted fehér belsö keretén kell beméretezve elhelyezned. Aztán becsukni a rétegszemeket kivéve a képedét. Vágd körbe a képet így megkapod azt a méretet amely passzol a keretedbe. Minden képedet be kell keretezned a saját elkészített kereteddel a munka megkezdése elött.
Before you do anything, the size of the frame you create determines the size of the images you collect for your topic from the Internet. You have to bring in all your portrait and landscape pictures together with the frames on a separate sheet. You must place the pictures very accurately on the white inner frame of your glass frame. Then close the layer meshes except for your image. Crop the image around so you get the size that fits your frame. You must frame all your pictures with your own frame before starting work.
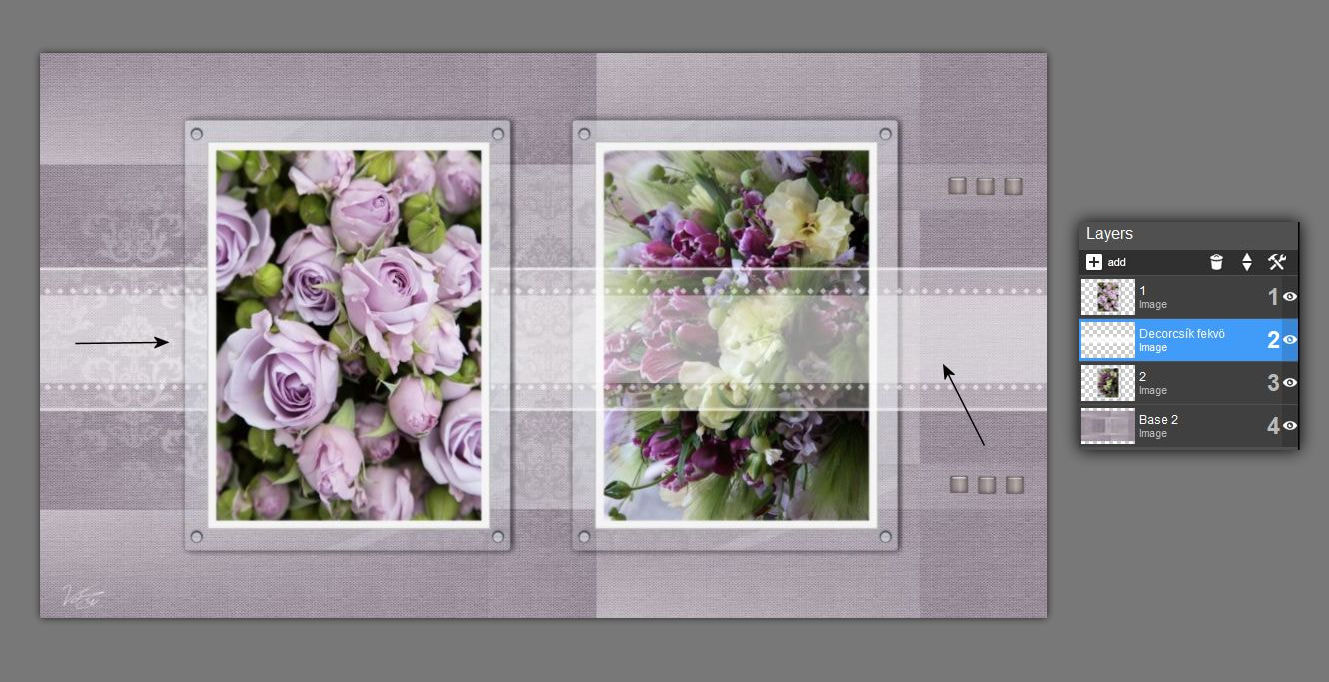
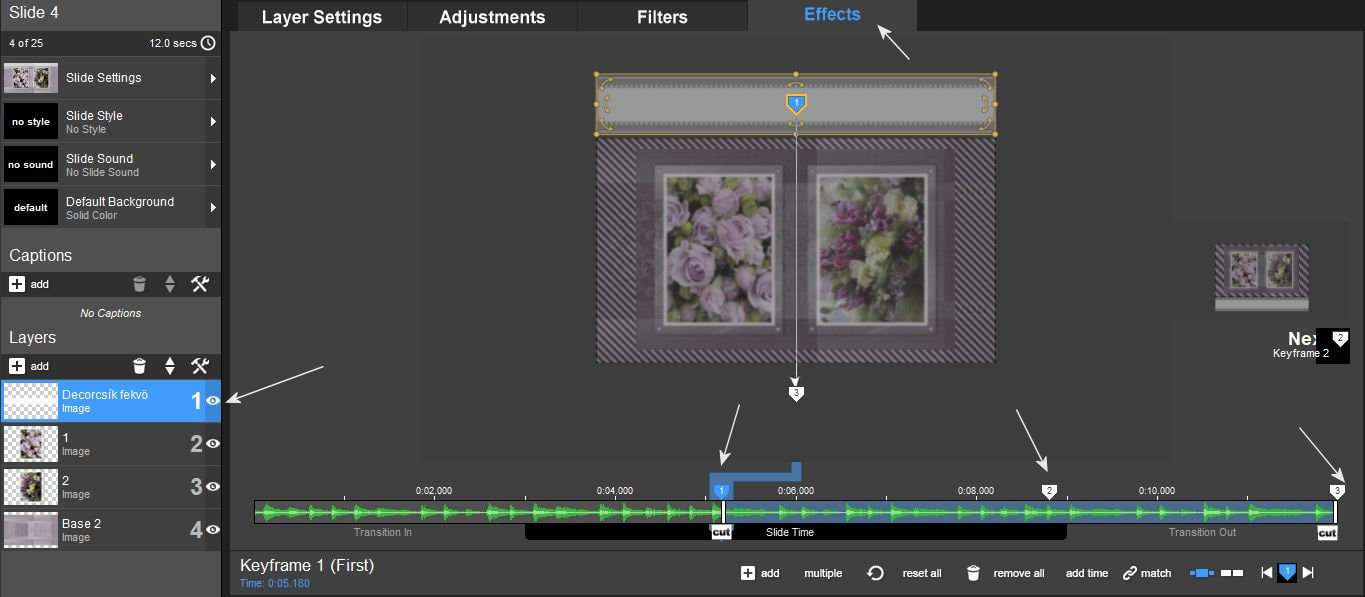
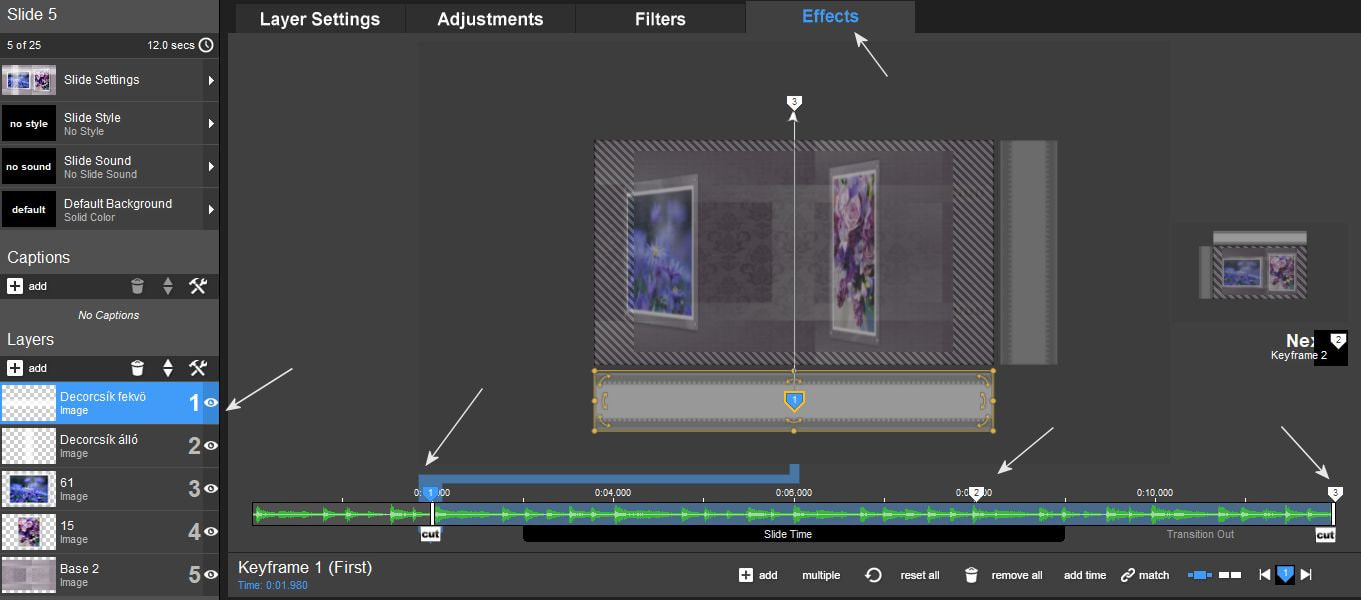
2. El kell döntened, hogy ezzel a módszerrel milyen vidit csinálsz a rétegek összerakását illetöen. Ha a képek elött akarod majd mozgatni a decorcsíkokat akkor így rakd össze a rétegeket ahogy itt a képen látod. Ha mögötte akarod akkor cseréld fel a réteget a képréteggel. Az egyéb effectbeállítások ugyanazok maradnak mint itt a képeken csak a rétegek sorrendje változik. 3 keyframe ponton müködik a dekorcsík itt ahogy a képen látod.
You have to decide how you want to assemble the layers with this method. If you want to move the decor strips in front of the pictures, then put the layers together as you can see in the picture. If you want it behind it, replace the layer with the image layer. The other effect settings remain the same as here in the pictures, only the order of the layers changes. The decor strip works here at 3 keyframe points, as you can see in the picture.
3. Elöfordulhat a ProShowban, hogy a dekorcsík még nem mindig olyan áttetszö mint azt a Corelban érzékeltük. Ebben az esetben még itt is halványíthatjuk az Adjustment
opacity menüjében. Vehetünk vissza rajta ha szükséges.
It may happen in ProShow that the decor strip is still not as transparent as we perceived in Corel. In this case, we can even fade the Adjustment here in the opacity menu. We can take it back if necessary.

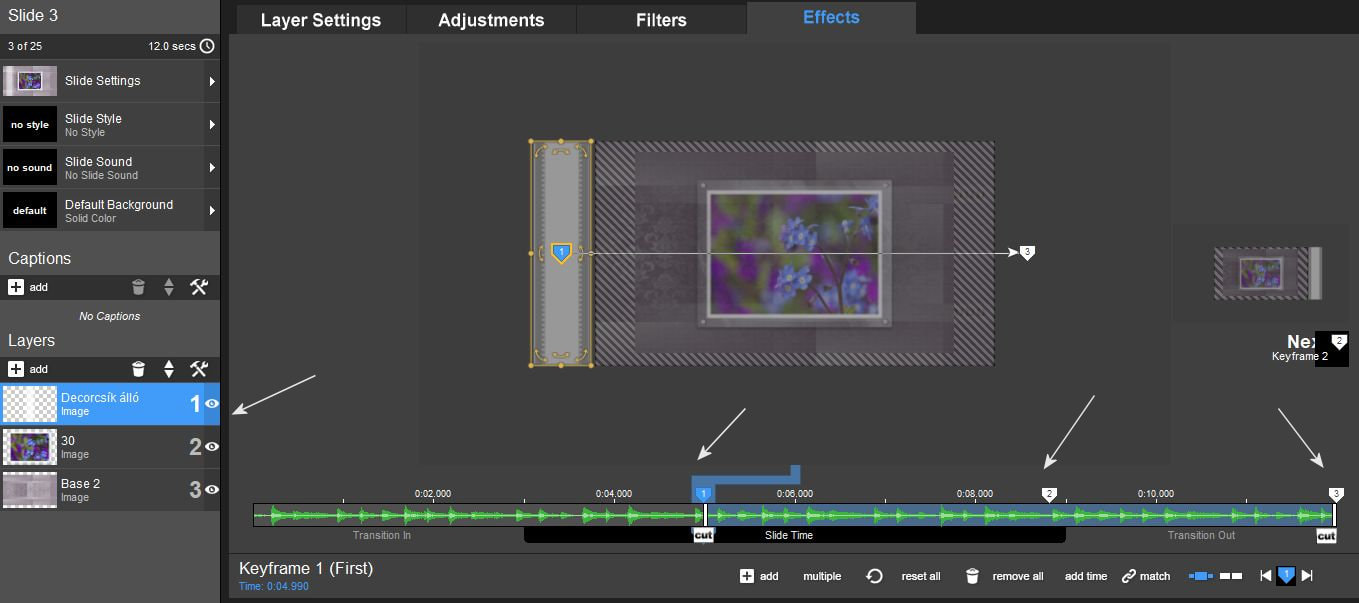
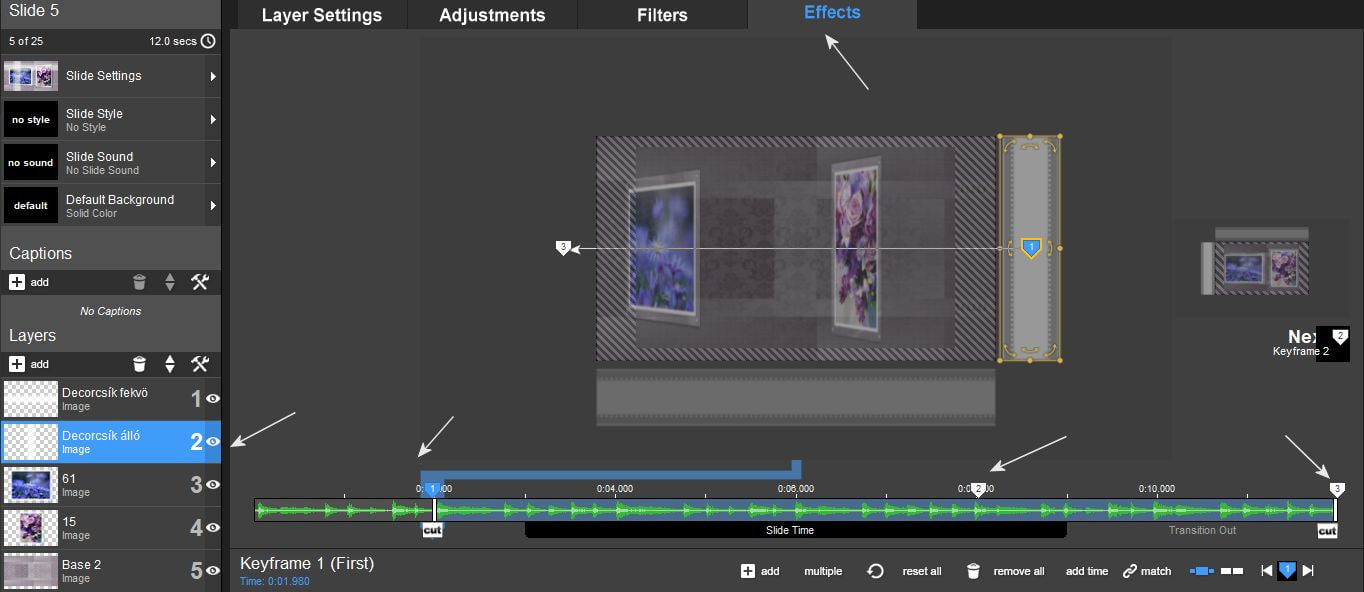
4. Itt a fekvö csik mozgatást látod. a kettes keyframe pont adatait át kell másolnod az utolsó keyframe pontra.
Here you see the lying buttock movement. you have to copy the data of the second keyframe point to the last keyframe point.
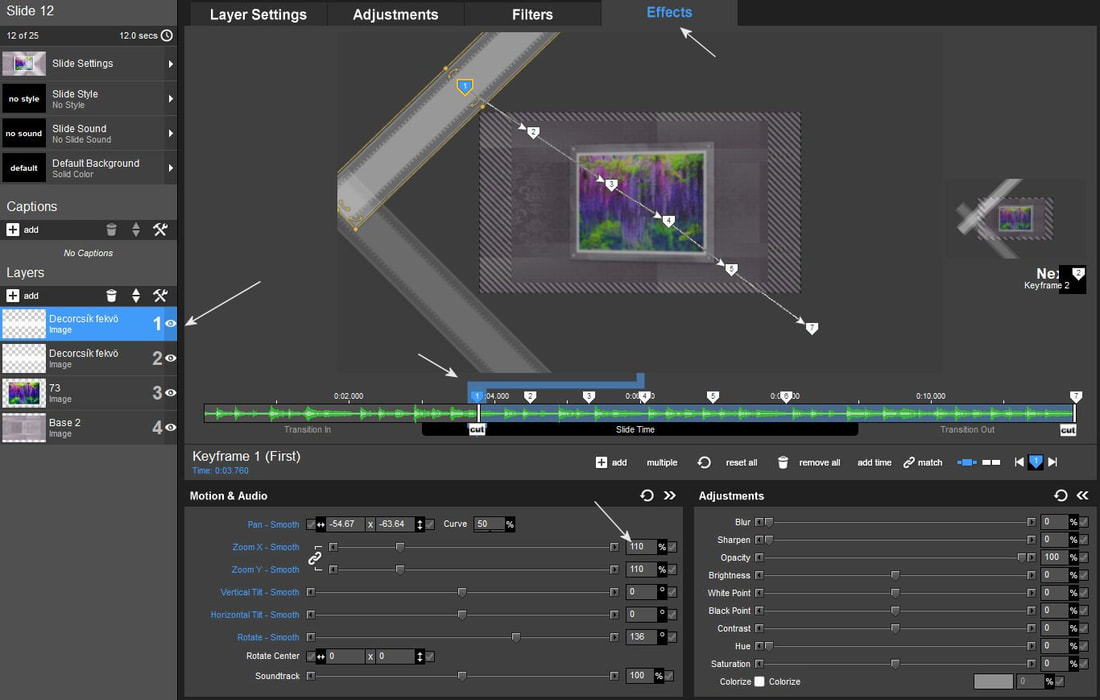
5. Ez itt egy keresztezö mozgás. Vagyis van egy álló és egy fekvö dekorcsík amelyek mozgása keresztezi egymást. A dekor csíkok mozgásának a kezdetét az 1-es keyframe pontnak a helyzetével tudod elindítani. Itt azért vannak az egyes keyframe pontok behúzva a léc elejéröl hogy csak akkor induljanak ha már a képek a megfelelö pozícióba érkeztek.
This is a crossing movement. In other words, there is a vertical and a horizontal decorative strip whose movement crosses each other. You can start the movement of the decor strips with the position of keyframe point 1. Here, the individual keyframe points are indented at the beginning of the bar so that they only start when the images have arrived at the appropriate position.
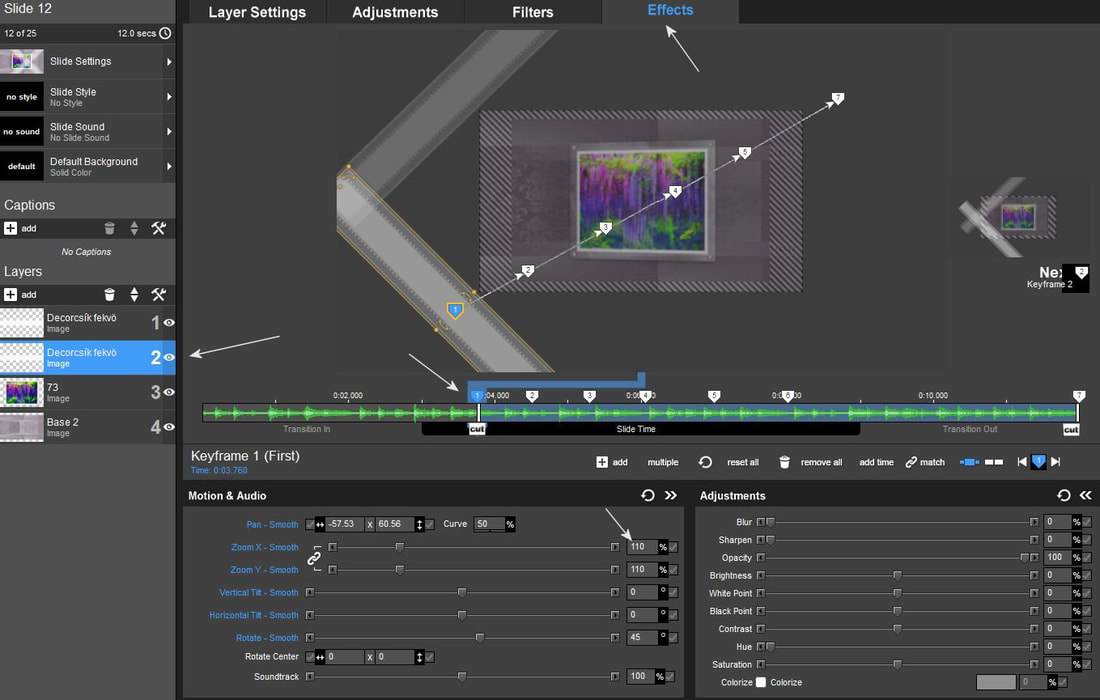
6. A másik dekor csíkna is ugyanakkor kell indulnia és mozognia mint az elsönek tehát a keyframe pontoknak is azonos helyen kell lenniük.
The other decor strip must also start and move at the same time as the first, so the keyframe points must also be in the same place.
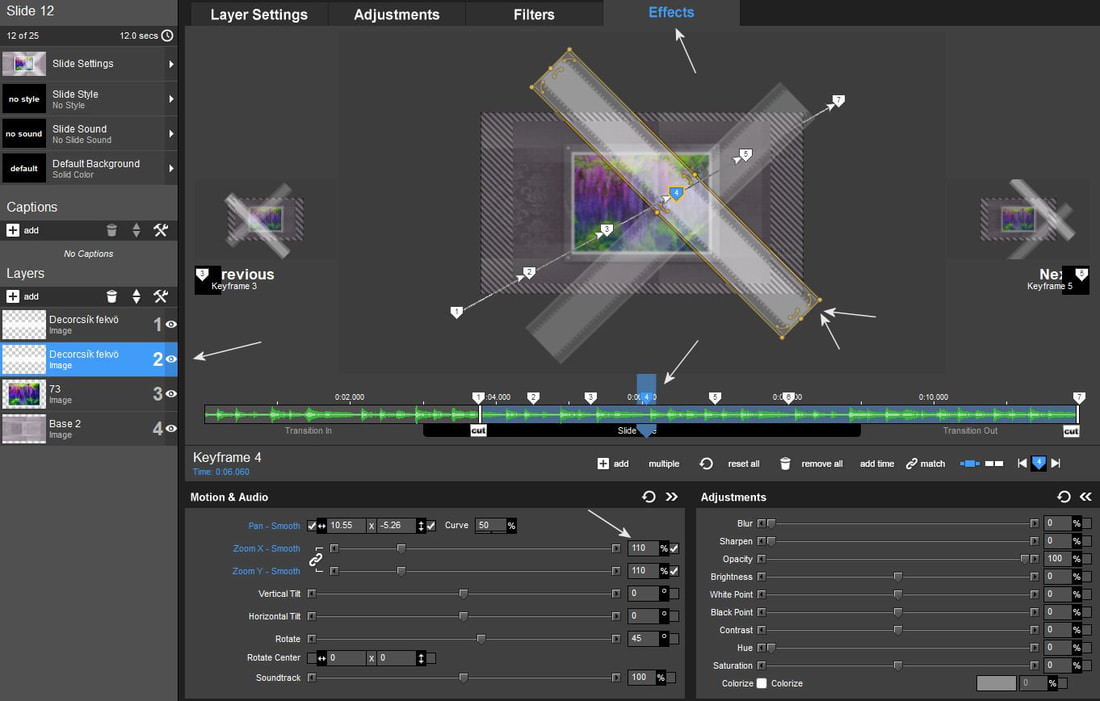
7. Ha ezt a dekort 45 fokos szögben akarod mozgatni ahhoz több keyframe pontot kell elhelyezned. Láthatod, hogy a mozgás saroktól sarokig van elkészítve. Mivel ennek a csíknak túl kell nyúlnia a mozgás alatt a képernyöfelületen egy kicsit meg kell nagyobbítani. Ezért a zoom-nak minden keyframe ponton a 100 helyett 110-nek kell lennie.
If you want to move this decor at an angle of 45 degrees, you need to place several keyframe points. You can see that the movement is made from corner to corner. Since this strip has to extend beyond the screen surface during movement, it has to be enlarged a little. Therefore, the zoom should be 110 instead of 100 at each keyframe point.
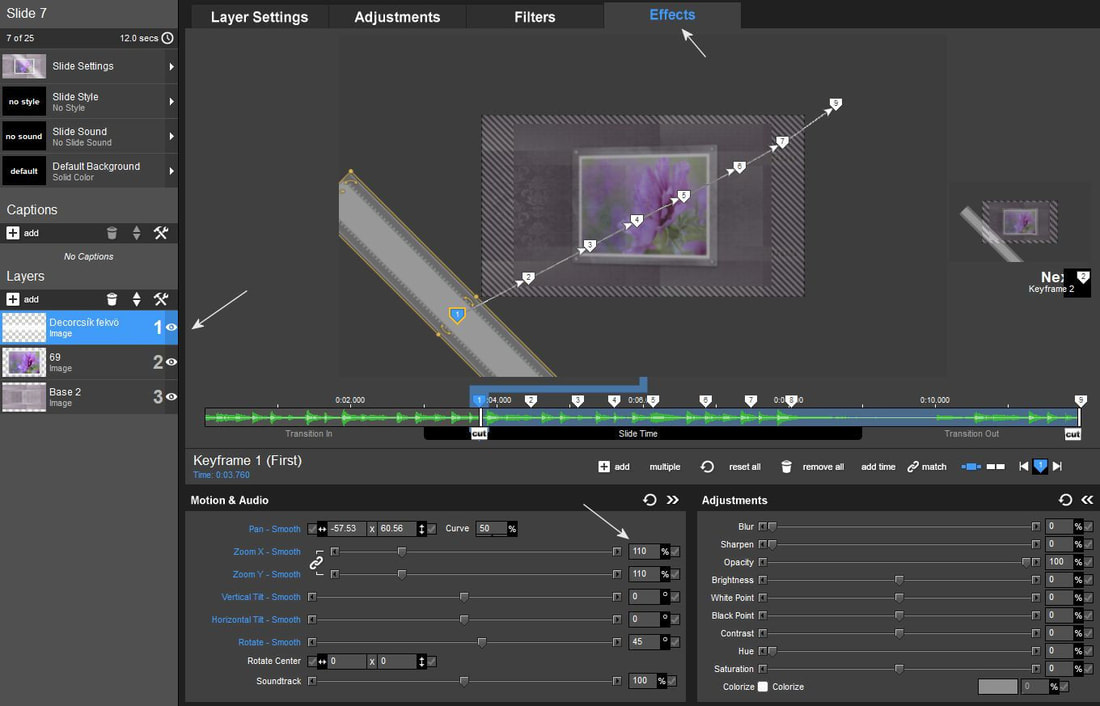
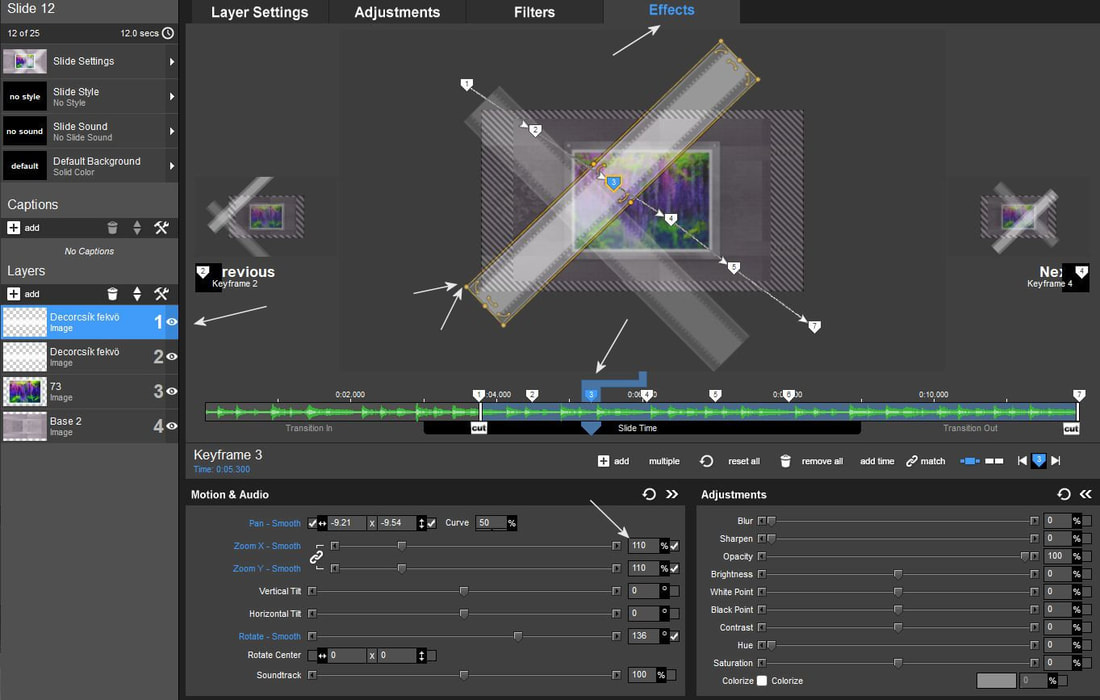
8. Amikor a keyframe pontokat elhelyezed le kell ellenörizni a mozgást nem látszik-e ki a csík vége a lejátszásnál. Ez különösen azoknál a keyframe pontoknál vészes amelyek a középmozgásnál vannak. Akkor a keyframe pontt elmozgatásával kell korrigálni a képen. Ez itt a bal alsó saroktól mozog a jobb felsöig.
When you place the keyframe points, you must check the movement to see if the end of the strip is visible during playback. This is especially dangerous for those keyframe points that are in the middle movement. Then the keyframe point must be corrected by moving it on the image. This goes from the bottom left corner to the top right.

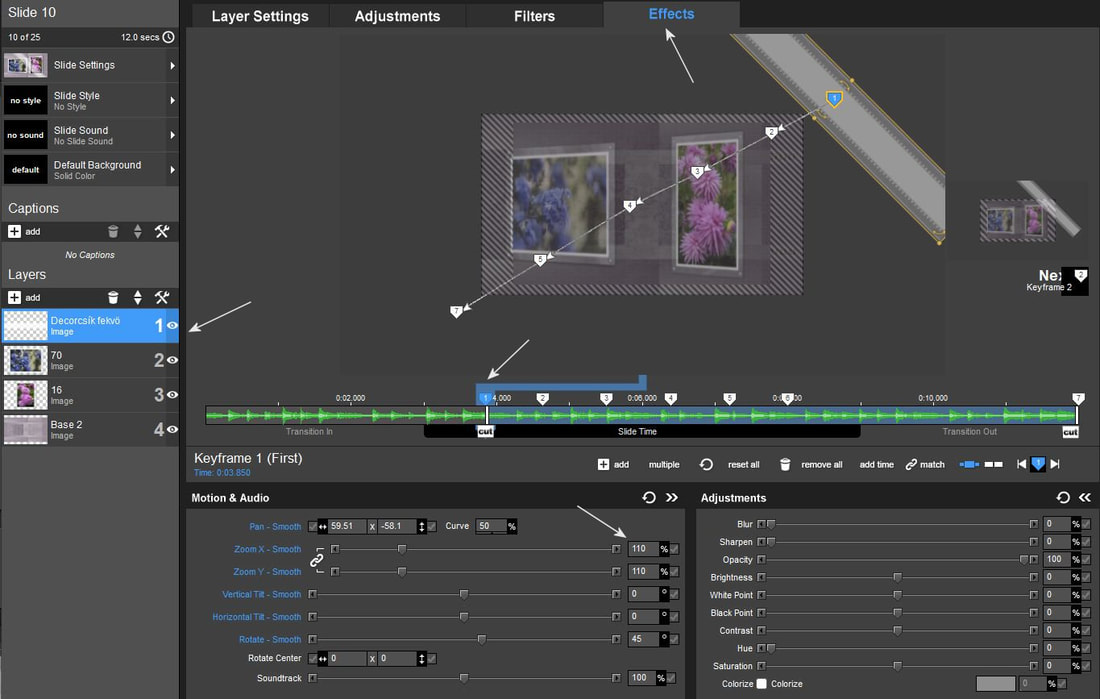
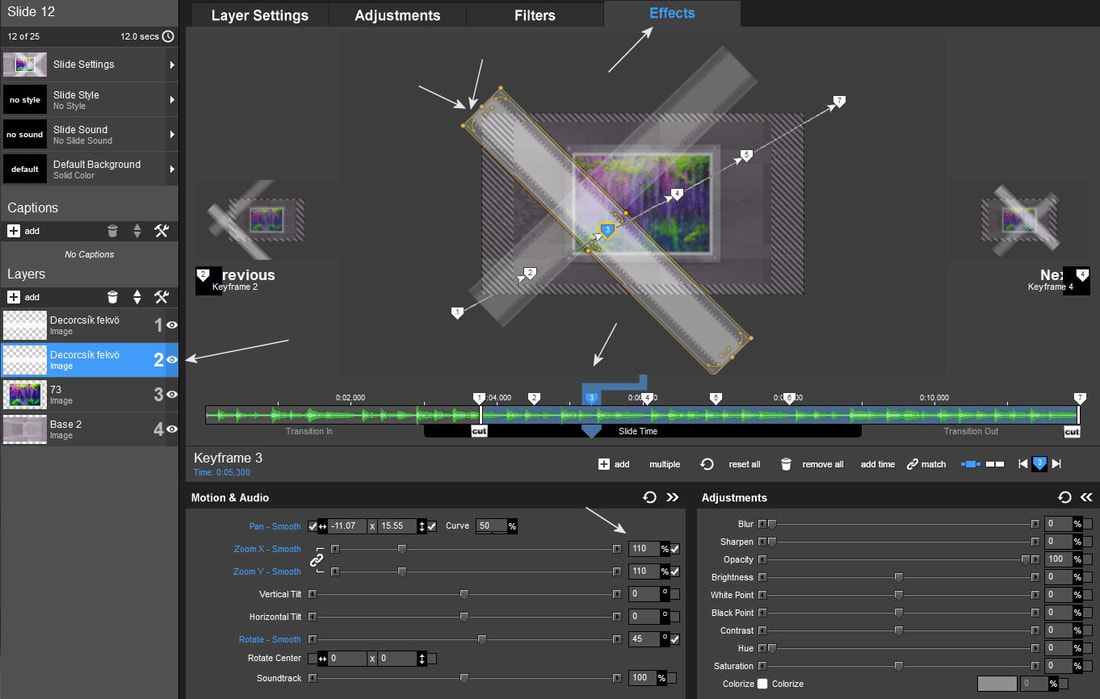
9. Ez pedig itt pont fordítva mozog. A jobb felsö saroktól a bal alsó sarokig.
And here it moves exactly the opposite way. From the upper right corner to the lower left corner.
10. Ezzel a 45 fokos csíkkal is csinálhatunk keresztezö mozgást ha 2 csíkot alkalmazunk. Akkor ezeket az ellenkezö sarkokból kell elindítani.
This 45 degree strip can also be used to make a crossing movement if 2 strips are used. Then these must be started from opposite corners.
11. Itt is nagyon kell ügyelni arra, hogy bele ne lógjanak a csíkok a képernyö részbe mindig nyúljanak túl azon minden keyframe pontnál.
Here, too, care must be taken to ensure that the stripes do not hang into the screen area and always extend beyond each keyframe point.
12. Szép sorban le kell ellenörizni a keyframe pontokat, hogy milyen helyzetben van a csíkunk.
The keyframe points must be checked in a neat row to see what position our strip is in.

13. Most a másik réteg mozgatását látod ahhoz hogy keresztezzék egymást.
Now you can see the other layer being moved so that they intersect.
14. Figyeld a képen levö értékeket is az is segít a szerkesztésben.
Pay attention to the values in the picture, it also helps in editing.
15. A csíkok sarkainak a helyzete fontos mint mondtam ne lógjon bele a screenbe.
The position of the corners of the strips is important, as I said, they should not hang in the screen.
16. És a végére még 2 ötlet a kreatív felhasználás variációkhoz ennél a vidinél.
Ha a képek mögött futtatod a csíkjaidat akkor az üvegkereted jobban érvényesül. Hiszen akkor a mozgásnál olyan hatás keletkezik mintha csak a belsö fehér keret mögött futna a csíkod mert a kereted széle áttetszö. Akkor így rakd össze a rétegeidet ahogy azt itt a képen is láthatod. De ha teljesen kész a vidid a rétegeket akkor is elmozgathathatod hogy próbálgasd a látvány
And at the end, 2 more ideas for creative use variations for this video. If you run your stripes behind the pictures, your glass frame will be more effective. After all, when you move, the effect is as if your strip runs behind the inner white frame because the edge of your frame is transparent. Then put your layers together as you can see in the picture. But if you are completely ready to move the layers, you can still move them around to try out the visuals.
17. De az a megoldás is müködik ha pl. 2 képed van egy csempén az egyik kép mögött mozog a dekor csíkod a másiknál meg elötte. Nem zavaró a látvány akkor sem hiszen a csíkod is áttetszö, legfeljebb különleges lesz töle. Akkor így mozgasd át a rétegeket ahogy itt a képen látod.
But that solution also works if e.g. You have 2 pictures on one tile, the decor strip moves behind one picture and in front of the other. Even then, the sight is not disturbing, since your strip is also transparent, at best it will be special. Then move the layers like you see in the picture.