
Sokszor hangoztattam már, hogy nem kell mindig túl bonyolult dolgokat csinálnunk ahhoz, hogy - hasonlóan mint a képszerkesztésben - itt a videózásban is szépségeket alkossunk. Ezt a bemutatót is a már szinte szállóigévé alakult mondásom jellemzi.
"Egyszerü de nagyszerü" kreativitás és harmonia a képekkel, zenével.
I've said many times that we don't always have to do overly complicated things in order to create beauty in videography, just like in image editing. This presentation is also characterized by my saying, which has almost become a catchphrase. "Simple but great" creativity and harmony with images and music.

1. Ehhez a videóhoz elökészületben erre a három rétegre van szükséged. Természetesen ezeket a dolgokat a saját témádhoz és képeidhez kell igazítani színben és stílusban.
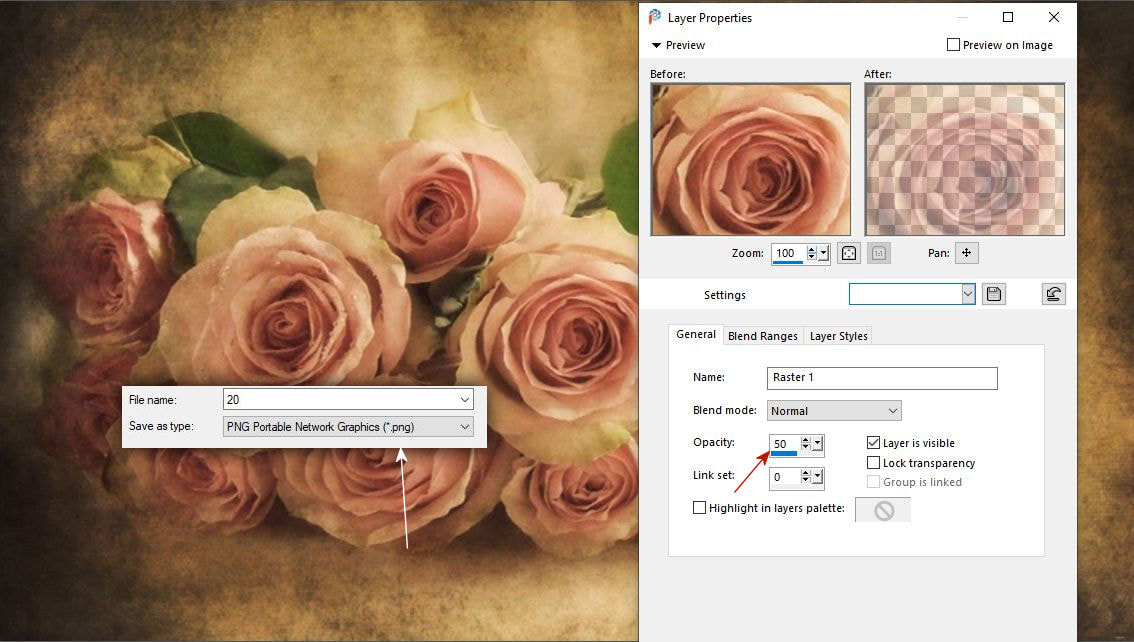
a. egy alapháttér - ne felejtsd el hogy a képed egy kicsit átlátszó az 50%-os blend mód
miatt.
b. Egy szép szerkesztett félképre is amelyet félbe png-zel ki és decorként használunk
c. Egy a témádnak és a stílusodnak megfelelö png képkeret.
1. For this video, you need these three layers in preparation. Of course, these things should be adapted to your own theme and images in color and style. the.
A. basic background - don't forget that your image is a bit transparent due to the 50% blend mode.
B. Also for a nice edited half-image, which we cut out in half with a png and use it as decor
C. A png photo frame that matches your theme and style.


2. Az elökészítési folyamatban a témádhoz összegyüjtött fekvö képeidet
( 1280x720 ) elöször a Corelban a blend módot minden képen tedd 50 %-ra és ments el öket png formátumban.
In the preparation process, you collected your landscape images for your topic ( 1280x720 ) first set the blend mode in Corel to 50% on all images and save them in png format.
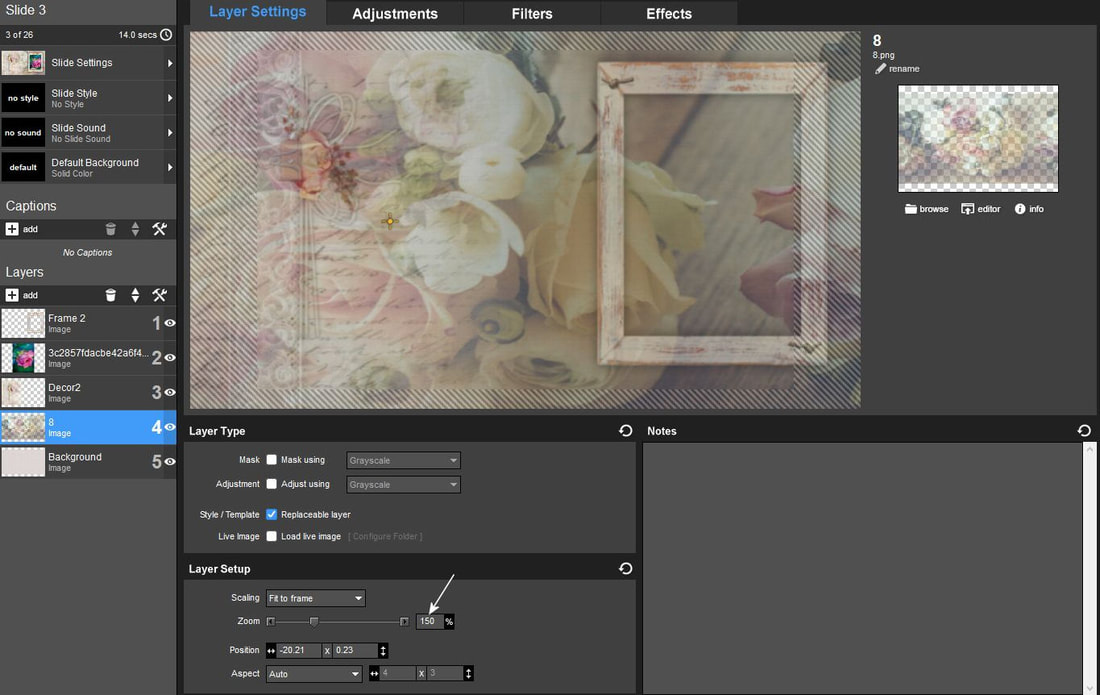
3. Szükséged lesz még fekvö és álló képekre is keretek nélkül. Ezeket a rétegeket ilyen sorrendben állítsd be a progidban. tehát fentröl lefelé
1. keret,
2. állókép
3. png félkép decor
4. fekvökép
5. alapháttér.
Minden csempén ugyanazok a lépések és ugyanazok a müveletek vannak ebben a videóban.
Figyelem: a Layer Settingsben a fekvö képed rétegén a zoom-ot állítsd 150%-ra.
You will also need horizontal and vertical pictures without frames. Set these layers in this order in your program. so from top to bottom.
1, Frame
2. Portrait style image
3. Png half image decor
4. Landscape style image
5. Basic background.
All tiles have the same steps and actions in this video. Attention: in the Layer Settings, set the zoom to 150% on the layer of your horizontal image.
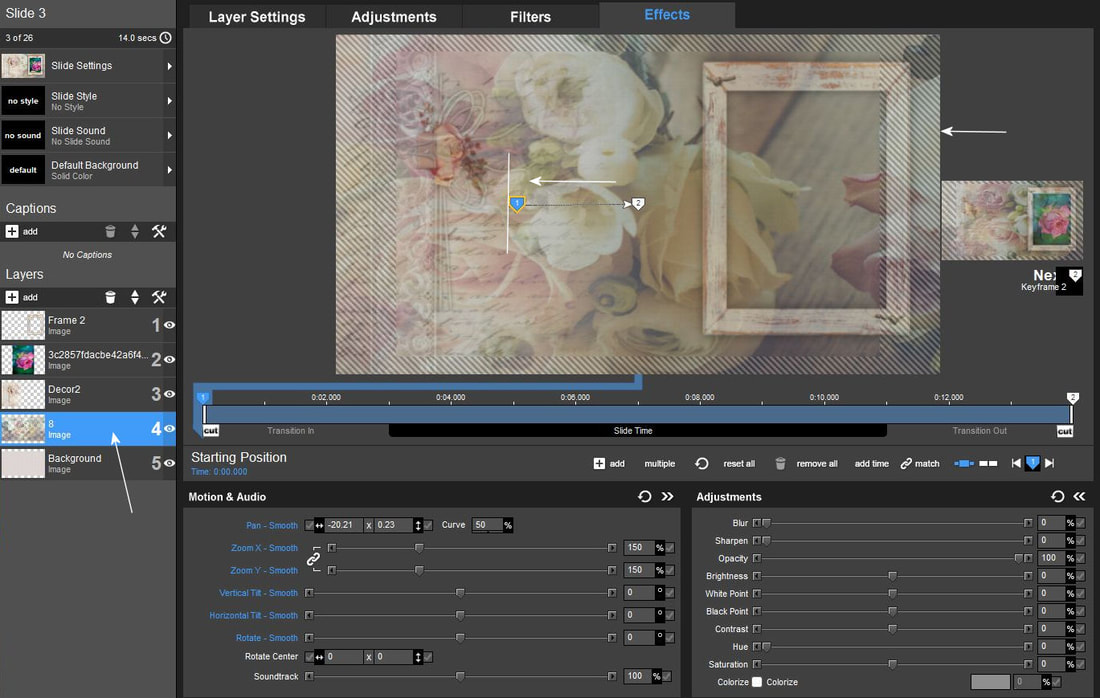
4. Ugyanezen a rétegen az Effectben fogd meg a képet és vidd balra kb 5 cm-t.
A képed jobb szélén ügyelj arra, hogy ne húzd túl a kereten és az ne látsszon ki.
On the same layer, in Effect, grab the image and move it to the left about 5 cm. On the right edge of your picture, make sure that it does not extend beyond the frame and that it does not show.
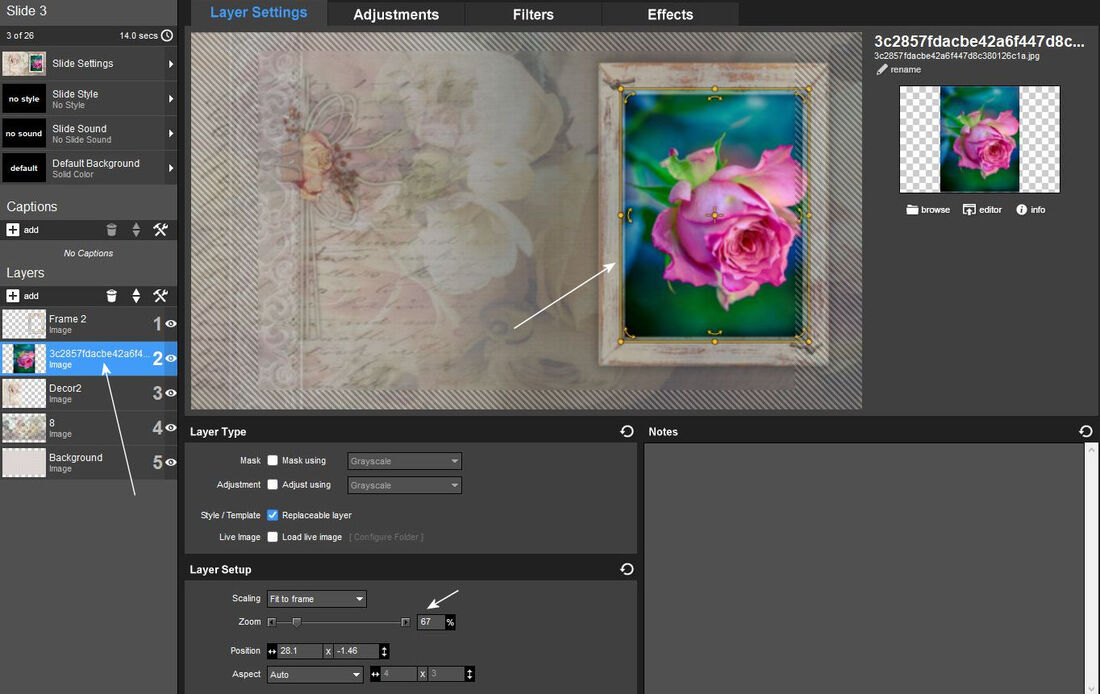
5. Menj vissza a Layer Settingbe és most az állóképeddel dolgozz. Méretezd rá a
keretedre és jegyezd fel a zoom állást az elsö ilyen méretezésednél. Igy az összes
többi csempédnél már tudni fogod a jó állókép méreteidet a keretedhez nem kell
az egérrel összehúzkodnod öket csak a zoom csúszkát kell használnod.
Go back to Layer Setting and now work with your portrait style image. Scale it onto your frame and note the zoom position for your first such scaling. So for all your other tiles, you will already know the dimensions of the good still image for your frame, you don't have to shrink them with the mouse, you just have to use the zoom slider.
6. Azután erre a képre ne effektet hanem egy idözített transitiont tegyél.
Ugyanezeket a lépéseket ismételd meg minden csempéden.
Then, do not apply an effect to this image, but a timed transition.
Repeat the same steps for each tile.


7. Ehhez a videóhoz a legjobb csempeidözítés a szép látványhoz a képen látható értékek. Vagyis nagycsempék 8 másodperc a kiscsempék 3 másodpercen vannak. A csempék között nincs áttünés effect állítás!
For this video, the best tile prompts for a nice look are the values shown in the image. That is, large tiles take 8 seconds, small tiles take 3 seconds. There is no transition effect setting between the tiles!
