Itt folytatom a maszkolás 2-nek a második részét mégpedig azzal. hogyha ilyen sokat dolgoztunk, akkor azt mentsük is meg magunknak egy saját effectként. Majd nézzük meg hogy, a létrehozott mozgásirányt hogyan lehet másirányúvá tenni könnyen.
Here I will continue the second part of masking 2, namely with this. that if we worked so much, then we should save it as our own effect. Let's see how the created direction of movement can be changed easily.

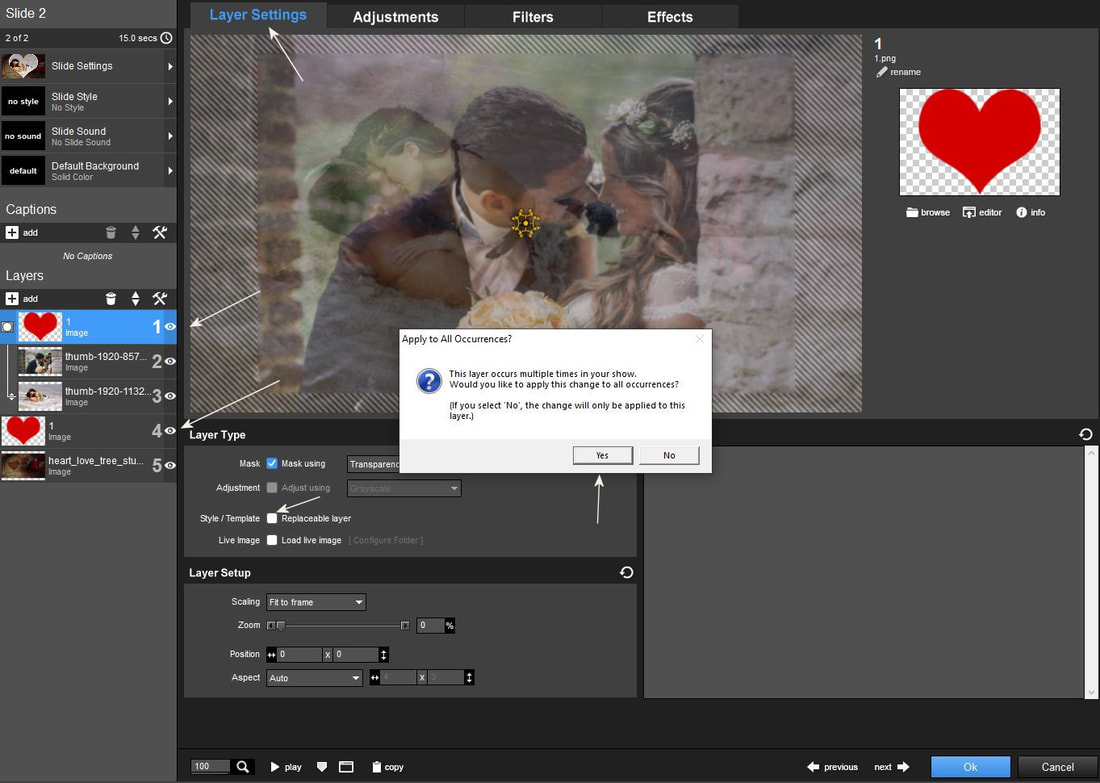
1. Az effected mentésénél a legfontosabb, hogy a maszkod jellemzöi megmaradjanak és egy újrafelhasználás esetén tökéletesen müködjenek. Ennek érdekében az effectet úgy mentsük el, hogy állj a szív maszk rétegre és menj a Layer Settingsbe majd a Layer Type ablakban vedd ki a pipát a Replaceable kiskockából. Ez most azt fogja jelenteni, hogy ez a réteg nem cserélhetö, le van fixálva és minden jellemzöje megmarad. Ugyanezt a másik (4-es) maszkrétegen is csináld meg ha a progi nem csinálta meg automatikusan.
When saving the effected, the most important thing is that the characteristics of your mask remain and that it works perfectly in case of reuse. To do this, save the effect by going to the heart mask layer and going to Layer Settings, then in the Layer Type window, uncheck the Replaceable box. This will now mean that this layer cannot be changed, it is fixed and all its characteristics remain. Do the same on the other mask layer (4) if the program did not do it automatically.
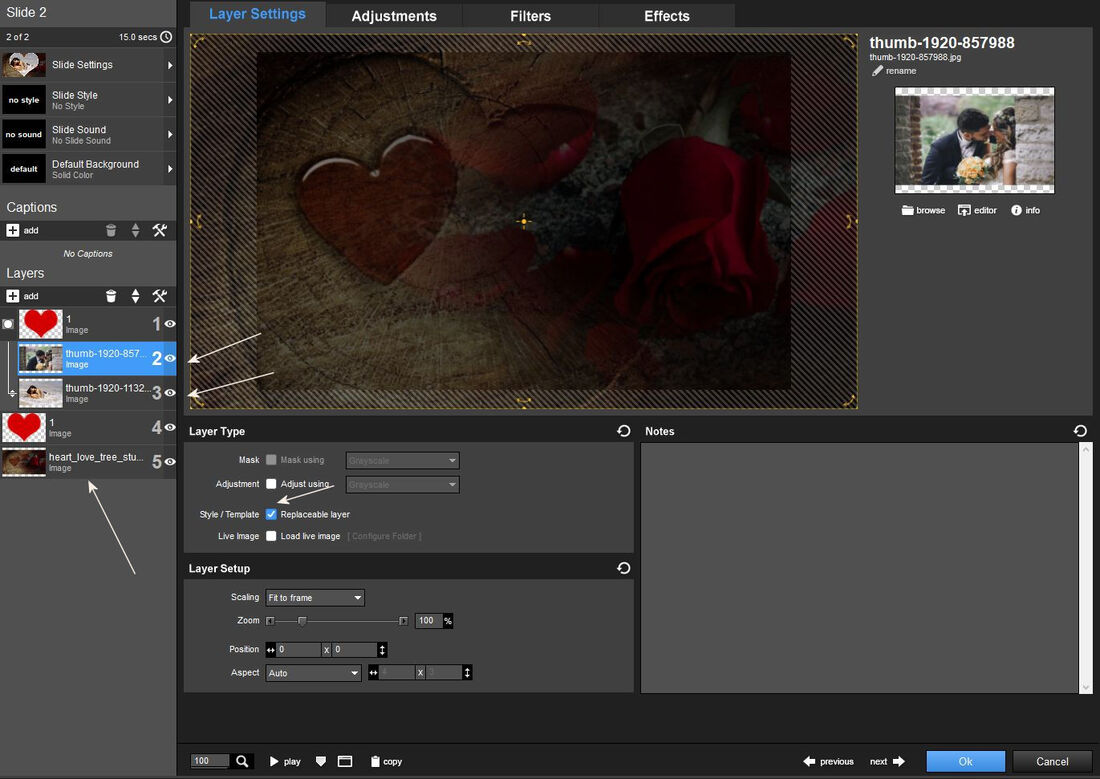
2. A képrétegekhez viszont be kell tenni azt a bizonyos kis pipát, mert ezeket a képeket cserélheted majd ha használni akarod az effectedet késöbb is.
On the other hand, for the image layers, you have to put that certain little checkmark, because you can change these images if you want to use your effect later.
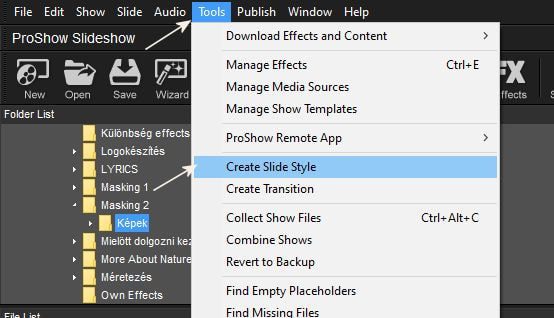
3. Aztán katt a Tools menüre és válaszd a Create Slide Style-t.
Then click on the Tools menu and choose Create Slide Style.
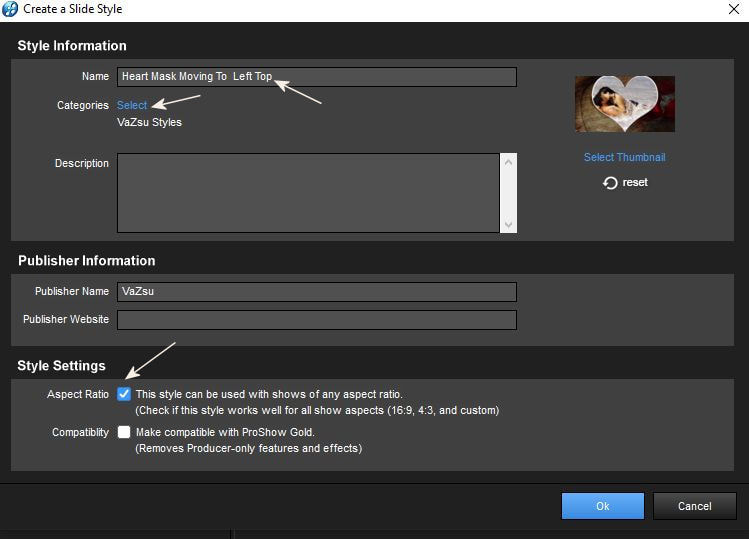
4. A legördülö ablakban meg add meg az effect nevét, A kategóriában nevezz meg egy könyvtárat, mert ez alatt a név alatt fogod majd a programban megtalálni az összegyüjtött effectjeidet. Majd csakis kizárólag az Aspect Ratio kockába tegyél pipát majd nyomd meg az ok. gombot.
In the drop-down window, enter the name of the effect, name a library in category A, because under this name you will find your collected effects in the program. Then just put a tick in the Aspect Ratio box and press OK. button.
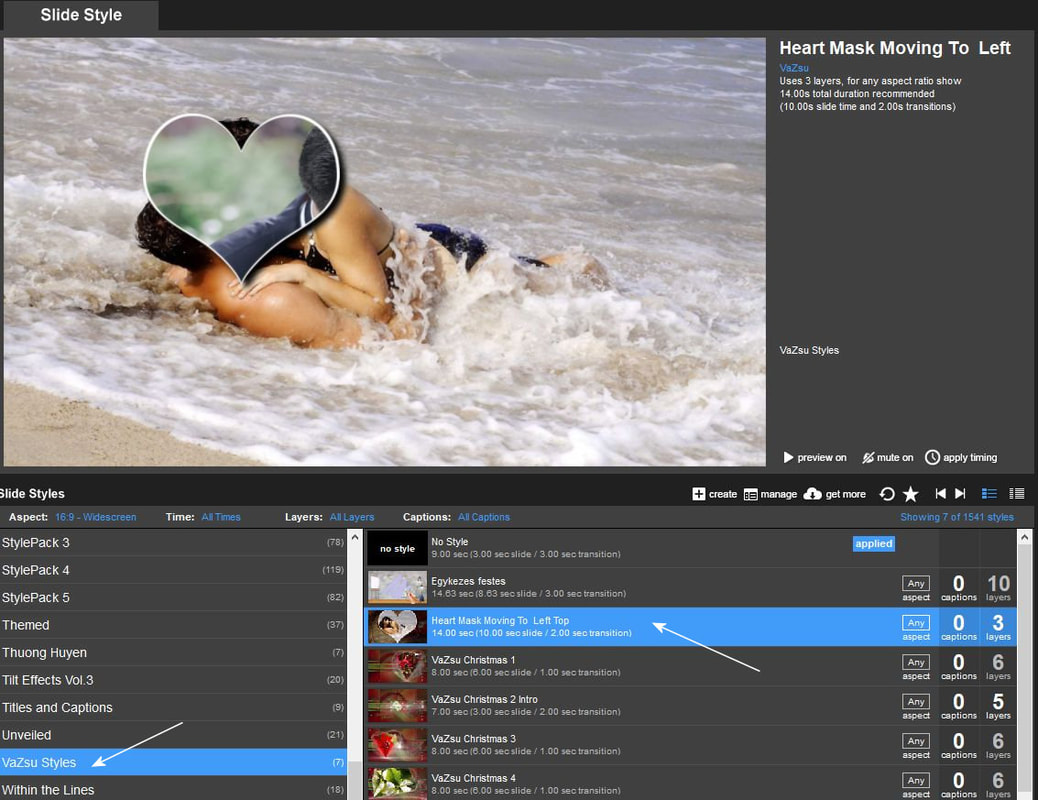
5. Tehát a mentés után már könnyen megtalálod majd a programodban.
So, after saving, you can easily find it in your program.
6. Folytassuk az effect mozgásirány változtatási lehetöségünkre irányuló tevékenységet.
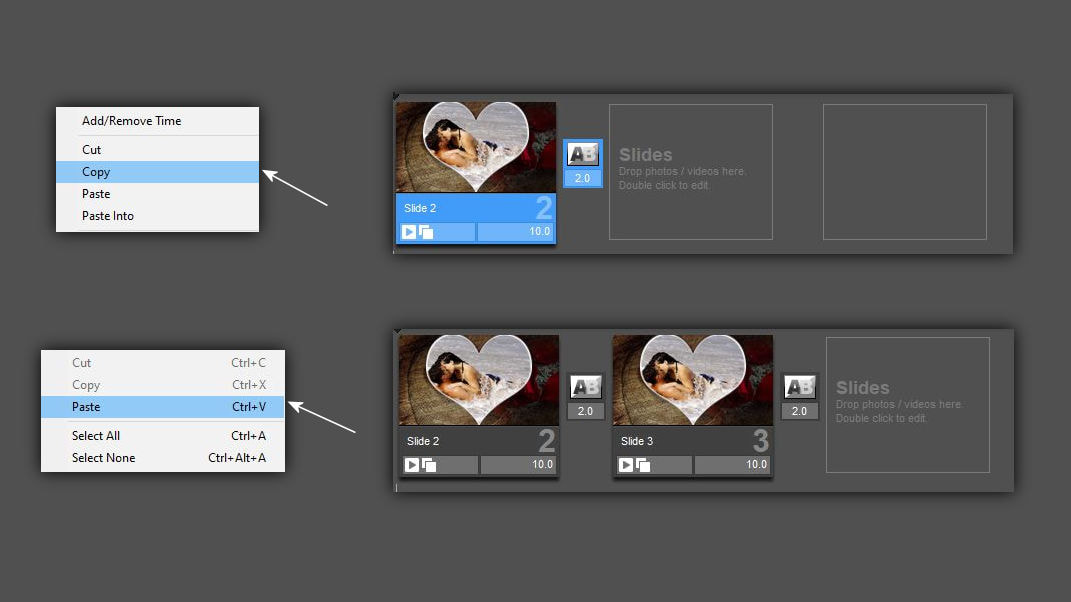
A folytatáshoz ha, elmentetted az effectedet akkor vagy beviszel egy új csempére 2 db új képet és ráteszed az effectedet, vagy egyszerüen átmásolod a csempédet a mellette levöre és azután cseréled a képeket ki. Ezt látjátok itt alul.
Let's continue the activity aimed at our ability to change the direction of movement of the effect. To continue, if you have saved your effect, you either import 2 new images onto a new tile and apply your effect, or you simply copy your tile down next to it and then replace the images. You see this below.
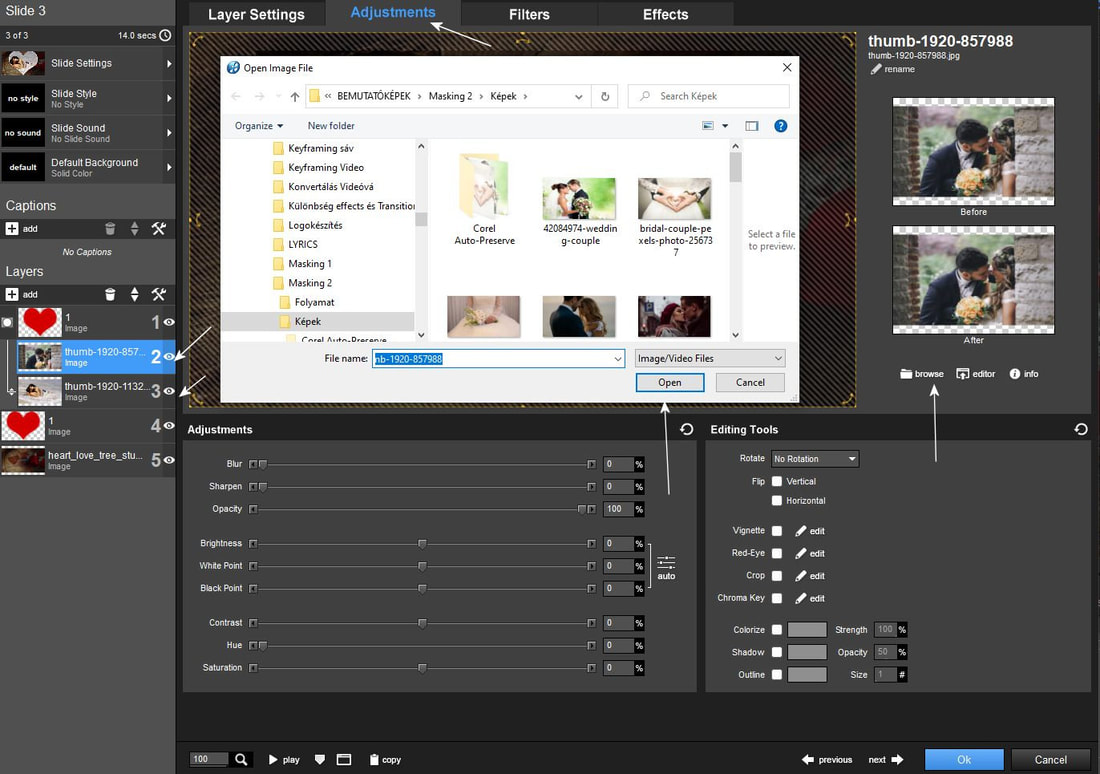
7. Elöször ki kell cserélned a képeket Tehát Adjustments - Browse és a könyvtáradból válaszd ki, ezt mindkét képpel csináld meg.
You have to replace the images first. So, go to Adjustments - Browse and select from your library, do this with both images.
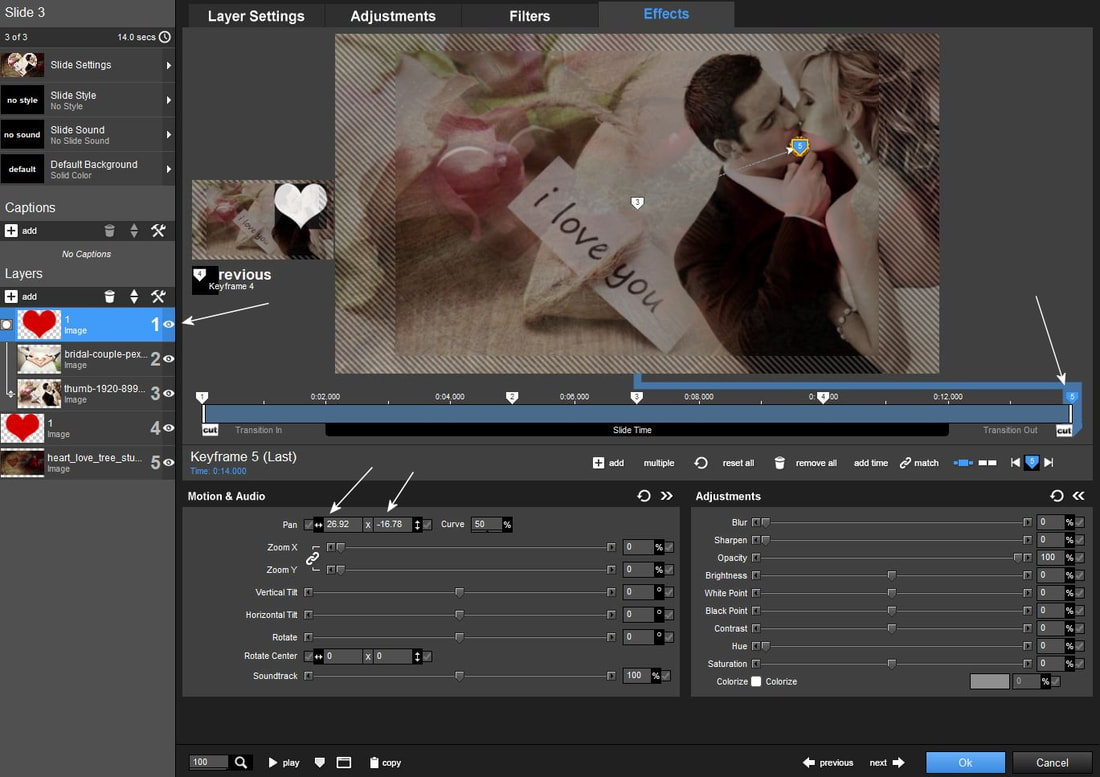
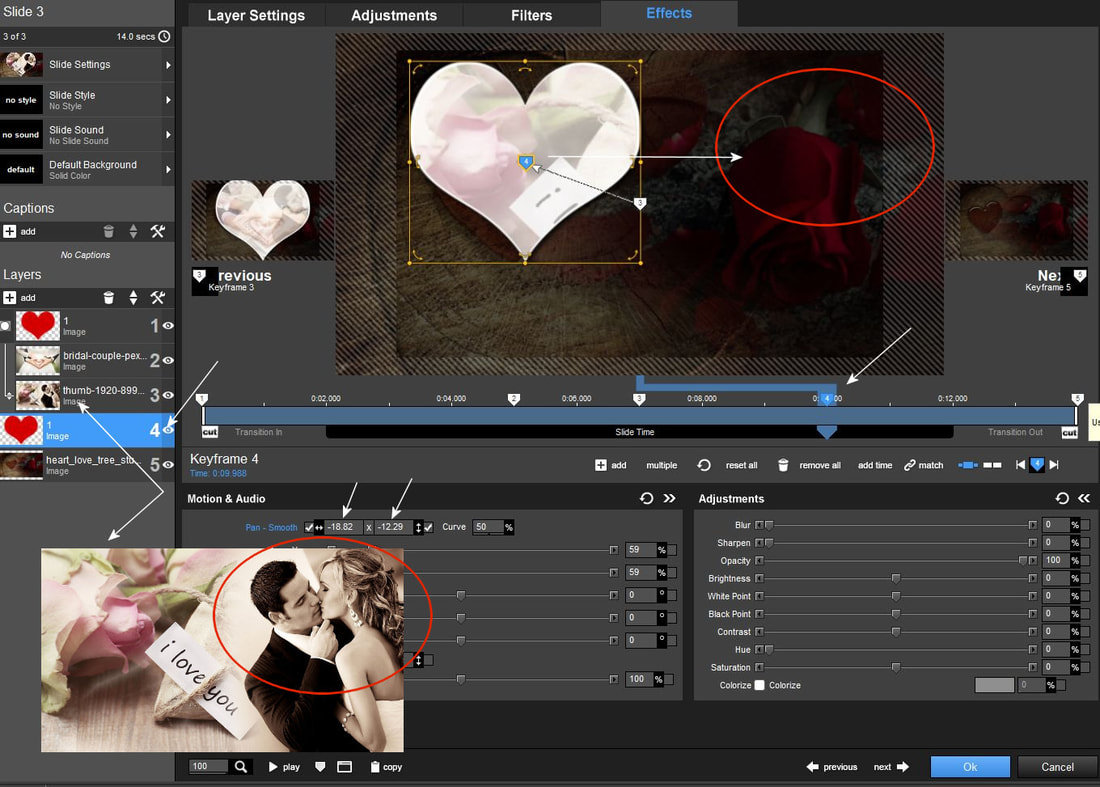
8. Én most szándékosan olyan képet választottam amelynél a fontos rész éppen az ellenkezö oldalon van, mint az elözöekben. Vagyis a szívmaszkomnak most a jobboldalra kell mennie és ott összezsugorodnia. Állj a képed rétegére és a 4-es keyframe pontodat fogd meg majd húzd át a megfelelö helyre a pozíció adatokat jegyezd meg. Ugyanezt a pozíciót kell átirnod az 5-ös keyframe pontra is. Csinálhatod azt is, hogy katt a 4-esre és a legördülöben Copy to Next Keyframe
I deliberately chose an image where the important part is on the opposite side, as in the previous ones. That is, my heart mask must now go to the right and shrink there. Stand on the layer of your image and hold your keyframe point 4, then drag it to the appropriate place and note the position data. You have to copy the same position to keyframe point 5. You can also click on number 4 and select Copy to Next Keyframe in the drop-down menu
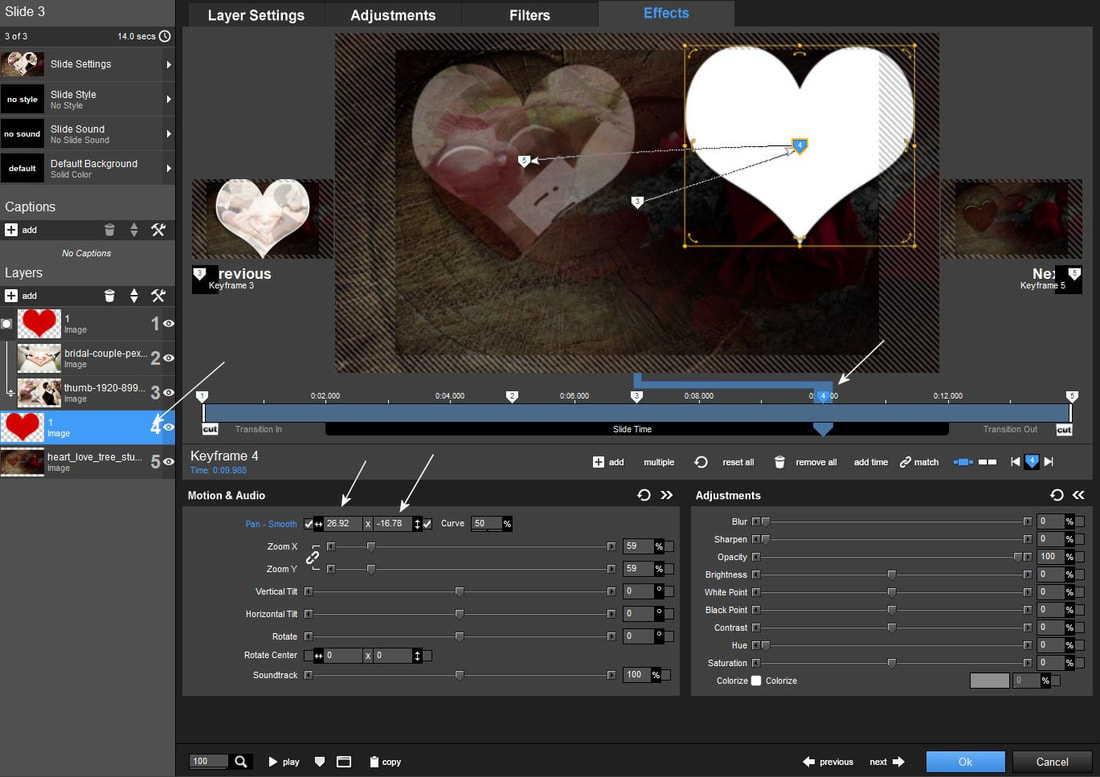
9. Azt fogod látni, hogy a 4-es keyframe ponton levö fehér maszk amely a keretünket képezi átkerül a megfelelö helyre , de az áttetszö maszk rétegünk még ott maradt
You will see that the white mask at keyframe point 4, which forms our frame, is moved to the right place, but our transparent mask layer is still there.
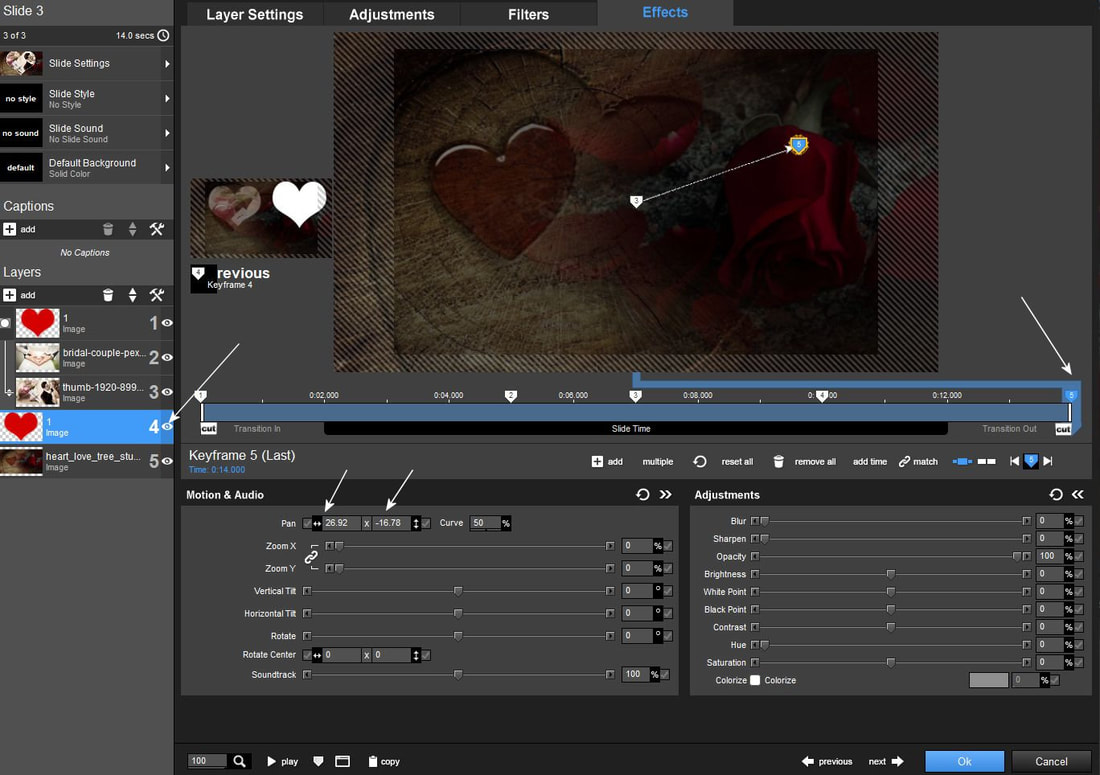
10.Tehát ugyanazt a pozícióadatokat kell átirnod az 5-ös keyframe pontra is hogy, pontosan egymásra kerüljenek. Csinálhatod azt is, hogy katt a 4-esre és a legördülöben Copy to Next Keyframe
So you have to transfer the same position data to keyframe point 5 so that they are exactly on top of each other. You can also click on number 4 and select Copy to Next Keyframe in the drop-down menu
11. Ugyanezt a müveletet el kell végezned a felsö szívmaszkunk rétegén is elöször a 4-es keyframe pontra tenni a pozíció adatokat.
You must perform the same operation on the layer of our upper heart mask, first place the position data on keyframe point 4.
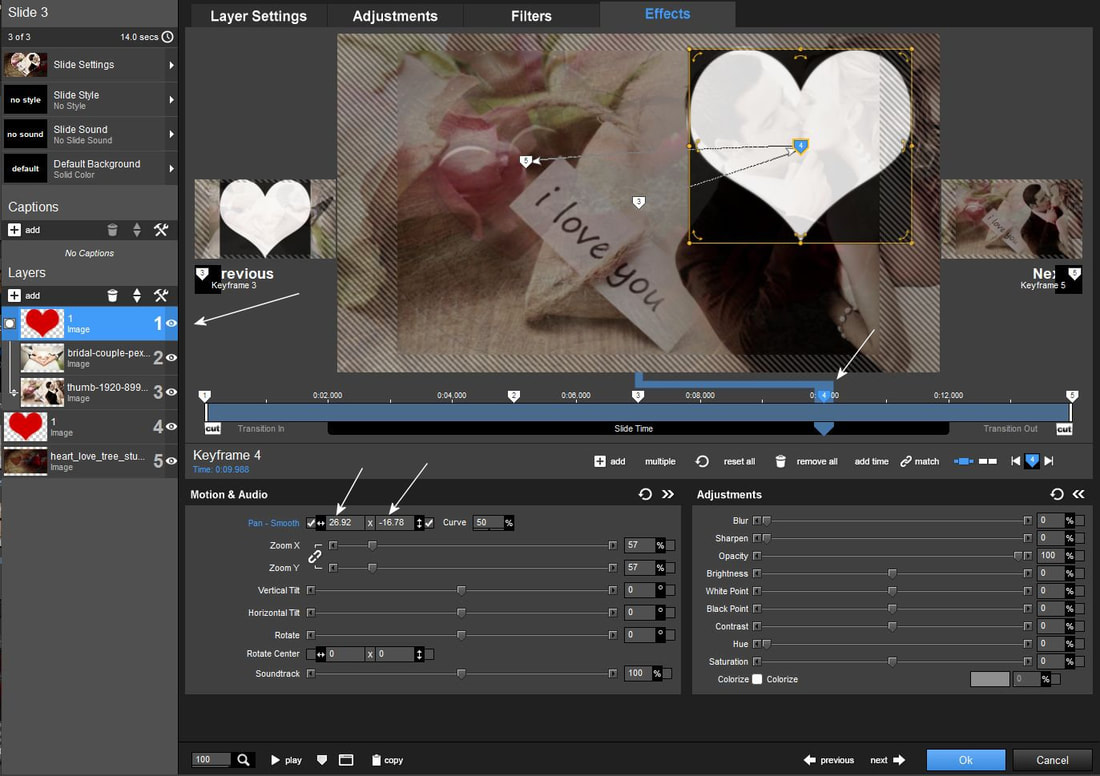
12. Majd az 5-ös pontra is. És már készen is vagyunk.
Then to point 5. And we're done.