Mindig sokat foglalkozok azzal a gondolattal, hogy hogyan lehet dimenziókat létrehozni a Pro Show Producer programban. Ha képesek vagyunk dimenziót megmutatni egy videóban akkor az mindig nagyon különleges, egyedi és kreatív munkával jár. Ebben a bemutatóban most egy ilyen videót szeretnék megmutatni amelynek a készülési folyamatát fotózva hoztam ide. Nagyon sok munkával járt az igaz ezért van ehhez a bemutatóhoz három rész. Lássuk, milyen is az a Spinning Effect dimenzióban. ( Forgó effect )
I'm always thinking a lot about how to create dimensions in Pro Show Producer. If we are able to show dimension in a video, it always involves very special, unique and creative work. In this presentation, I would like to show such a video, the production process of which I brought here with photos. It took a lot of work, that's why there are three parts to this presentation.
Let's see the Spinning Effects in dimension.

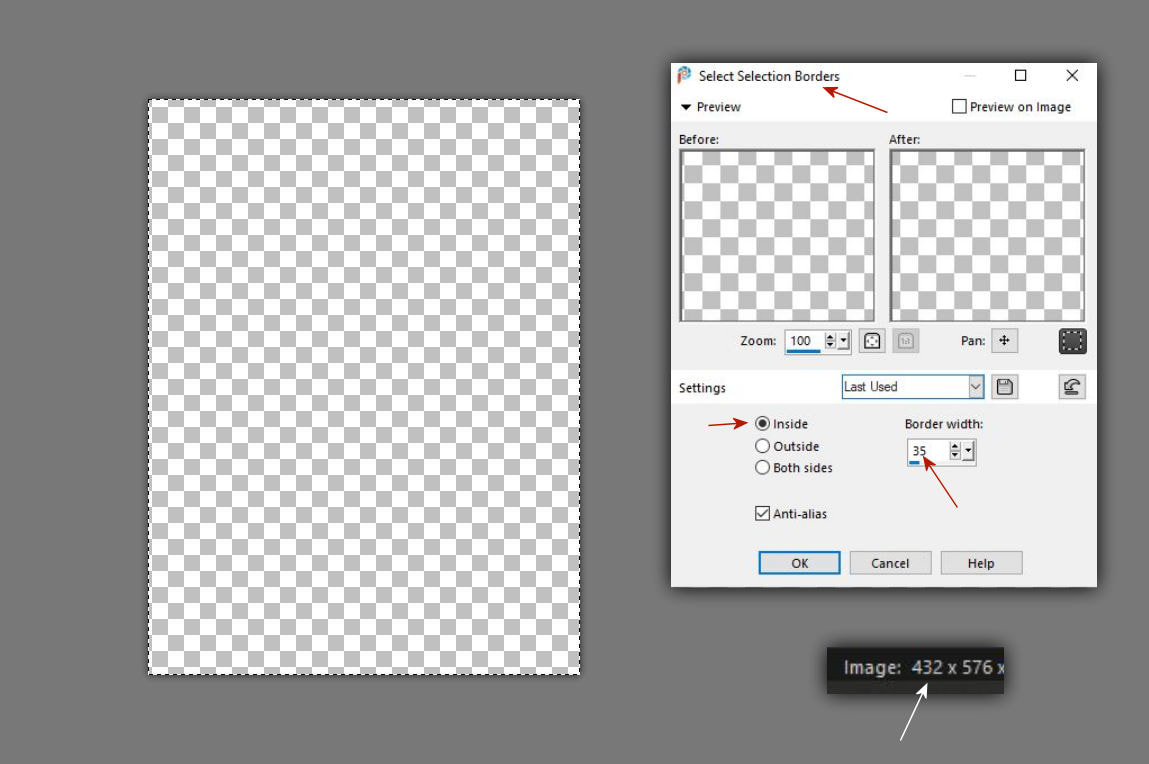
1. Hozz be egy üres lapot és méretezd át 432 x 576 méretre. Ez lesz az álló maskod mérete és egyben az ehhez a videóhoz gyüjtendö állóképek mérete is. Majd jelöld körbe a lapot.
Effects - Selections - Modify - Select Selection Borders
Open in a blank page and resize it to 432 x 576. This will be the size of your portrait mask and also the size of the portrait images to be collected for this video. Then circle the sheet. Effects - Selections - Modify - Select Selection Borders
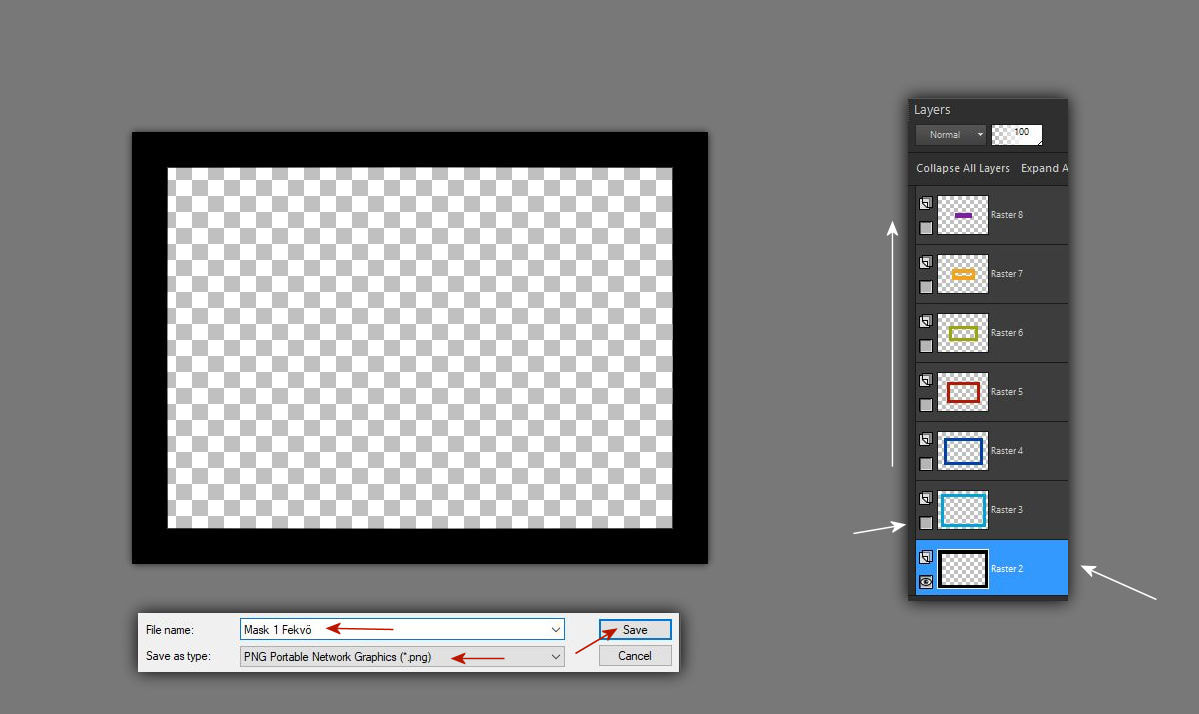
2. Öntsd ki fekete színnel a kijelölést és mentsd el png formátumban
mask 1 álló néven.
Fill the selection with black color and save in png format
mask 1 as name.

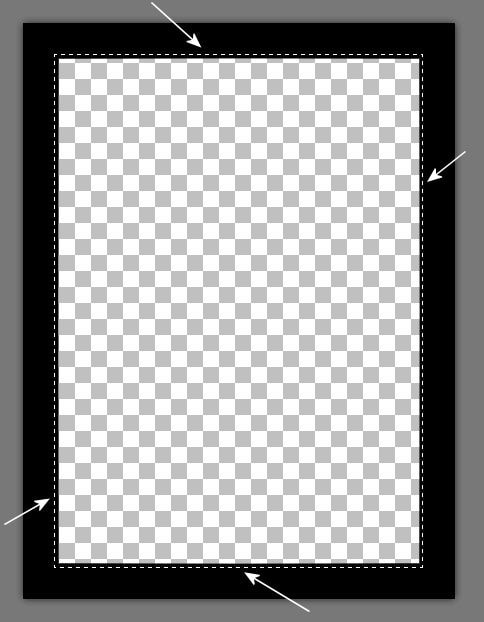
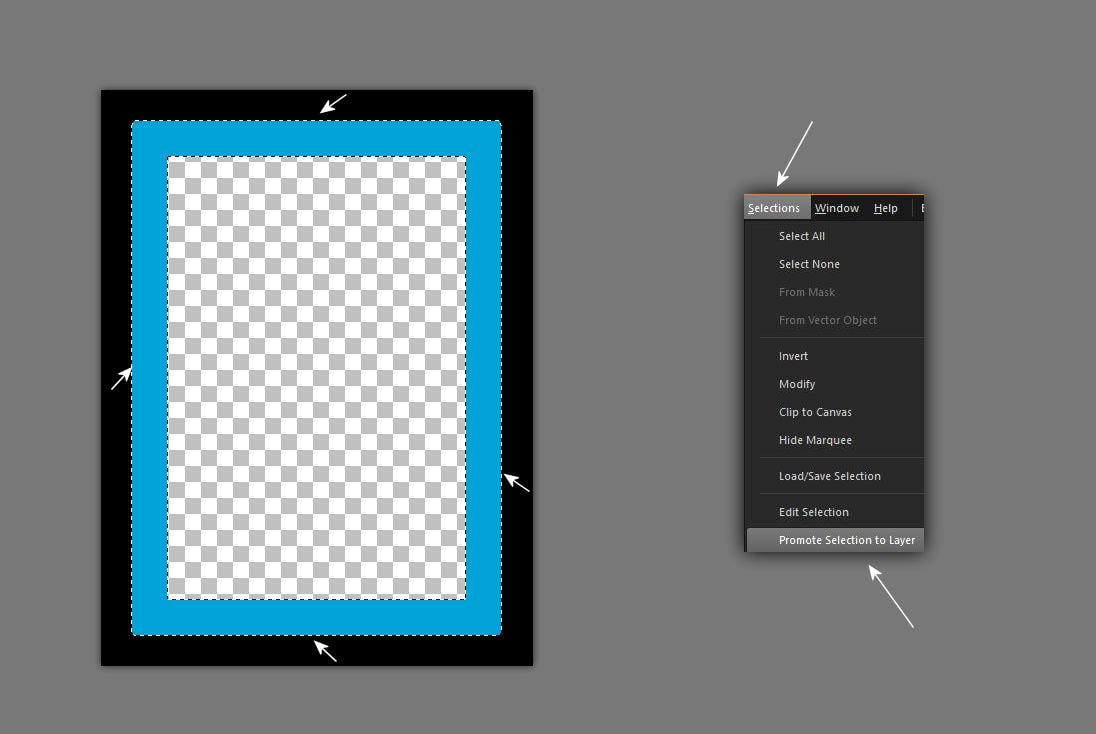
3. Utánna csinálj egy következö kijelölést úgy, hogy egy kicsit rajta legyél az elözö színen is a takarás miatt. Ha ezt nem így csinálod akkor a Pro Show Producer programban rések maradnak a képeiden.
After that, make another selection so that you are a little bit on top of the previous color because of the masking. If you don't do it this way, there will be gaps in your pictures in the Pro Show Producer program.
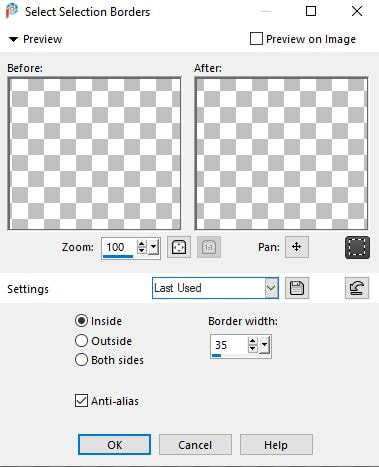
4. Majd ismét, Selection - Modify - Select Selection Borders
Then again, Selection - Modify - Select Selection Borders
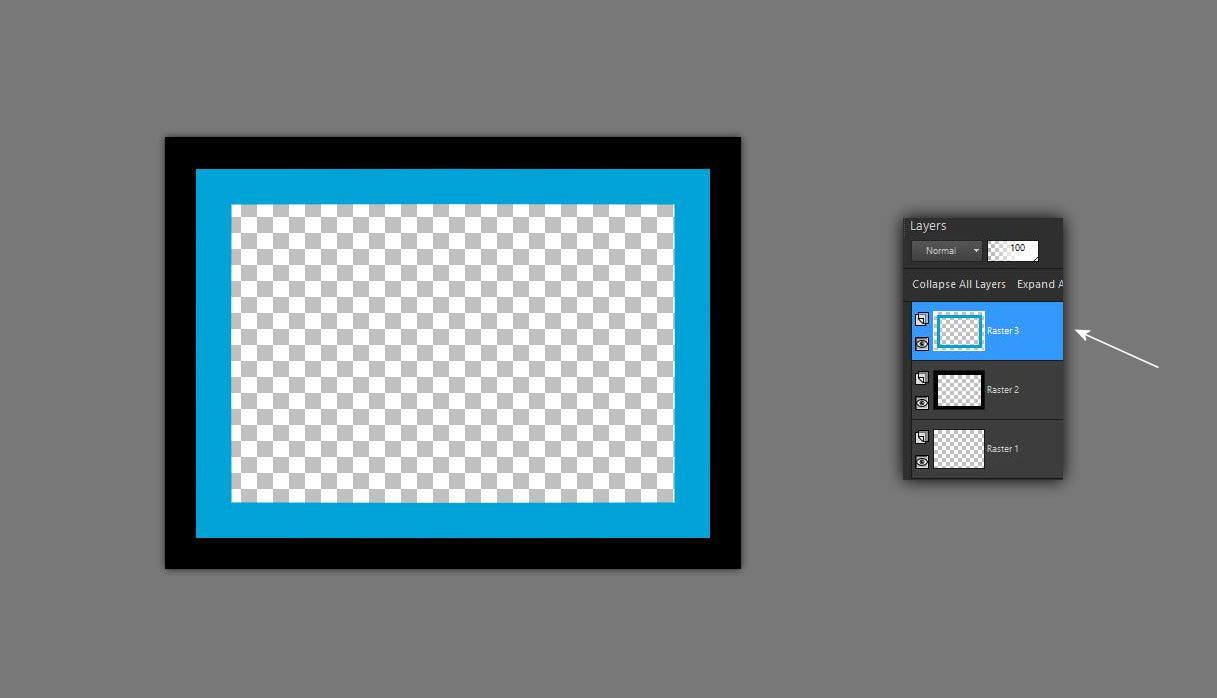
5. Majd ismét öntsd ki egy másik színnel a keretet, gyözödj meg róla, hogy a fekete részen is ki legyen öntve. Promótáld új rétegként ezt a színü maszkot.
Then pour another color on the frame again, making sure that it is also poured on the black part. Promote this color mask as a new layer.
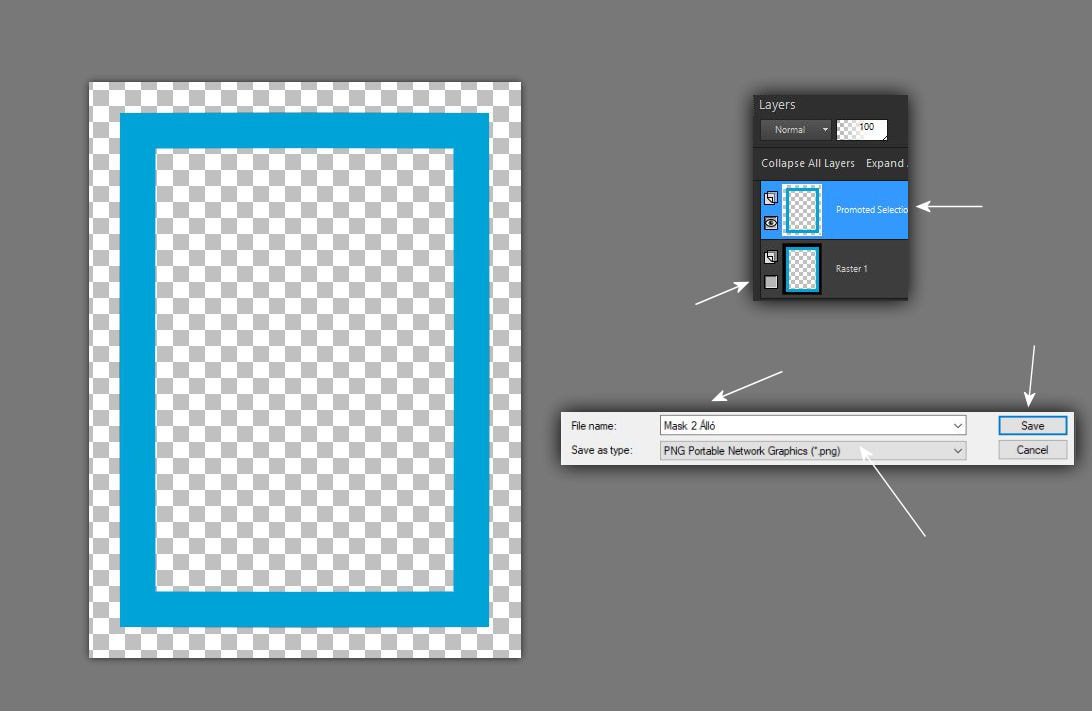
6. Csukd be az alsó rétegszemet és állj a promótált rétegre majd mentsd el png
formátumban mask 2 álló néven.
Close the lower layer eye and stand on the promoted layer and save it in png format with the name mask 2.
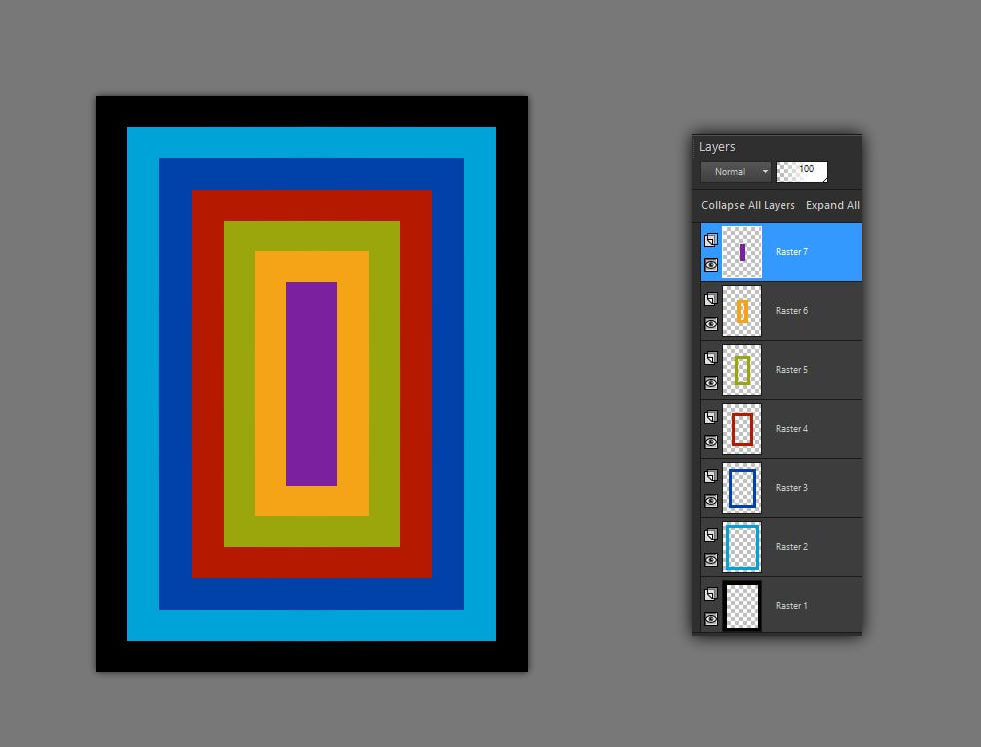
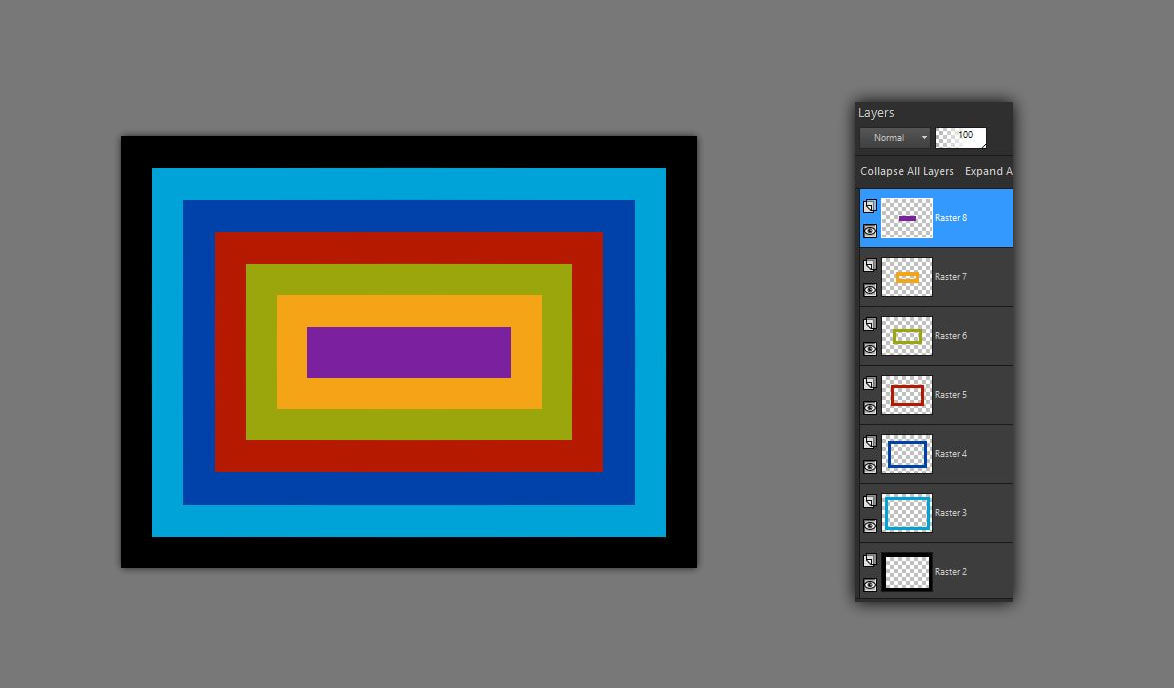
Ezt a folyamatot kell csinálnod újra és újra amíg 7 db mask el nem készül. Mindig más színnel dolgozz és a kijelölést az elözö maskod belsö szélén kezd.
You have to do this process again and again until 7 masks are finished. Always work with a different color and start the selection at the inner edge of your previous mask.
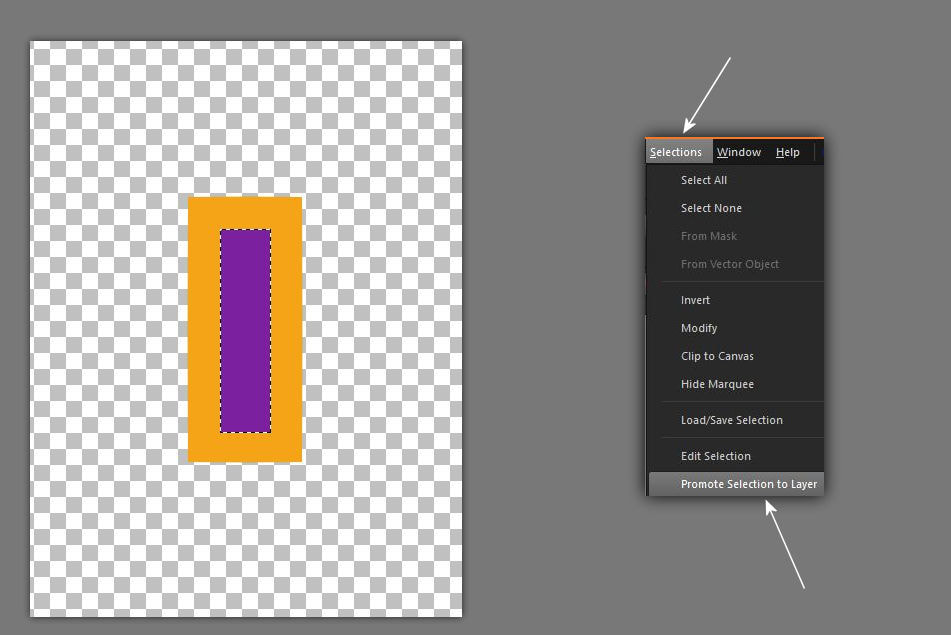
7. Az utolsó hetedik maszkod úgy alakul kihogy ott csak a belsö keretet kel kijelölnöd nem kell a Modify. Csak önts ki a közepét és promótáld a réteget. majd mentsd el azt png formátumban mask 7 álló néven.
Your last seventh mask is formed in such a way that you only need to select the inner frame, you don't need Modify. Just pour out the center and promote the layer. then save it in png format with the name mask 7.
Ha egy lapon most minden színes maskodat egymásra helyezed azoknak tökéletesen fedniük kell egymást, hogy ezek segítségével ki tudjon alakulni pontosan a képed is a ProShow Producer programban.
If you now place all your colored masks on one page, they must overlap each other perfectly so that your image can be formed exactly in the Pro Show Producer program.
8. A maszkokkal sokat dolgoztunk. Ezért most ezeket a rétegeket felhasználjuk a fekvö maszkunk elkészítéséhez is. Vagyis minden réteget egyenként átmásolunk egy fekvö alapra. Hozz be egy öres lapot méretezd át 572 x 432 méretre.
Az álló rétegen állj és Edit - Copy
We worked a lot with the masks. Therefore, we now use these layers to create our horizontal mask. That is, each layer is copied one by one onto a horizontal base. Load in a square sheet and resize it to 572 x 432.
Stand on the standing layer and Edit - Copy

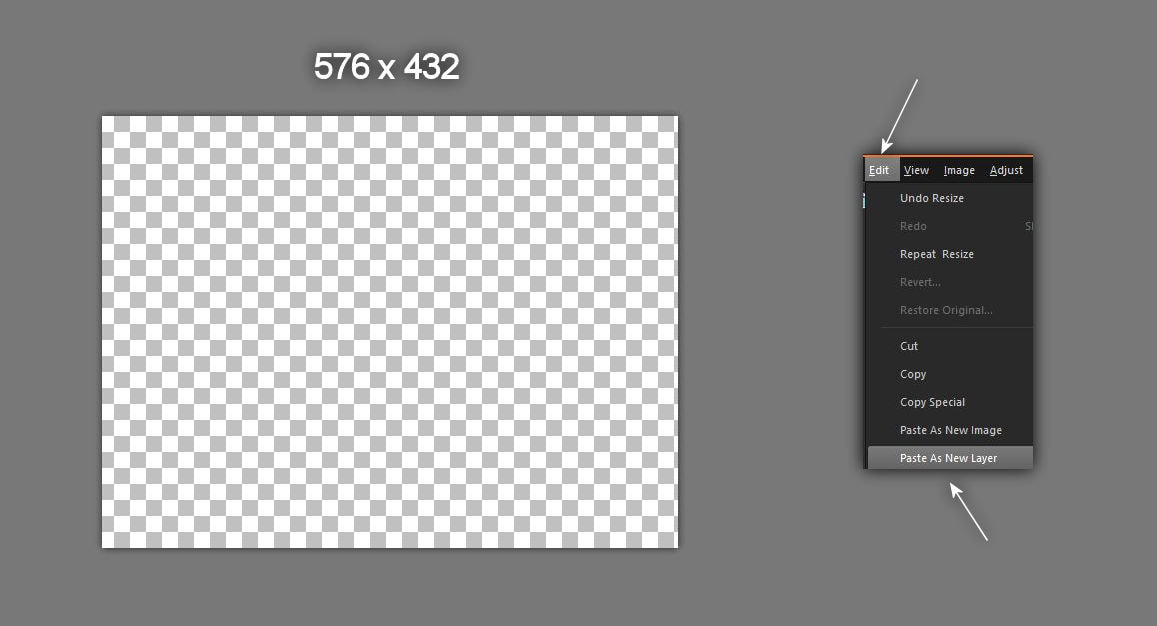
9. Majd menj a fekvö üres lapodra és Edit - Paste As New Layer
Then go to the horizontal blank page and Edit - Paste As New Layer
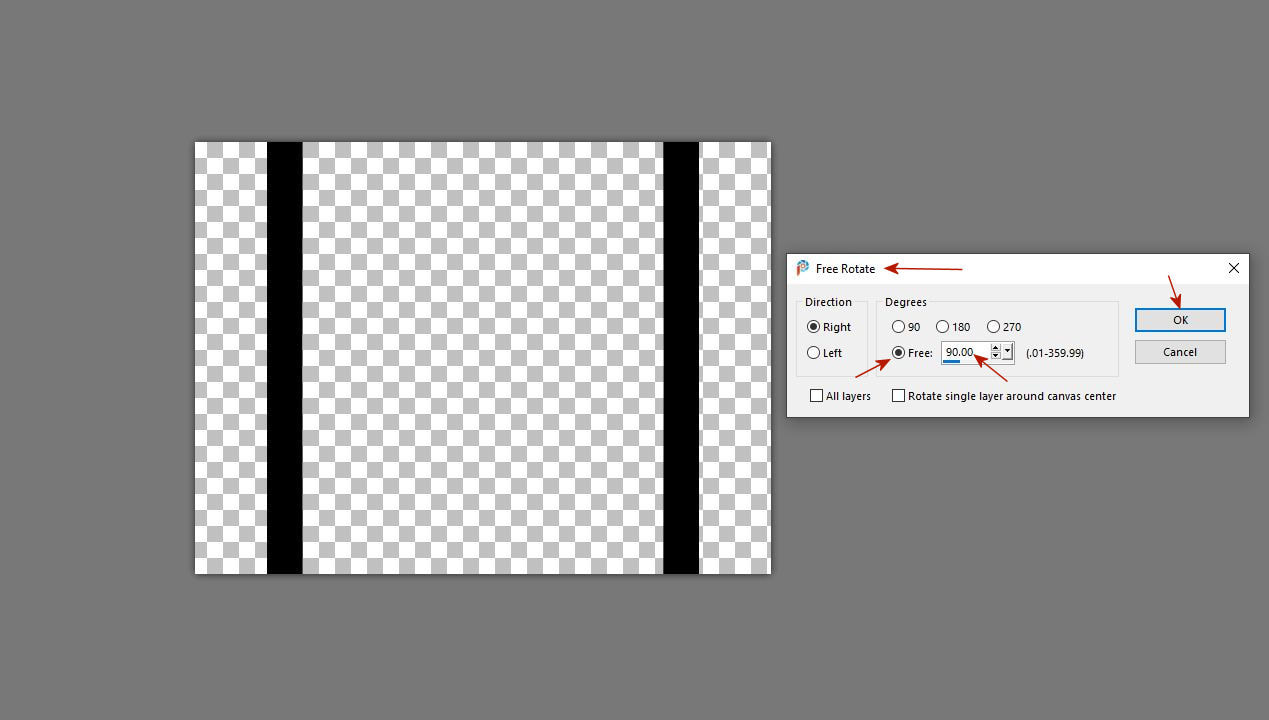
10. Image - Free Rotate 90.00 fok.
Image - Free Rotate 90.00 degrees.
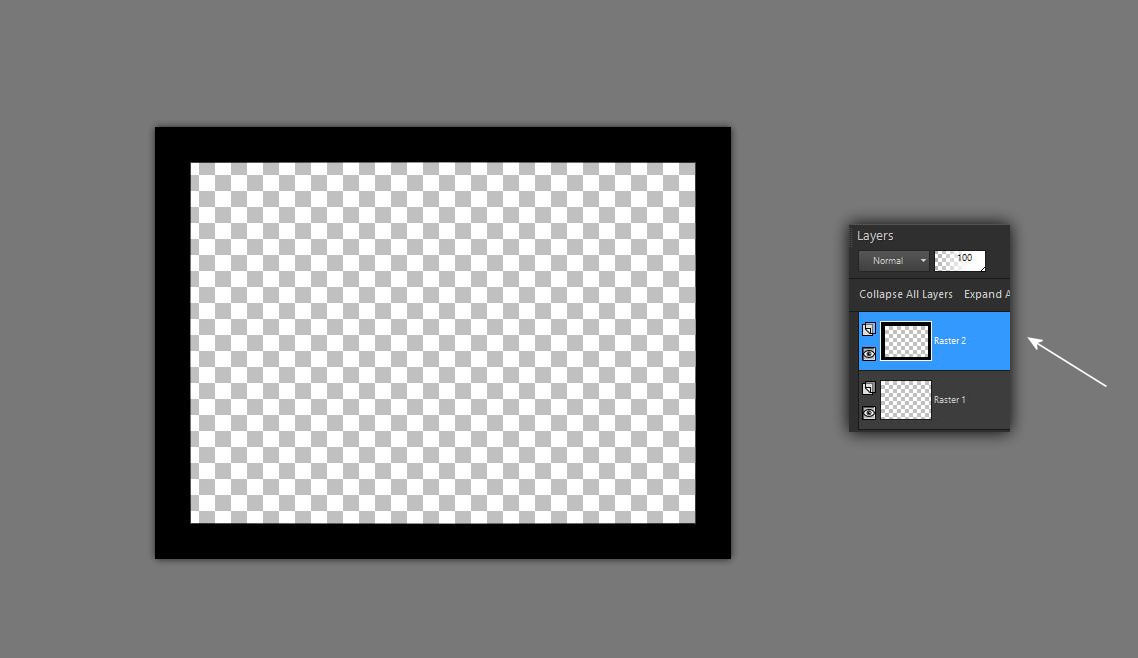
11. Már készen is van az elsö fekvö maszkod.
Your first horizontal mask is ready.
12. Folytasd a müveletet a következö réteggel.
Continue with this operation to the next layer.
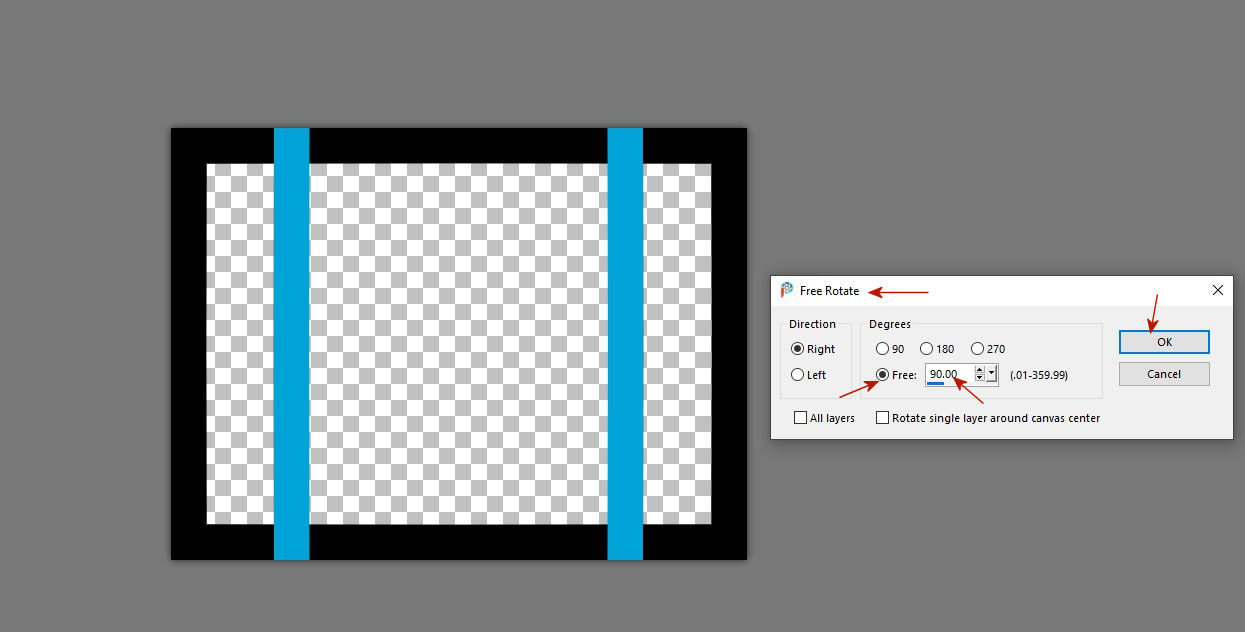
13. Igy már 2 réteg fekvö maszkod van.
You now have 2 layers of horizontal masks.
14. Folytasd a müveletet amíg mind a 7 db. maszkod át nincs másolva.
Continue the operation until all 7 pcs. your mask is ready.
15. Azután csukd be a rétegek szemeit. és egyenként mentegesd le a rétegeket png formátumban. Természetesen ugyanazokat a színeket ugyanazokkal a számmokkal csak fekvö maszkként.
Then close the eyes of the layers. and save the layers one by one in png format. Of course, the same colors with the same numbers just as a horizontal mask.