Ebben a bemutatóban hasonló effect készítést láttok amely az elözöekben de mégis más megoldásokkal dolgozunk. Ezt az effectet double image effectnek hívják.Mint a legtöbb effecthez ehhez is elö munkálatokat kell csinálni valamilyen Photo Shop Programban. Én köztudottan a Corel programot használom erre.
Tehát ez a bemutató is két részböl áll.
In this presentation, you can see a similar effect creation that we used in the previous ones, but with different solutions. This effect is called the double image effect. As with most effects, prepare work must be done in some Photo Shop Program. I usually use Corel for this. So this presentation also consists of two parts.

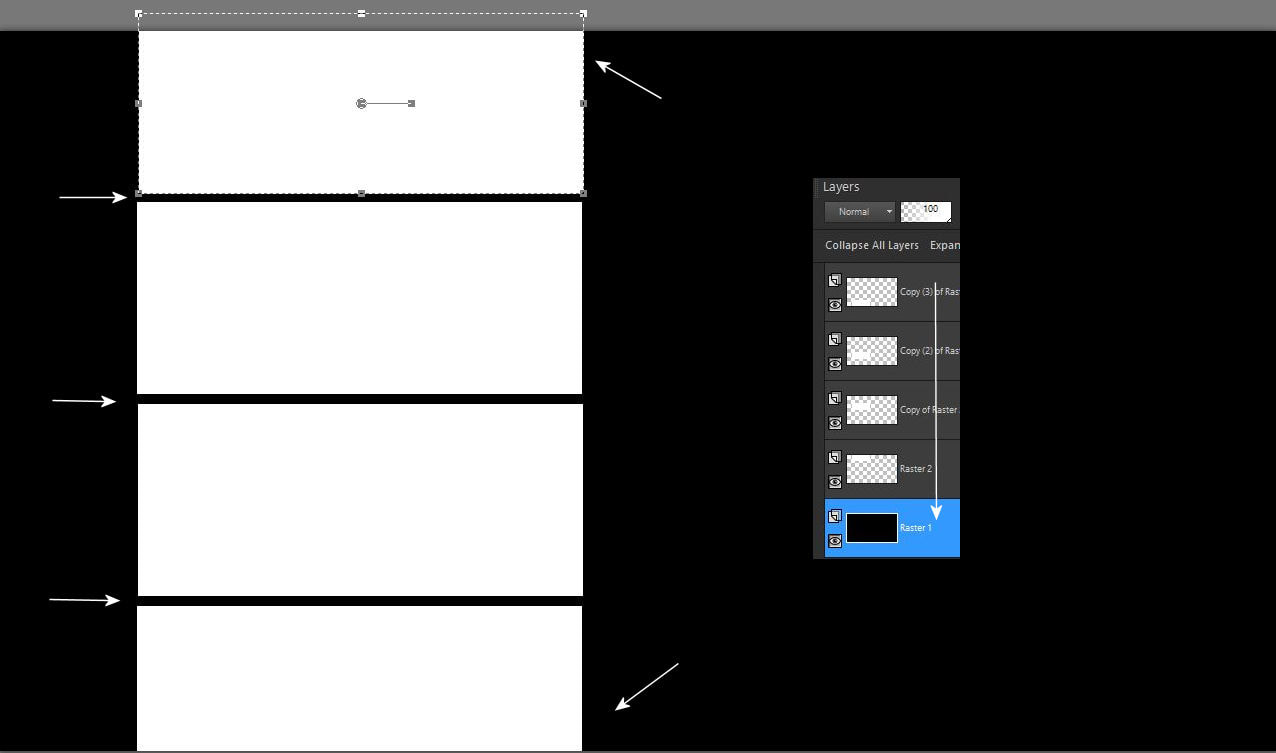
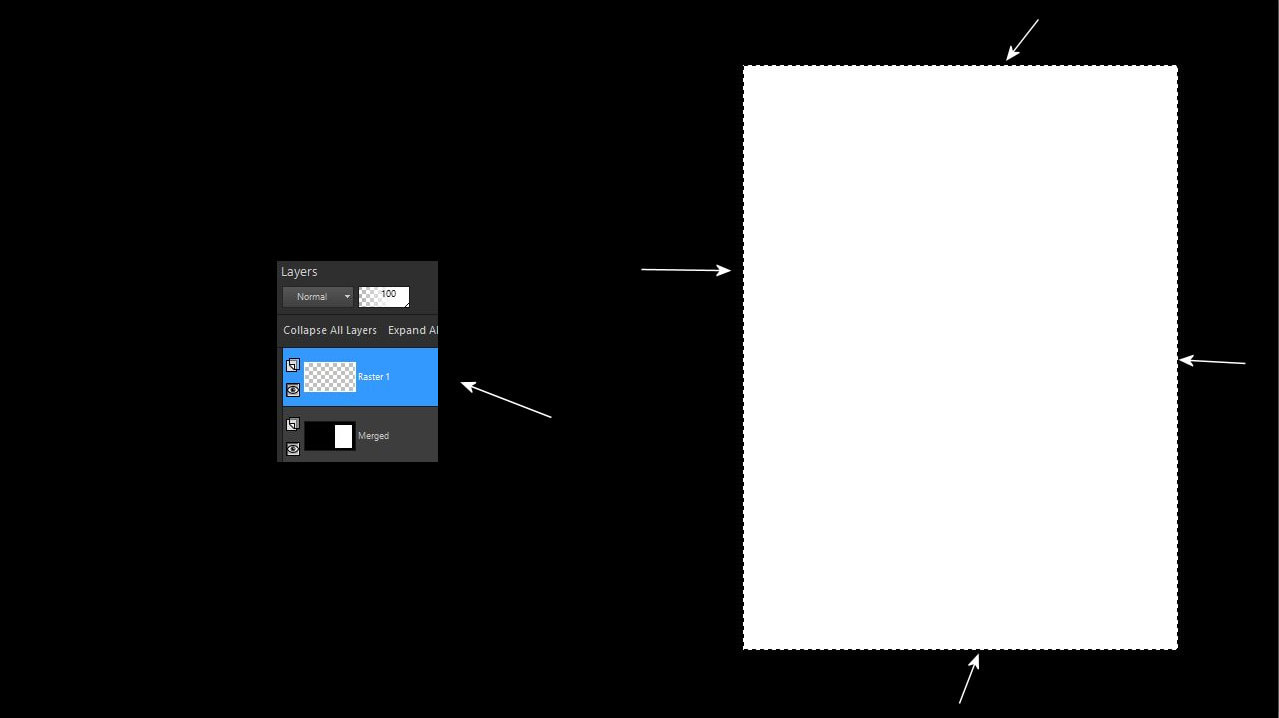
1. Hozz be két alapot az egyiket öntsd ki fekete a másikat fehér színnel. A fehérböl vágj ki egy kissebb téglalapot és vidd be a fekete alapra új rétegként. Alakítsd ki ezt az alapo 1280 x 720-as méretben 4 darab fehér kis téglalappal. Az nem baj ha az alsó és felsö kicsit kissebb lesz csak pontosan legyen egymás alatt és a rések is pontosan egyformák legyen köztük. Majd add össze a rétegeket.
Load in two bases, fill up one with black and the other with white color. Cut out a smaller rectangle from the white and place it on the black base as a new layer. Form this base in 1280 x 720 size with 4 small white rectangles. It's okay if the bottom and above are a little smaller, as long as they are exactly under each other and the gaps are exactly the same between them. Then merge visible the layers together.
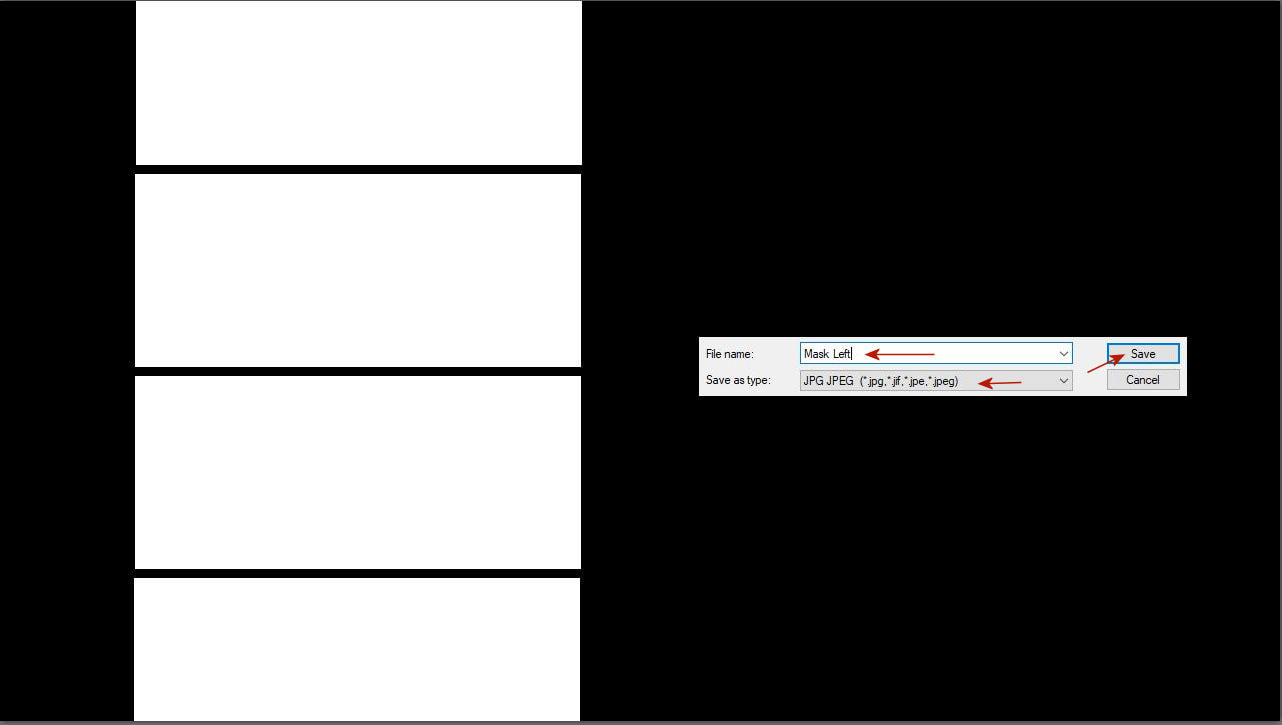
2. Mentsd el ezt az alapot balos maszkként jpg. formátumban.
Save this base as left mask jpg. format.
3. Egy újabb fekete alapra most egy álló téglalap réteget tegyél amely mögött majd a videód álló képei lesznek majd. A méretét te határozod meg ez a jobb szélen legyen.
Ha készen vagy add össze a rétegeket.
Now put a vertical rectangle layer on another black background, behind which the vertical images of your video will be. You determine its size, it should be on the right edge. When you are ready, merge down the layers together.
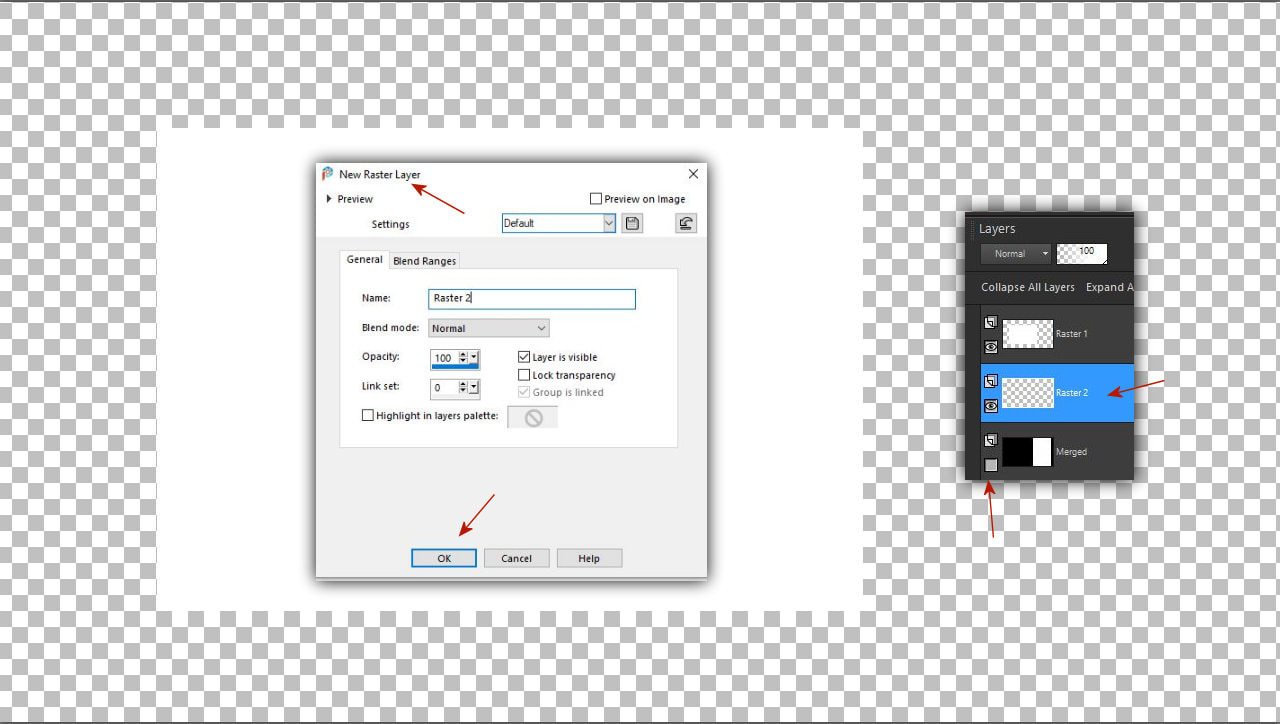
4. Most egy vékony keretet kell csinálnunk a fehér rész köré. Ehhez be kell hoznunk a menüböl egy újabb áttetszö réteget.
Layer - New Raster Layer
Now we need to make a thin frame around the white part. For this, we need to bring in another transparent layer from the menu. Layer - New Raster Layer

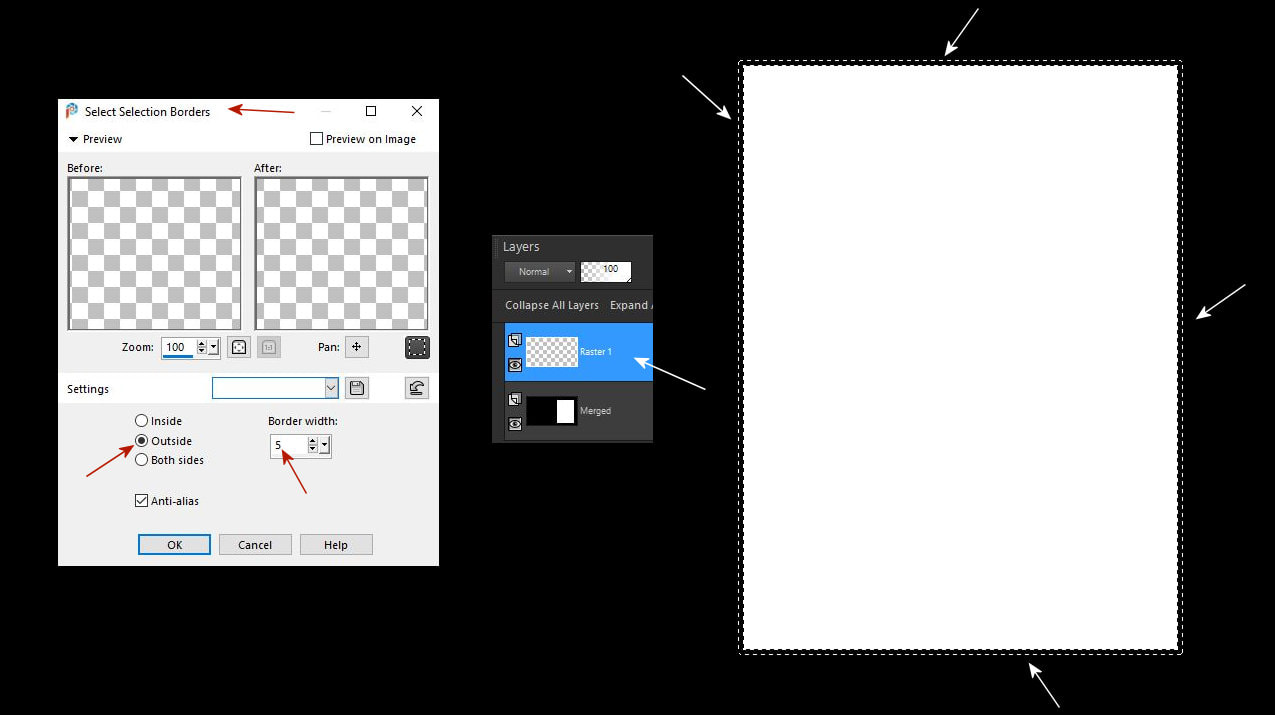
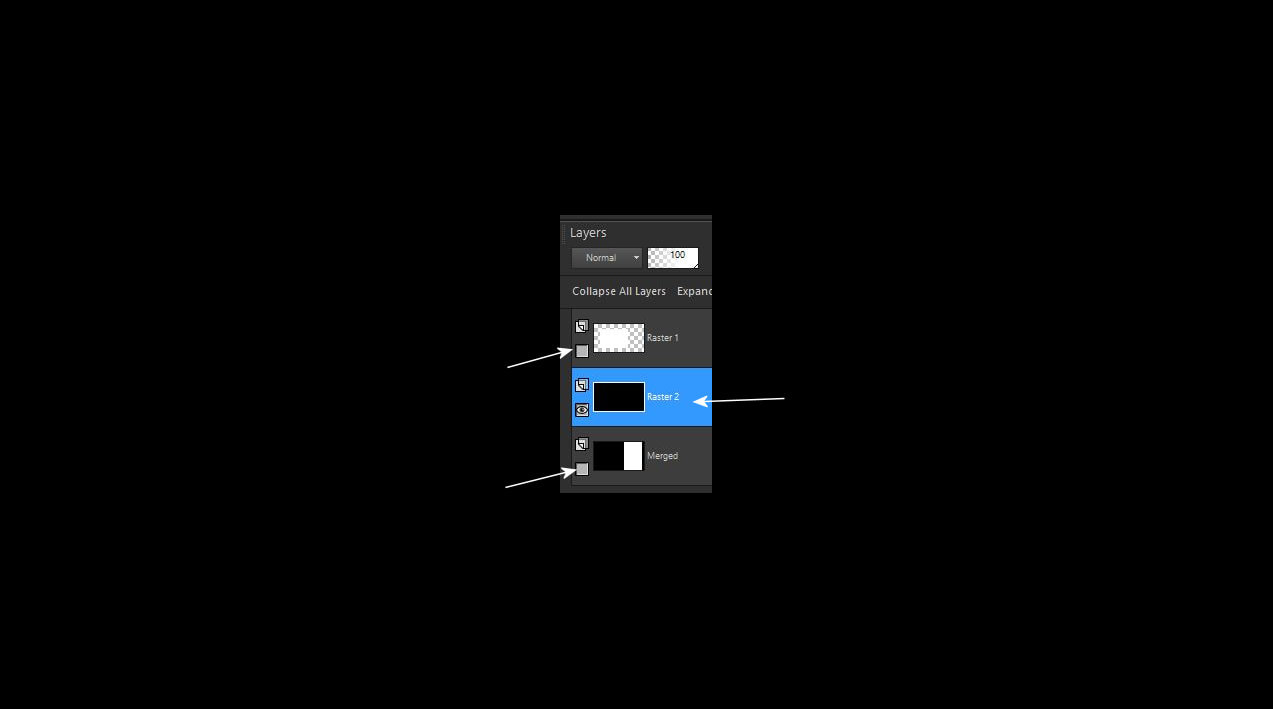
5. Nagyon pontosan az alsó rétegen jelöld körbe a fehér részedet.
Mark your white part very precisely on the bottom layer.
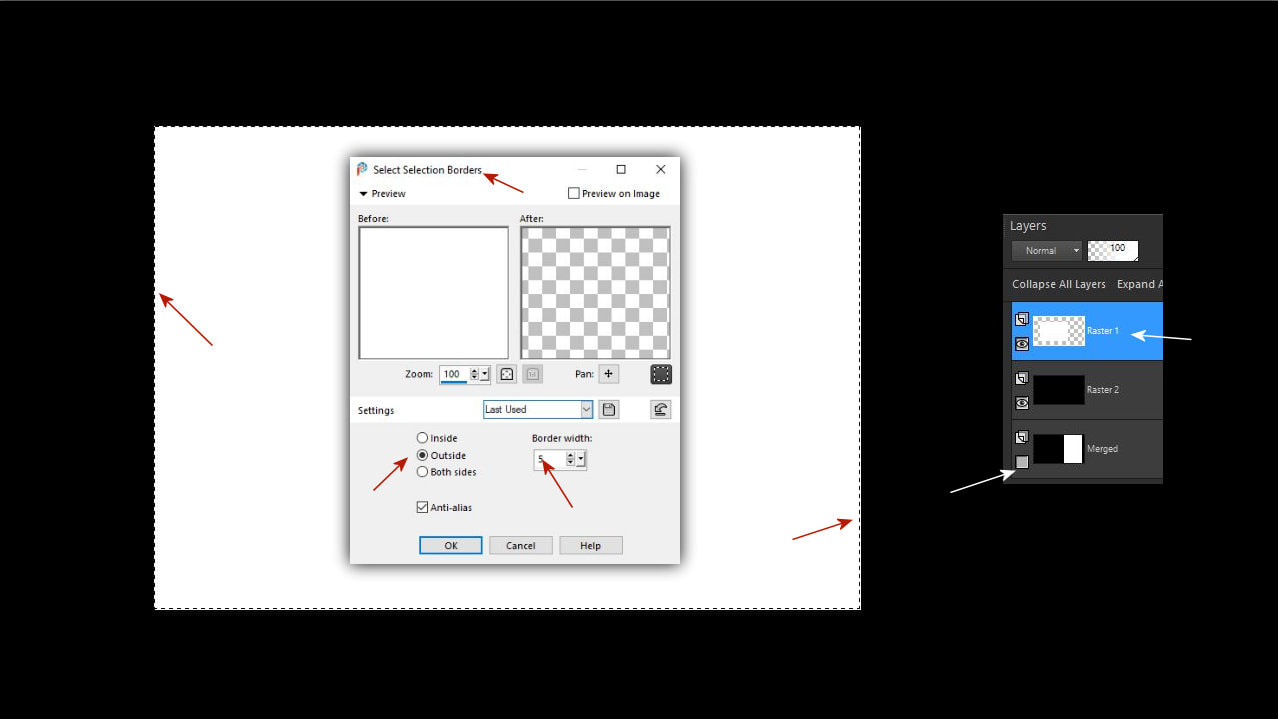
6. Selection - Modify - Select Selection Borders
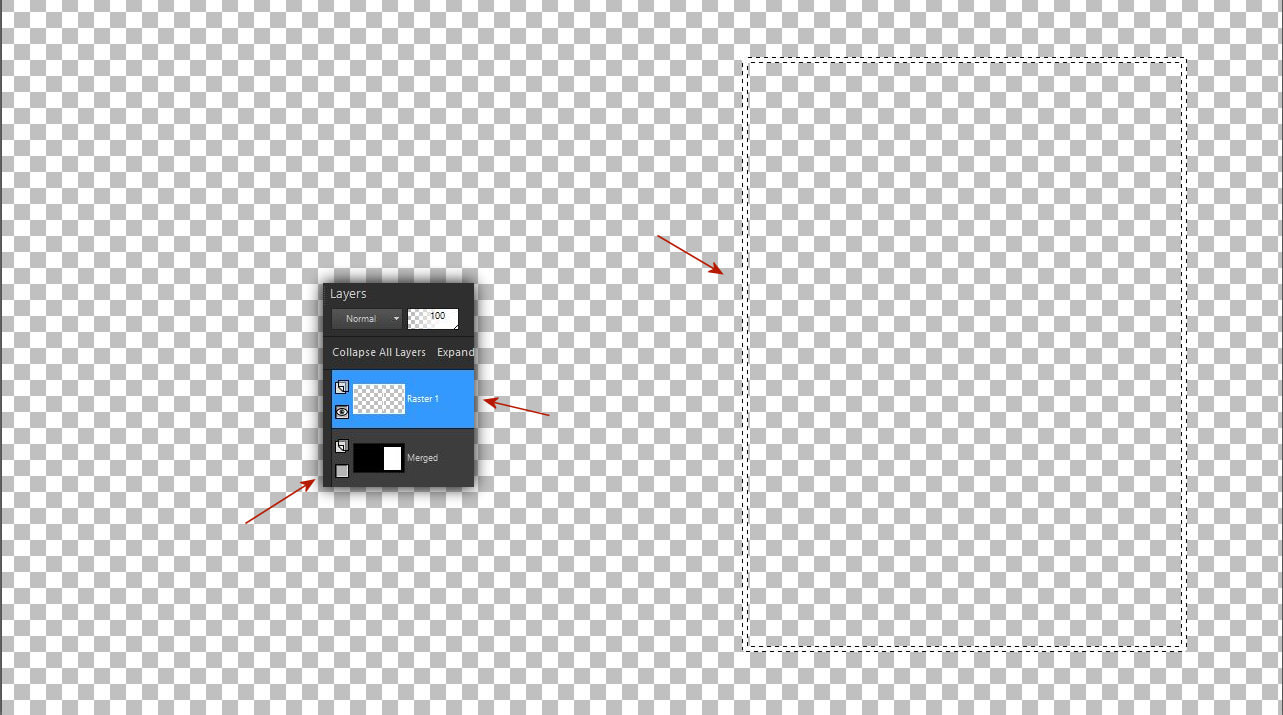
Amikor kijelölés kész csukd be az alsó rétegszemet
Selection - Modify - Select Selection Borders
When the selection is complete, close the lower layer eye
7. Állj a felsö rétegre és öntsd ki a kijelölést fehér színnel.
Stand on the top layer and fill the selection with white color.
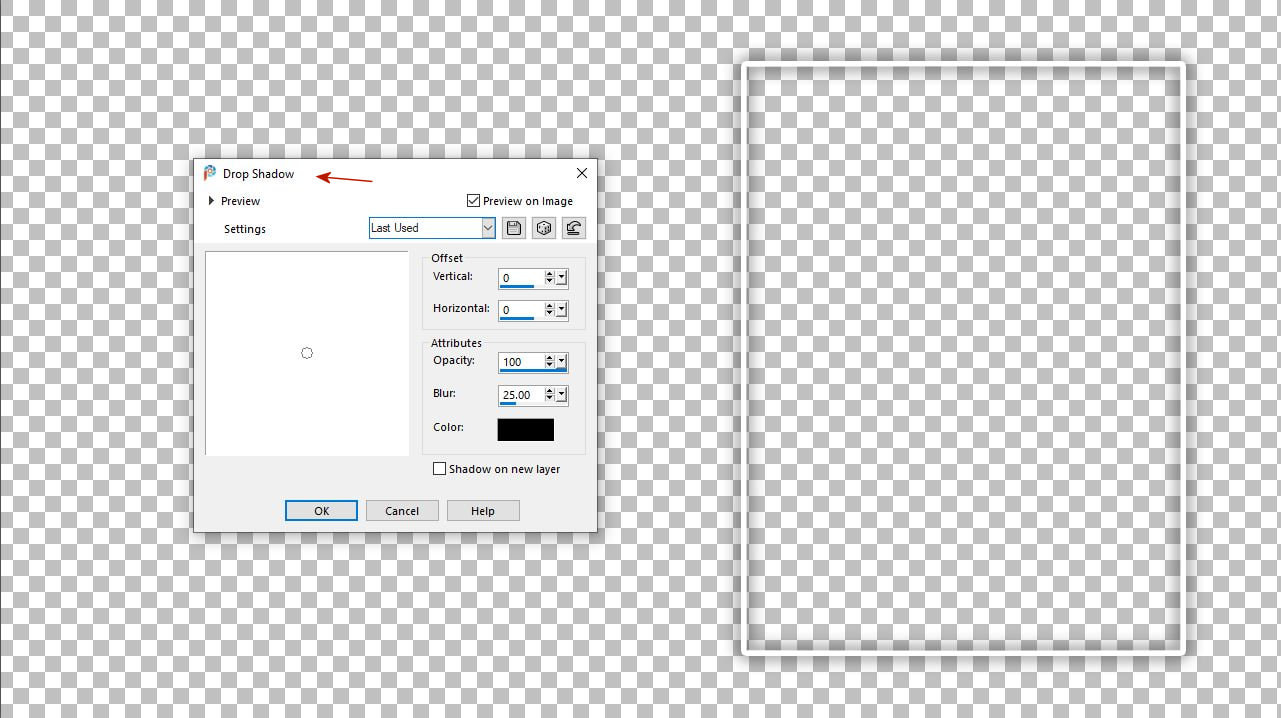
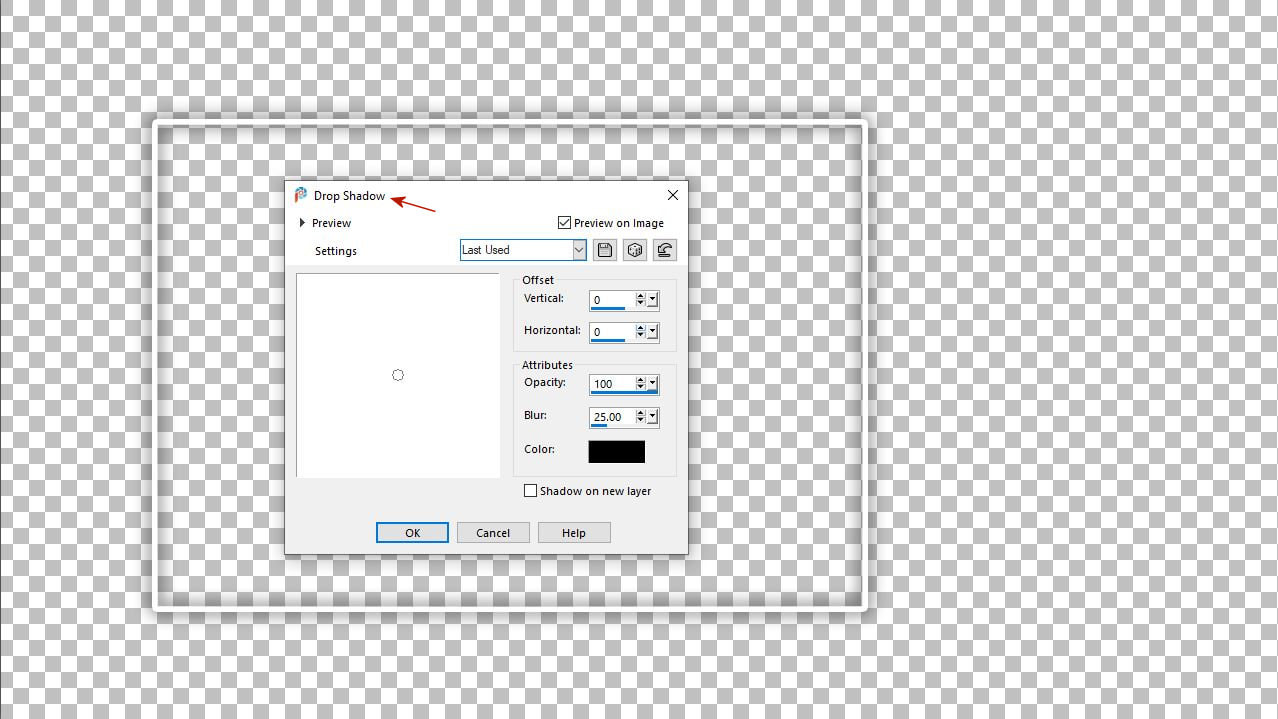
8. Árnyékold be a keretedet.
Shade your frame. 0,0,100,25
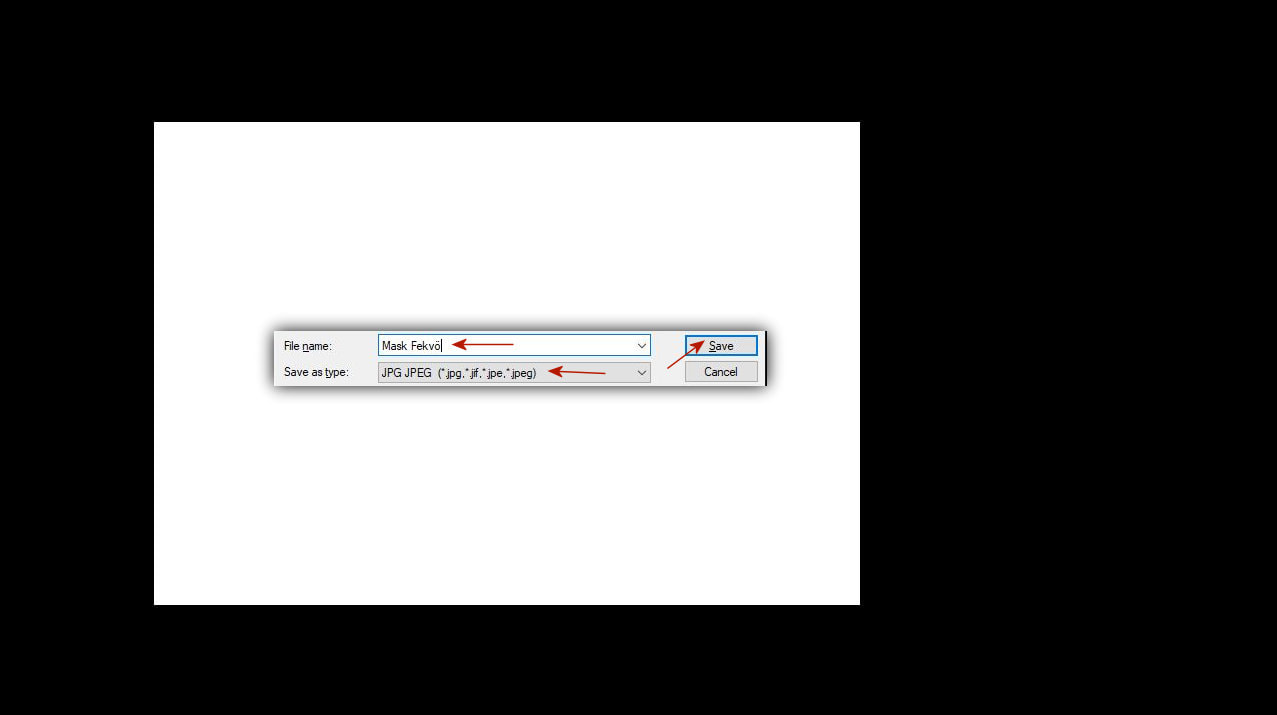
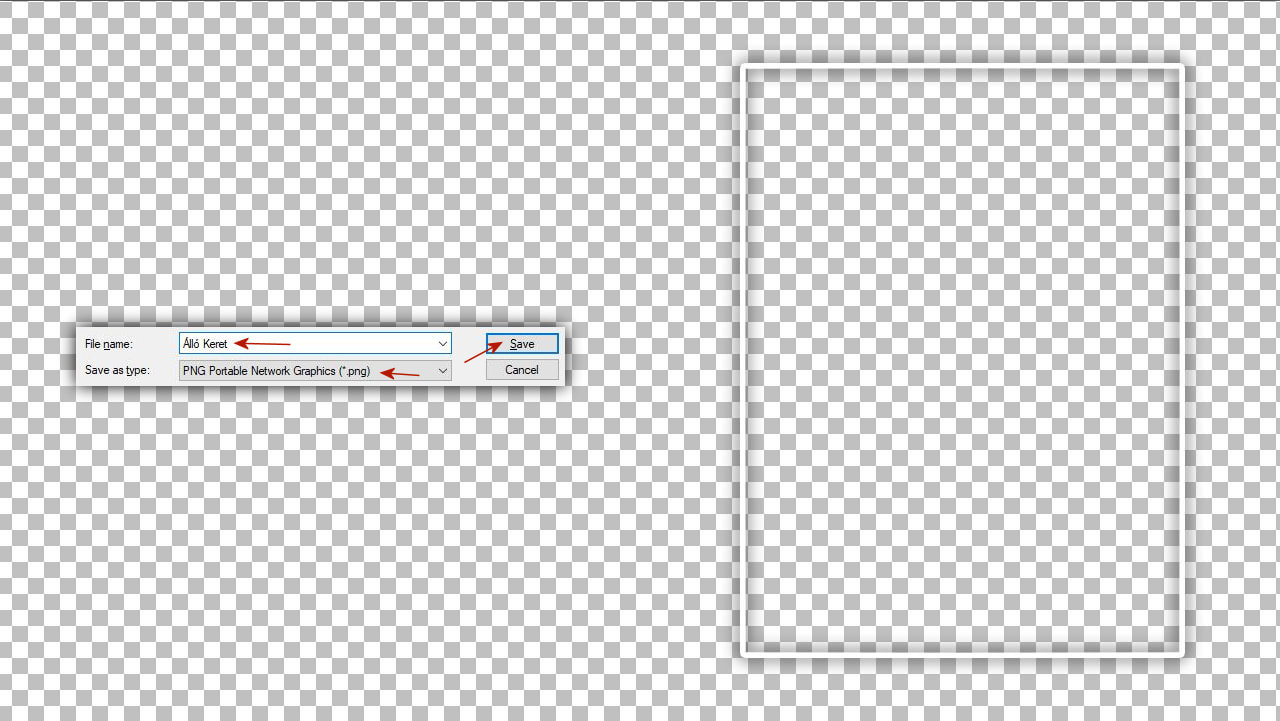
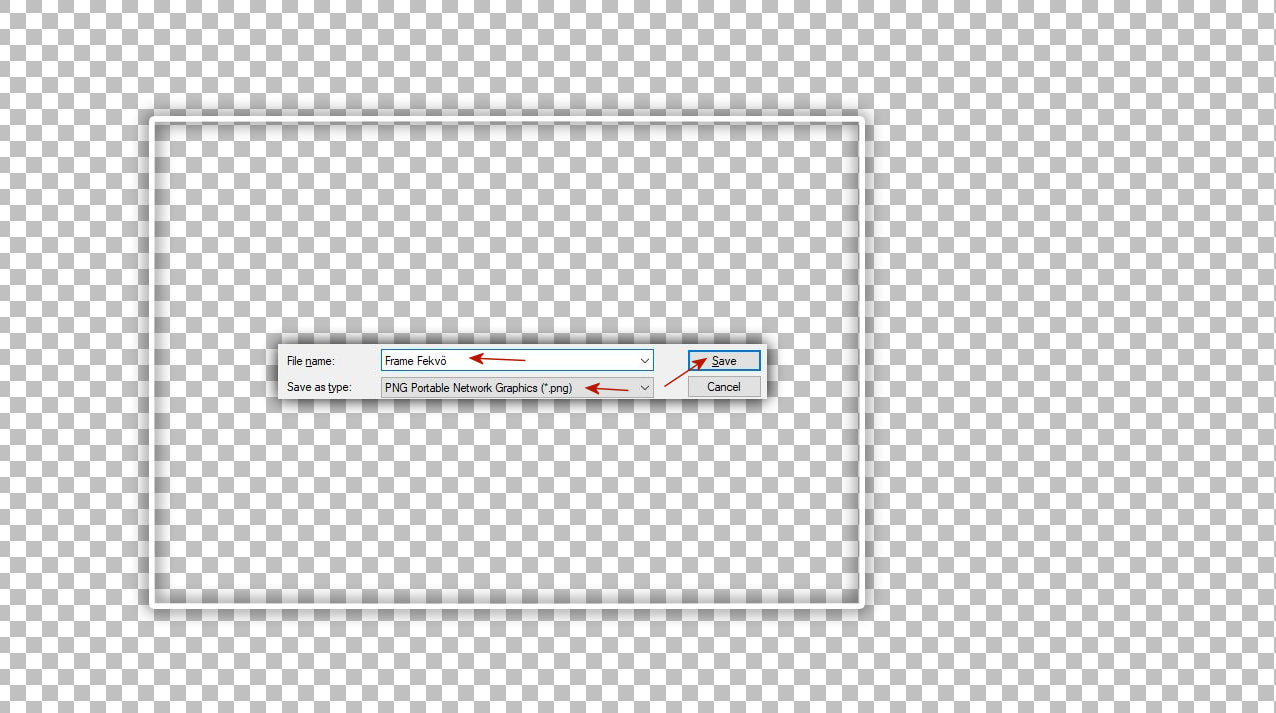
9. Igy ahogy van a bal szélen mentsd el álló keret néven png formában.
As it is on the left edge, save it as a vertical frame in png format.
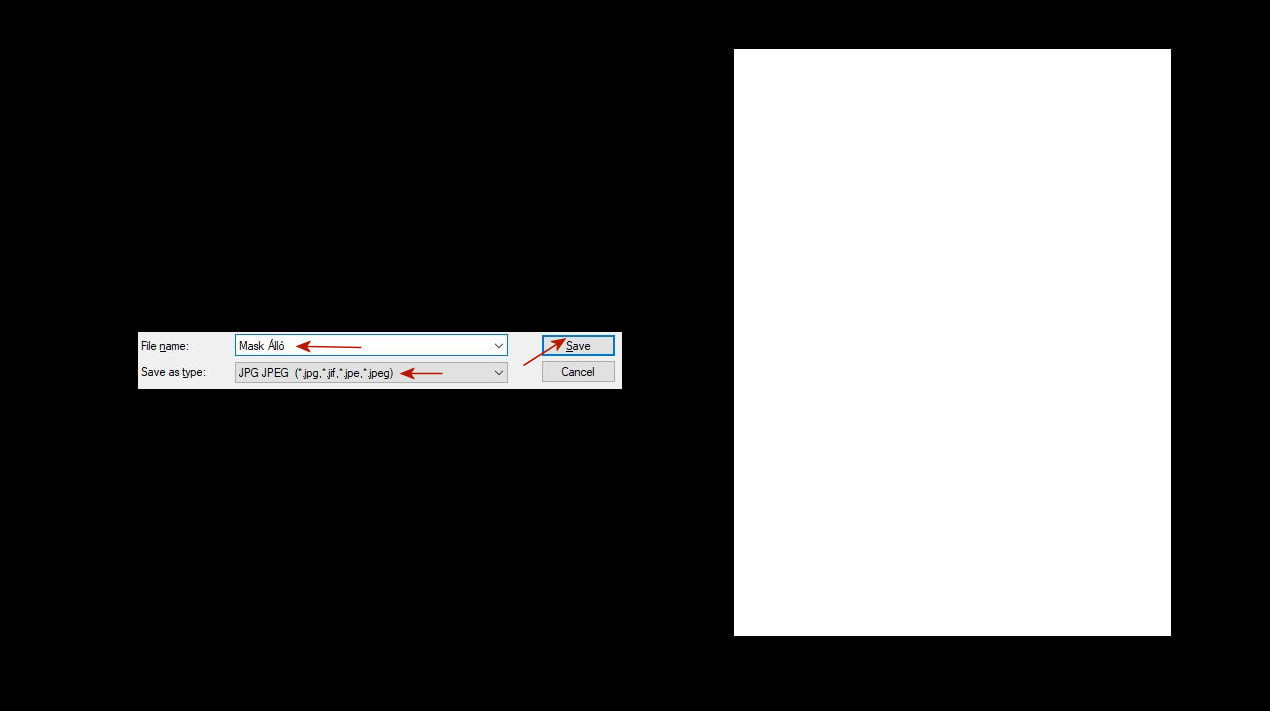
10. Mostmár az alsó réteget is elmentheted maszk álló néven jpg formában.
Now you can also save the lower layer as a mask in jpg format.
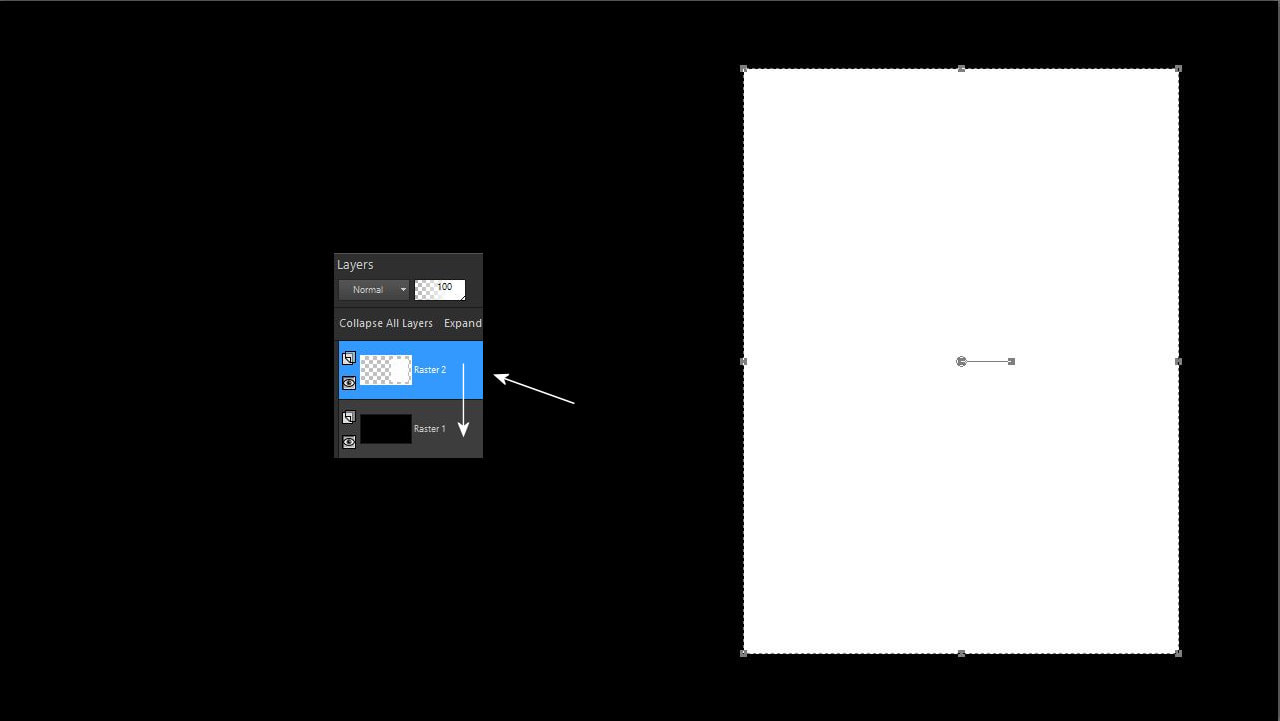
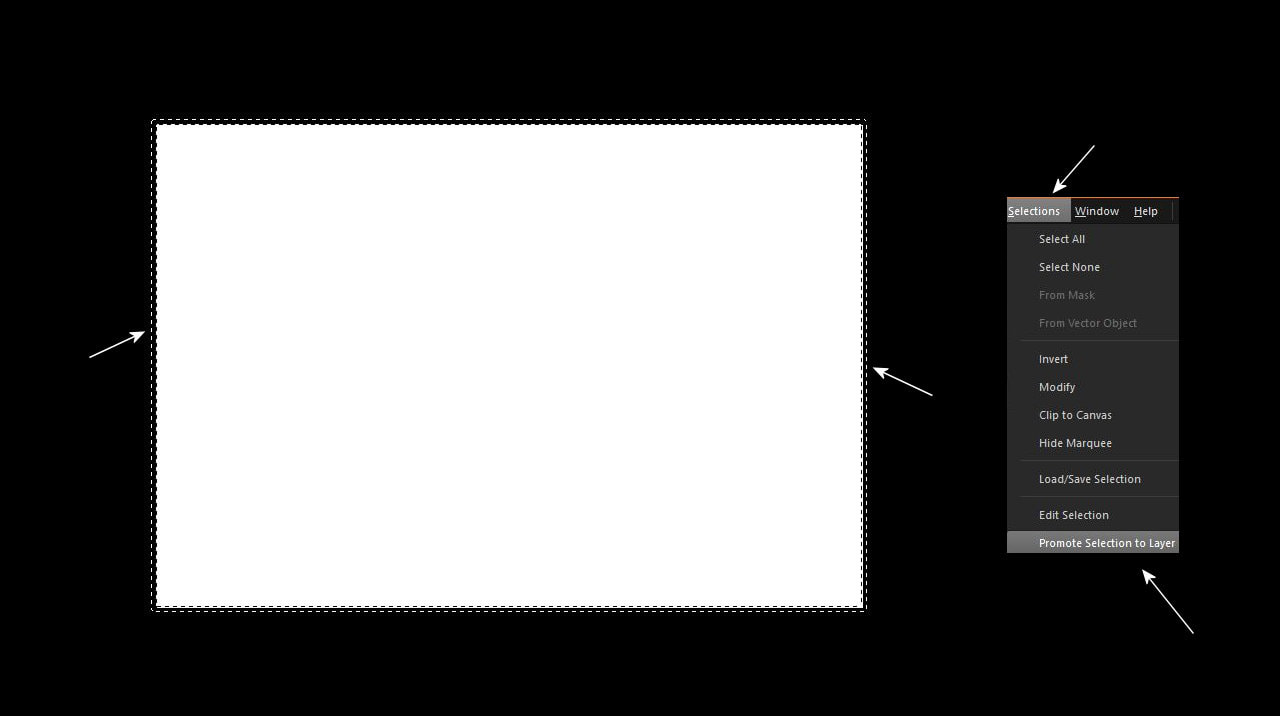
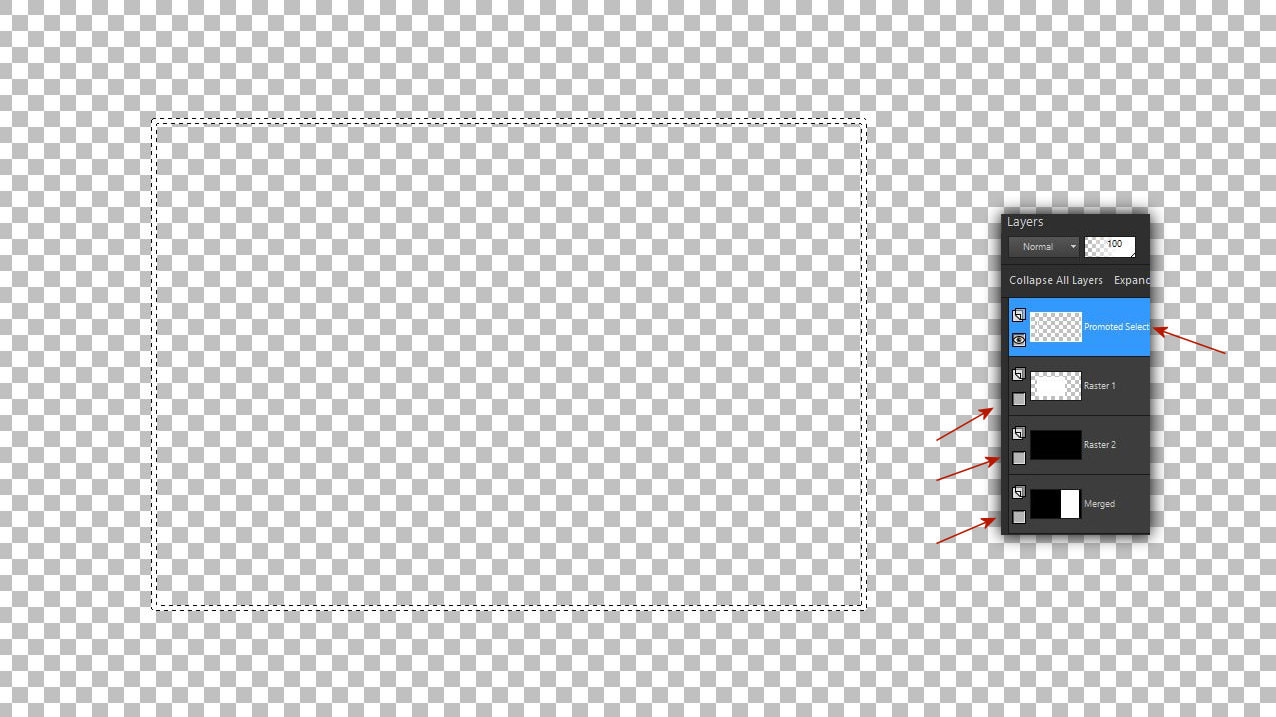
11. Most hozd be a már elmentett álló maszkodat és jelöld körbe pontosan a fehér részt és promótáld azt. Erre azért van szükség hogy ne kelljen mégegyszer megcsinálni ezt a részt a jobbos maszkhoz. Valamint a jobb oldalon a fekvö képekhez ennek a résznek jobban a szélen kell majd lennie.
Now bring in your already saved standing mask and circle the white part exactly and promote it. This is necessary so that you don't have to do this part again for the right mask. Also, for pictures lying on the right side, this part will have to be more on the edge.

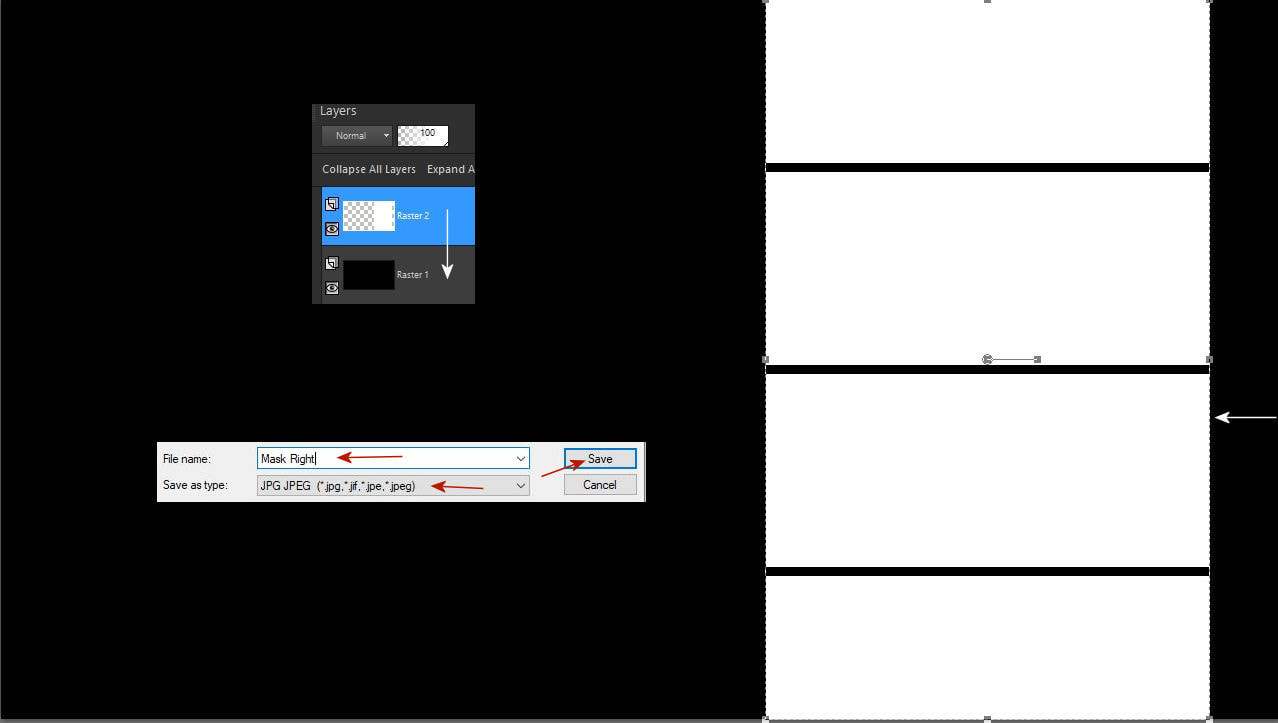
12. Hozz be egy fekete lapot és másold át a promótált réteget erre az oldalra. Figyeld meg a jobb szélen látható kis nyilat ami mutatja hogy kb. hova tedd a ezt a réteget a fekete lapon mennyire legyen a szélen. Majd add össze a rétegeket és mentsd el mask right néven jpg formában.
Bring in a black sheet and copy the promoted layer to this page. Notice the small arrow on the far right, which shows that approx. where should you place this layer on the black sheet, how far should it be on the edge. Then merge down the layers and save as mask right in jpg format.
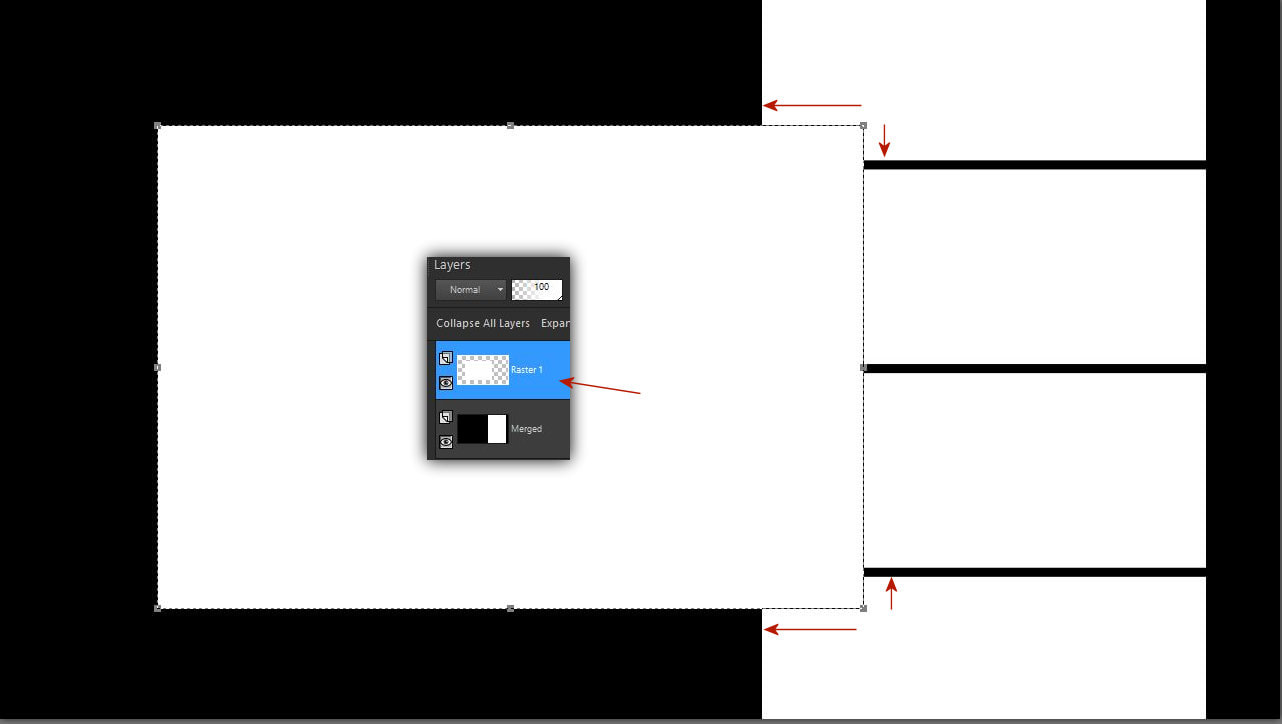
13. Folytasd a munkát ezen a lapon. Hozz be új rétegként egy téglalapo fehér színben. Helyezd el ógy hogy ez lesz majd a maszkod a fekvö képeidhez. Szép arányosan helyezd el úgy hogy rálógjon egy kicsit a függöleges fehér részre.
Continue working on this page. Add a rectangle in white as a new layer. Place it so that this will be your mask for your horizontal pictures. Place it in a nice proportion so that it hangs a little on the vertical white part.
14. Most csukd be az alsó réteg szemét éshozz be egy új raster rétget is
helyezd el azt középre..
Now close the eyes of the bottom layer and add a new raster layer
place it in the middle..
15. Most csukd be a felsö és alsó réteg szemét és öntsd ki a középsöt fekete színnel.
Now close the eyes of the top and bottom layers and fill up the middle with black.
16. Most ennek a fekvö résznek csinálunk keretet. Jelöld körbe a felsö rétegen pontosan a fehér részt és utánna menj erre a menüre.
Selection - Modify- Select Selection Borders
Now we make a frame for this horizontal part. Circle exactly the white part on the top layer and then go to this menu. Selection - Modify - Select Selection Borders
17. Majd promótáld a kijelölést új rétegként.
Then promote the selection as a new layer.
18. Öntsd ki a keretet fehér színnel csak elötte csukd be az alsó réteg szemeket.
Fill the frame with white color, just before that, close the eyes of the lower layer.
19. Árnyékold be a keretedet
Shade your frame 0,0,100,25
20. Mentsd el a keretet frame fekvö néven png formában.
Save the frame as frame landscape in png format.
21. Ezt a réteget is mentsd el mask fekvö néven jpg formában.
Also save this layer as mask landscape in jpg format.