Ebben a bemutatóban is nemcsak egy látványos megoldást, hanem igen kreatív ötletet kínálok a látogatóimnak. Egy szép látványtervhez ha egy egyszerü objektum mozgást teszünk ismét egy teljesen egyedi , elegáns videót tudunk készíteni. Ám ehhez bizony a segédprogramokban is sokat kell dolgozni. Ennek e bemutatónak az elsö része a látványterv kidolgozását tartalmazza a Corel progiban.
In this presentation, I offer my visitors not only a spectacular solution, but also a very creative idea. If we add a simple object movement to a beautiful visual design, we can again create a completely unique, elegant video. But this requires a lot of work in the utilities. The first part of this presentation includes the development of the visual design in the Corel program.

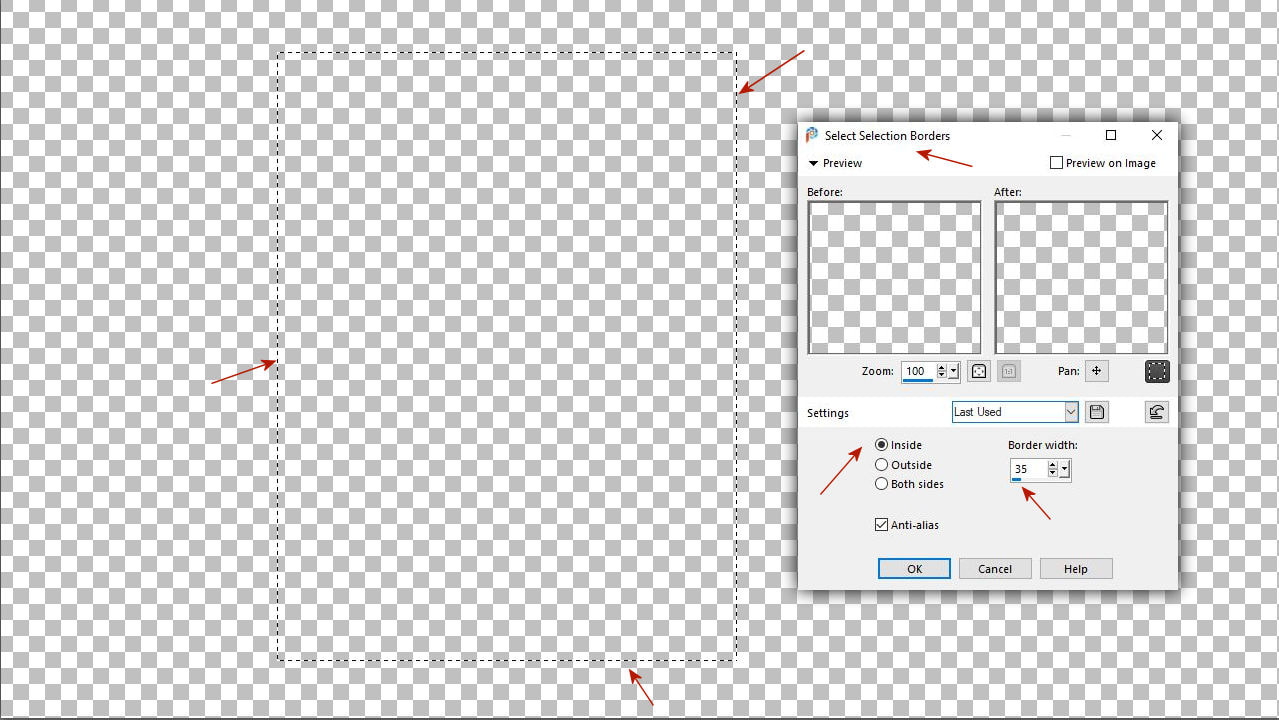
1. Elöször készítsünk egy átlátszó üvegkeretet. Ezzel a proshowban majd különlegessé tudjuk tenni az effectünket. Jelölj ki egy álló keretnek megfelelö téglalapot mint ahogy azt itt a képen látod. Azután menj a következö menüpontra.
Selection - Modify - Select Selection Borders állítsd minimum 35 esetleg 40-es méretre az ablakban található értéket. Én 35--tel dolgoztam.
First, make a transparent glass frame. With this, we will be able to make our effect special in the ProShow. Select a rectangle corresponding to a vertical frame as you see in the picture. Then go to the next menu item. Selection - Modify - Select Selection Borders, set the value in the window to at least 35 or 40. I worked with 35.
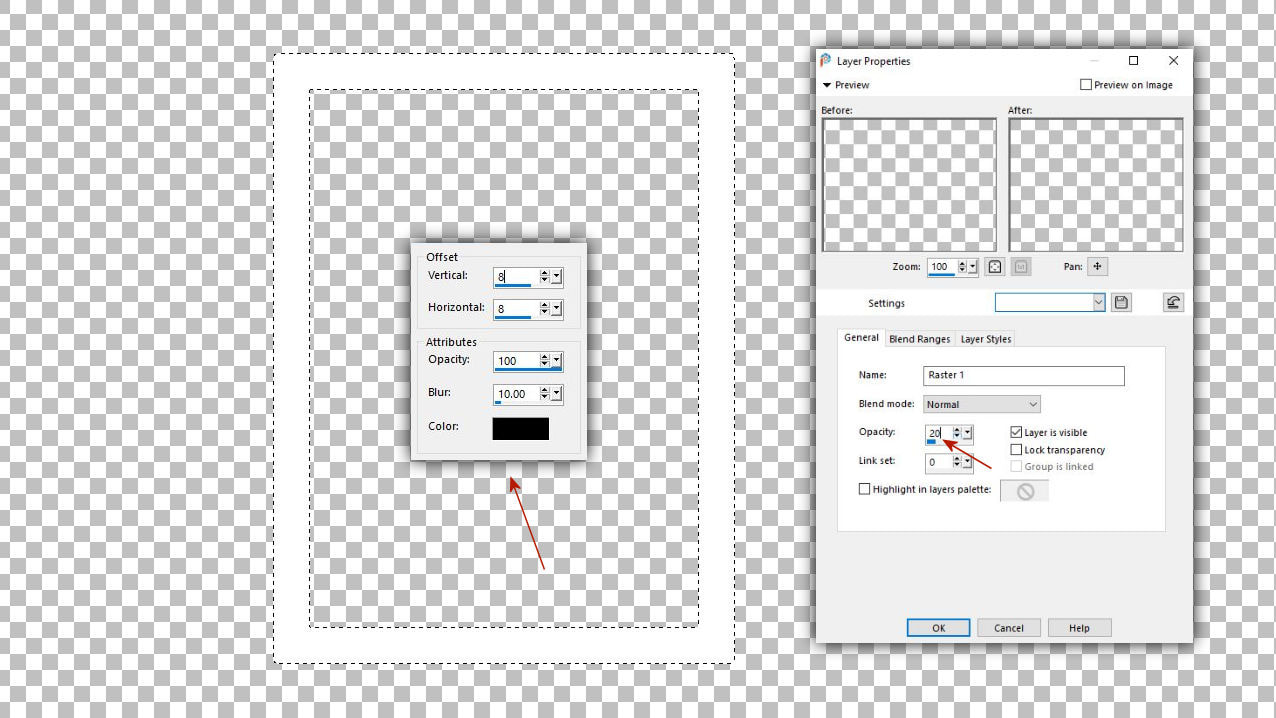
2. A létrehozott keretet öntsd ki fehér színnel. Majd finoman árnyékold be. Vedd vissza a rétegeden az opacity-t 20 vagy 30-as értékre hogy áttetszö legyen a kereted. Mindenkinél más lehet az átlátszóság döntsd el te az érték alapján mi jó neked.
Fill the created frame with white color. Then gently shade it. Return the opacity of your layer to 20 or 30 to make your frame transparent. Transparency can be different for everyone, decide what is good for you based on the value.
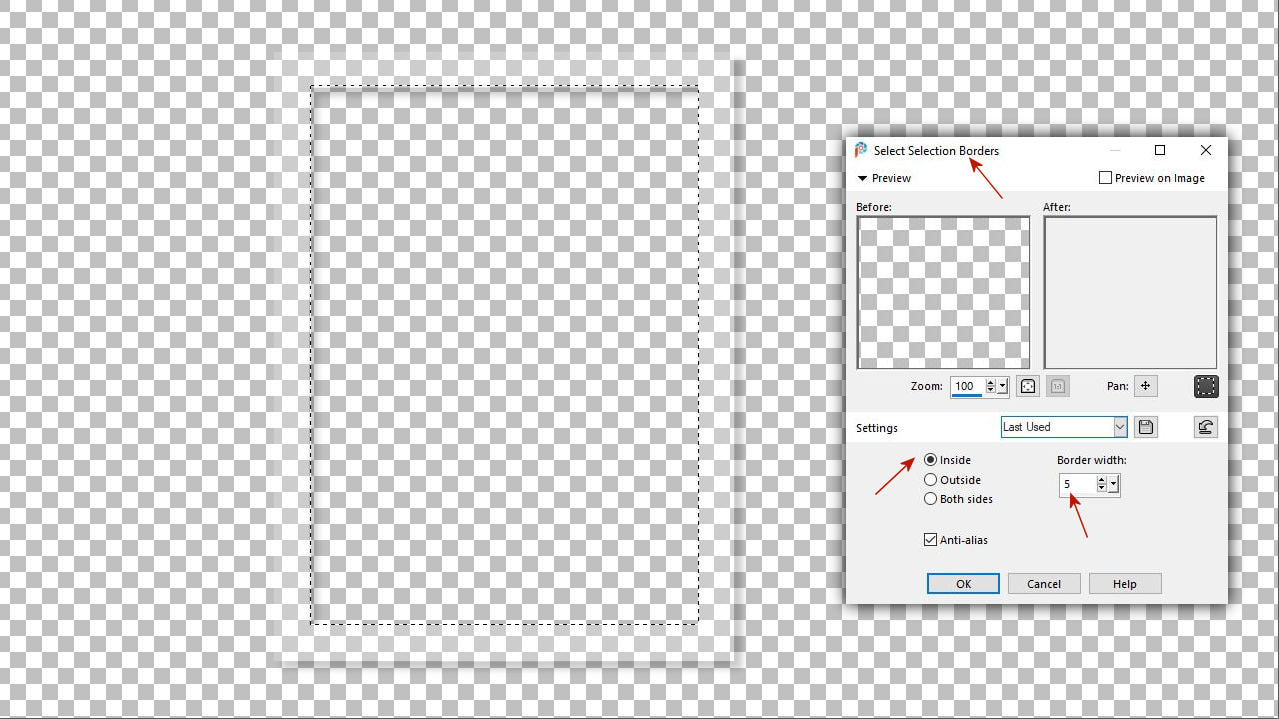
3. Azért kellett árnyékolnod is mert itt akkor nem látod hova jelöld ki a belsö keretet.
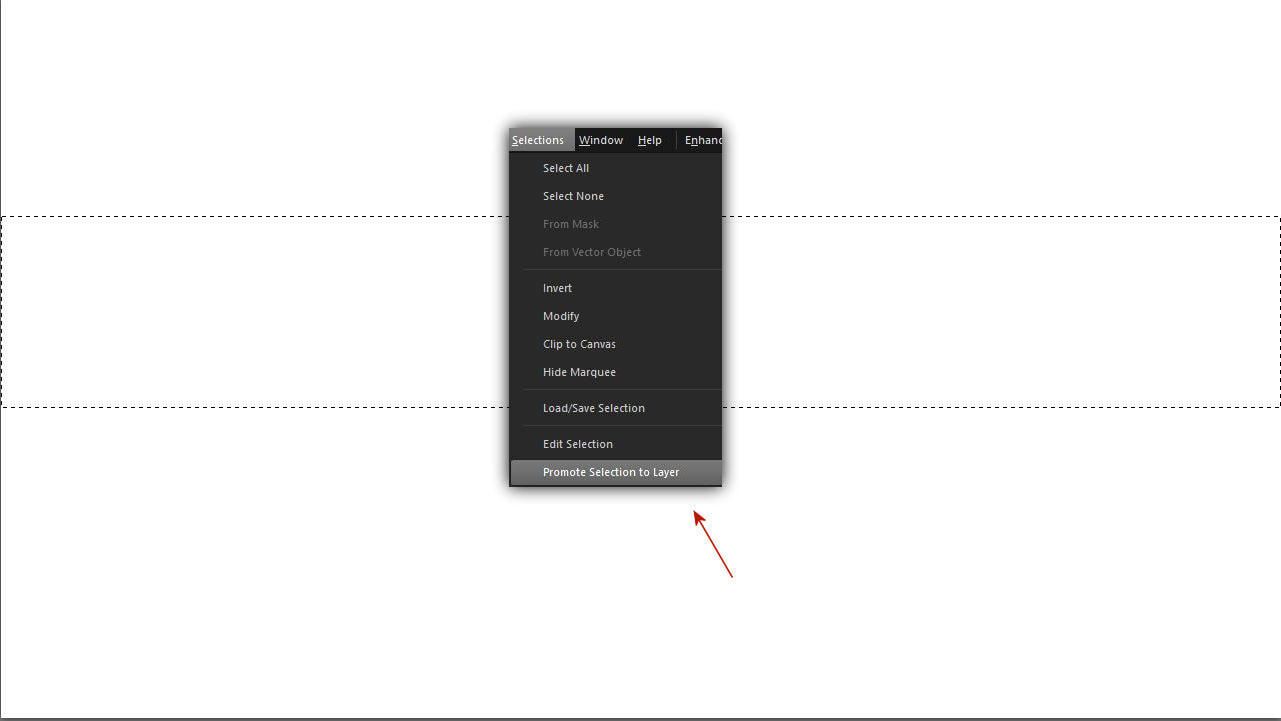
Tehát most jelöld ki a belsö keretedet ismét menj a
Selection - Modify - Select Selection Border menüre és itt csinálj egy 5-ös vastagságot a kijelöléssel.
You had to shade it because you can't see where to select the inner frame. So now select your inner frame again go a Selection - Modify - Select Selection Border menu and here make a thickness of 5 with the selection.
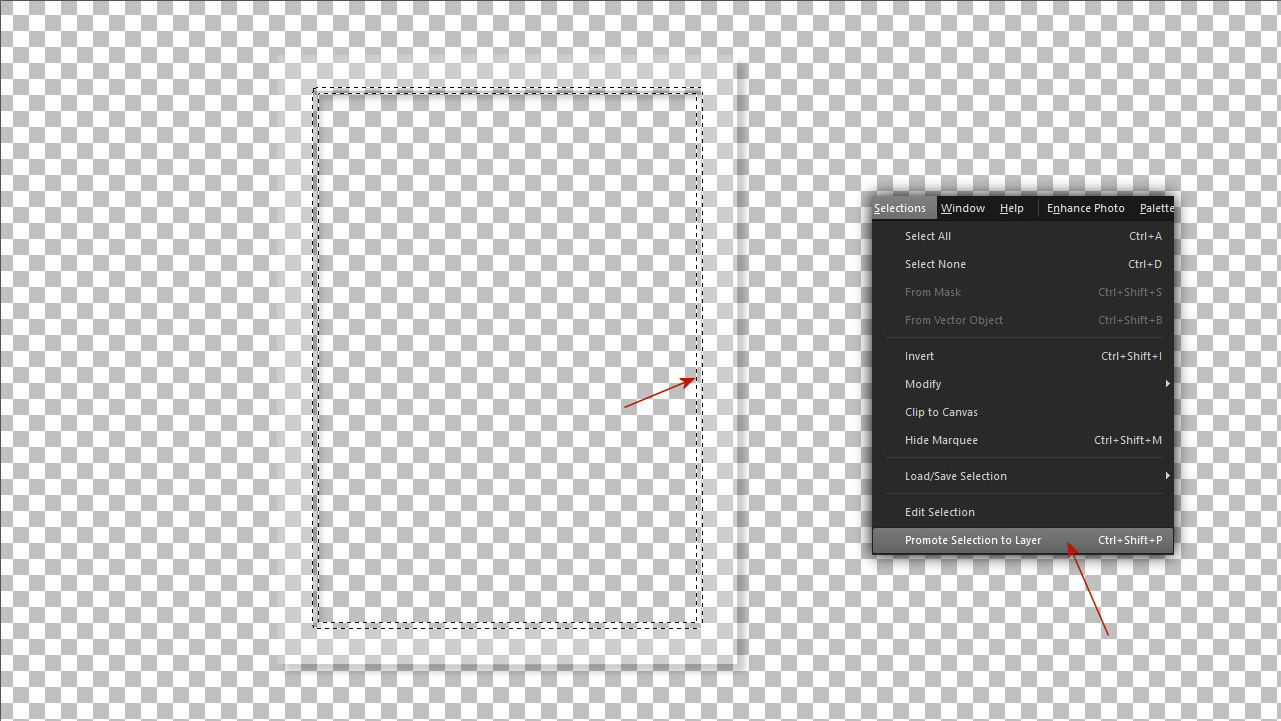
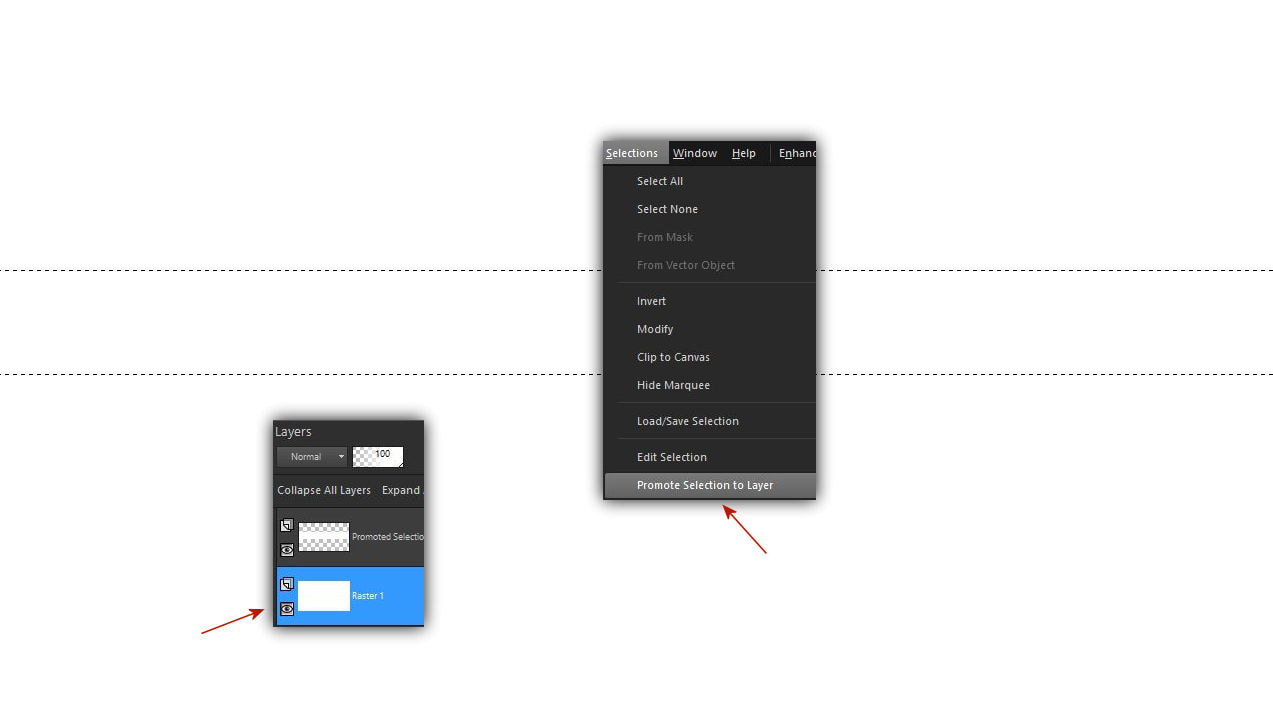
4. Majd promótáld a kijelölést.
Then promote the selection.
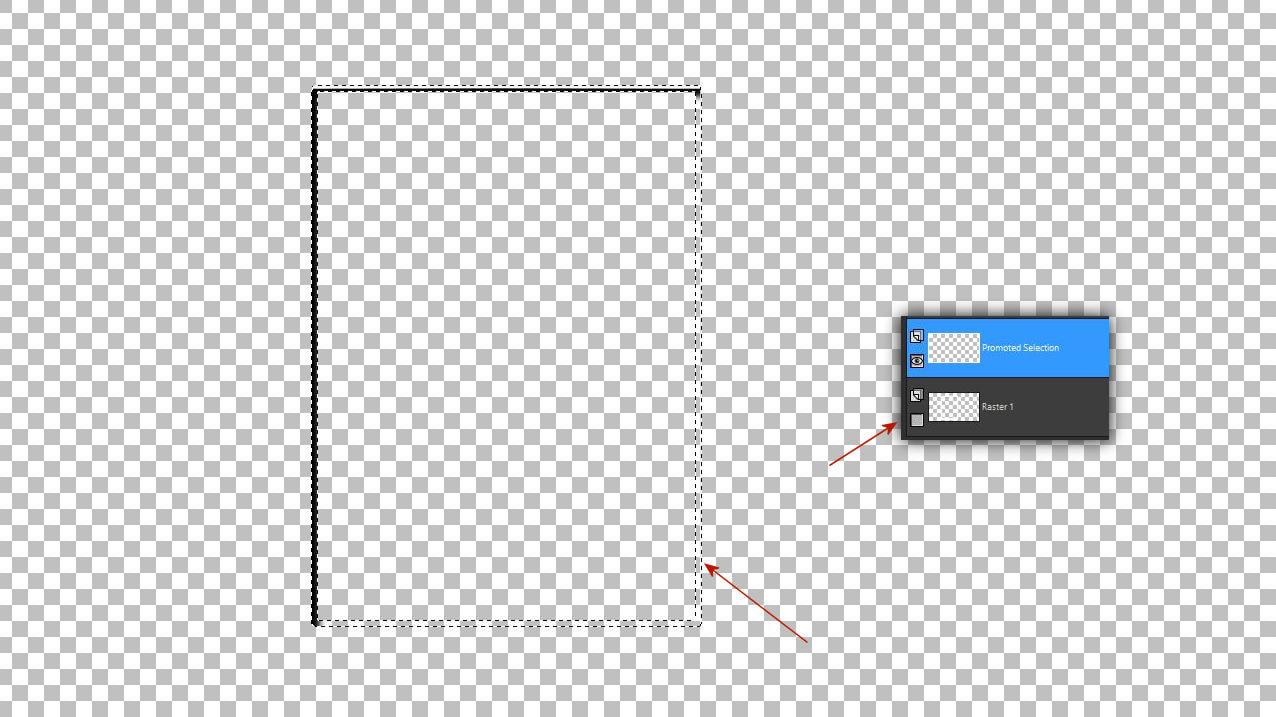
5. Csukd be az alsó rétegszemet és maradj a promótált rétegeden. Látni fogod az elözöekben a keretre tett árnyékot is kicsit feketén.
Close the lower layer eye and stay on your promoted layer. You will also see the shadow placed on the frame a little black.
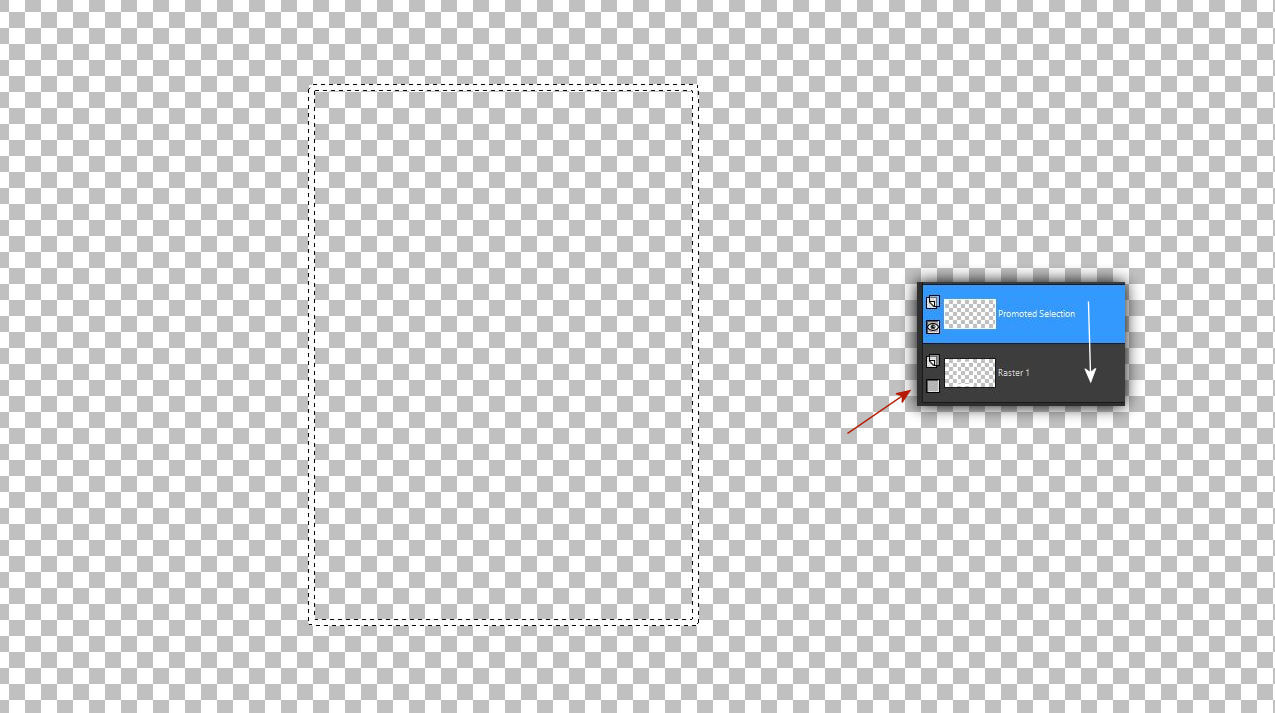
6. Ezt a kijelölést öntsd ki fehér színnel. Elötte nyisd ki az alsó szemet és ha kiöntötted add össze a két réteget.
Fill this selection with white color. Before that, open the lower layer eye and when you have poured it, join the two layers.
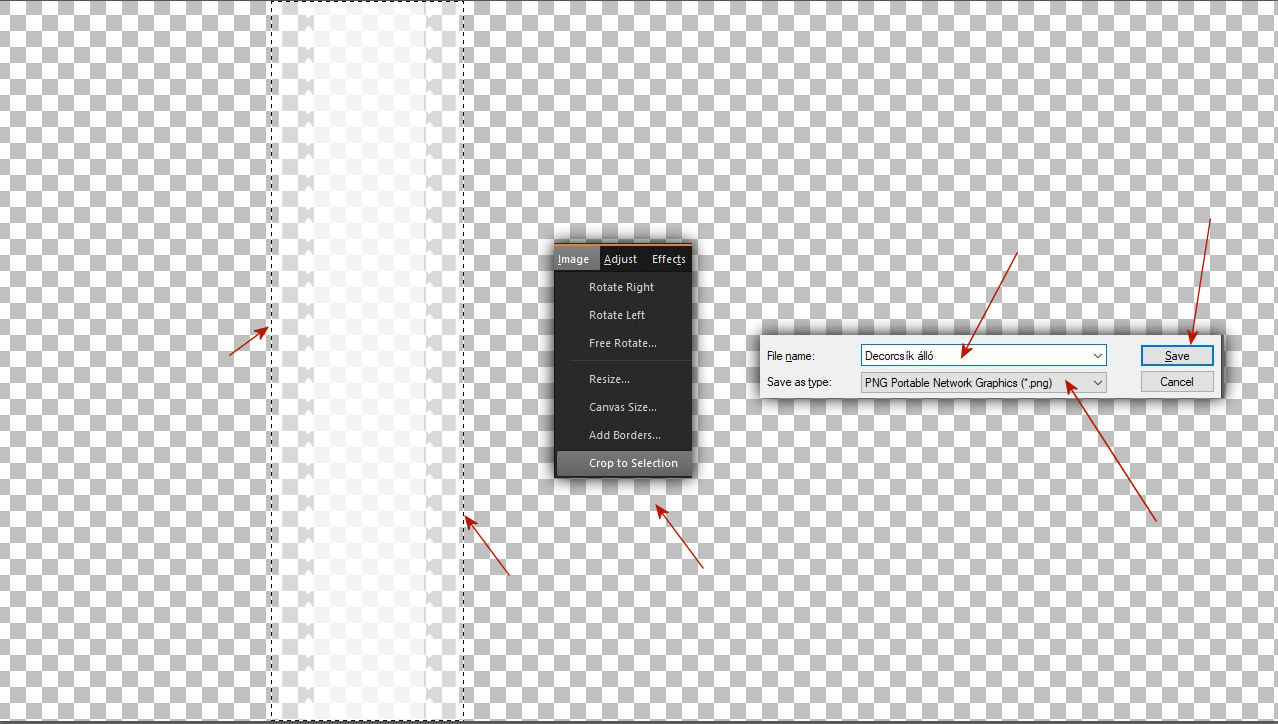
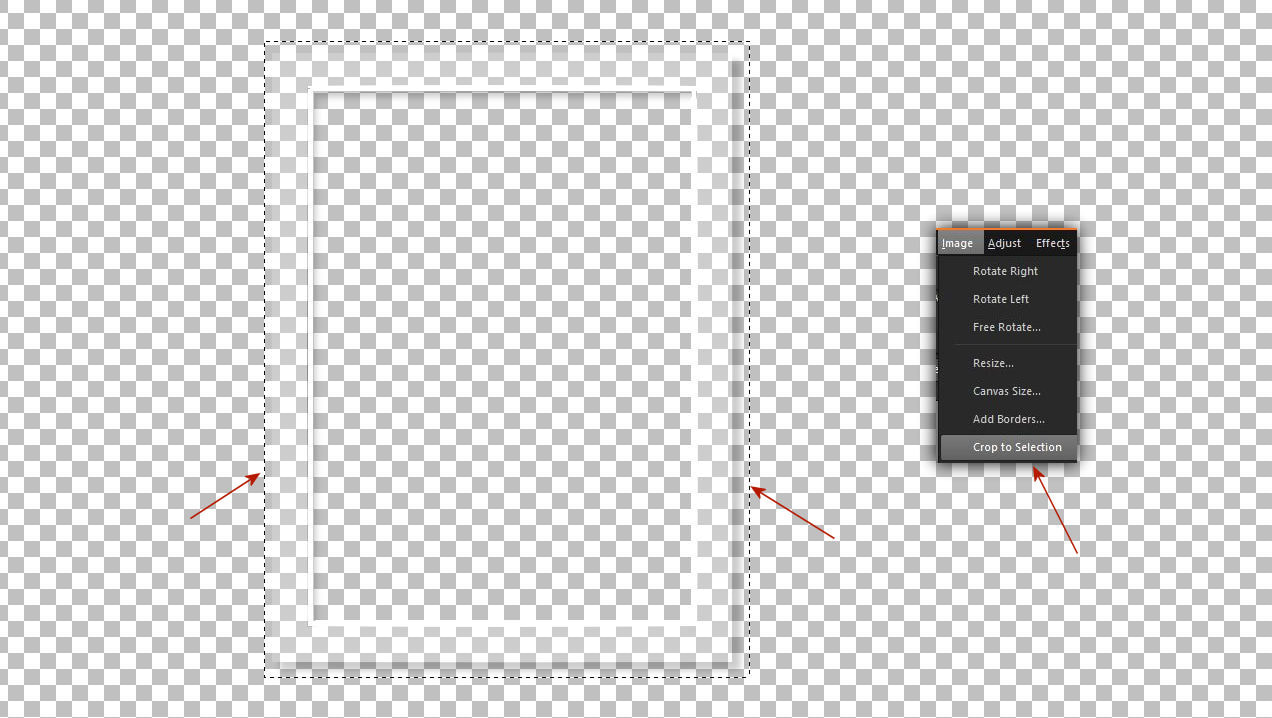
7. Jelöld körbe a kész keretedet és vágd ki azt.
Make a selection around your finished frame and cut it out.
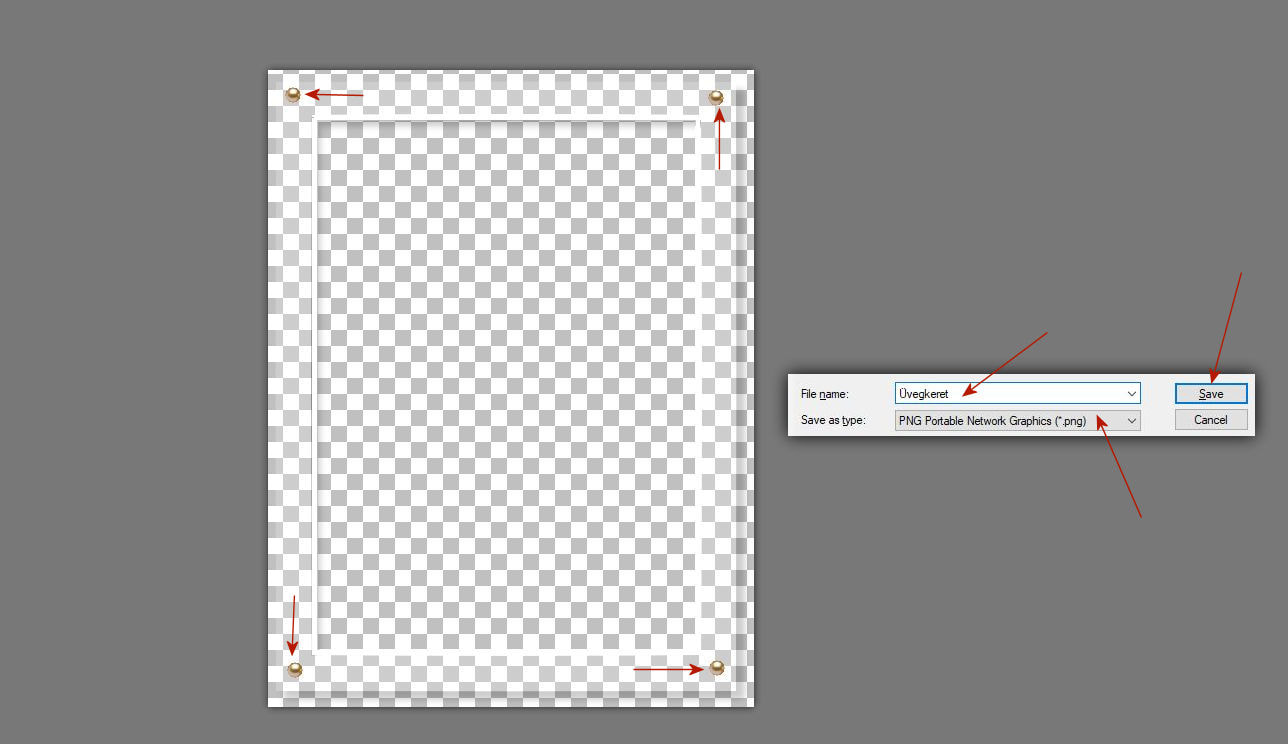
8. Mentsd el a keretedet png formátumban.Ha akarod díszítheted a mentés elött kics gyönggyel vagy gombbal a négy sarokban. Amikor használni akarod ezt átforgatod és fekvö keretként is elmentheted ezt.
Save your frame in png format. If you want, you can decorate it with small pearls or buttons in the four corners before saving. When you want to use it, you rotate it and you can also save it as a horizontal frame.
9. Kezdjük el csinálni a látványtervedhez a hátteret. Két különbözö színárnyalattal dolgozz azonos színtartományon belül. Önts ki egy alapot a világosabb színnel.
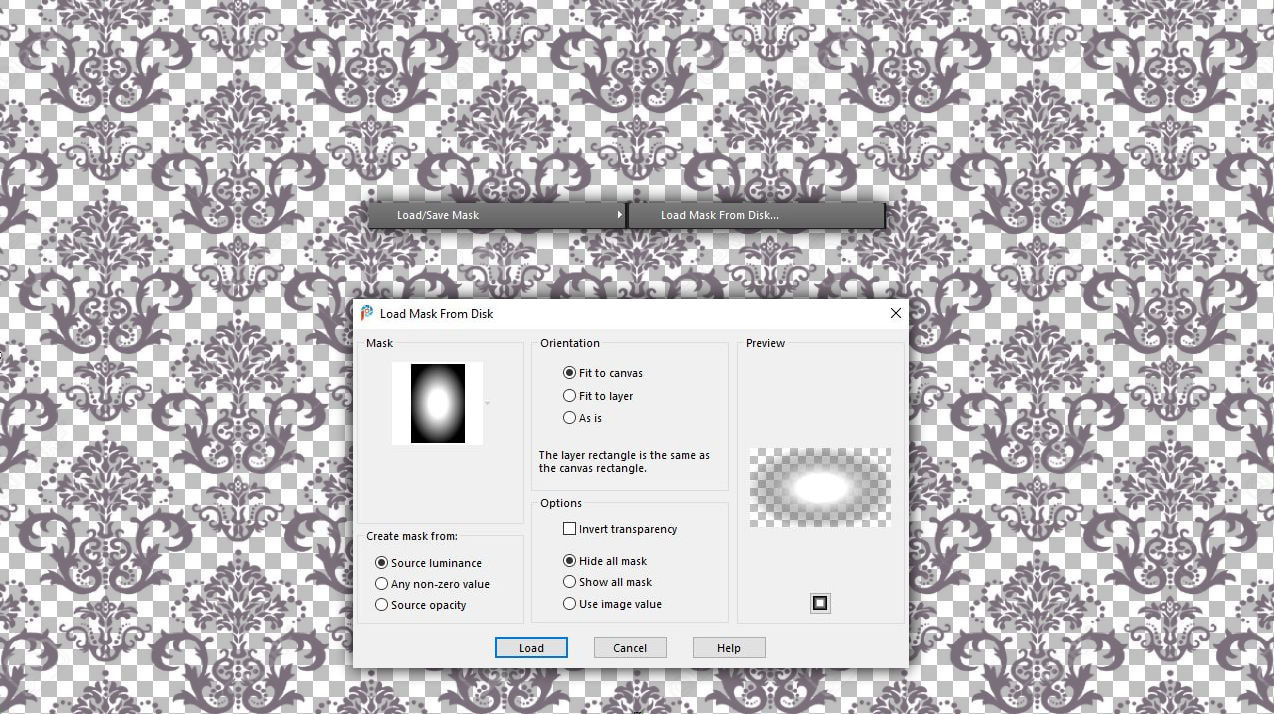
Én maszkoltam egy damaszk maszkkal.
Let's start making the background for your visual design. Work with two different shades within the same color range. Pour a base with the lighter color. I masked with a damask mask.

10. A kész maszkot aztán egy 2020-as maszkkal is kimaszkoltam.
I even added a 2020 mask to the finished image
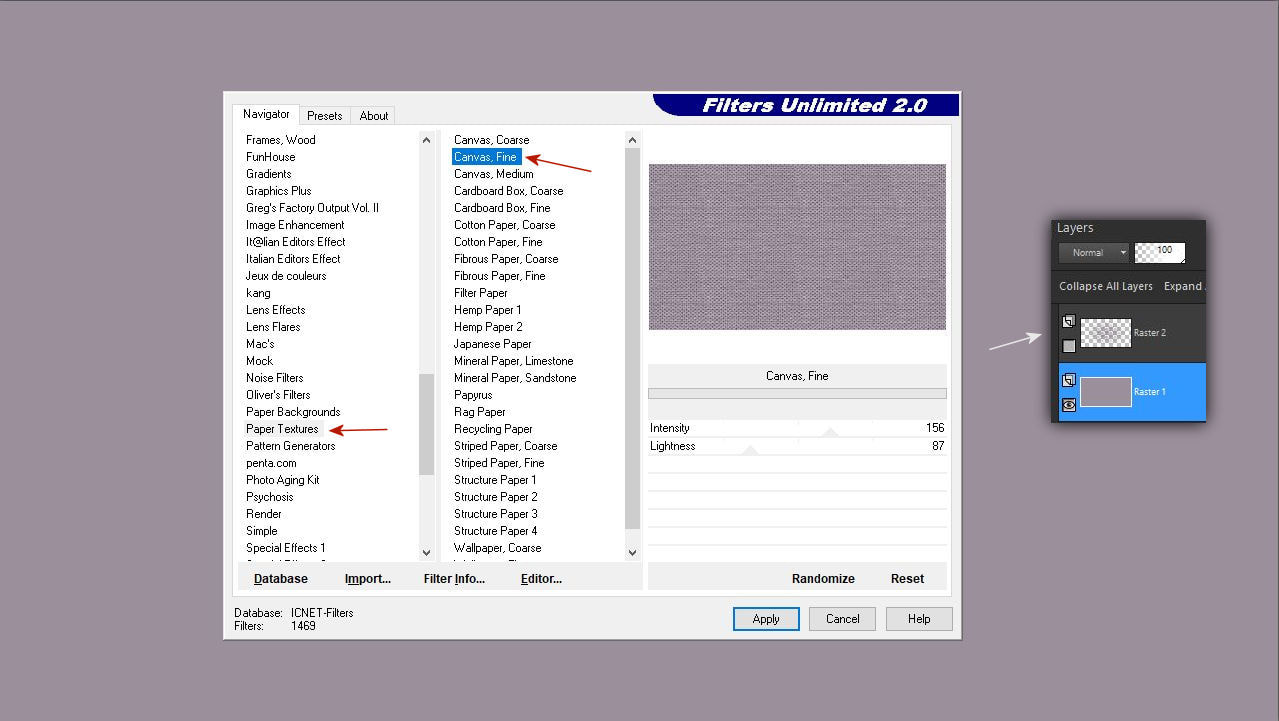
11. A sötétebb színnel kiöntött alapot pedig megszüröztem a vászonnal a Filter Unlimitedban.
And I filtered the base, which was poured with a darker color, with the canvas in Filter Unlimited.
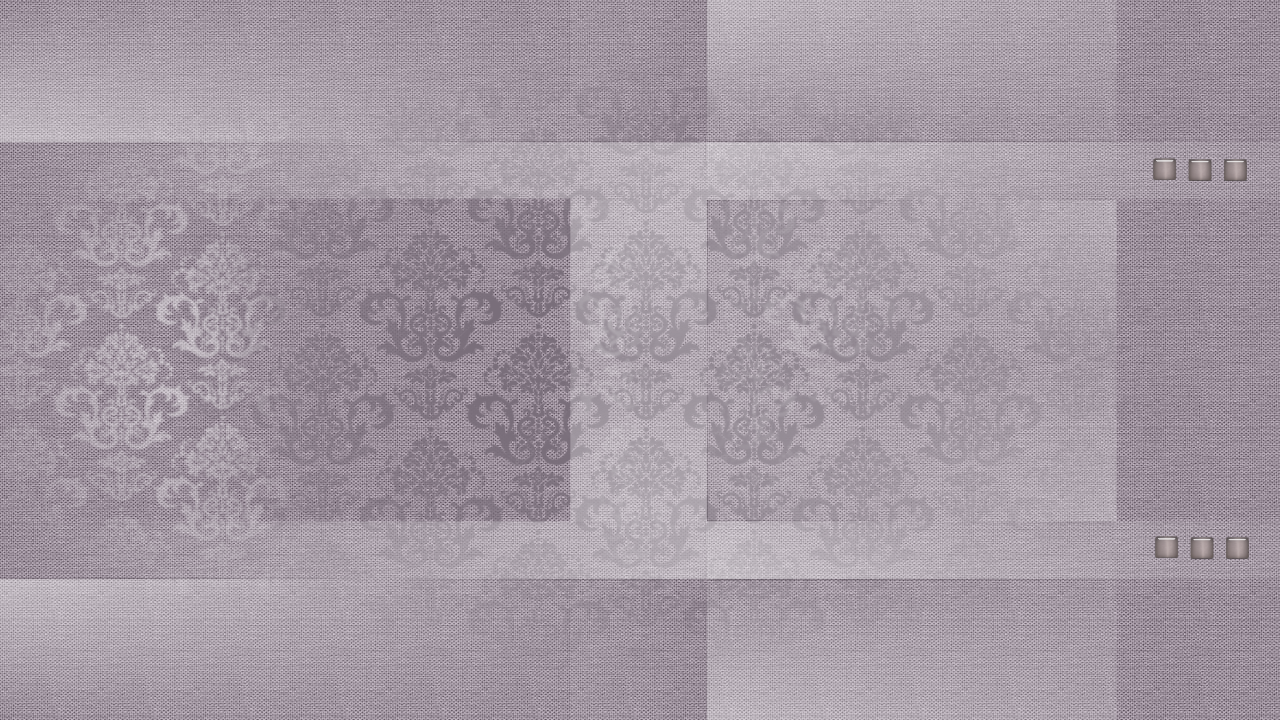
12. Még egy kicsit szépítgettem az alapomat egy másik fehér maszkkal és gombokkal. Ez mindenkinek a saját kreativitásától függ hogyan dekorál.
I spruced up my base a bit more with another white mask and buttons. It depends on everyone's own creativity in how they decorate.
13. Kezdjünk csinálni decorcsíkot amely a "föszereplöje" ennek a videónak a látványtervében. Önts ki egy fehér lapot jelölj ki egy csíkot és promótáld azt.
Let's start making a decor strip, which is the "main character" in the visual design of this video. Pour out a white card, select a strip and promote it.
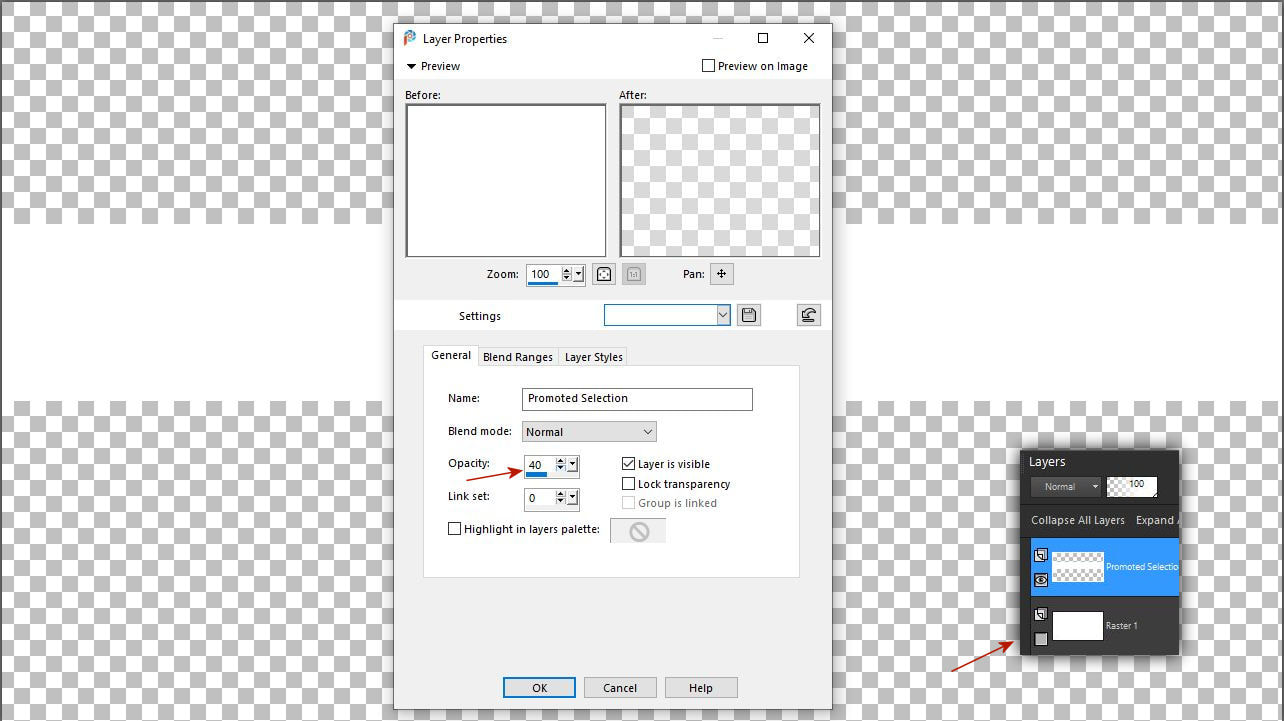
14. Állj a promótált rétegre csukd be az alsó rétegszemet. Kattints a felsö rétegre és állítsd az opacity-t 40%-ra.
Stand on the promoted layer and close the lower layer mesh. Click on the top layer and set the opacity to 40%.
15. Önts ki egy másik fehér lapot és jelölj ki rajta egy keskenyebb csíkot mint az elözö. Promótáld ezt a kijelölést. Majd csukd be az alsó rétegszemet.
Fill up another sheet with white color and mark a narrower strip on it than the previous one. Promote this selection. Then close the lower layer mesh.
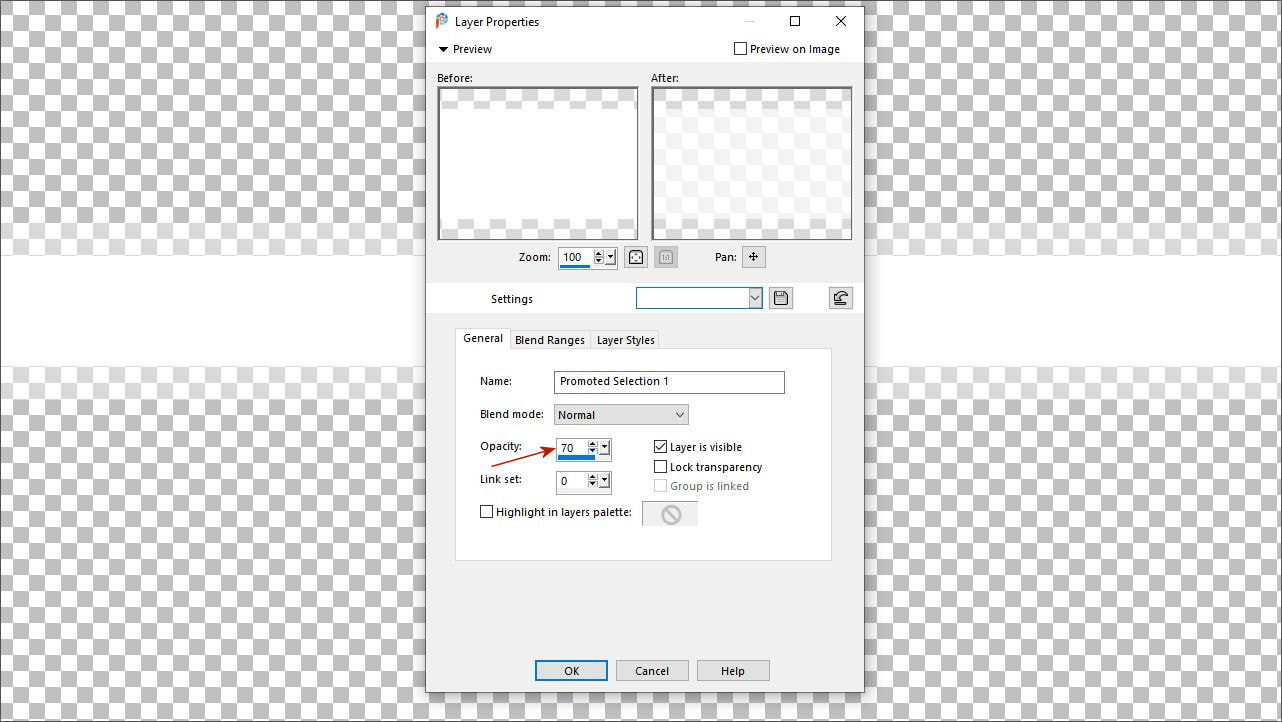
16. Másold át ezt a réteget a másik szélesebb csíkra és ennek az opecity-jét tedd
70%-ra
Copy this layer to the other wider strip and set its opacity to 70%
18. Add össze ezt a két réteget és húzz a két szélre fehér csíkokat.
Merge down these two layers together and draw white stripes on the two edges.
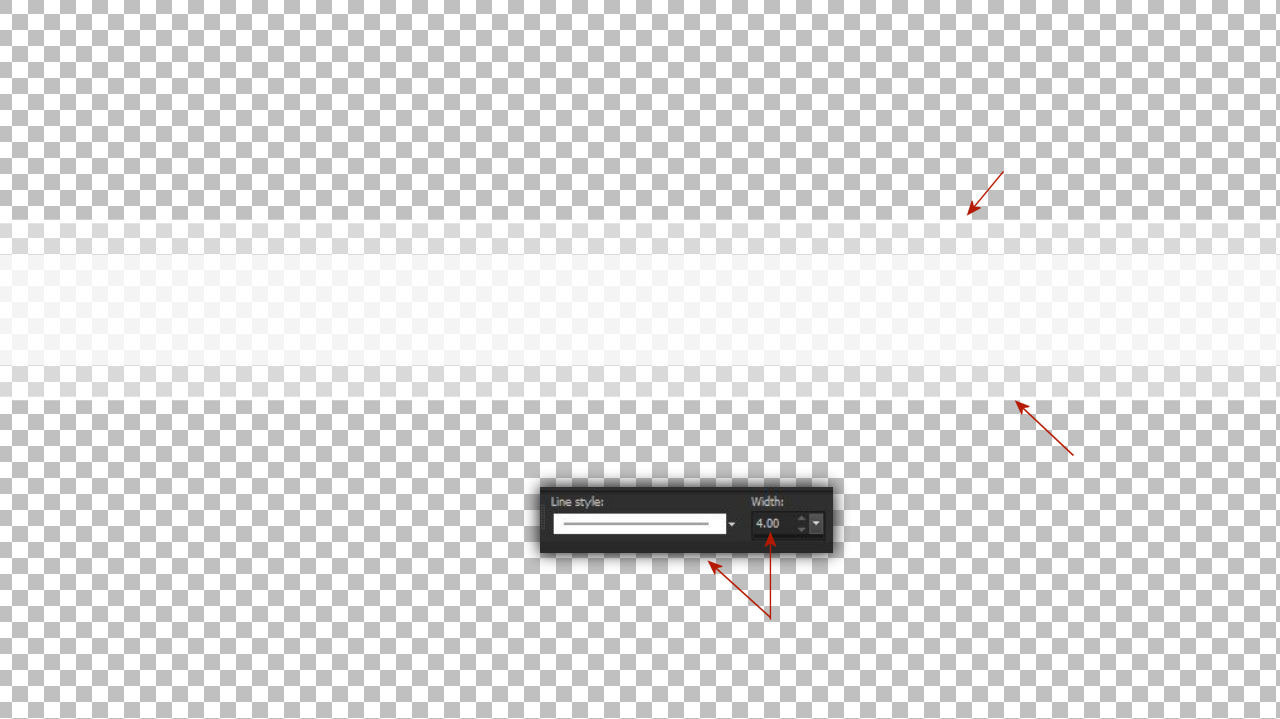
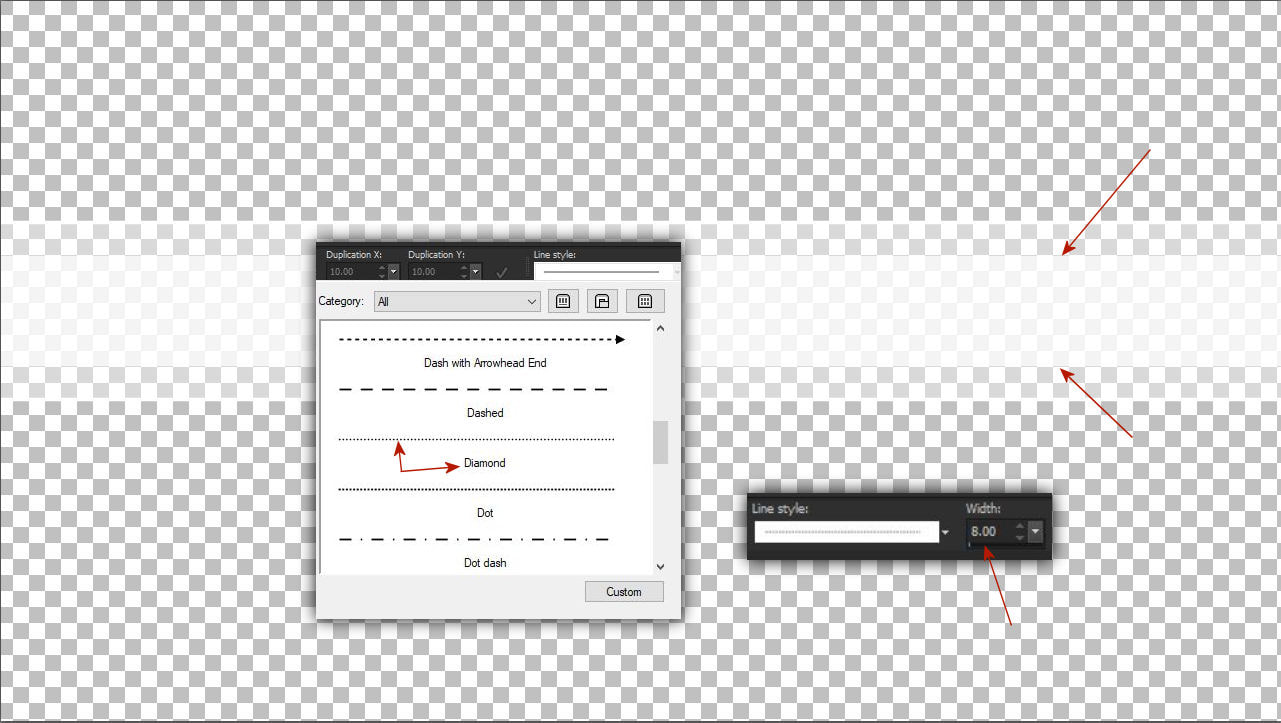
19. Azután válts csikfajtát a diamondra és nagyonn értékre. Majd húzz csíkokat a sötétebb csík mellett.
Then change the type of cat to diamond and very valuable. Then draw stripes next to the darker stripe.
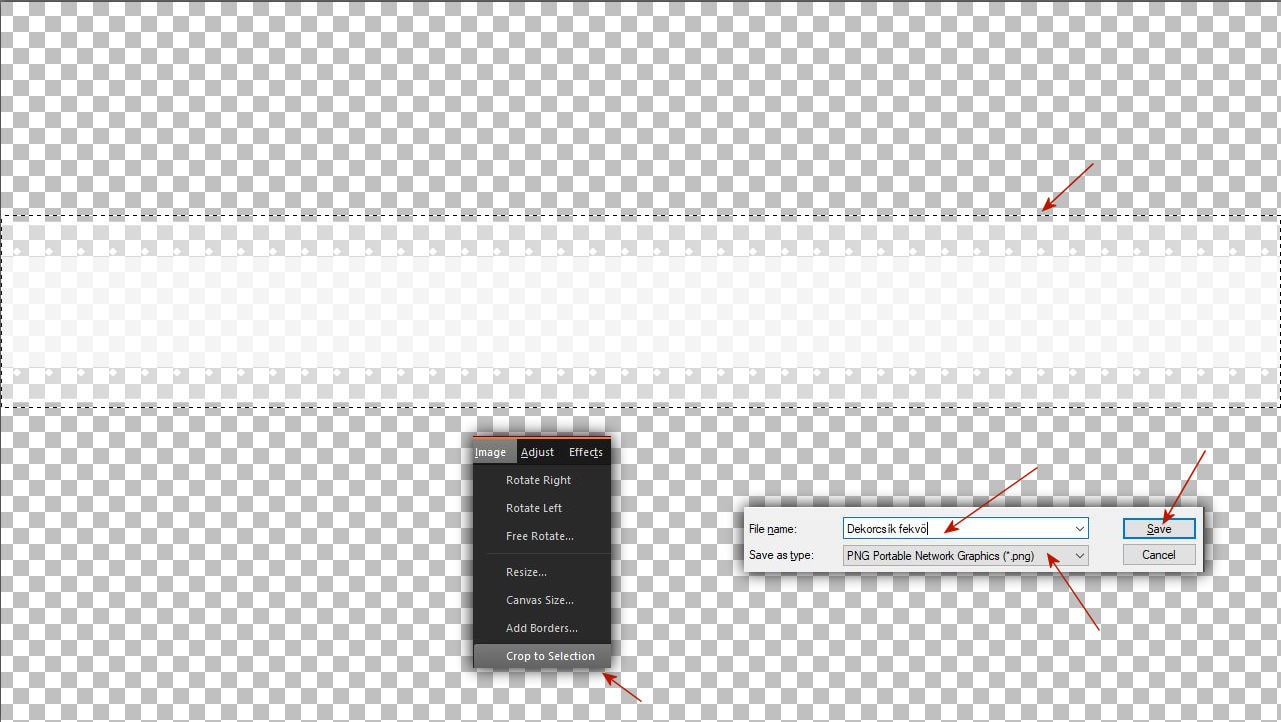
20. Add össze a rétegeket jelöld körbe és vágd ki azt.
Mentsd el a decort png formátumban.
Merge down the layers, make a selection around your decor and cut it out. Save the decor in png format.
21. Aztán fordítsd át ezt a decort 90 fokkal .
Then turn this decor 90 degrees.
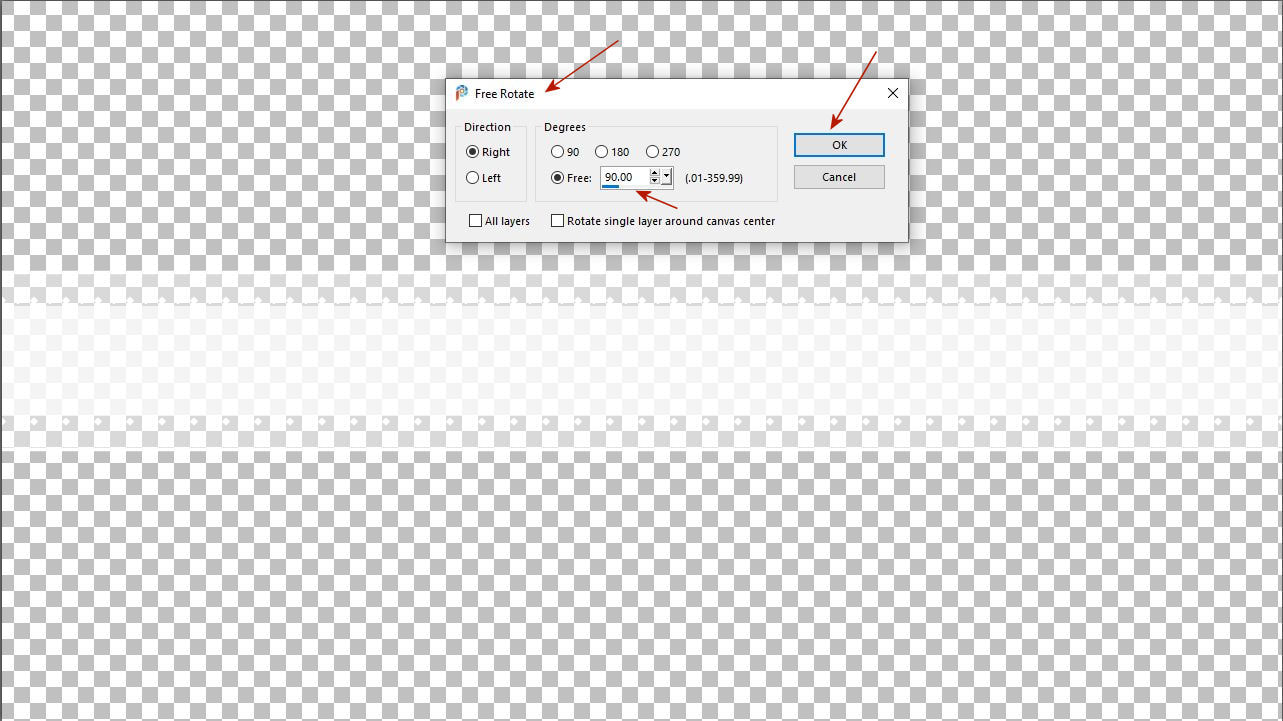
22. Majd ezt is vágd körbe és mentsd el ezt is png formában.
Then cut this out also and save it in png format.