Ezt az effectet úgy hívják, hogy Distorted, hajlítás effect. Ezt akkor használjuk amikor az effecthez használatos képeket valahogy eltorzítjuk olyan formában, hogy a képen látható dolgok viszont nem torzulnak. Itt most ennek egy változatát tanuljuk meg elkészíteni.
This effect is called the Distorted effect. This is used when the images used for the effect are somehow distorted in such a way that the things visible in the image are not distorted. Here we will learn how to make a version of this.

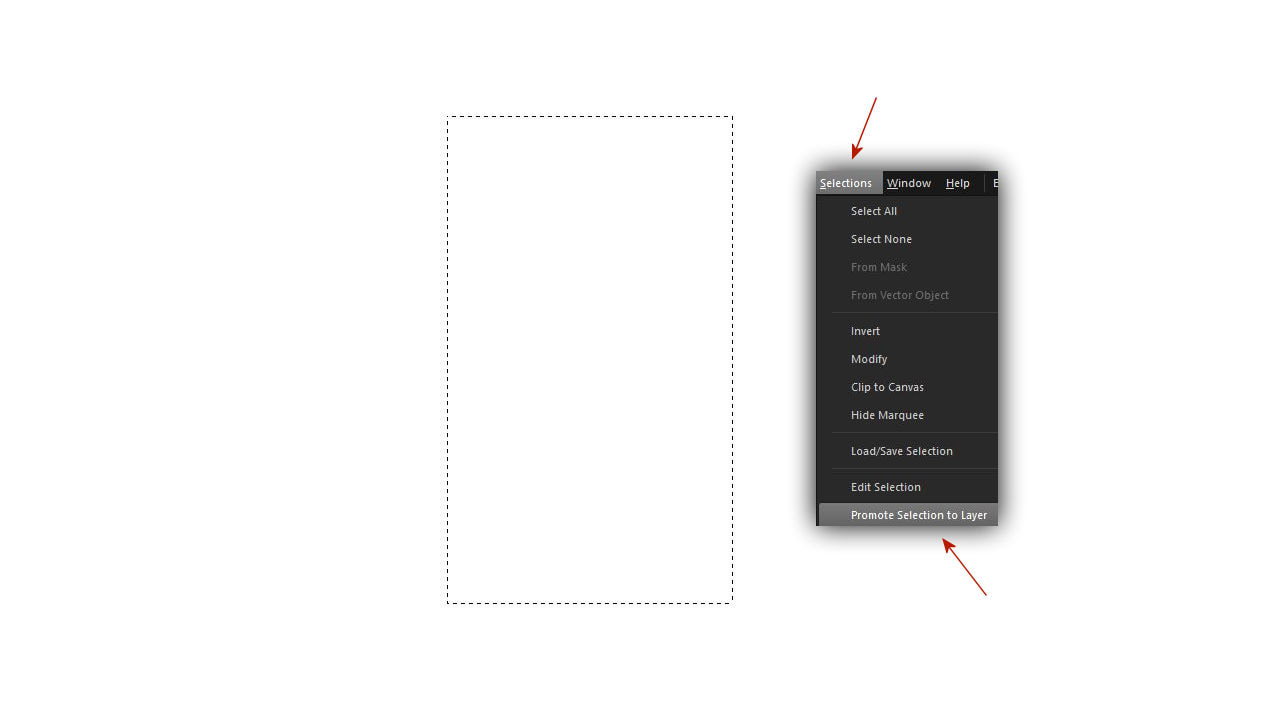
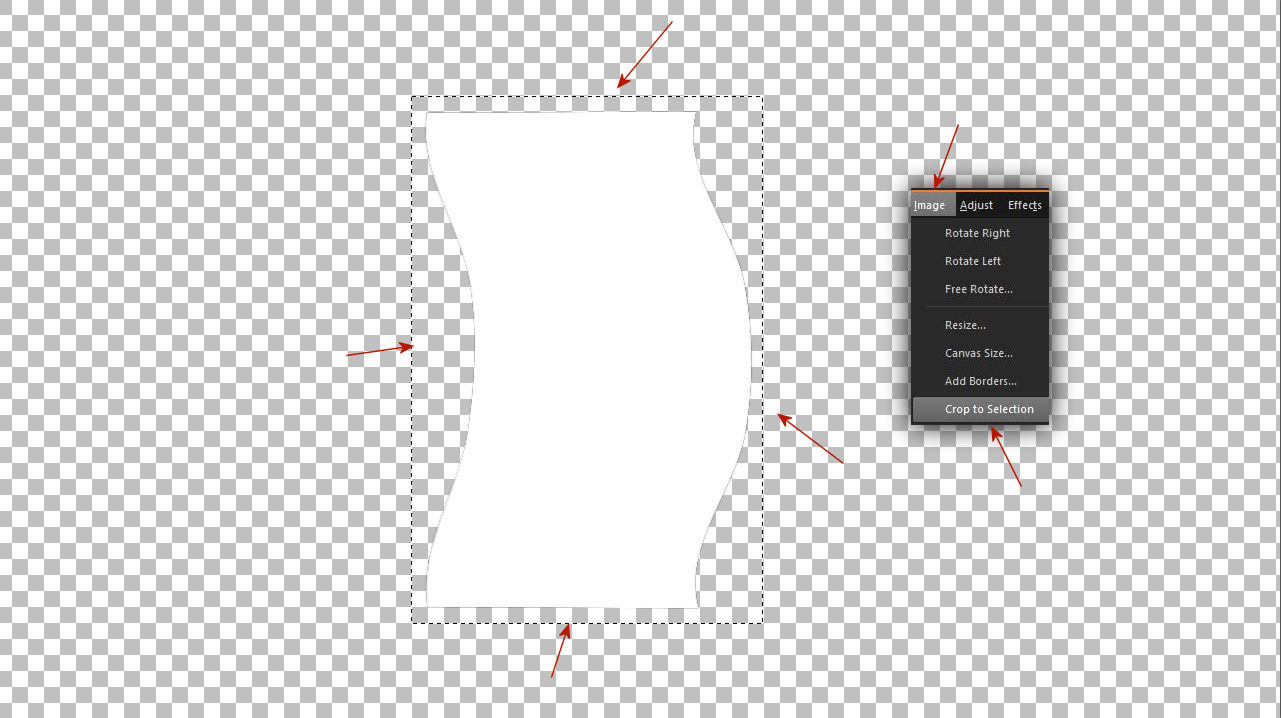
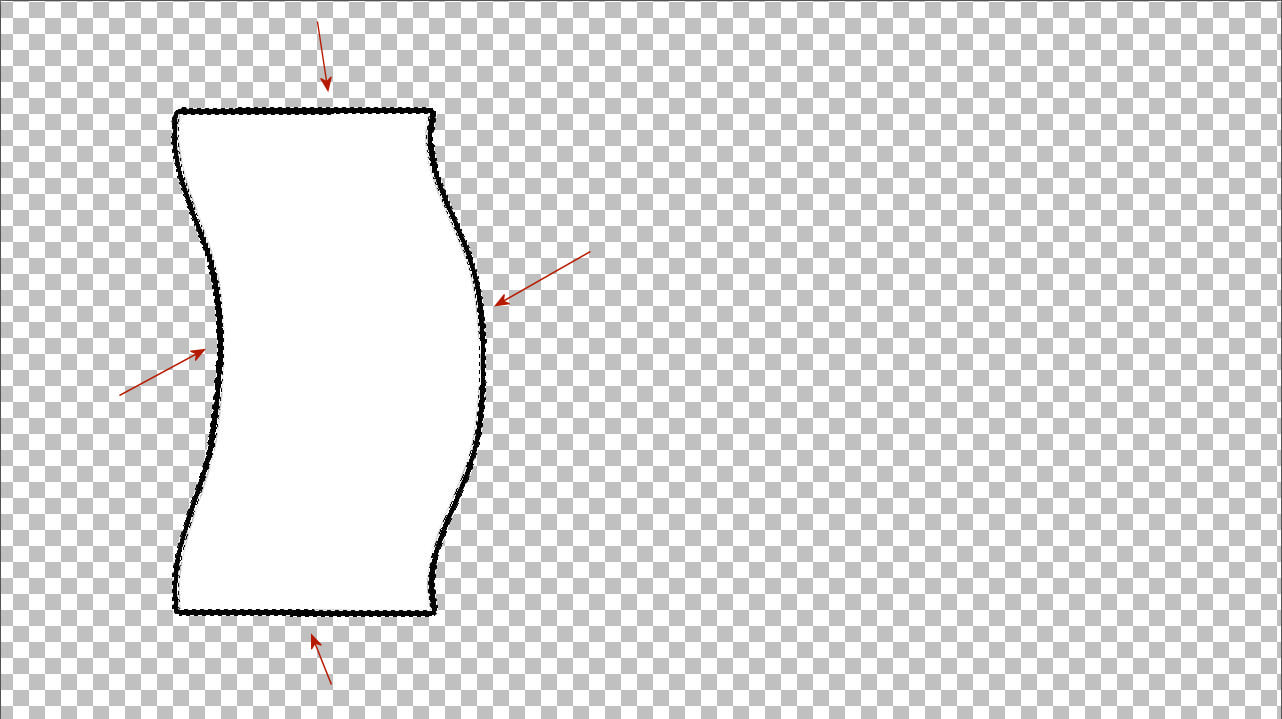
1. Egy fehér alapból jelölj ki egy téglalapot és promótáld azt.
A promótált réteget mentsd el png formában.
Select a rectangle from a white base and promote it.
Save the promoted layer in png format.
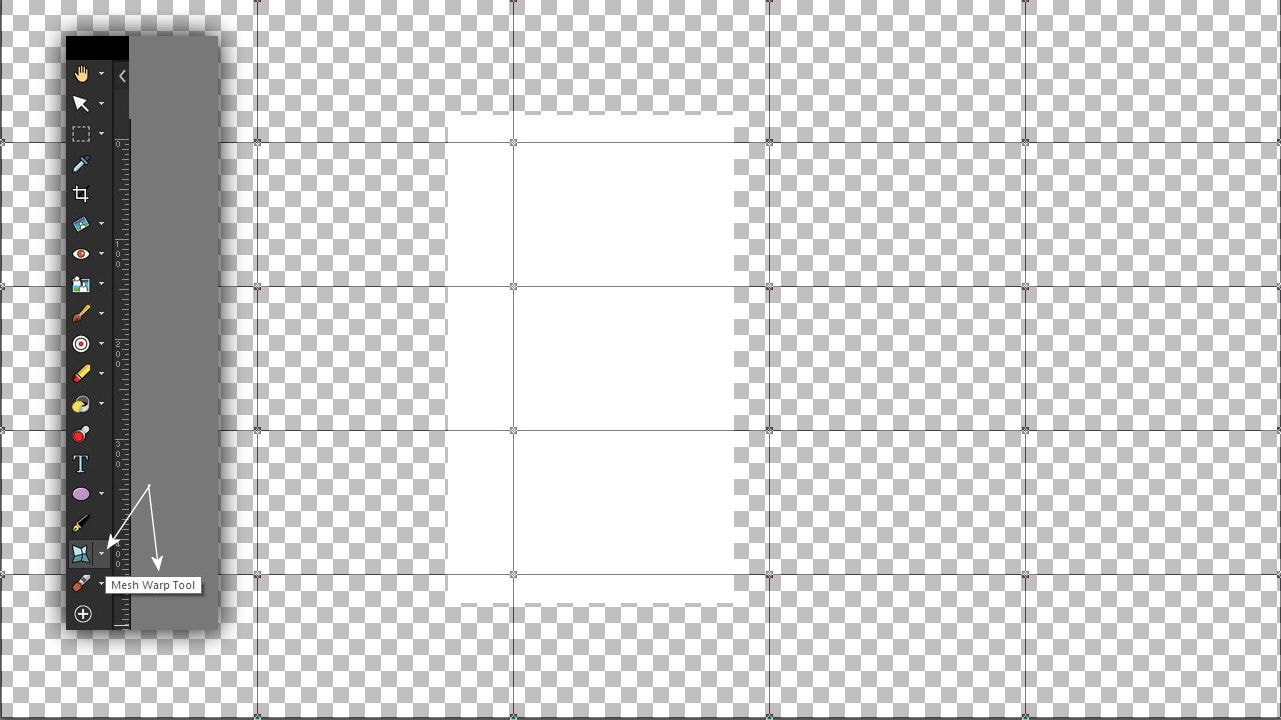
2. Vidd be a képedet a Corel programba és az eszköztárból nyisd ki a Mesh Wrap Toolt
Import your image into the Corel program and open the Mesh Wrap Tool from the toolbar
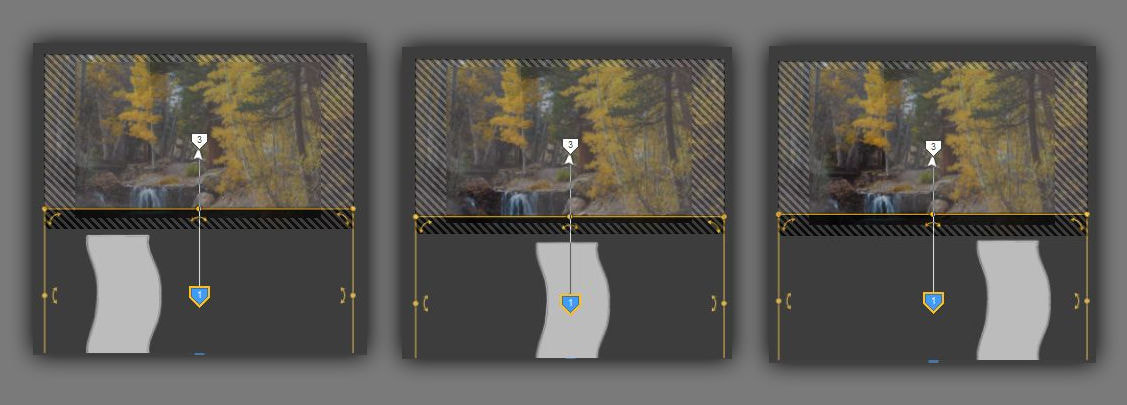
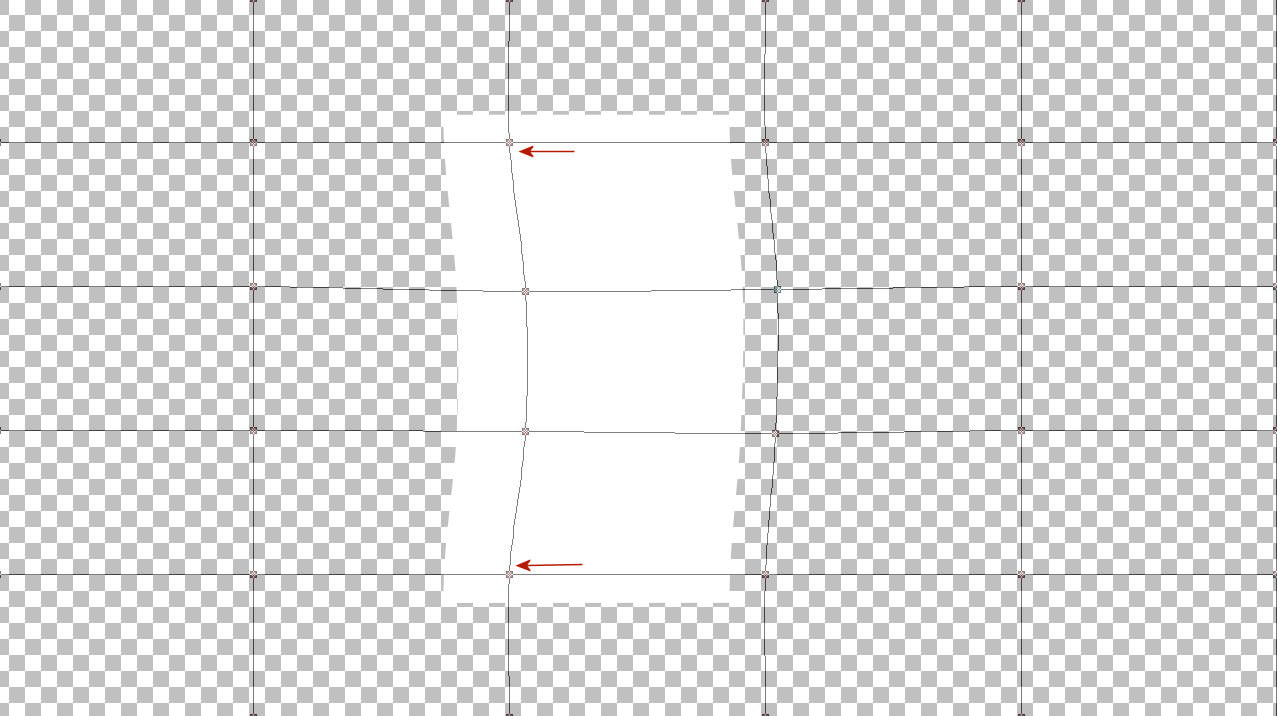
3. Kezdd el a fogógombokatteljesen egyenesen elmozgatni úgy ahogy itt a képen látod.
Ne mozogj le, fel csak akkor engedd el az egered fülét a háló egyenes.
Start moving the handle knobs completely straight as you can see in the picture. Do not move down, let go of your mouse's ear only then the net is straight.
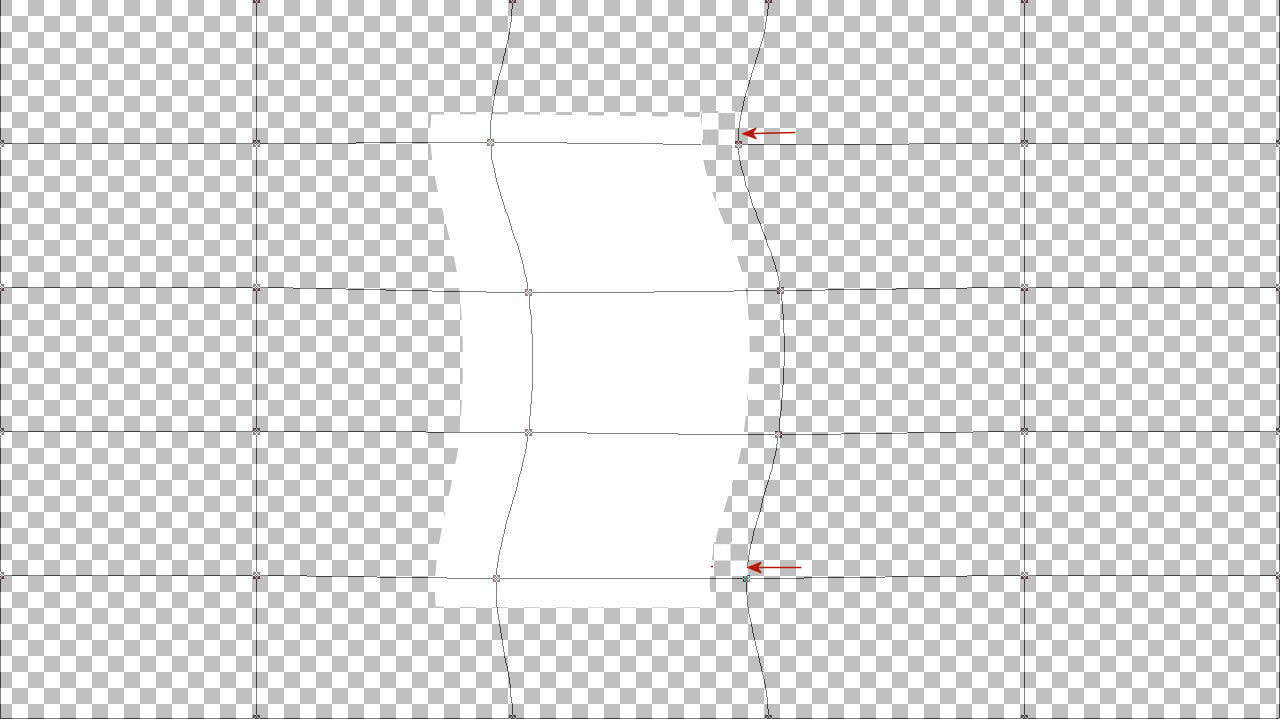
4. Folytasd ahogy itt látod.
Continue as you see here.
5.

6.
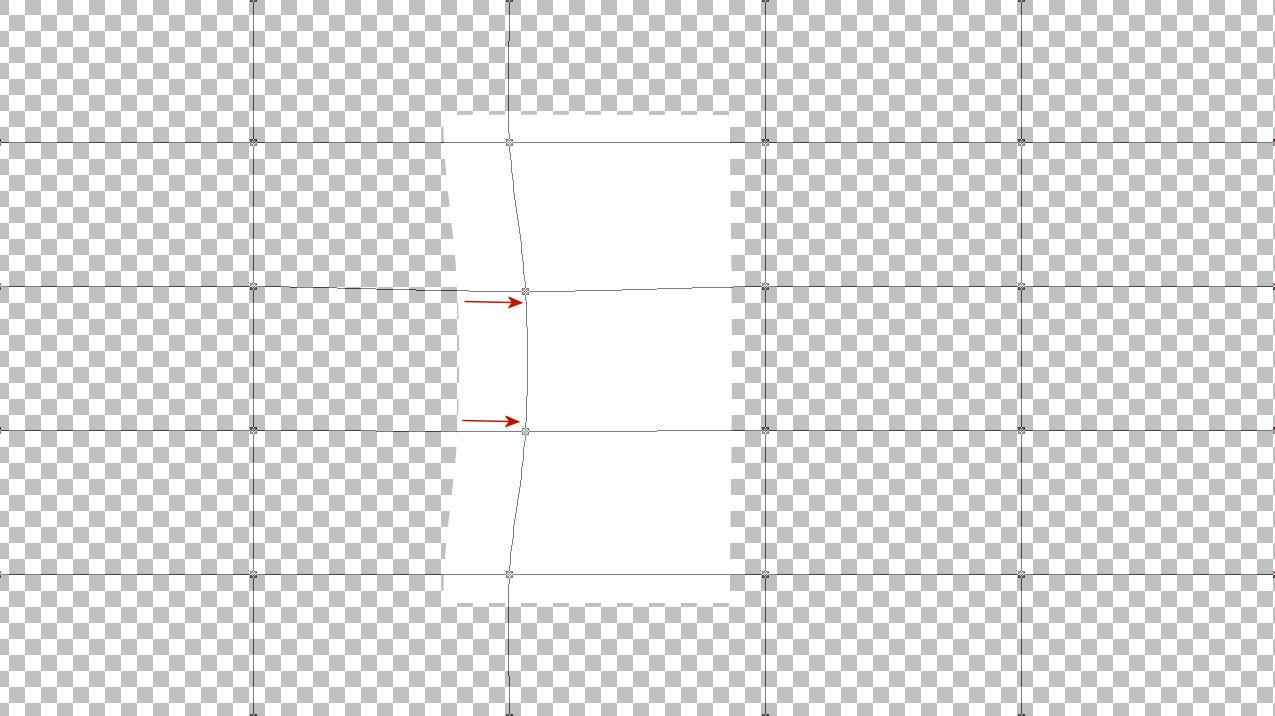
7. Ha a háló nem egyenes akkor a gombokkal egyenesítsd ki.
Ez a müvelet nem könnyü
If the net is not straight, use the buttons to straighten it.
This operation is not easy
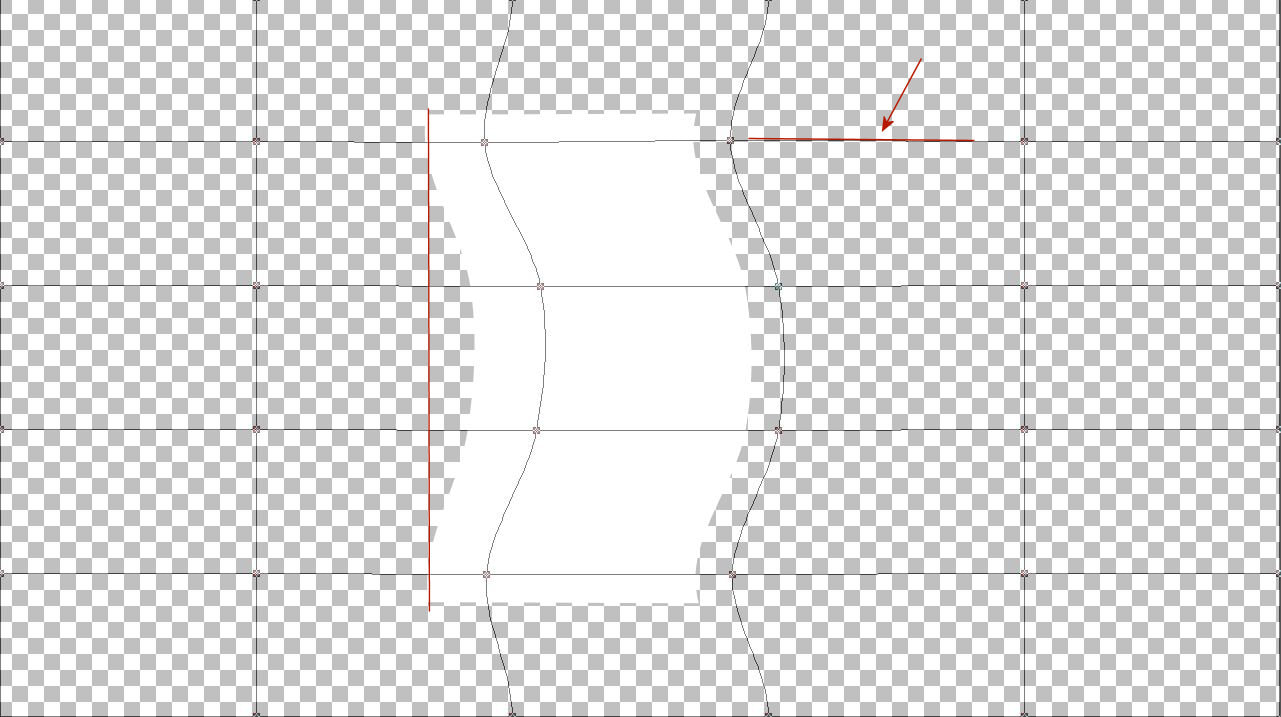
8. Akkor dolgoztál jól ha a téglalapod sarokpontjai egy síkban vannak.
You have worked well when the corner points of your rectangle are in the
same plane.
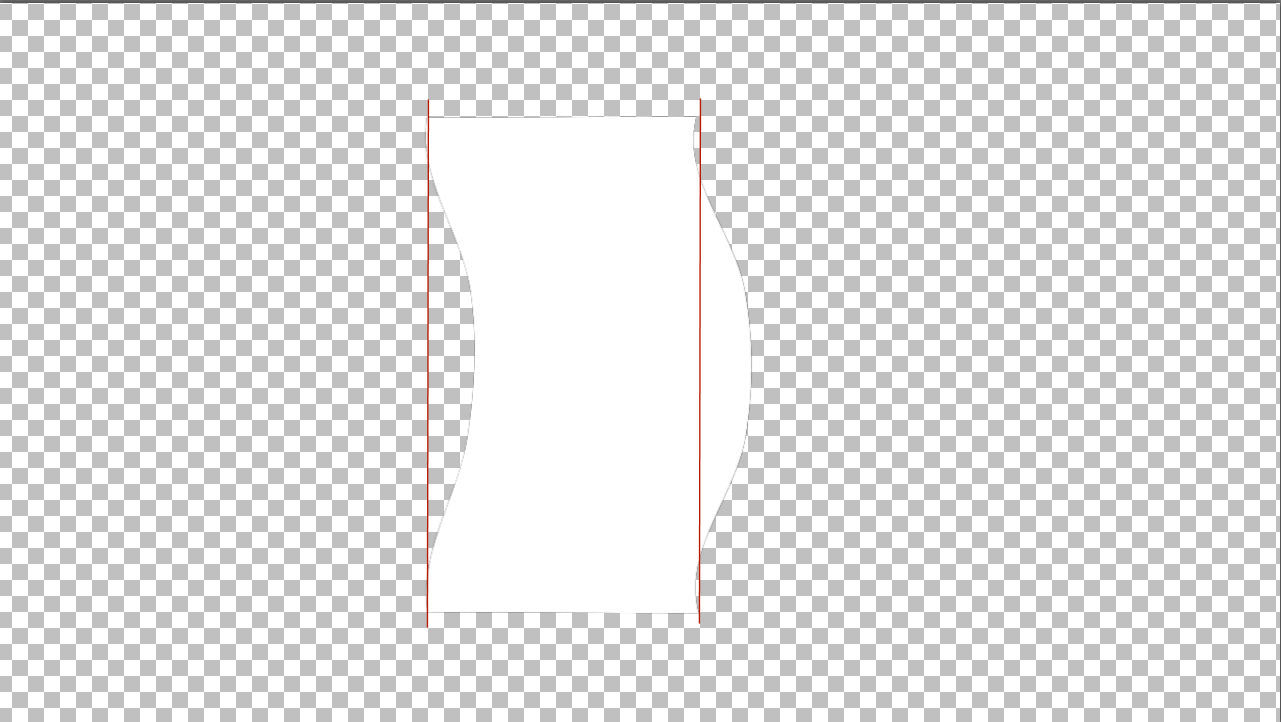
9. Jelöld ki a téglalapodat és vágd ki azt.
Select your rectangle and cut it out.
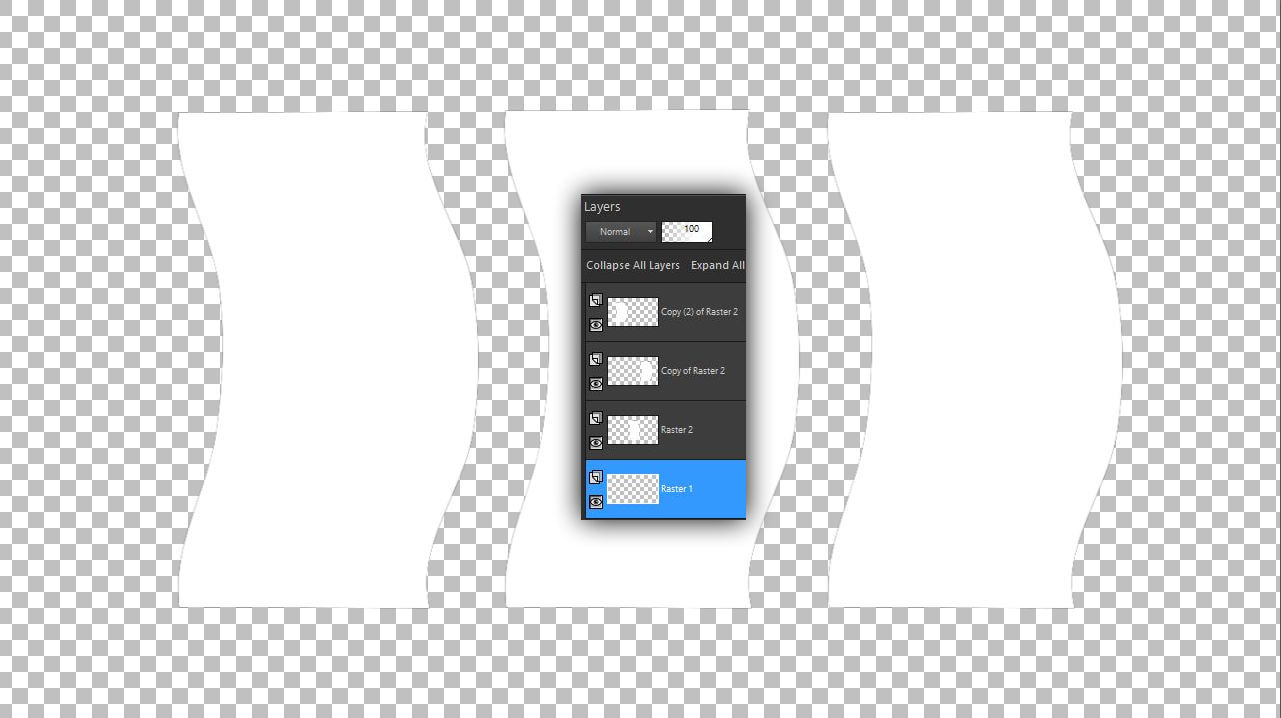
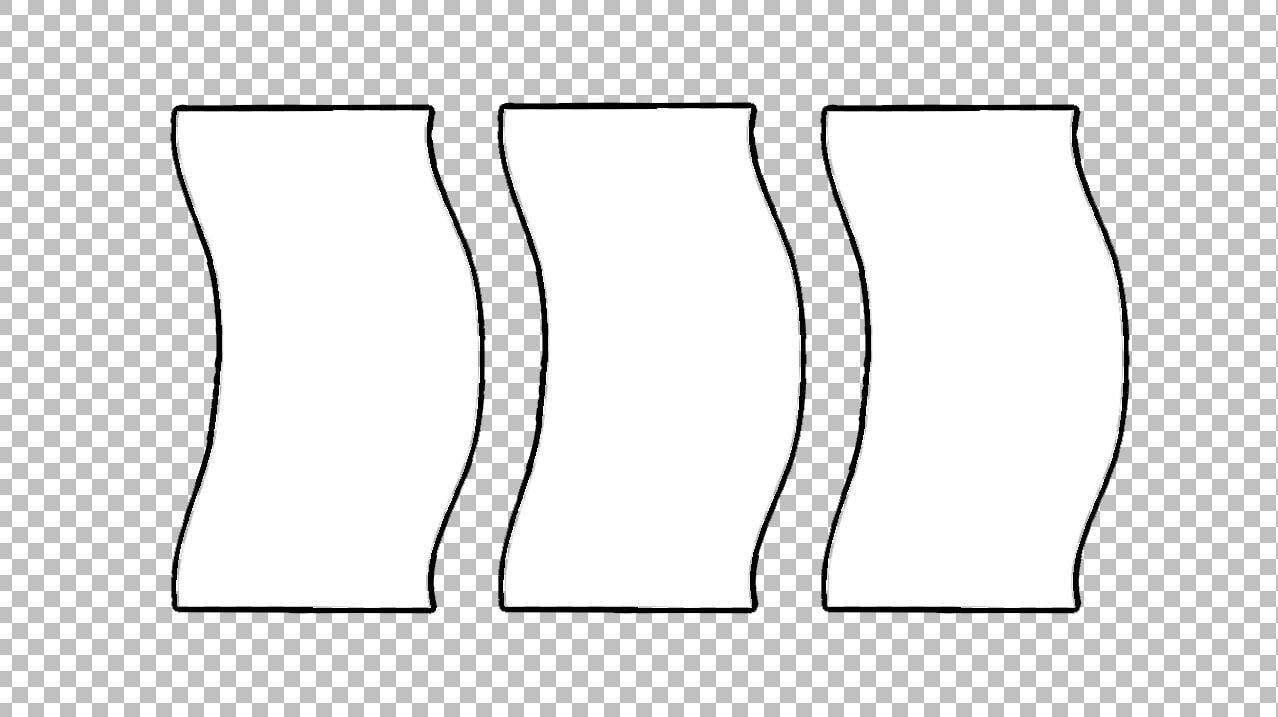
10. Hozz be egy üres lapot és másold be a téglalapodat középre. Majd duplázd meg a rétegeket kétszer és a rétegeket helyezd el szépen egyforma távolságra.
Load in a blank sheet and copy your rectangle in the middle. Then duplicate the layers twice and place the layers neatly at the same distance.
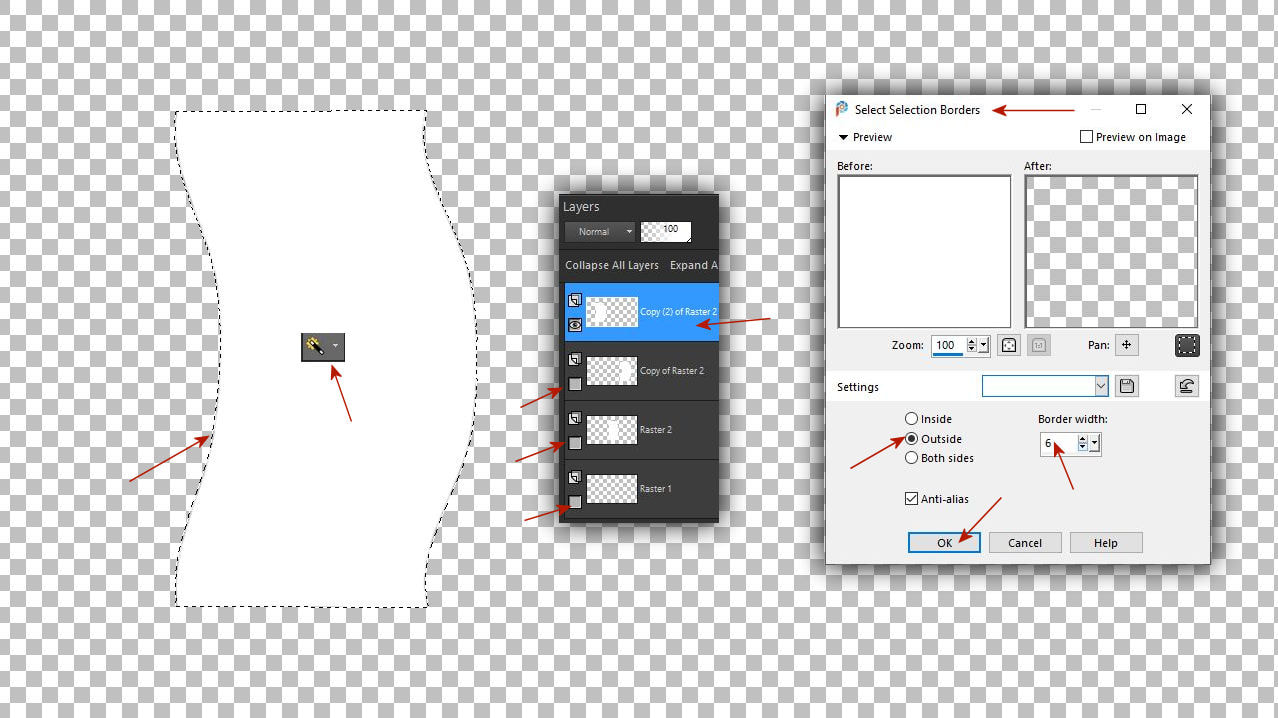
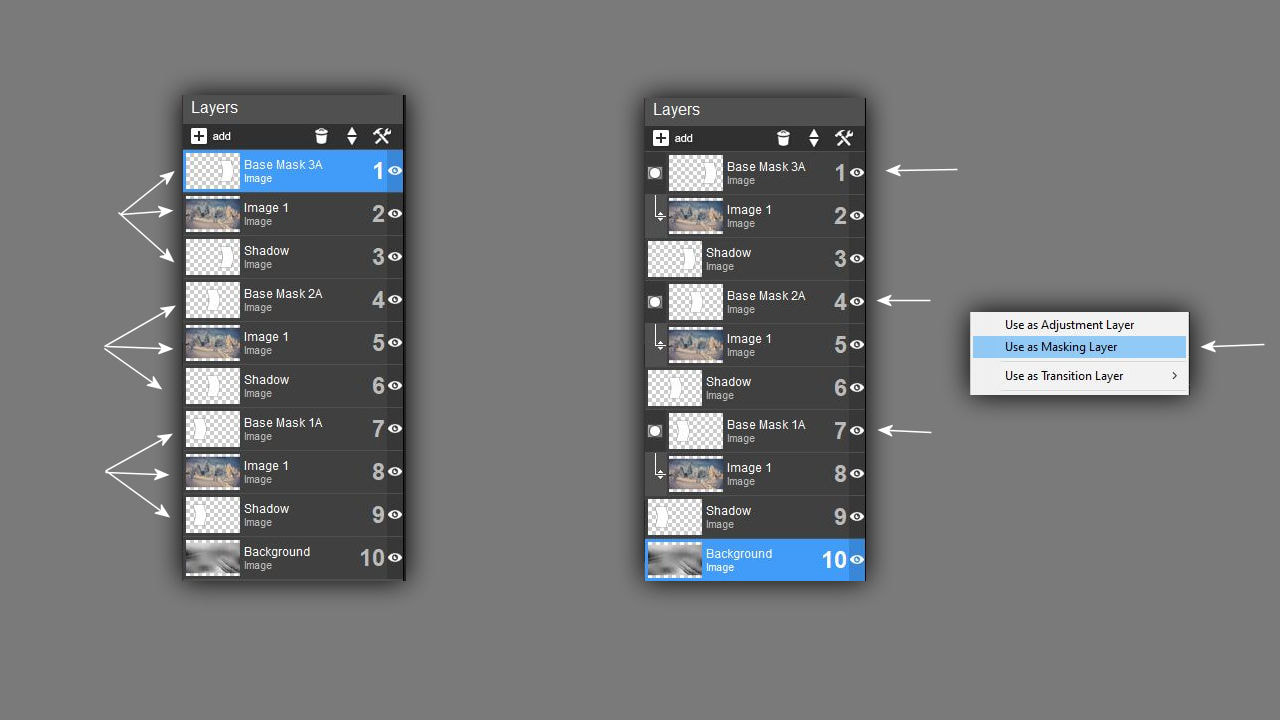
11. Csukd be az alsó rétegszemeket és az elsö téglalapod rétegén állj. Kattints a varázspálcával a fehér részre hogy kijelöld az objektumot.
Majd nyisd ki ezt a szüröt.
Selection - Modify - Select Selection Borders
Close the lower layer stitches and stand on the layer of your first rectangle. Click the white part with the magic wand to select the object.
Then open this menü.
Selection - Modify - Select Selection Borders
12.
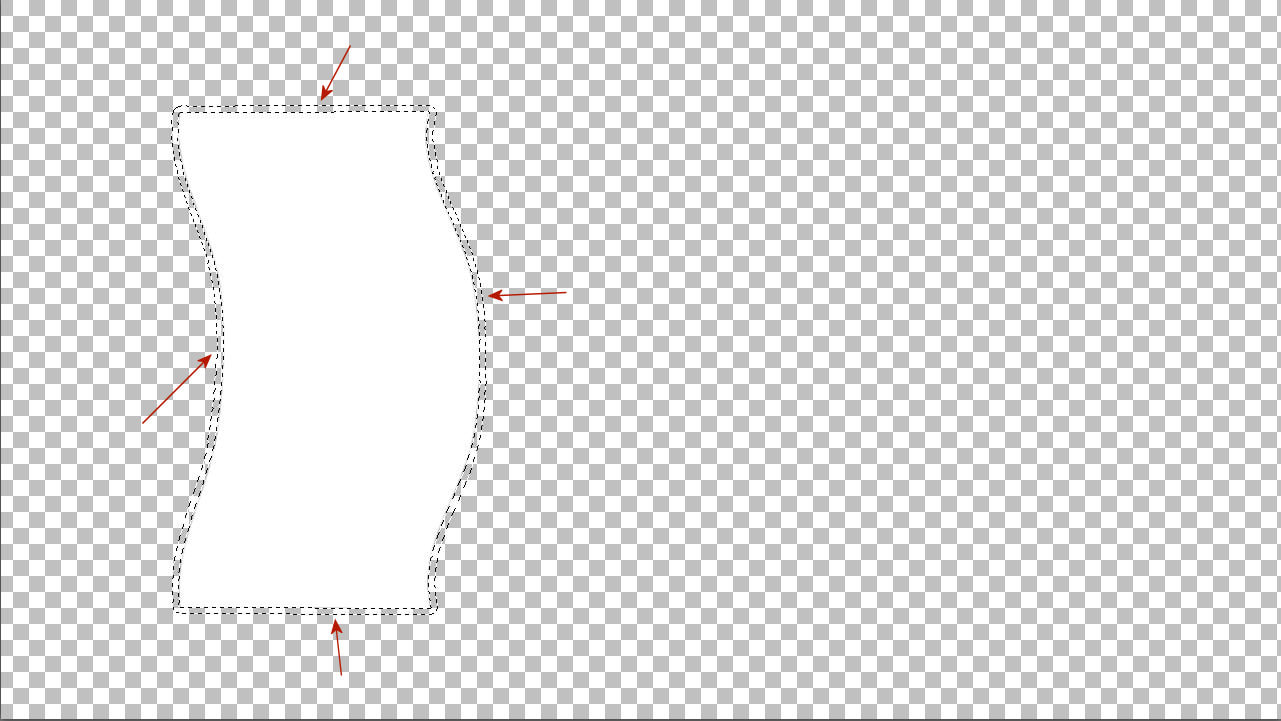
13. A kijelölést öntsd ki feketével. Majd mentsd el ez az elsö téglalapot png formában base Mask 1 néven.

14. Ezt a müveletsort és a mentéseket csináld meg mindegyik rétegeddel külön.
Do this sequence of operations and saves with each of your layers separately.
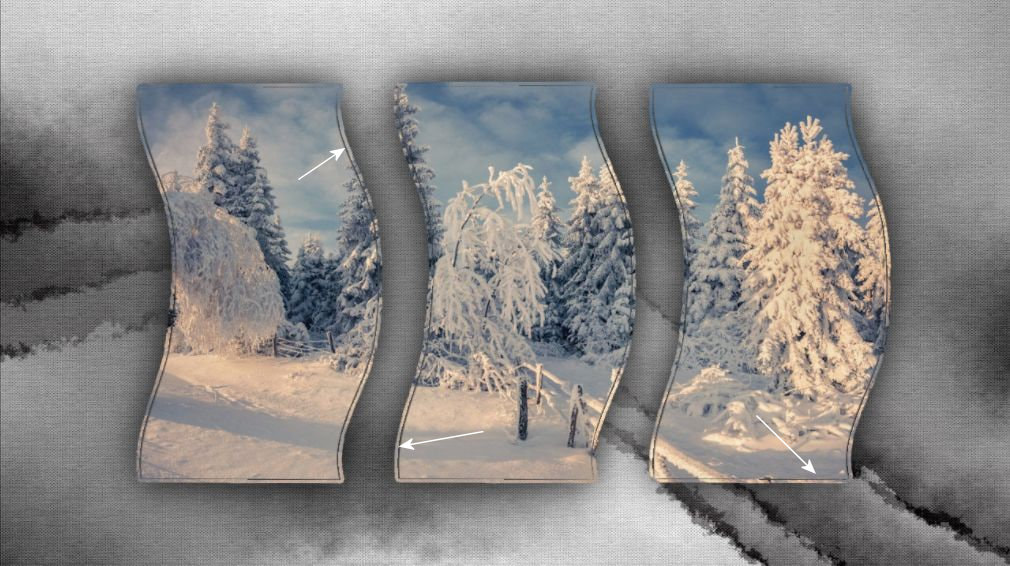
15. Ha jól dolgoztál ez a szegély így fog kinézni a Pro Show Programban.
If you worked well, this border will look like this in the Pro Show Program.
16. A Pro Showban folytatjuk. Igy kell a rétegeidet összerakni alap módon.
Ugyanazt a képet kell használnod egy -egy csempén 1280x720-as méretben.
We continue in the Pro Show. This is how the layers should be put together in a basic way. You must use the same image on each tile in 1280x720 size.
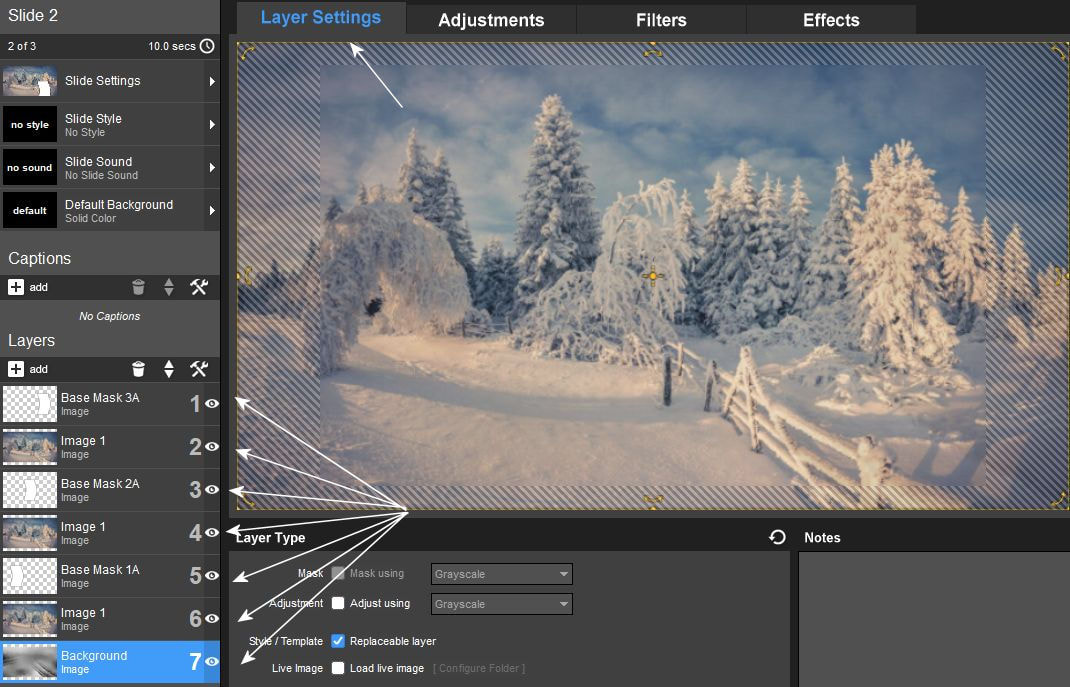
17. A maszk rétegeidet meg kell dupláznod és mindegyikböl kell egy a képed felett és a képed alatt is lennie. A képek alatti rétegeket át kell nevezned shadow-rétegnek. Majd maszkold össze öket ahogy itt a képen látod.
You need to double your mask layers and there should be one of each above and below your image. You have to rename the layers under the images as shadow layers. Then mask them together as you see in the picture.
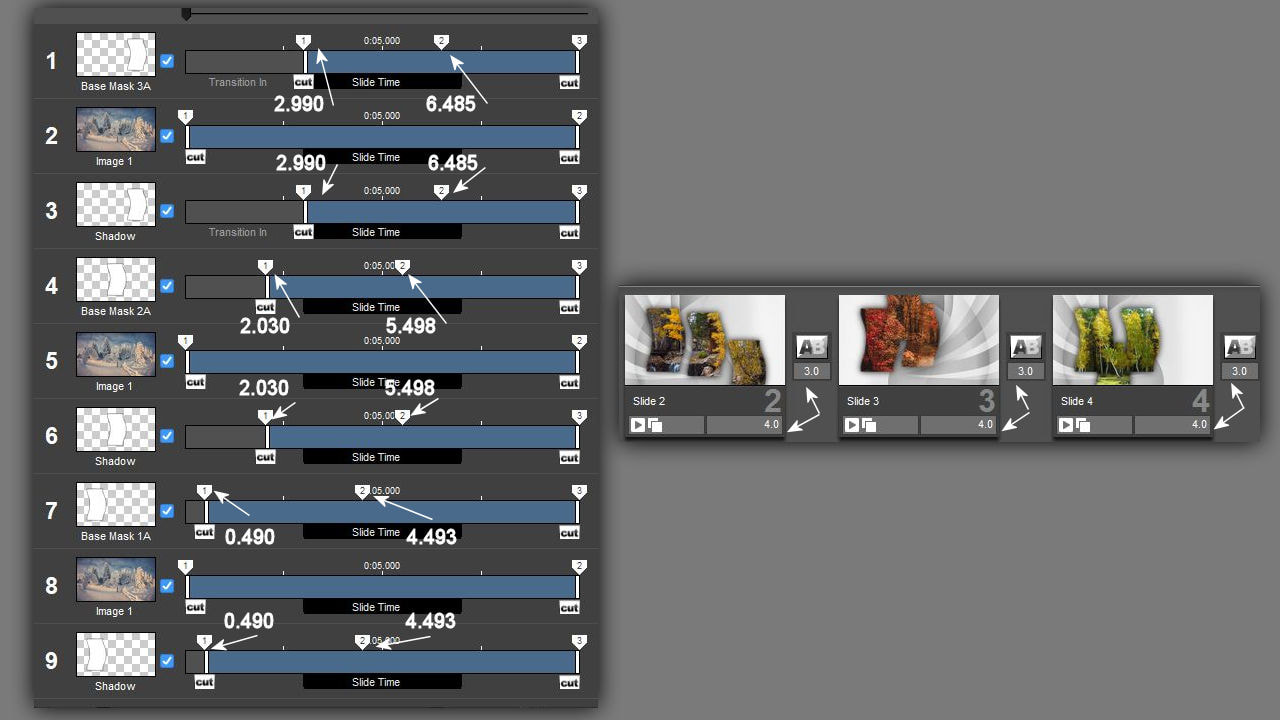
18. A keyframe pontokat így állítsd be a rétegeken.
A csempék ideje 4 és 3 másodperc.
Set the keyframe points on the layers like this. Tile times are 4 and 3 seconds.
19. Mindenki úgy mozgatja a maszkokat ahogy neki megfelel. A layer settingsben el kell helyezni a kiindulási pontjaikaon. Olyan irányból indítod a három maszkot ahonnan te szeretnéd. Egyetlen dologra kell ügyelned hogy azok indulási pontjai a screen területen kívül legyenek. Itt most a képen nekem alulról érkezik mindhárom maszk késlelteve egymáshoz képest. Tehát a videó látványában a mozgás teljesen rátok van bízva.
Everyone moves the masks as they see fit. In the layer settings, they must be placed at their starting points. You start the three masks from the direction you want. You have to make sure that their starting points are outside the screen area. Here, in the picture, the delay of all three masks is coming to me from below. So the movement in the view of the video is completely up to you.