Ebben a bemutatóban egy igazán különleges horizontális transition-t készítünk. A késöbbiekben megcsináljuk ennek a vertikális változatát is. Ezzel a módszerrel egy gyakorlott program felhasználó több elegáns és dekoratív transition-t csinálhat csak egy kis kreativitás kell hozzá.
In this presentation, we create a really special horizontal transition. Later on, we will also make a vertical version of this. With this method, an experienced program user can make several elegant and decorative transitions, all it takes is a little creativity.

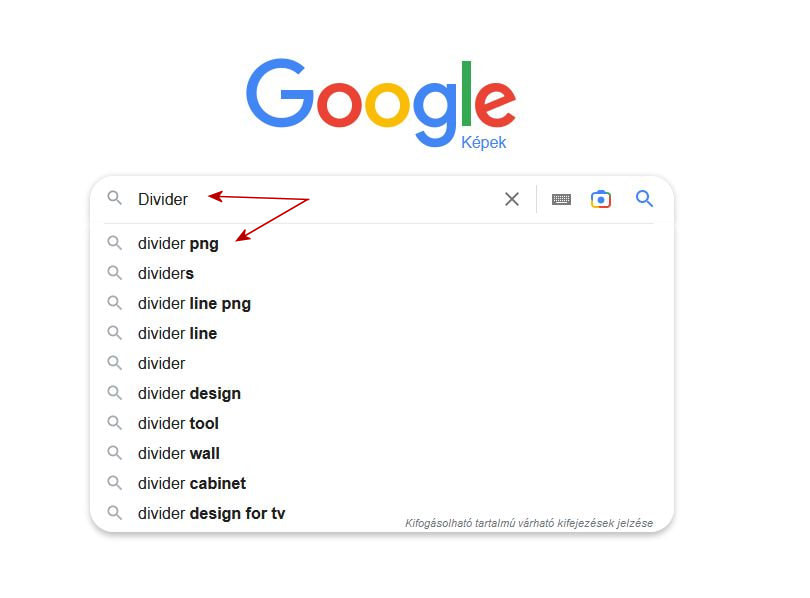
1. Elöször a google képkeresöben irjátok be azt hogy divider (elválasztó )png formában.
First, enter the word divider in the form of png in the google image search.
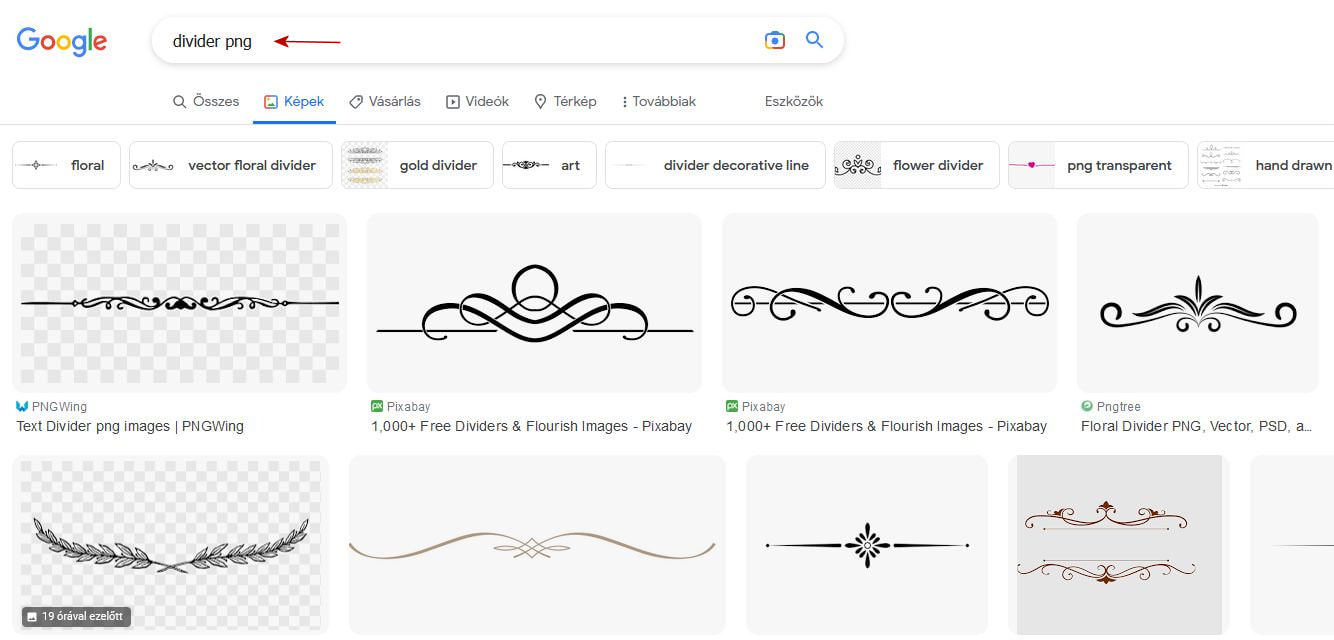
2. Aztán amikor feljöttek a képek akkor keress egy szép formát ezekböl a dekoratív képekböl. De egyenesen egy png weblapon is kereshetsz ezzel a szóval.
Then, when the pictures came up, look for a nice shape from these decorative pictures. But you can also search directly on a png web page with this word.
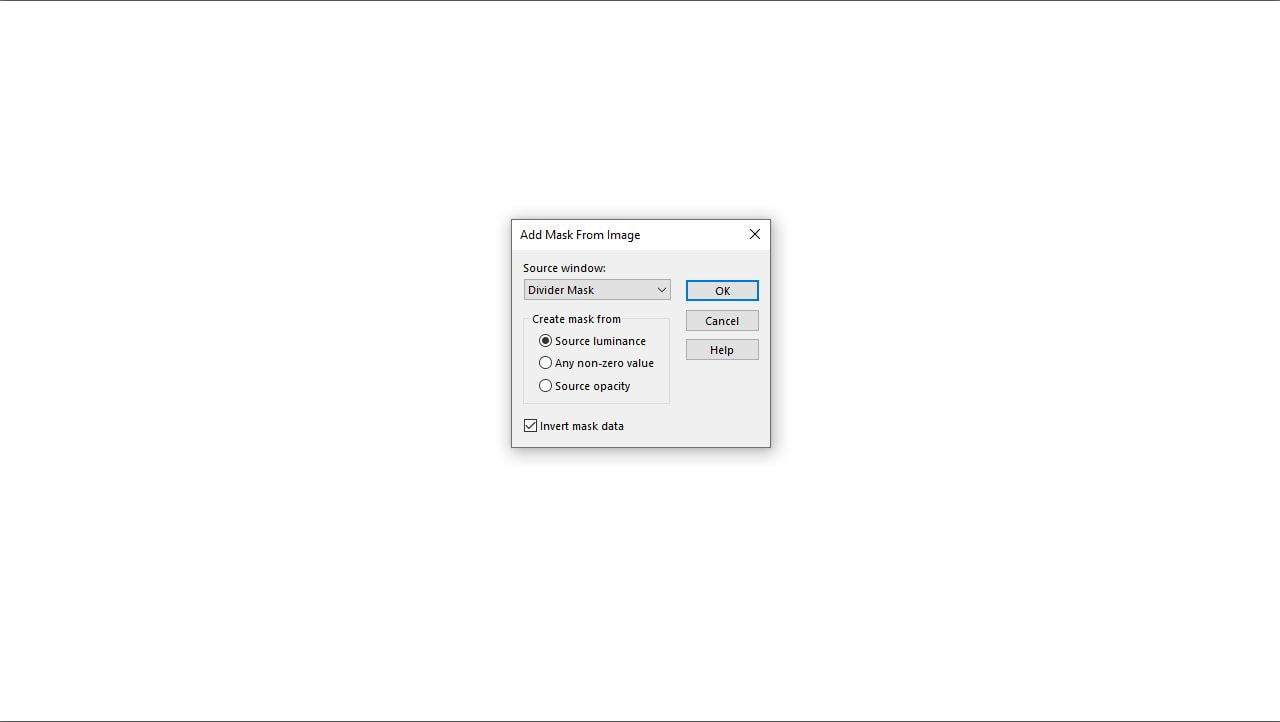
3. Kezdj el dolgozni egy photoshop programban a kiválasztott képeddel. Én itt a Corelban dolgozom és egy maszkot készítettem. Ti is csináljátok ezt a maszkot meg.
Start working in a photoshop program with your selected image. I work here at Corel and I made a mask. You can also make this mask.

4. Majd egy fehér lapra maszkoljátok rá a ti elválasztótokat.
Then mask your divider onto a white sheet.
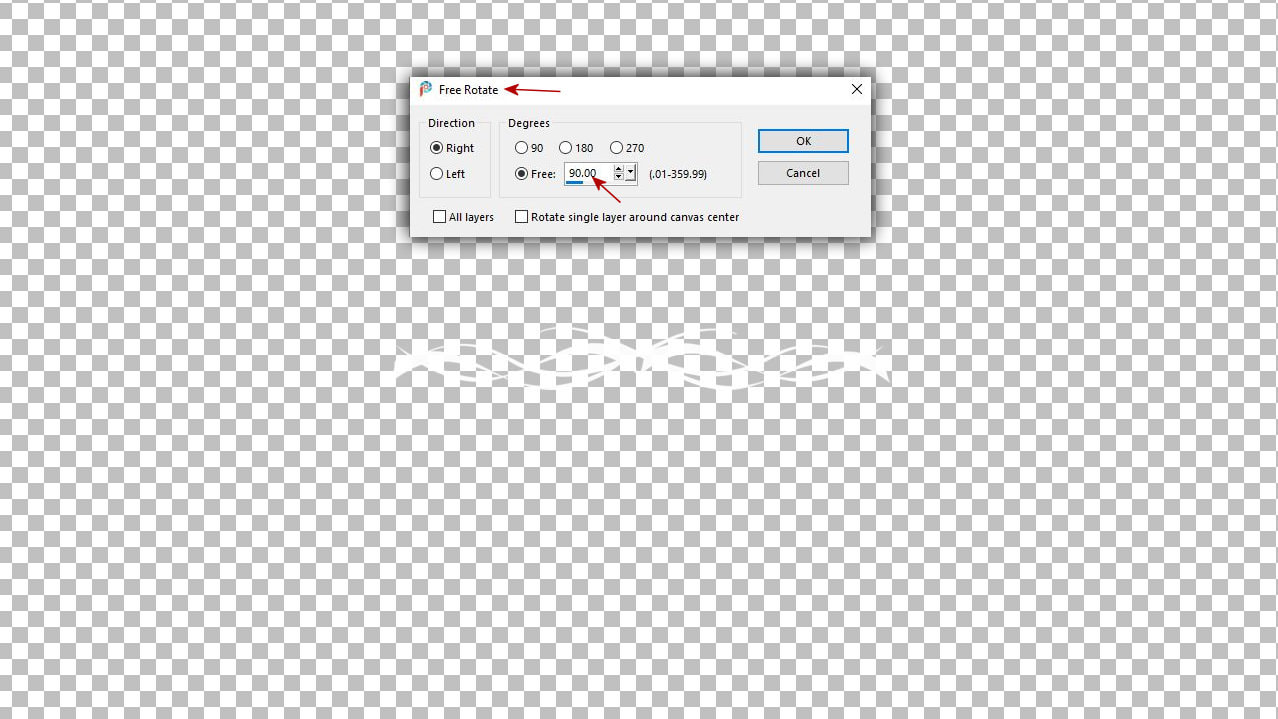
5. Fordítsátok át a kész dekorotokat függöleges irányra.
Turn your finished decorations to the vertical direction.
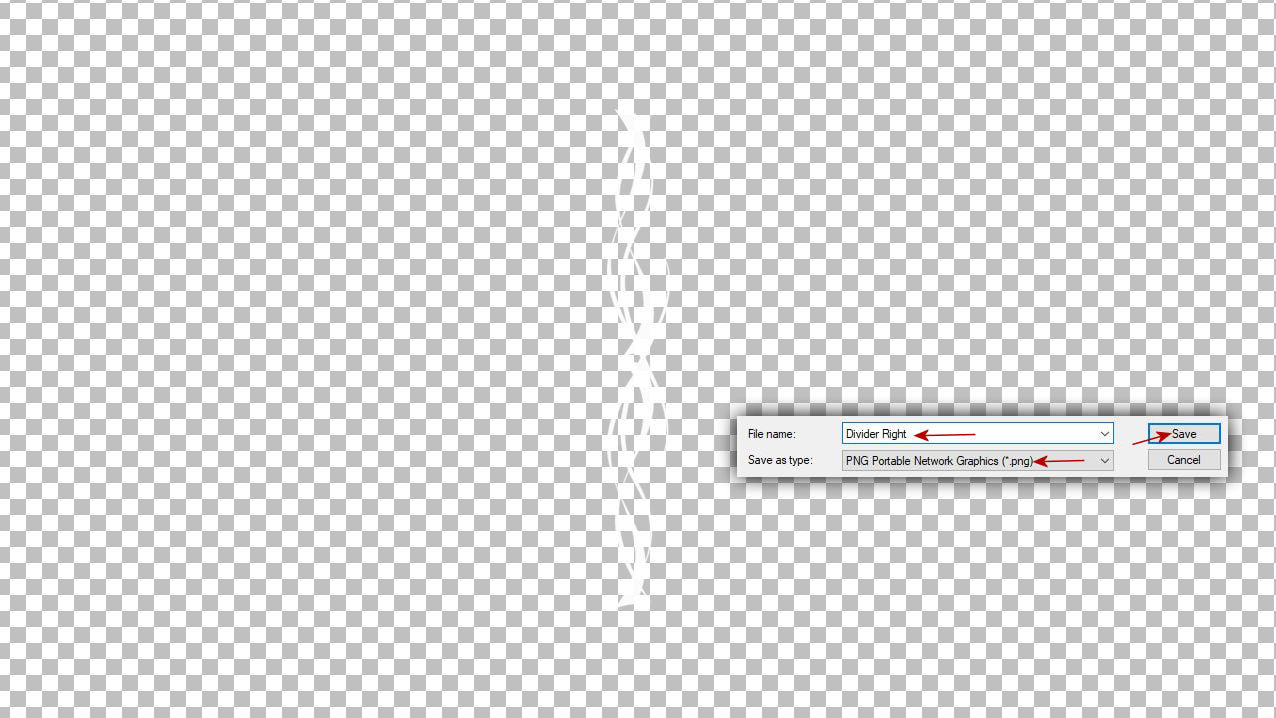
6. Majd mentsétek el jobbos dekorként png formában.
Then save it as a decoration in png format.
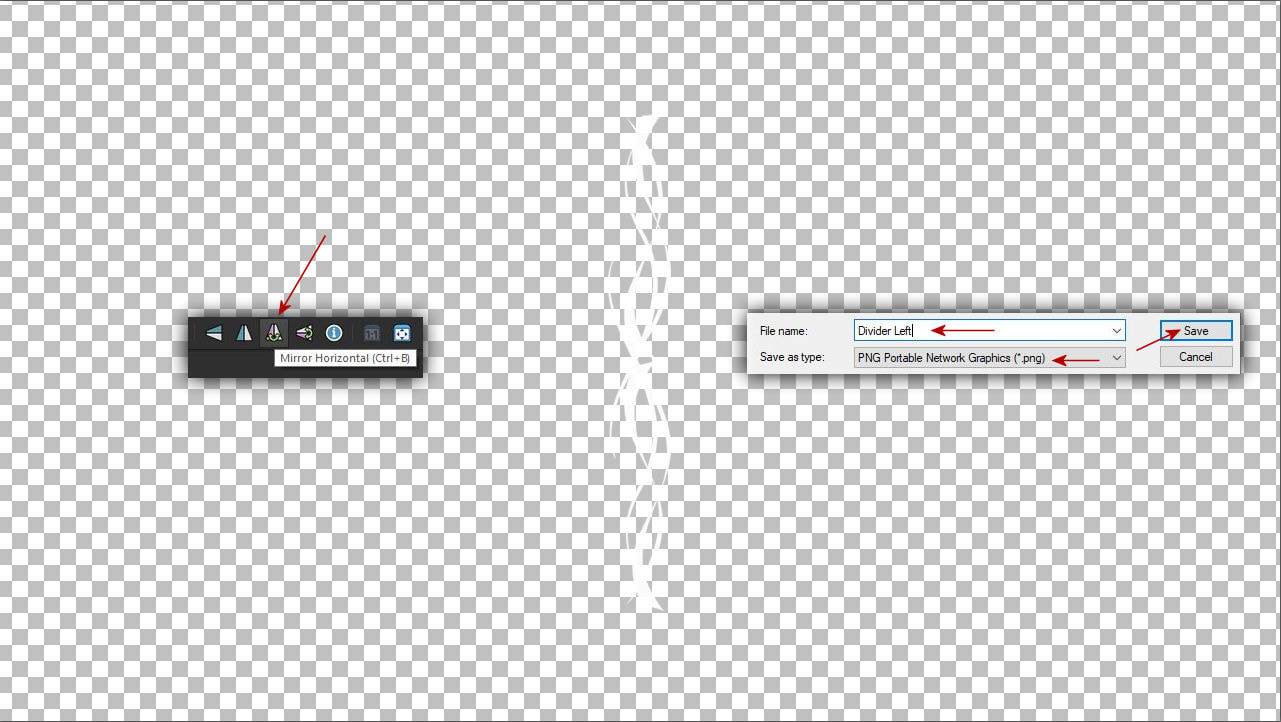
7. Majd tükrözd át a másik oldalra és mentsd el balos dekorként png formában.
Then mirror it to the other side and save it as a left decor in png format.
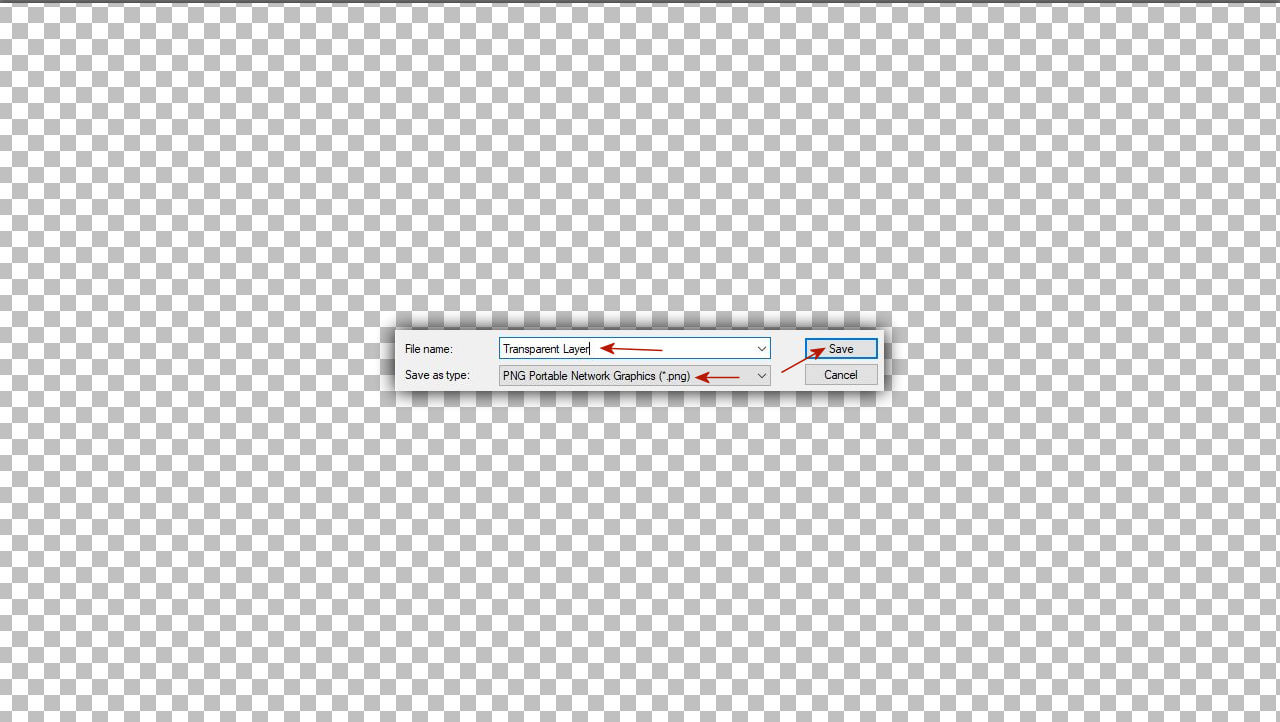
8. Azután simán ments el egy 1280 x 720 méretü png lapot is.
Erre szükség lesz majd a következö lépésekben.
Then simply save a 1280 x 720 png sheet. This will be needed in the next steps.
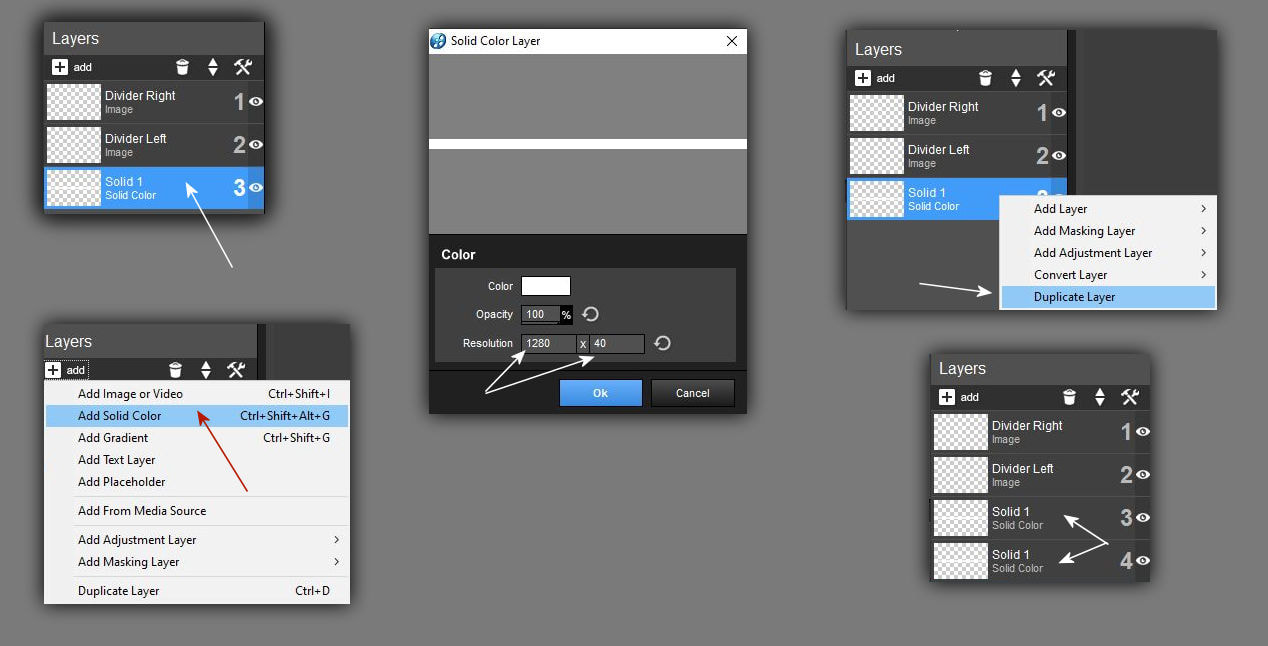
9. Kezdd el összerakni a rétegeket fentröl lefelé, ahogy itt látod.
Start creating the layers from top to bottom as shown here.
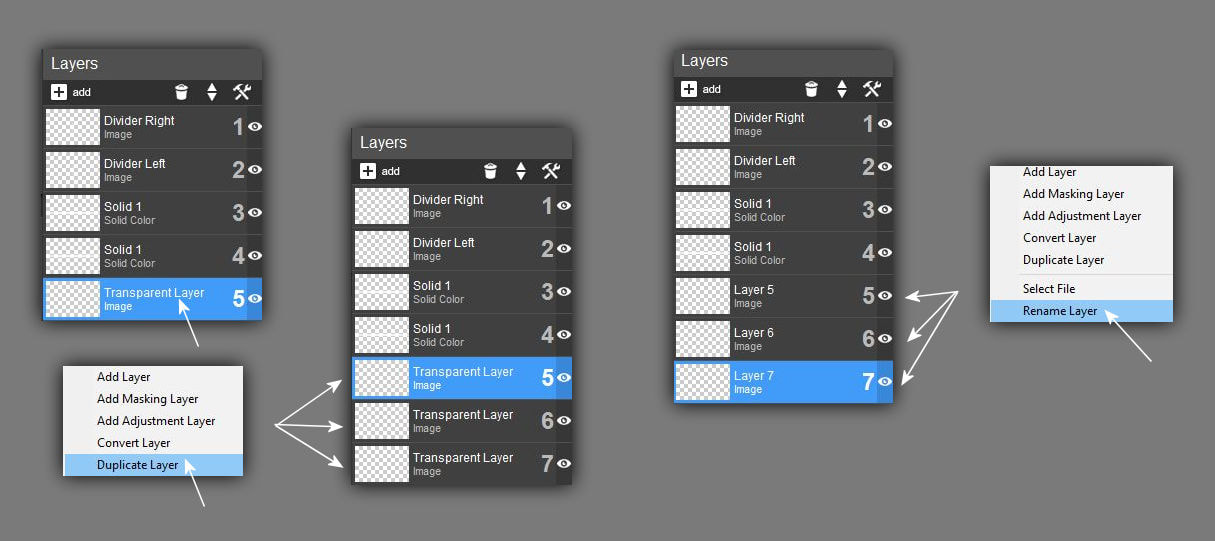
10. Dolgozz tovább a kép alapján.
Continue working based on the image.
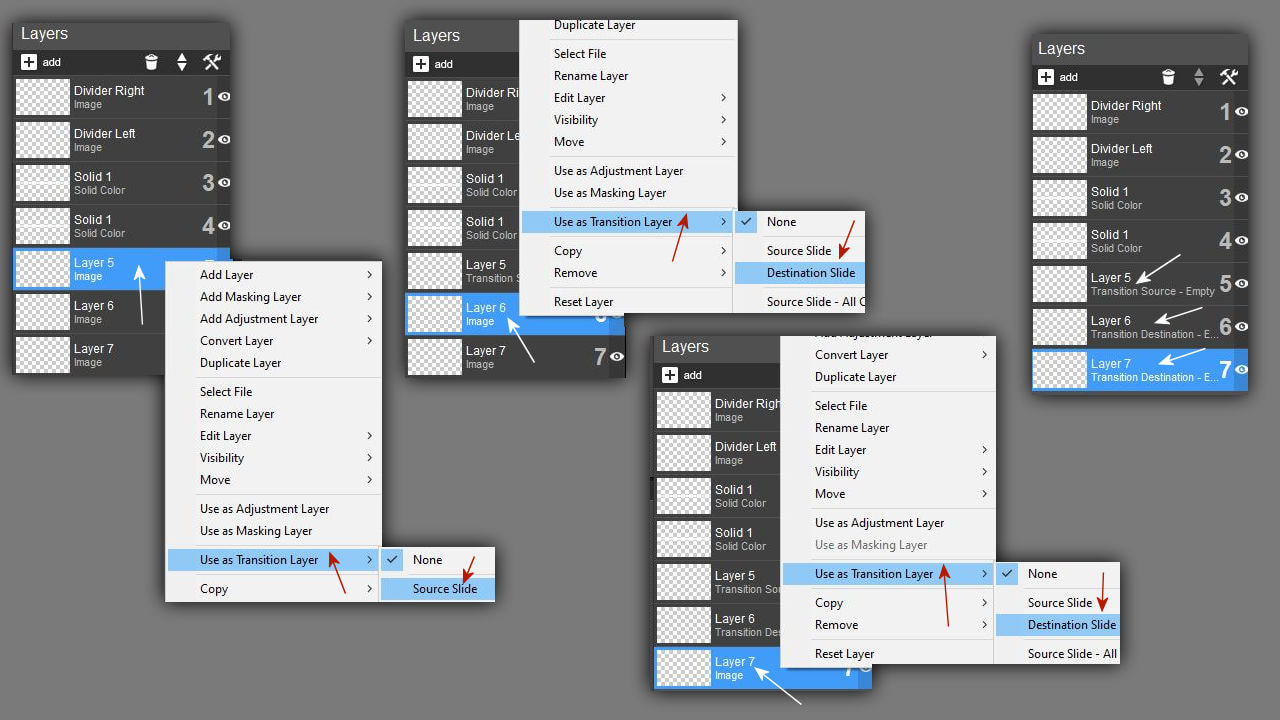
11. Nagyon figyelmesen dolgozz ezzel az utolsó 3 réteggel.!!!
Work very carefully with these last 3 layers.!!!
11. Helyezd el a keyframe pontokat a rétegeken.
Place the keyframe points on the layers.
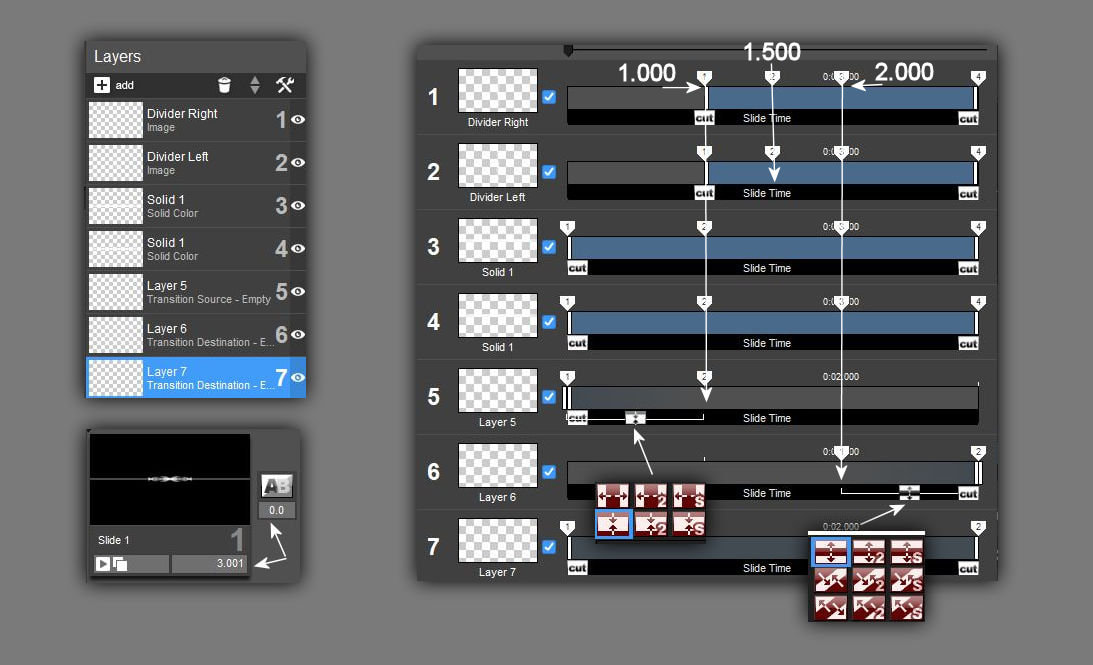
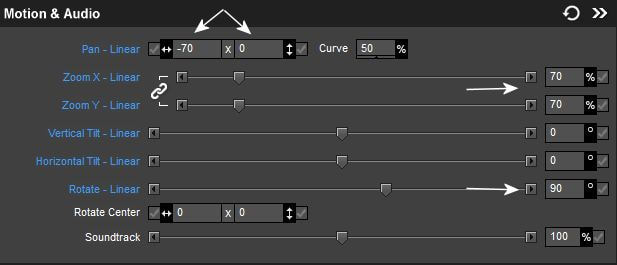
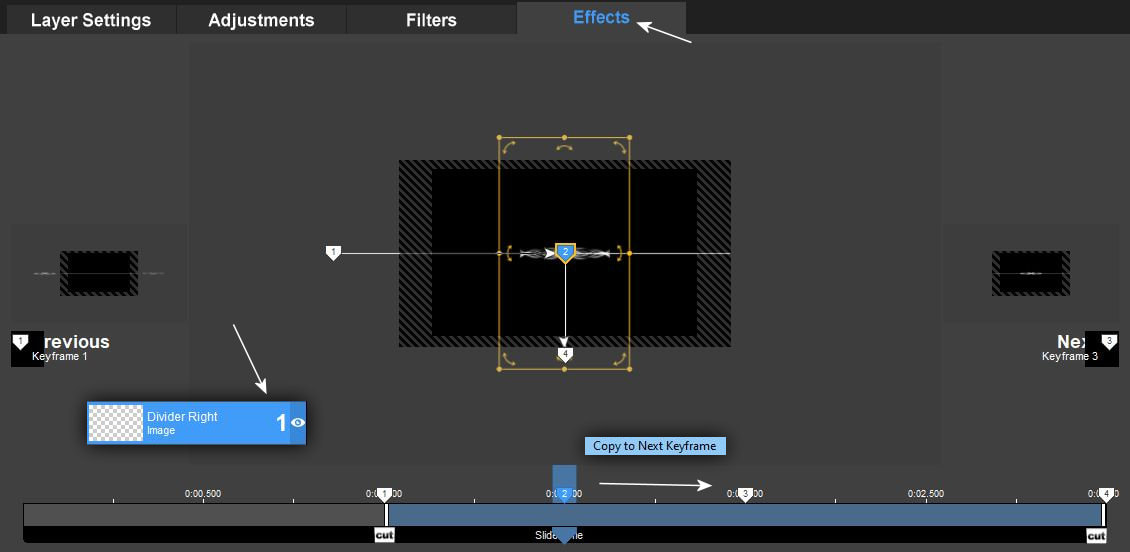
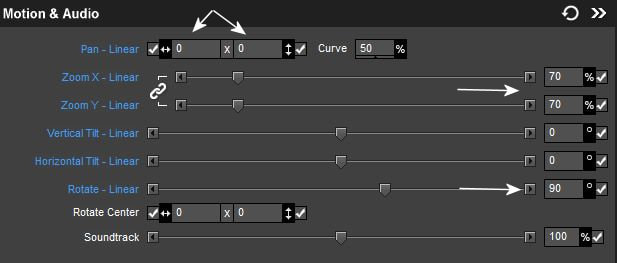
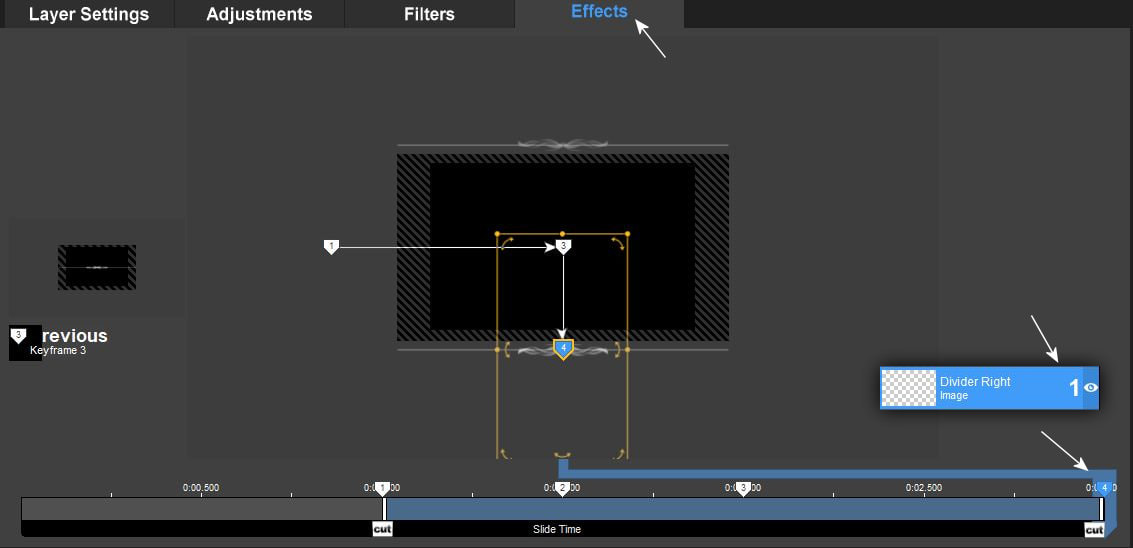
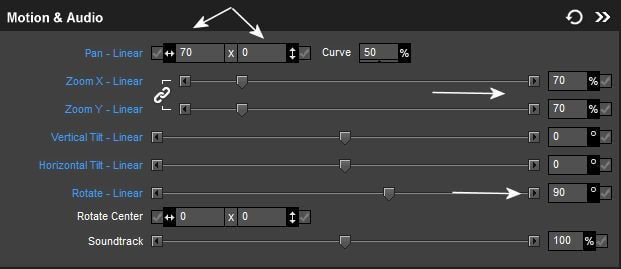
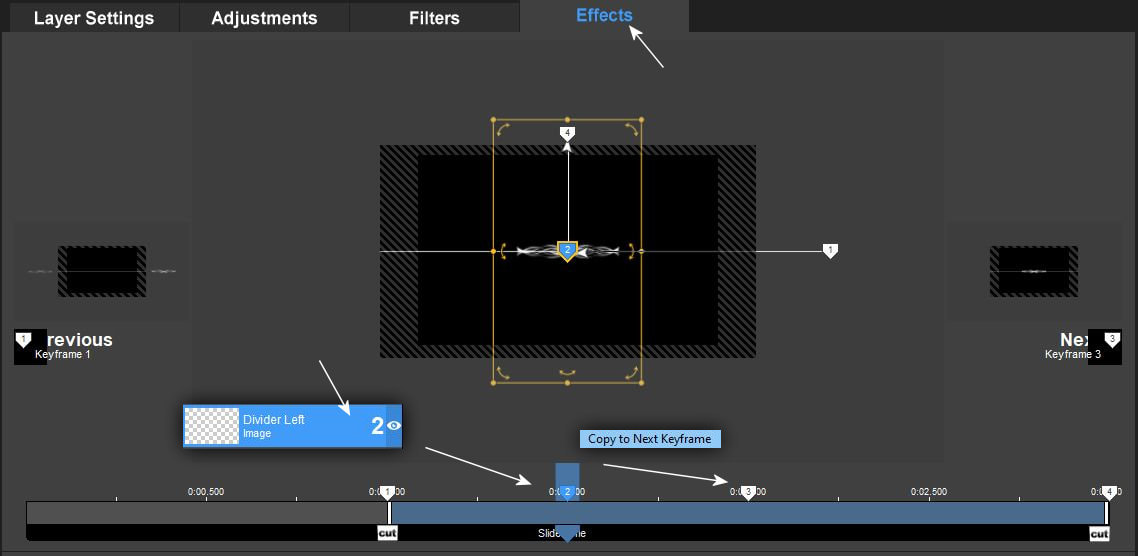
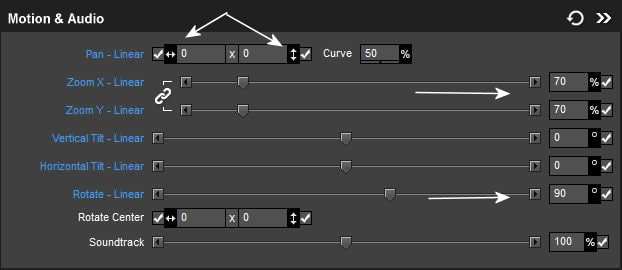
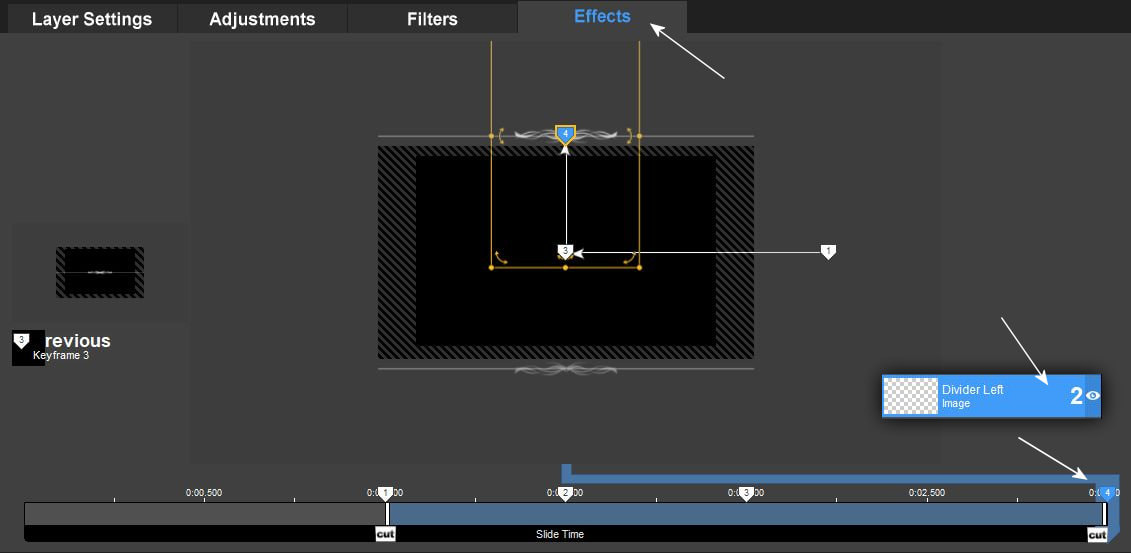
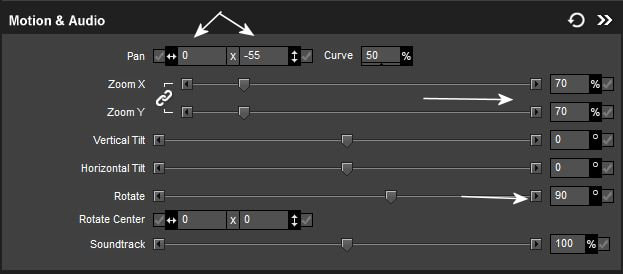
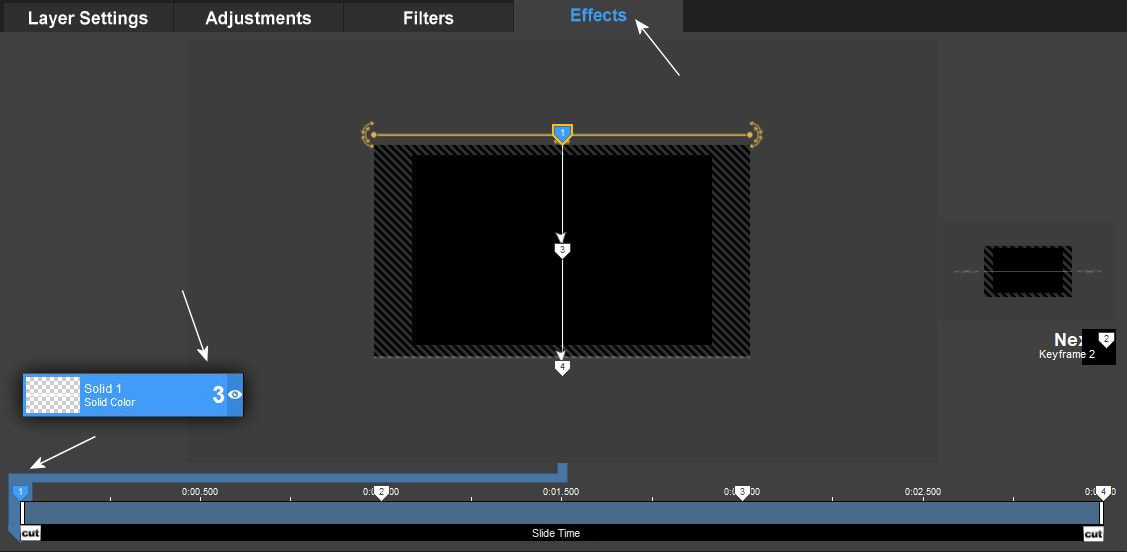
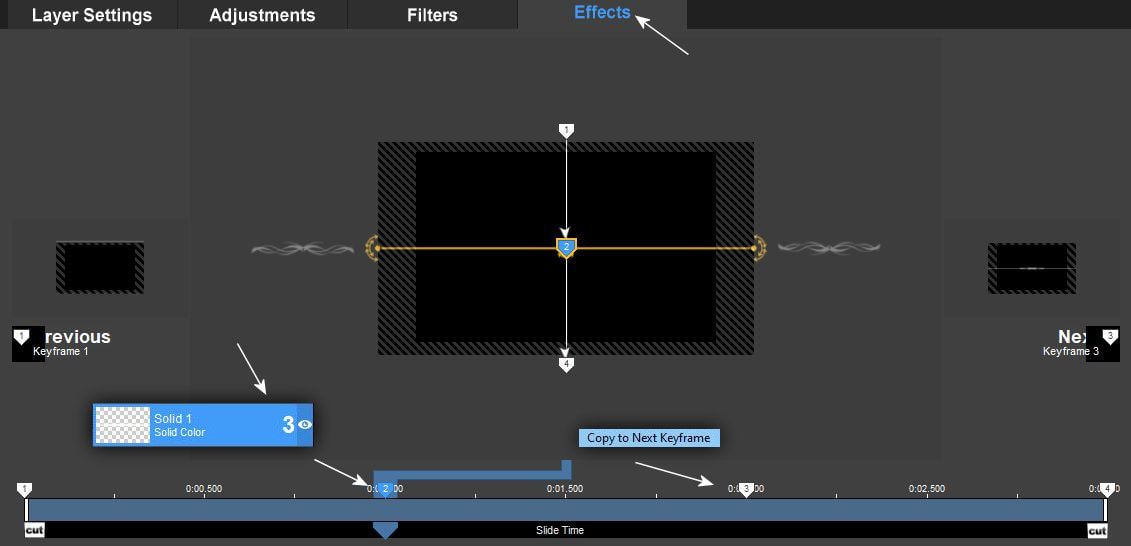
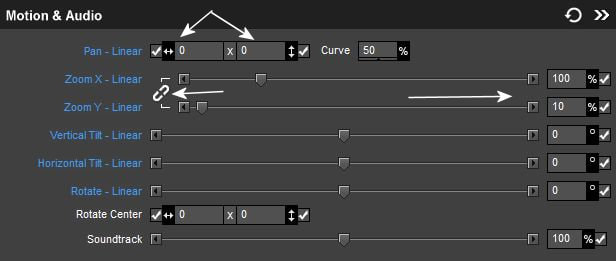
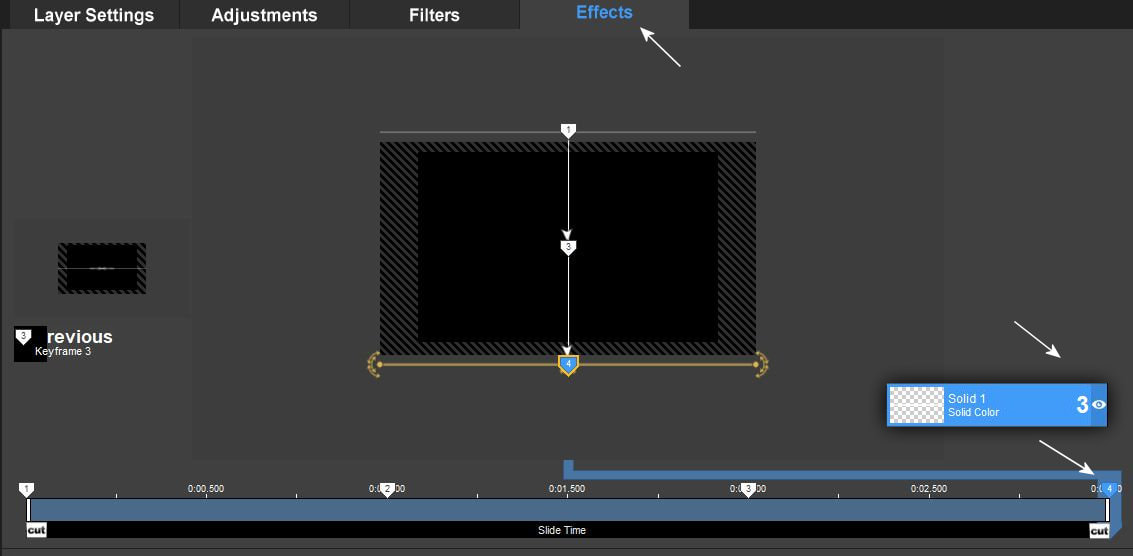
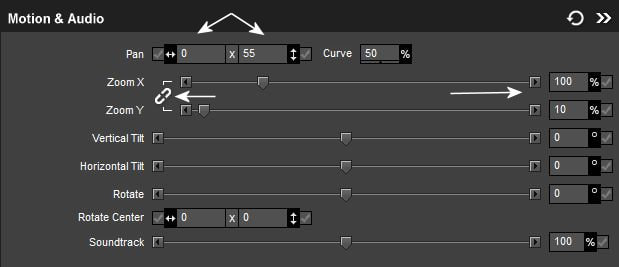
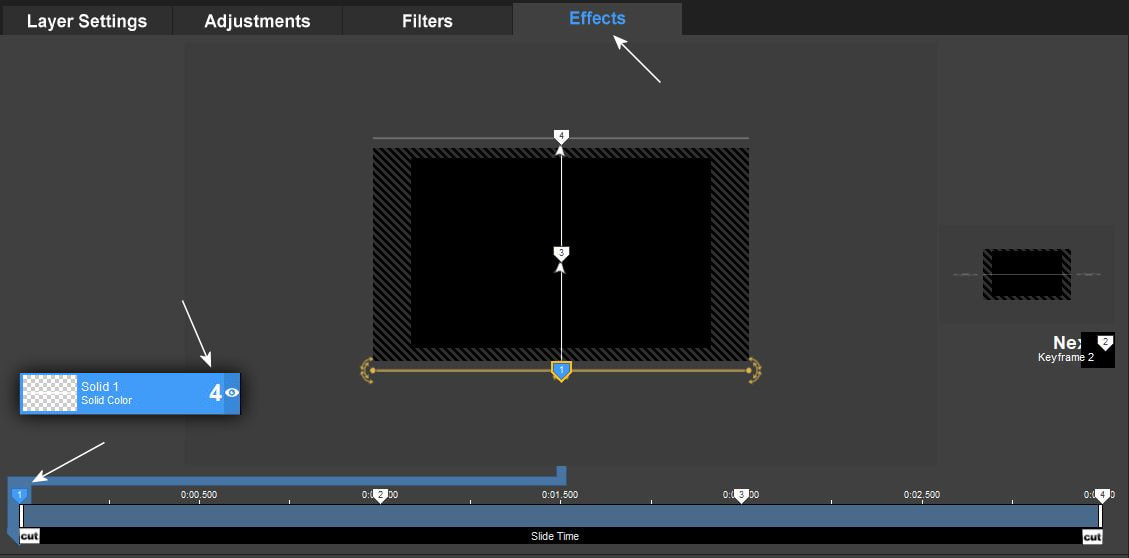
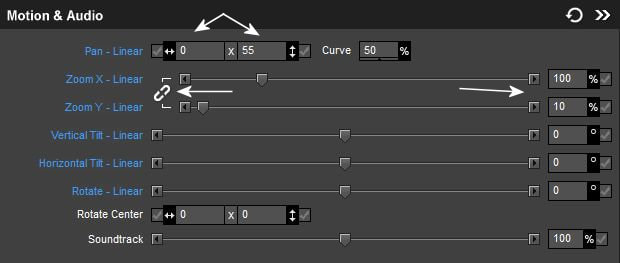
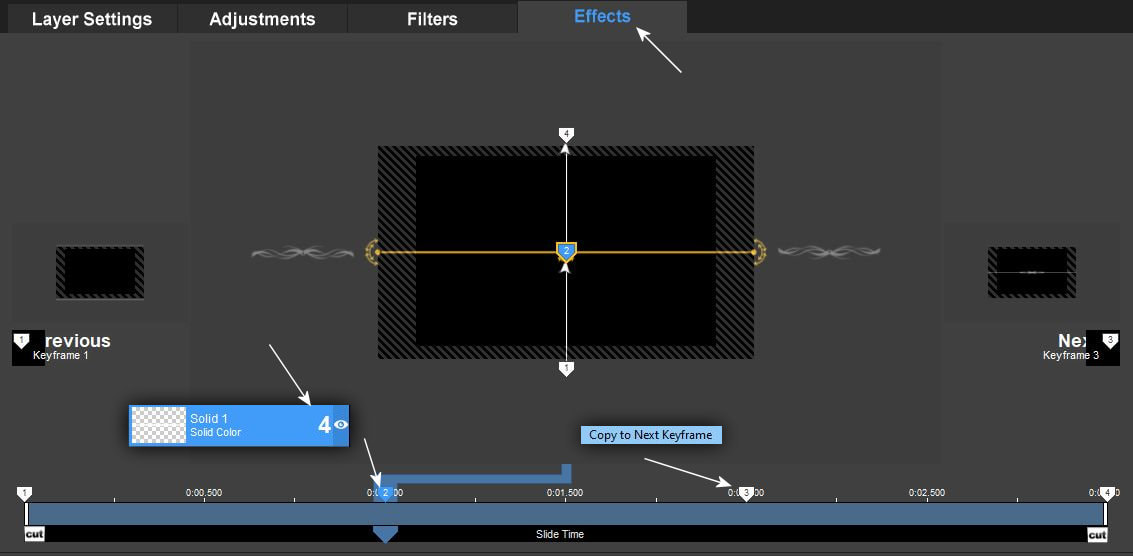
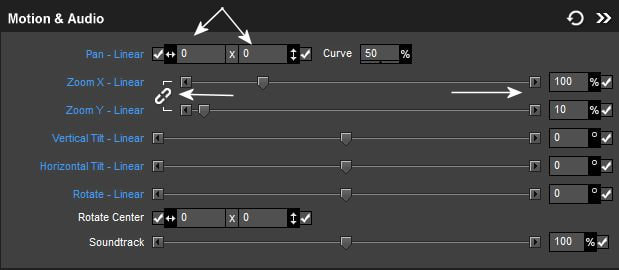
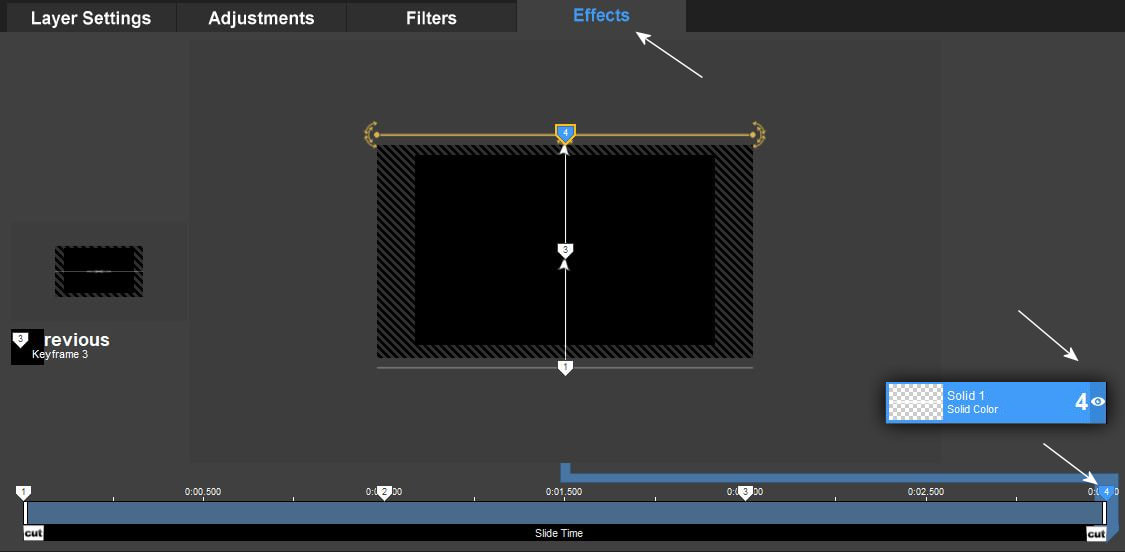
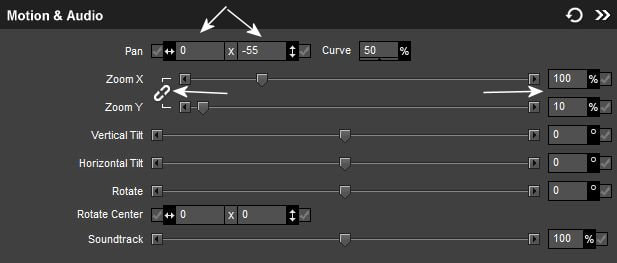
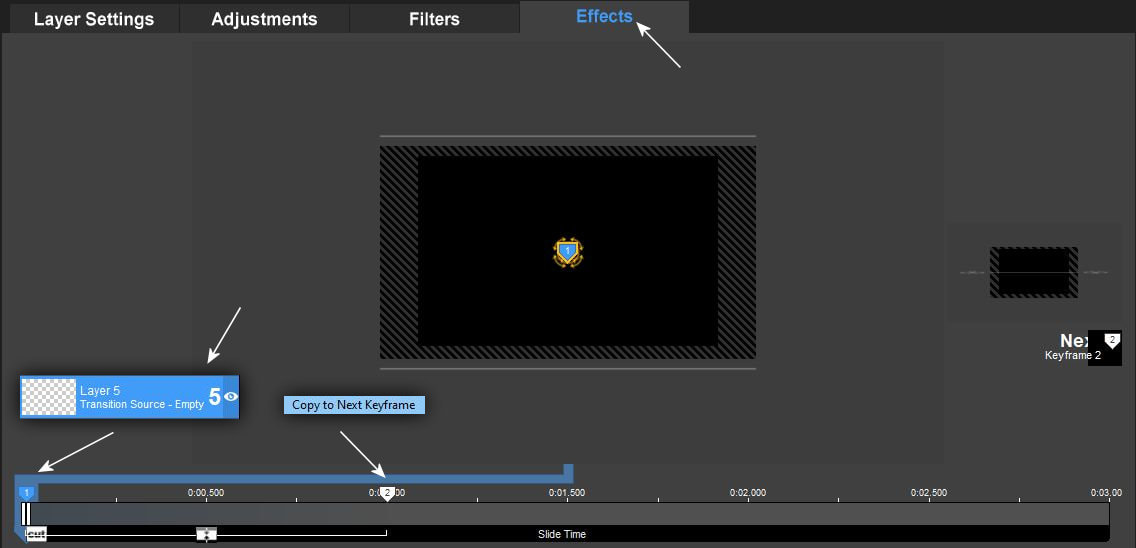
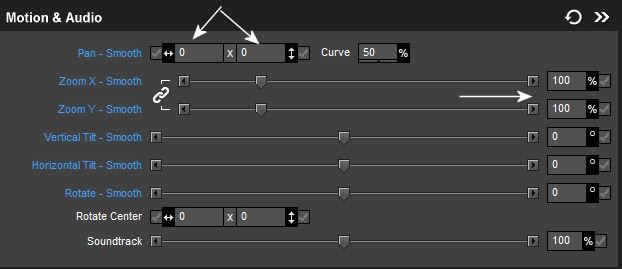
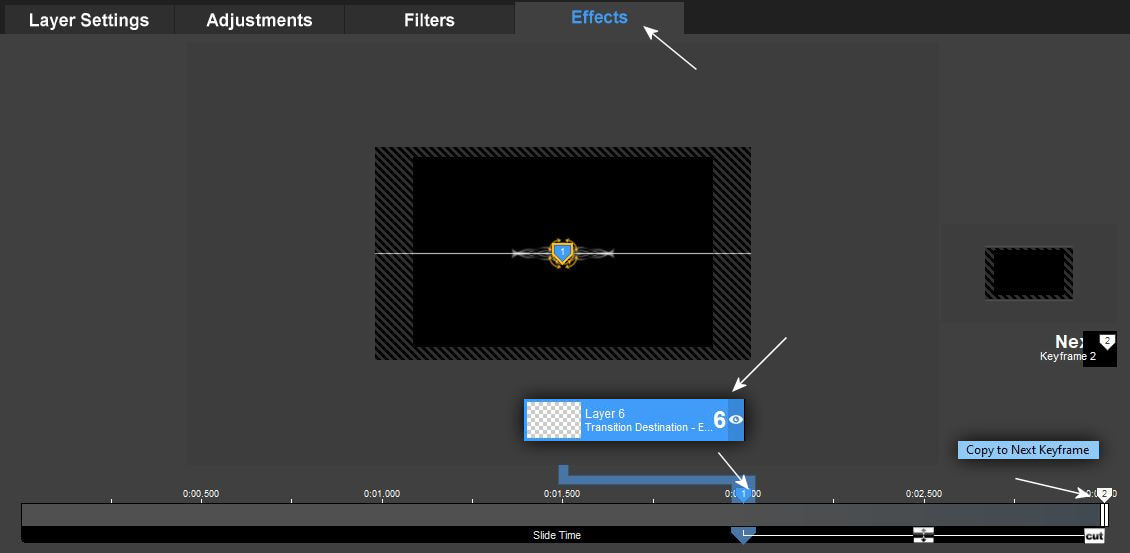
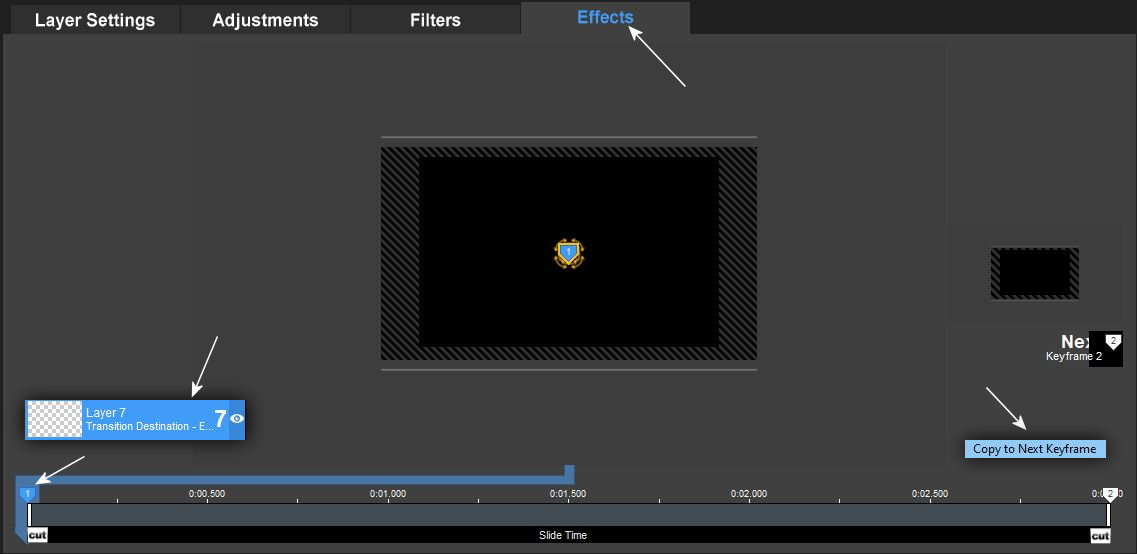
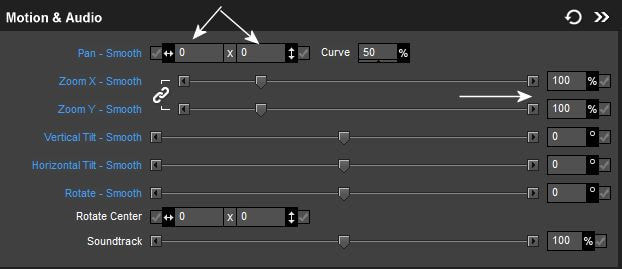
12. Kezdjünk effektálni. Kövesd a képeken látottakat figyelmesen dolgozz.!!!
Let's start making an effect. Follow what you see in the pictures, work carefully.!!!

13.
14.

15.

16.
17.
18.

19.
20.
21.
22.
23.
24.
25.

26.
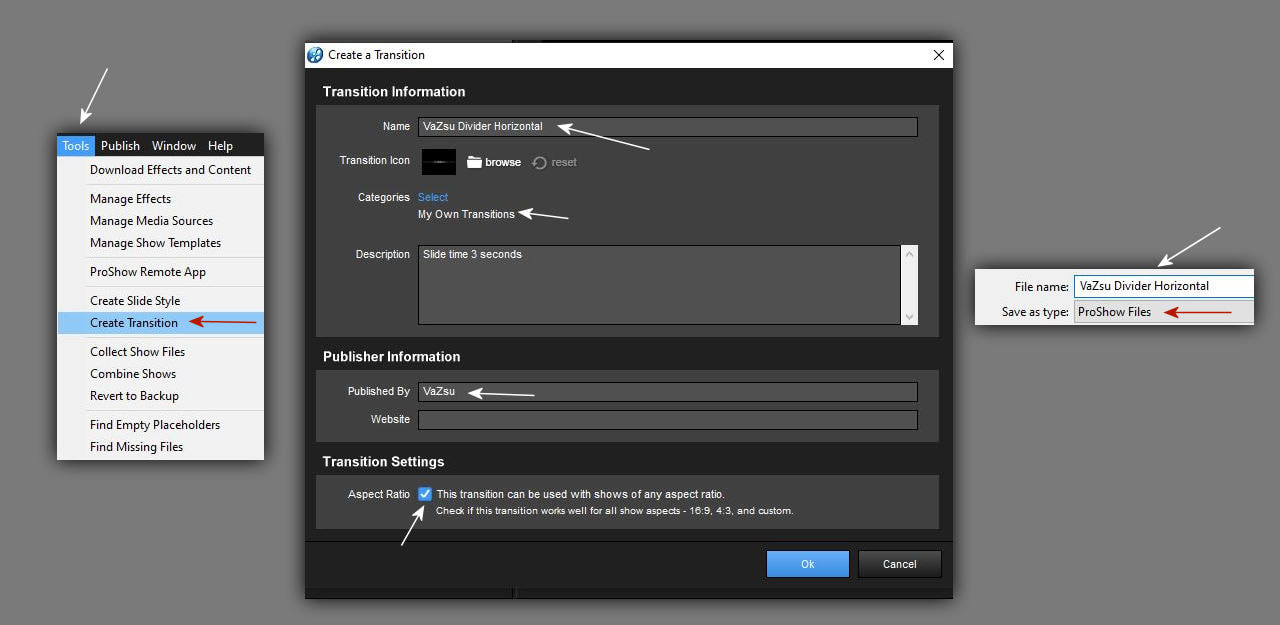
27. A munka befezéseként mentsd el a transitionodat a programodba és psh formában is, hogy ha valami nem jól müködik ki tudd javítani valamint ezt az alapot használhatod újra másik transition készítéshez is.
At the end of the work, save your transition in your program and in psh format also, so that if something doesn't work well, you can fix it, and you can use this base again to create another transition.