Folytassuk a spinner effect bemutatóját az álló képekkel.

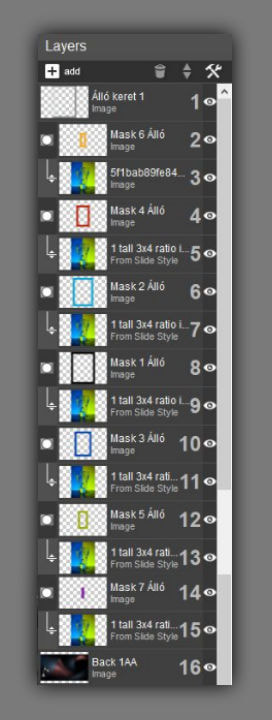
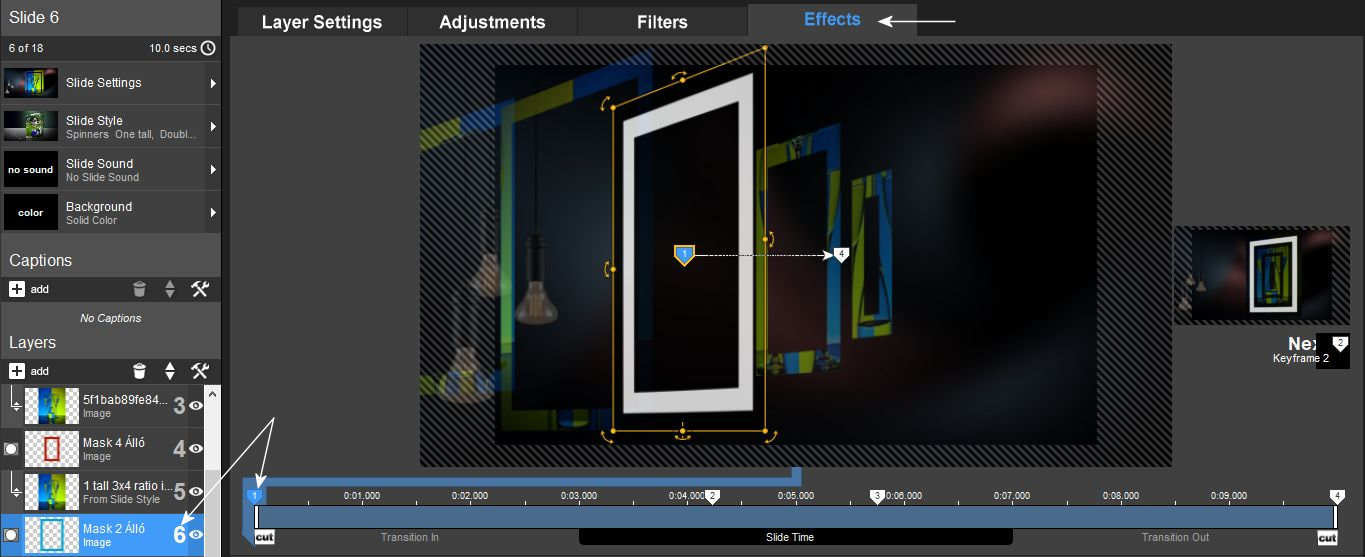
1. A rétegeket a maszkokkal így kell összerakni. Minden maszkhoz ugyanazt a képet kell tenni. Most az álló képekhez tartozó rétegeket rakjuk össze. A Corelban elkészített maszkok sorrendjére is ügyelj, itt a képen jól be tudod azonosítani ha azon a néven mentetted ahogy a leírásban van. A színek is segítenek ebben.
Layers with masks should be put together like this. The same image must be placed for each mask. Now we put together the layers belonging to the portrait images. Also pay attention to the order of the masks created in Corel, you can easily identify them in the picture if you saved them under the same name as in the description. Colors also help with this.
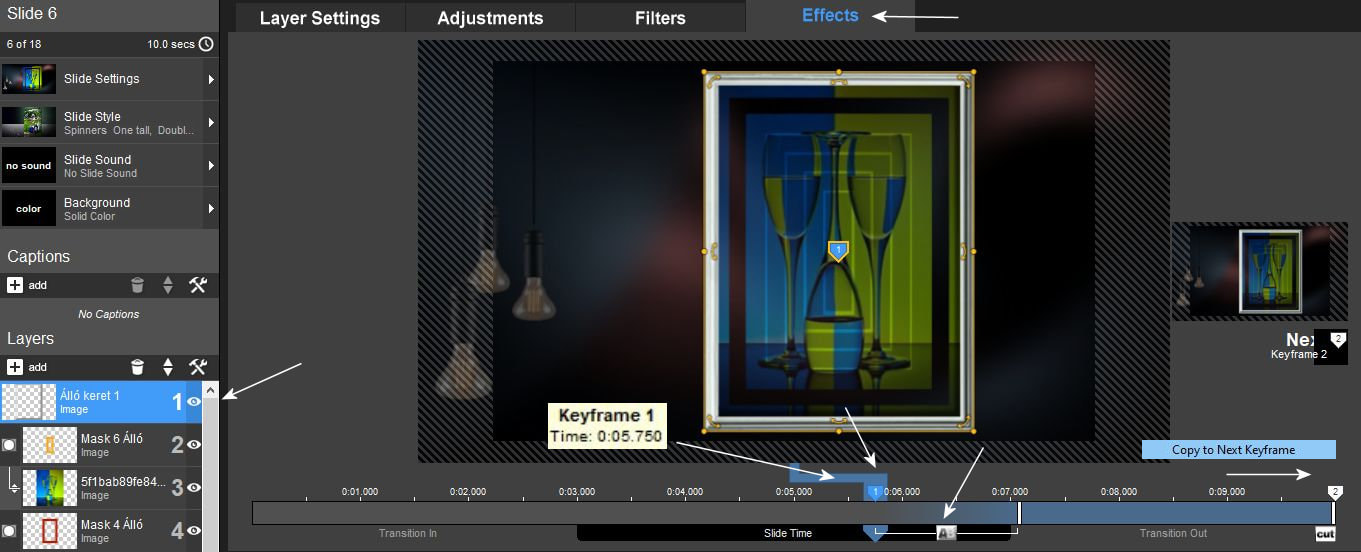
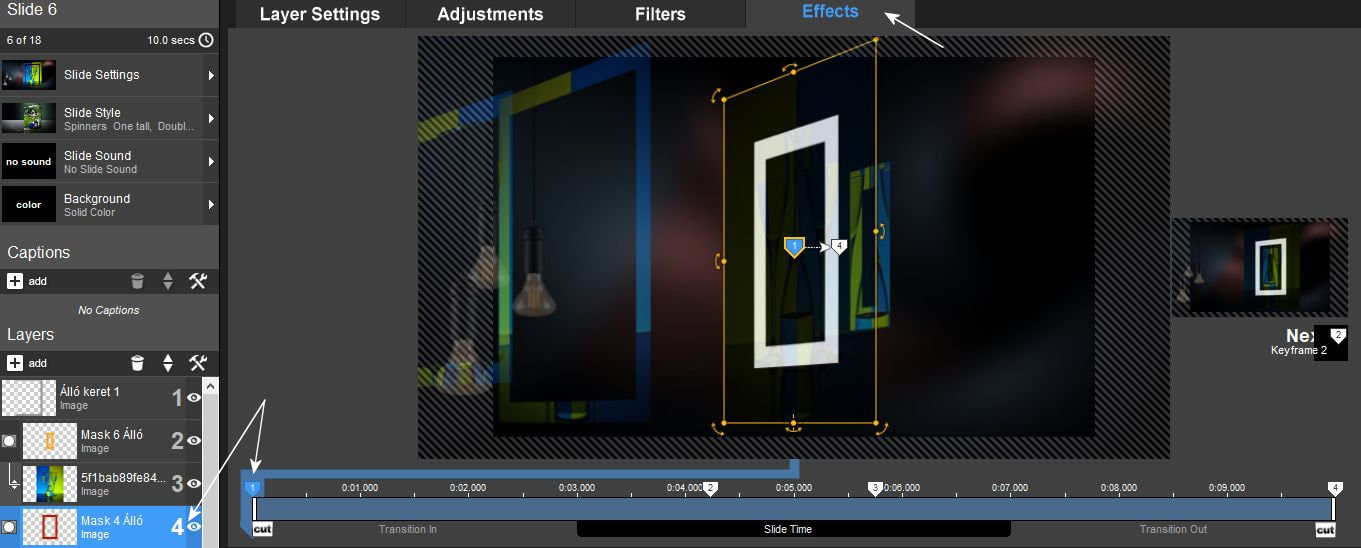
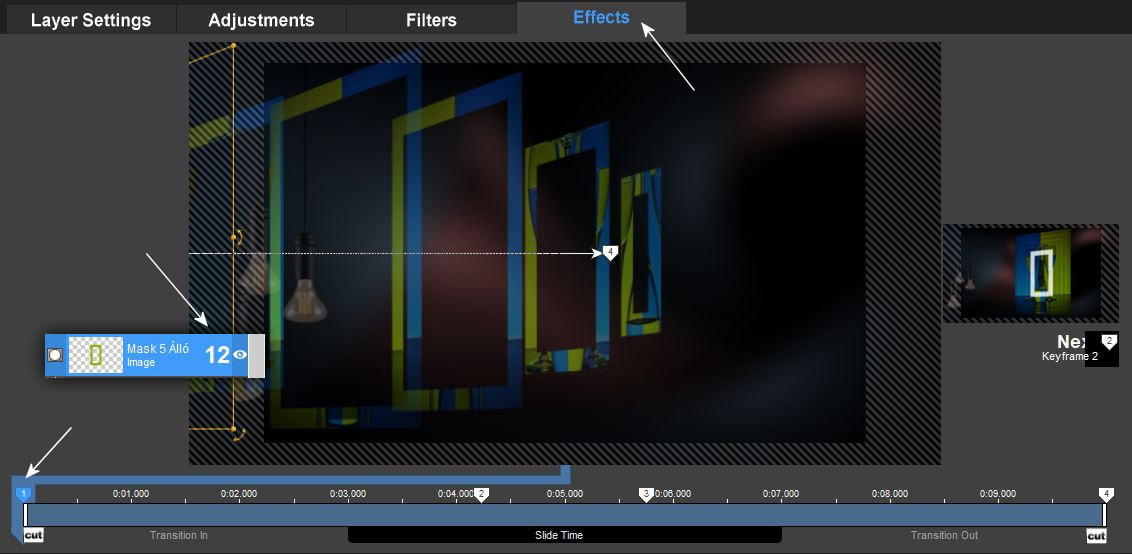
2. A kereted rétegének az 1-es keyframe pontját húzd be 5.750-re és tedd rá az "ab" transitiont. Majd másold át ezt a 2-es keyframe pontra.
Drag the keyframe point 1 of your frame's layer to 5.750 and put the "ab" transition on it. Then copy this to keyframe point 2.
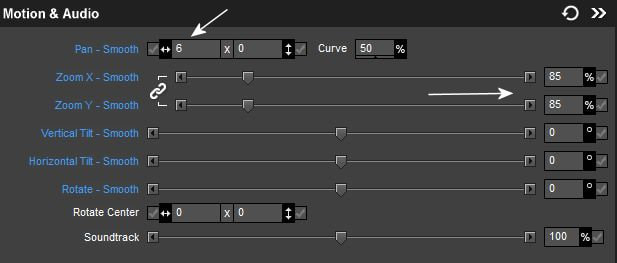
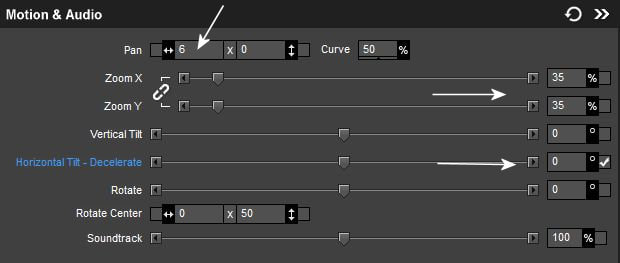
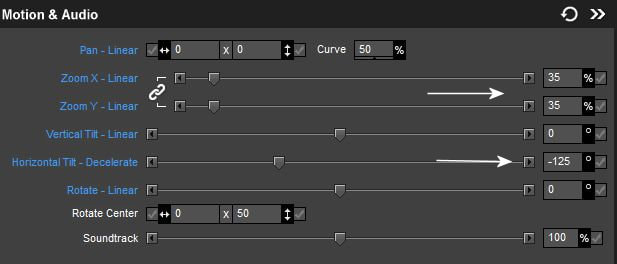
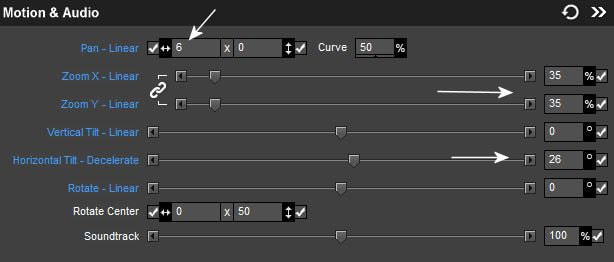
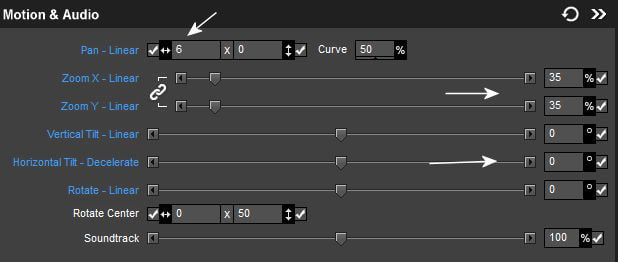
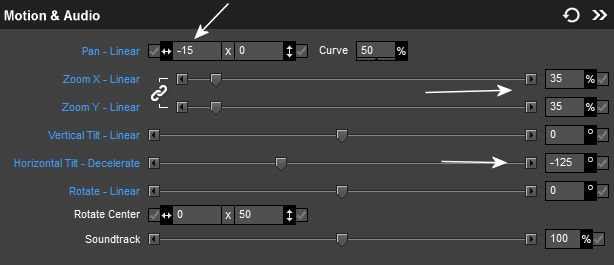
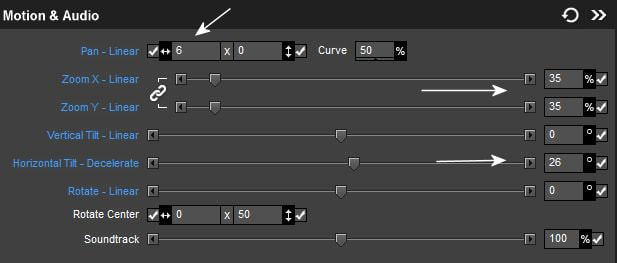
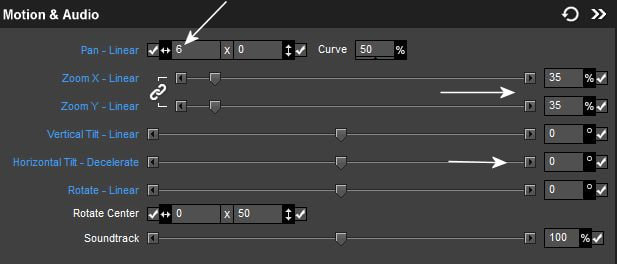
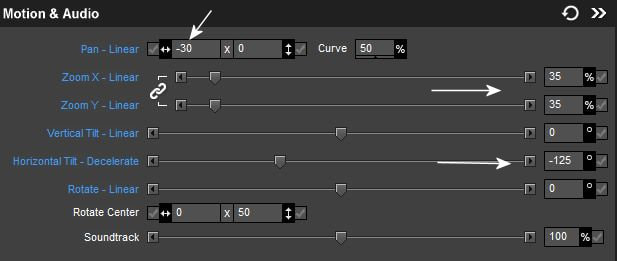
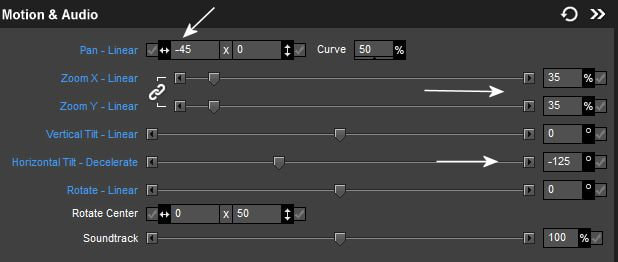
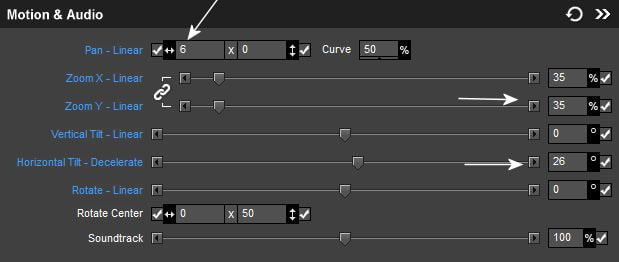
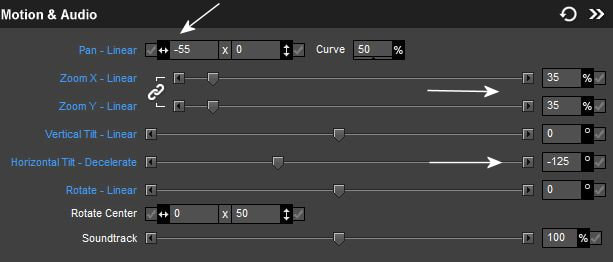
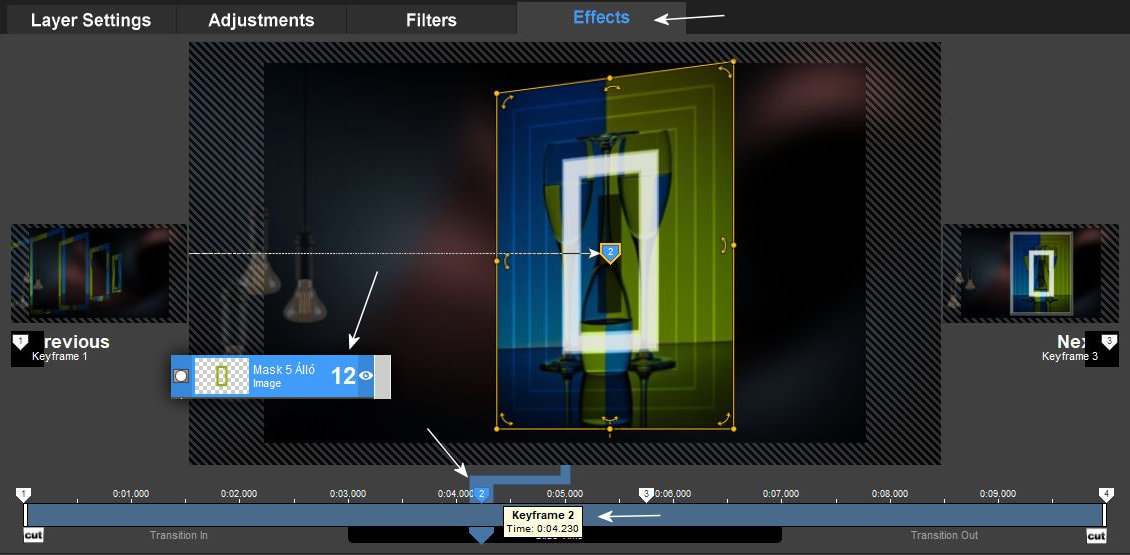
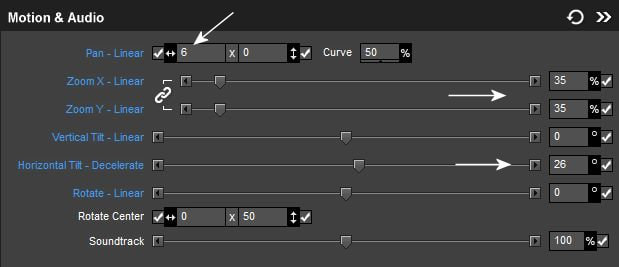
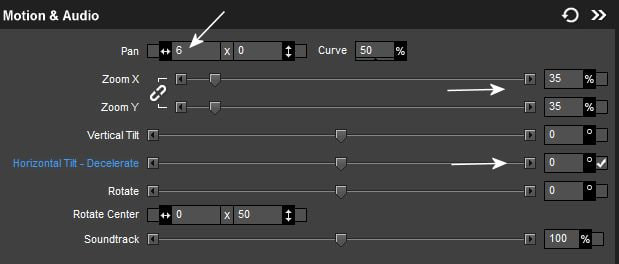
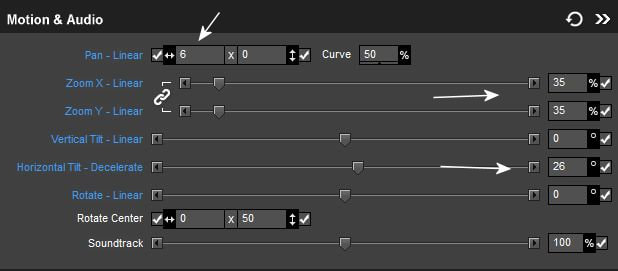
3. Kezd el az effectértékeket beírni a maszkoknál. 2-es keyframe ponttal dolgozunk. Figyeld meg a képeket pontosan úgy dolgozz. Csak a maszkok-nál vannak az értékek fotózva, mert a hozzájuk tartozó képeken is ugyanezek az értékek vannak!!!
Start entering the effect values for the masks. We work with keyframe point 2. Look at the pictures and work exactly like that. Only the values are photographed for the masks, because the accompanying pictures also have the same values!!!
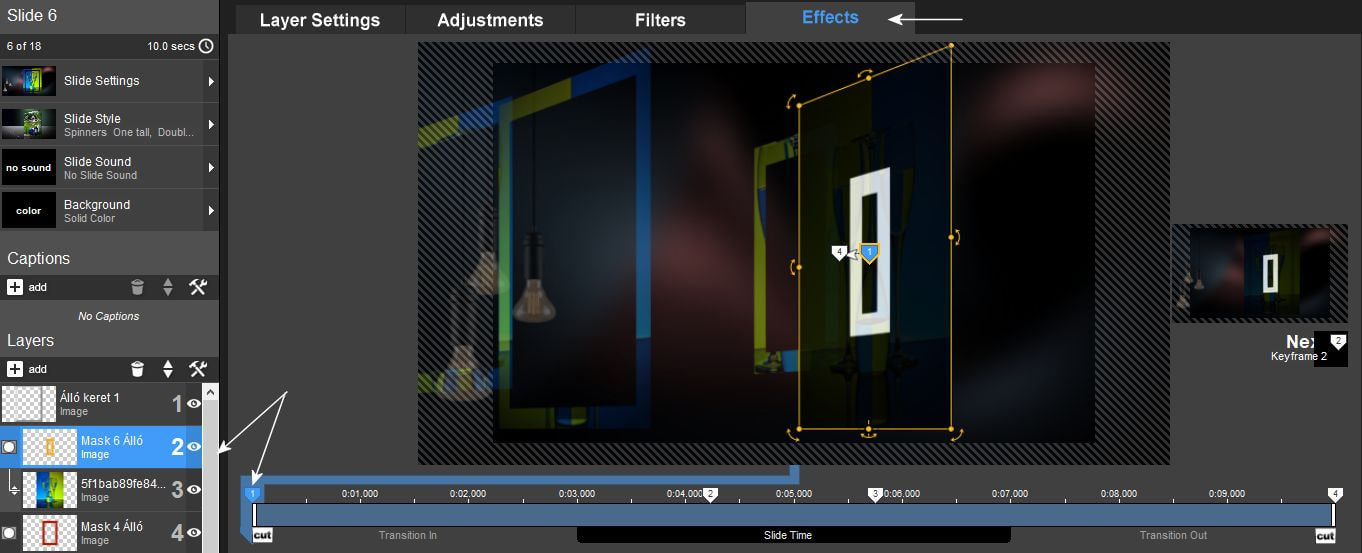

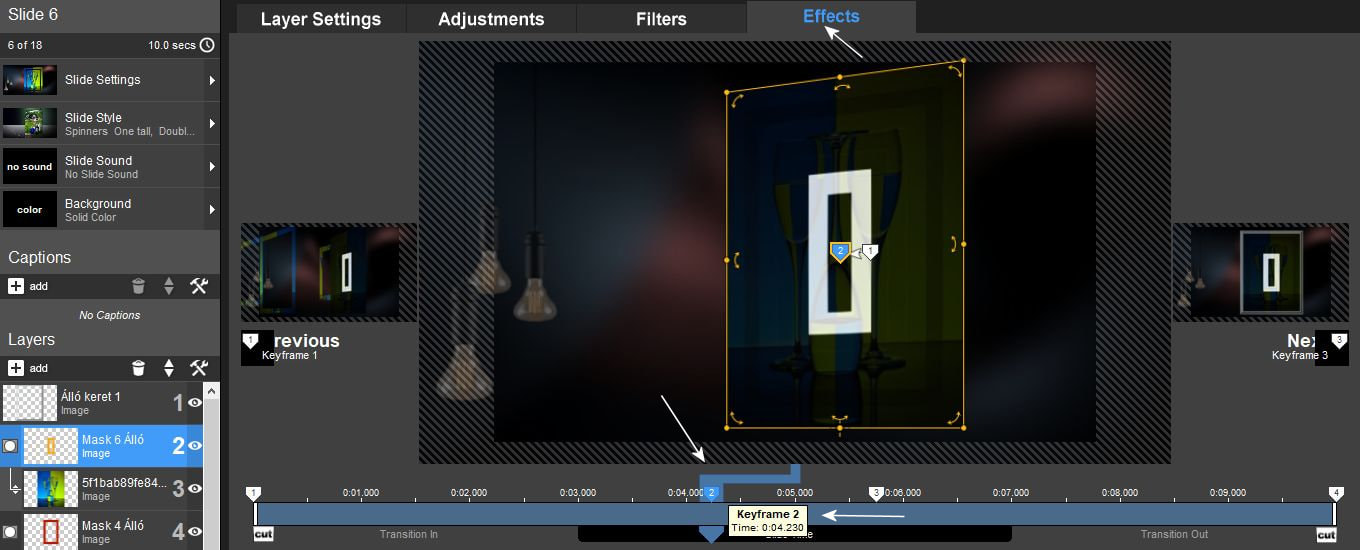
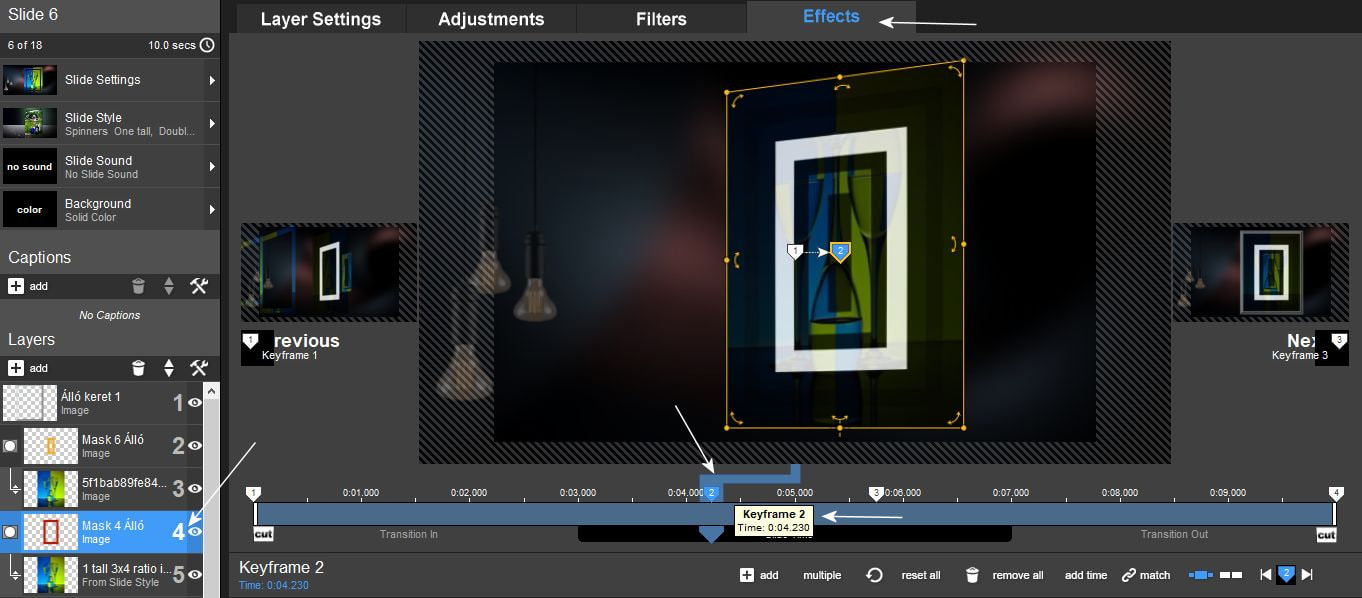
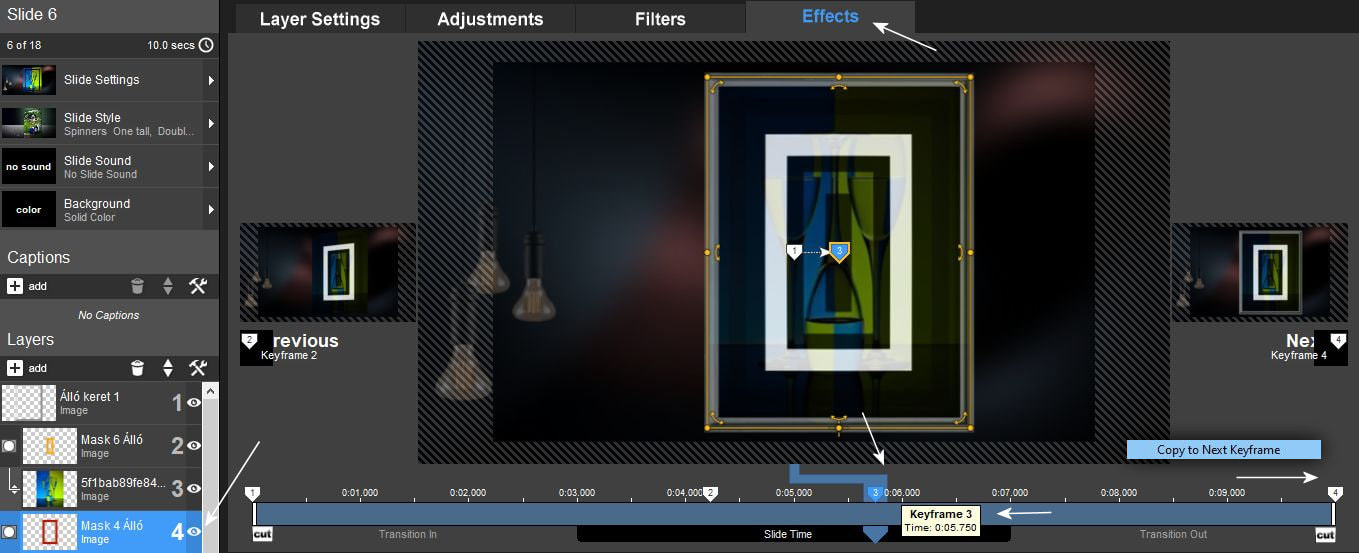
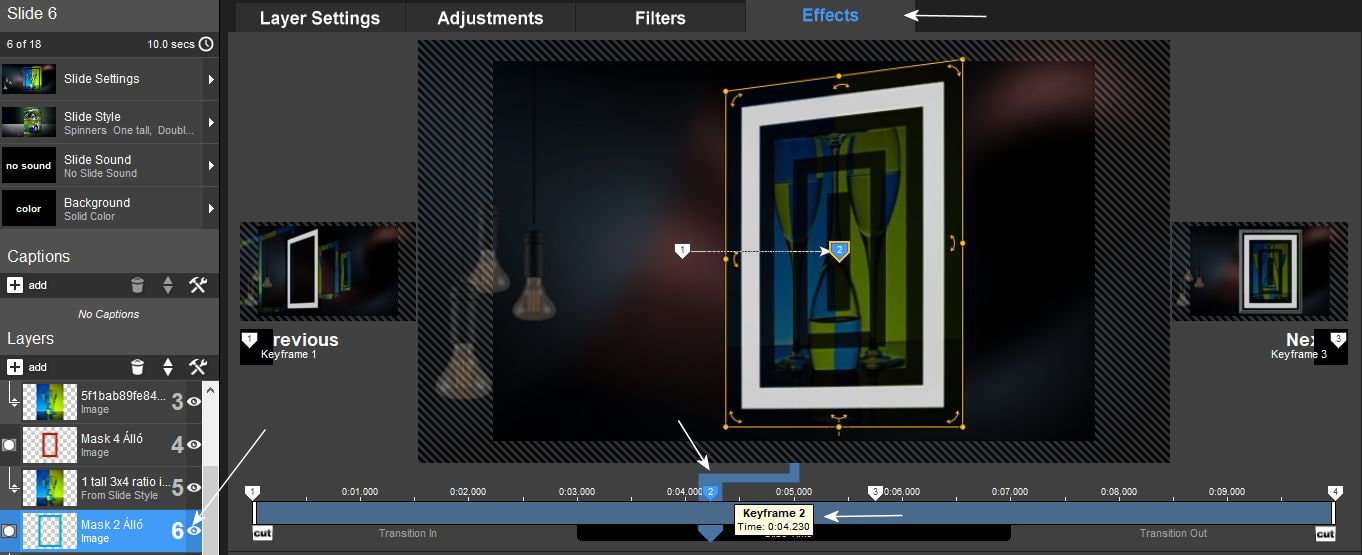
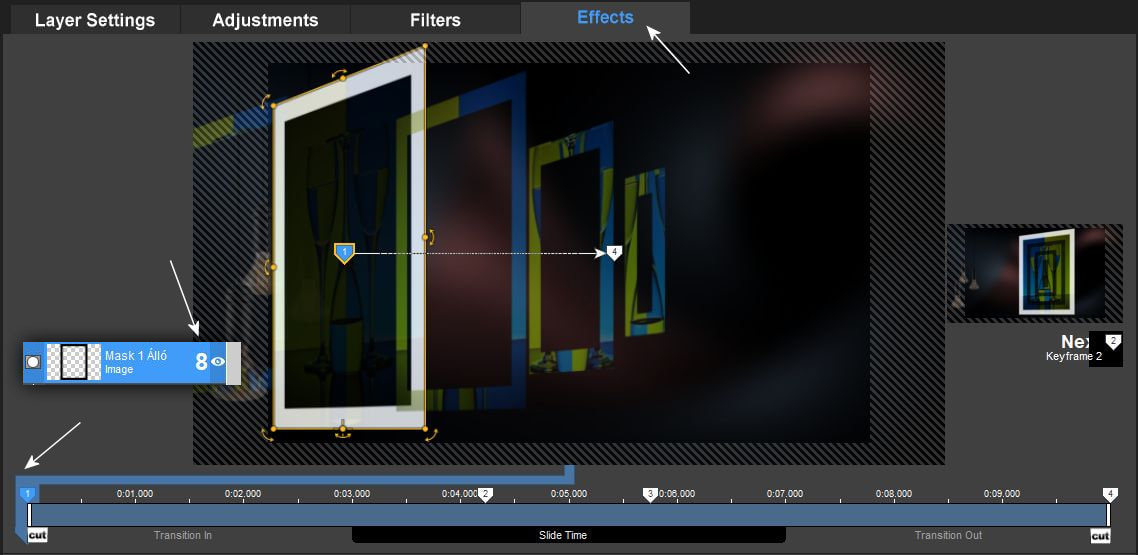
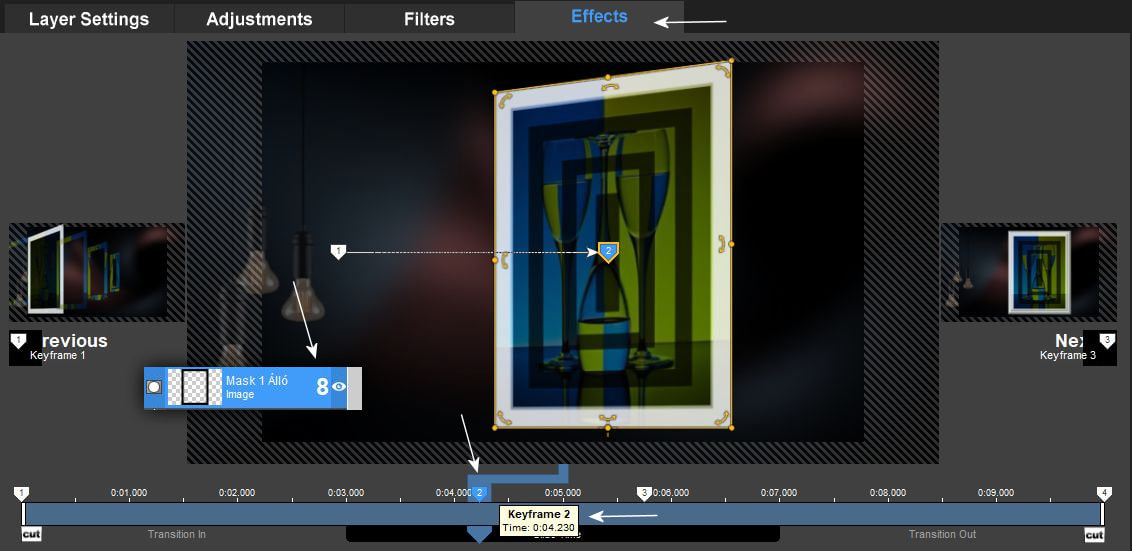
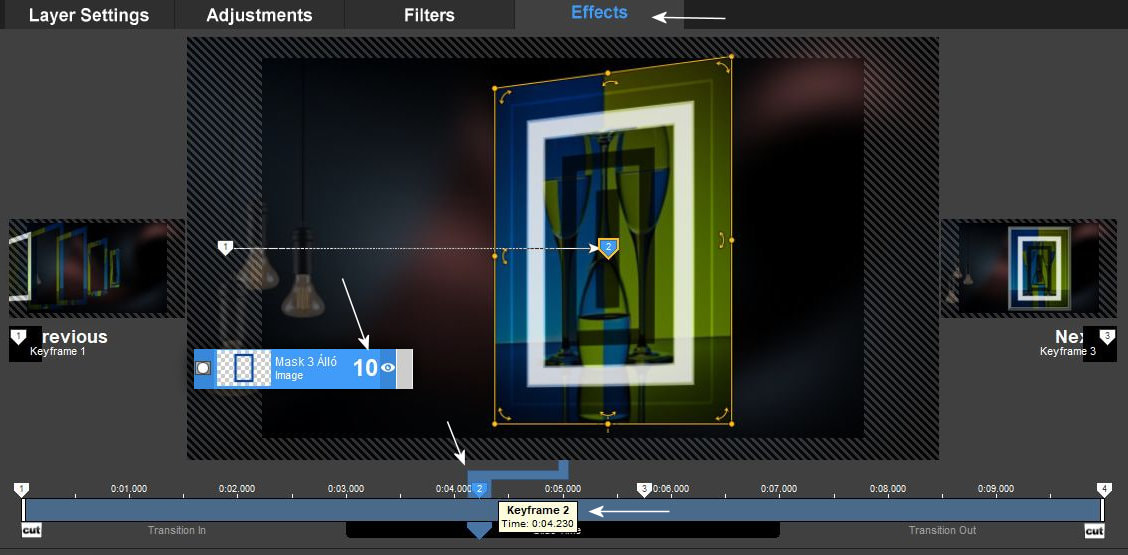
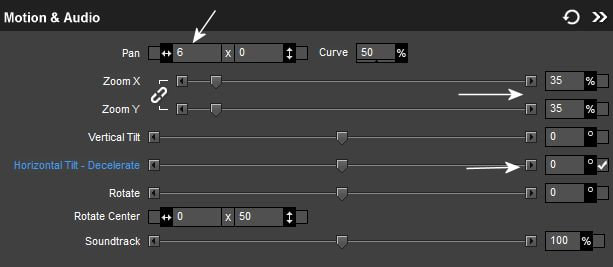
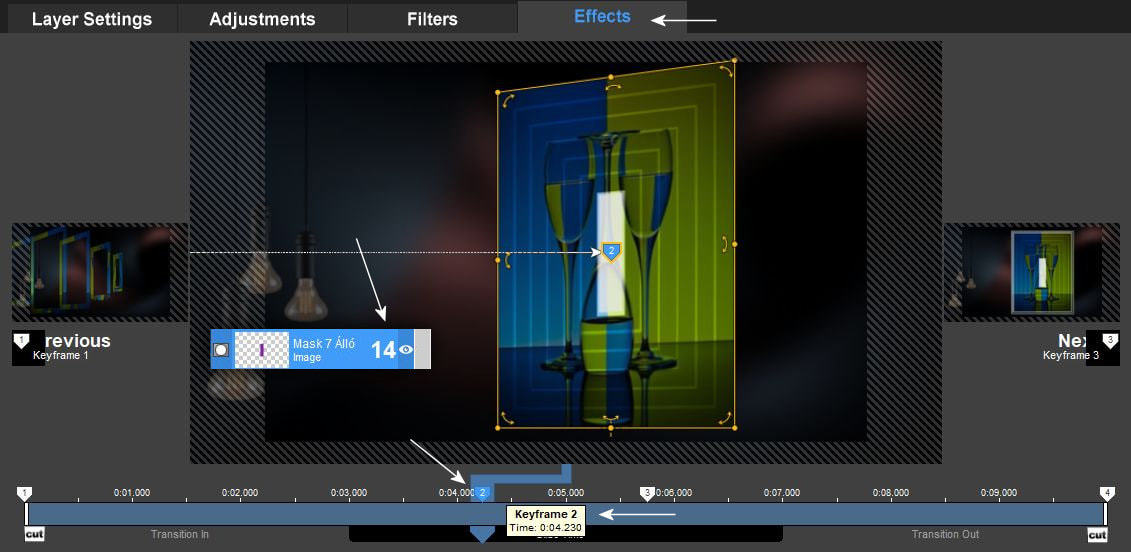
4. A kettes keyframe pontot minden rétegen 4.230 értékre kell betenni.
The second keyframe point must be set to 4.230 on all layers.
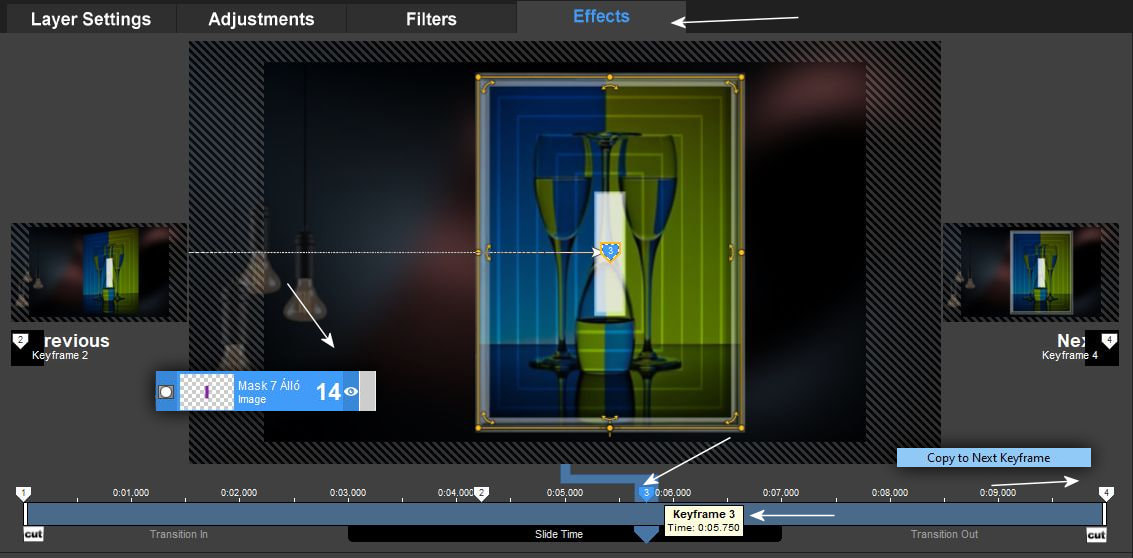
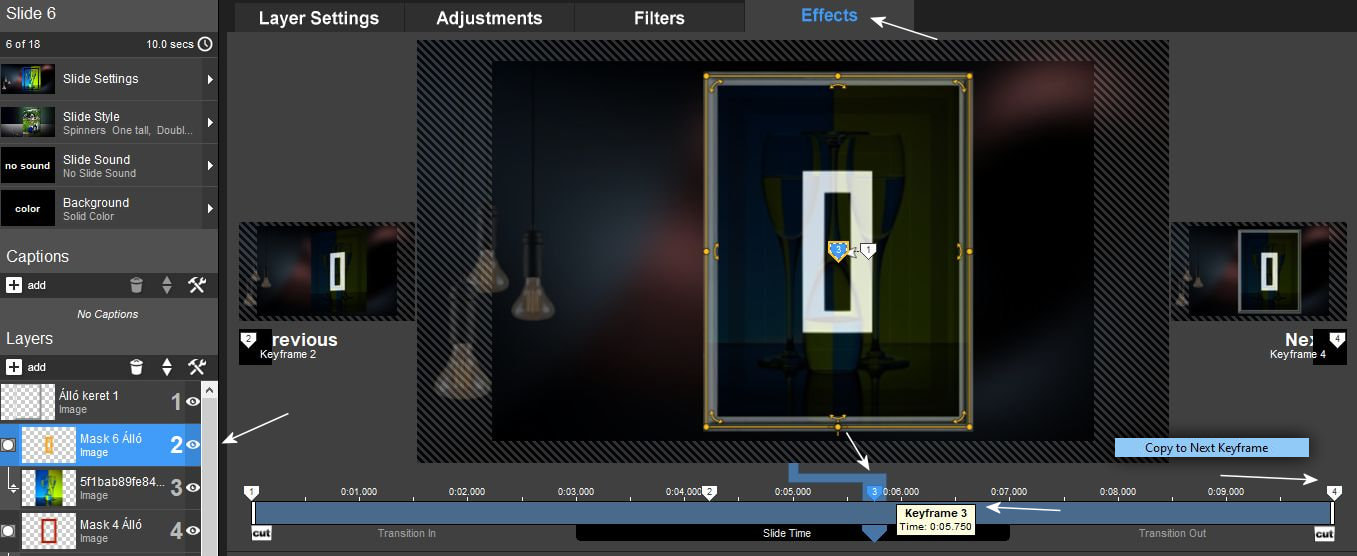
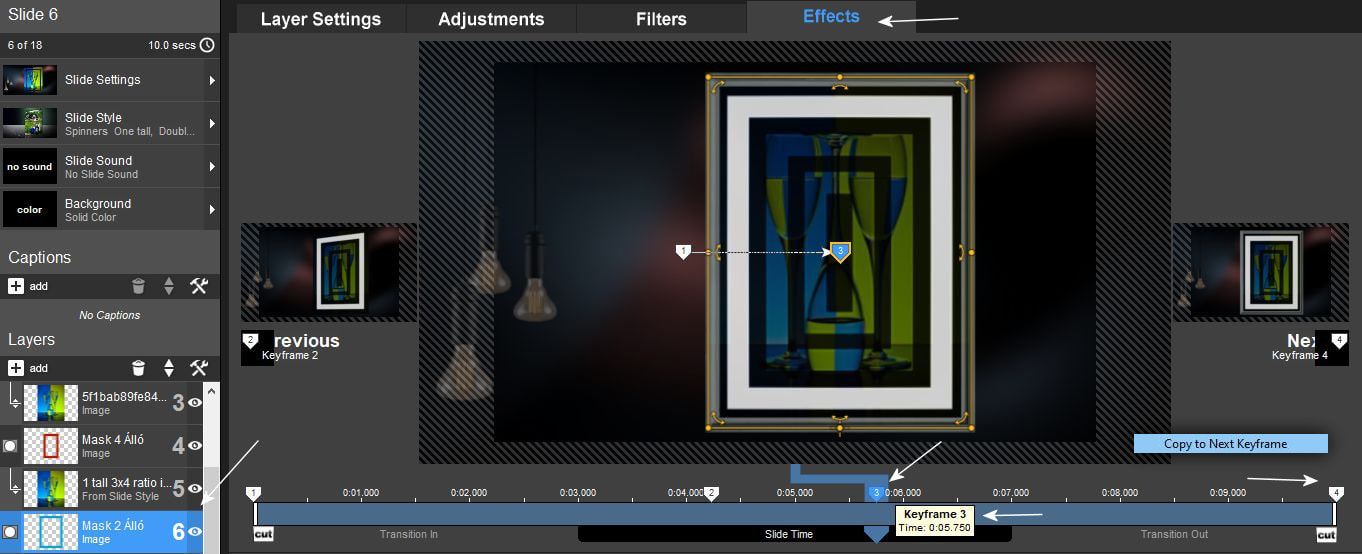
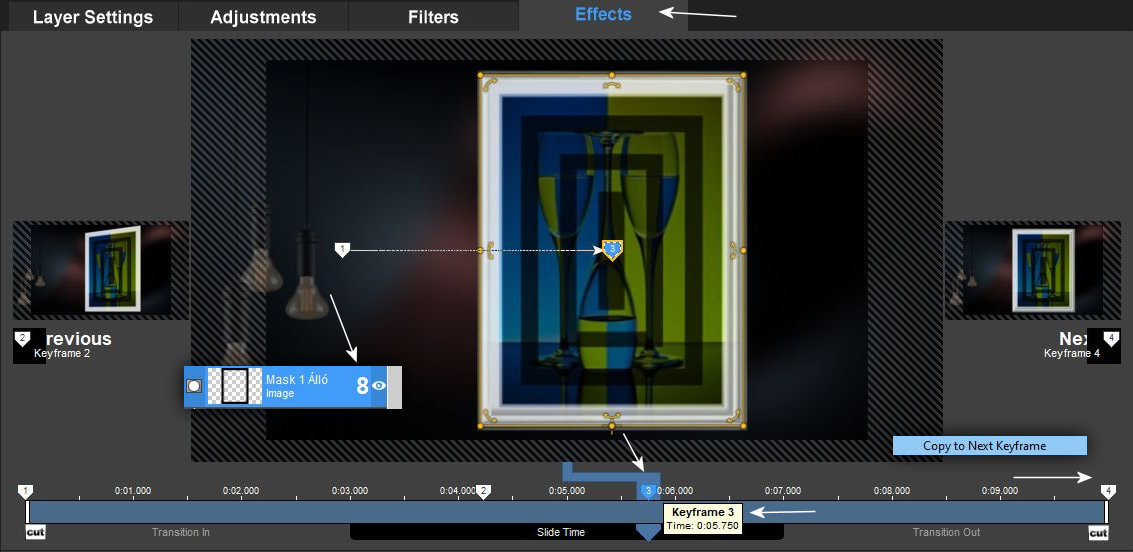
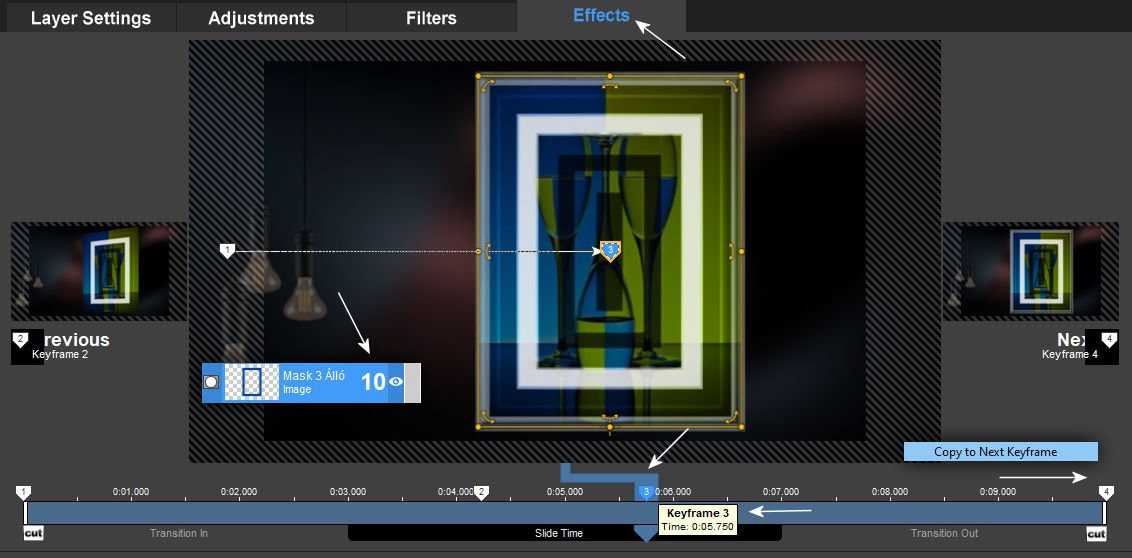
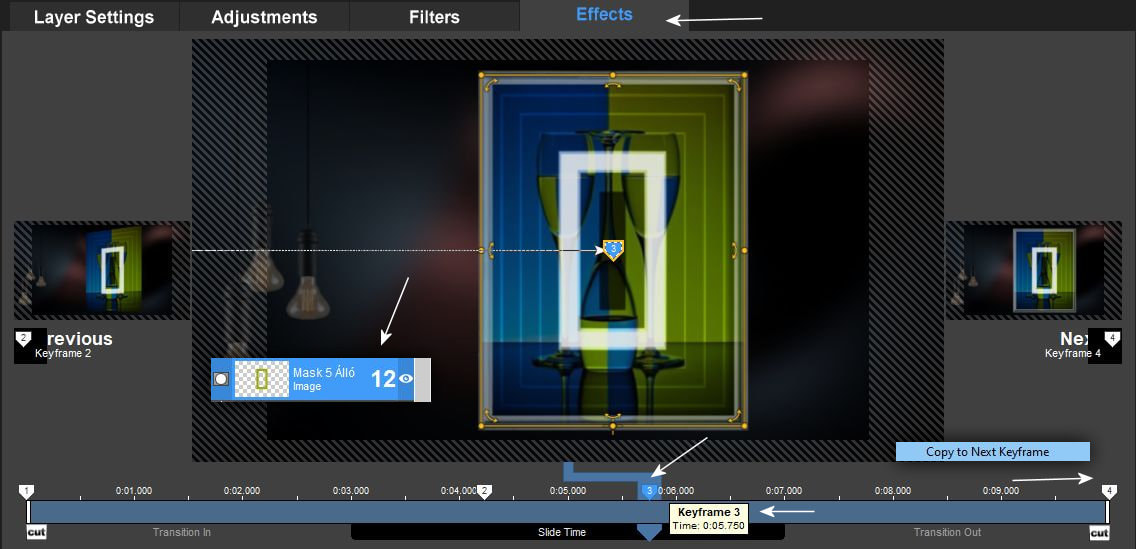
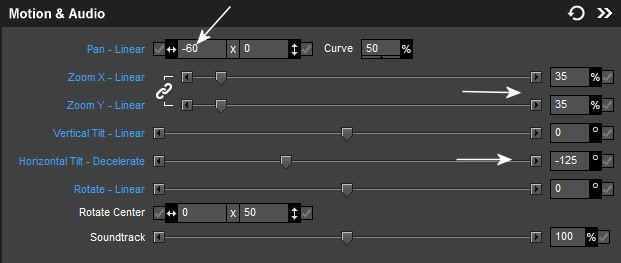
5. A 3-as keyframe pontot minden rétegen az 5.750 értékre kell betenni.
Minden 3-as keyframe pontot át kell másolnod a 4-es keyframe pontra.
Keyframe point 3 must be set to 5,750 on all layers.
You have to copy every keyframe point 3 to keyframe point 4.

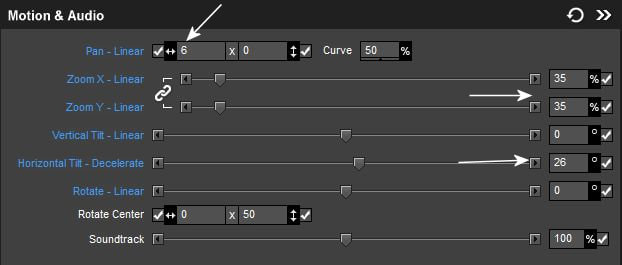
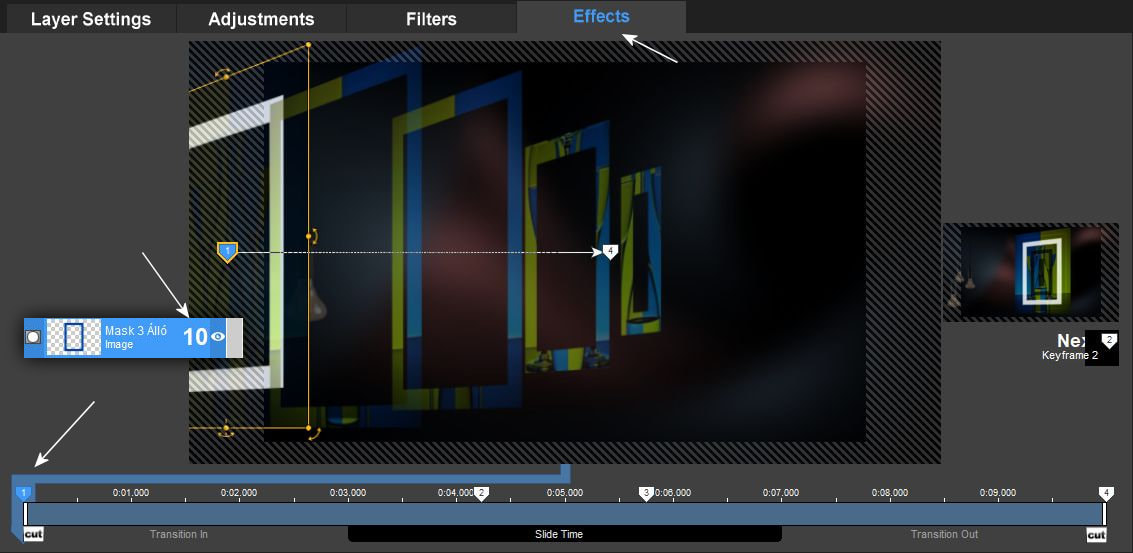
6. Figyelmesen dolgozz, kövesd a képeken látottakat figyelj oda minden fehér nyillal jelzett értékre !!! Ne felejtsd el, hogy minden maszkhoz tartozó kép rétegen is ugyanazokat az értékeket kell használnod. !!!
Work carefully, follow what you see in the pictures, pay attention to all the values marked with a white arrow!!! Don't forget that you have to use the same values on all mask image layers also. !!!
7.
8.
9.
10.
11.
12.
13.

14.

15.
16.
17.
18.
19.
20.
21.

22.
23.