Folytassuk a borítékos effectünk elkészítését a ProShow Producerben.
Let's continue creating our envelope effect in ProShow Producer.

1. A ProShow Progidban így rakd össze a rétegeidet. Felül legyen az a boríték amelyröl letöröltük a fekete buttonize csíkot. Azután egy karácsonyi kép amelyet természetesen itt a progiban is bekeretezhetsz a korábbiakban megtanult módon. Majd a baige alappal összerakott elmentett borítékod jön és alulra a háttér.
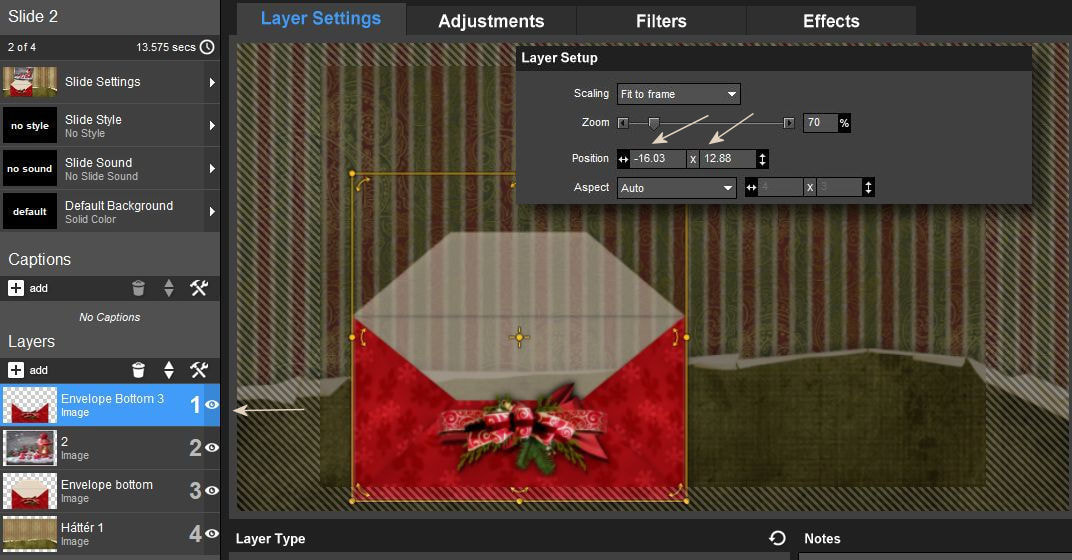
Nagyon fontos, hogy amikor a megfelelö helyre a zoomal való beméretezésed után elhelyezted a Layer Settingsben a borítékodat jól megjegyezd a position értékeket.
This is how you put your layers together in ProShow Progid. The envelope on which we wiped the black buttonize strip should be on top. Then a Christmas picture, which of course you can frame here in the program in the way you learned earlier. Then your saved envelope assembled with the beige base comes and the background is at the bottom. It is very important that when you place your envelope in the Layer Settings after sizing it to the right place with the zoom, you remember the position values well.
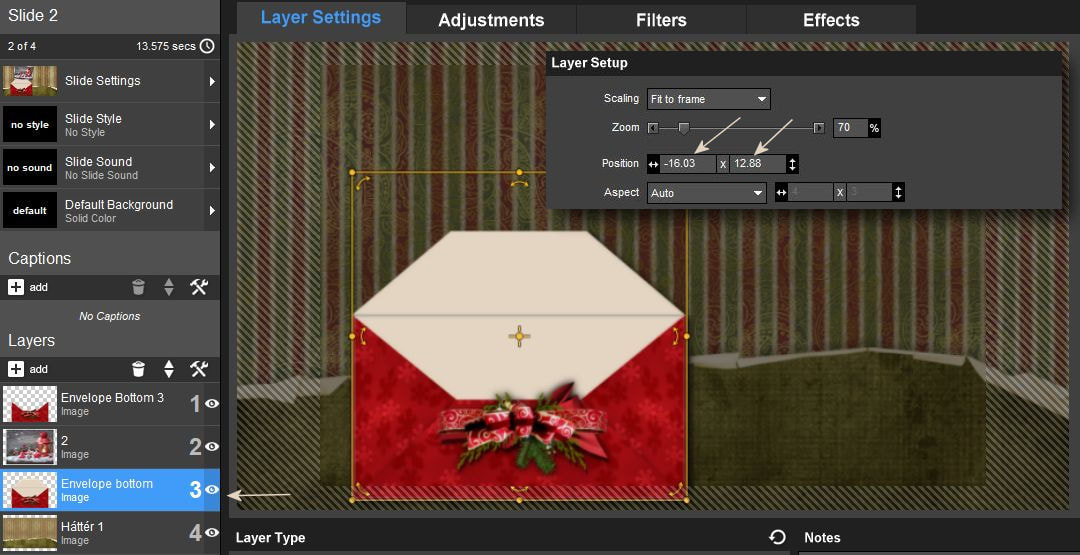
2. Ezen a rétegen is ugyanannak az értékeknek kell lennie!!! Még itt a Layer Settingsban vidd ki a képedet a jobb oldalra a képernyön kívülre kb. közép tájra.
This layer must have the same values!!! Even here in the Layer Settings, move your image to the right side outside the screen approx. middle landscape.
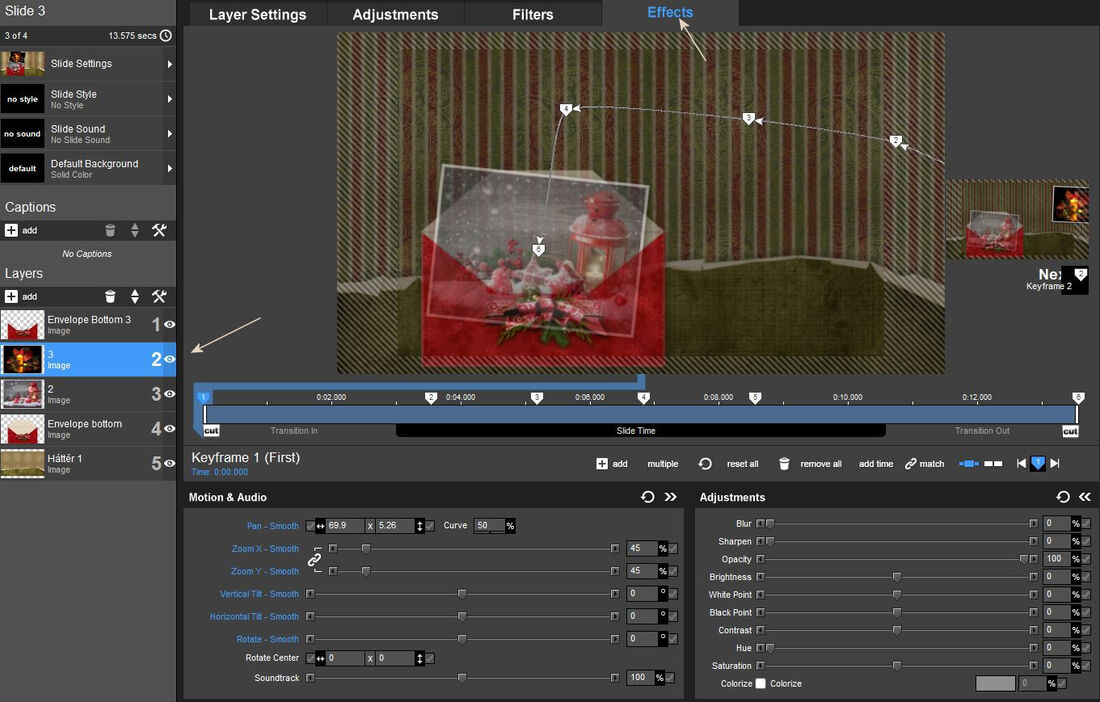
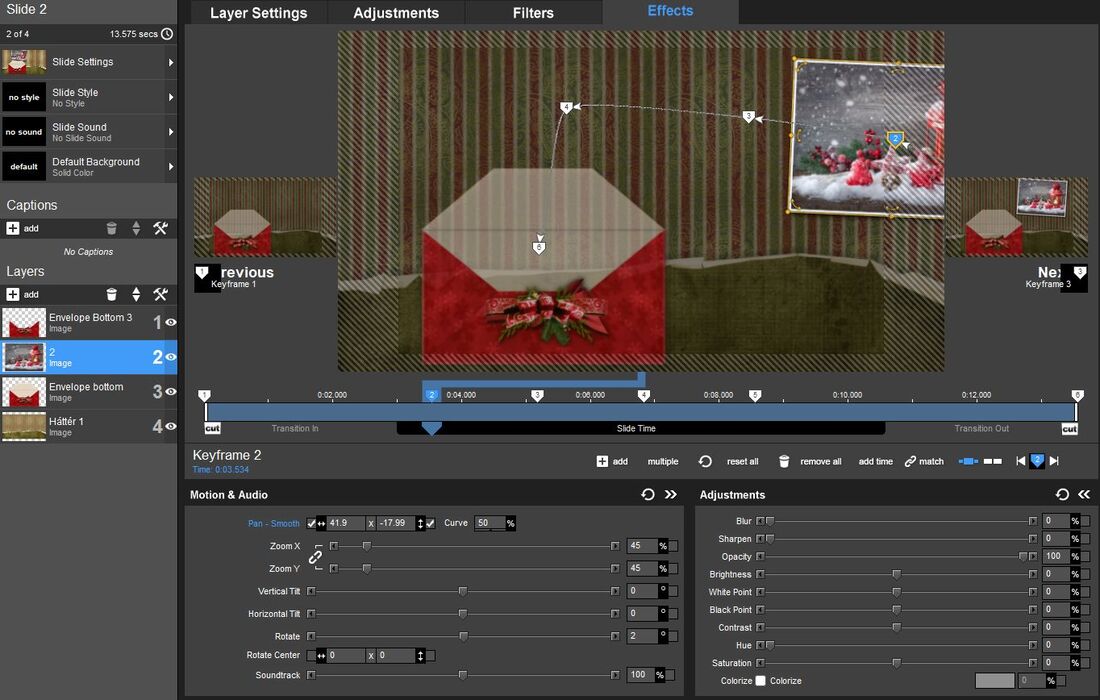
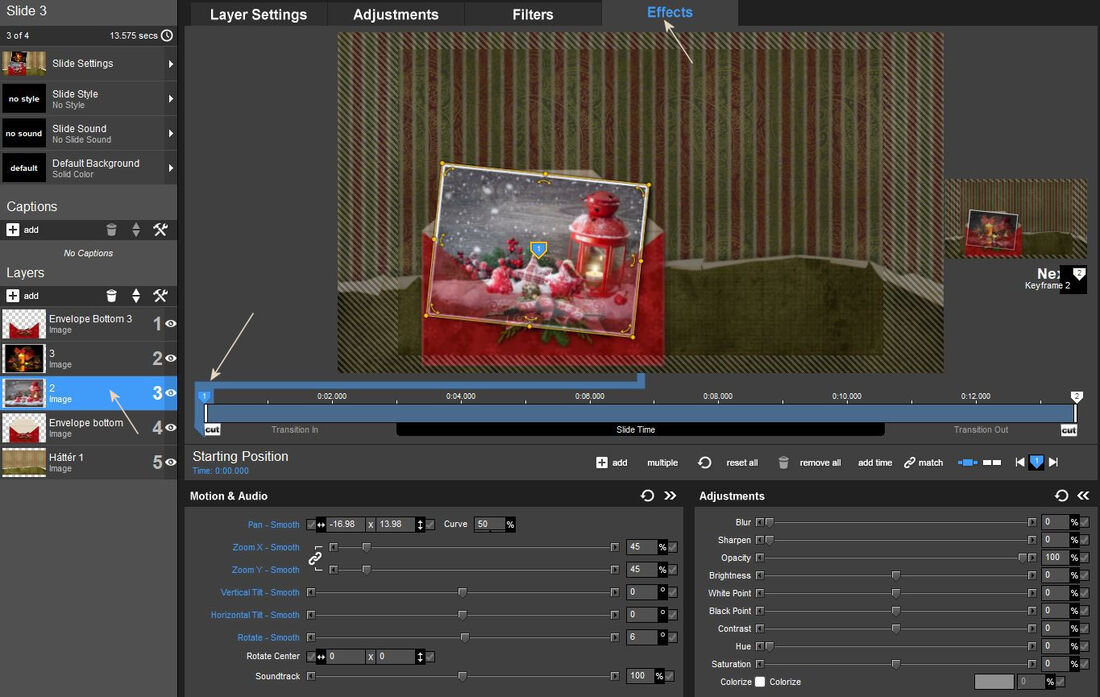
3. A képed mozgásához az effectben kb. így kell keyframe pontokat betenned ahogy ezt
itt a képen látod. Ne feljtsd el, hogy elöször 2 intro csempe helyed legyen és a harmadik csempén kezdj el dolgozni. Nekem itt a harmadik csempe ideje 7,5 -ön áll és elötte, utánna a kiscsempék pedig 3-on. Tehát az egyes keyframe ponton a képed kívülröl indul.
For the movement of your image in the effect, approx. this is how you have to insert keyframe points as you can see in the picture here. Don't forget to have 2 intro tiles in place first and start working on the third tile. For me, the time of the third tile is 7.5 and in front of it, and the small tiles after it are at 3. So, at each keyframe point, your image starts from the outside.
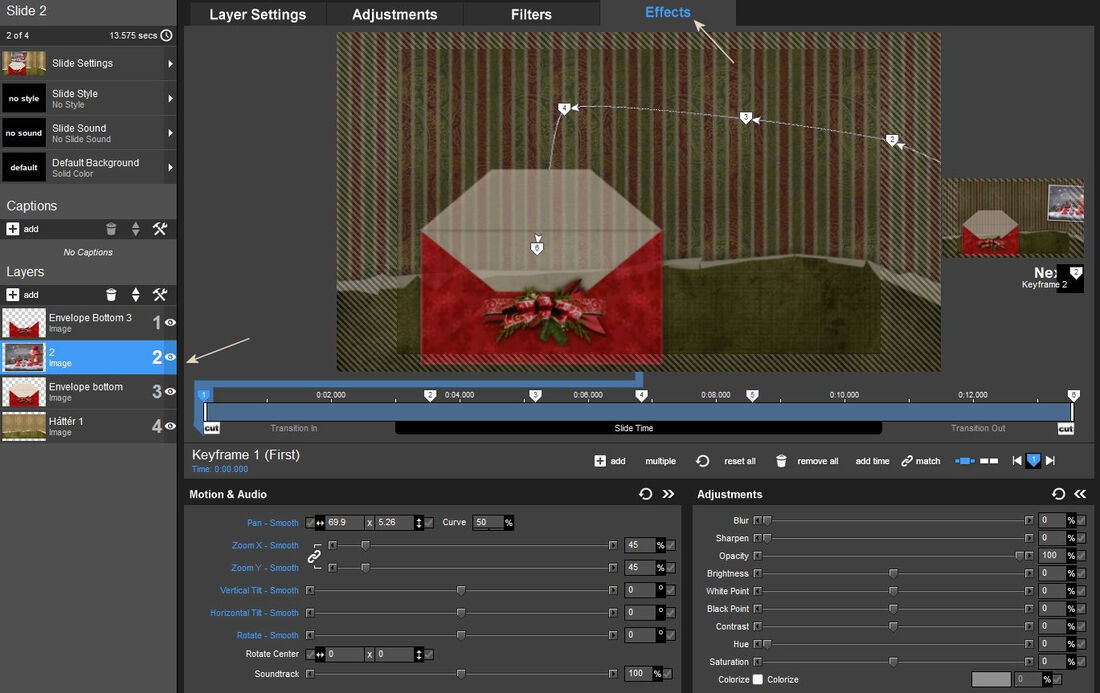
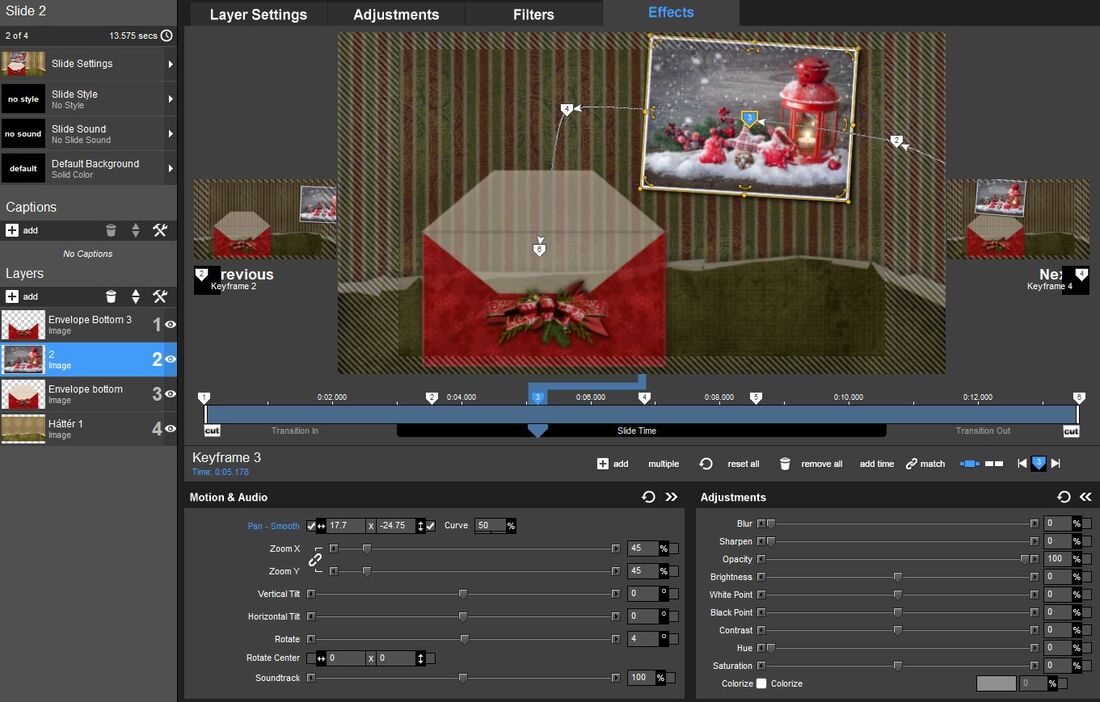
4. A kettesen itt látható.
The two can be seen here.
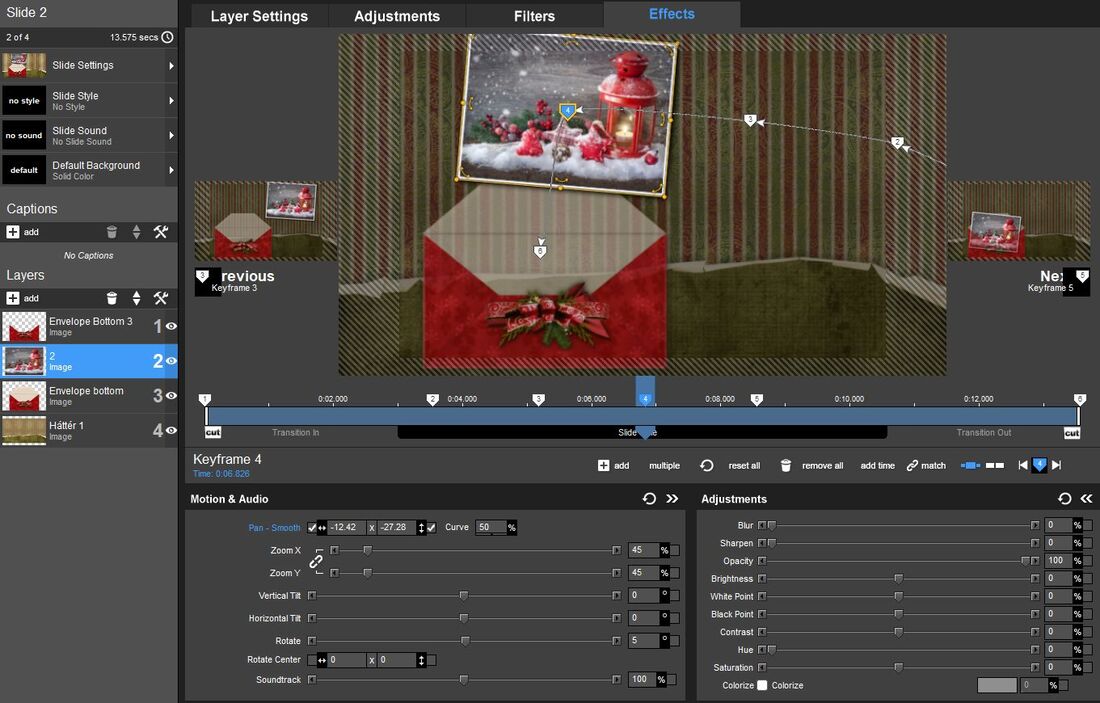
5. és így tovább... Ezt is meg kell tudni csinálni az elözöekben tanultak alapján.
and so on... You have to be able to do this as well based on what you learned previously.
6.
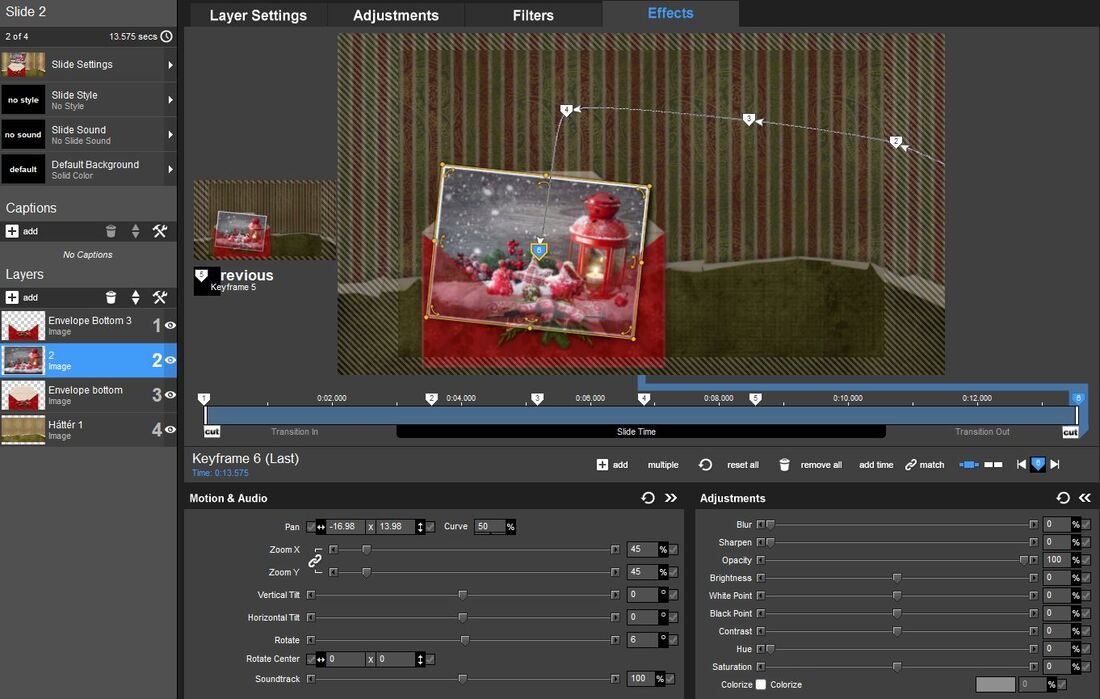
7. Ne feljetsd el ezt a keyframe pontot átmásolni az utolsóra.
Don't forget to copy this keyframe point to the last one.

8. Ennek a pontnak is ugyanannak kell lennie mint az elözön. Itt jegyezd meg a position értékeket!!!! Fontos, hogy hol állt meg a képed.
This point should also be the same as the previous one. Note the position values here!!!! It is important where your image stopped.
9. Ez itt már a következö csempe. Itt már az elözözö csempén levö képednek a helyén kell lennie mozgás nélkül. A pozíciójának ugyanannak kell lennie mint ahol az elözö csempén az utolsó keyframe ponton volt. Majd tegyél be egy újabb képet fölé.
This is the next tile. Here, your image on the previous tile should be in place without movement. Its position must be the same as where it was at the last keyframe point on the previous tile. Then put another picture above it.
10. Ennek a képnek teljesen ugyanolyan effecten kell mozognia mint az elsönek. Ezért én egyszerüen ide másoltam az elözö be efcktált képemet ide és az adjustmentben kicseréltem azt. Azután ennek a csempének a kopizásával folytathatod a munkát csak arról ne feledkezz meg, hogy mindig az éppen megérkezett képnek a következö csempén már mozgás nélkül a borítékban kell lennie.
This image should move with exactly the same effects as the first one. That's why I simply copied my previously uploaded image here and replaced it in the adjustment. After that, you can continue the work by copying this tile, just don't forget that the image you just received must always be in the envelope without moving on the next tile.