Ez a második része a slant típusú áttünéseknek. Tehát ez a bemutató a jobbos változata az elözö bemutatónak. Az elsö 10 lépést ide men tettem be ismét ha valaki nem emlékszik, hogy a balos változatot hogy kezdte akkor az elözö bemutatóval kell elkezdenie ezt a munkát is. és itt folytatnia.
This is the second part of the slant type transitions. So this presentation is the right version of the previous presentation. I've included the first 10 steps here again, if someone doesn't remember how they started the left version, then they have to start this work with the previous presentation as well. and continue here.

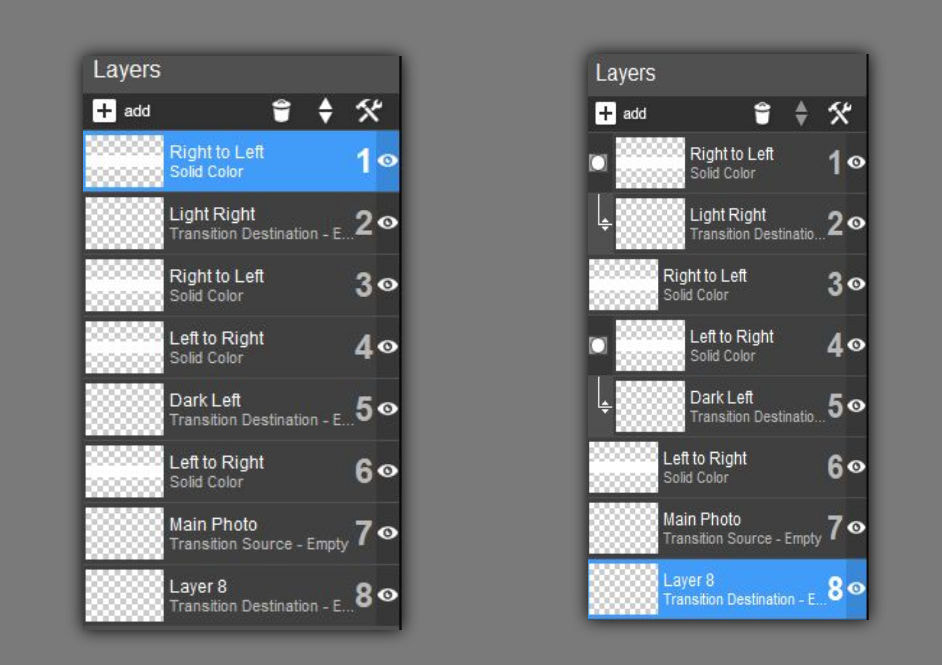
Gyakorlatilag elöször meg kell csinálnod a solid color elsö rétegedet 2000x300-as méretben és a gradient réteget is. Majd meg kell dupláznod öket és sorba rakni ahogy a képen látod.
Practically, first you have to make your solid color first layer in size 2000x300 and the gradient layer as well. Then you have to double them and line them up as you see in the picture.
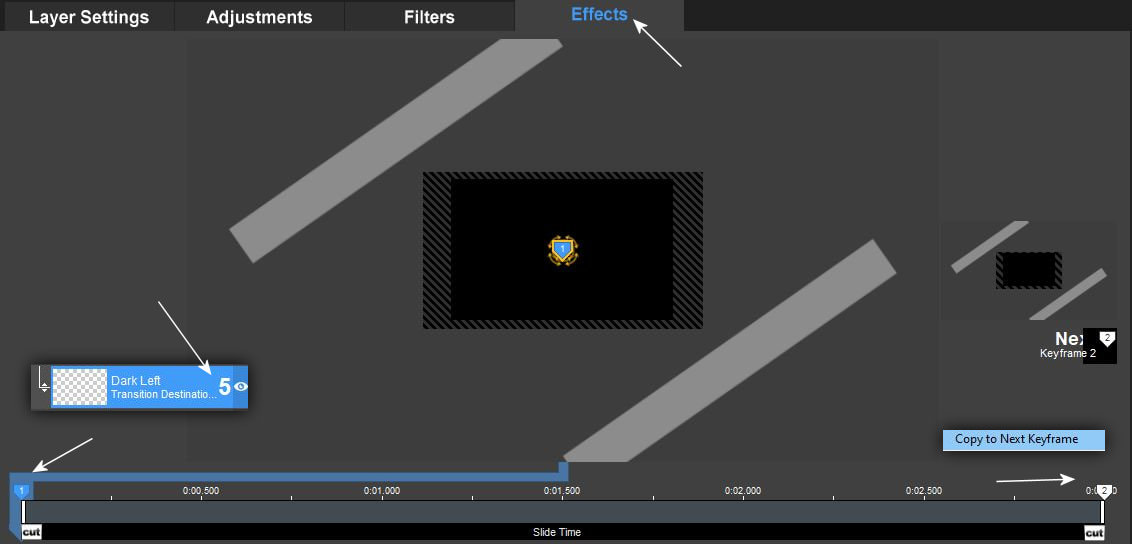
1. Igy rakd össze a rétegeket és nevezd el öket. Ez teljesen ugyanaz mint az elözö bemutatóban a bal slant áttünésnél.
So put the layers together and name them. This is exactly the same as in the previous presentation for the left slant transition.
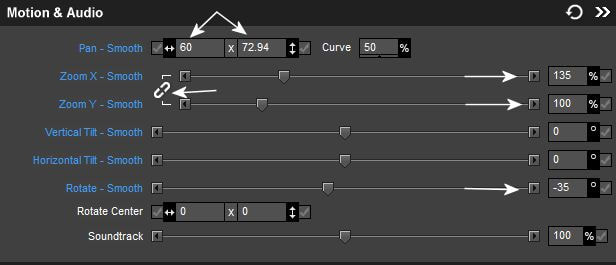
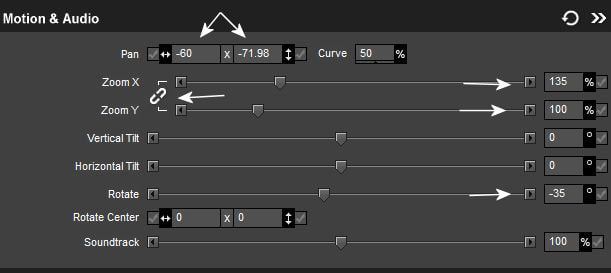
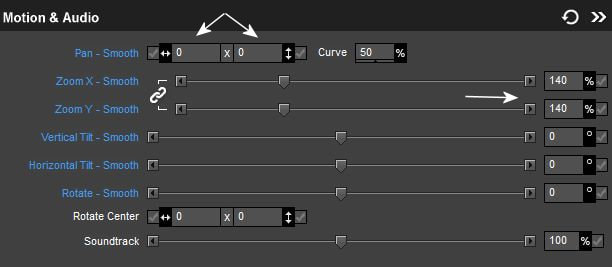
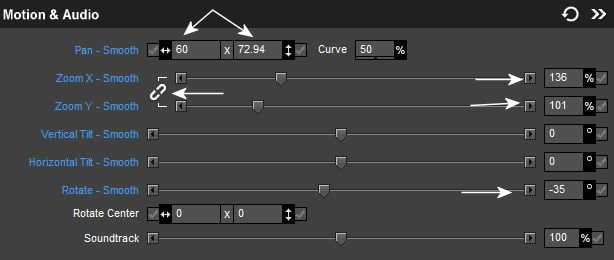
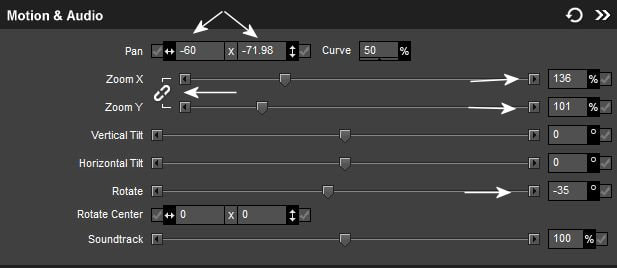
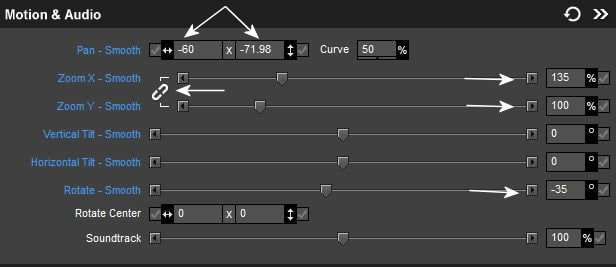
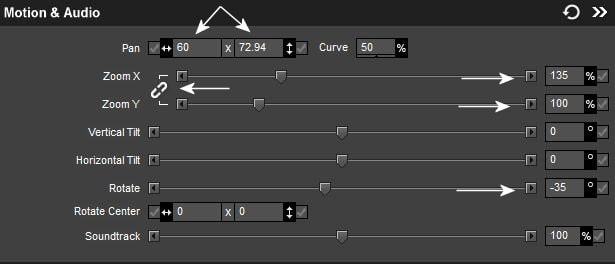
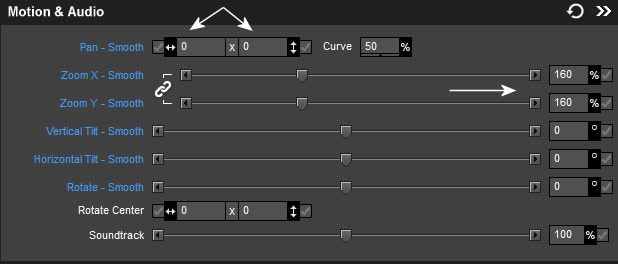
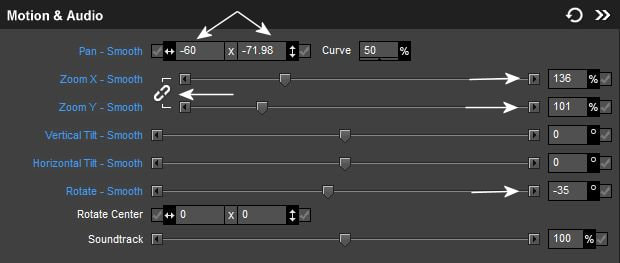
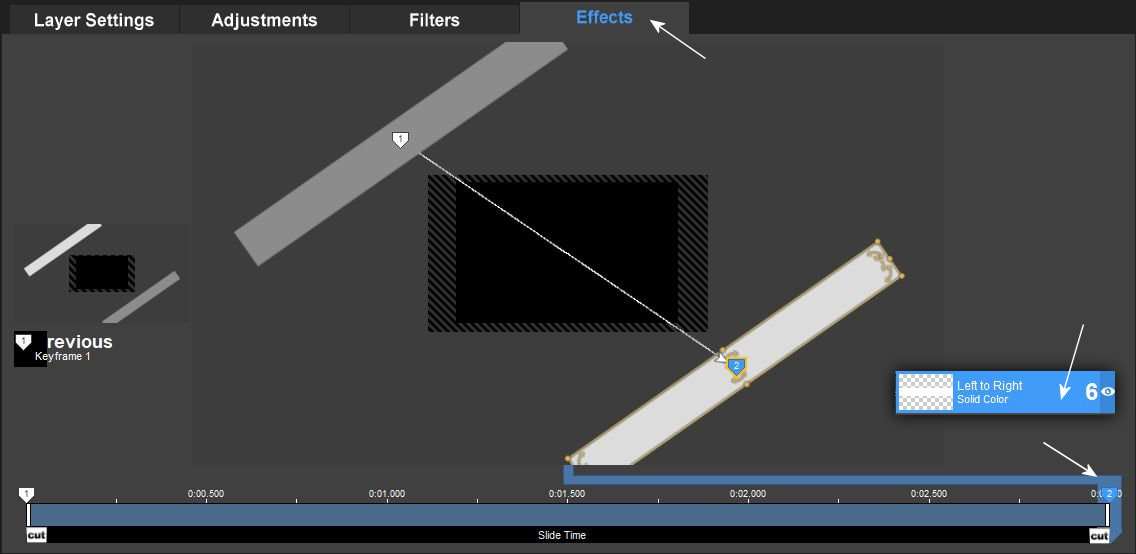
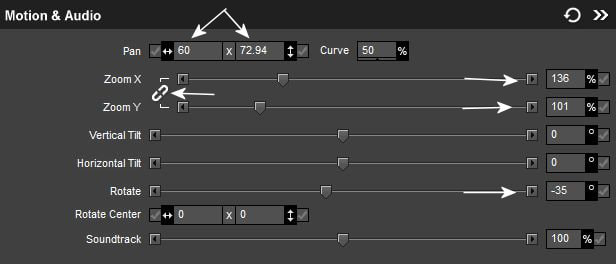
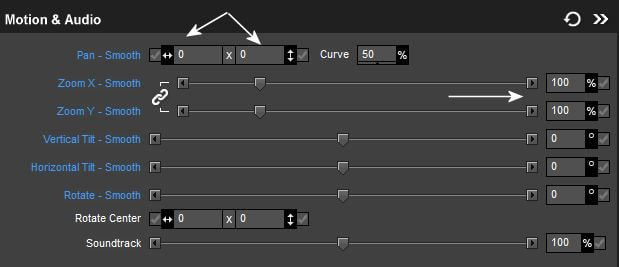
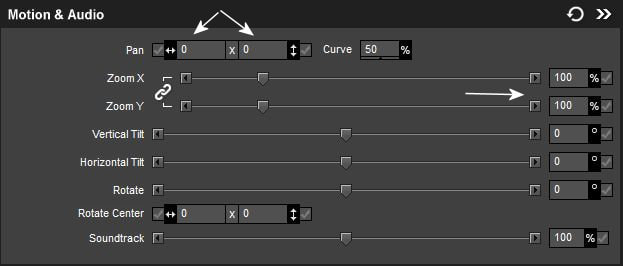
2. Figyelmesen dolgozz és kövesd a képeken látható értékeket amelyeket használnod kell.
Work carefully and follow the values shown in the pictures that you must use.

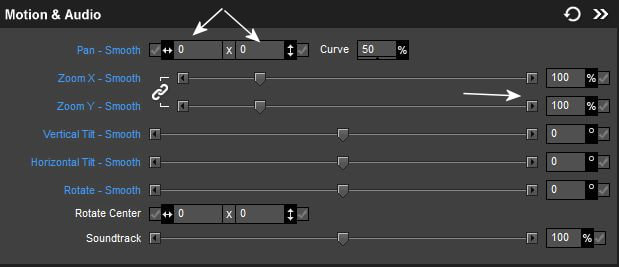
Figyelem, ahhoz hogy a zoom-hoz különbözö értékeket tudj írni mindig rá kell
kattintani a sor elején látható láncszem ikonra.!!!
Attention, in order to be able to write different values for the zoom, you must always click on the chain icon at the beginning of the row.!!!
3.
4.

5.
6.
7.

8.
9.
10.
11.
12.
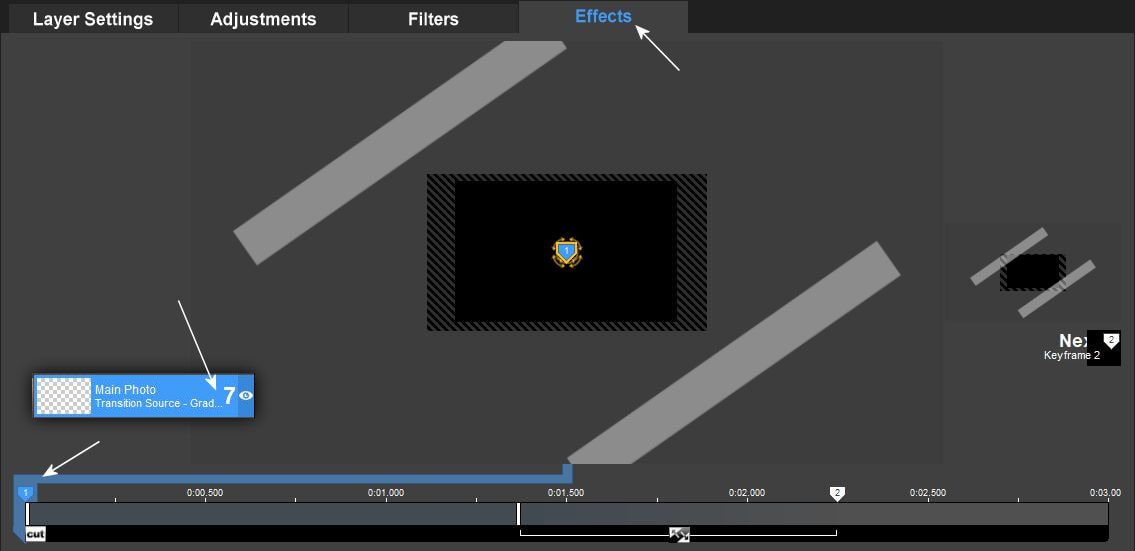
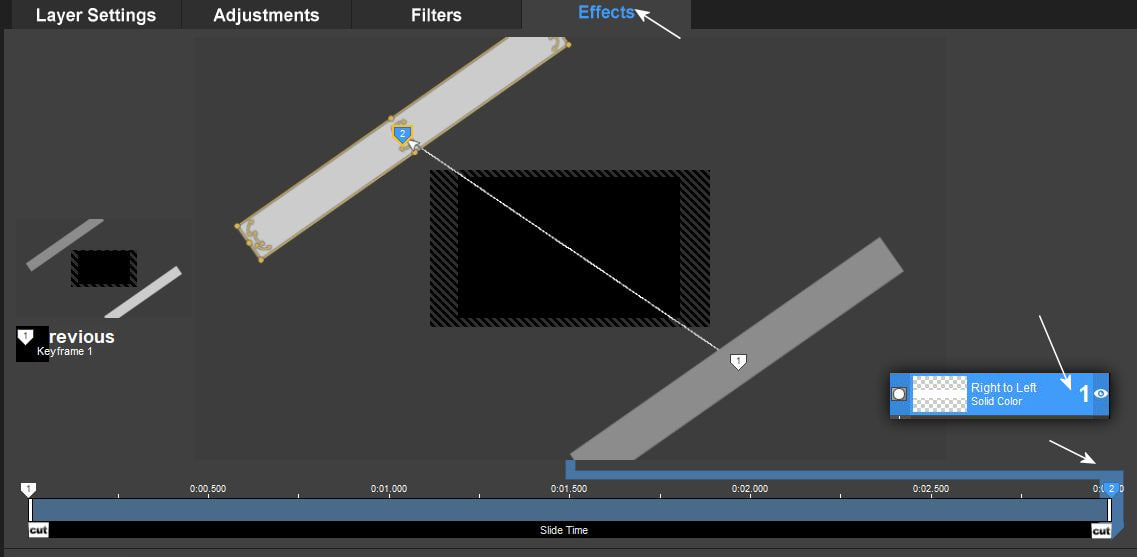
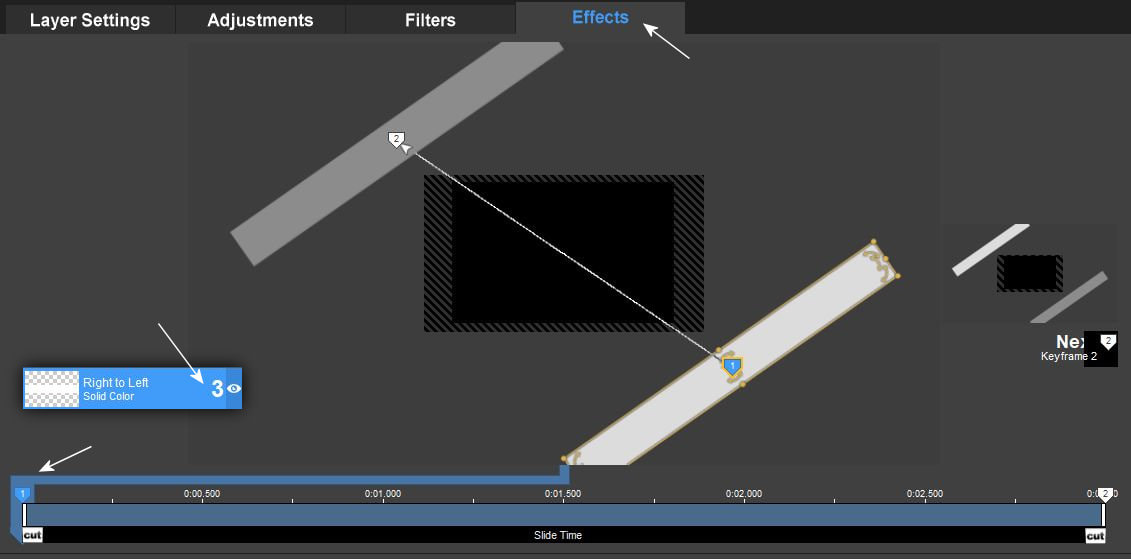
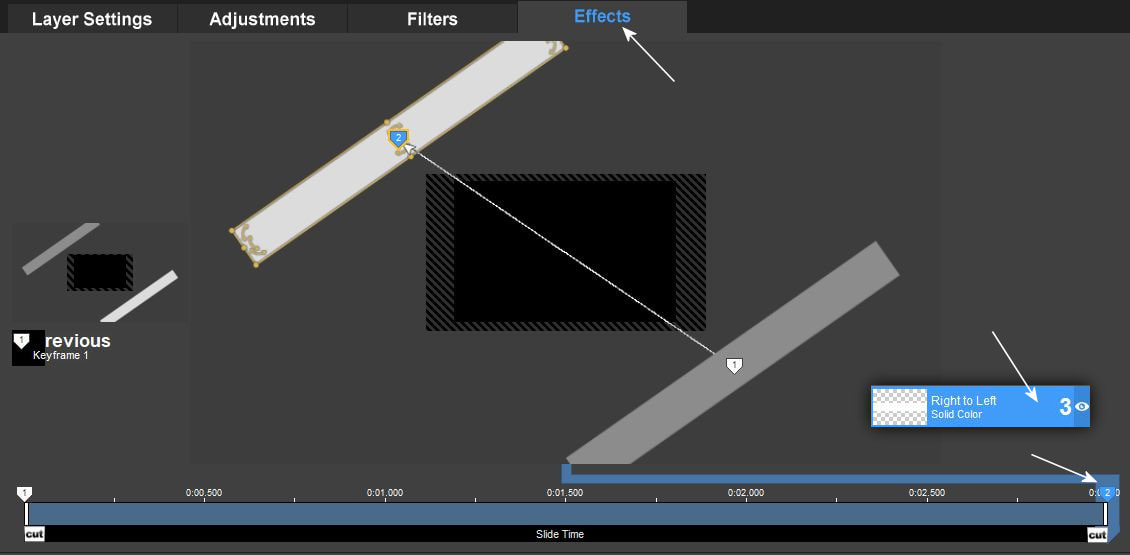
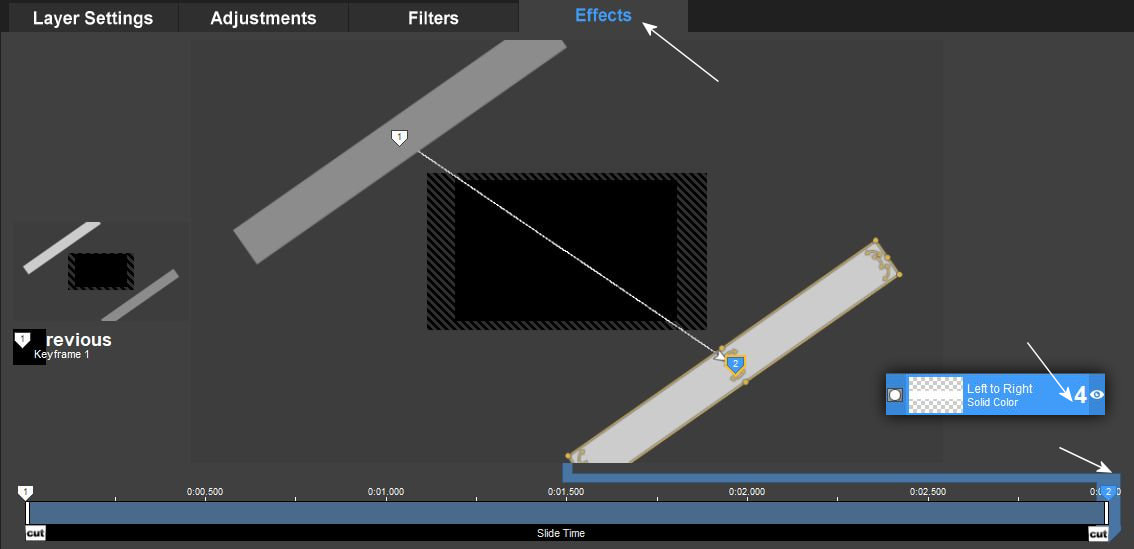
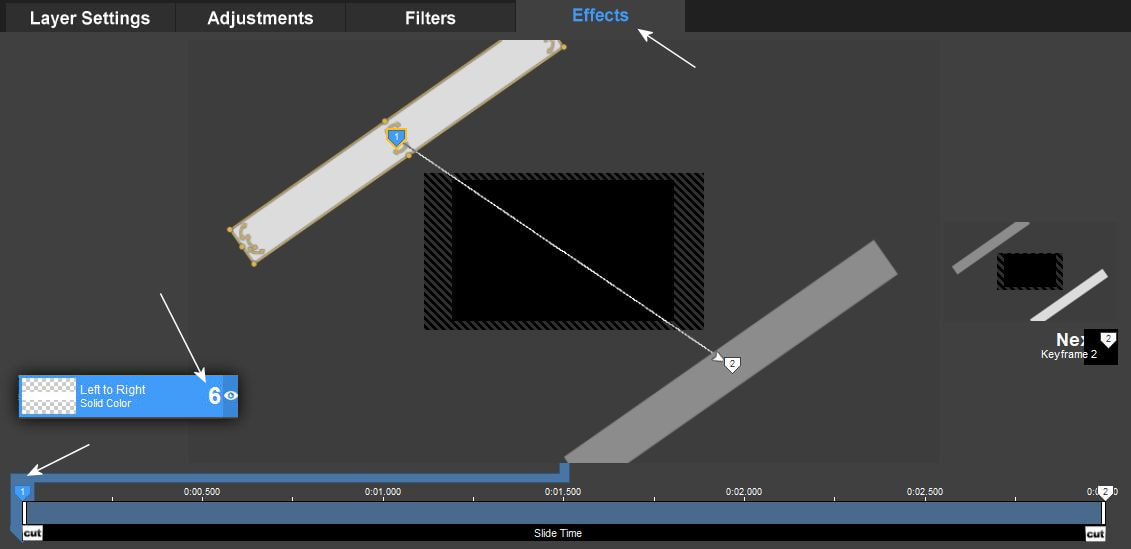
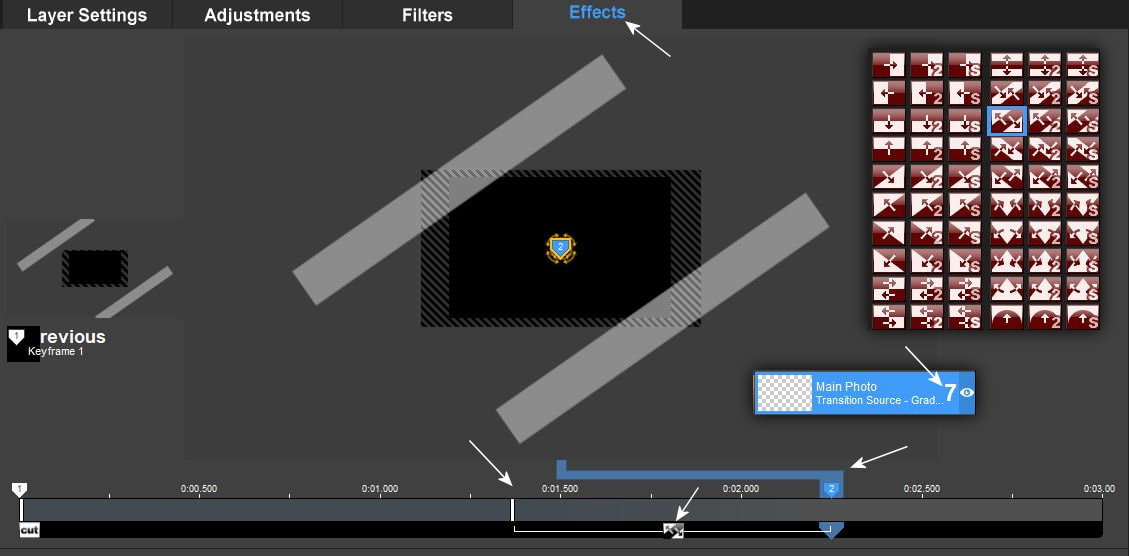
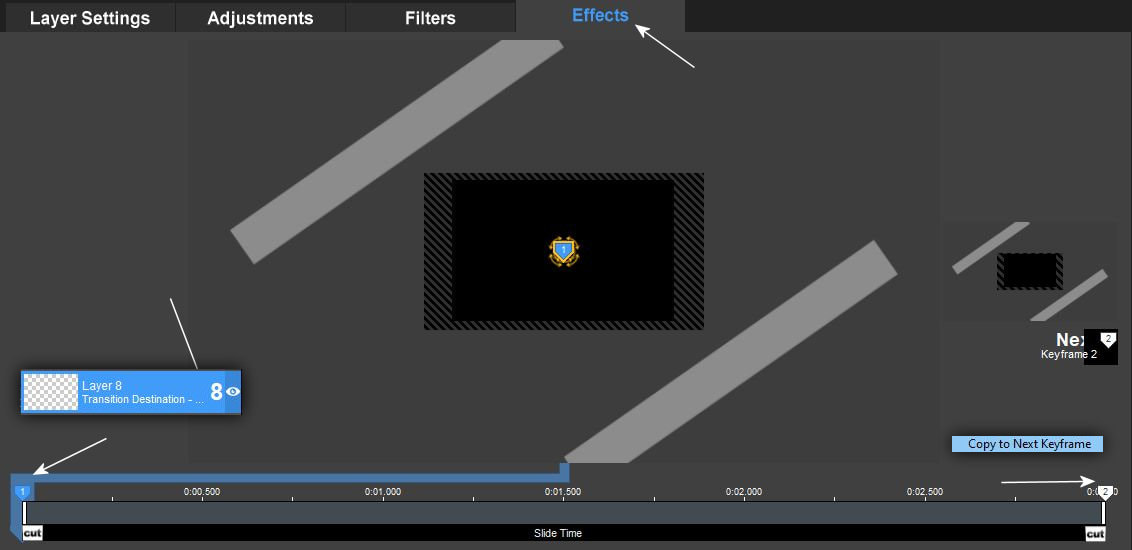
13. Ezen a képen nagyon sok információ van, figyelj meg mindent alaposan különösen a képen látható transition típust, hogy mit kell a 2-es keyframe pontra tenned.
There is a lot of information in this picture, pay close attention to everything, especially the transition type shown in the picture, what you need to do at keyframe point 2.
14.
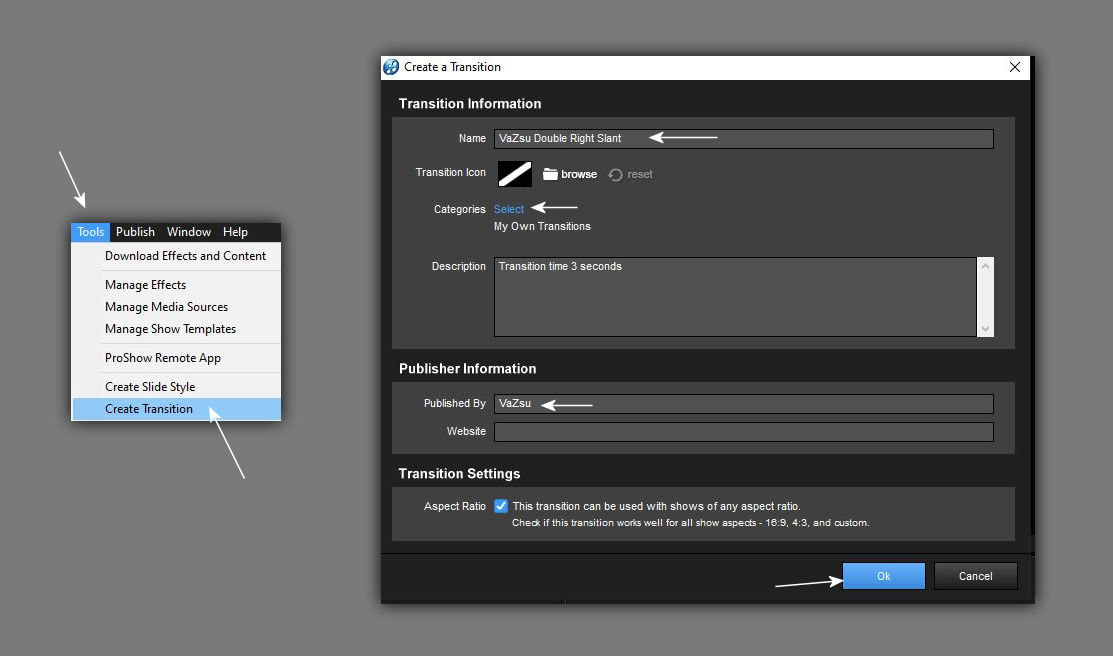
15. Nevezd el a transitionodat úgy hogy a saját beceneved is elötte legyen valamint a Published By sorba is írd be a saját neved.
Name your transition so that your own nickname is in front of it and enter your own name in the Published By line.