
Amikor már komolyabb látványtervvel rendelkezünk egy videóhoz, mindig érdemes azt elöre elkészíteni a Corelban is rétegenként mert ha ott pontosan abban a méretben stilizáljuk a rétegeket azzal sokkal könnyebben dolgozunk a ProShow Producerben.
Én minden videómat a Corelban készítek elö hogy a méretek pontosak legyenek. Ne felejtsd el, hogy mi saját egyedi vidiket csinálunk saját effektekkel és nem azokkal amelyek a programban alapon benne vannak. Ha azt használod csak, akkor semmilyen elökészítésre nincs szükség csak a képekre az arra rakott effectek majd mindent megcsinálnak. De úgy nem tanuljuk meg a programhasználatot és unalmas is lesz majd minden videóban ugyanazt az effectet használni. Soha, de soha ne sajnáld az idödet az elökészületi munkára , az mindig meghálálja neked látványban a videódat és egyedi dolgokat alkothatsz. Ennél a szerkesztési módszernél most a háttér mozgatást is megtanuljuk. Azt sem felejtes el, hogy ez csak egy minta nem ugyanezt kell képekben és témában megcsinálnod, csak a szisztémát tanulod meg vele mit kell a feladathoz csinálnod.
When we already have a more serious visual plan for a video, it is always worth preparing it layer by layer in Corel, because if we stylize the layers in the exact size there, it will be much easier to work in ProShow Producer. I prepare all my videos in Corel so that the dimensions are accurate. Don't forget that we make our own unique videos with our own effects and not those that are included in the program. If you only use it, then no preparation is necessary, only the effects applied to the images will do everything. But we won't learn how to use the program that way, and it will be boring to use the same effect in every video. Never, never regret the time spent on the preparatory work, it will always thank you visually for your video and you can create unique things. In this editing method, we will now also learn how to move the background. Also, don't forget that this is just a sample, you don't have to do the same in pictures and subject matter, you only learn the system with it and what you have to do for the task.

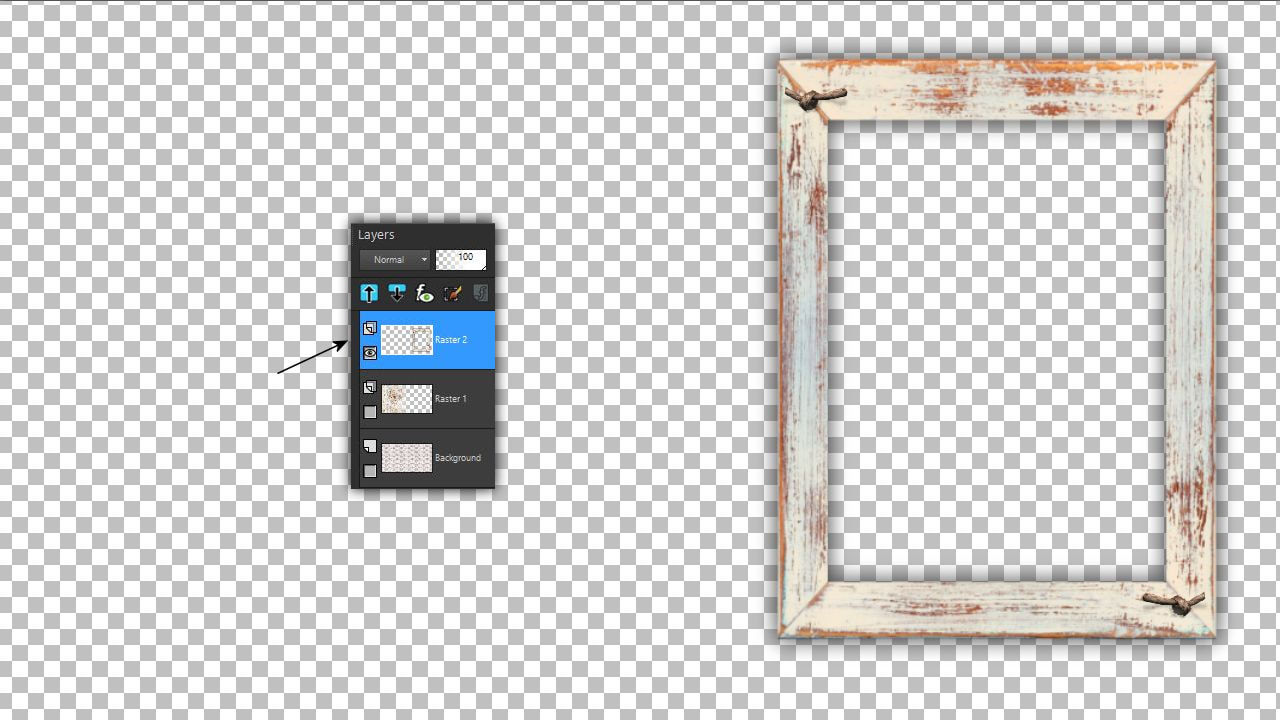
1. Ehhez a videó feladathoz szükség van egy álló képkeretre. Csak ezt használjuk minden videócsempén most nincs fekvö keretre szükség. Ez a keret természetesen lehet a neten talált png keret is vagy általad szerkesztett keret is. Egyetlen fontos dolog van, hogy a stílusa ennek a keretnek megfeleljen a videód témájához hátteréhez és színharmóniában legyen a vidiben szereplö alkotóelemekkel. Legelöször a Corel programodban hozz be egy 1280x720-as alapot ami megeggyezik a ProShow Producerben használatos mérettel. Arra helyezd el a kiválasztott keretedet megfelelö helyre a lapon és megfelelö méretben ahogy azt a videódban akarod láttani. A kiválasztott témájú képeid közül hozz be egyet és helyezd el a keret alatt kis takarással. Vagyis beméretezzük azt a kerethez. Erre azért van szükség mert itt tudjuk mozgatni a középsö fogógombokkal is ha szélesebb vagy hosszabb kel a takaráshoz. A ProShowban ezt nem tudod csinálni mert egyben mozog minden.
This video task requires a still frame. We only use this on all video tiles, now there is no need for a horizontal frame. This frame can of course be a png frame found on the net or a frame edited by you. The only important thing is that the style of this frame matches the theme of your video, the background and is in color harmony with the components in the video. First, import a 1280x720 background in your Corel program, which matches the size used in ProShow Producer. Place your chosen frame in the right place on the page and in the right size as you want to see it in your video. Bring in one of your selected theme pictures and place it under the frame with a small cover. That is, we scale it to the frame. This is necessary because we can move it here with the middle handle buttons if it is wider or longer for the cover. You can't do this in ProShow because everything moves together.
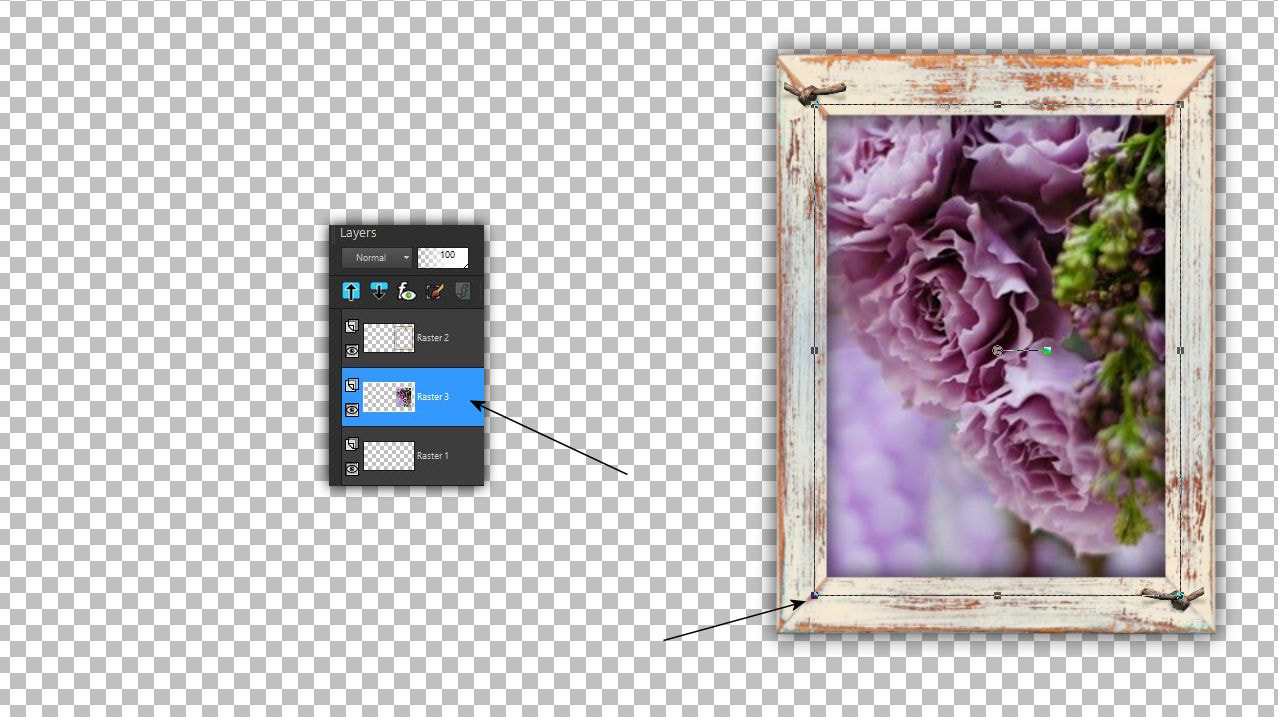
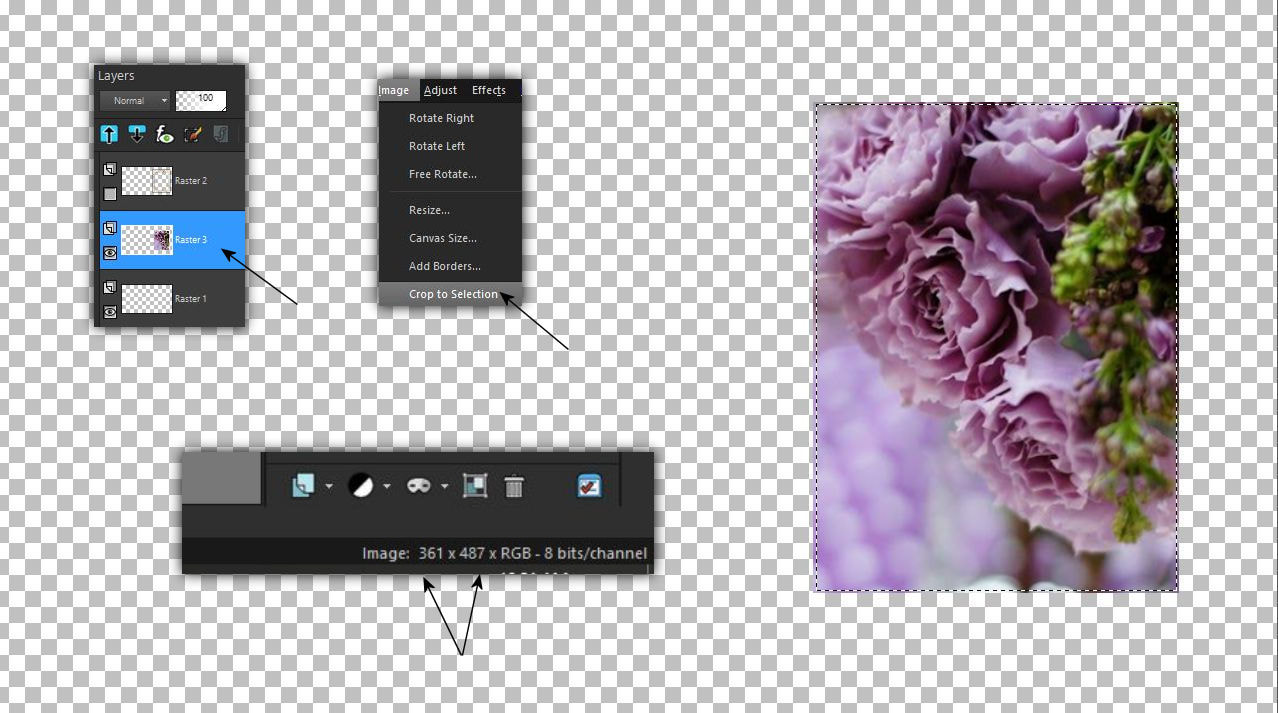
2. Csukd be a rétegszemeket és állj a középsö képrétegedre. Jelöld körbe pontosan
a képedet vágd ki azt és nézd meg a méretet a Corel képernyöd jobb alsó sarkában. Ez azt jelenti, hogy ehhez a kiválasztott kerethez amit a vididben alkalmazni akarsz minden állóképedet erre a méretre kell átméretezned, hogy jól be tudd illeszteni a ProShowba a kerethez.
Close the layer meshes and stand on your middle image layer. Circle your image exactly, cut it out and check the size in the lower right corner of your Corel screen. This means that for this selected frame that you want to use in your video, you must resize all your still images to this size, so that you can fit them well in ProShow to the frame.
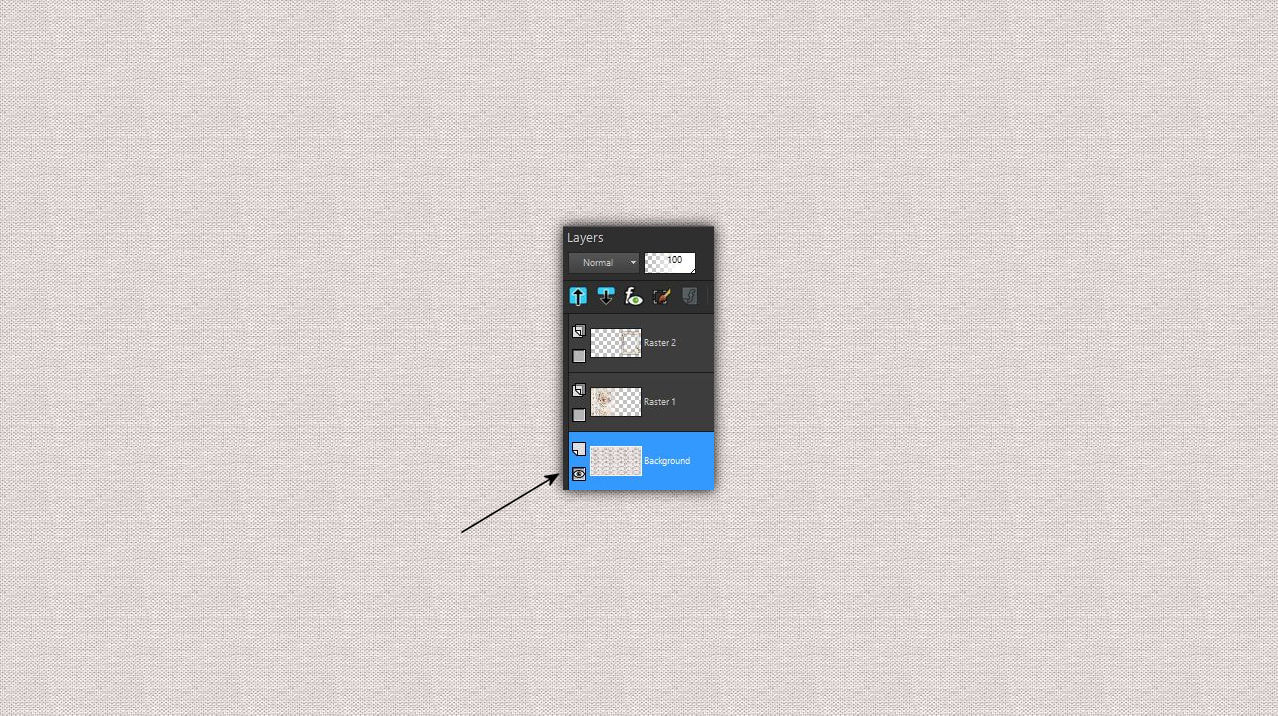
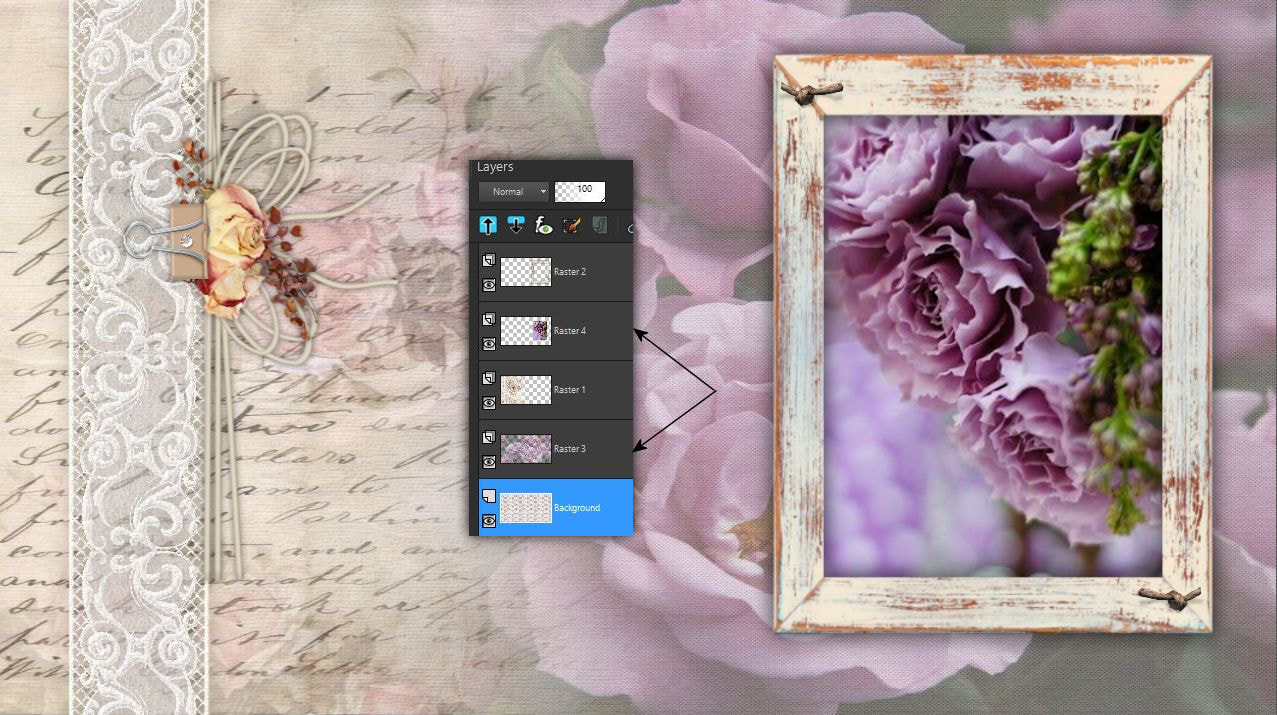
3. Rakjuk össze most a rétegeket amelynek pontosan ilyen sorrendben kell majd a ProShowban is lennie ehhez a videófeladathoz. Elöször legyen egy színes alapod amely passzol majd a többi összetevöhöz színharmónikusan.
Now let's assemble the layers, which must be in exactly the same order in ProShow for this video task. First, you should have a colored base that will match the other components harmoniously.
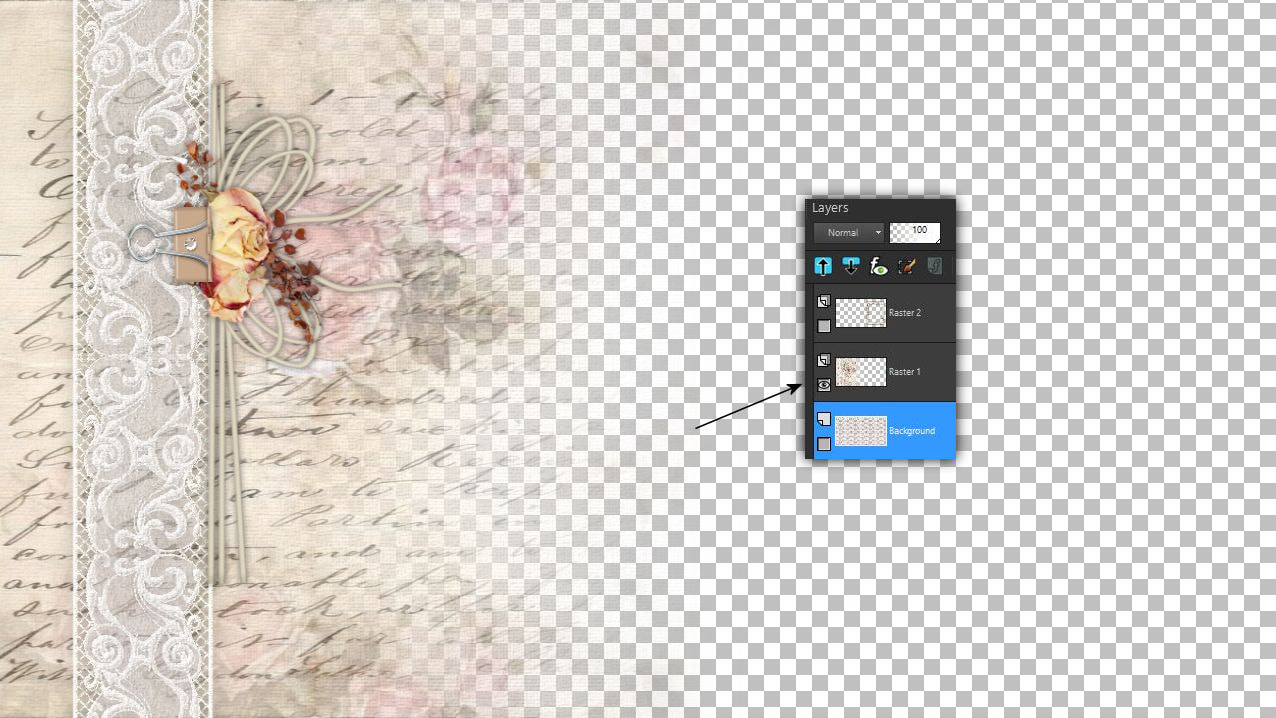
4. Ez egy különleges stílusban készülö videó lesz amelyhez szükség van egy függölegesen félbe maszkolt dekor alapra. Itt egyben van a dekor is a szépen megszerkesztett alapomon nem kell alatta mozgatni majd semmit. A komplett félmaszkolt alap alatt lesz majd mozgás. Ezt a maszkomat alul ezen a weblapon megtaláljátok letöltésre
This will be a video made in a special style, which requires a decor base masked vertically in half. The decor is here as well, on my well-constructed base, you won't have to move anything underneath. There will be movement under the complete semi-masked base. You can find this mask for download at the bottom of this website

5. Ennek a félmaszkolt dekoralapnak kell a színes alap felett elhelyezkednie.
This masked decor base must be located above the colored base.
6. Legfelül pedig a keretes réteged van. Az a legjobb ha ezt egy az egyben úgy mentitek el a Corelban png-ben ahol itt beállítottátok.
And at the top you have the frame layer. It is best if you save this one by one in Corel in png where you set it up here.
7. Itt azt látjátok hogy a második és negyedik réteg lesz az amelyekre mozgást teszünk majd így minden csempéden a ProShow-ban ez a két réteg cserélödik majd a témádhoz összegyüjtött képeidnöl. Egy db állókép a megfelelö méretben és egy fekvö kép amelyet halvány blend móddal mentettél el magadnak.
Here you can see that the second and fourth layers will be the ones on which we will move, so on each tile in ProShow, these two layers will be replaced from the images collected for your theme. One still image in the appropriate size and one landscape image that you saved for yourself with a faint blend mode.
Remélem hogy érthetö volt az elökészület ehhez a videófeladathoz. Folytassuk a munkát a ProShow Producerben.
I hope that the preparation for this video task was understandable. Let's continue working in ProShow Producer.

| vazsu_mask_right.rar |