Folytassuk a tanulmányokat egy egyszerü csík maszk készítéssel amelyet mozgásra teszünk effektként. Elörebocsájtom, hogy a képszerkesztésben megszokott maszkolás fogalom meröben eltér a ProShow Producer programban való maszkolási technikától.
A munkafolyamat alatt ne siess minden apró részletet figyelj meg a képeken, különös tekintettel a fehér nyilakra. Ezek a müveletek egyáltalán nem egyszerüek.
Let's continue the studies by creating a simple strip mask, which we move as an effect. The usual concept of masking in image editing is quite different from the masking technique used in the ProShow Producer program. During the work process, take your time and observe every little detail in the pictures, especially the white arrows. These operations are not simple at all.

Figyelem!!!
Mielött bárminek is nekiláttok egy nagyon fontos dolog van ennél a stílusnál, rendkívül pontosaknak és azonosaknak kell lenniük a maszkok pozíciójának az egymáshoz tartozó 1-es és 2-es keyframe pontoknak azután amikor a helyükre húzzátok öket.!!!
Hogy érts miröl van szó ideteszem egy maszknak az én vidimböl a képeit hol kell figyelned ( minden maszknál ) különben nem együtt futnak majd a vonalak hol vastagabb hol vékonyabbak lesznek. Itt lassú, pontos, figyelmes munka kell.!!!
Attention!!! Before you start anything, there is one very important thing about this style, the position of the masks must be extremely precise and identical to the corresponding keyframe points 1 and 2 after you drag them into place.!!! To understand what I'm talking about, here are the pictures of a mask from my video, where you have to pay attention (for all masks), otherwise the lines will not run together, where they will be thicker and thinner. Slow, precise, attentive work is required here.!!!
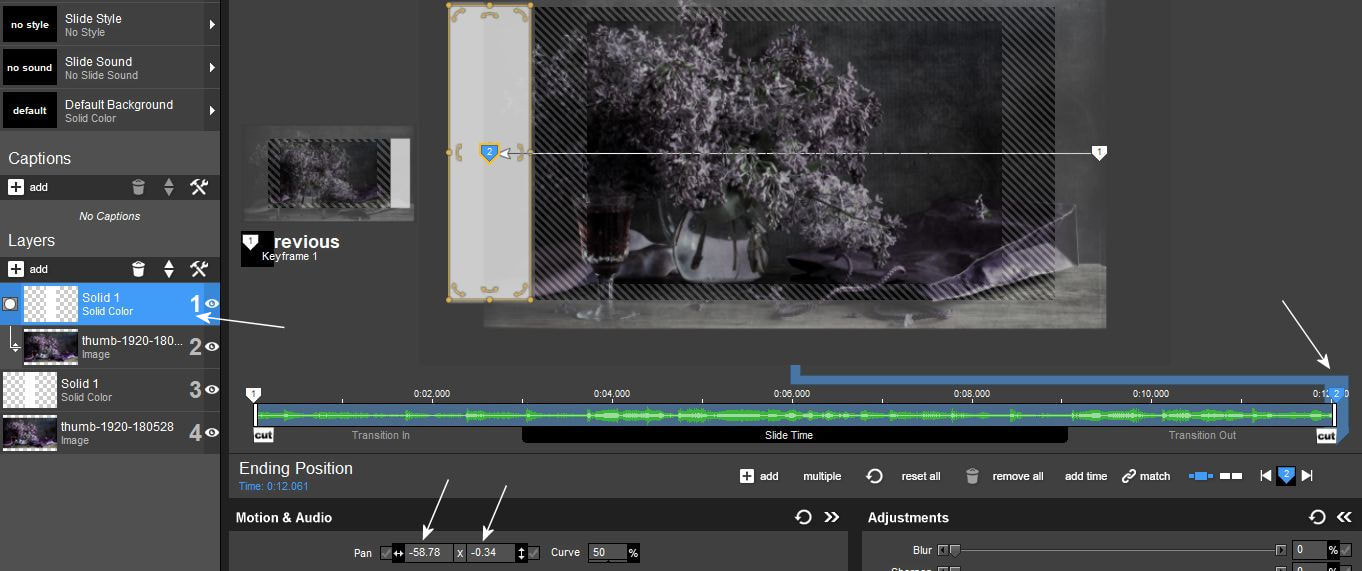
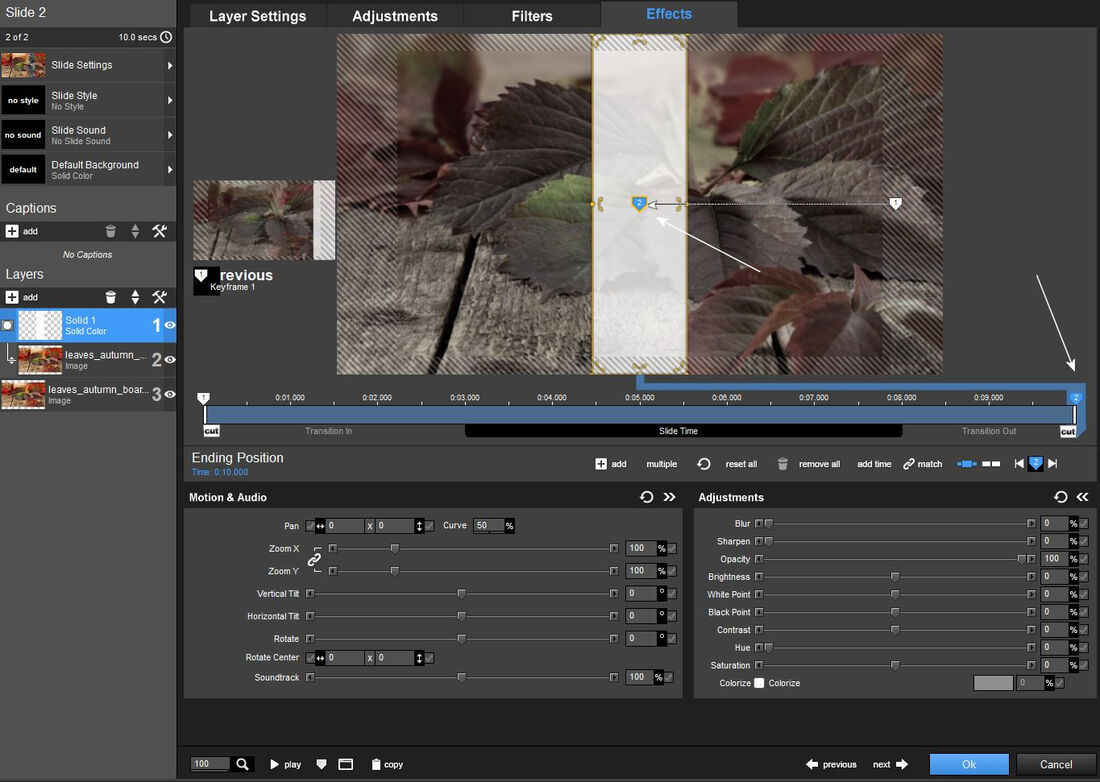
A. Felsö maszk keyframe 1- es pont a Motion & Audio ablakban levö pozíciódnak
a 2-es keyframe ponton is ugyan annak kell lennie.
Upper mask keyframe point 1. Your position in the Motion & Audio window must be the same at keyframe point 2.
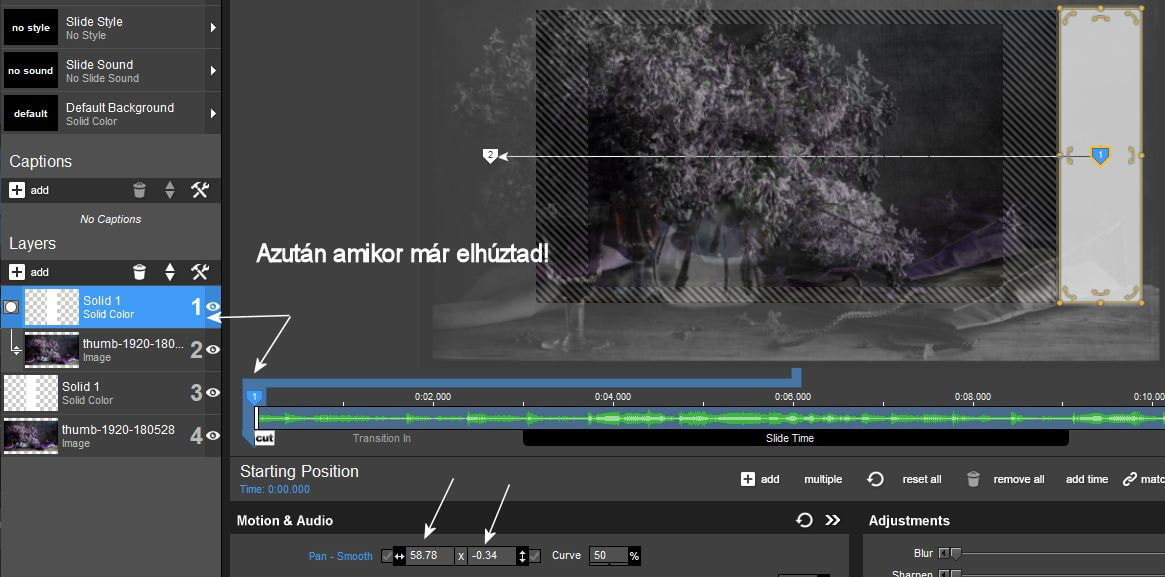
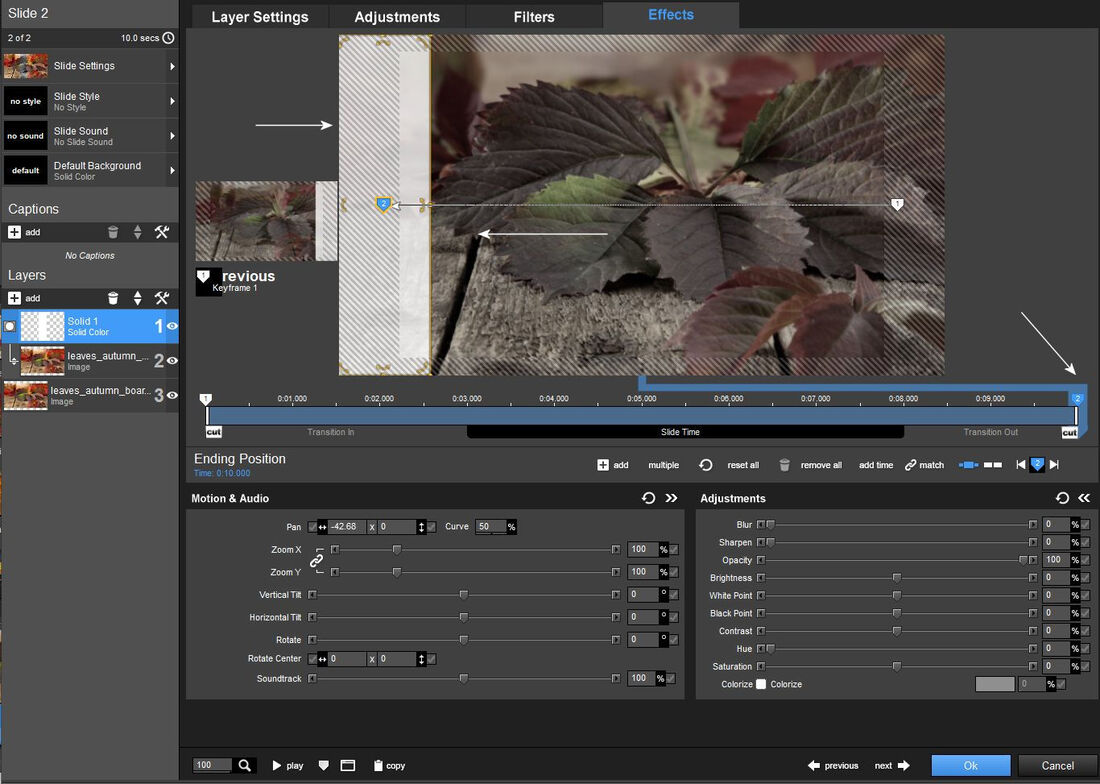
B. Felsö maszk keyframe 2.-es pont. Amikor az egérrel elhúzod a maszkot valamilyen irányba senki nem tudja azt pontosan. Ezért mielött a maszk réteget
megduplázod, meg kell gyözödj arról, hogy a pozíciók egyformák mindkét ponton. Ha nem azonos be kell írnod.!
Upper mask keyframe point 2. When you drag the mask in a certain direction with the mouse, no one knows exactly. Therefore, before you double the mask layer, you must make sure that the positions are the same at both points. If it is not the same, you must enter it.!
1. Akkor kezdjünk. Hozz be a témádhoz gyüjtött képekböl egy képet a csempédre. Ennek a csempének az idejét állítsd 5 mp-re a transitiont pedig 2-re. Ezzel dolgozz ha szükséges lesz késöbb ezeket az értékeket a munka végeztével megváltoztathatod.
Arra is figyelj, hogy a csempéden 1280x720-as méretü képet használj.
Duplázd meg a réteget.
Then let's get started. Bring an image from the images collected for your topic onto the tile. Set the time of this tile to 5 seconds and the transition to 2. Work with this if necessary, you can change these values after the work is finished. Also, make sure to use a 1280x720 image on the tile. Duplicate the layer.
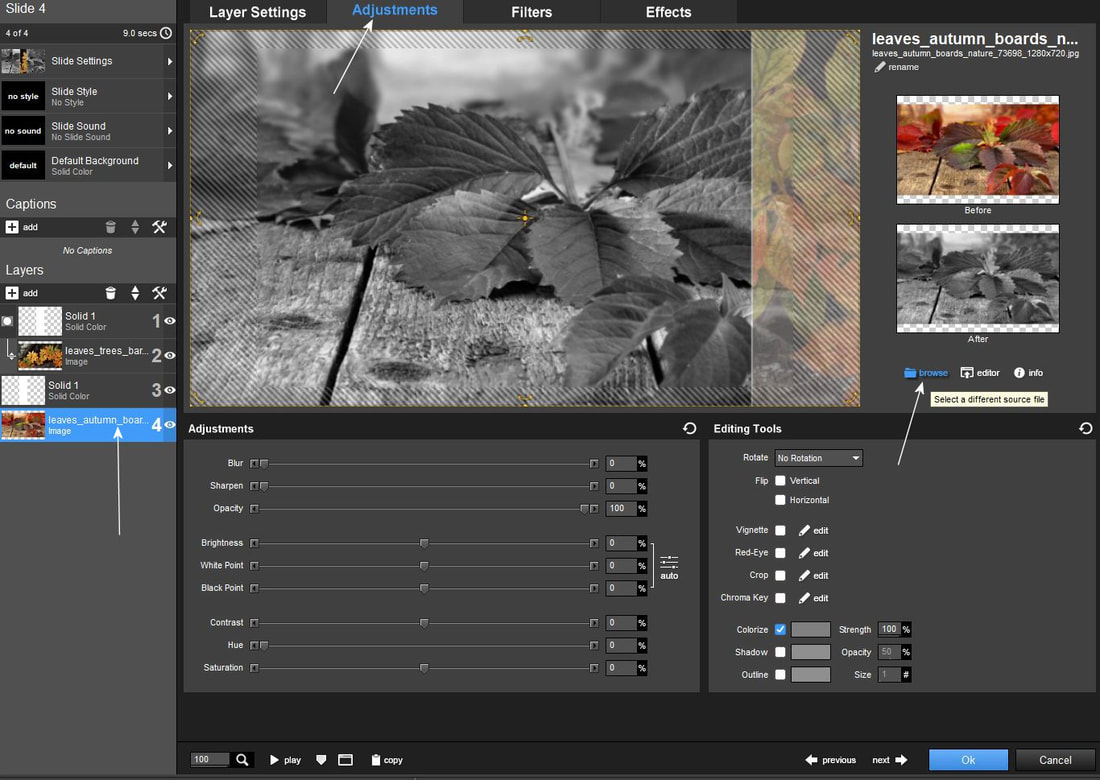
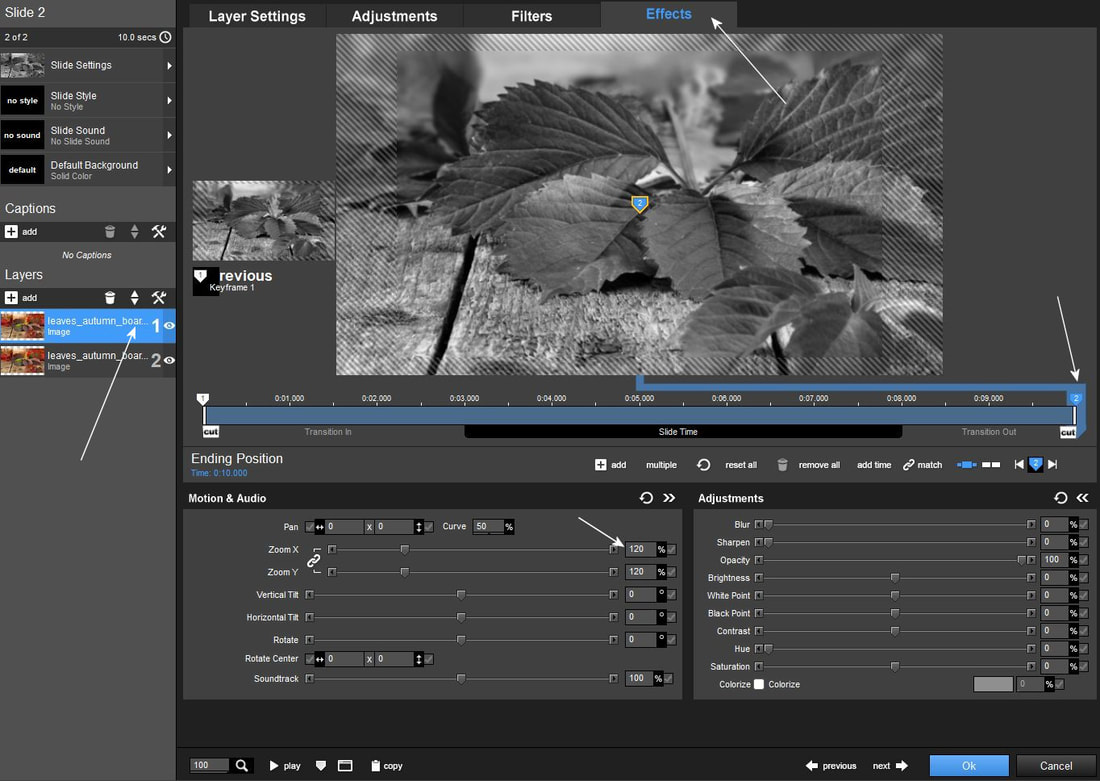
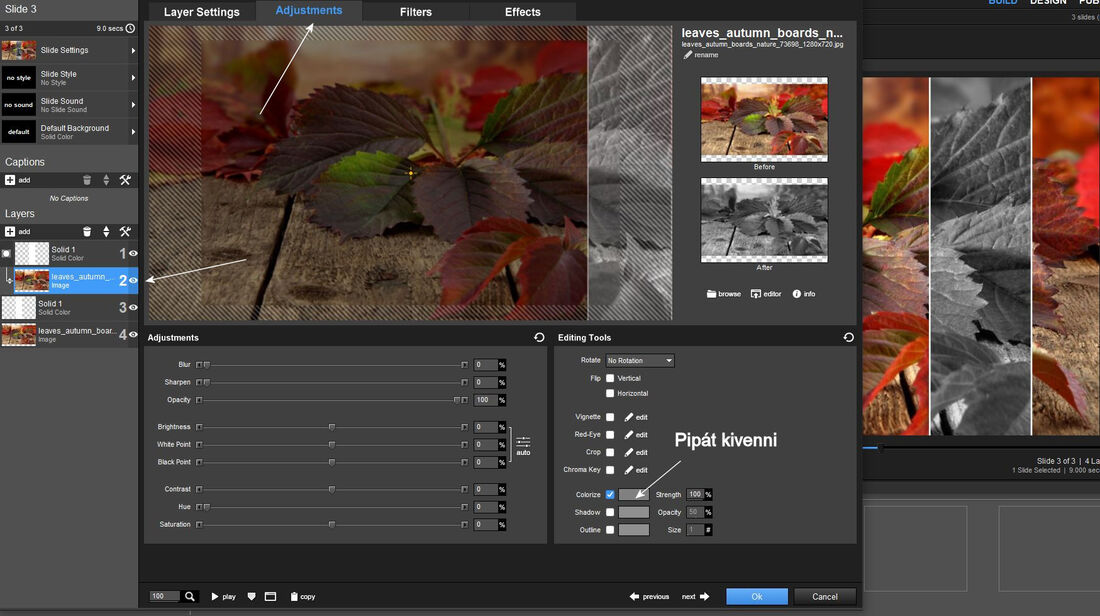
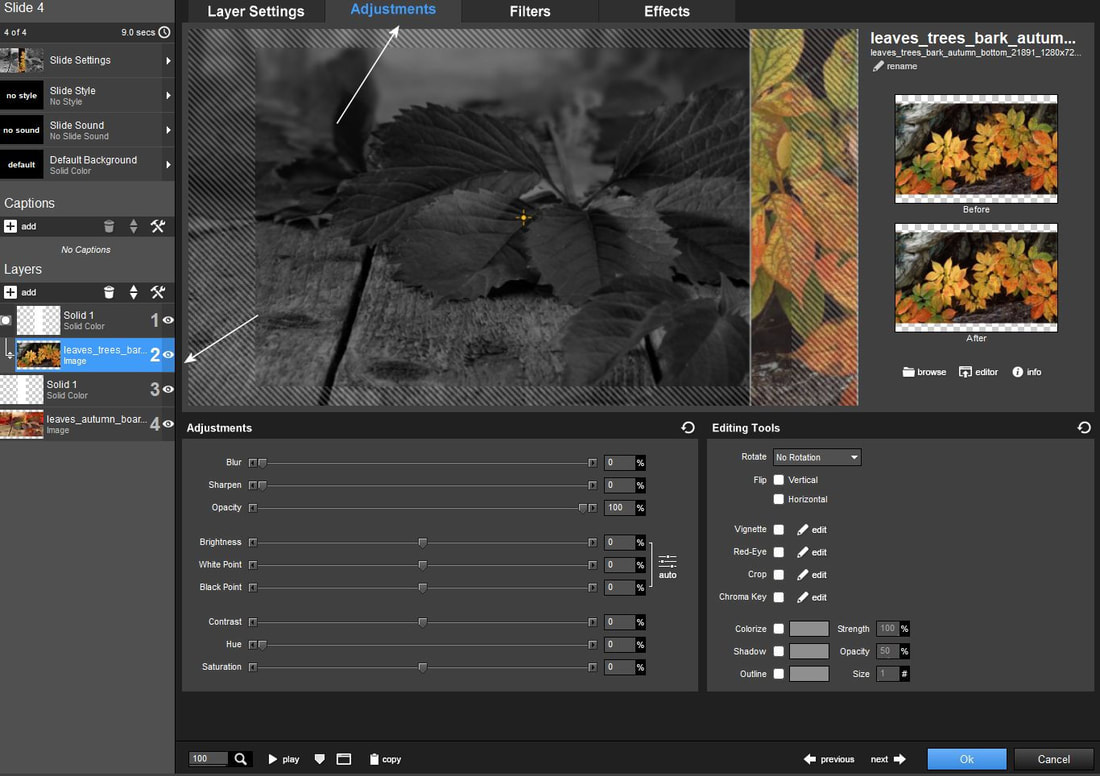
2. A felsö rétegképeden maradj. Állj az Adjustment menüpontra, majd tegyél pipát a colorize kockába, hogy a felsö rétegképed fekete-fehér legyen.
Figyelem a rétegen a szín nem változik meg de a munkálatok során látod majd, hogy az látványban biztosan fekete-fehér kép lett.
Stay on your top layer image. Go to the Adjustment menu item, then check the colorize box so that your top layer image is black and white. Attention, the color does not change on the layer, but during the work you will see that it must have turned out to be a black and white image.

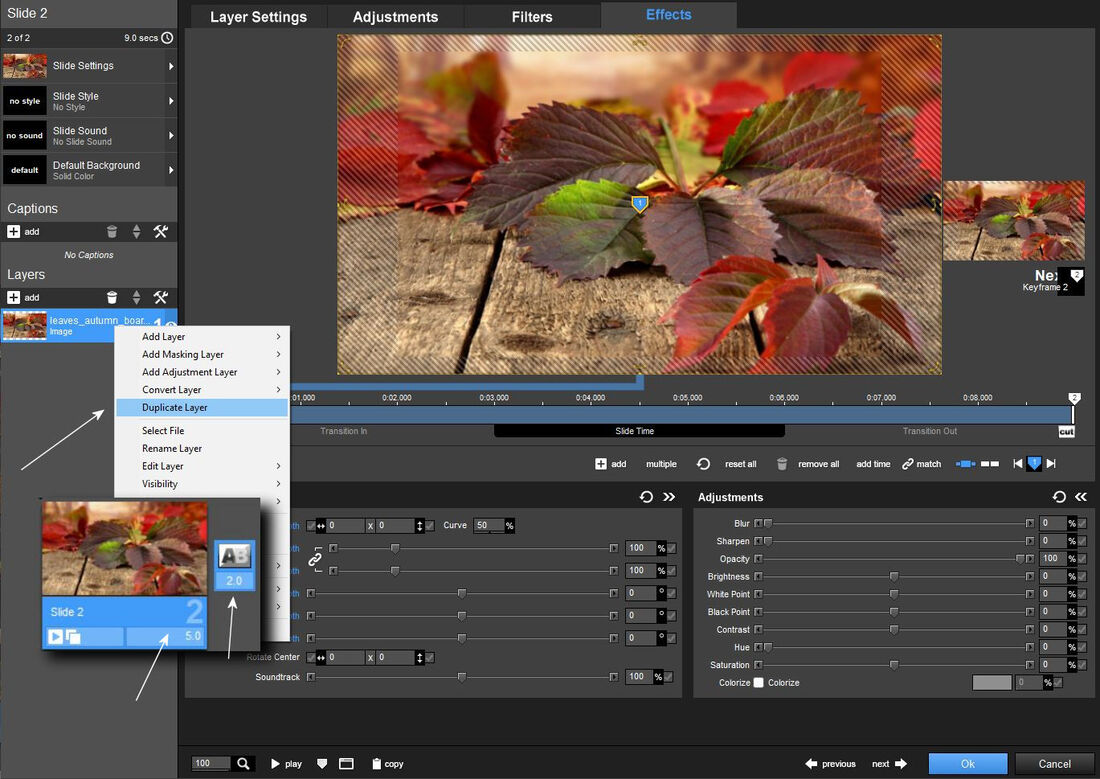
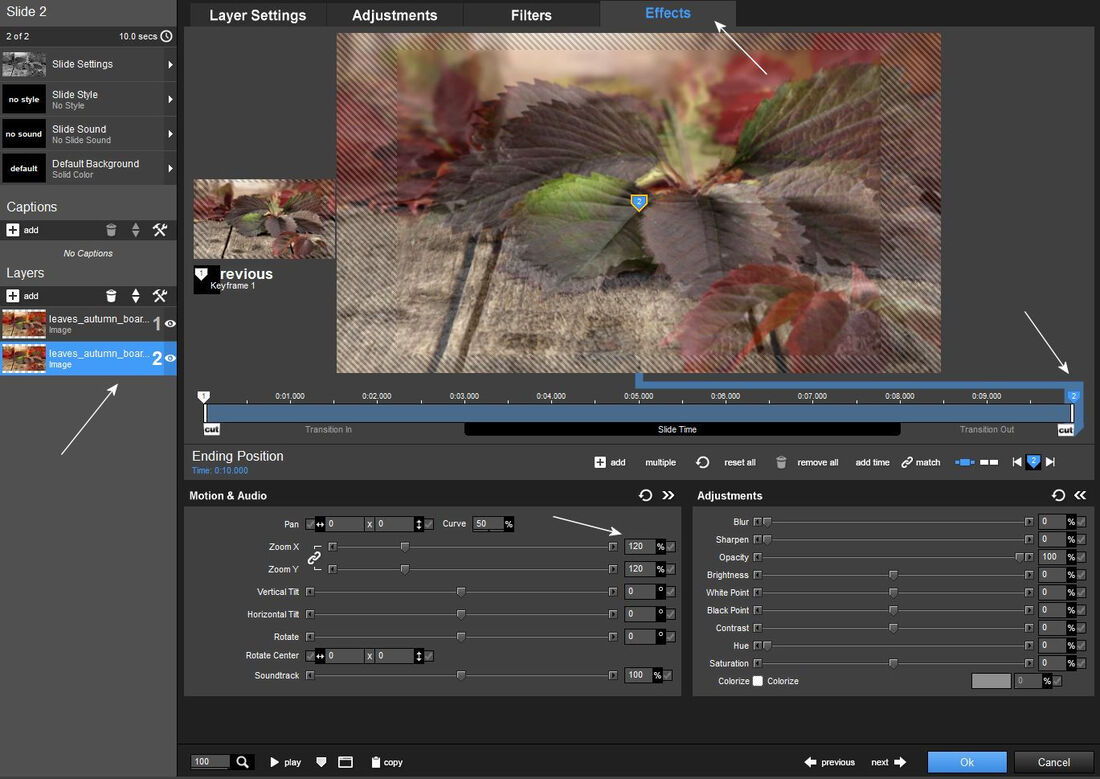
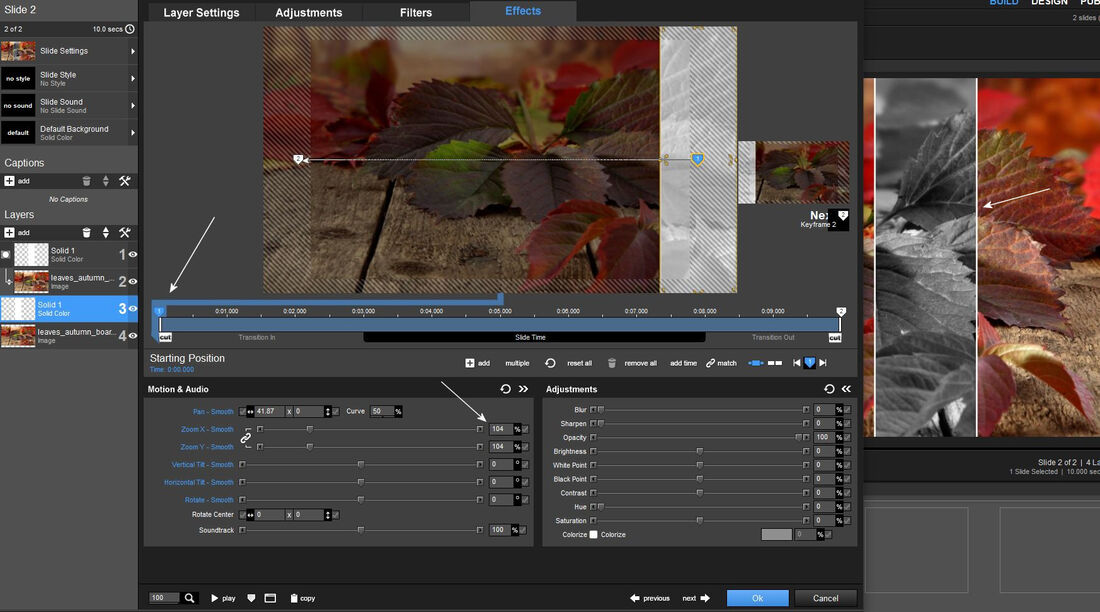
3. Most menj az effects menüre és a második rétegedre. Kattints a 2-es keyframe pontra, hogy az legyen kék és a zoom-ot állítsd 120-as értékre.
Now go to the effects menu and your second layer. Click on keyframe point 2 to make it blue and set the zoom to 120.
4. Majd menj a felsö rétegedre és a 2-es keyframe ponton levö zoom értéket szintén
állítsd 120-as értékre.
Then go to your upper layer and set the zoom value at keyframe point 2 to 120.
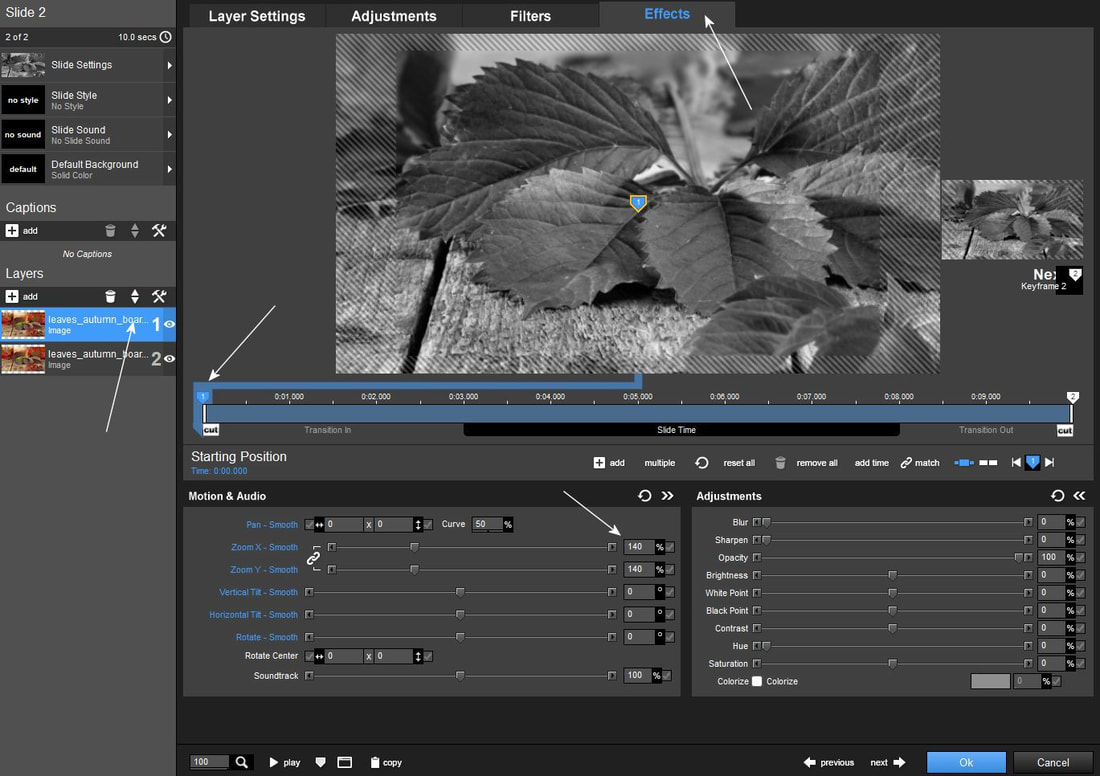
5. Ugyanitt kattints az 1-es keyframe pontra itt a zoom értéket tedd 140-re.
In the same place, click on keyframe point 1, set the zoom value to 140.
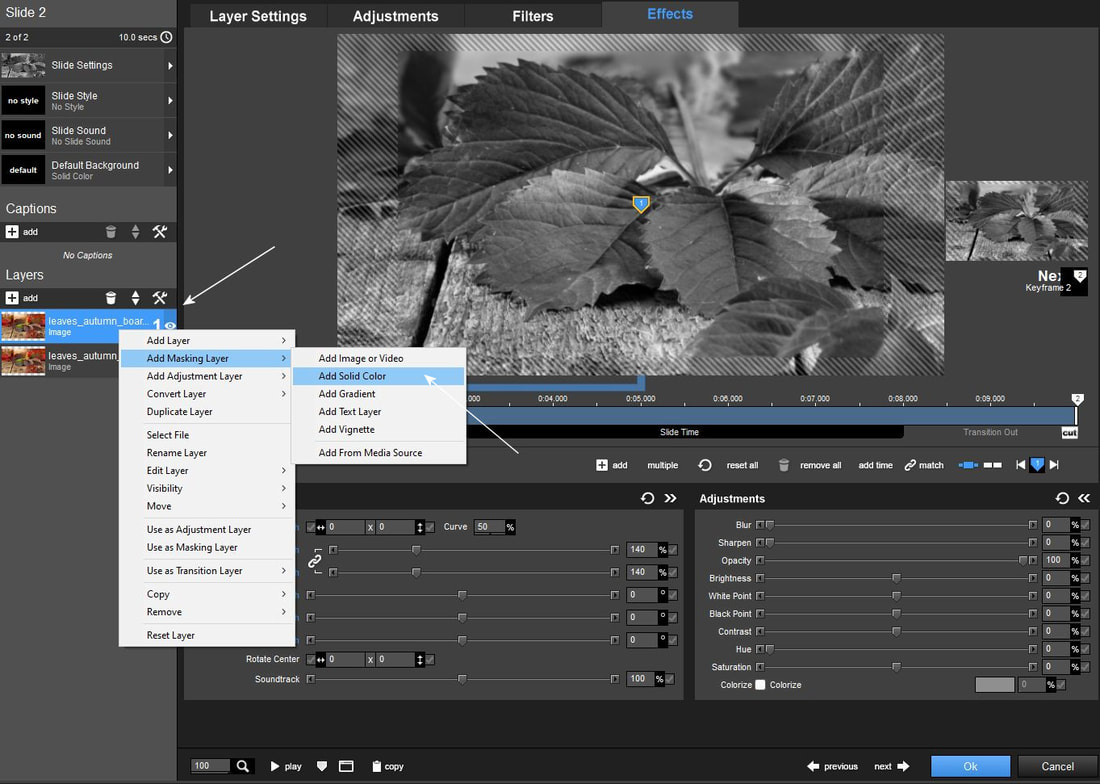
6. Maradj a felsö rétegen elkezdjük a maszk elkészítésének az elsö lépését. Jobb füllel katt a felsö rétegre és a legördülö menüben válaszd az Add Solid Color menüpontot.
Stay on the top layer and we will start the first step of making the mask. Right-click on the top layer and select Add Solid Color from the drop-down menu.
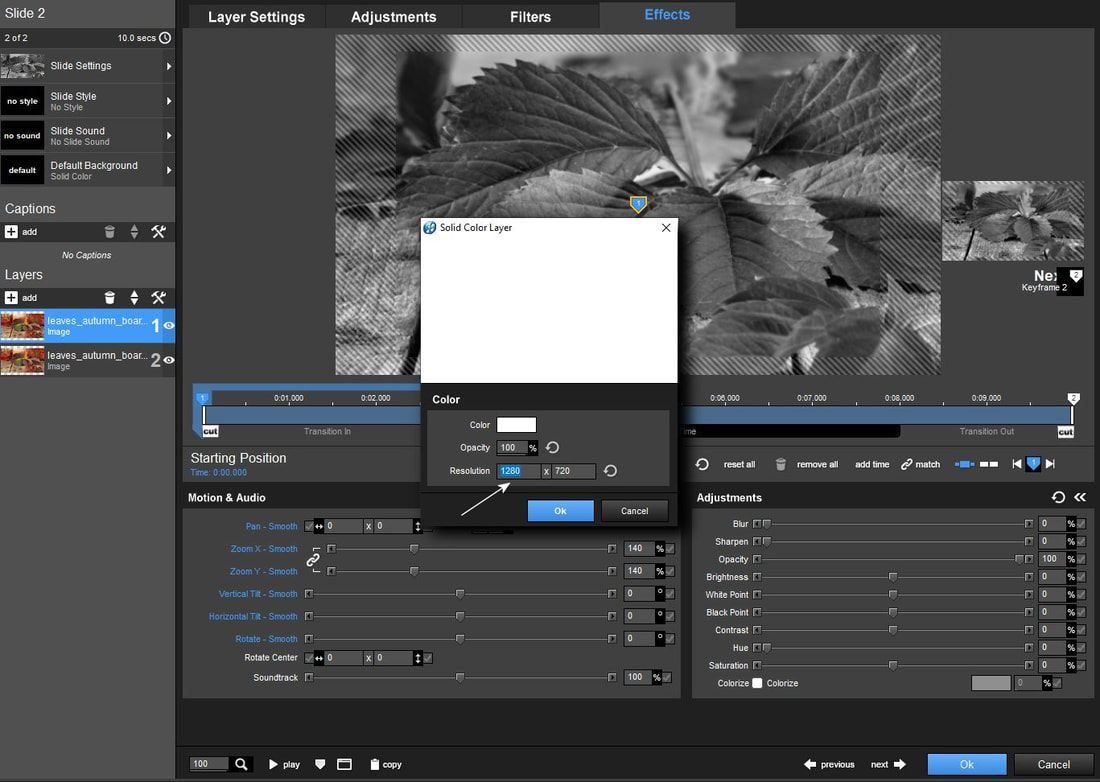
7. Mivel mi most egy csíkmaszkot készítünk, nem az egész lapnak kell fehérnek lennie, már itt kialakítjuk a maszk méretét. Vagyis egy fehér csíkmaszkra lesz szükségünk.
Már most el kell dönteni, hogy a csíkunkat függölegesen vagy vízszintesen szeretnénk használni. Most egy függöleges csíkmaszkkal fogunk dolgozni. Ehhez meg kell változtatnunk a képernyönk szélességében (1280) az értéket vagyis kissebbre kell vennünk. Ezzel a resolution értékcserével összezsugorítjuk a fehér maszk lapunkat.
Since we are now creating a stripe mask, the entire sheet does not have to be white, we already create the size of the mask here. That is, we will need a white strip mask. It is now necessary to decide whether we want to use our strip vertically or horizontally. Now we will work with a vertical strip mask. To do this, we need to change the value in the width of our screen (1280), that is, we need to take it smaller. With this resolution value exchange, we shrink our white mask sheet.
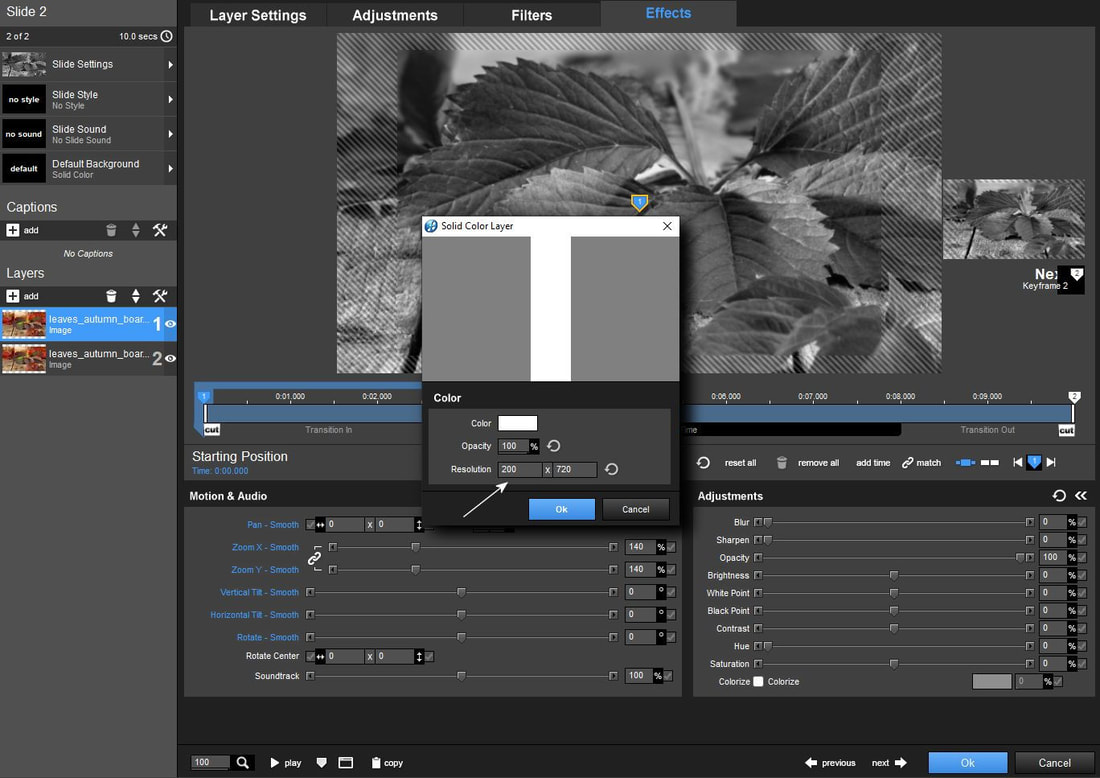
8. Jelen esetben ezt az értéket én 200-ra tettem. Jól látható, hogy egy függöleges csík alakult ki. Ezzel az érték cserével szélesebb és keskenyebb csíkokat hozhatunk létre. Tehát érdemes ezzel a lépéssel játszadozni. Ha ezt a maszkot keresztbe szeretnéd akkor majd a 720-as értéken kell változtatnod.
In this case, I set this value to 200. You can clearly see that a vertical strip has formed. By exchanging this value, we can create wider and narrower stripes. So it's worth playing around with this step. If you want this mask crossed, you will have to change the value 720.
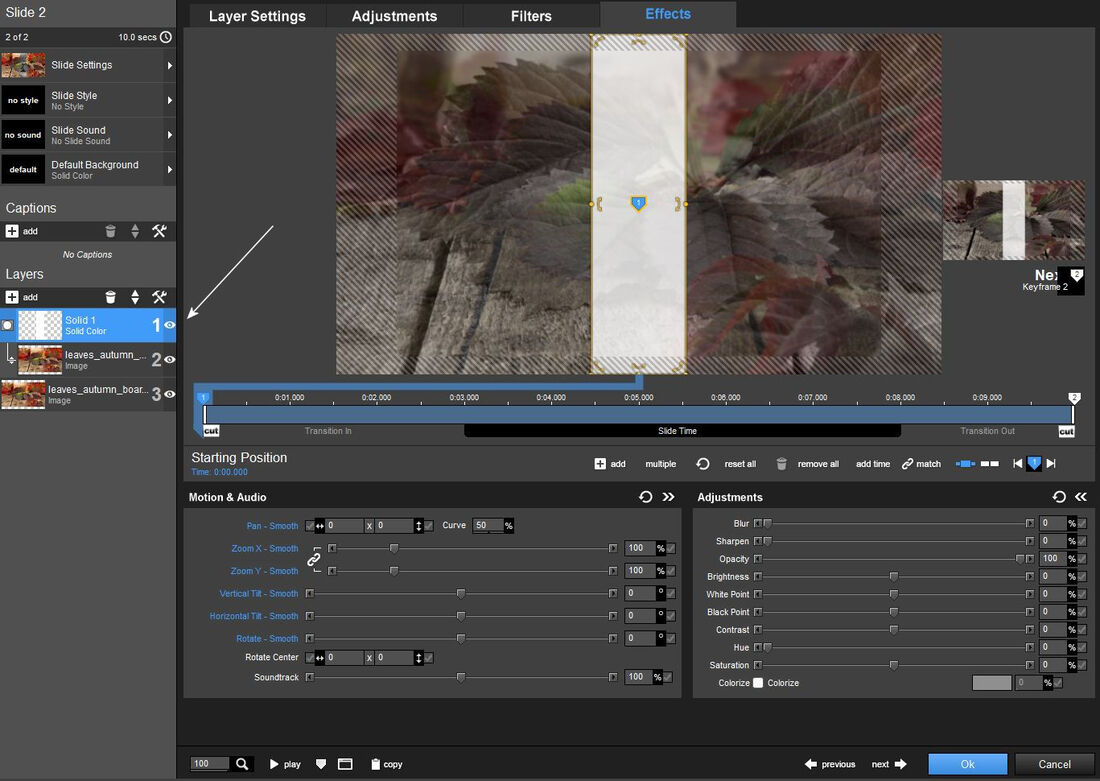
9. Amikor az érték beállítás után le ok-zod az ablakot a maszkod bekertült a képed fölé és összekapcsolódott a képpel vagyis arra a képre rákerült a maszkod. Ez a maszk most a fekete-fehér képeden van és a munka végeztével egy fekete -fehér csíkként fog majd mozogni.
When you close the window after setting the value, your mask was placed over your image and connected to the image, that is, your mask was placed on that image. This mask is now on your black and white image and will move as a black and white stripe when the job is done.
10. Nem árt arról sem meggyözödni, hogy ez maszk a layer settings setup-jában a fit to frame-on áll-e? Ez azt jelenti, hogy alul és felül is a teljes képernyö széléig kell hogy érjen a maszkunk.
To make sure that this mask is set to fit to frame in the layer settings setup? This means that our mask must reach the edge of the entire screen both at the bottom and at the top.

11. Most kattints az 1-es keyframe pontra fogd meg azt a képernyödön és vidd ki pontosan a képernyö széléig jobbra. Ha ezt így kezded akkor majd az effected jobbról balra fog mozogni. ezt a folyamatot mutatom most itt be. De ezt elkészítheted egy másik effektnek is szimmetrikusan ha elöbb ezt a pontot balra húzod. Most maradunk ennél a verziónál.
Now click on keyframe point 1, grab it on your screen and move it exactly to the edge of the screen to the right. If you start this way, your effect will move from right to left. I present this process here. But you can create this symmetrically for another effect if you first drag this point to the left. We'll stay with this version for now.
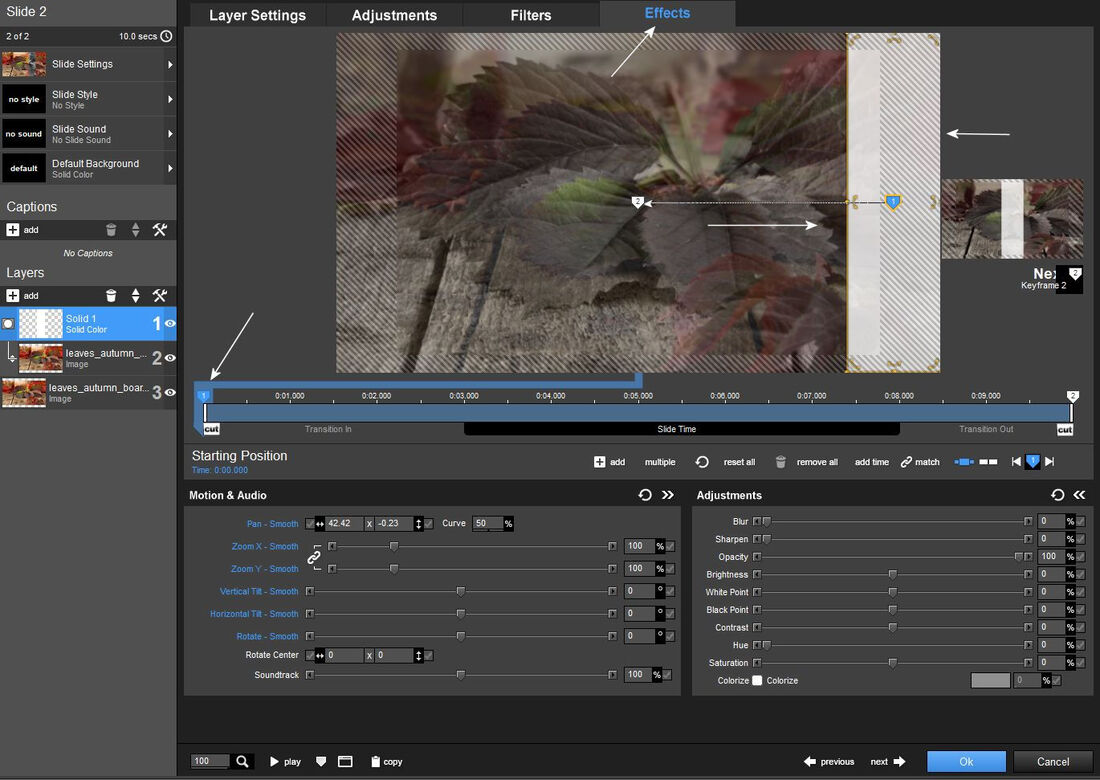
12. Most csináld meg ugyanezt a müveletet a keyframe 2-es ponttal a másik oldalra.
Now do the same operation with keyframe point 2 on the other side.
13. Húzd ki most a kettes pontodat a bal szélre.
Figyelem! Nagyon pontosan dolgozz!!!
A húzásokat teljesen egyenesen csináld mert a maszkod nem fogja takarni
rendesen a képedet.
Now drag your second point to the left edge. Attention! Work very precisely!!! Make the strokes completely straight, because your mask will not cover your image properly.
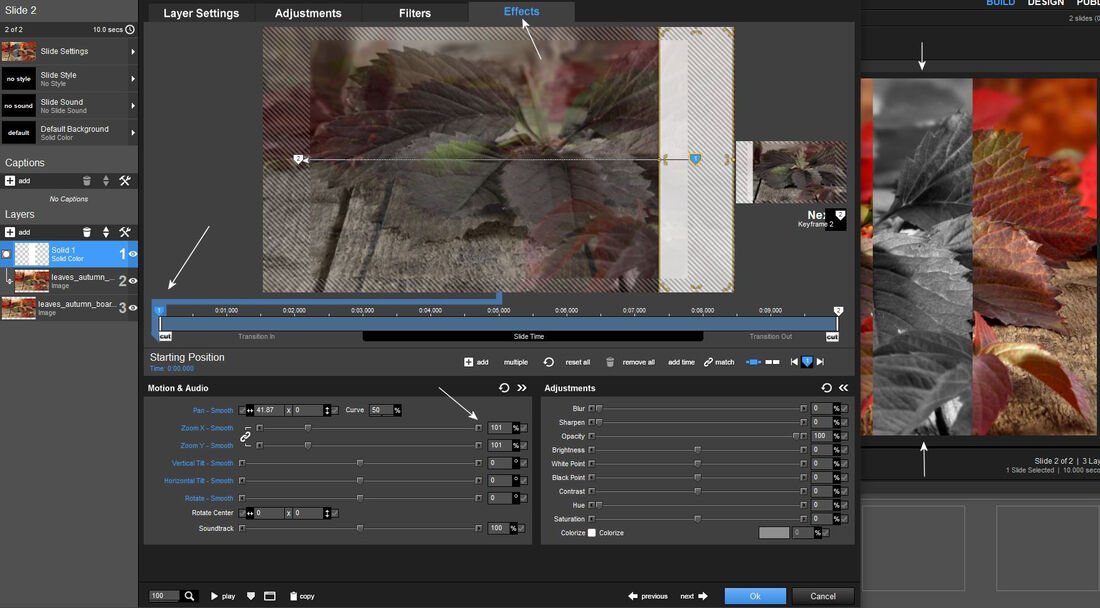
14. Fogd meg a munka ablakodat felül és vidd egy kicsit balra akkor látni fogod a mögöttes részt is a következö müveletekhez. Igy már azt is látod, hogy a maszk mit csinált a fekete-fehér képeddel. Ebben a müveletben meg kell emelned a zoom értéket kicsit, hogy a fekete-fehér rész túl érjen a képernyö részen. Tedd az értéket 101-re az 1-es keyframe ponton.
Grab your work window at the top and move it a little to the left, then you will also see the part behind it for the following operations. Now you can see what the mask did to your black and white image. In this operation, you have to increase the zoom value a little so that the black and white part reaches beyond the screen part. Set the value to 101 at keyframe point 1.
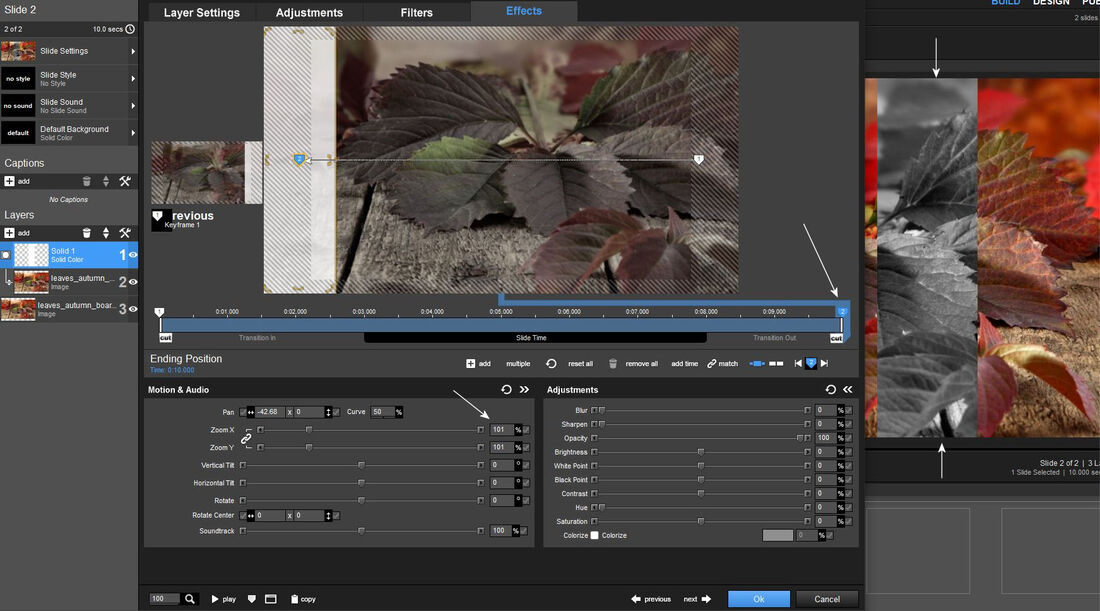
15. Ugyanezt csináld meg a 2-es keyframe ponton is.
Do the same at keyframe point 2.
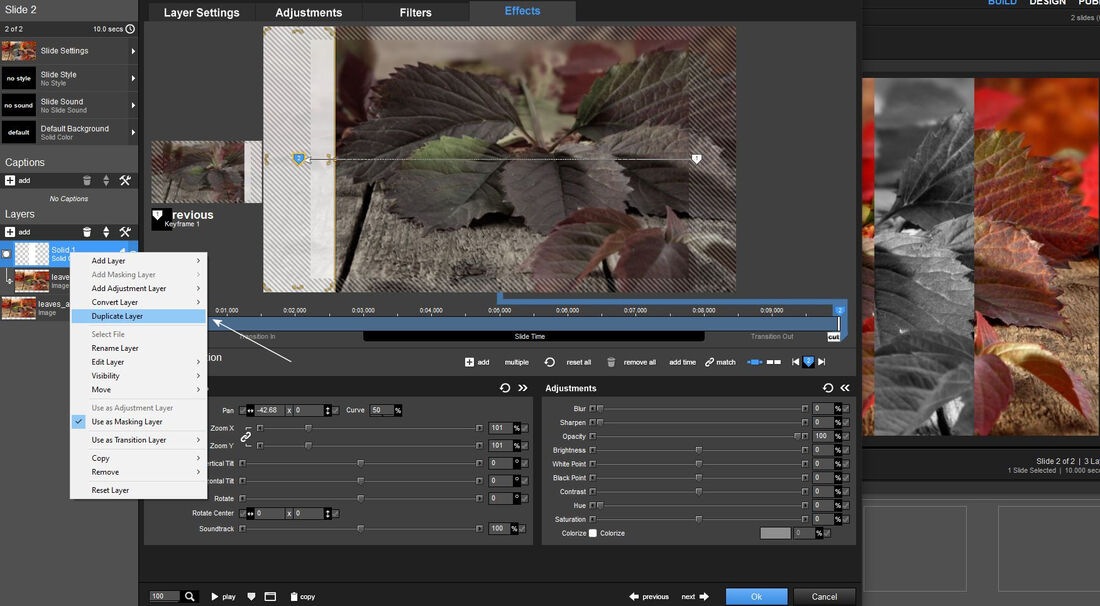
16. Most duplázd meg ezt a maszkréteget.
Jobb fül katt a rétegre és duplicate layer
Now duplicate this mask layer. Right click on the layer and duplicate layer
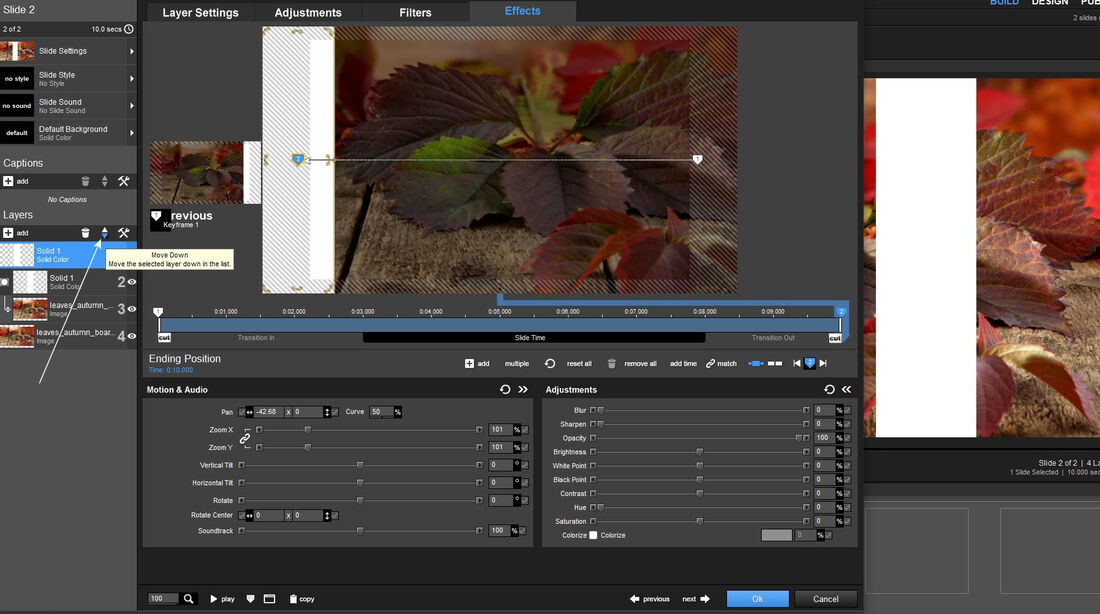
17. Kattints az alsó nyílra egyet, hogy ez a réteg lekerüljön a maszkolt réteg alá.
Click on the bottom arrow once to move this layer below the masked layer.
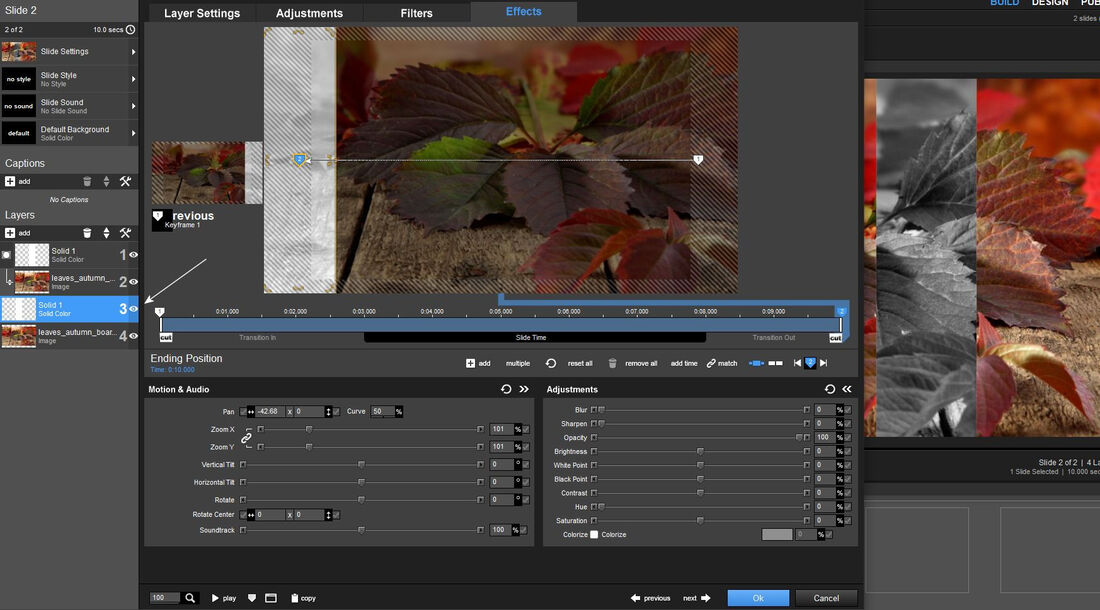
18. Ezzel a maszkréteggel fogunk létrehozni egy fehér keretet a fekete-fehér maszk
csík két szélére, hogy jól el különüljön a mozgásnál a színes alapodtól.
Maradj most ezen a rétegen.
With this mask layer, we will create a white frame on the two edges of the black and white mask strip so that it is well separated from your colored base when moving. Stay on this layer for now.
19. Ez megint egy olyan pontja a müveletnek ahol töled függ milyen széles keretet akarsz a szürke képcsík köré. Attól függ mennyire növeled ennek a rétegnek a zoom értékét vagyis ezzel szélesítjük az alsó maszk réteget, kilógatjuk a felsö alól a fehér részt ami keret képez majd. Amikor növeled a zoom értéket a jobb oldalon jól látod majd, hogyan vastagszik a fehér keretcsík. Tehát katt a 2-es keyframe pontra és a zoomot állítsd 104-re. Ezzel is lehet játszadozni amilyen vastagság neked jó. Csak azt ne felejtsd el, hogy a kész videóban a vékonyabb keretek mutatnak jól.
This is another point of the operation where it depends on you how wide a frame you want around the gray image strip. It depends on how much you increase the zoom value of this layer, i.e. with this we widen the lower mask layer, we stick out the white part below the upper one, which will form a frame. When you increase the zoom value on the right side, you will clearly see how the white frame strip gets thicker. So click on keyframe point 2 and set the zoom to 104. You can also play with this, whichever thickness is right for you. Just don't forget that thinner frames look good in the finished video.
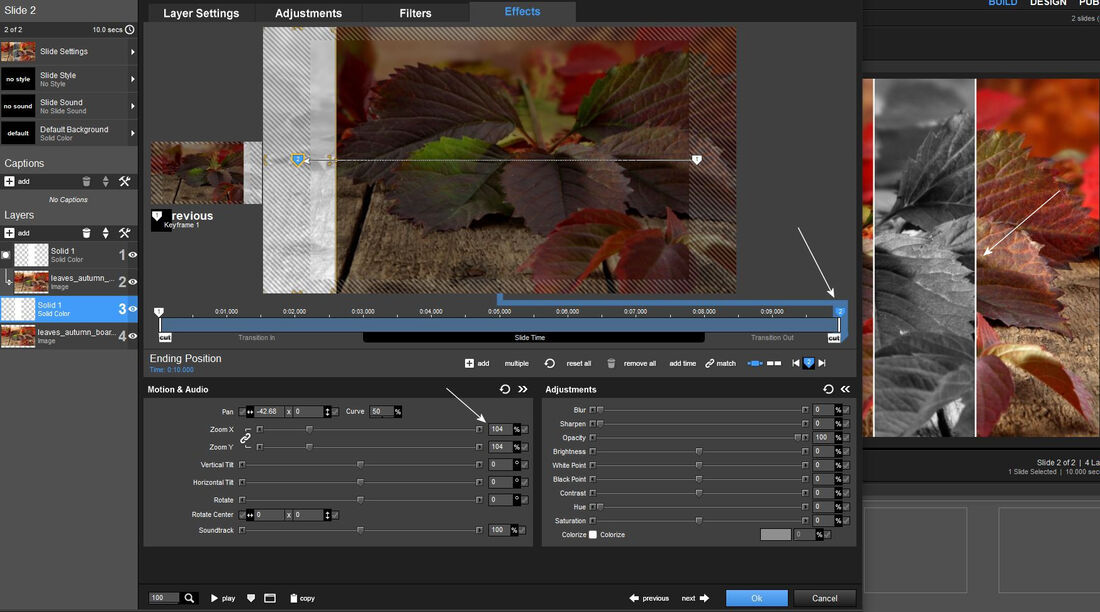
20. Ugyanezt az értéket ( 104) az 1-es keyframe pontodra is be kell állítanod. És már készen is vagy ezzel az effecttel. Lejátszhatod ezt az effectet hiszen már müködik. De ezt az effectet megcsinálhatod igazán egyszerü módon fordíva is ennek a negatív formáját. A továbbiakban azt mutatom meg hogy, hogyan csináld.
You must also set the same value (104) to your keyframe point 1. And you're done with this effect. You can play this effect as it is already working. But you can do this effect in a really simple way by reversing the negative form of it. Next, I'll show you how to do it.
21. Másold át az eddig elkészített effectes csempédet egymás mellé és kezdj dolgozni a másolt csempén. Menj a maszkolt képed rétegére és az Adjustmentben vedd ki azt a pipát amit amivel a müvelet elején ezt a képet fekete-fehérré tetted.
Copy the effect tiles you have created so far next to each other and start working on the copied tile. Go to the layer of your masked image and in Adjustment, remove the checkmark that you used to make this image black and white at the beginning of the operation.
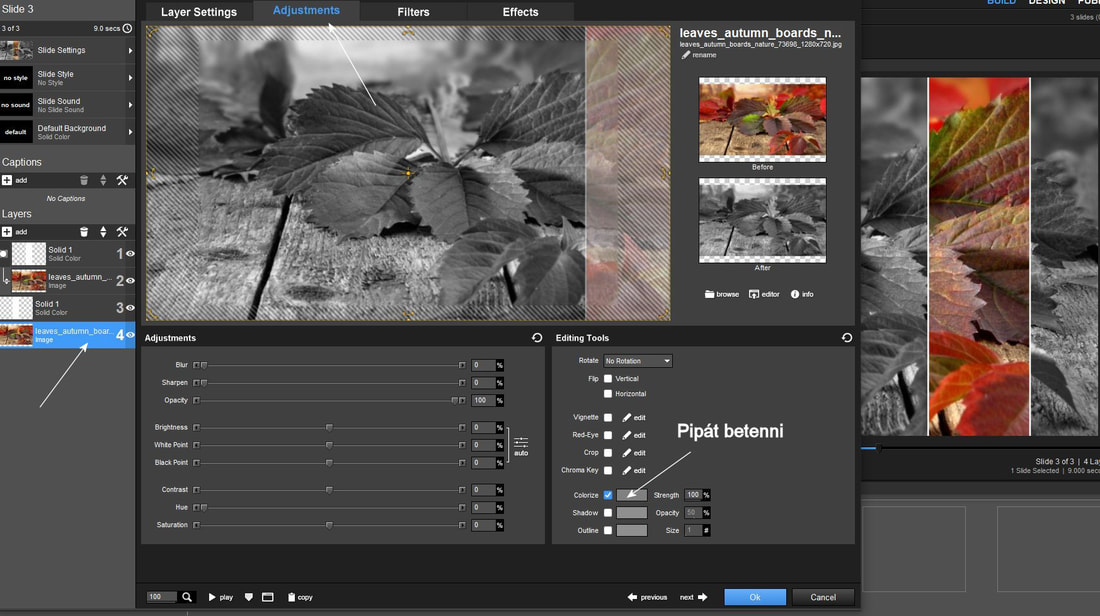
22. Aztán menj az alsó réteg képedre és ott viszont tedd a pipát be a kis kockába és az legyen fekete-fehér. Igy most a fekete - fehér alapodon a színes csík mozog majd.
Máris csináltunk egy videóhoz 2 féle effectet. Csak képeket kell majd cserélned.
Then go to your bottom layer image and put the tick in the small box there and it should be black and white. So now the colored strip will move on your black and white background. We have already made 2 types of effects for a video. You will only have to exchange pictures.
23. A képcserét is az Adjusments -ben teheted meg. állj a rétegre és nyomd meg a browse feliratot. Majd a legördülö könyvtár menüdböl válaszd ki azt a képet amit szeretnél.
You can also change the image in Adjustments. stand on the layer and press browse. Then select the image you want from the drop-down library menu.
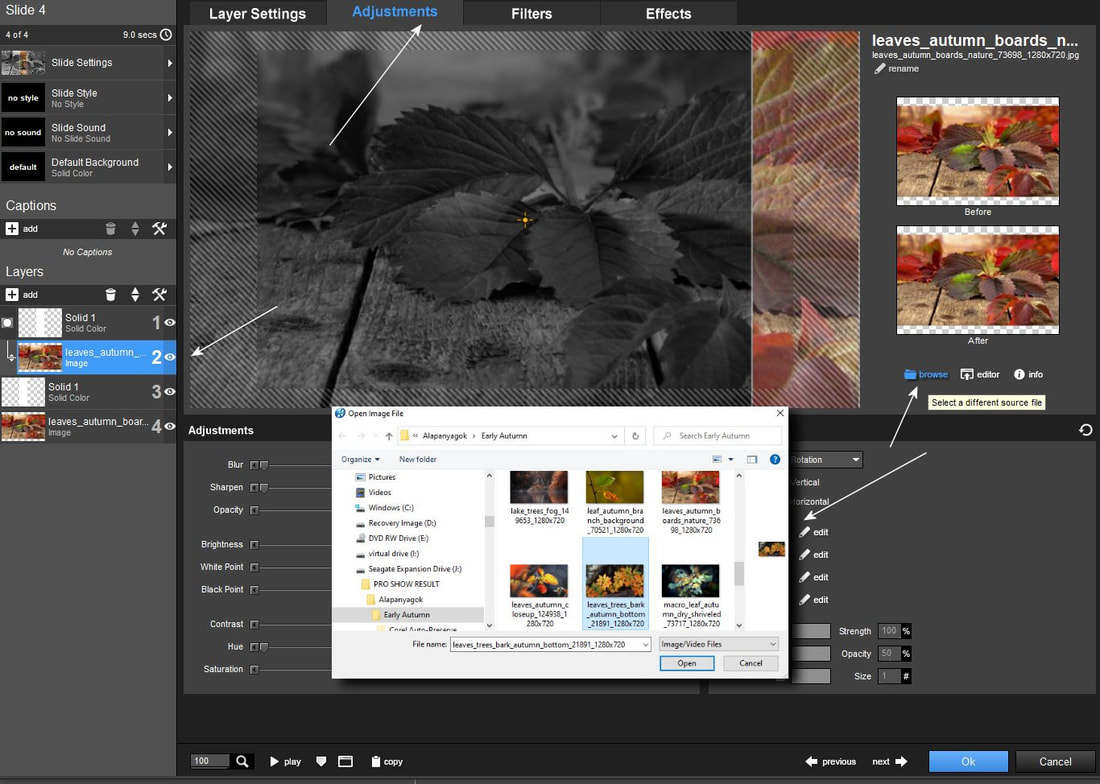
24. Jól lehet látni, hogy a csere megtörtént.
You can clearly see that the exchange has taken place.
25. Ugyanezt a cserét meg kell tenned a másik alsó rétegképeden is.
You have to do the same change on the other bottom layer image.