Ebben a bemutatóban egy olyan egyszerü effectet mutatok meg amelyhez nem szükséges mozgatni a képeket. Mozgatni csak a képkeretet és az ahhoz tartozó dekorációt fogjuk. Ezzel a kevés mozgással is lehet szép és kellemes videót készíteni. Most csak a transitionokat használjuk ehhez a moving frame line effecthez.
( mozgó keret csík effekt )
In this presentation, I show a simple effect that does not require moving the images. We will only move the picture frame and the corresponding decoration. Even with this little movement, you can make a nice and pleasant video. Now we only use the transitions for this moving frame line effect.

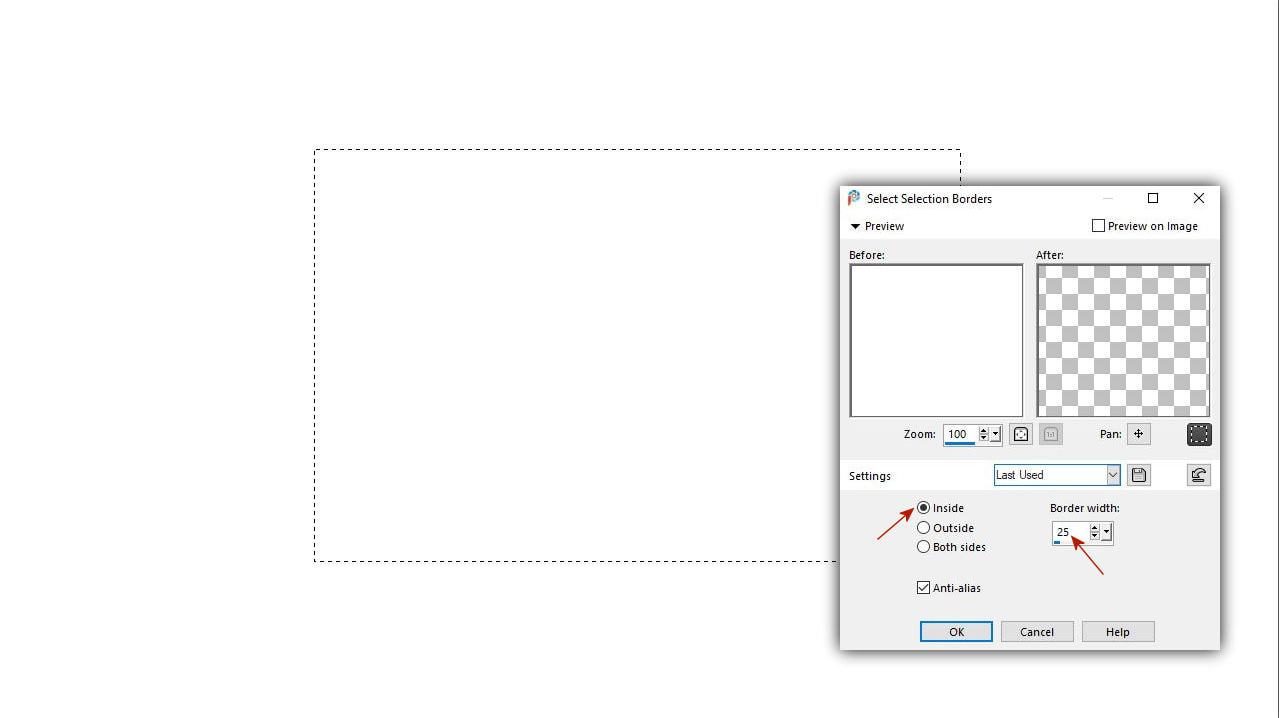
1. Kezdjük az elökészületi munkákat a Corel programban. önts ki egy lapot fehér színnel és csinálj egy téglalap kijelölést.
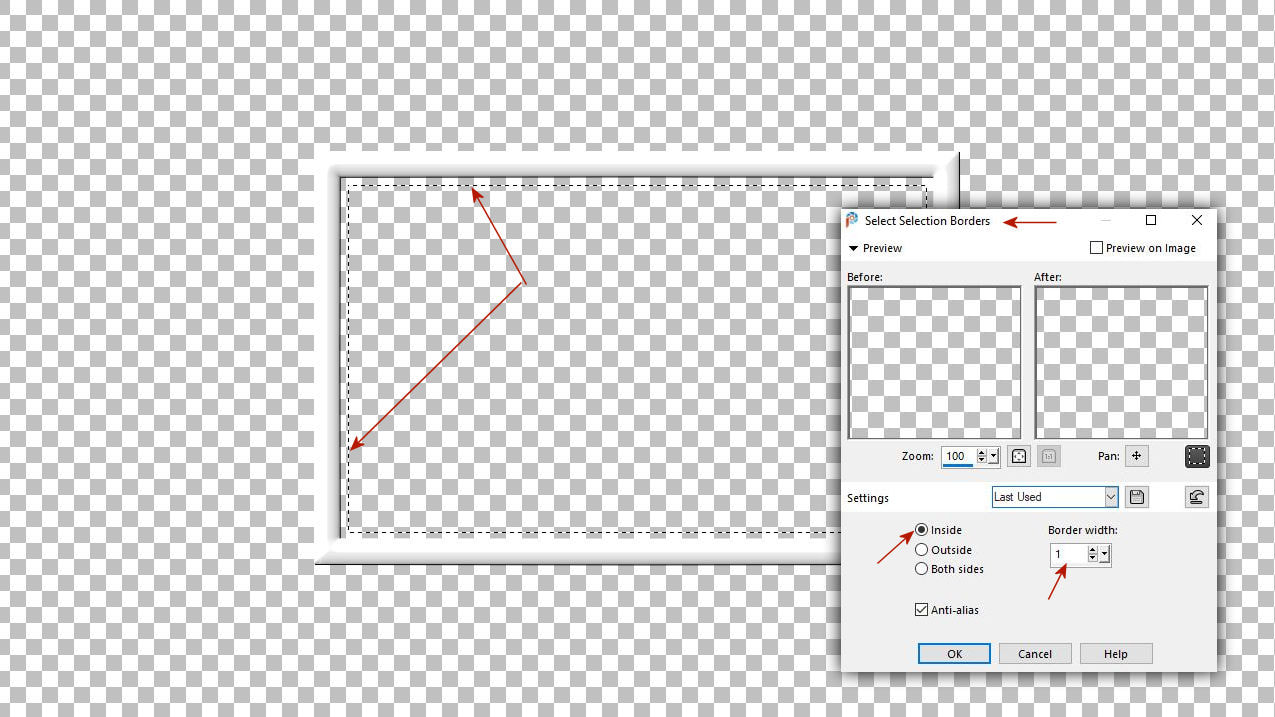
Majd menj a Selection - Modify - Select Selection Borders menüre .
Let's start the preparatory work in the Corel program. pour a sheet with white color and make a rectangle selection. Then go to the Selection-Modify-Select Selection Borders menu.
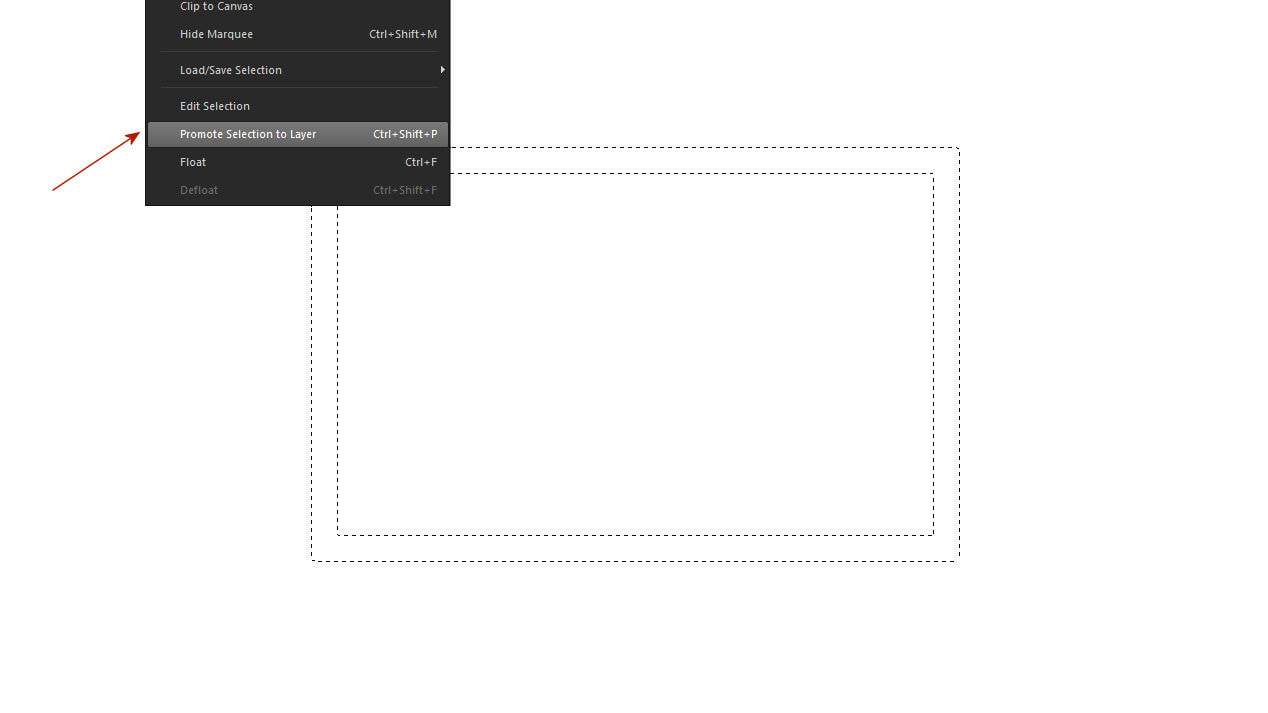
2. Amikor kijelölted a kereted promótáld azt.
When you have selected your frame, promote it.
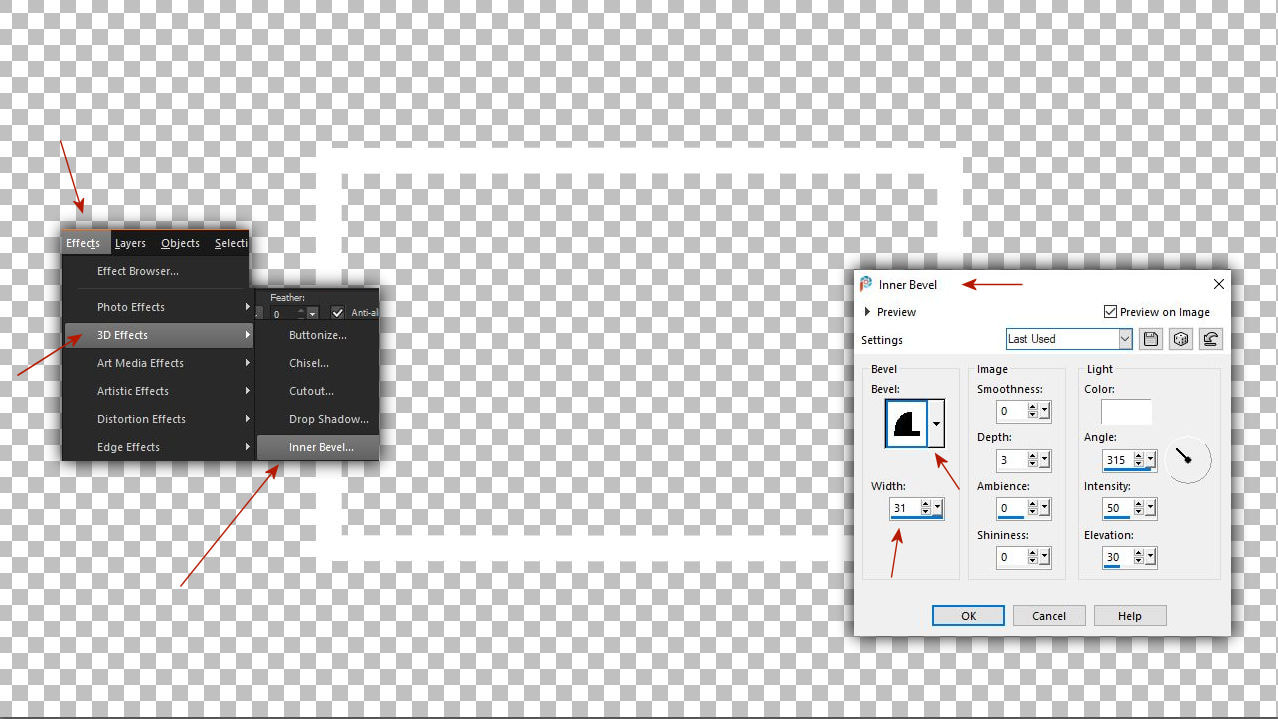
3. Most domborítsd meg a keretedet az Inner Bevel menüpontban.
Now bevel your frame in the Inner Bevel menu item.
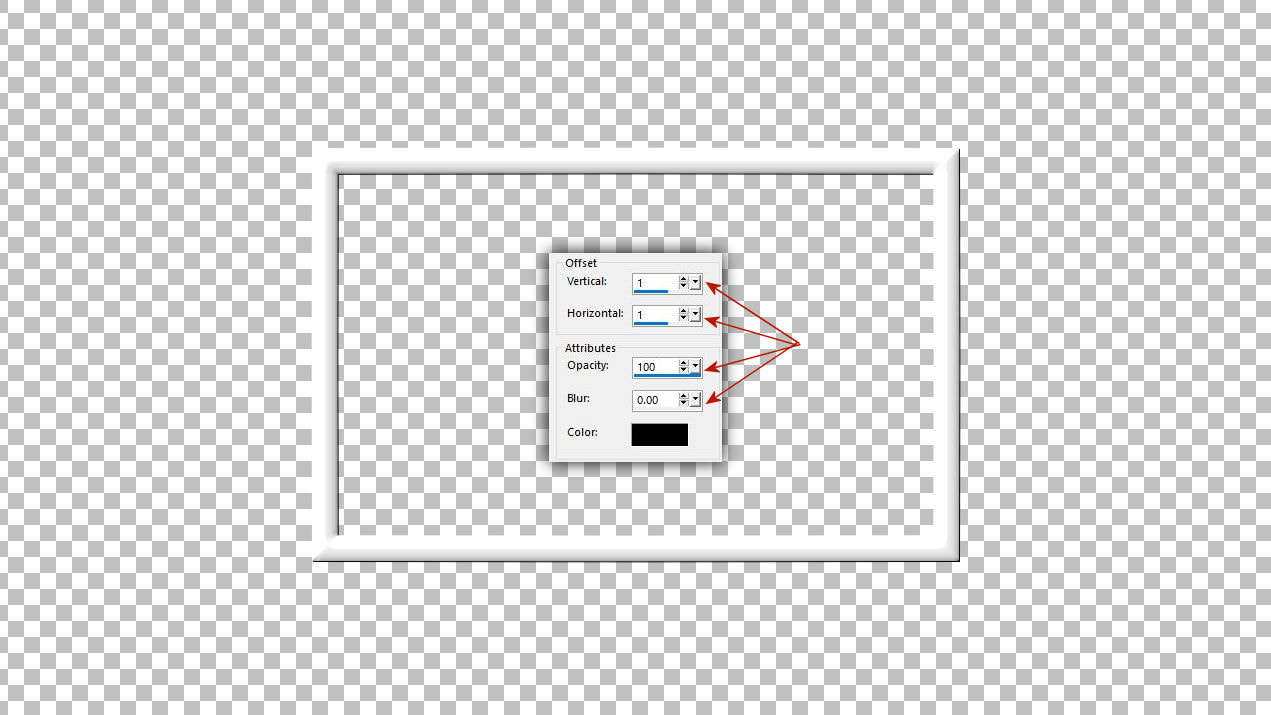
4. Tegyél egy kis árnyékot a keretedre.
Add some shadow to your frame.
5. Csinálj egy kijelölést a kereteden belül egy új rétegen.
Selection - Modify - Select Selection Borders
Make a selection inside your frame on a new layer.
Selection - Modify - Select Selection Borders
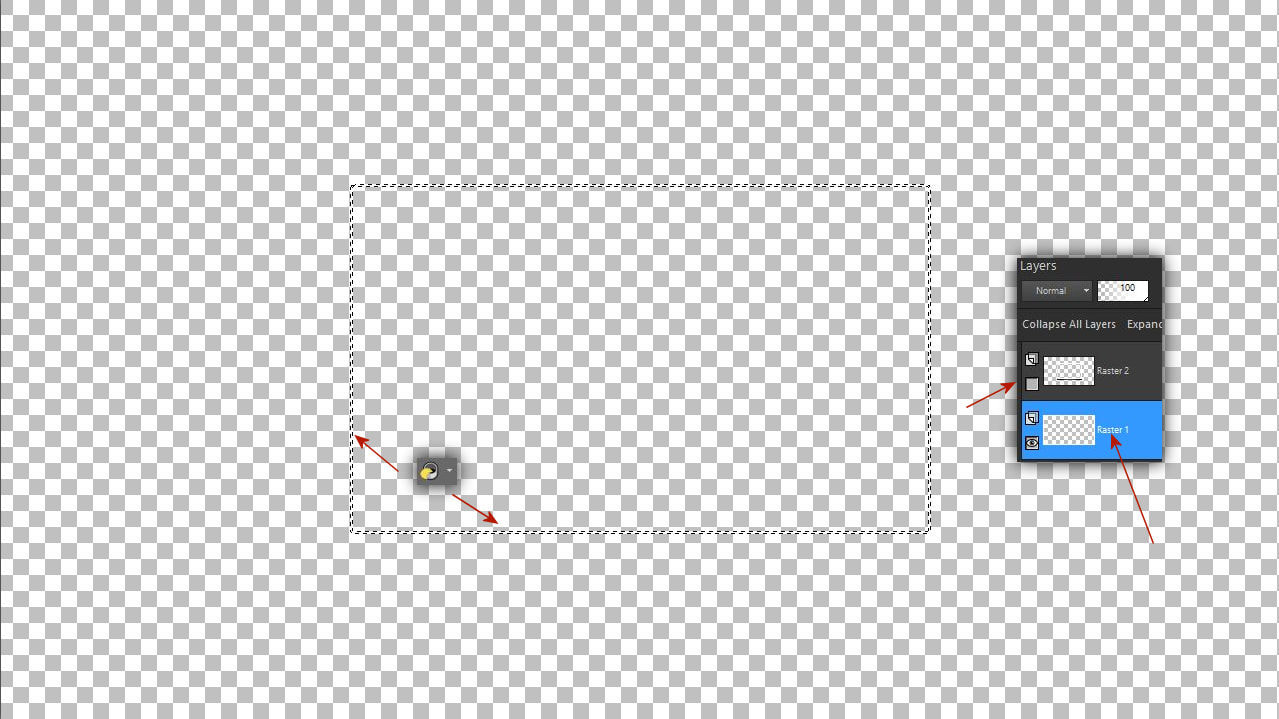
6. Önts ki fehér színnel a vékony keretet.
Fill the thin frame with white color.
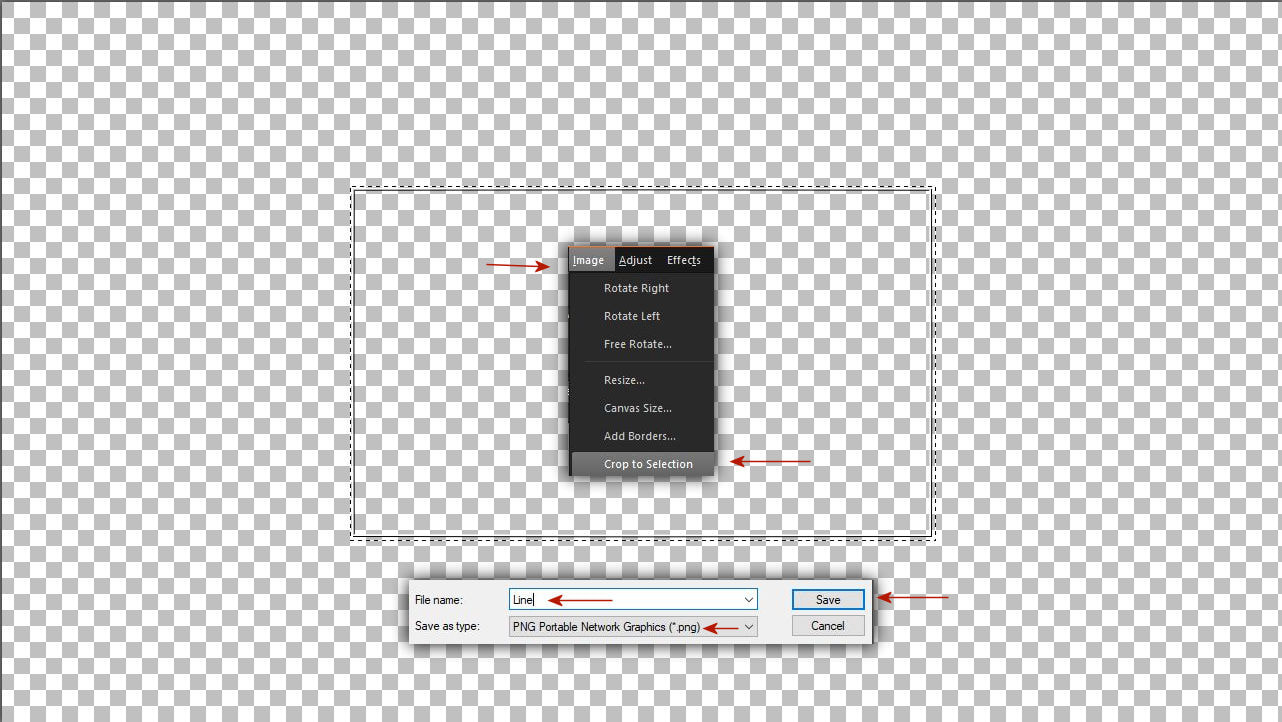
7. Majd jelöld körbe és vágd ki a vékony csík keretet és mentsd el png. formátumban.
Then circle and cut out the thin strip frame and save as png. format.
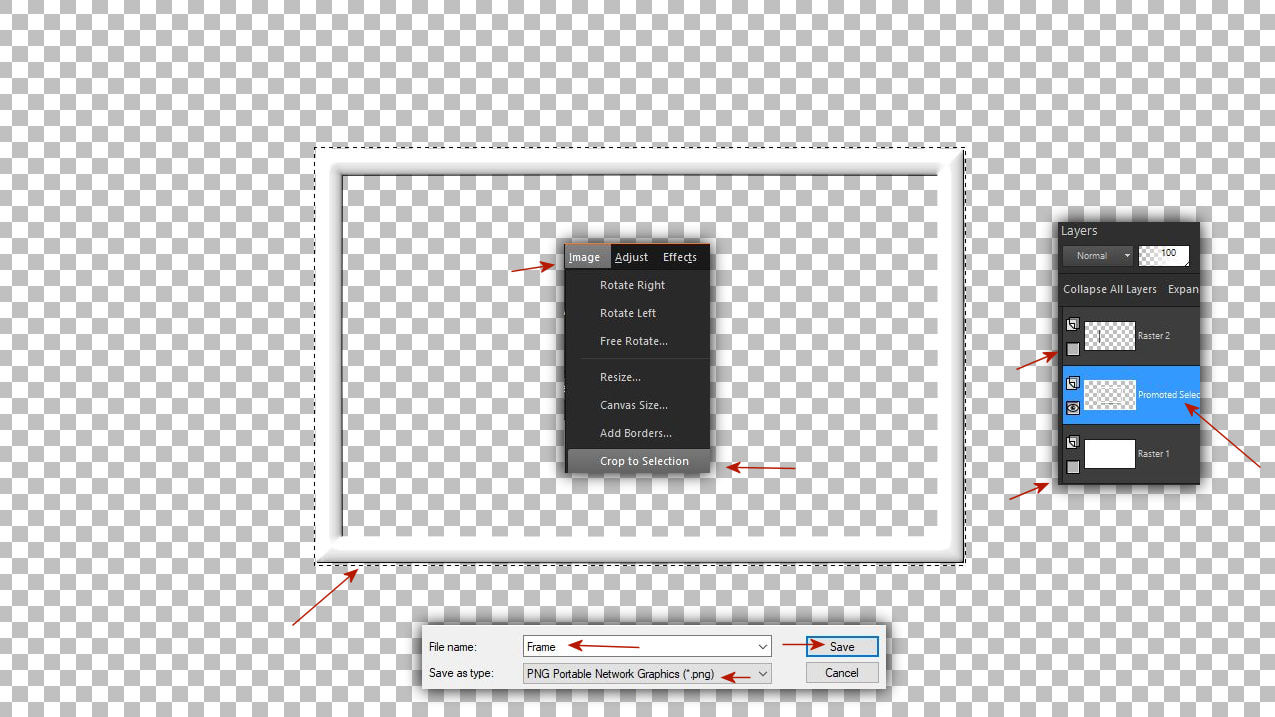
8. Ugyanezd csináld meg a kereteddel is.
Do the same process with your frame.
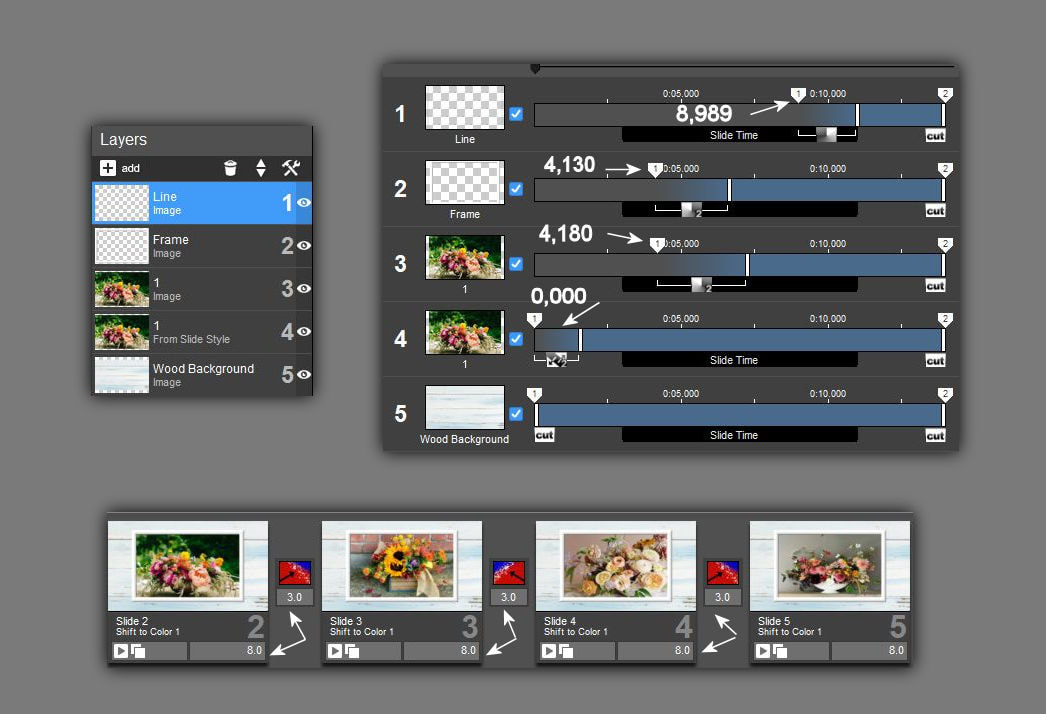
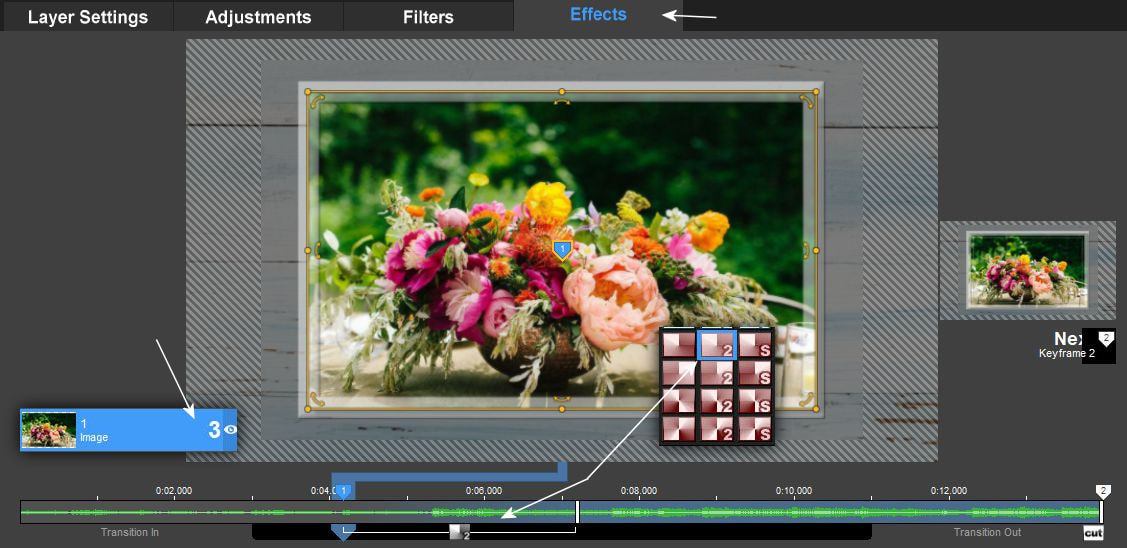
9. Folytassuk a munkát a Pro Show Producer programban. Igy rakd össze a rétegeidet. Valamint a keyframe editorban a transition effecteket. A csempe idöket állítsd 8 és 3 másodperdre.
Let's continue working in the Pro Show Producer program. So put your layers together. As well as the transition effects in the keyframe editor.
Set the tile times to 8 and 3 seconds.
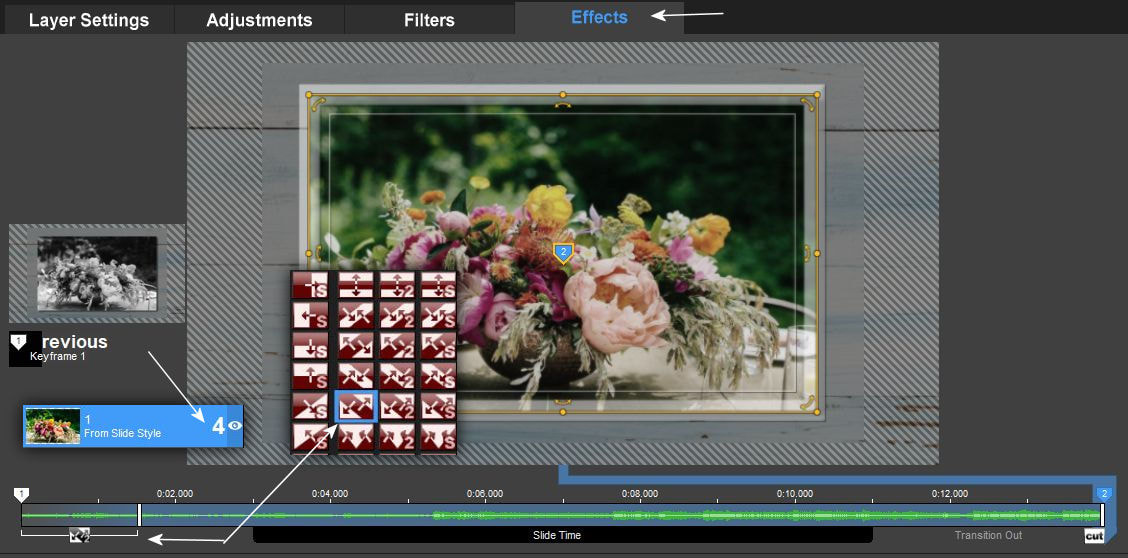
10. Minden rétegen csináld meg ezt a transition beállítást. Tehát húzd a keyframe pontokat a megfelelö helyre és klikk a Cut feliratú kis négyzetre majd állítsd be a megfelelö transitiont ahogy azt itt a következö képeken is látod.
Make this transition setting on every layer. So drag the keyframe points to the right place and click on the small square labeled Cut and set the appropriate transition as you can see in the following pictures.

11.
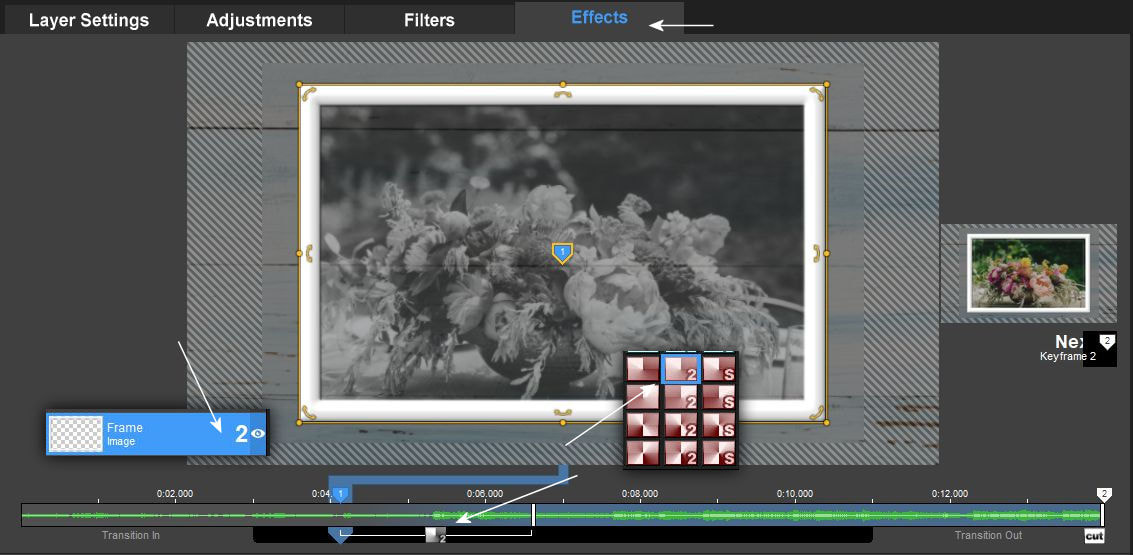
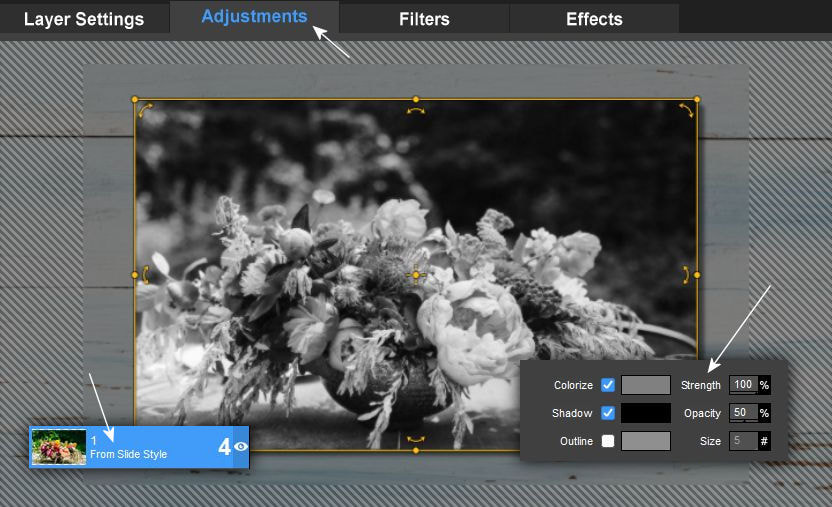
12. Figyelem itt az Adjustment menüben is kell árnyékot állítanod.
Attention, you also need to set a shadow in the Adjustment menu.
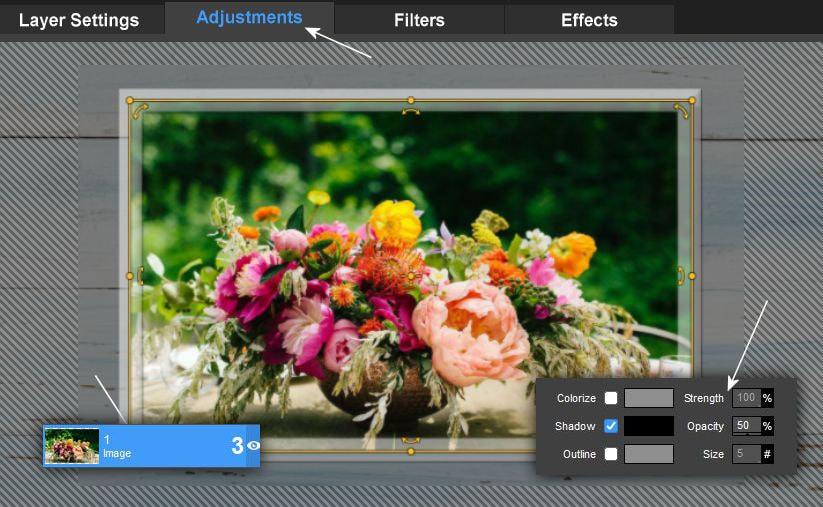
13. Itt is kell használnod az Adjustment menüt.
You have to use the Adjustment menu here as well.