Folytassuk a munkát a Pro Show Producerben.
Let's continue working in Pro Show Producer.

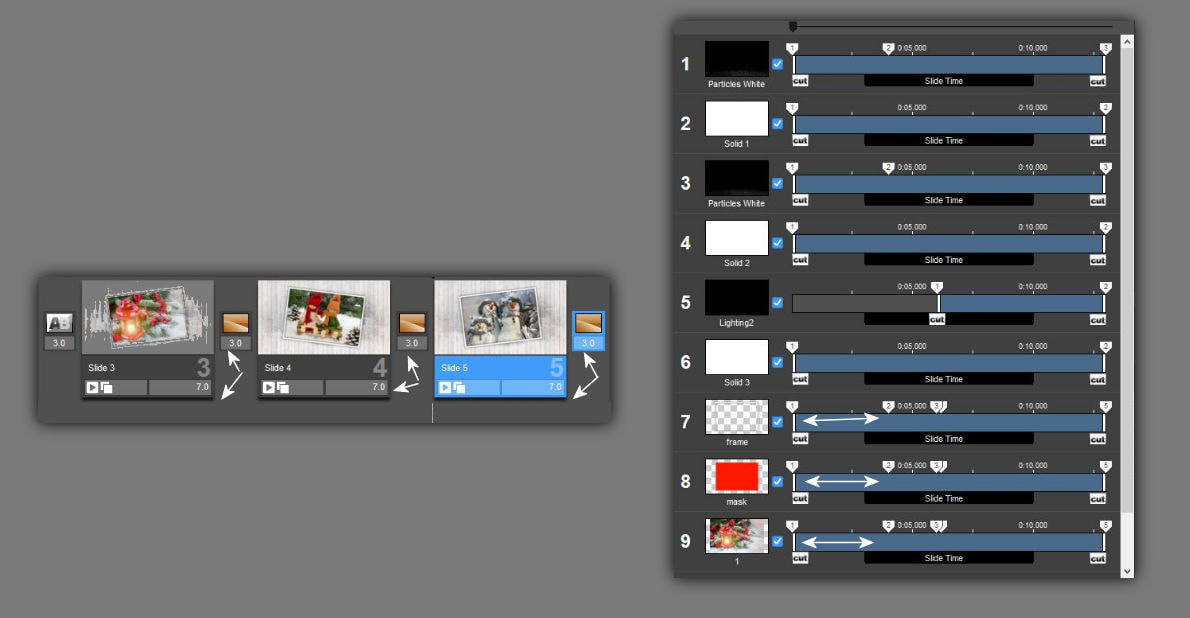
1. Majd ha elkezdesz dolgozni az elsö csempéden akkor az idejét 7 és 3 másodpercre állítsd. A keyframe pontok ugyanazon a helyen lesznek a keret, maszk és képed rétegeken.
Then, when you start working on the first tile, set the time to 7 and 3 seconds. The keyframe points will be in the same place on the frame, mask and image layers.
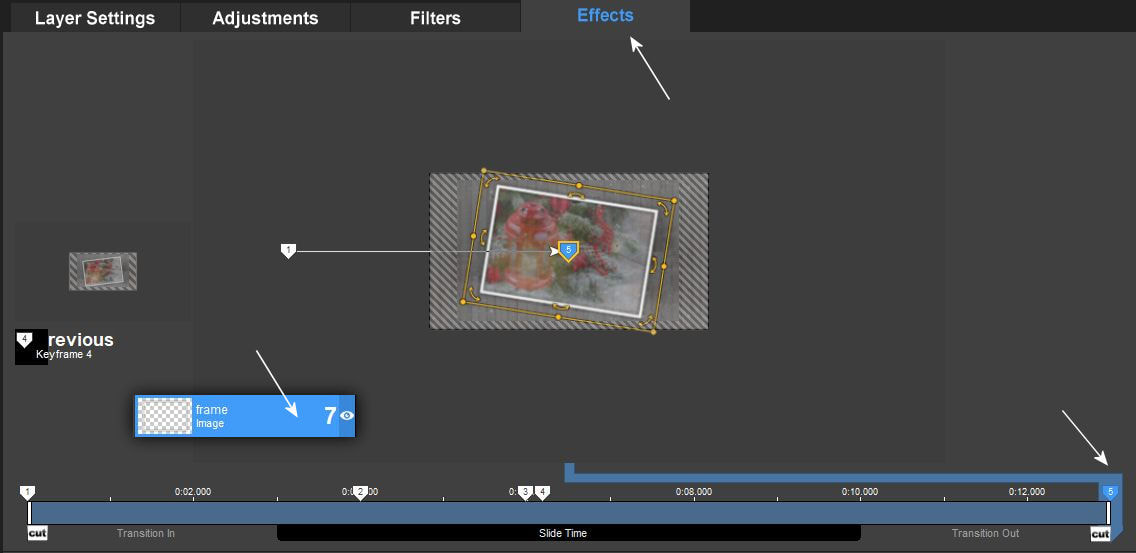
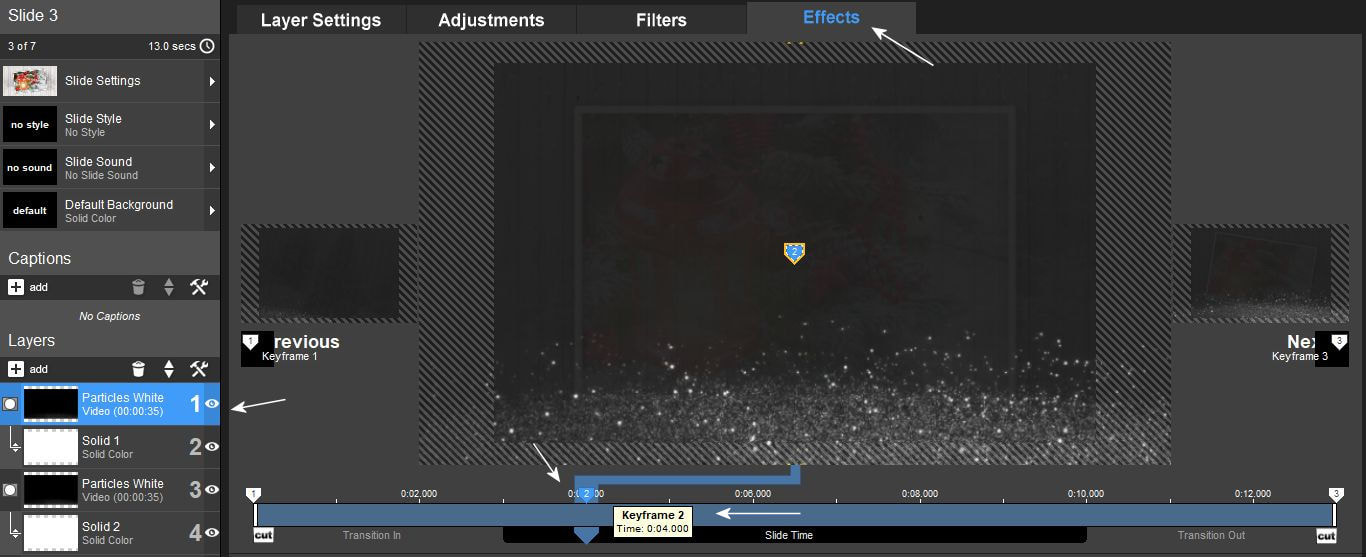
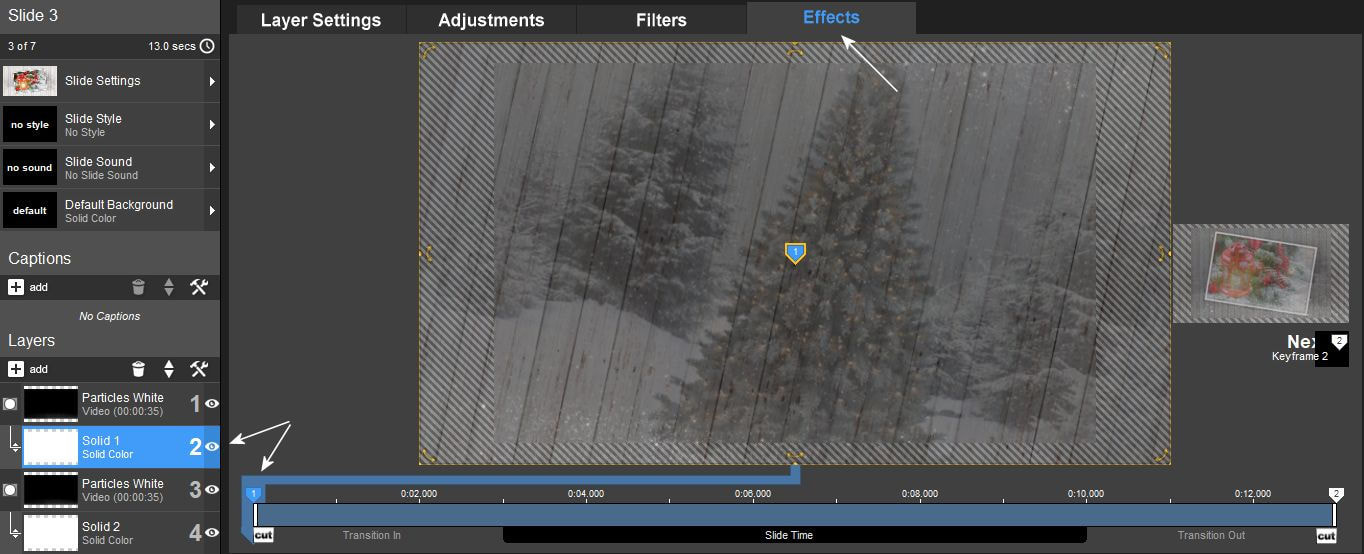
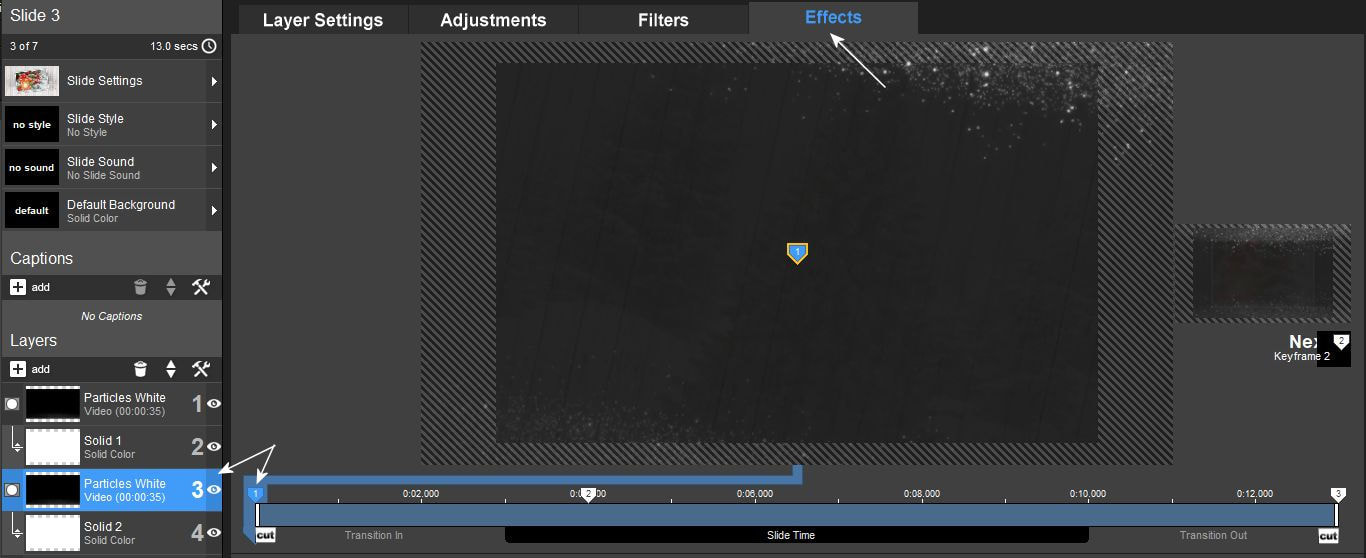
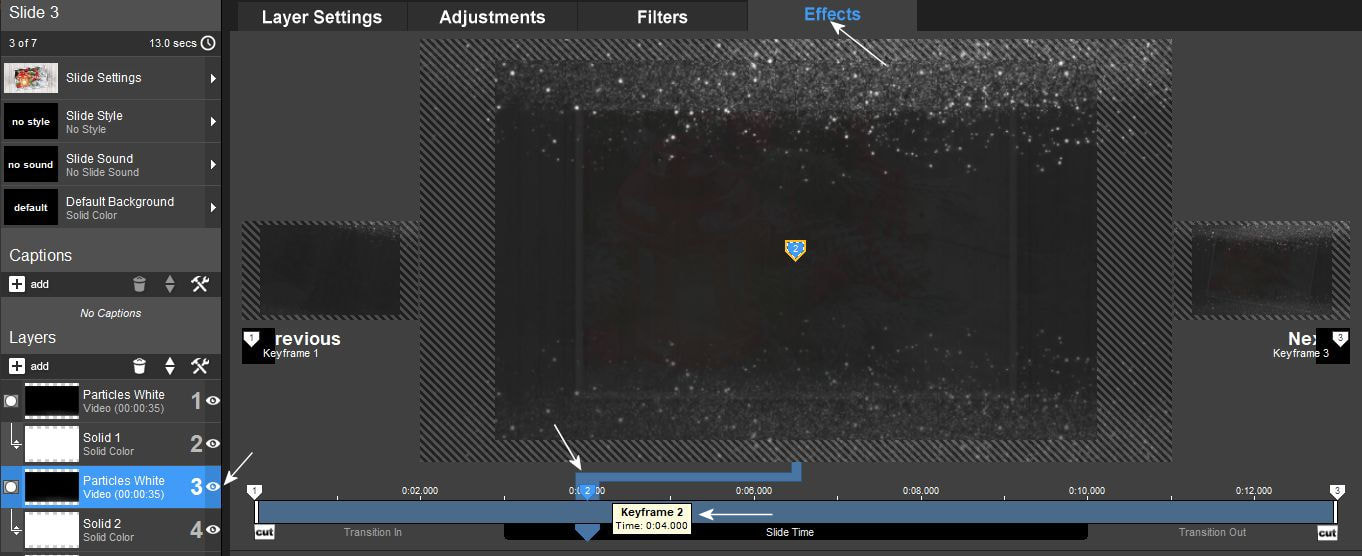
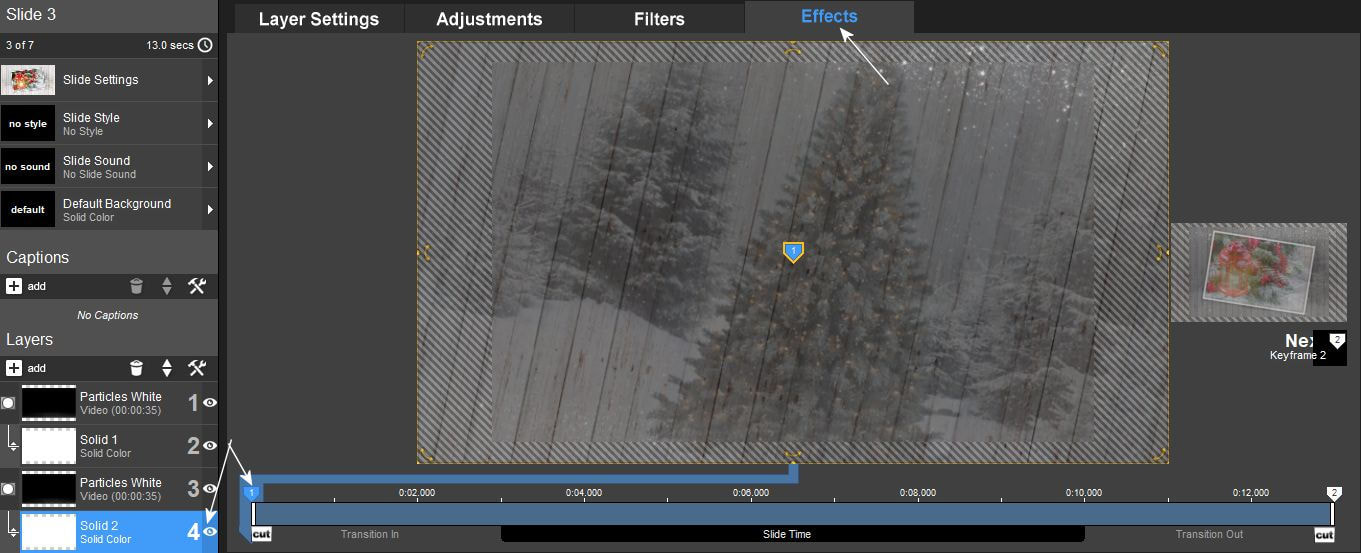
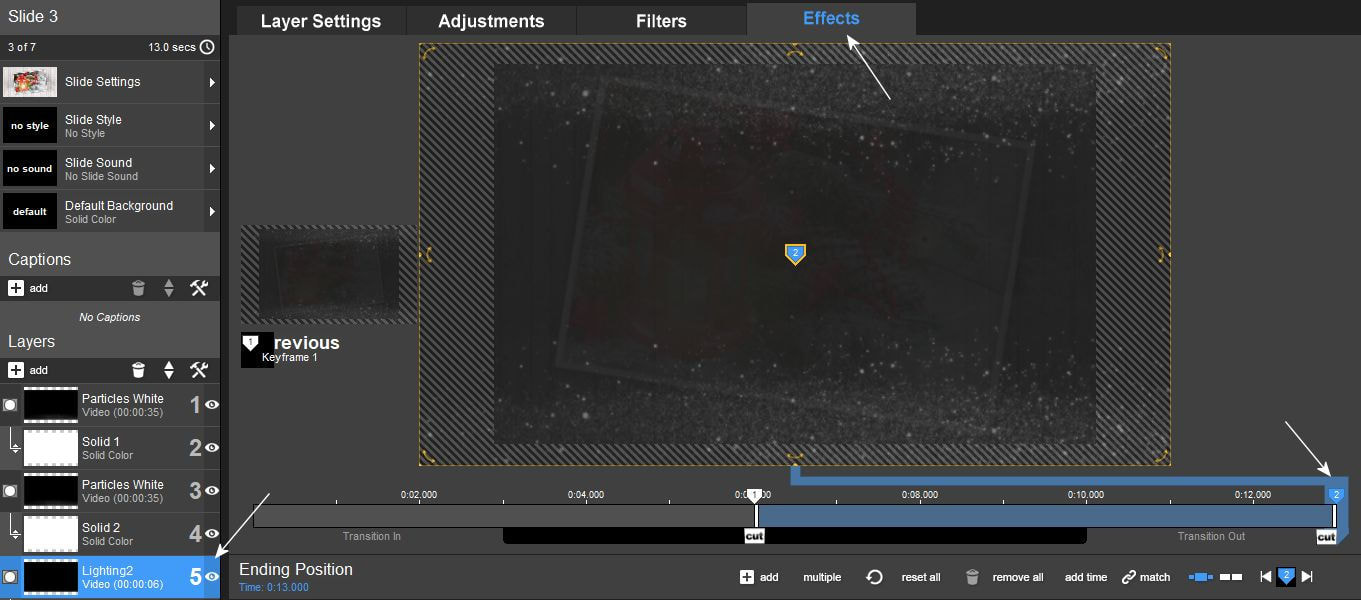
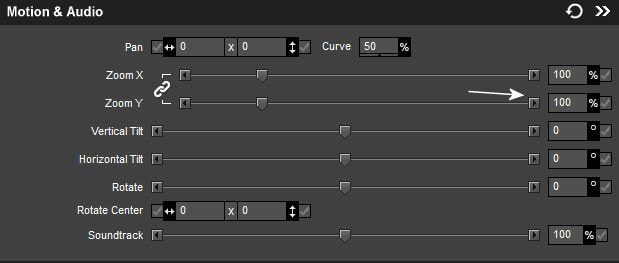
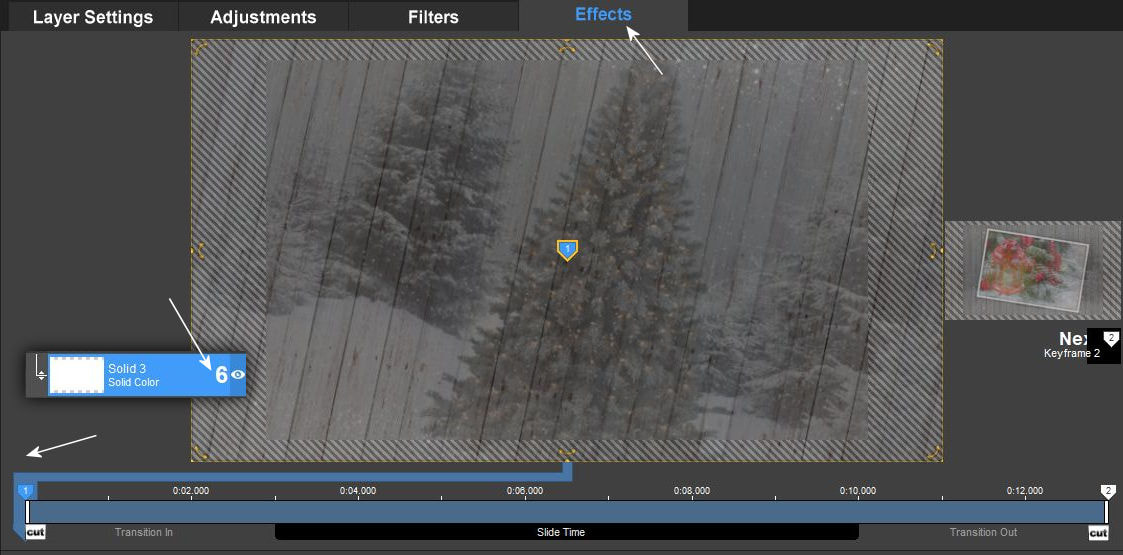
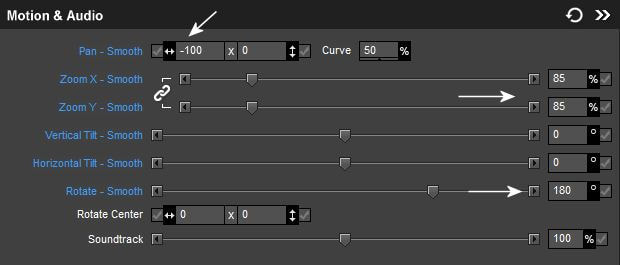
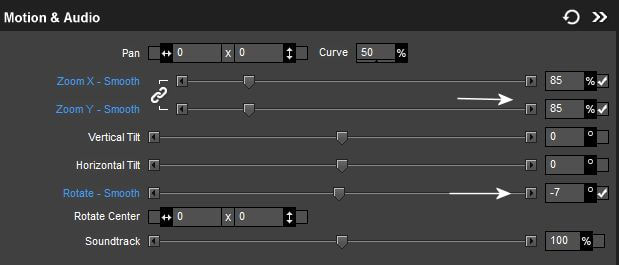
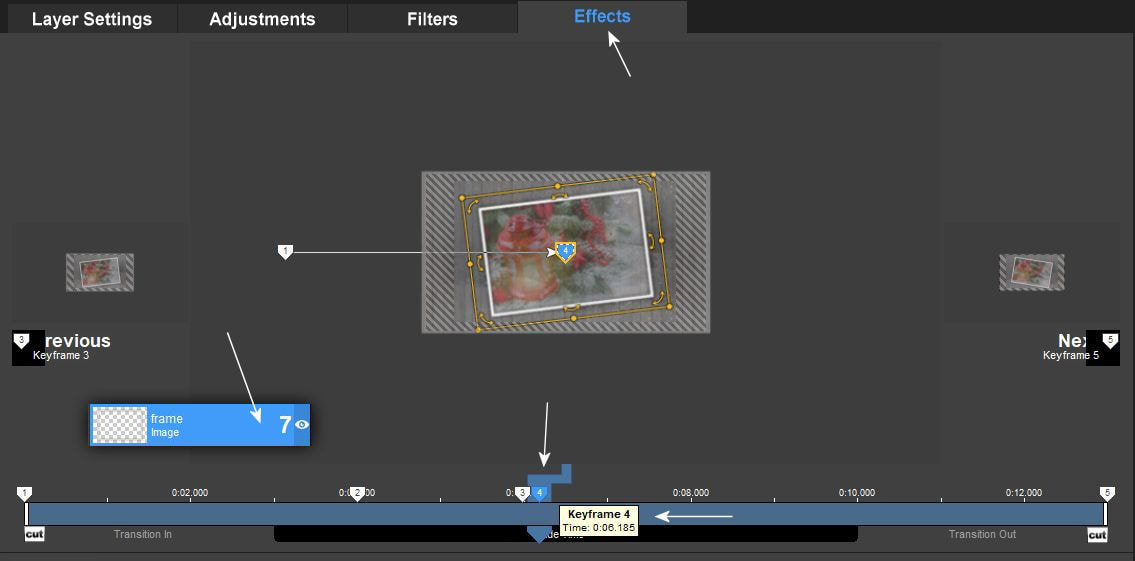
2. Figyeld a nyilakkal jelölt részeket és kövesd a képeken látottakat.Nagyon figyelmesen dolgozz és görgess a következö képhez, mert könnyen kimaradhat egy lépés a folyamatból.
Pay attention to the parts marked with arrows and follow what you see in the pictures. Work very carefully and scroll to the next picture, because it is easy to miss a step from the process.

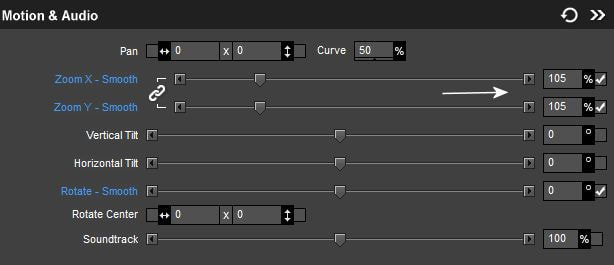
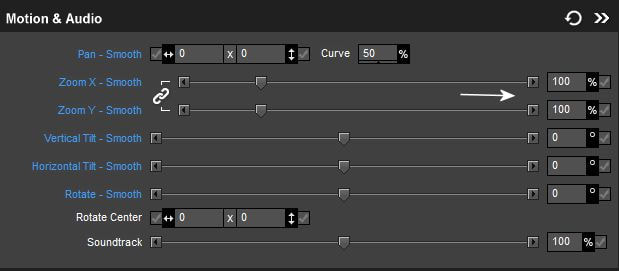
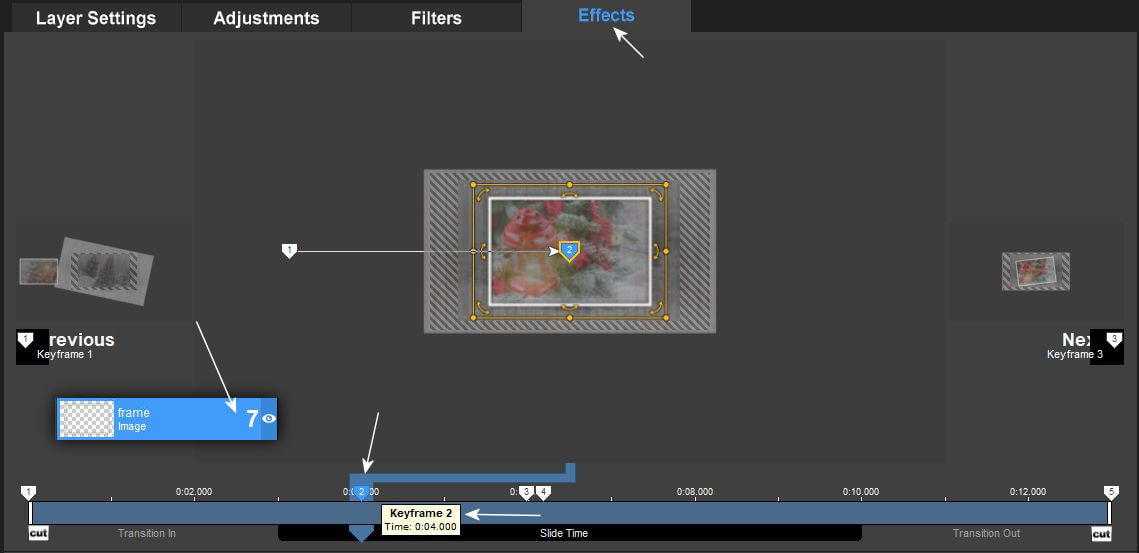
3. Keyframe point value: 4.000
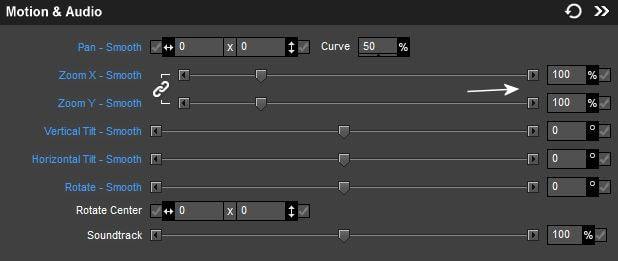
4.
5.
6.
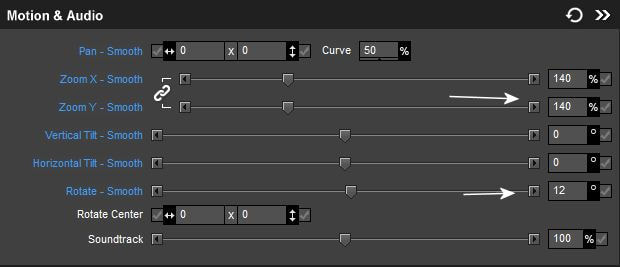
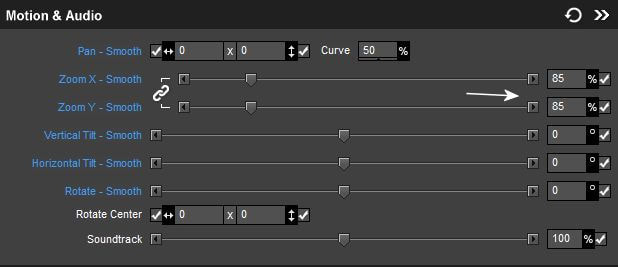
7. Keyframe Point value: 4.000
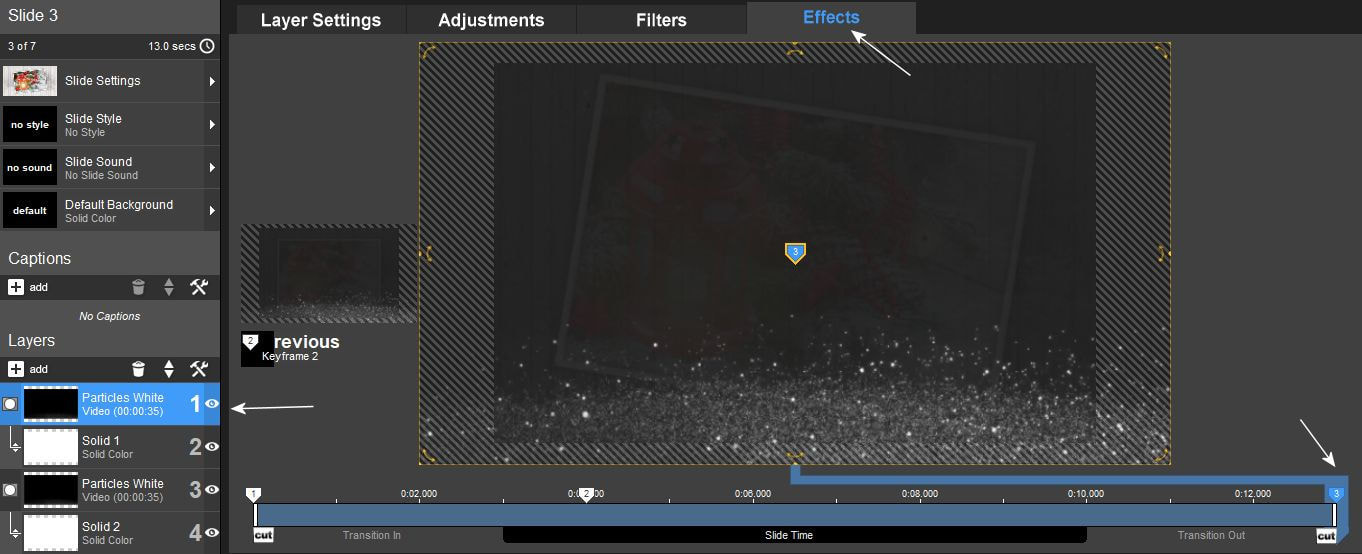
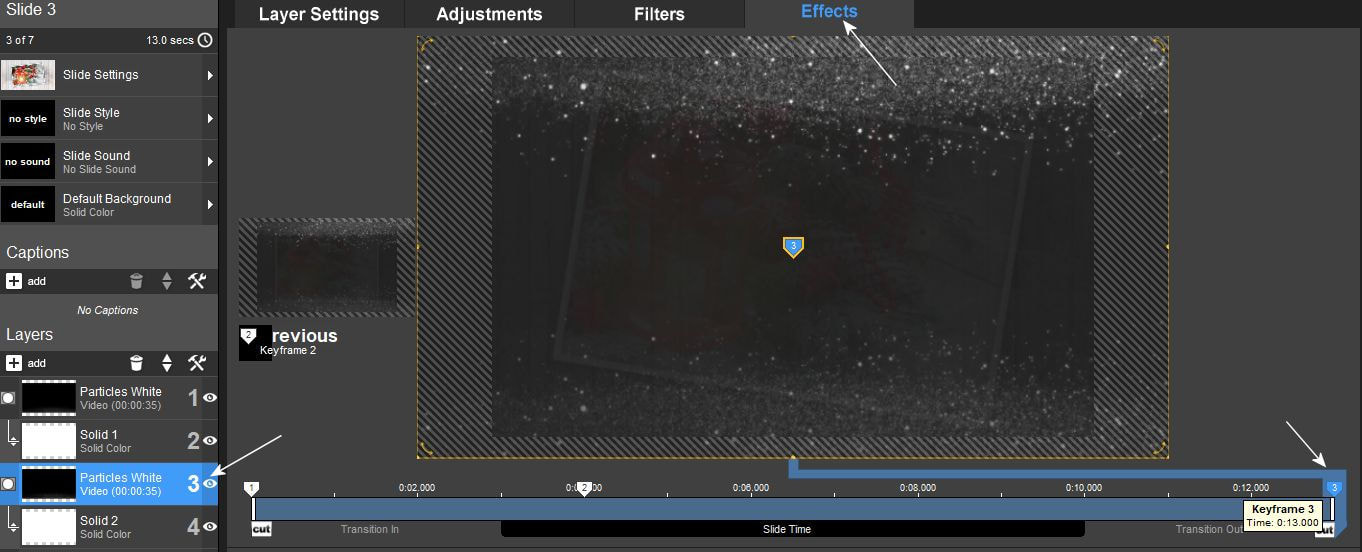
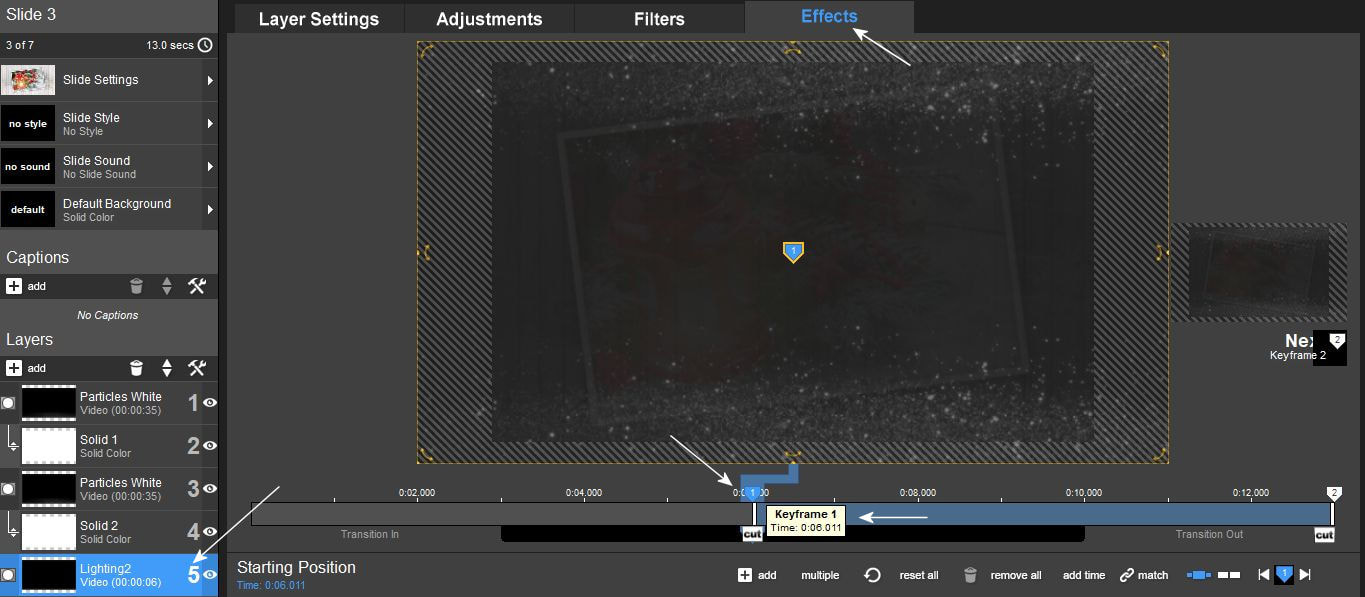
8. Keyframe Point the last one: 13.000
9.
10. Keyframe point value: 6.011
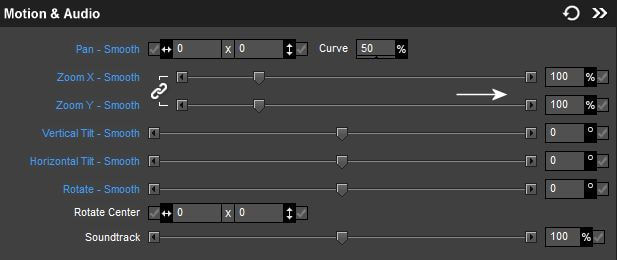
11.
12. Másolás a következö keyframe pointra
Copy To Next keyframe
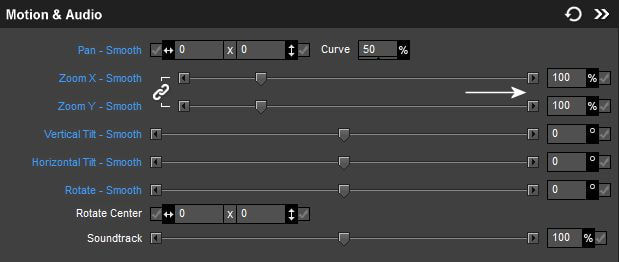
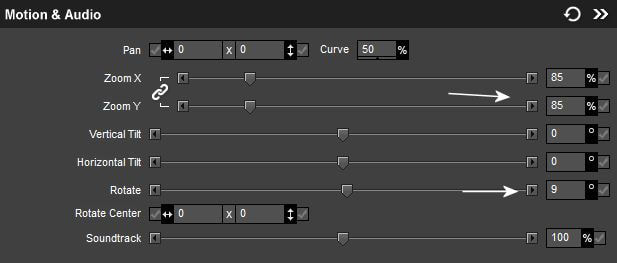
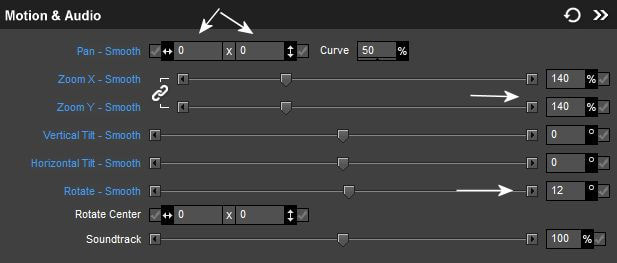
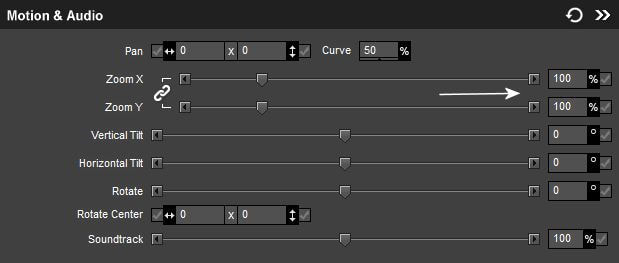
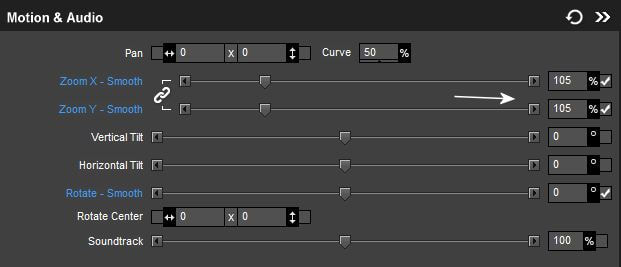
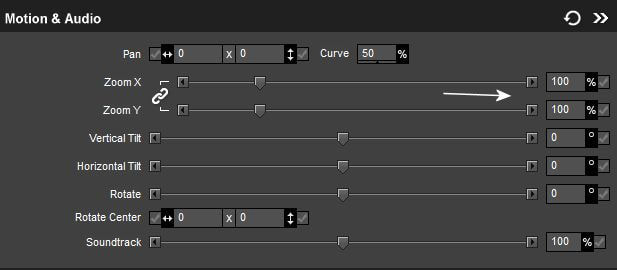
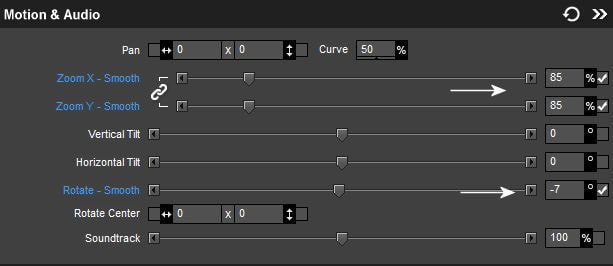
13. Csak a képkeret rétegen fotóztam le a beállítási értékeket mert a maszk és a képrétegen is ugyanezeket az értékeket kell használni. Tehát kövesd a képeken látottakat.
I only took pictures of the setting values on the frame layer because the same values must be used on the mask and the image layer as well. So follow what you see in the pictures.

14. Keyframe value: 4.000
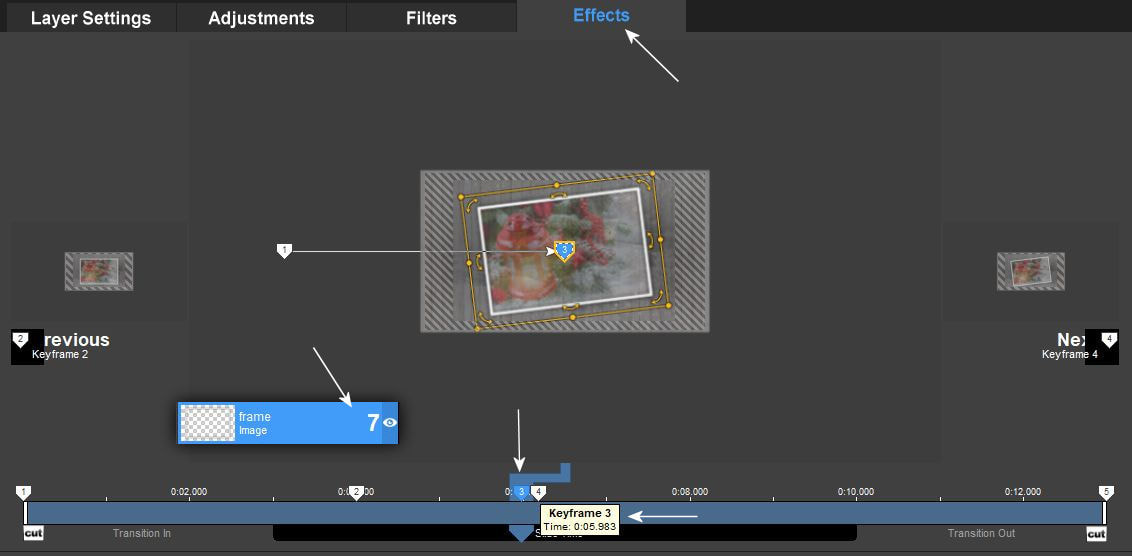
15. Keyframe value: 5.983
16. Keyframe value: 6,185
17.