Itt folytatom most a Line maszkolás a lehetséges variációjait egy szép videó elkészítéséhez.Most ugyanazt a maszkot csináljuk csak vízszintes formában.
Here I continue with the possible variations of Line masking to make a nice video. Now we make the same mask only in horizontal form.

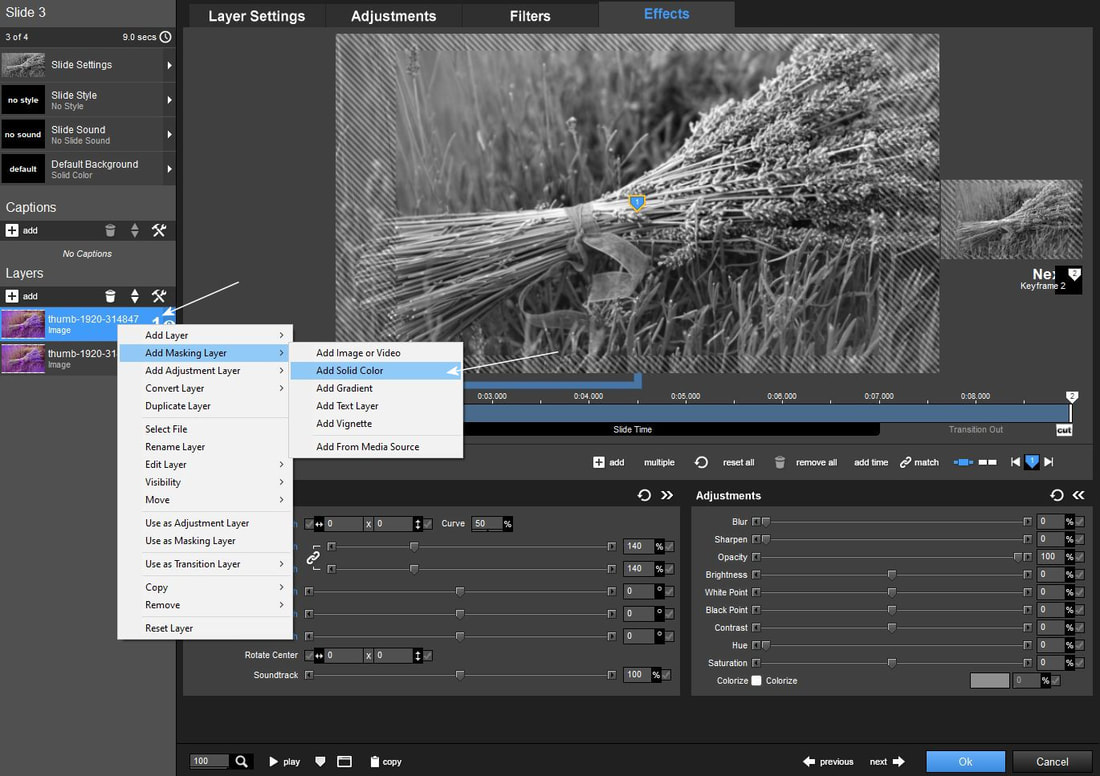
1. Válassz egy képet magadnak és duplázd meg a réteget. Katt a felsö rétegre és
Add Masking Layer - Add Solid Color
A csempe idö itt is minimum 5 mp.
Choose an image for yourself and duplicate the layer. Click on the top layer and Add Masking Layer - Add Solid Color The tile time here is at least 5 seconds.
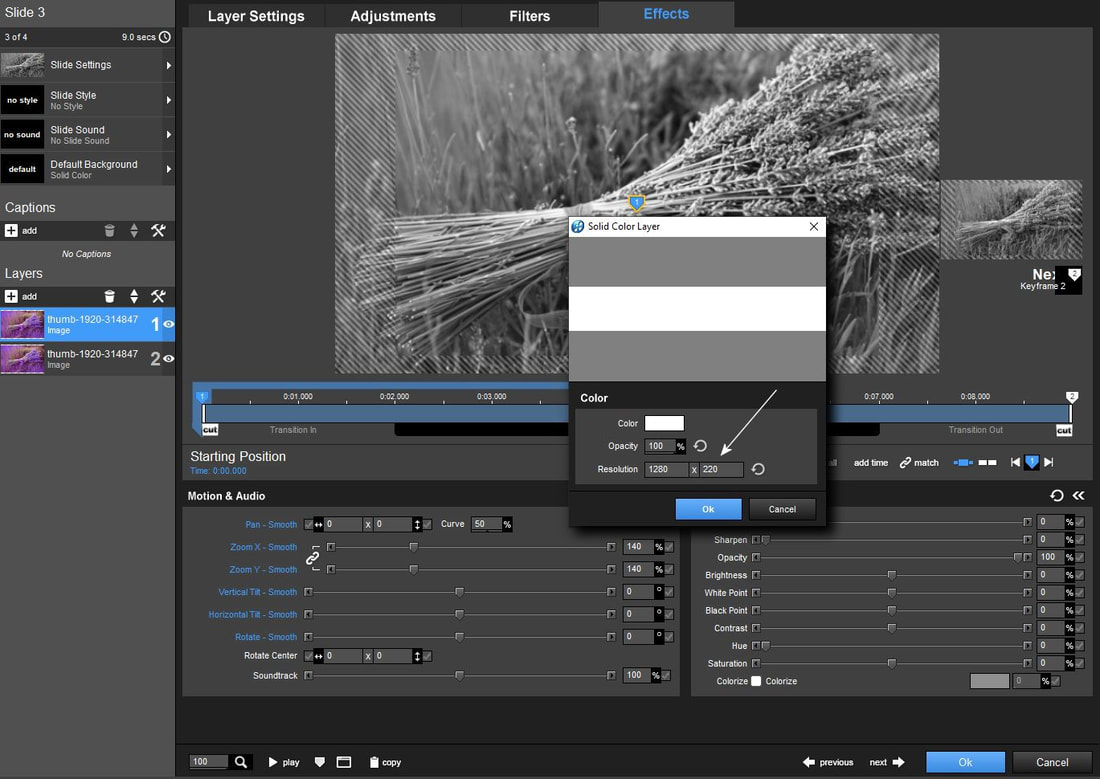
2. Most a magasági méretet (720) kell zsugorítani a maszkhoz tehát azt kell átméretezni. Itt nekem ez 220-as méret. Ne felejtsd el ezt is variálhatod, hogy milyen széles csíkot akarsz. De azért arra ügyelj, hogy megközelítöleg ez a csíkod is olyan legyen egy videón belül mint a függöleges. Ha ez nem így van, akkor nem annyira szép a látvány a vidiben.
Now the height dimension (720) must be shrunk for the mask, so it must be resized. This is size 220 for me. Don't forget that you can also vary how wide a strip you want. But make sure that this strip is approximately the same as the vertical one within a video. If this is not the case, then the view in the vidi is not so beautiful.
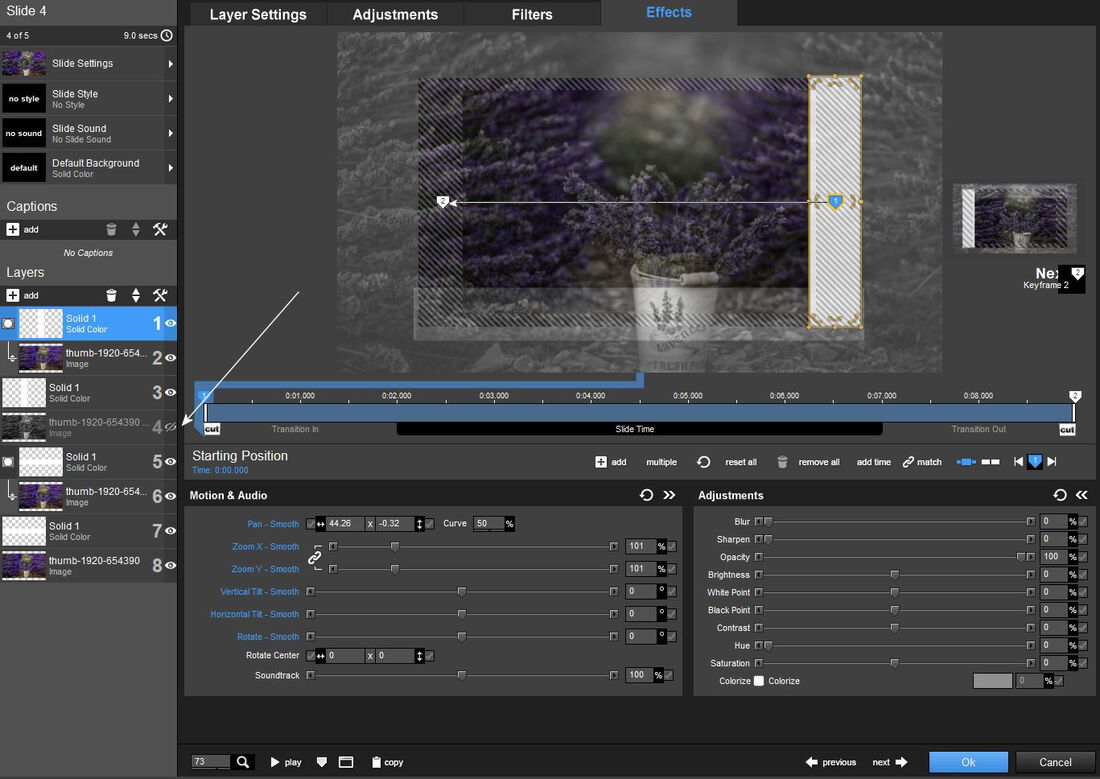
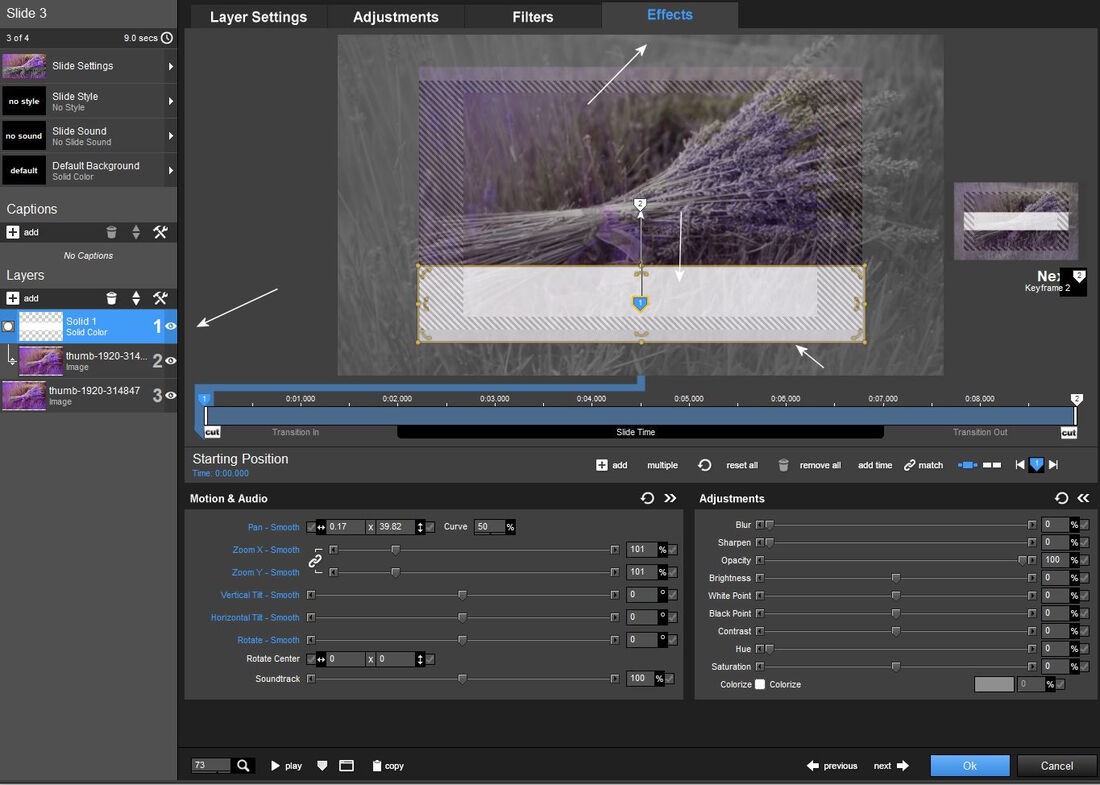
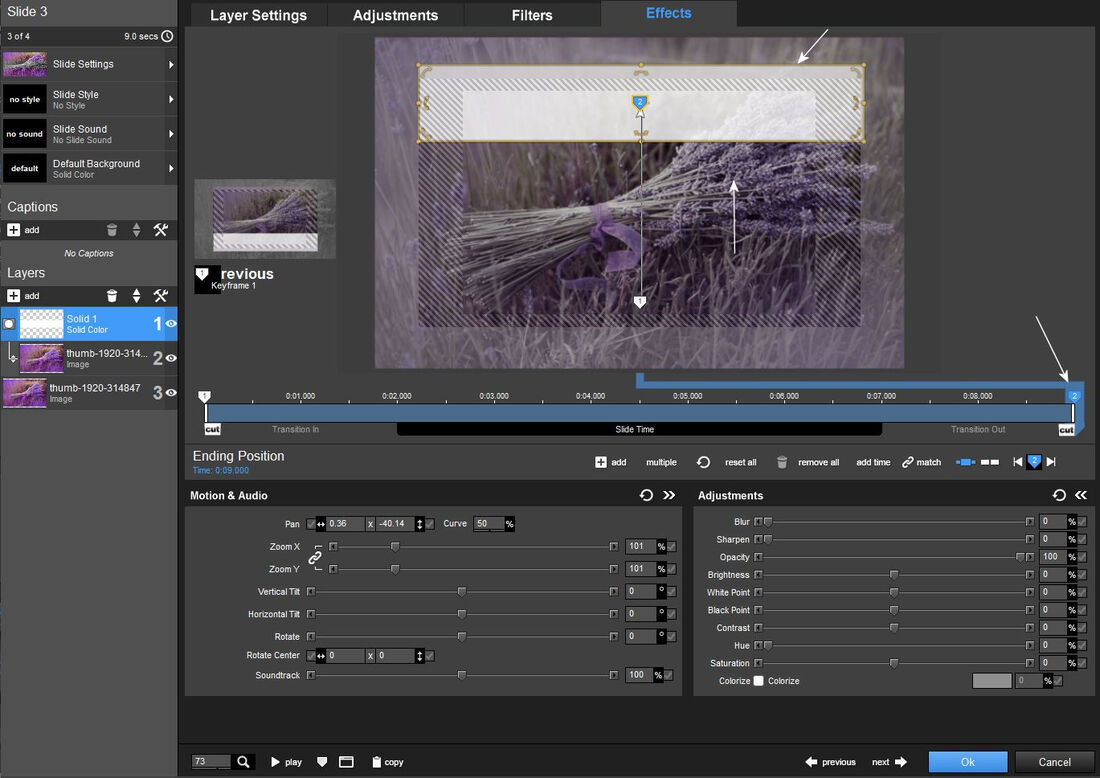
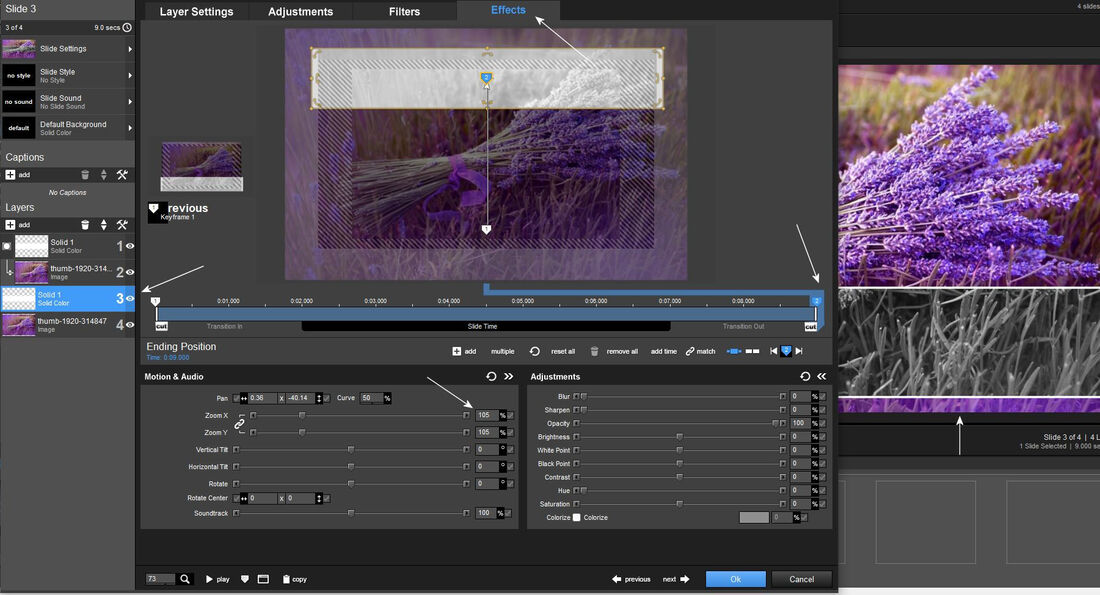
3. Katt az 1-es keyframe pontra és húzd le a maszkot a képernyöd alsó széléig ahogy azt itt látod. Alul a bal alsó sarokban kicsinyítheted a látómezöt, hogy jól lásd a széleket. Ezt is variálhatod majd egy másik alkalommal, mert most így alulról felfele fog haladni a maszkod. Ha ezt felfelé húzod akkor az majd fentröl lefele fog mozogni.Most maradok ebben a bemutatóban ennél a verziónál.
Click on keyframe point 1 and drag the mask down to the bottom edge of your screen as you see here. At the bottom in the lower left corner, you can reduce the field of view to see the edges clearly. You can also vary this another time, because now your mask will move from bottom to top. If you drag this up, it will move from top to bottom. For now, I will stay with this version in this tutorial.
4. Aztán a 2-es keyframe pontot meg vidd felfelé a szélig. Pontosan dolgozz!
Csak egyenesen húzd a pontokat ne mozogj sem jobbra-sem balra az egérrel!!!
Then take keyframe point 2 up to the edge. Work exactly! Just drag the points straight, don't move left or right with the mouse!!!
5. Duplicate Layer
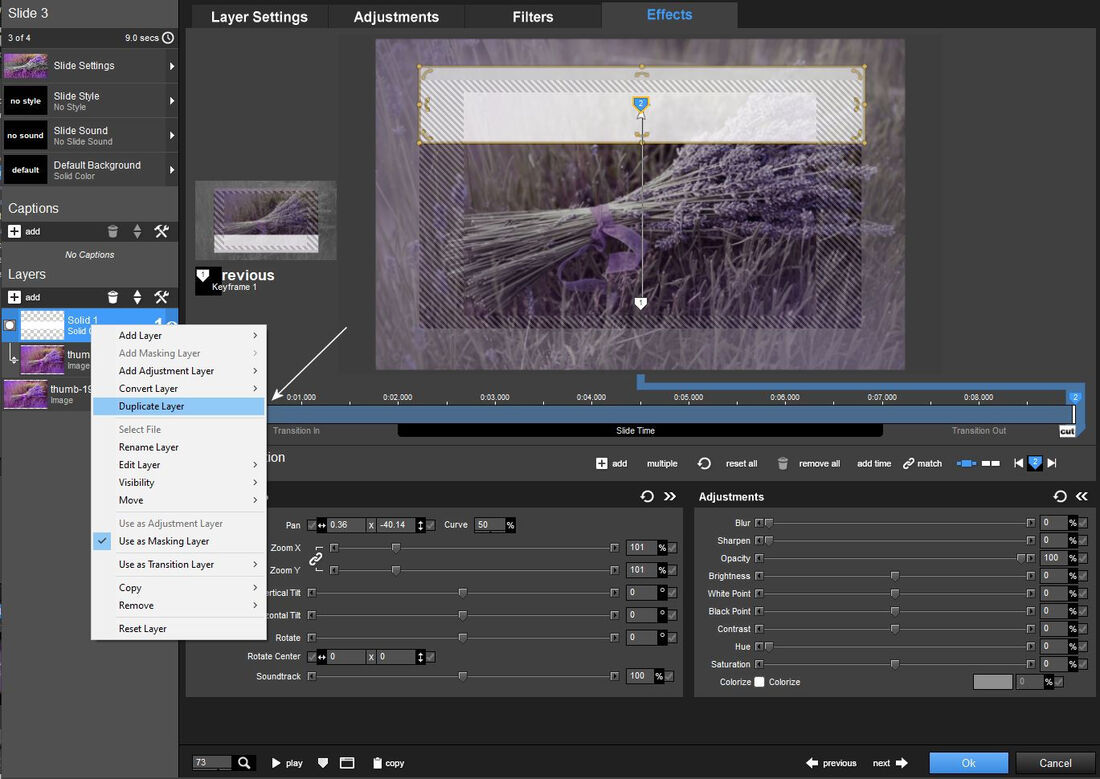
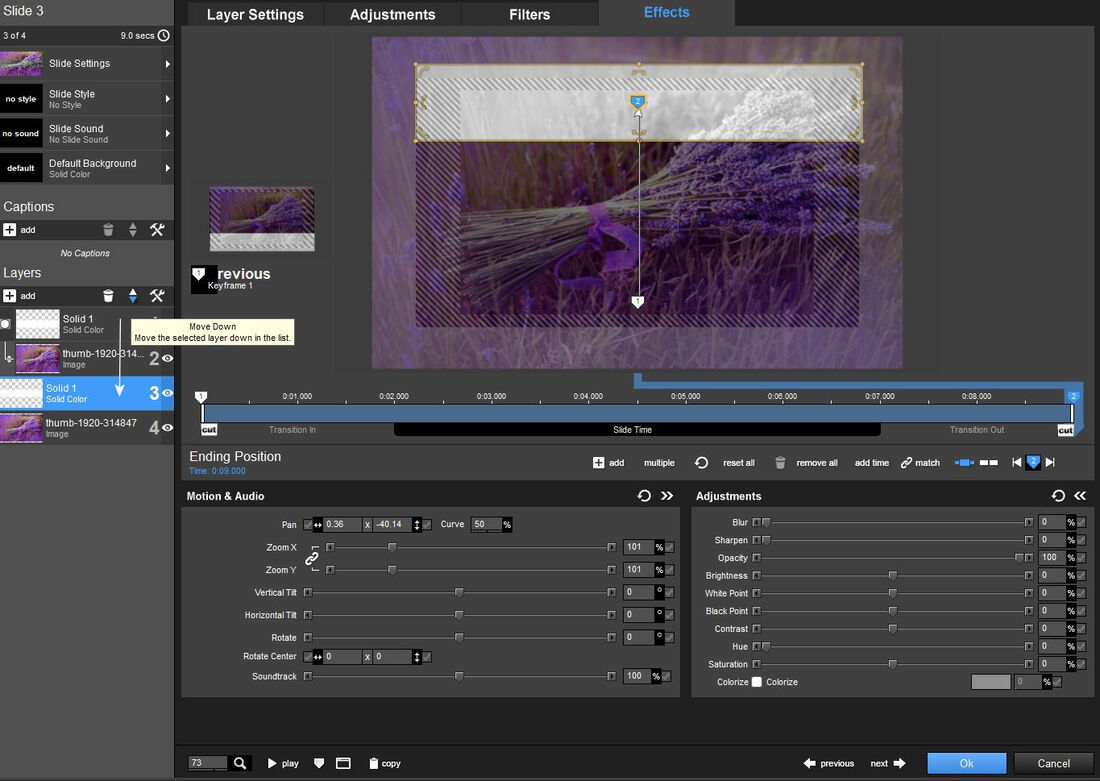
6. Vidd le az új rétegedet a maszkolt réteg alá.
Drop your new layer below the masked layer.
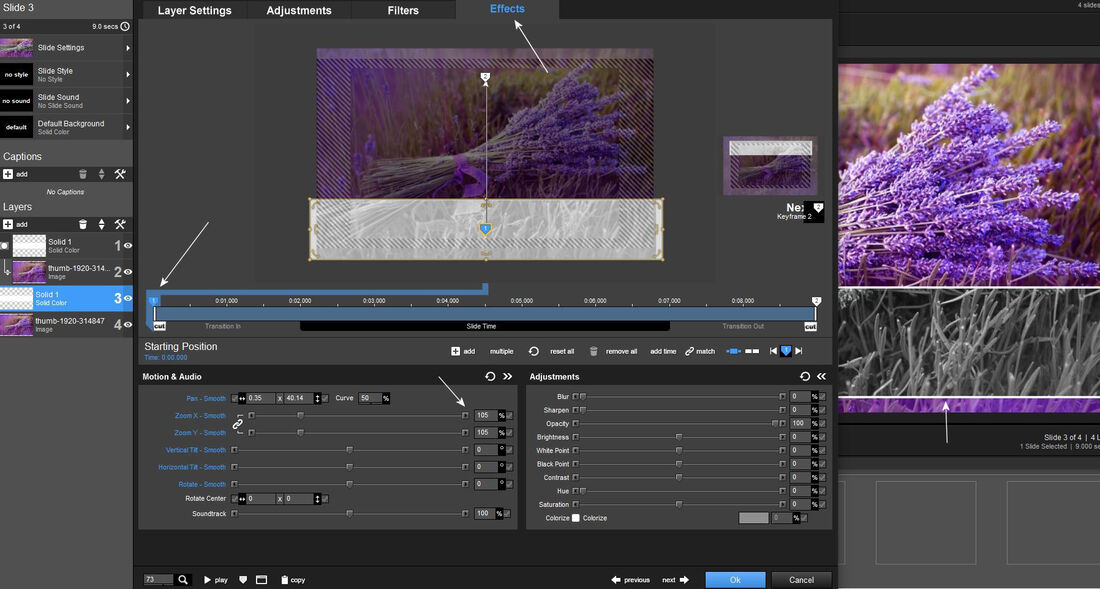
7. Most a keretet kell megcsinálni úgy ahogy azt az elözö leírásban megtanultuk.
Elöször az 1-es keyframe ponton nyújts meg hogy keretet kapj a maszkodhoz.
( zoom 101)
Now the frame must be made as we learned in the previous description. First, stretch it at keyframe point 1 to get a frame for your mask. (zoom 101)
8. Azután ismételd meg a zoom értéket a 2-es keyframe ponton is. Ezzel a fekvö line maszk mozgással is készen vagy. Most azzal folytatom, hogy megvariáljuk egy újabb csempén a már 2 megtanult maszkmozgást. egymásra tesszük egy csempére a vízszintes és függöleges mozgású maszkolásunkat. Igy keresztezö mozgást is létre tudunk hozni.
Then repeat the zoom value at keyframe point 2 as well. You are also ready with this lying line mask movement. Now I will continue by changing the 2 mask movements we have already learned on another tile. we stack our horizontal and vertical movement masking on one tile. We can also create a crossing movement.
9. Mivel sokat kell dolgozni akár egy vízszintes vagy függöleges maszkolással, akkor hasznosítsuk azt egy harmadik mozgás effect létrehozásához azokat.
Itt azt látjátok, hogy van már egy csempéd a függölegessel és van egy a vízszintessel.
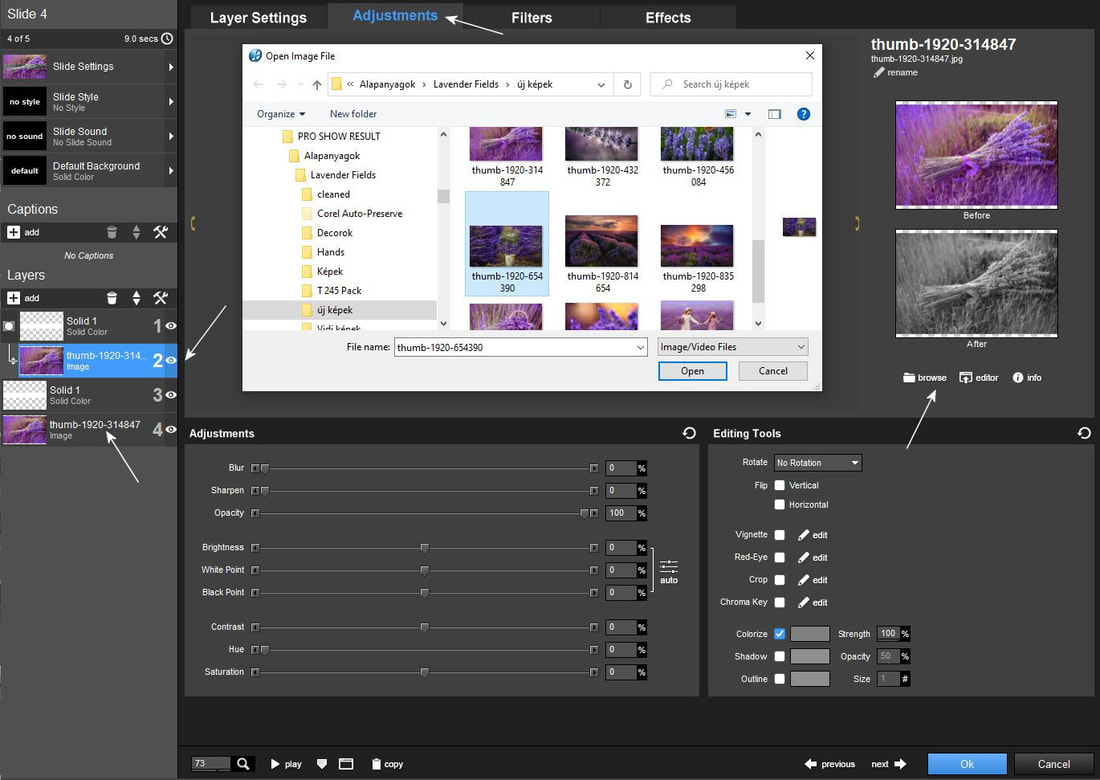
Most a vízszintes csempédet másold át egy harmadik csempére.
Since you have to work a lot with even a horizontal or vertical masking, let's use it to create a third movement effect. Here you can see that you already have one tile with the vertical one and one with the horizontal one. Now copy your horizontal tile to a third tile.
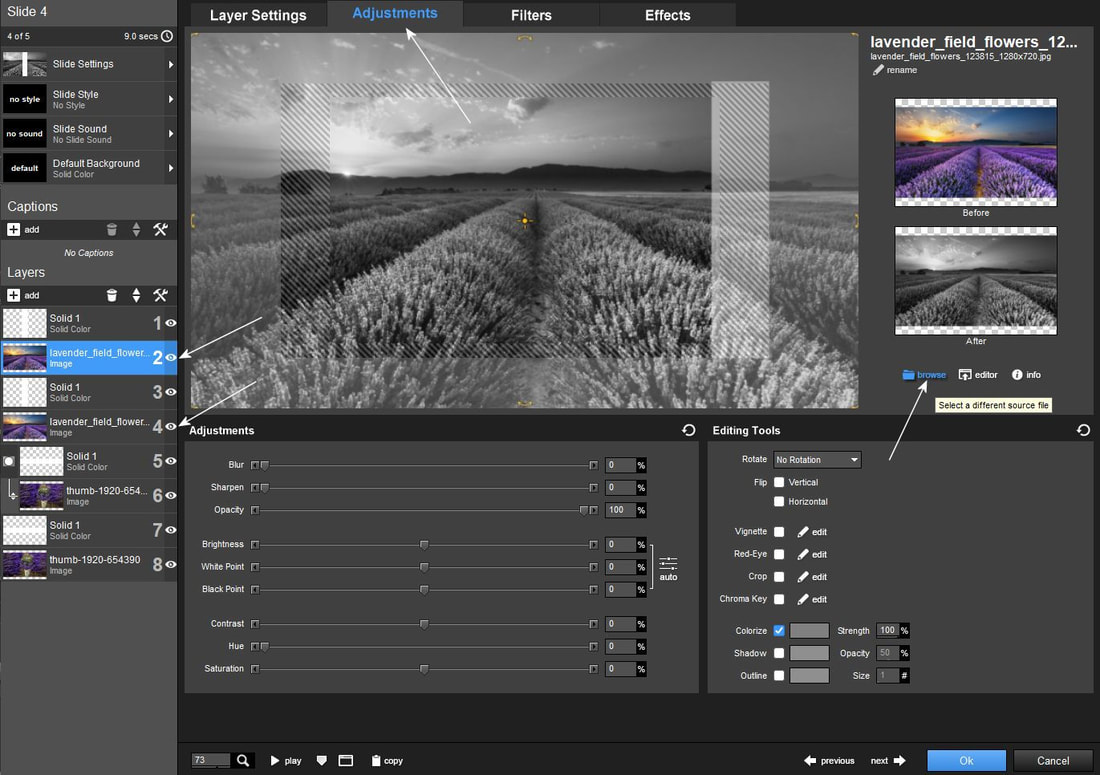
10. Cseréld ki ezen a csempén a képeket az Adjustmentben.
Replace the images on this tile in Adjustment.
11. Itt látod, hogy a csere megtörtént a 3. csempén. Most állj a függöleges csempédre, hogy áttegyük azt a maszkolást is a 3.-ra. Igy létre tudunk hozni egy dupla maszkot amellyel keresztezödés effectet tudunk csinálni.
Here you can see that the exchange has been made on the 3rd tile. Now stand on the vertical tile so we can transfer that masking to the 3rd as well. In this way, we can create a double mask with which we can create a crossover effect.

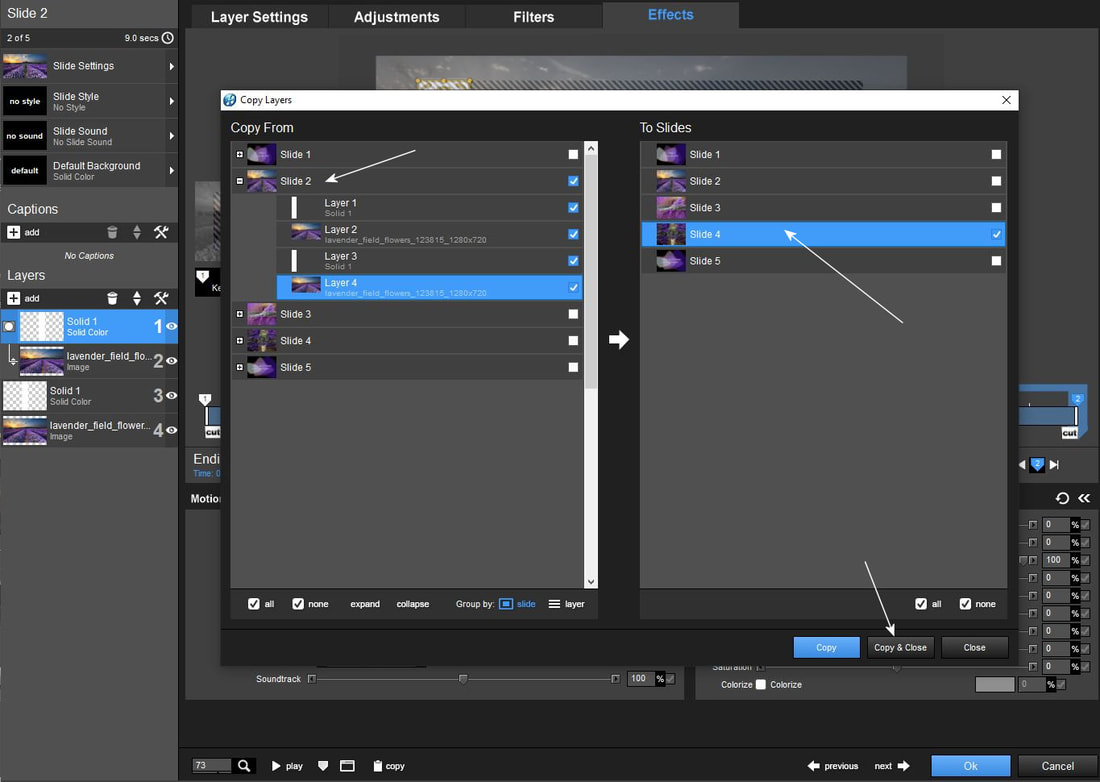
12. Katt a felsö csempére a jobb füllel majd - Copy - Copy To Specific Slides
Click on the upper tile with the right tab and then - Copy - Copy To Specific Slides
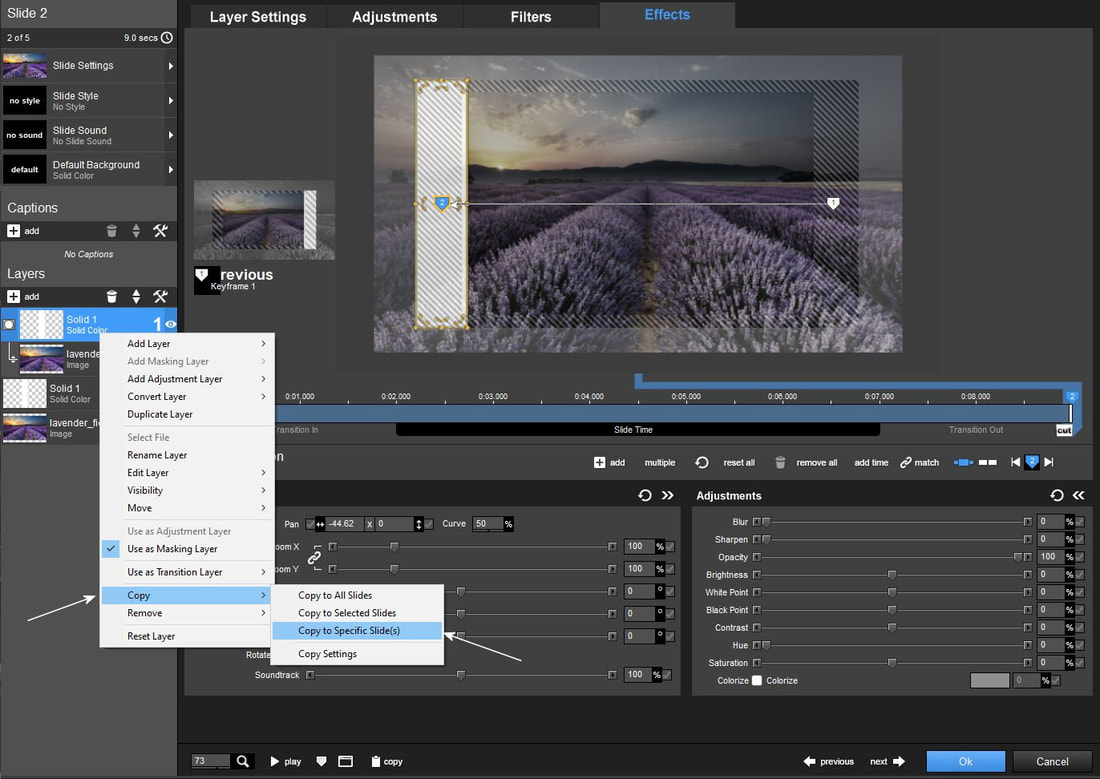
13. A legördülö ablak baloldali részében látod, hogy melyik csempéröl a jobboldalon pedig hogy melyik csempére akarsz másolni. Jellölj ki minden réteg kiskockát a baloldalon és jelöld ki azt a csempét ahova azokat másolni akarod, majd katt a
Copy & Close gombra.
In the left part of the drop-down window, you can see which tile you want to copy to, and on the right, which tile you want to copy. Select each layer of small cubes on the left and select the tile where you want to copy them, then click Copy & Close button.
14. Itt már jól látod, hogy erre a csempére mindkét maszkolás átkerült.Most ki kell cserélned a képeket ugyanarra amit itt a 6-os és 8-as rétegen is látsz. Ezeket cserélted már az elözöekben.
Here you can clearly see that both masks have been transferred to this tile. Now you have to replace the images with the same ones you see here on layers 6 and 8. You have already changed them in the past.
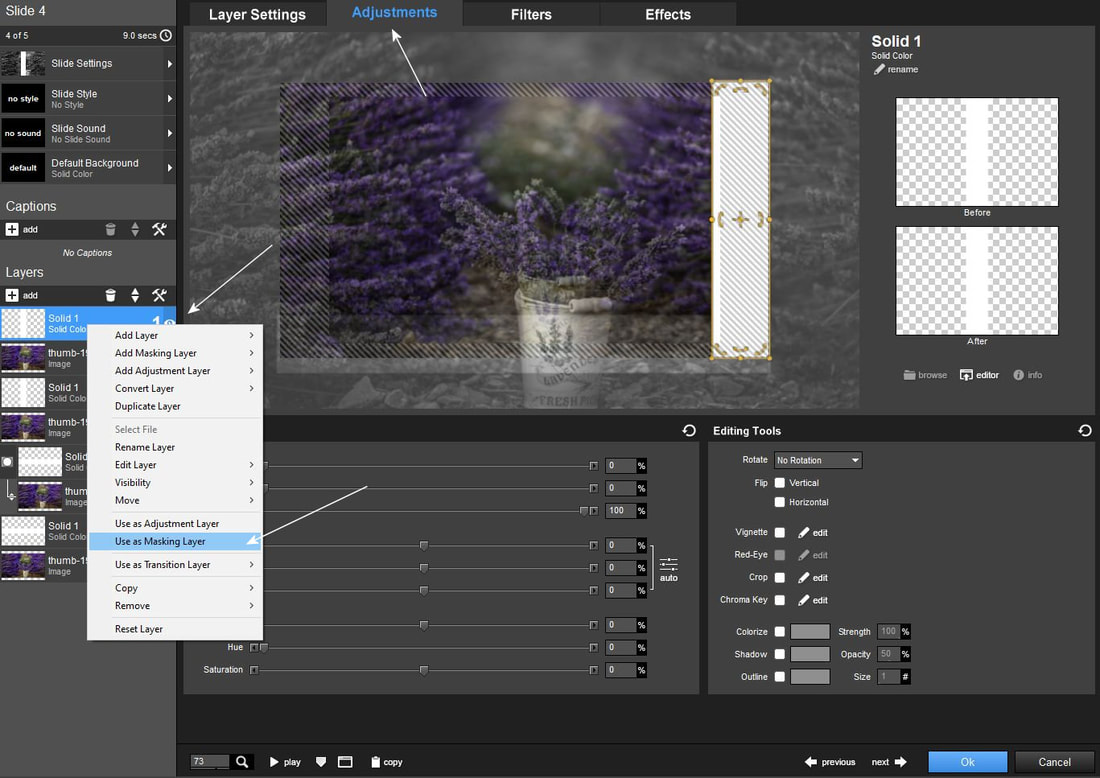
15. Mivel a másolásnál az elsö két réteget a program nem kapcsolta össze maszkká azt most neked kell megtenned. Katt az elsö rétegre jobb füllel és válaszd a
Use as Masking Layer menüt.
Since the program did not connect the first two layers into a mask when copying, you have to do it now. Click on the first layer with the right ear and choose a Use as Masking Layer menu.
16. Mostmár minden rendben van, de ahhoz, hogy ne legyen fennakadás a keresztezödö mozgásban a 4. rétegszemet csukd be mert nincs rá szükség akár ki is törölheted. Csodálatosan müködik ezen a csempén is a line maszkod és az ezzel létrehozott effected.
Now everything is fine, but in order to avoid interruptions in the crossing movement, close the 4th layer mesh because it is not needed, you can even delete it. Your line mask and the effect created with it work wonderfully on this tile as well.