Ebben a bemutatóban ismét egy nyíló és csukódó effectet készítünk el. A hajtogatás használata a témánkhoz tartozó képeknél mindig látványos elem a videónkban.Ezekböl a hajtogatásokból álló effectekböl már több fajtát is találhattok itt a weblapon. Remélem, hogy ez a típus is tetszik majd annyira nektek, hogy lesz olyan felhasználó aki el is készíti ezt az effectet az itt található tutorial szerint.
In this presentation, we will again create an opening and closing effect. The use of folding in the images belonging to our topic is always a spectacular element in our video. You can already find several types of these folding effects here on the website. I hope that you will like this type so much that there will be users who will create this effect according to the tutorial here.

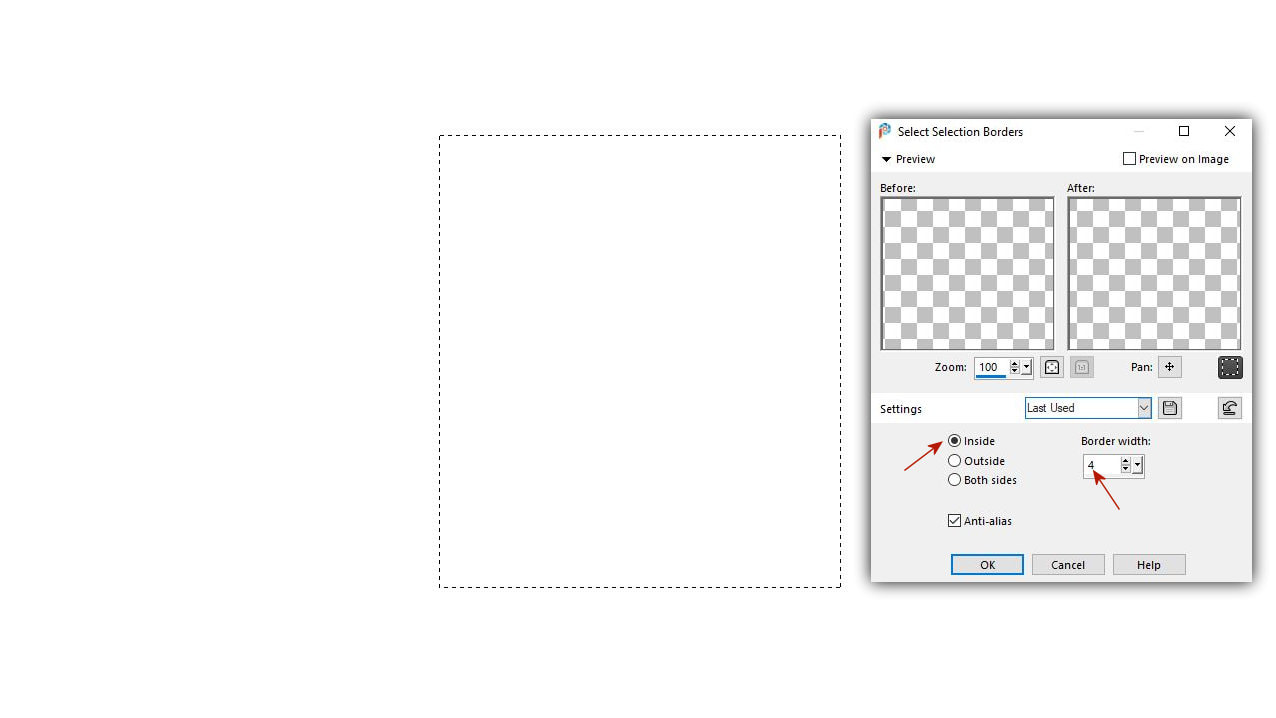
1. A munkát ismét a Corelben kezdjük vagy valamilyen PhotoShop program is alkalmas erre. Jelöljünk ki egy fehér alapon egy téglalapot ahogy azt itt a képen látod.
Selection - Modify - Select Selection Boreders
We start the work again in Corel or some PhotoShop program is also suitable for this. Select a rectangle on a white background as you see in the picture. Selection - Modify - Select Selection Borders
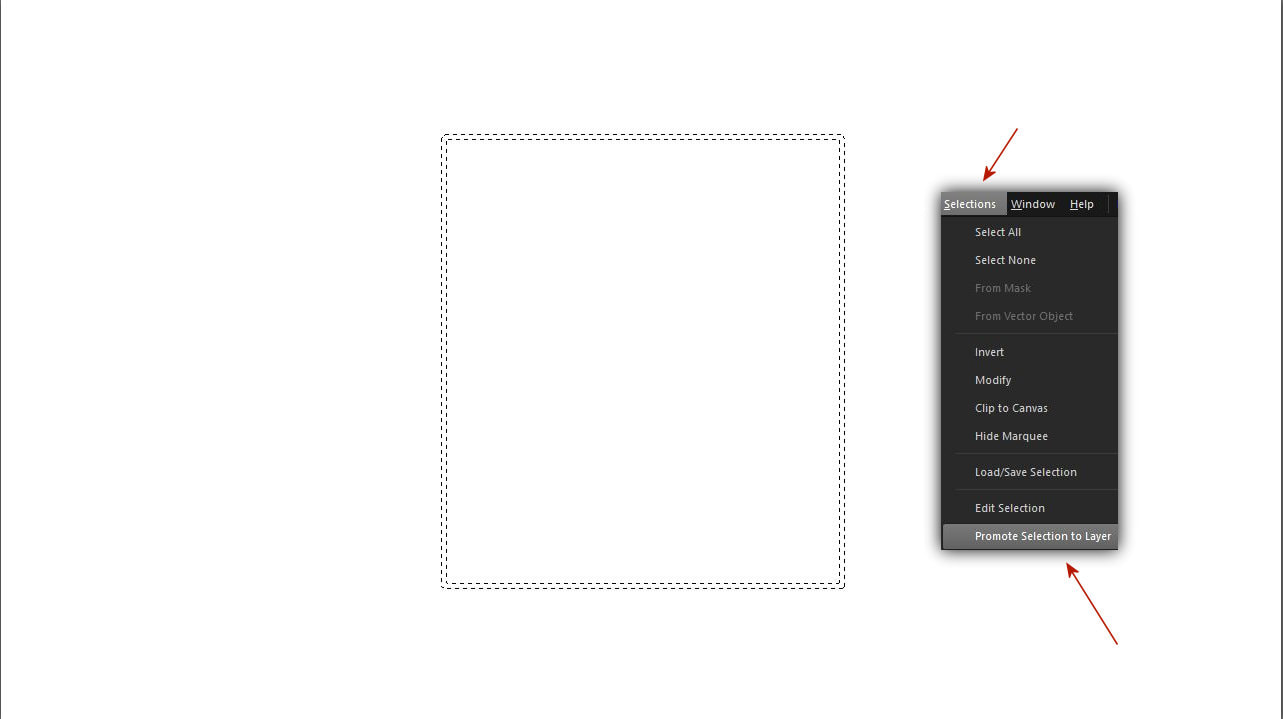
2. Promótáld a kijelölést egy külön rétegként.
Promote the selection as a separate layer.
3. Majd vágd ki a vékony keretes téglalpodat és méretezd át azt 400x450 -re.
Then cut out your thin frame rectangle and resize it to 400x450.
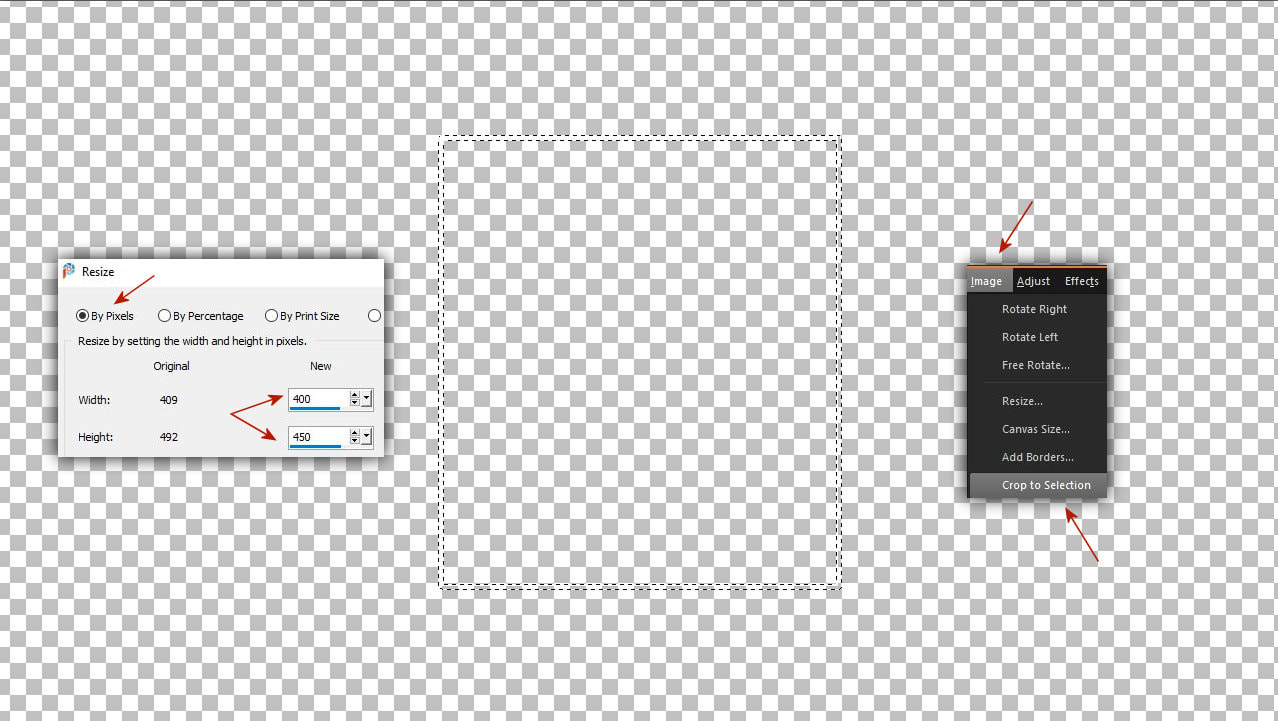
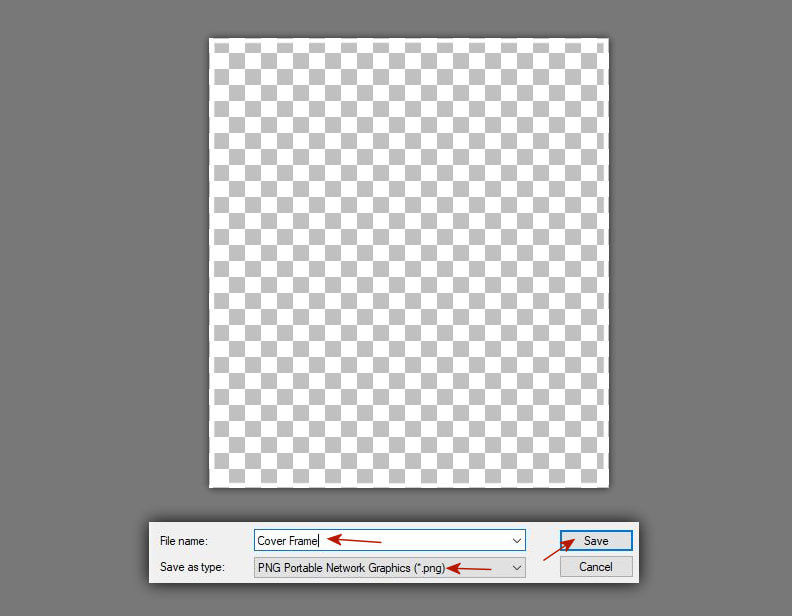
4. Mentsd el png. formátumban.
Save it in Png format.
5. Minden egyéb összetevöt a ProShow Producerben készítünk el. Kettö különbözö slide-on dolgozunk ennél az effectnél. A használandó képek mérete 800x450 A slide-okat és azok idejét így alakítsd ki. Azok kettesével váltják egymást a videónkban.
All other components are created in ProShow Producer. We are working on two different slides for this effect. The size of the images to be used is 800x450. Create the slides and their time set up in this way. The two of them alternate in our video.
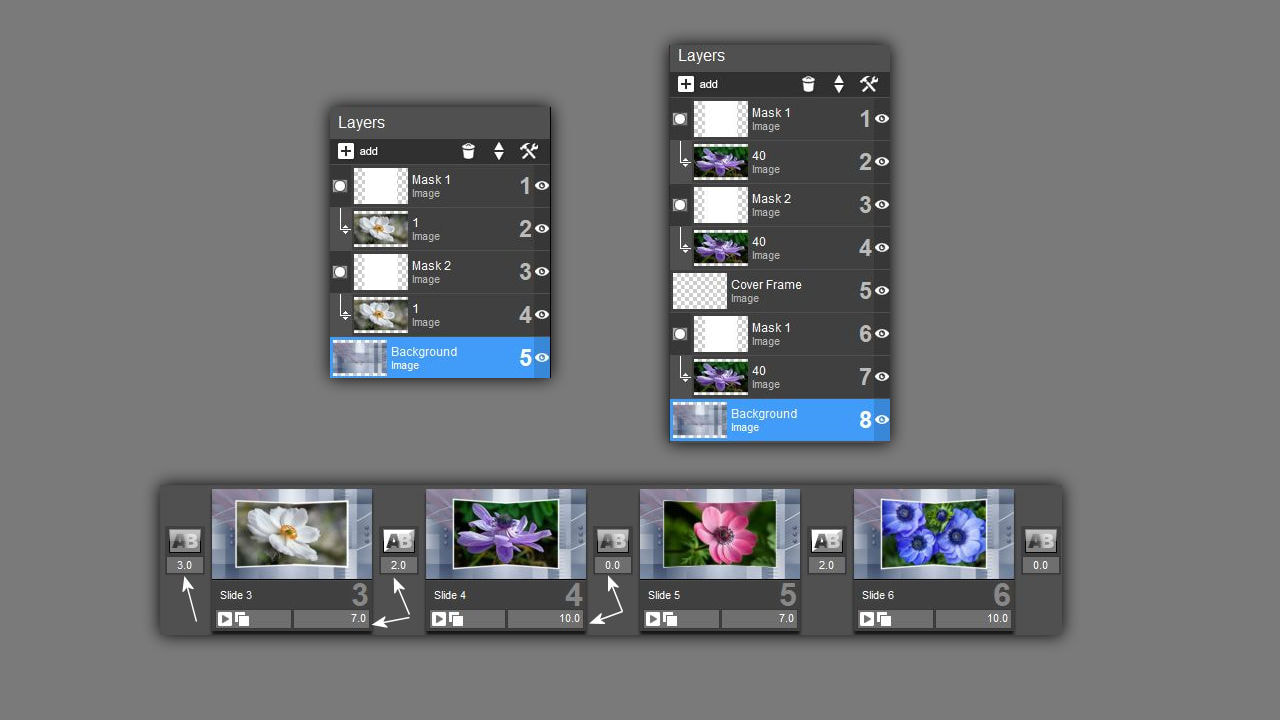
6. A rétegek kialakítási folyamata az elsö slide-on.
The process of creating the layers is on the first slide.
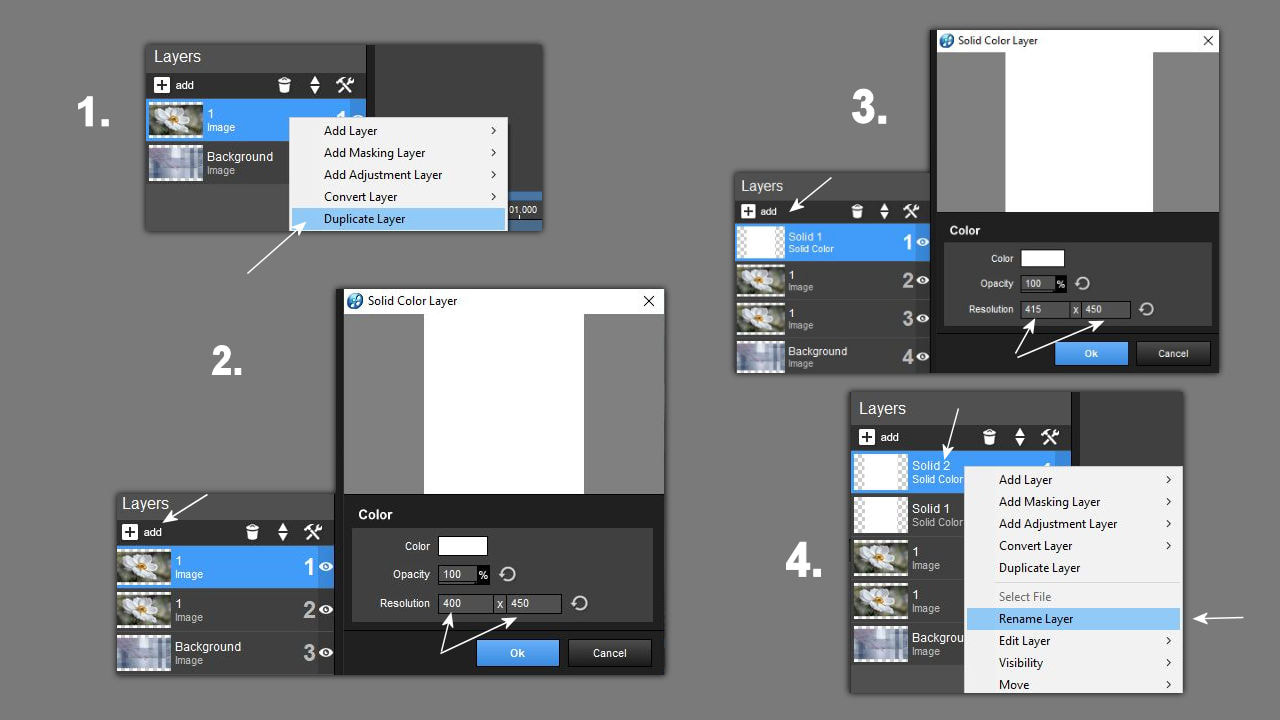
7. A rétegek átnevezése a könnyebb munka érdekében.
Renaming layers for easier work.

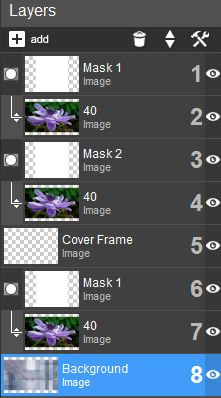
8. Ugyanúgy alakitsd ki a második slide-ot is ahogy azt itt a fentiekben láttad az elsönél. A maszkok is ugyanolyan méretüek csak itt bekerül új rétegként a Corelben elkészített vékony kereted is.
Create the second slide in the same way as you saw in the first one above. The masks are also the same size, only the thin frame created in Corel is added here as a new layer.
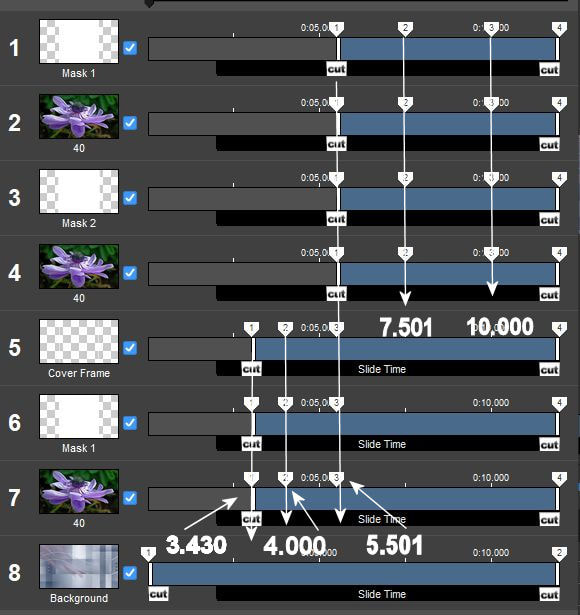
9. A keyframe pontok elhelyezése az elsö slide-on.
Placement of keyframe points on the first slide.
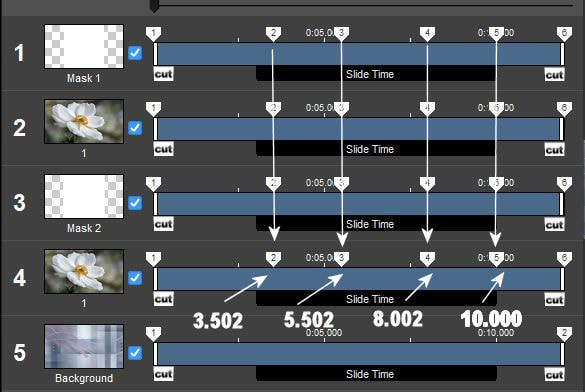
9. A keyframe pontok elhelyezése a második slide-on.
Placement of keyframe points on the second slide.