
Ez a bemutató a Following Effect- tel ( követö effect ) ismerkedünk meg. Ez azt jelenti, hogy egy hosszabb idejü csempén folyamatosan mozog horizontálisan egy alap amelyen több kép vagy objektum is van. Ennek az effectnek az a hátránya, hogy kicsi százalékon kell dolgoznod hogy minden jól láss.
This presentation introduces us to the Following Effect. This means that a base on which there are several images or objects continuously moves horizontally on a longer tile. The disadvantage of this effect is that you have to work on a small percentage to see everything well.

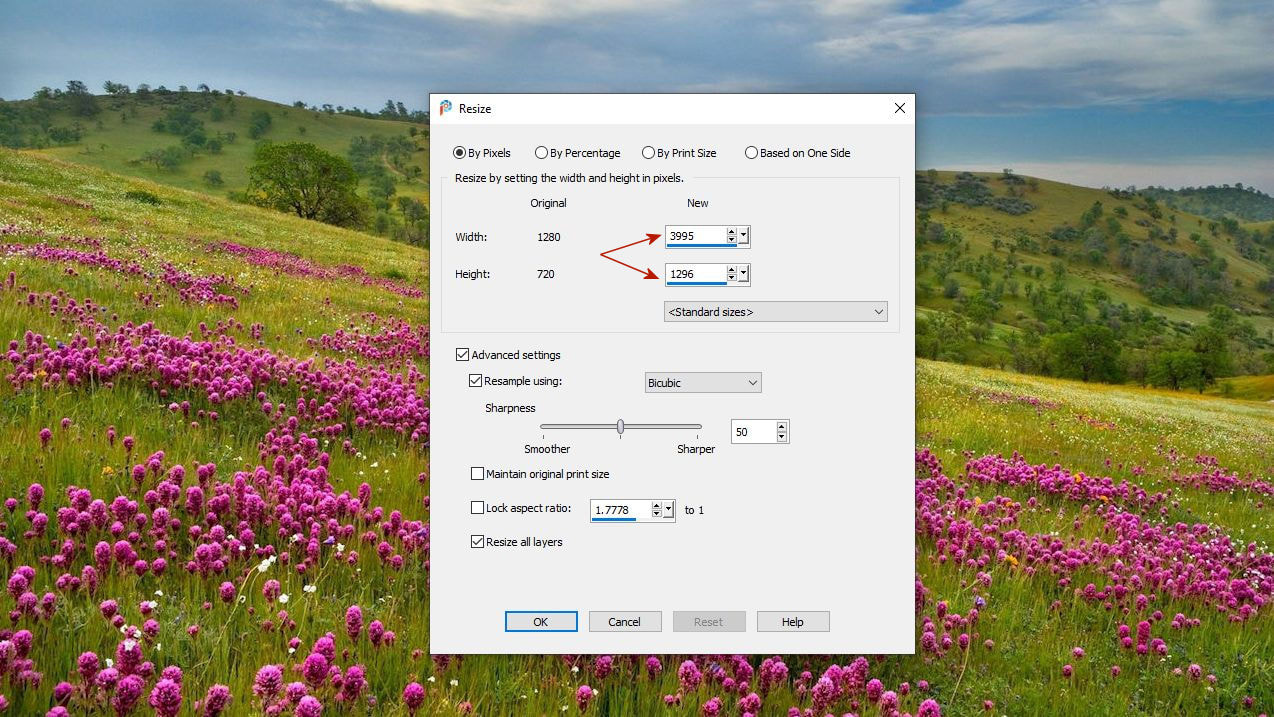
1. Ha kiválasztottad az alap tájképet amivel dolgozni akarsz.Itt hívom fel a figyelmedet, hogy a lehetö legnagyobb méretben mentsd le.
Ezután méretezd át 3995 X 1296 méretre.
If you have selected the basic landscape image you want to work with, I would like to draw your attention here to save it in the largest possible size.
Then resize it to 3995 X 1296.
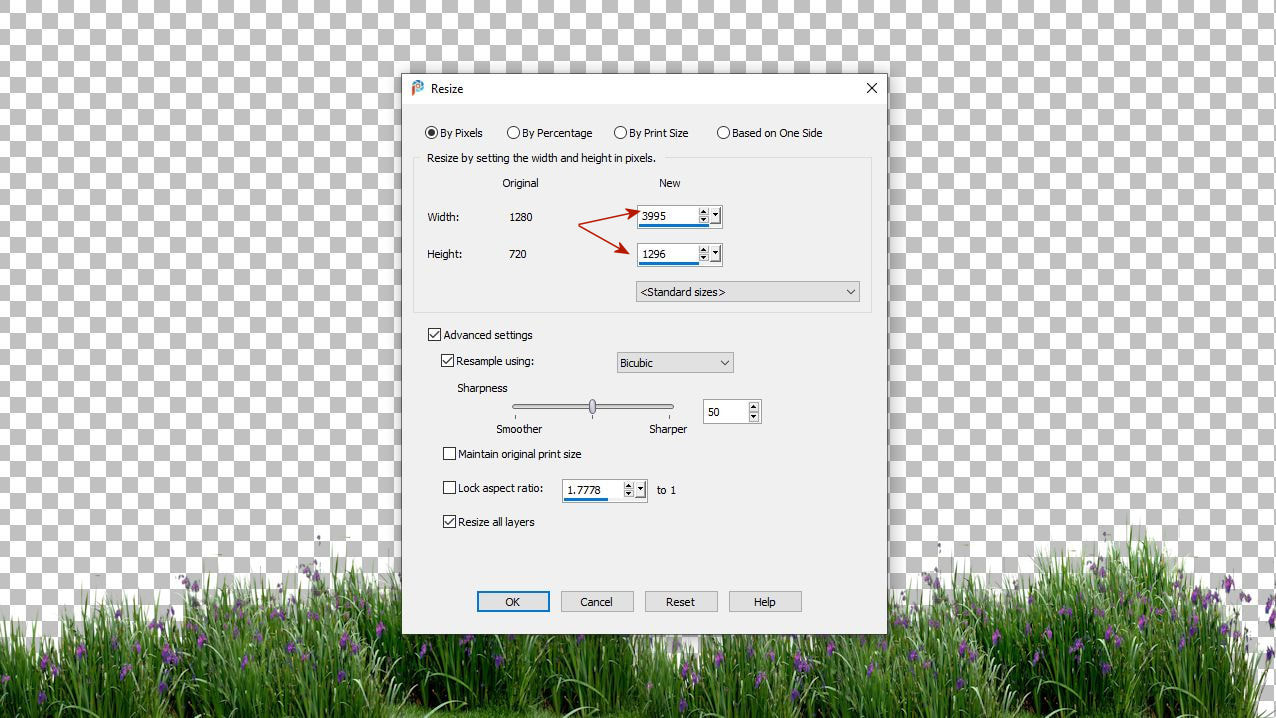
2. A png képed is méretrezd át.
Also resize the png image.
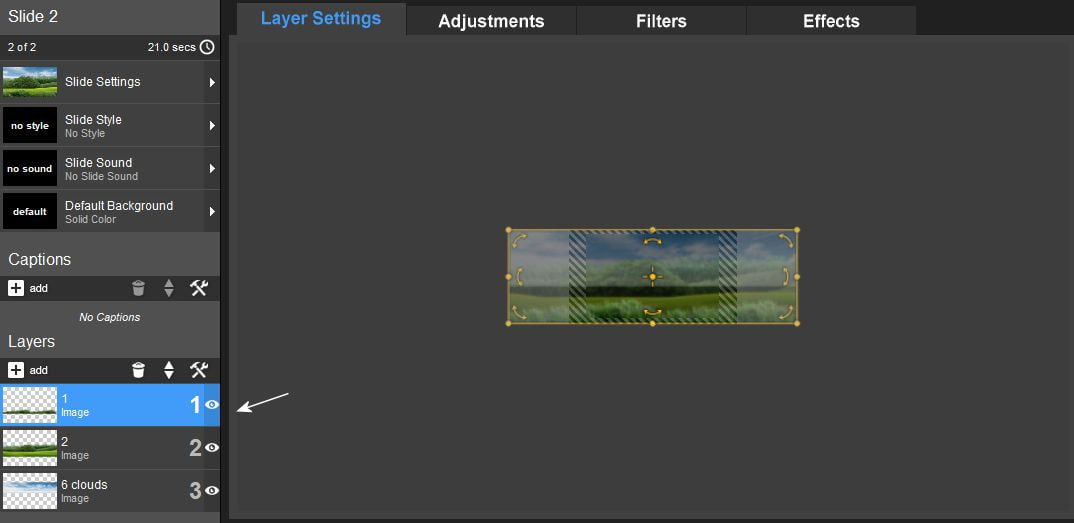
3. Igy méretezd át a csempéid idejét.
So sets up the time of your tiles.

4. Állj az egyes rétegre.
Stay on the first layer.
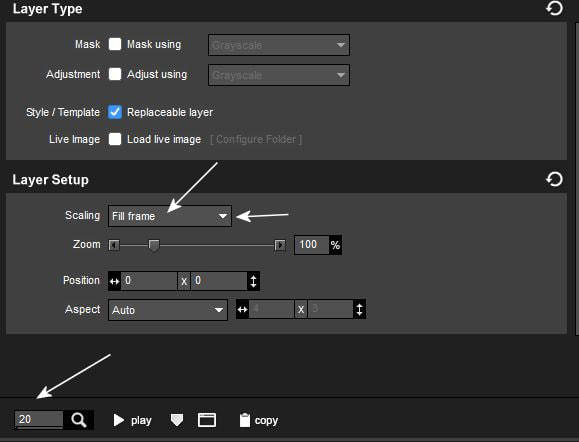
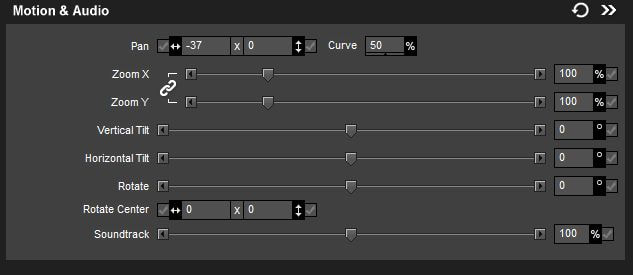
5. Csináld meg ezeket a beállításokat.Elöször a nagyitódat vedd le 20-ra és ahhoz tedd be a háteredet majd állj a fill frame-re.
Make these settings. First, reduce your magnification to 20 and set your background to that, then stop at the fill frame.
6. A másik rétegen is csináld meg a beállításokat.
Make the settings on the other layer as well.
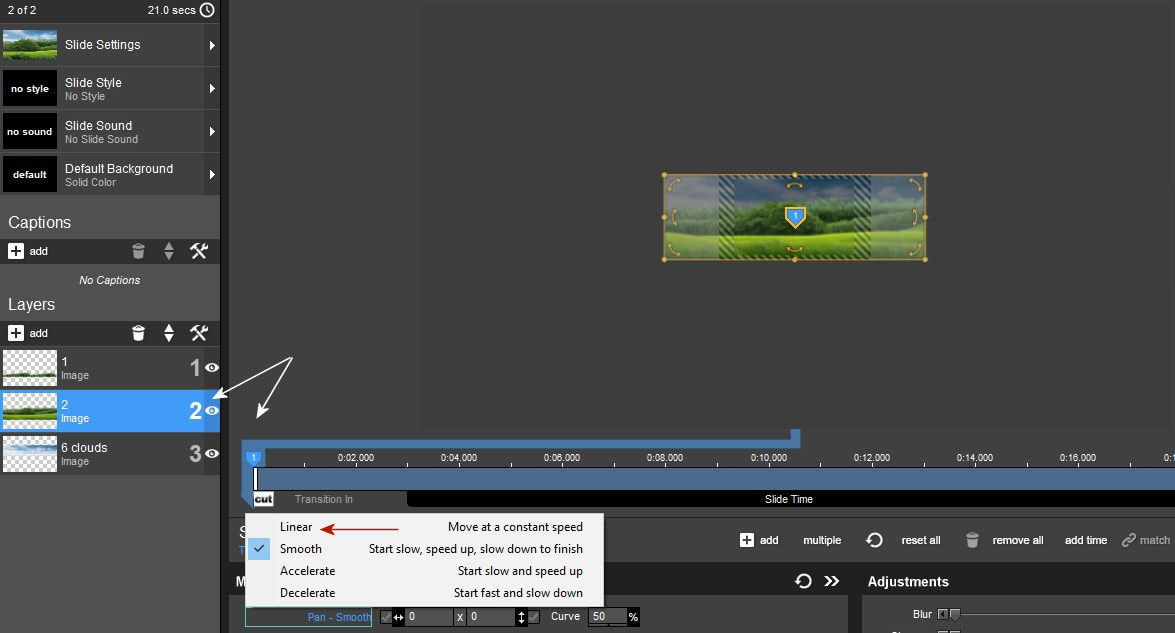
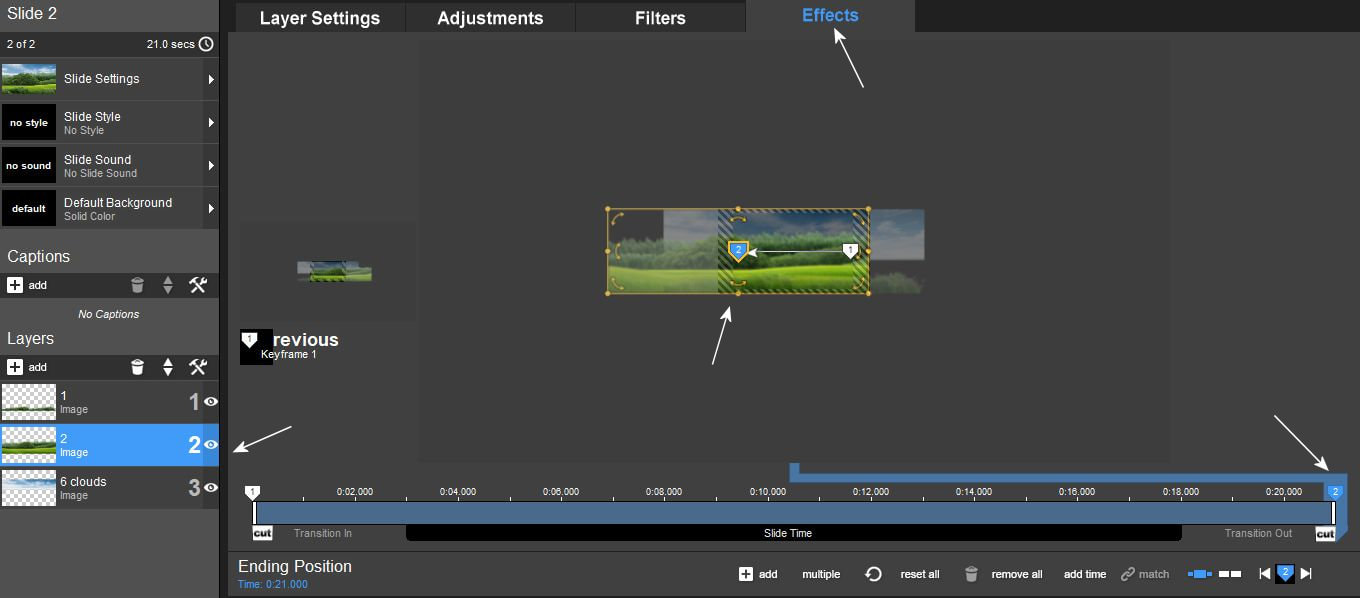
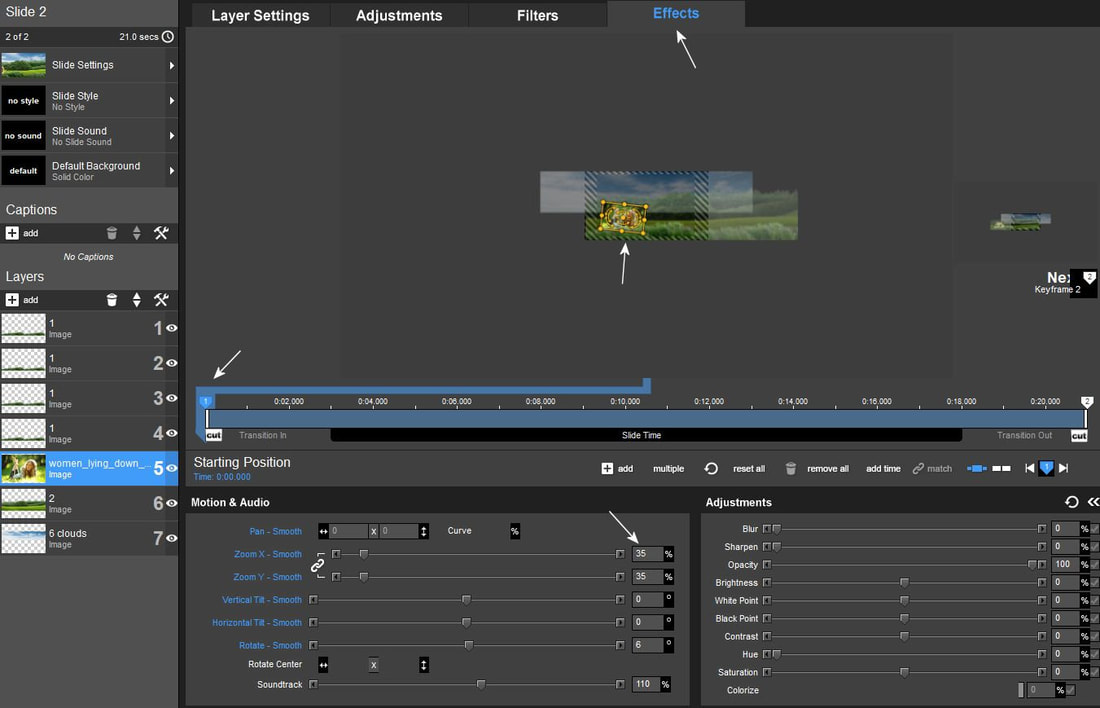
7. Állítsd át az egyes keyframe ponton. Katt a Pan-Smooth kék feliratra és a legördülöben állj a linearra.
Adjust on the first keyframe point the blue label Pan-Smooth and select linear in the drop-down menu.
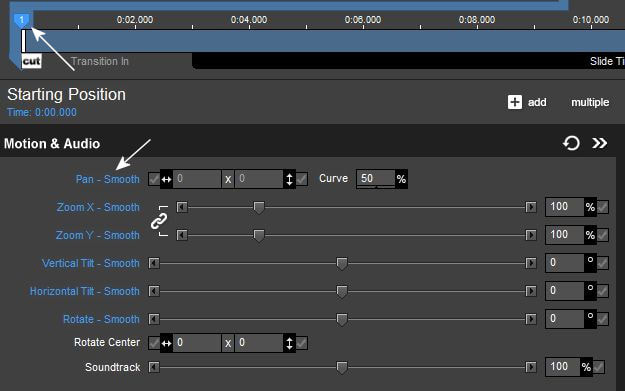
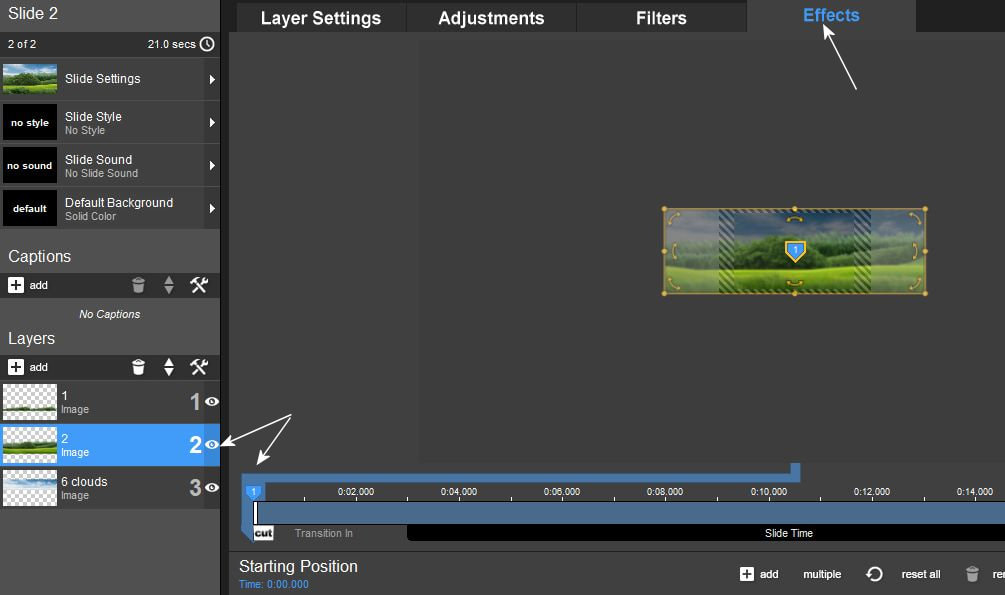
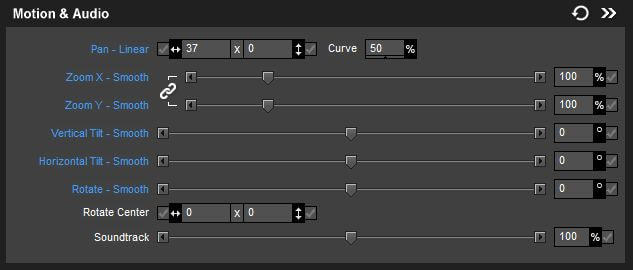
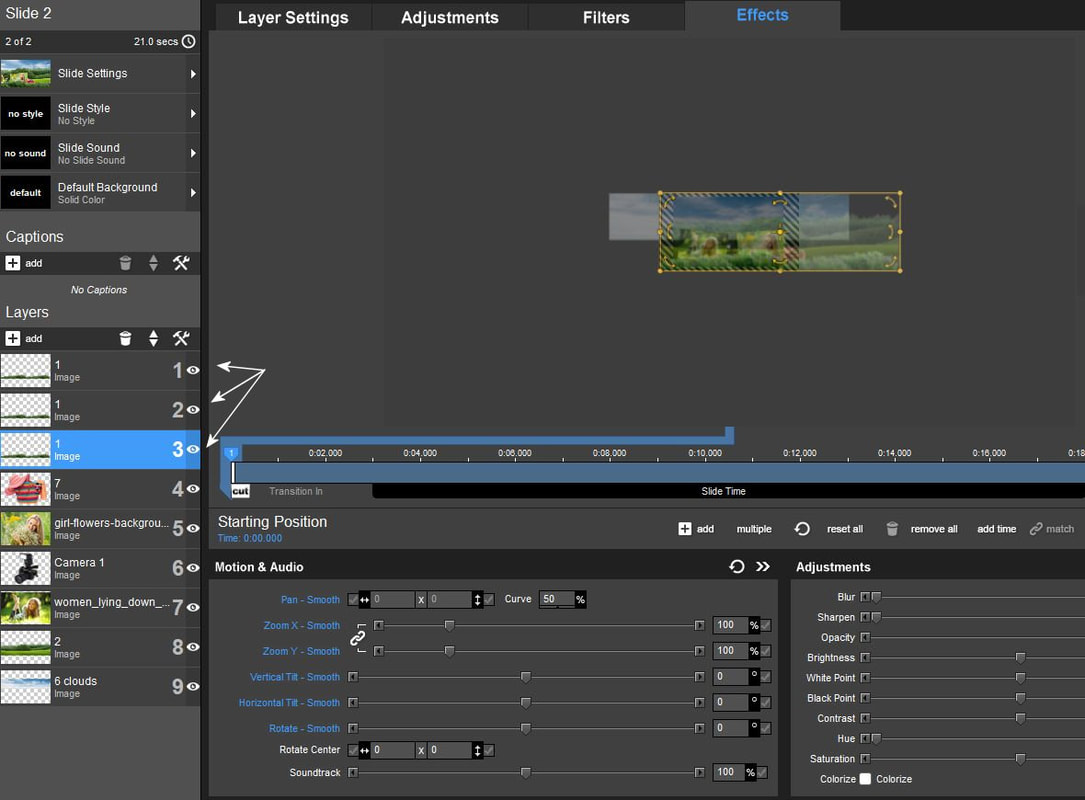
8. Most kövesd a beállításokat a képeken.
Now follow the settings in the pictures.

9.
10.
11.
12.

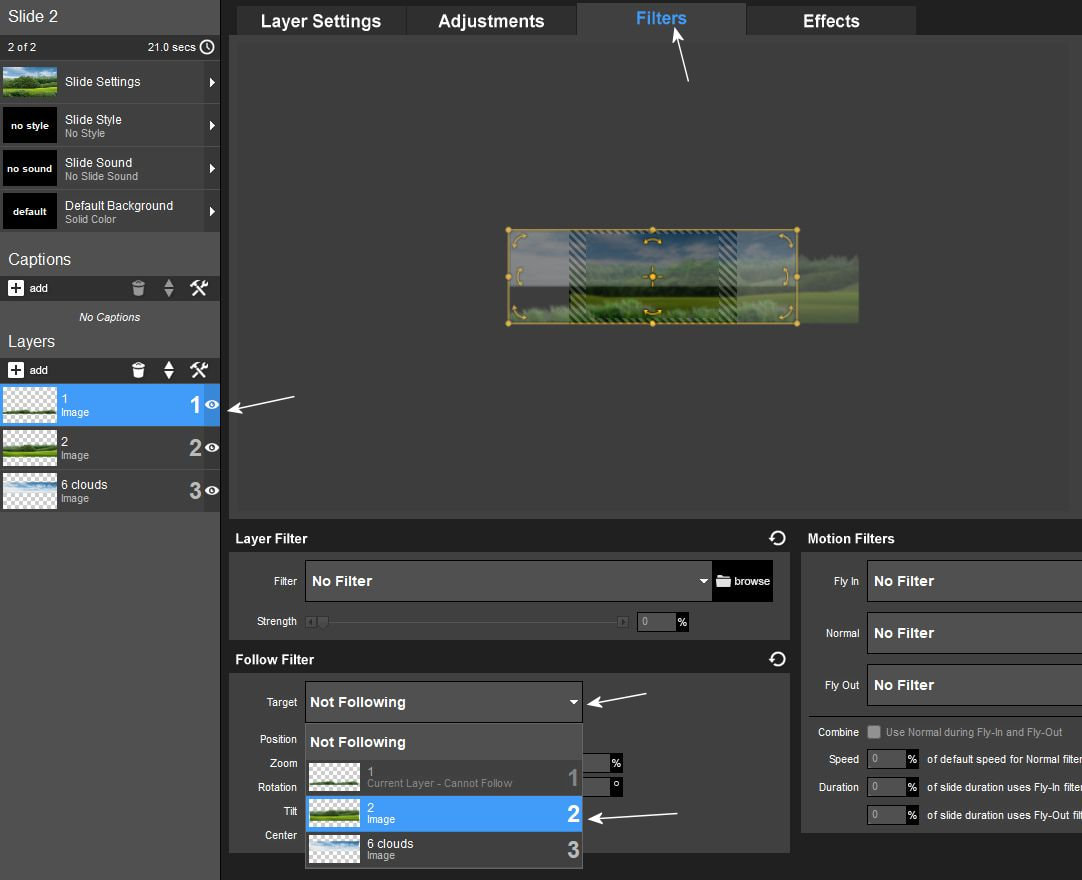
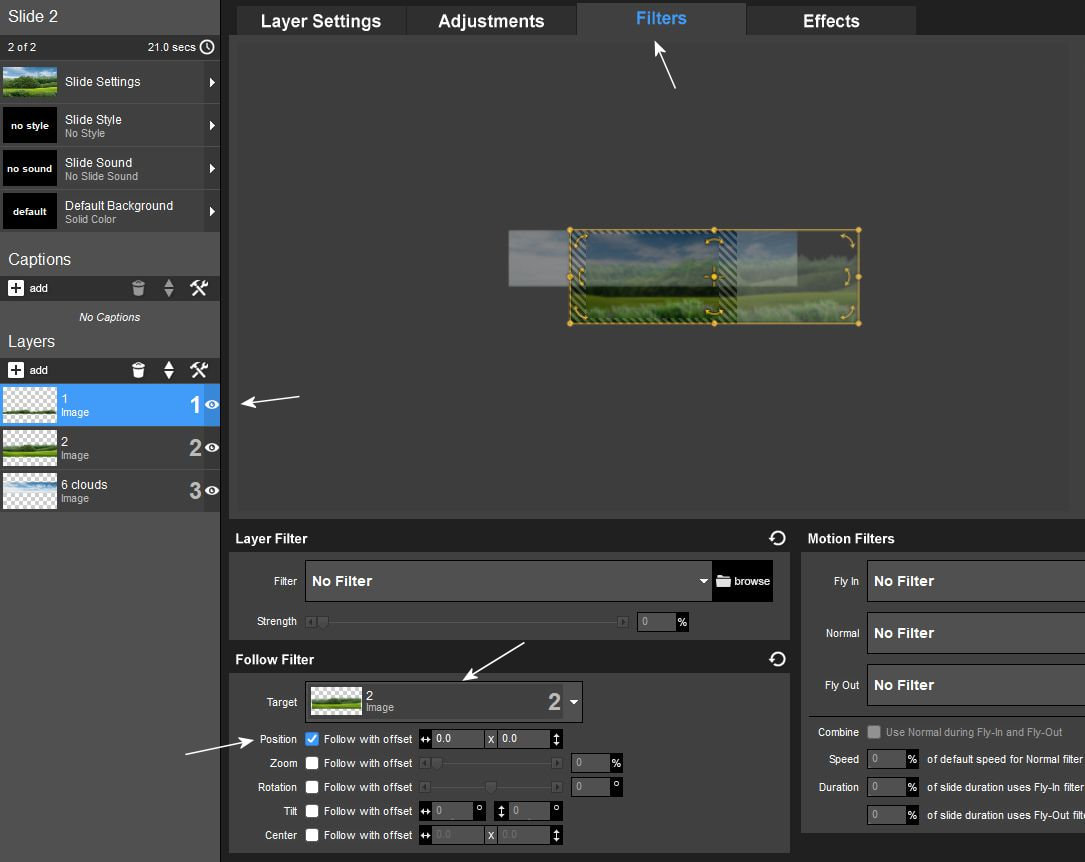
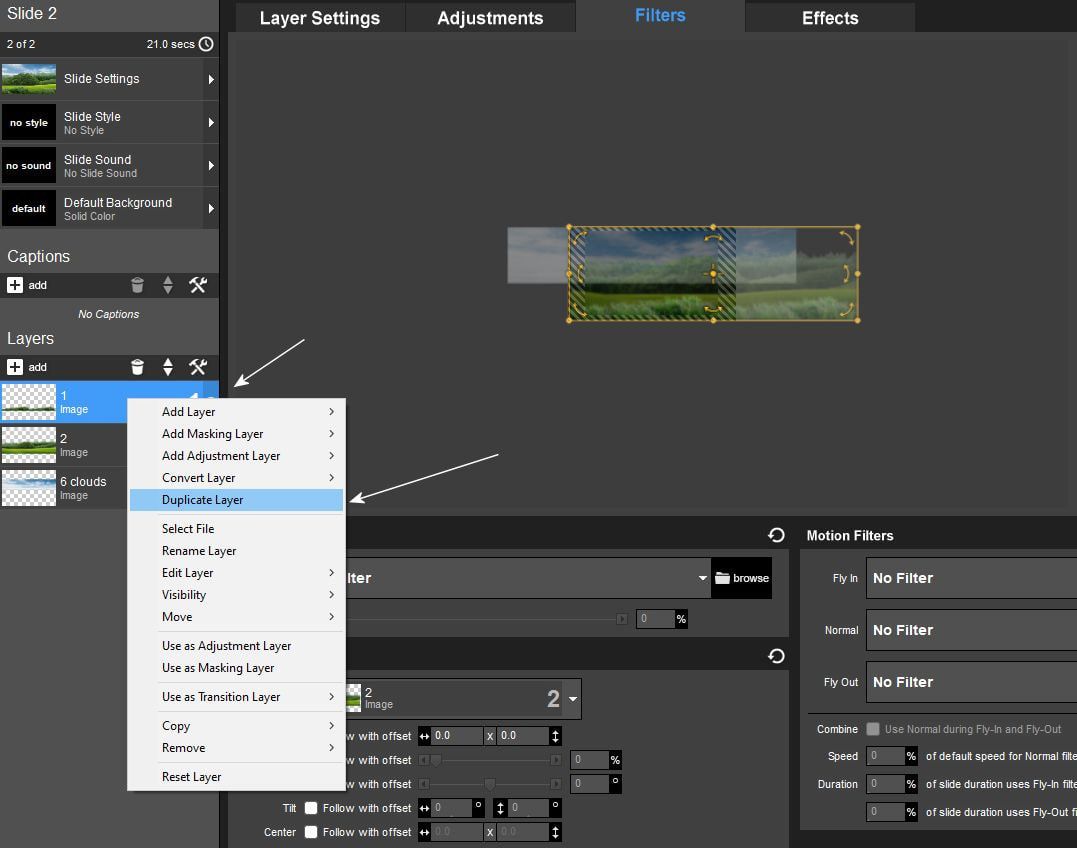
13. A filter menüben állítsd be a follow ( követö effectet az 1-es rétegen. Nyisd le a not following fület a legördülö menübe tedd be a 2 -es réteget, hogy azt kövesse a folyamatos mozgás.
In the filter menu, set the follow effect on layer 1. Open the not following tab and put layer 2 in the drop-down menu so that the continuous movement follows it.
13.
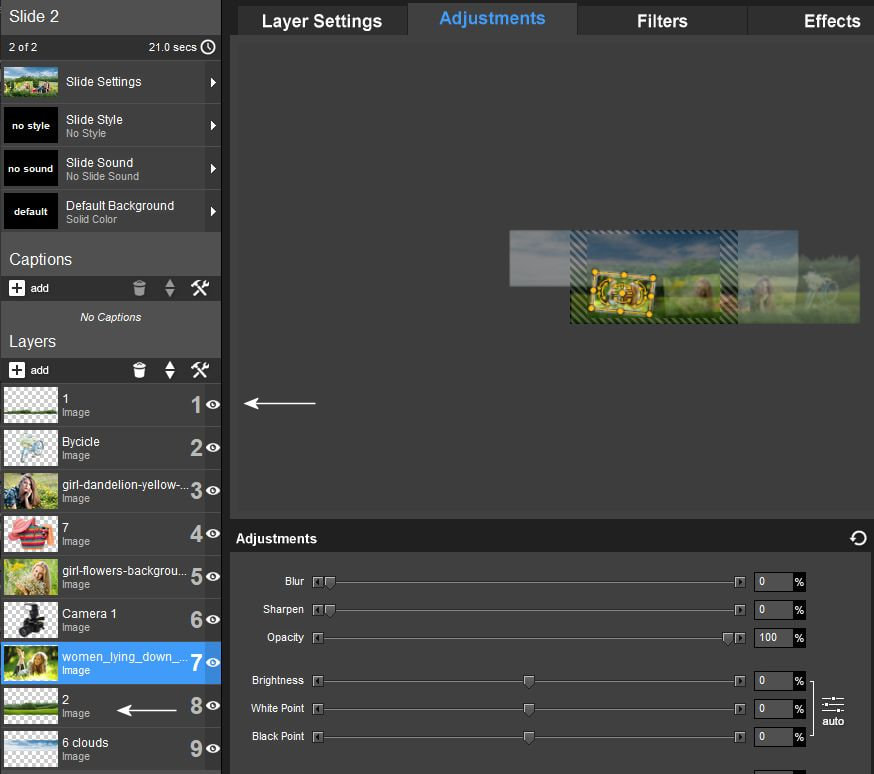
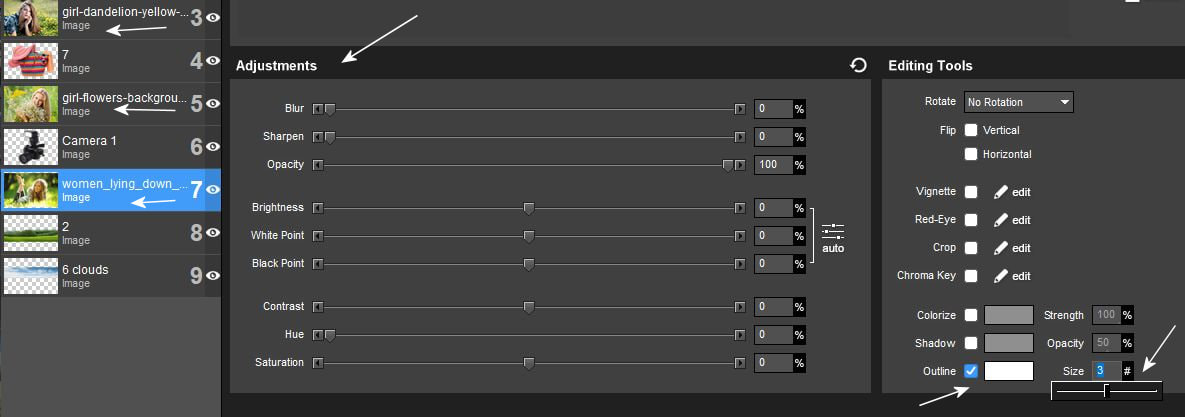
14. Dulikáld a rétegeket ahászor akarod mert az Adjustment menüben a rétegedre tedd be a fotókat.
Duplicate the layers as many times as you want, because in the Adjustment menu, put the photos on your layer.
15. Most kövesd a beállításokat a képeken.
Now follow the settings in the pictures.
15.
16.
17.
18.
