Ebben a bemutatóban egy csodálatos szív maszkkal készült effectet tanulunk meg elkészíteni csupán egy jól megválasztott zoomolási technikával. Ez az effect sok kreativ megoldást tartogat azoknak a gyakorlott program felhasználóknak akik különbözö artisztikus szív alakzatokat szeretnének használni. Itt a tutorialban egy hagyományos szív alak van használva de minden más alakzathoz a maszkokat ugyanígy kell elkészítenetek.
In this presentation, we learn to make a wonderful heart mask with just a well -chosen zooming technique. This Effect has many creative solutions for experienced program users who want to use different artistic heart shapes. Here in the tutorial a traditional heart shape is used, but for all other shapes you need to make the masks in the same way.

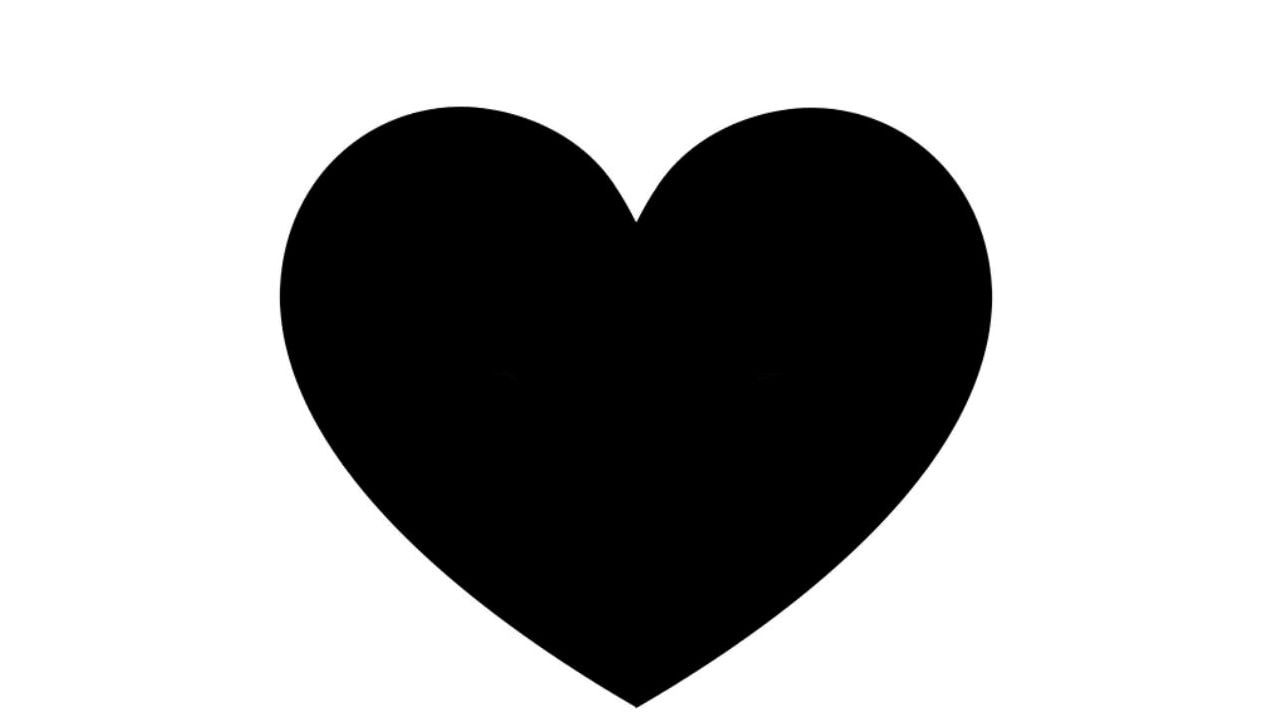
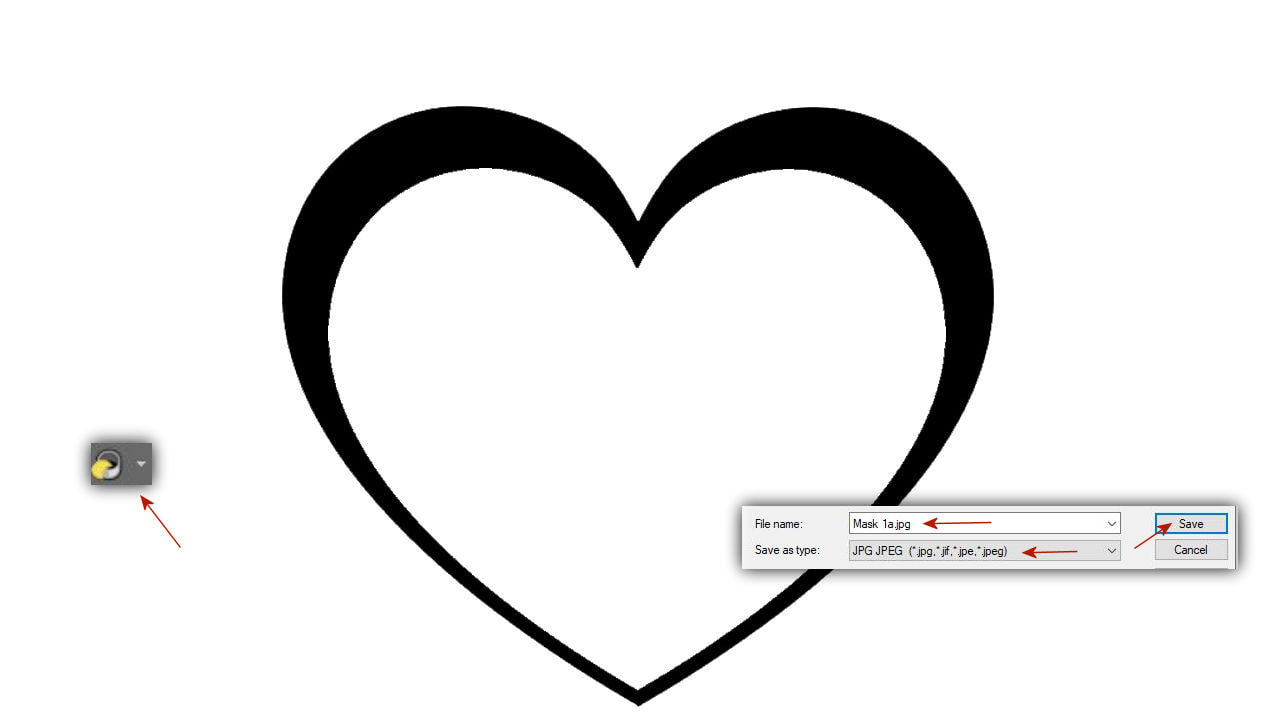
1. Elöször készítsd el magadnak a szív alakú maszkodat fekete fehérben. Ments el magadnak maszk 1 néven jpg formátumban. Ebböl készül el a maszk keret is.
First, make your heart -shaped mask in black white. Save yourself for Mask 1 in JPG format. The mask frame is also made from this.
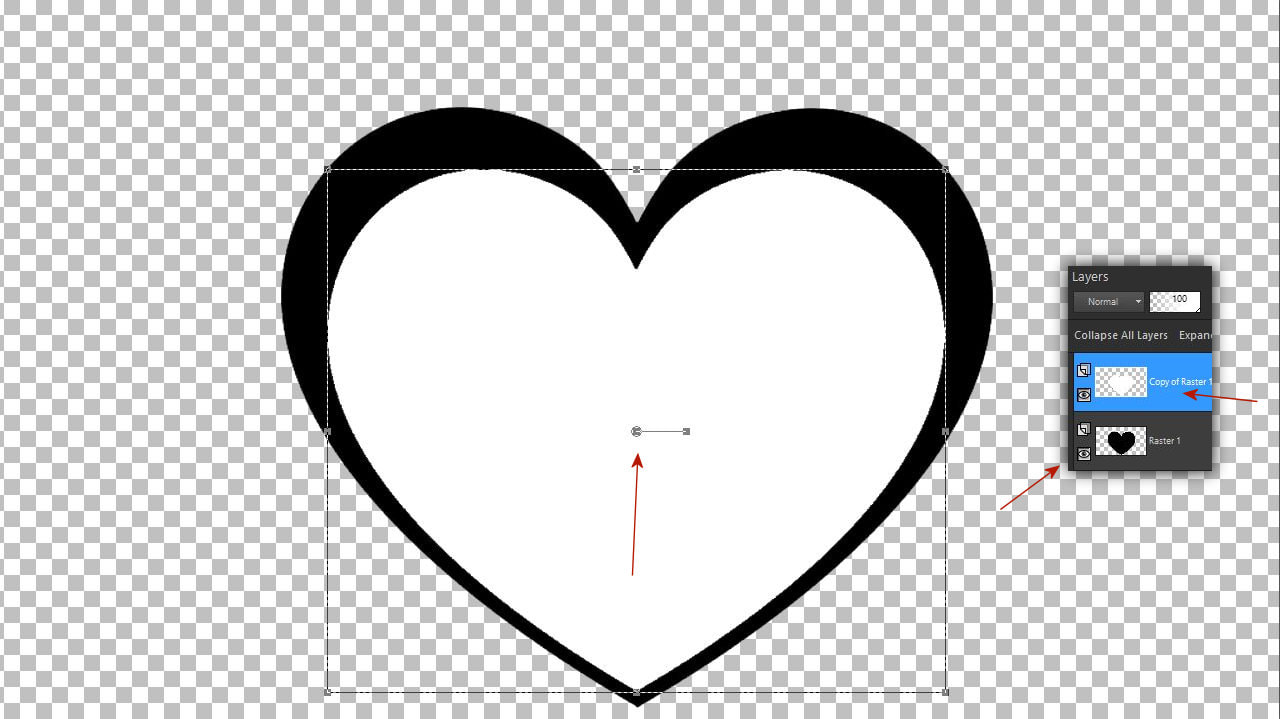
2. A varázs pálca eszközzel kattints a fehér részre és nyomd meg a klaviaturádon a delete gombot. Majd kettözd meg a réteget és állj a felsöre.
Use the Magic Wand tool to click the white section and press the Delete button on your keyboard. Then double the layer and stand on the top.
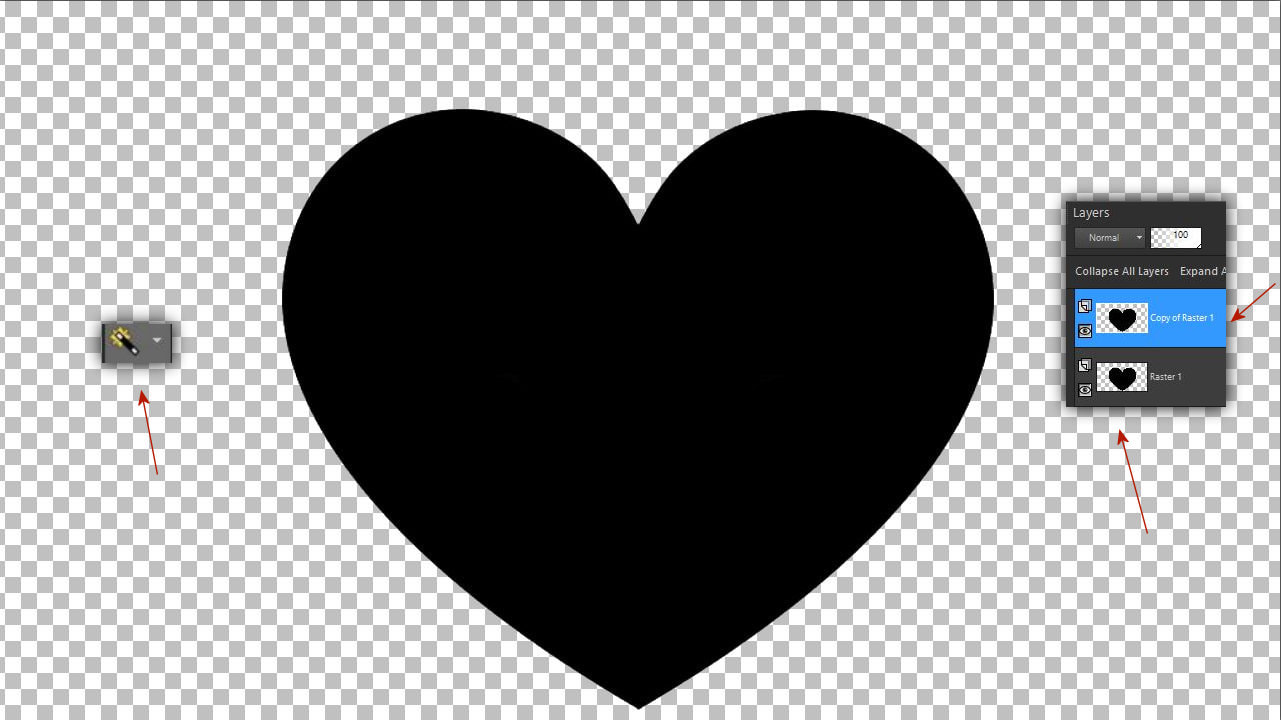
3. Csukd be az alsó rétegszemet és a felsö réteget öntsd ki fehér színnel.
Close the lower layer and fill up the upper layer with white.
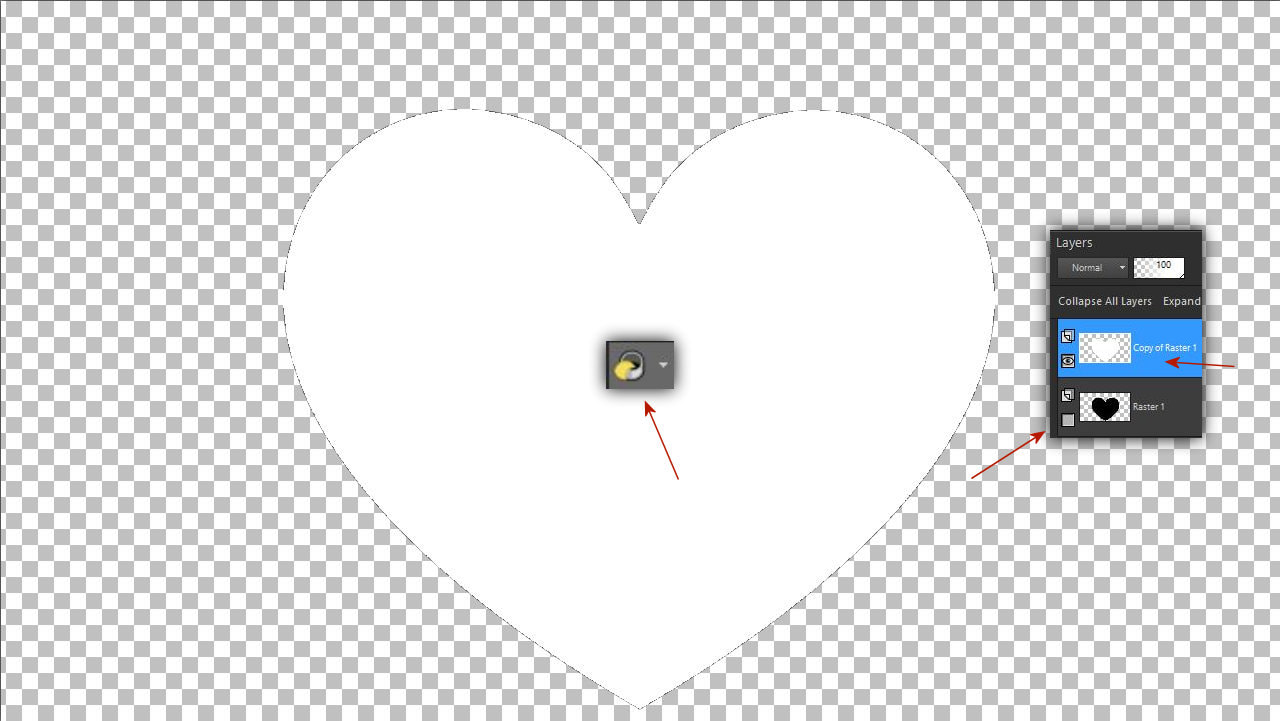
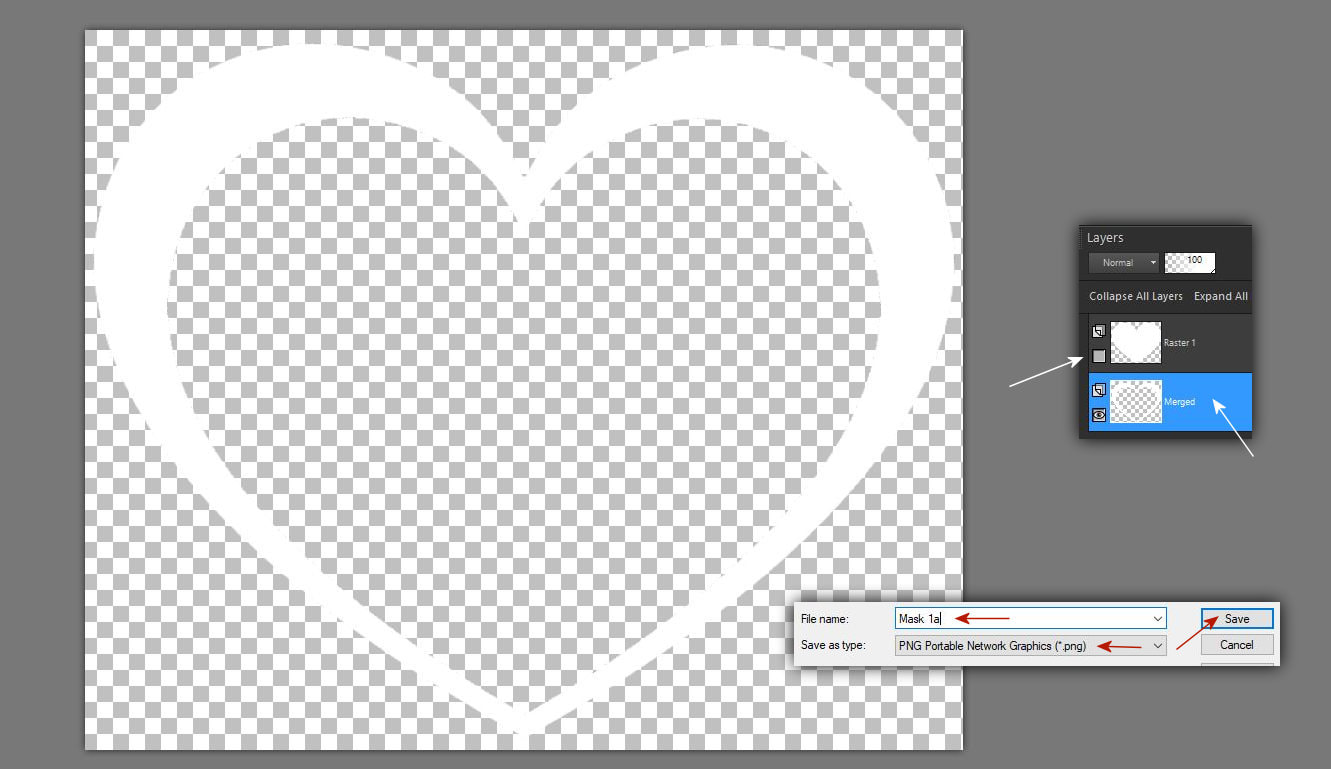
4. Majd nyisd ki az alsó rétegszemet és a felsö fehér réteget nyomd kicsit össze és mozgasd el úgy ahogy azt itt a képen látod.
Then open the lower layer and press the upper white layer slightly and move it as you see it here.
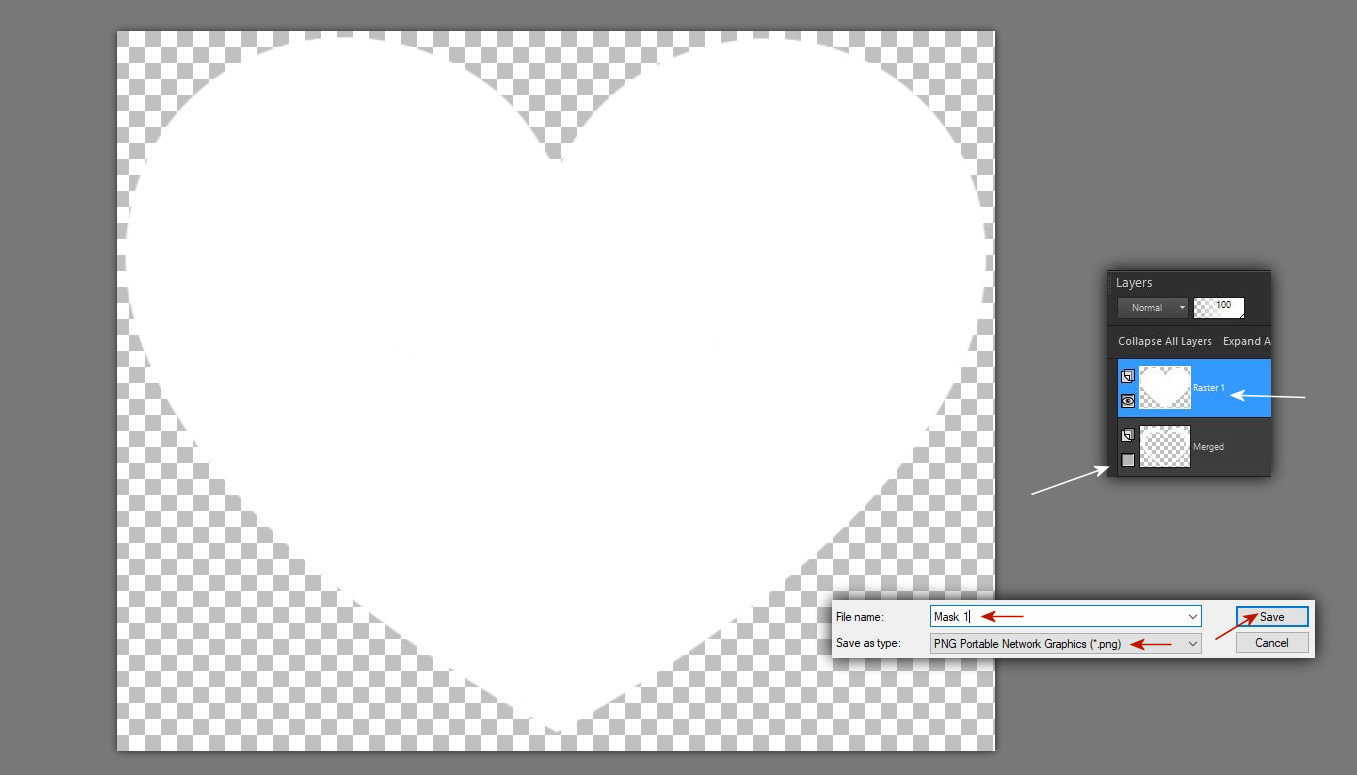
5. Majd öntsd ki fehér színnel az alapot is majd mentsd el a képet mask 1a néven jpg formátumban.
Then fill out the base with white and save the image in jpg format called mask 1a.
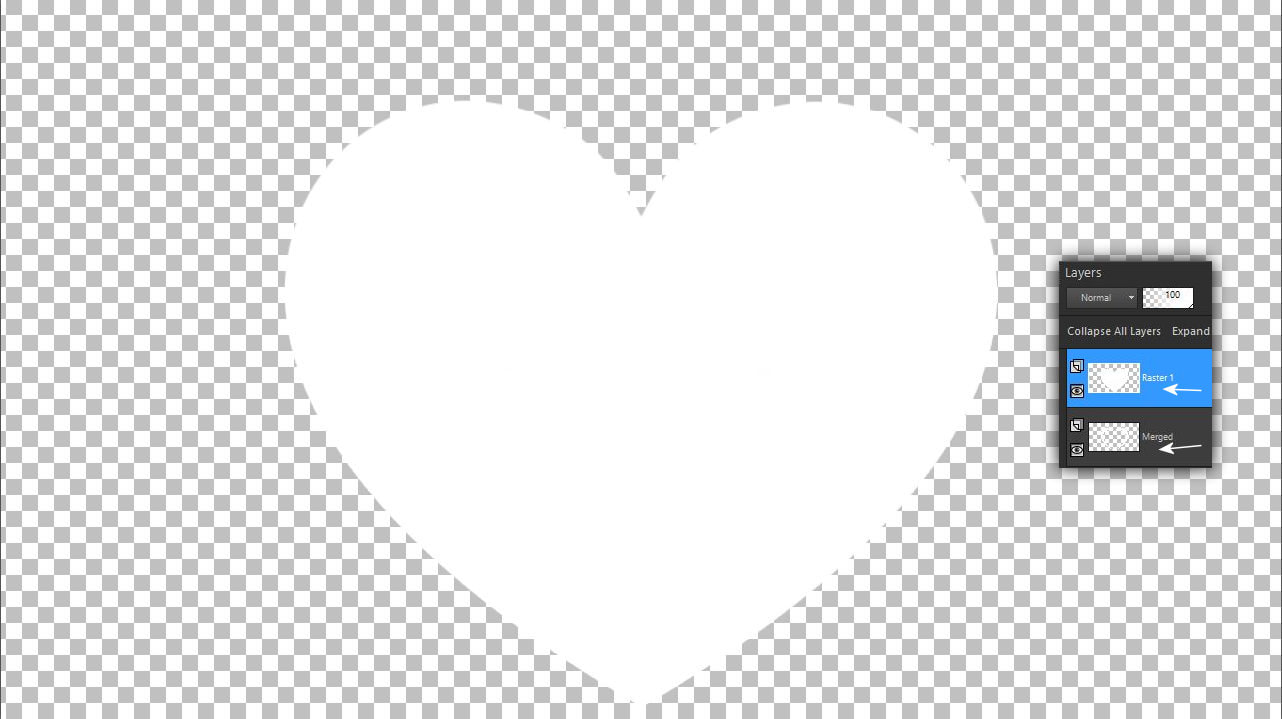
6. Mindkét maszkkal készítsetek fehér png maszkot és helyezzéteg egymásra a rétegeket. Ha nem fedik pontosan egymást akkor ezt itt még mozgatással korrigálhatod.
Both masks Make a white PNG mask and place the layers on each other. If you do not cover exactly each other, you can correct this here by moving.
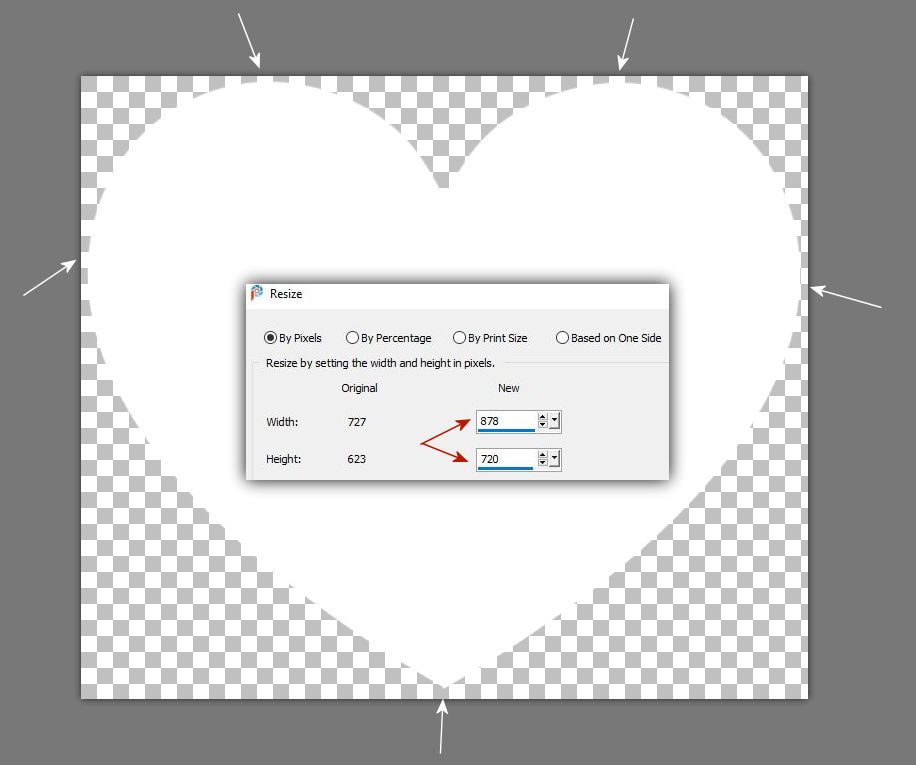
7. Jelöljétek körbe a szívmaszkotokat viszonylag közel a szélekhez és vágjátok ki azt majd méretezzétek át 878x720 -as méretre. Dolgozzatok úgy ahogy itt a képen látjátok.
Mark your heart masks relatively close to the edges and cut it out and score it to 878x720. Work as you see here in the picture.
8. Majd csukd be az alsó réteg szemét és mentsétek el a felsö réteget mask 1 néven png formátumban.
Then close the lower layer of garbage and save the upper layer under the name mask 1 in png. format.
9. Ugyanezt csináljátok meg az alsó réteggel is mask 1a néven.
Do the same with the bottom layer called mask 1a.
10. A Pro Show Programban igy folytasd majd a munkát.2 féle effectet csinálunk.
A slidok 8 mp-re vannak állítva
In the Pro Show, you will continue to work. We make 2 effects.
Slides time 8 seconds.

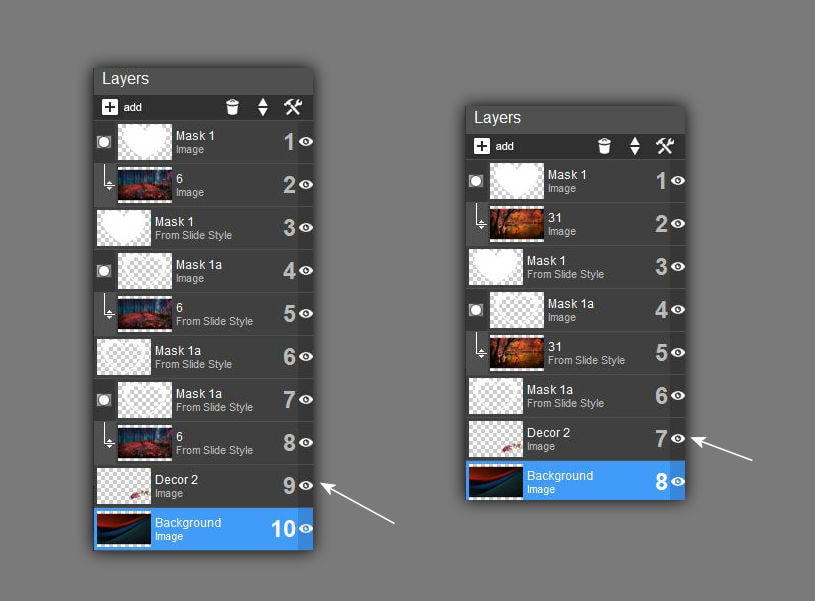
11. Igy rakd össze a rétegeket a két slide-on. A 9-es és a 7 réteg nem szükséges nekem ott egy dekorációs réteg van. Tehát nektek a rétegek eggyel kevesebb lesznek.
So put the layers on the two slides. Layers 9 and 7 do not need a decorative layer there. So the layers will be one less.
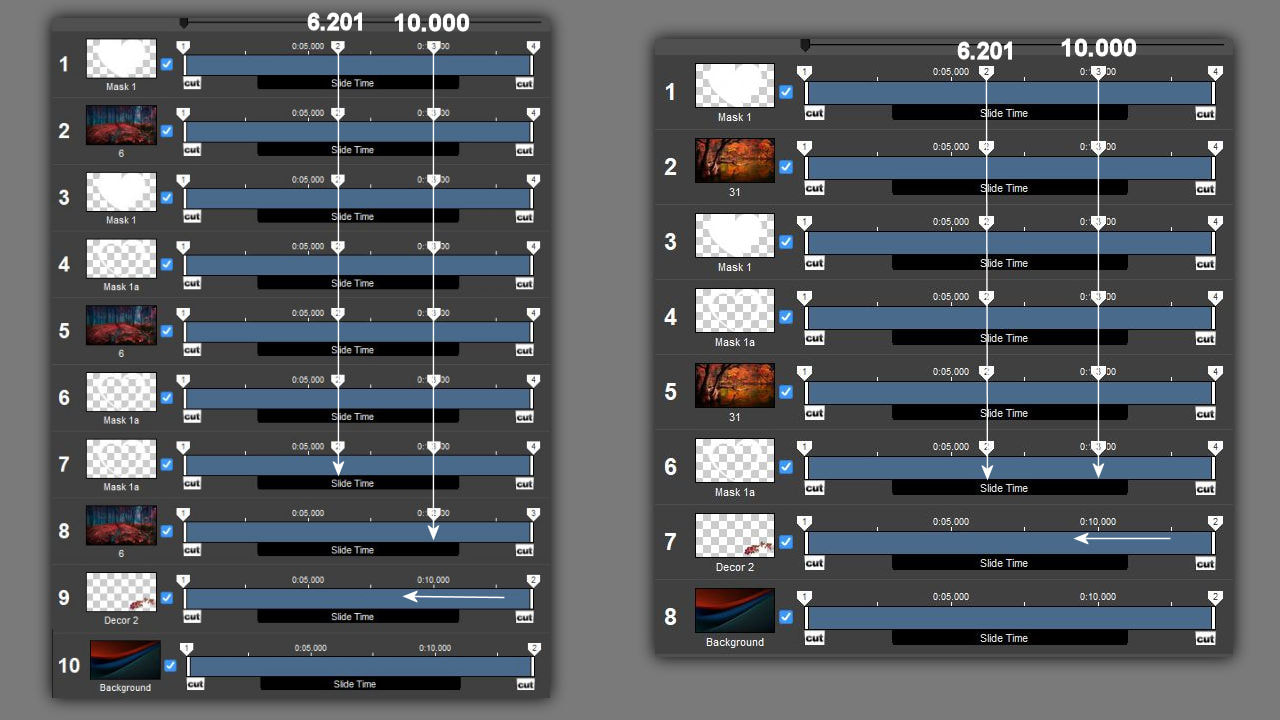
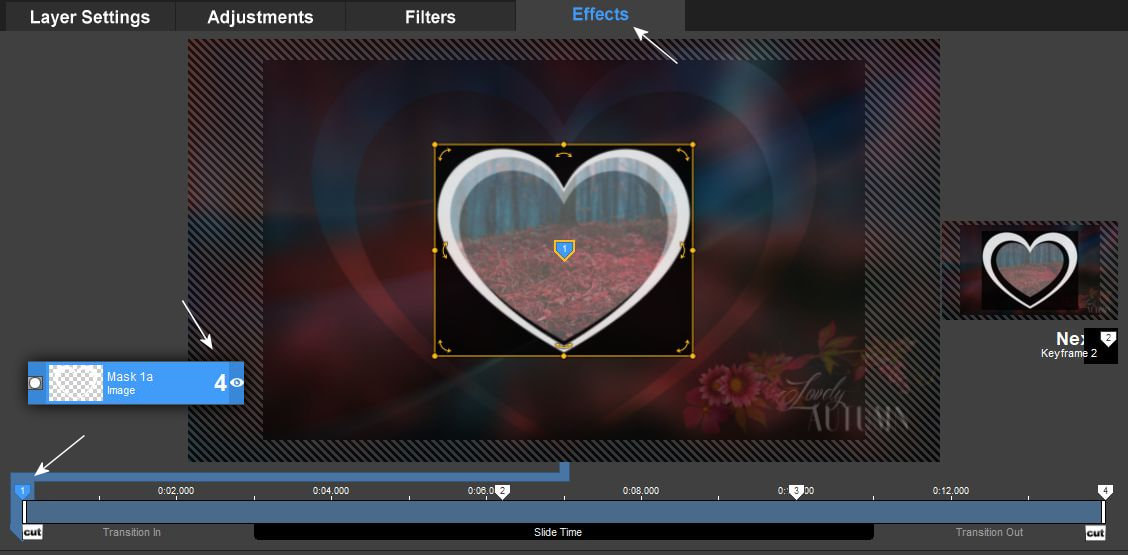
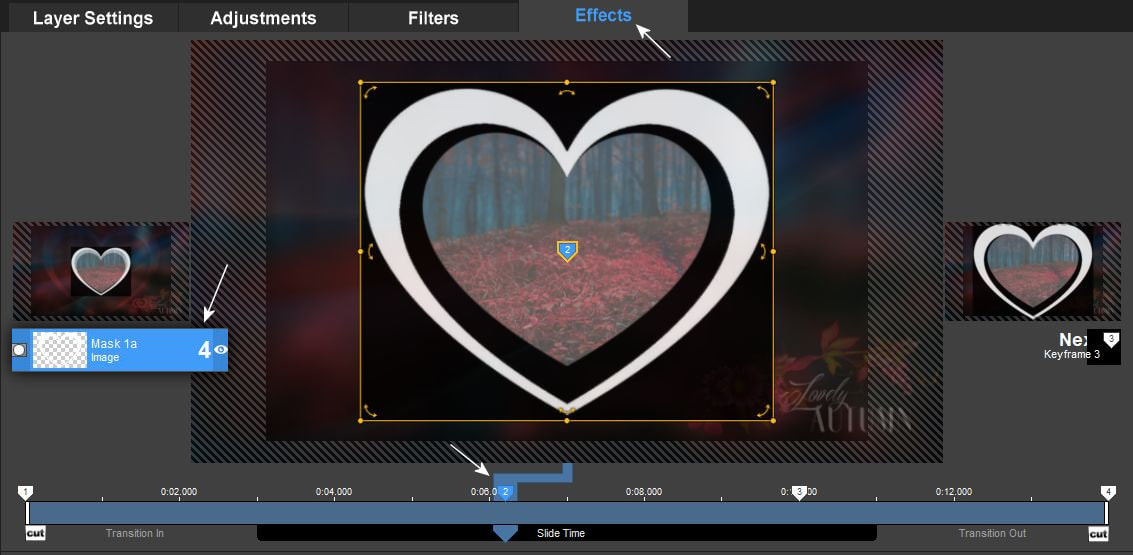
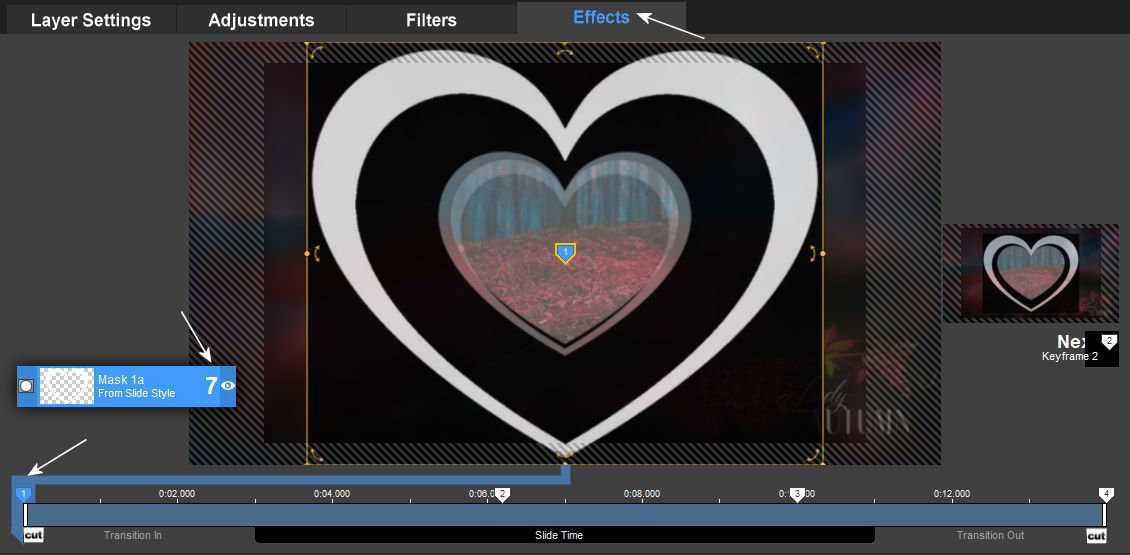
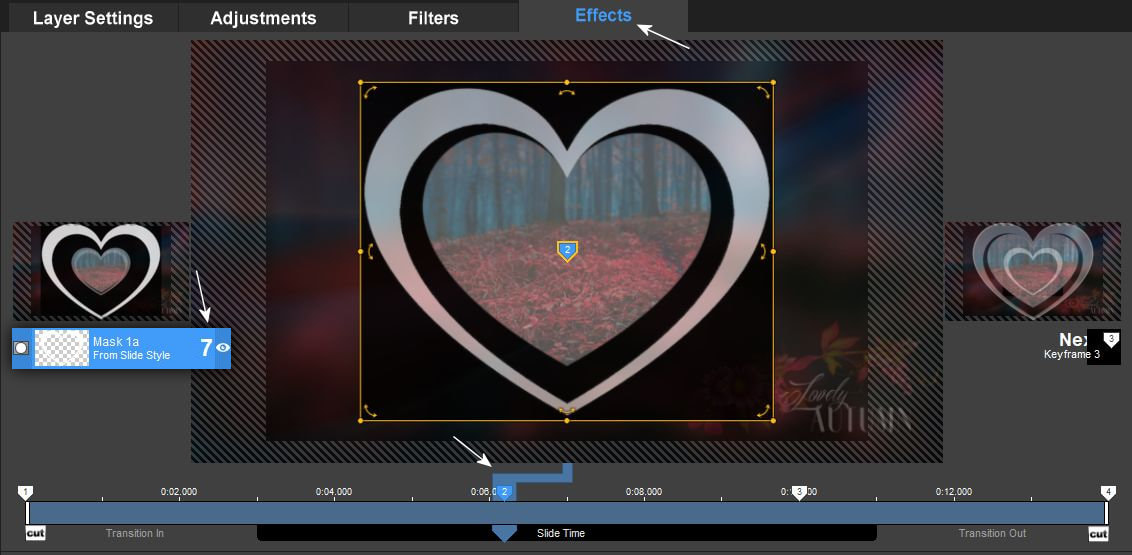
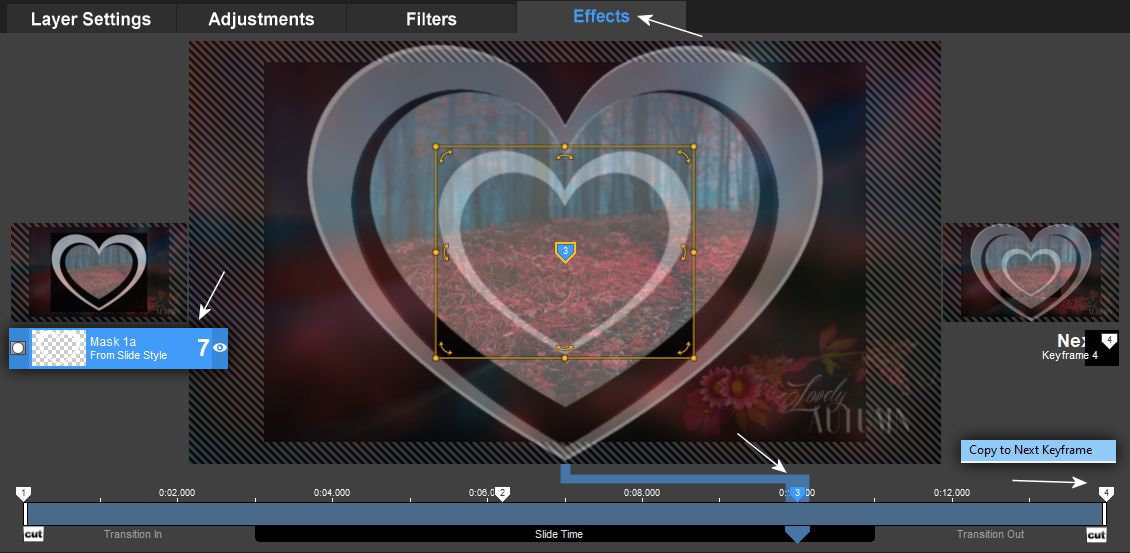
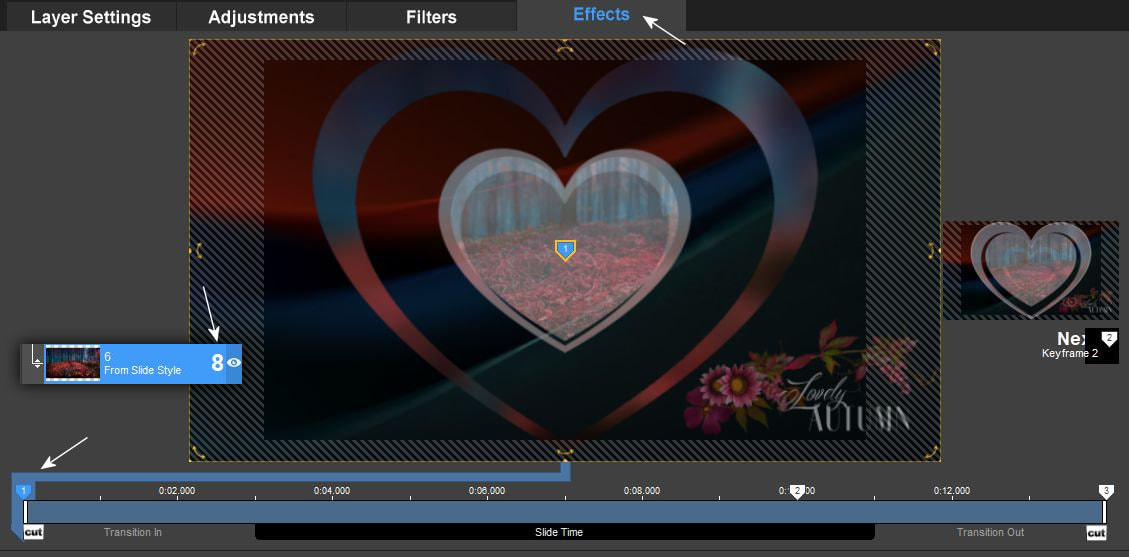
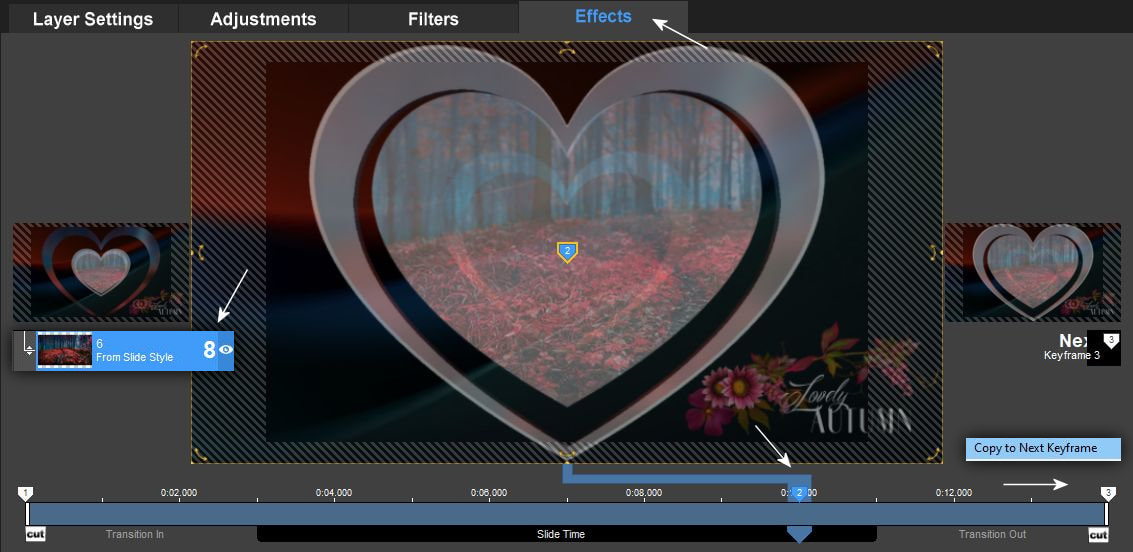
12. A keyframe pontok heylzetét itt látod. De itt sem szükséges a dekor réteg.
You see the position of Keyframe points here. But here's no need for the decor layer either.
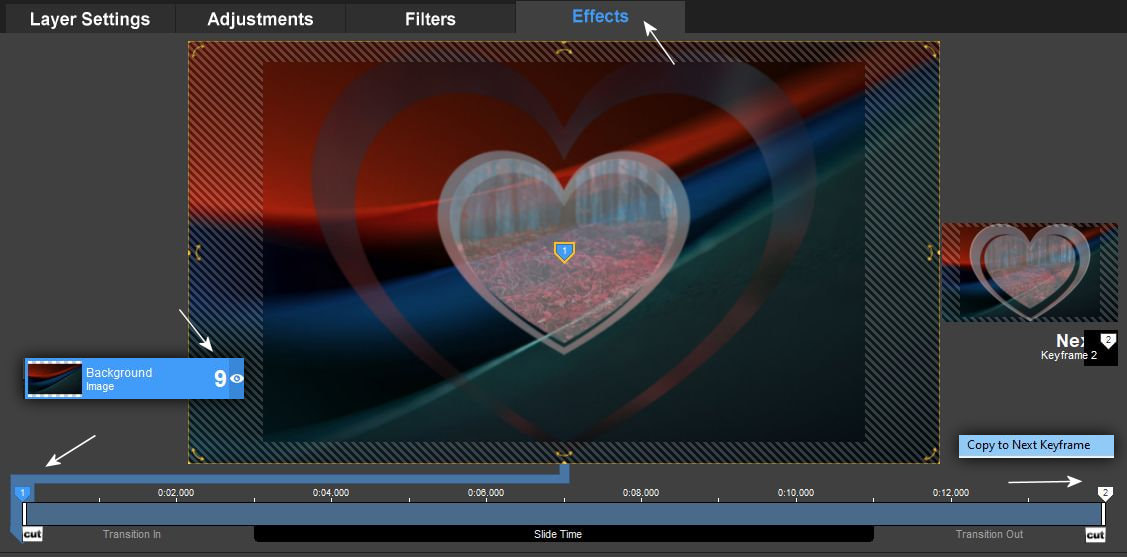
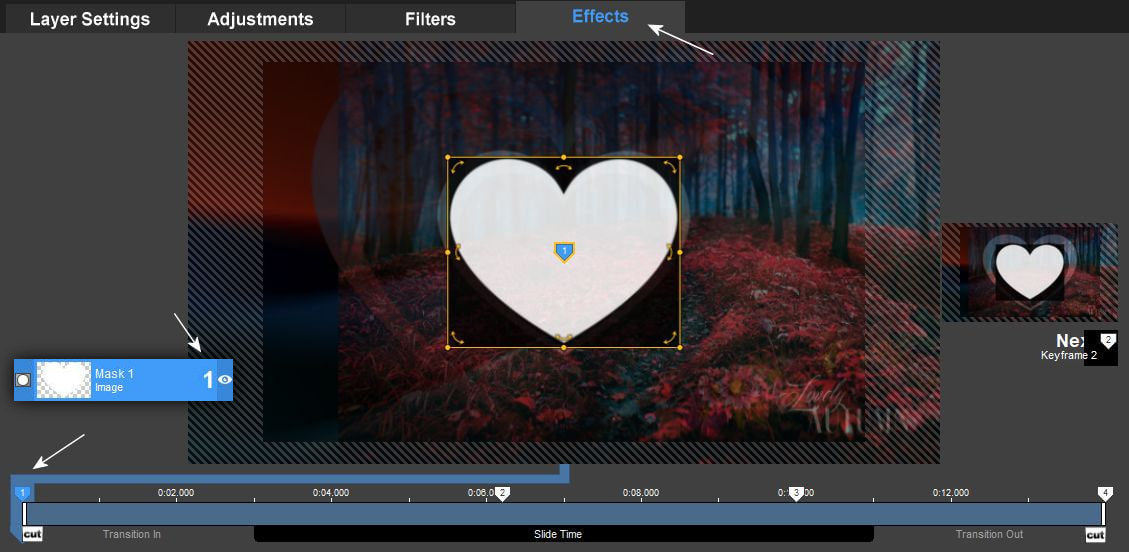
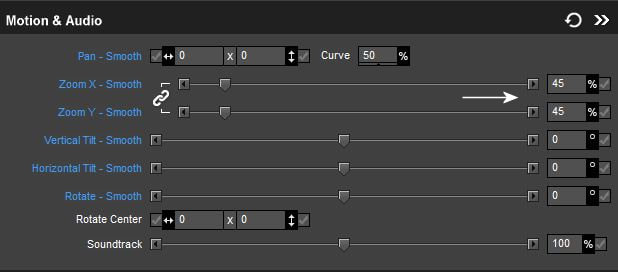
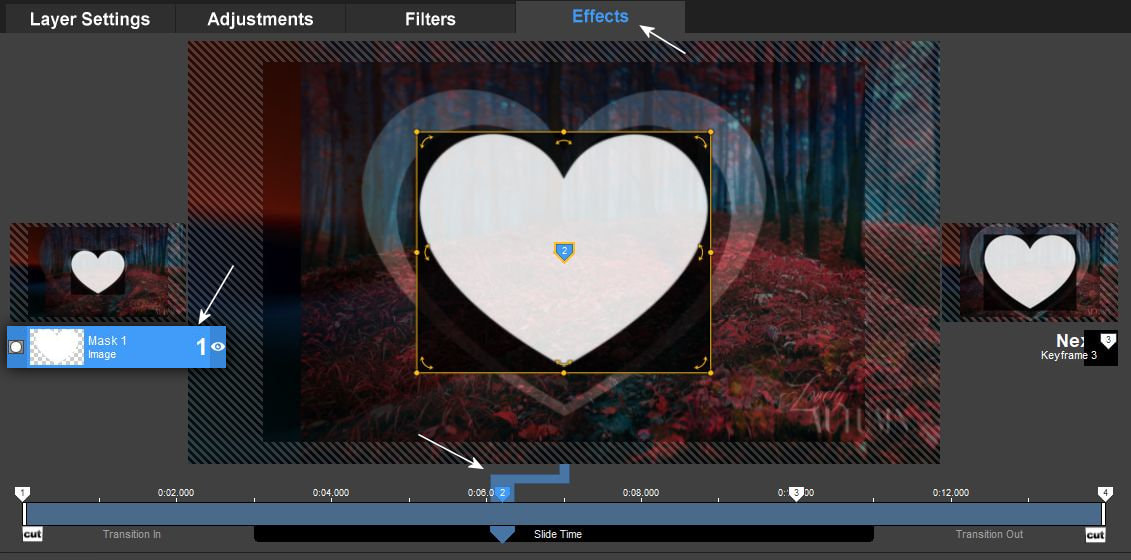
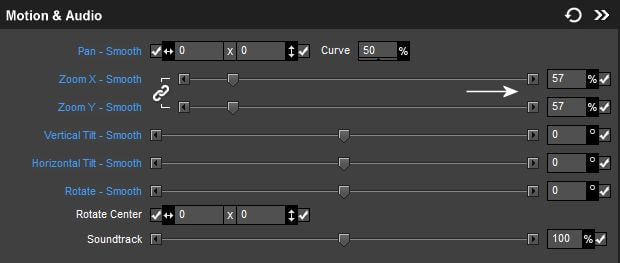
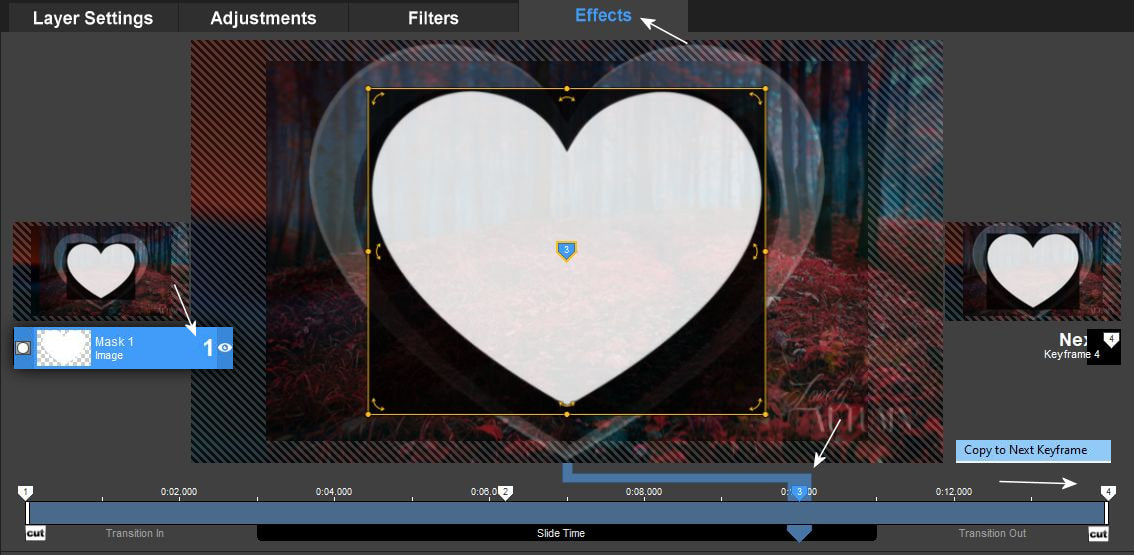
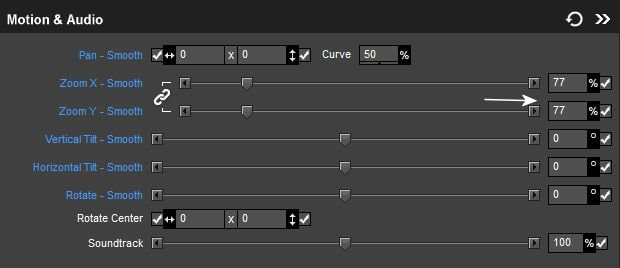
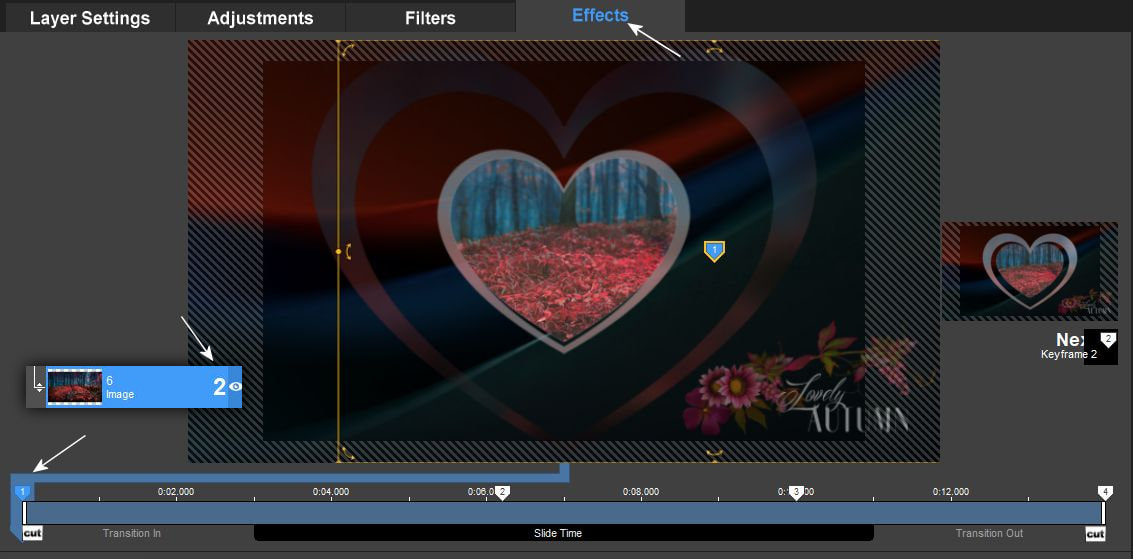
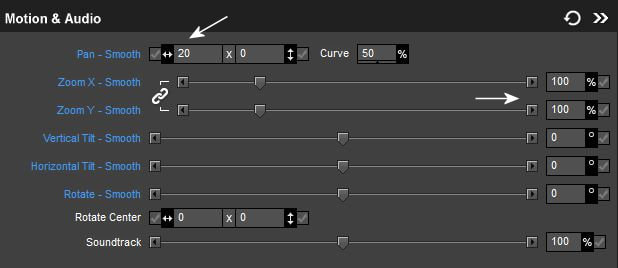
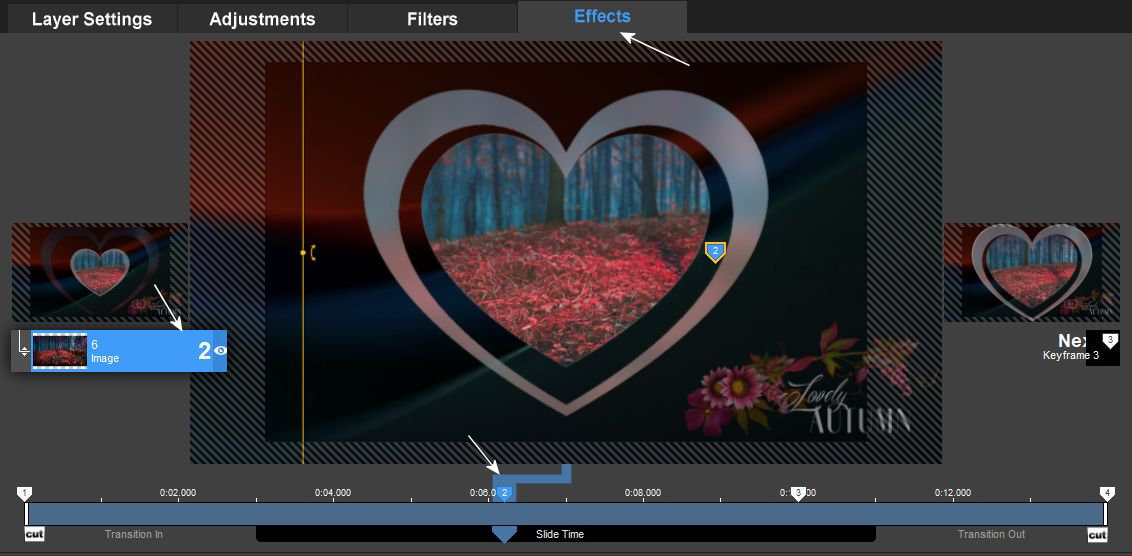
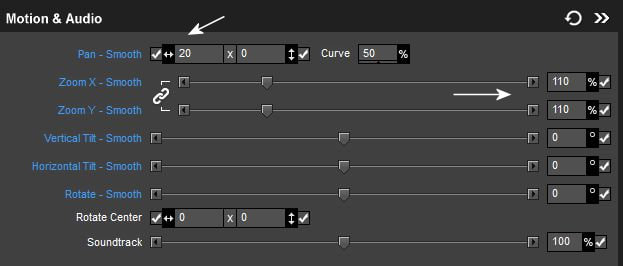
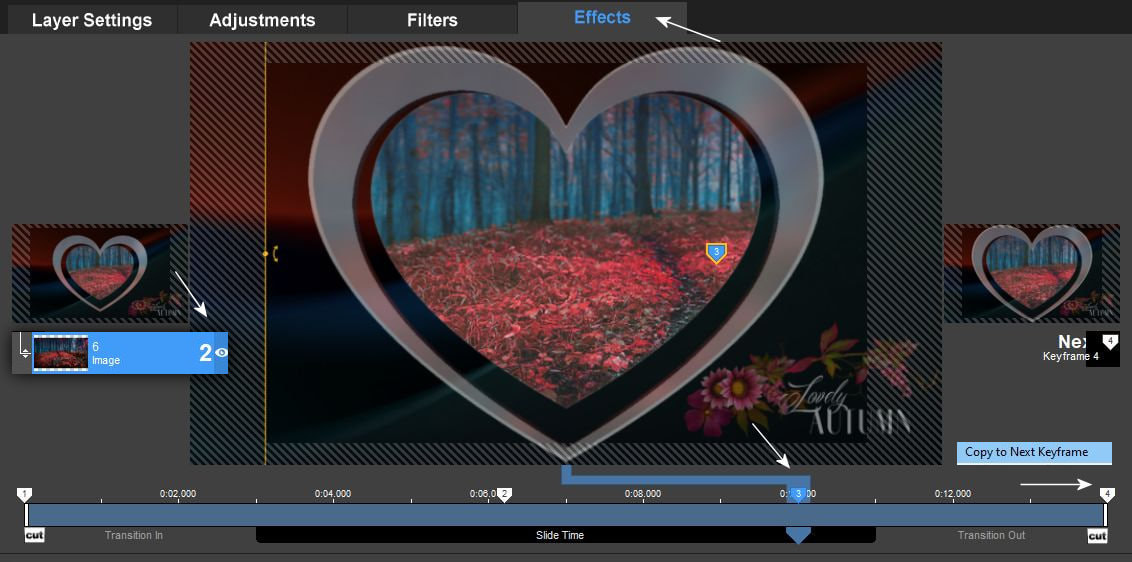
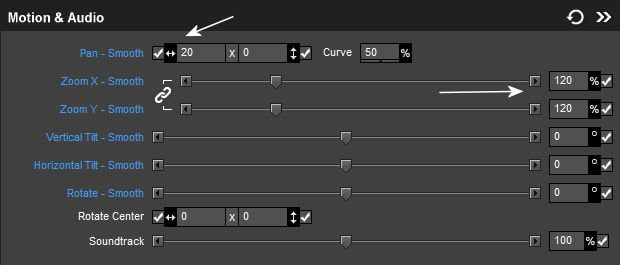
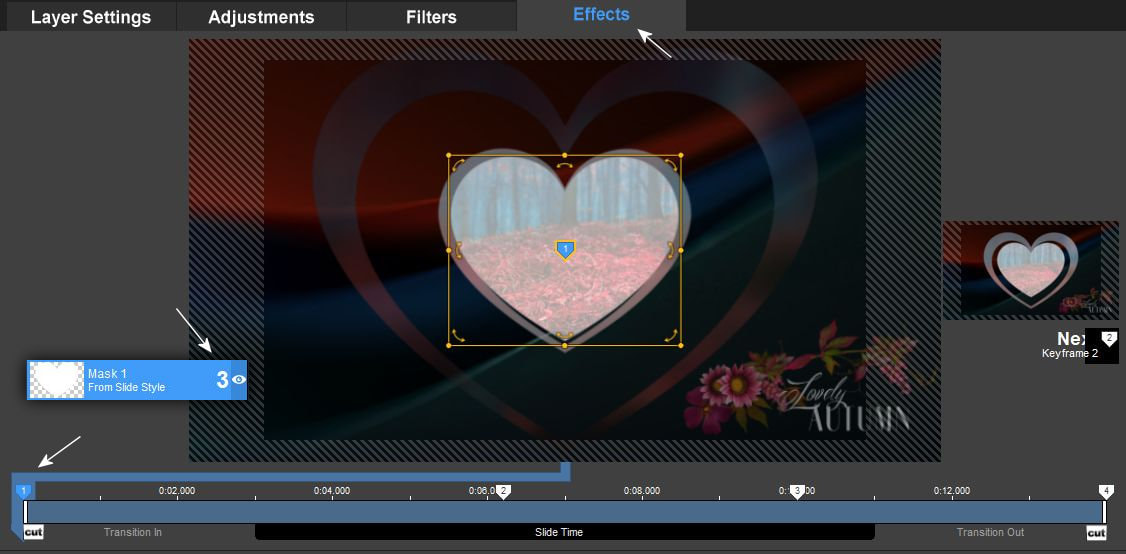
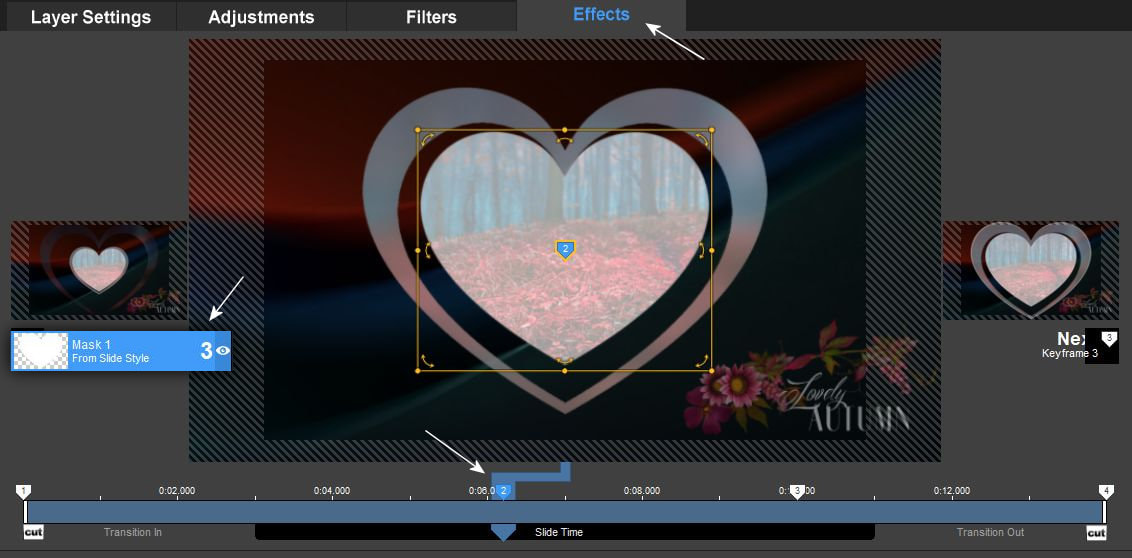
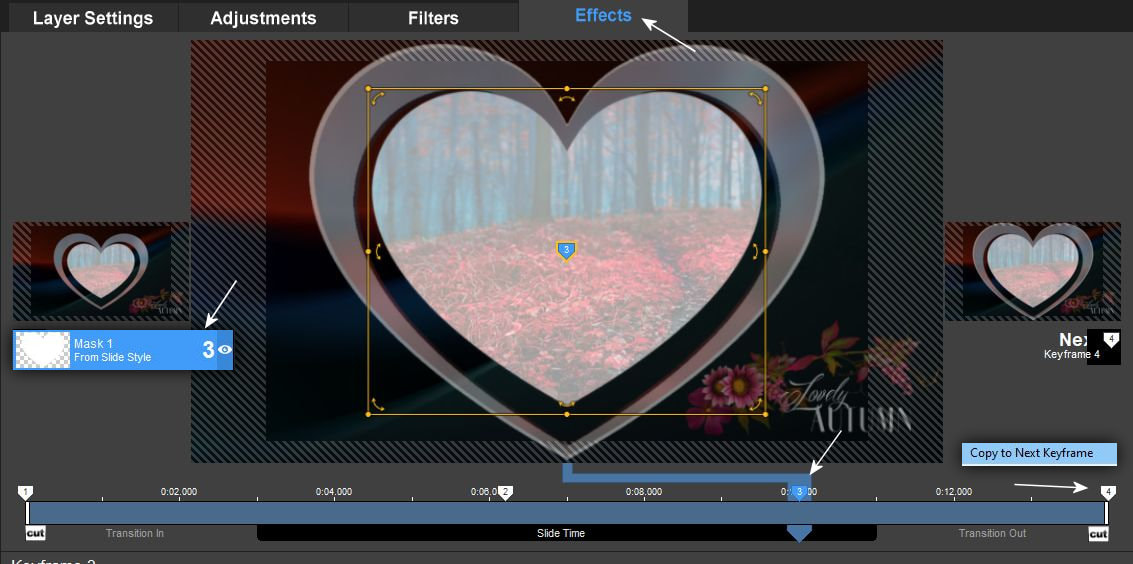
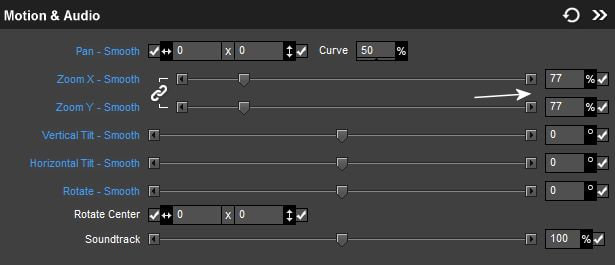
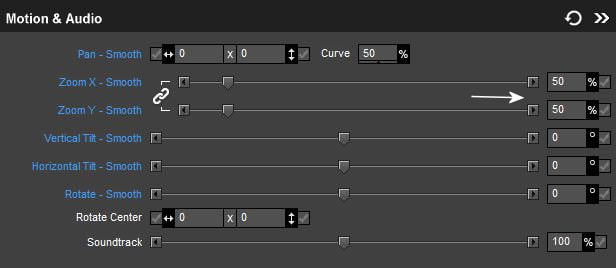
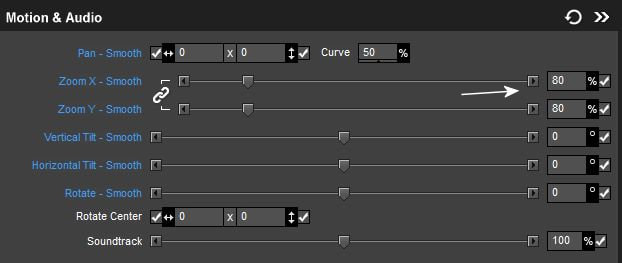
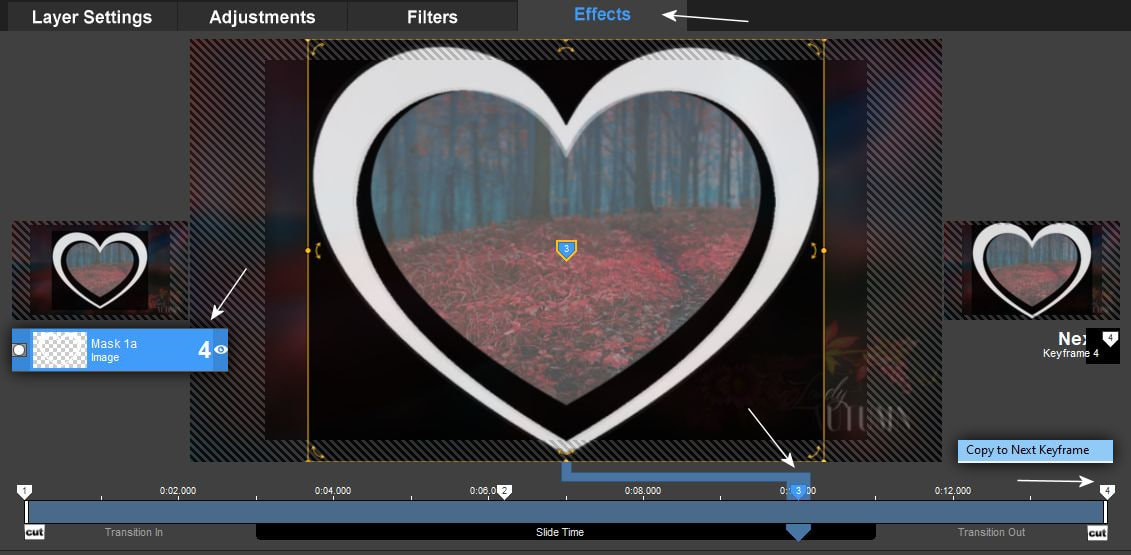
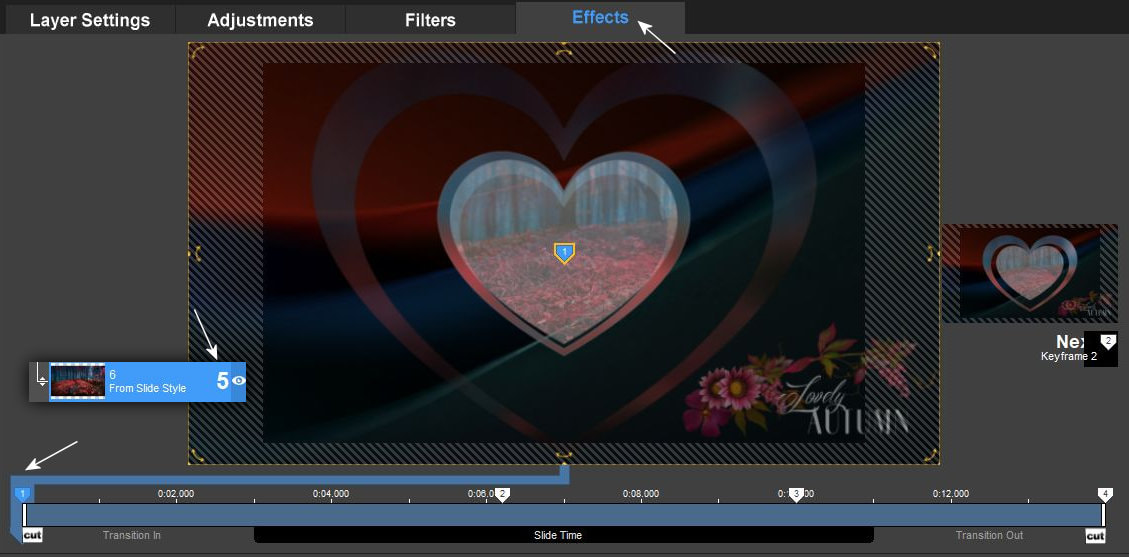
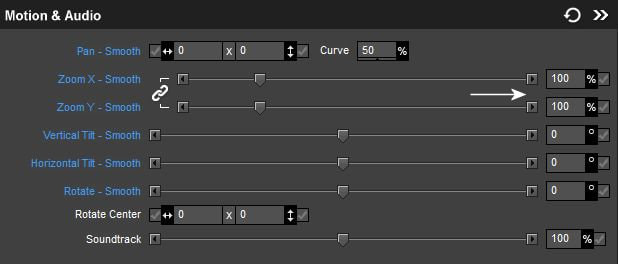
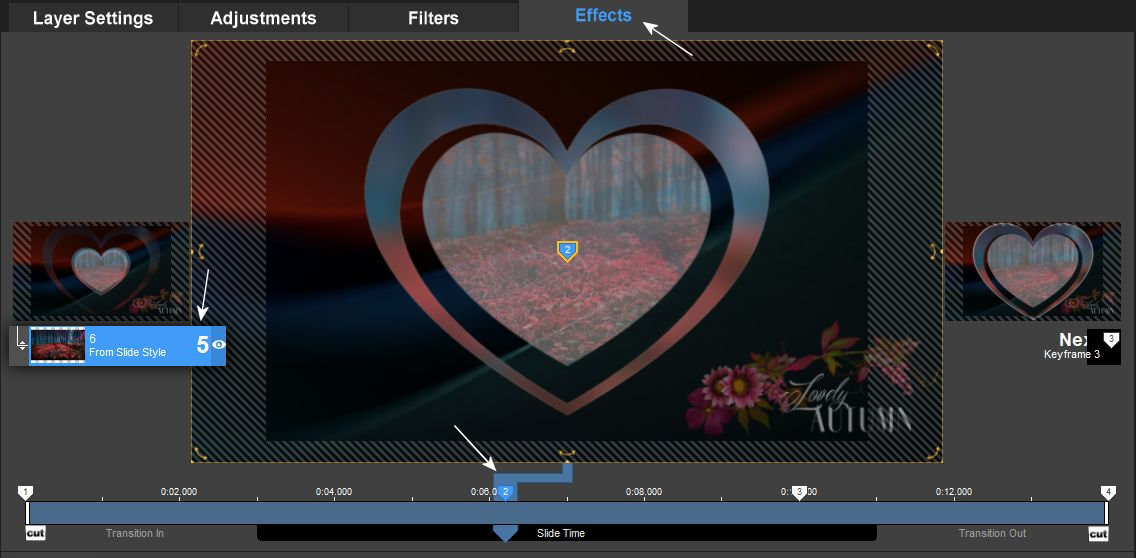
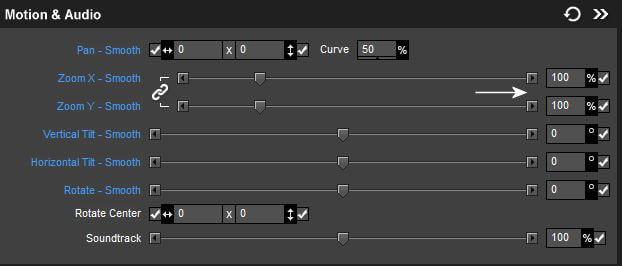
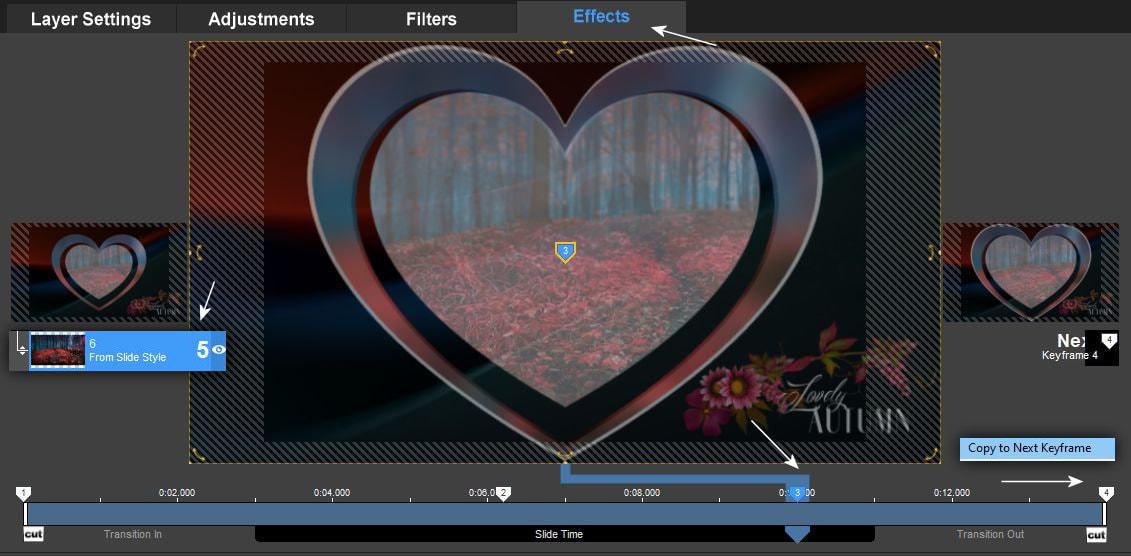
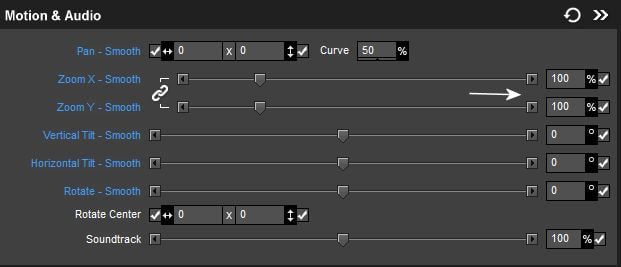
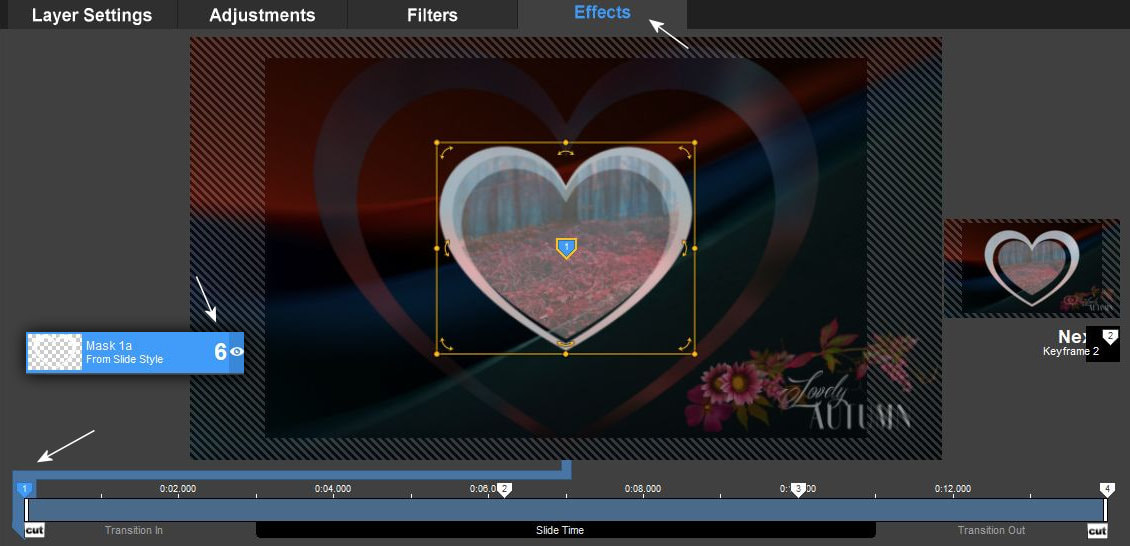
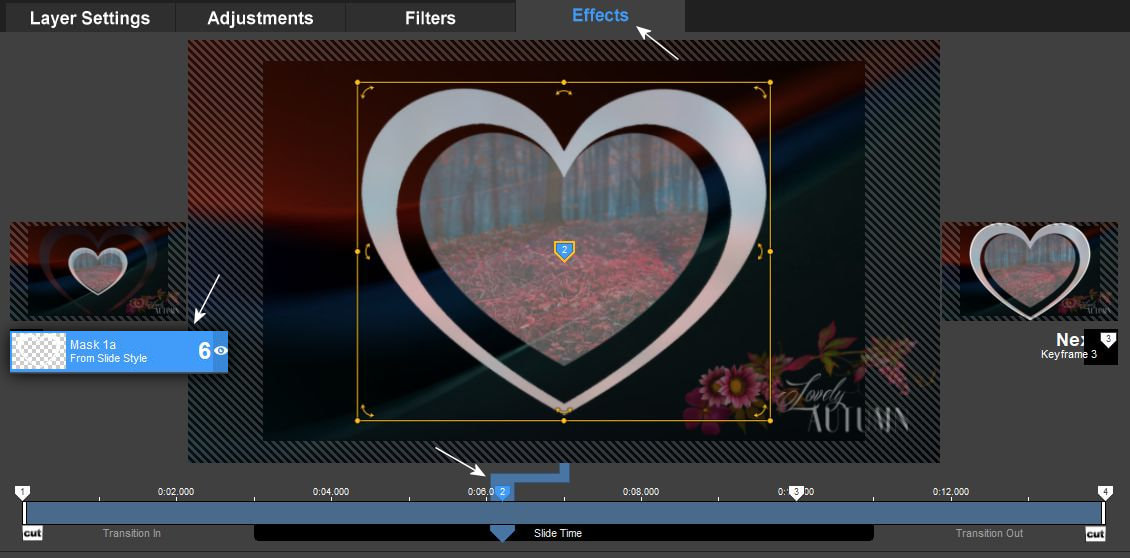
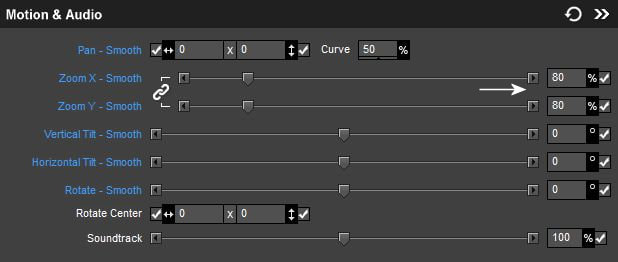
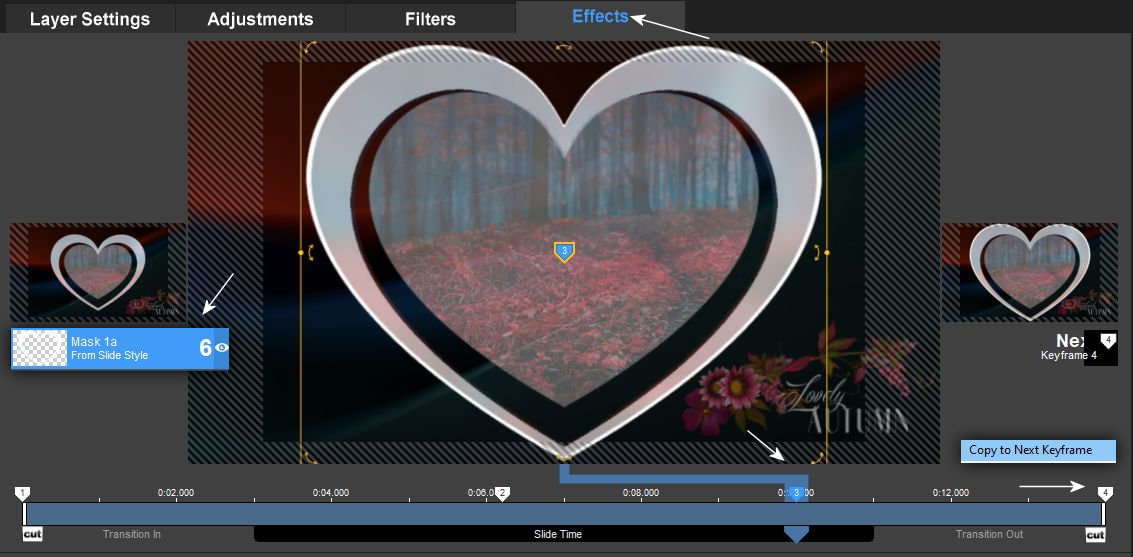
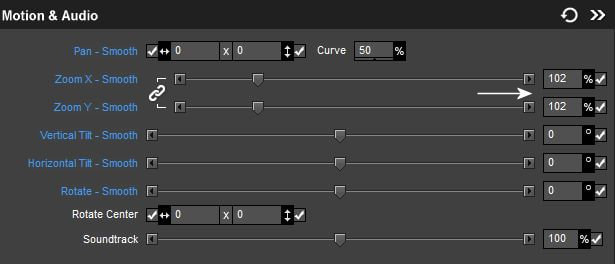
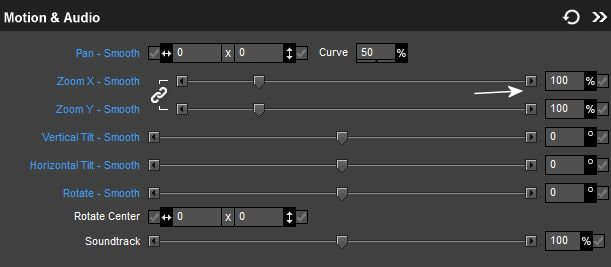
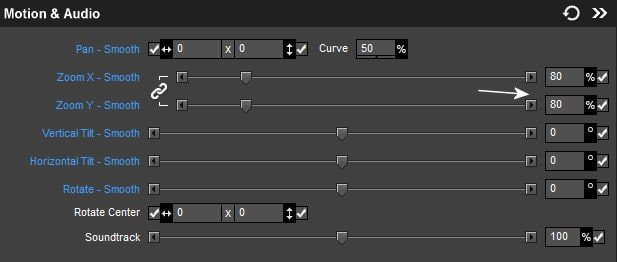
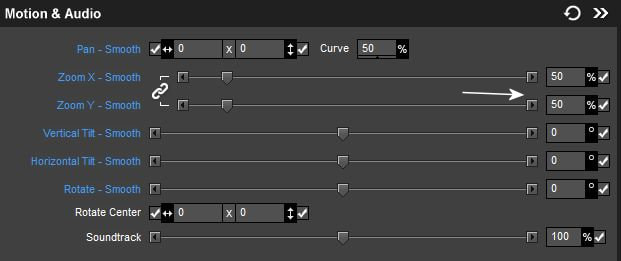
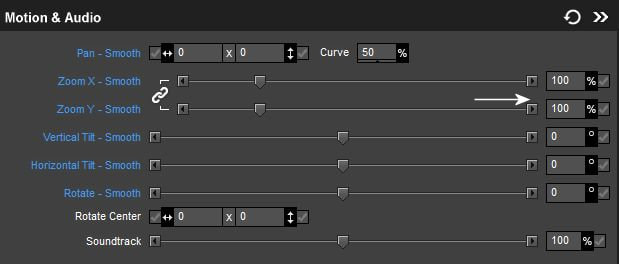
13. Kezdjük el az effectelést. Csak a képeken látottakat kell követned az effecthez. Figyelmesen dolgozz!!!
Let's start effecting. You only have to follow what you see in the pictures to the effect. Work carefully !!!
14.
15.
16.
17.
18.
19.
20.

21.
22.
23.
24.

25.
26.
27.
28.

29.
30.
31.
32.
33.
34.
35.

36.