Folytassuk a munkát a pro Show Producerben. Nagyon figyelmesen kövesd a képeken látottakat.
Let's continue working in the pro Show Producer. Follow the pictures very carefully.

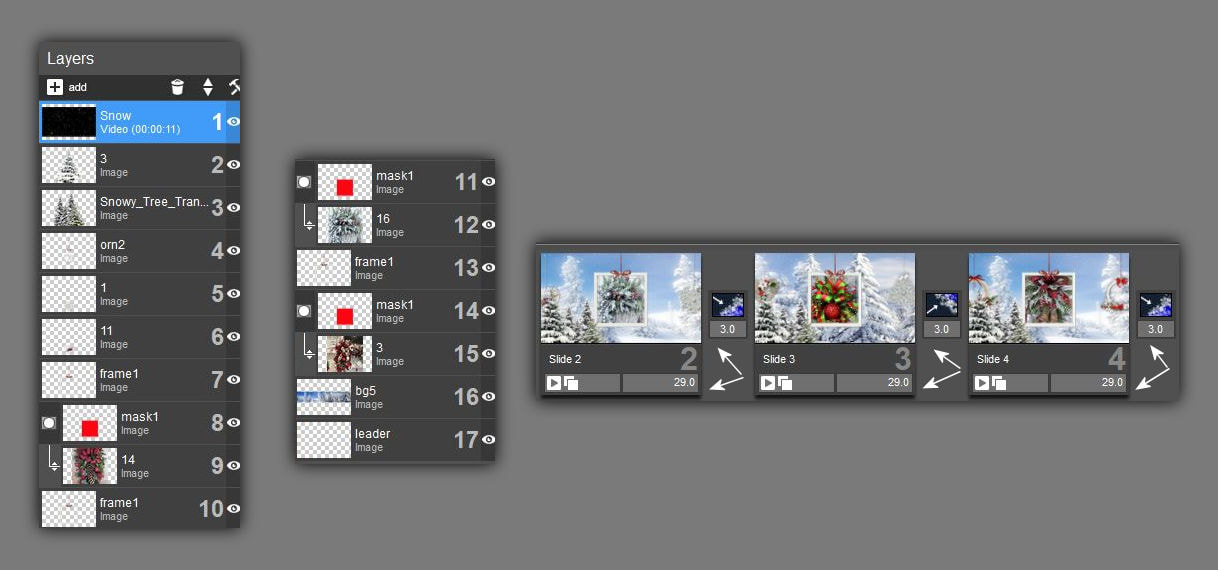
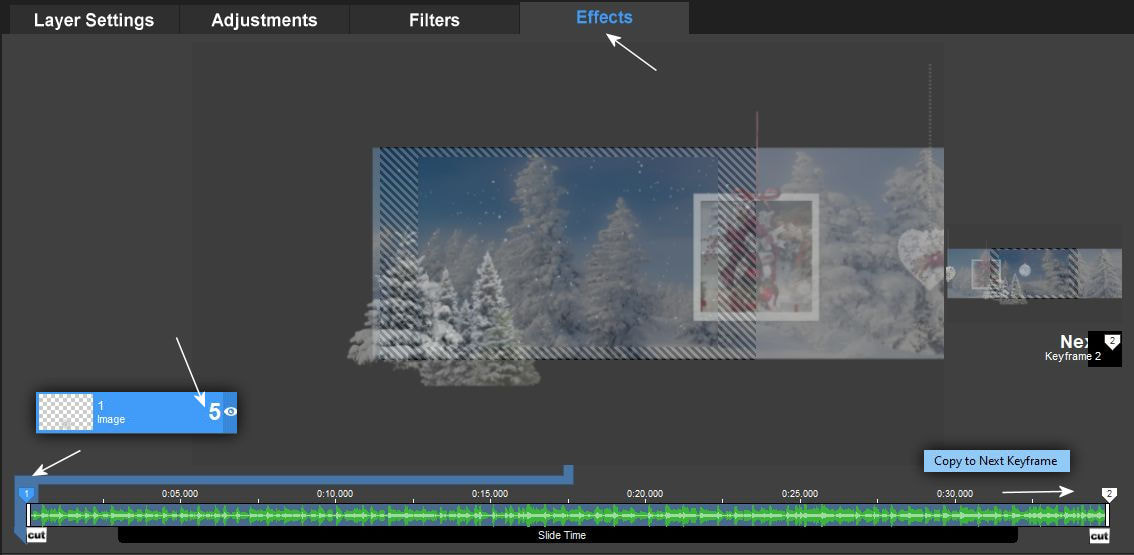
A Pro Show Producerben így rakd össze a rétegeket.
A csempeidö 29 és 3 másodpercen áll. Az elsö réteg a csomagból a letöltött videó file lesz maszkolás nélkül. A 4,5,6, rétegen karácsonyi dekorációk pl. gömbök és egyebek vannak.Ide neked is ilyen dekorokat kell belógatni hogy a képek közé tudjanak ékelödni.
A képek mérete ehhez a kerethez 650x650.
This is how you put the layers together in Pro Show Producer. Your tile time is 29 and 3 seconds. The first layer will be the downloaded video file from the package without masking. Christmas decorations on layers 4, 5, 6, e.g. there are spheres and others. You also need to hang such decorations here so that they can be wedged between the pictures. The picture size is to this frame 650x650
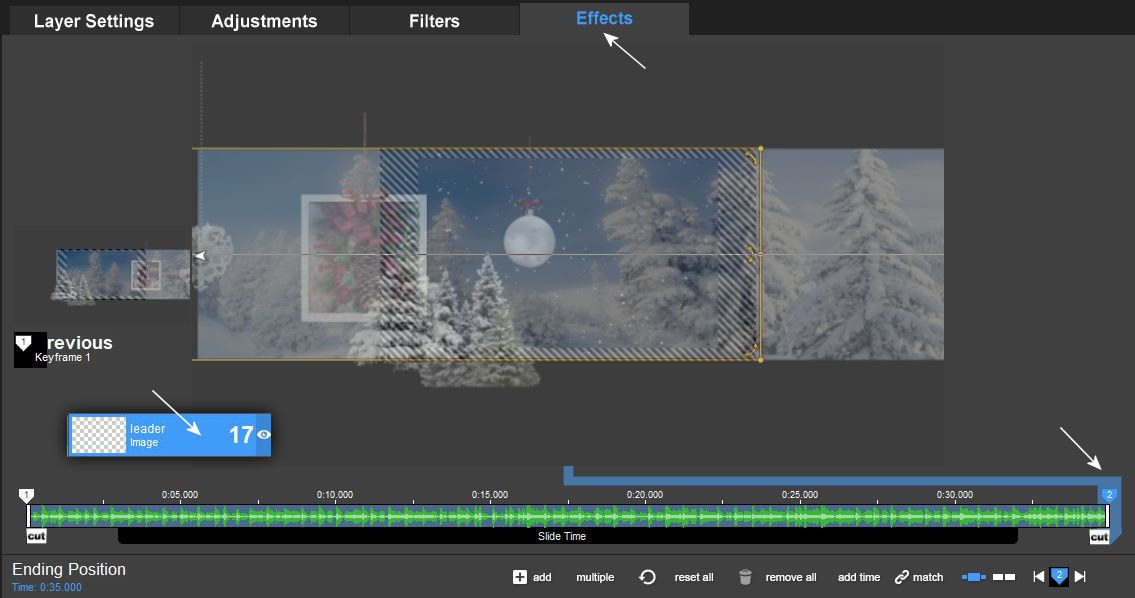
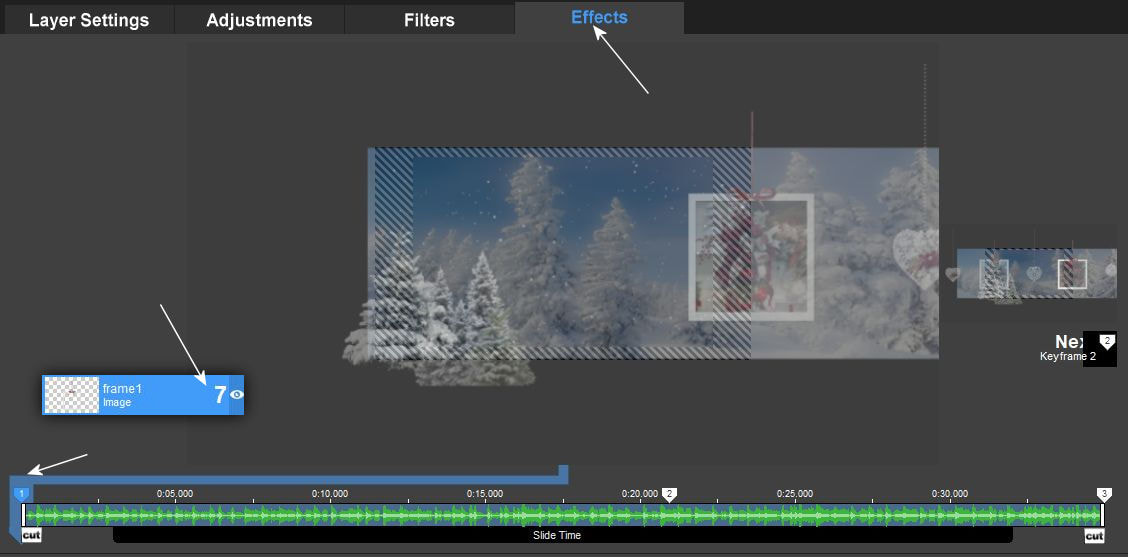
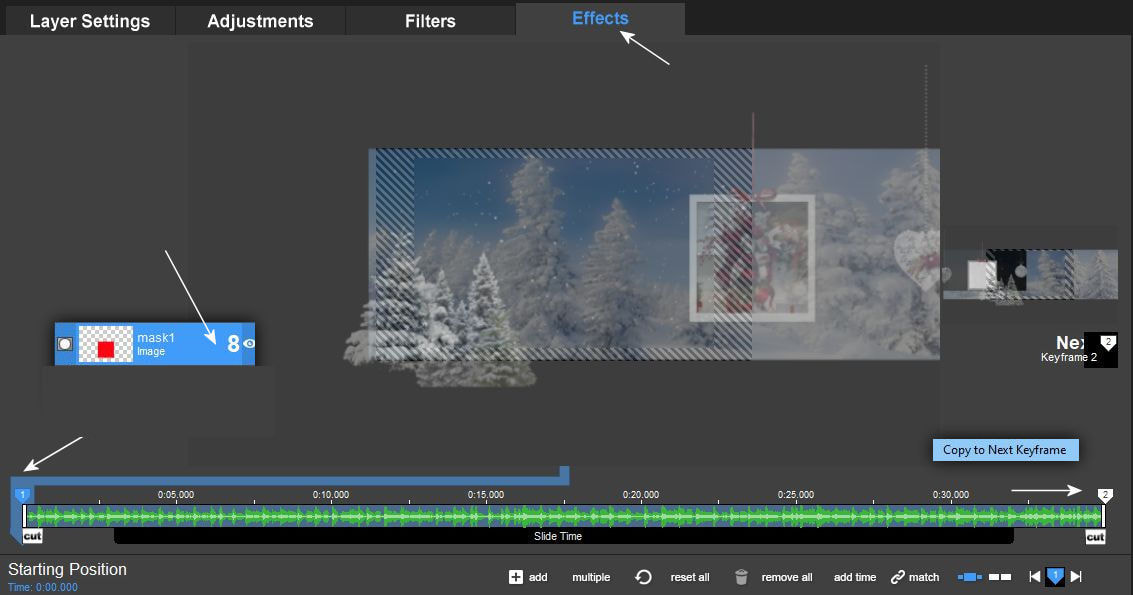
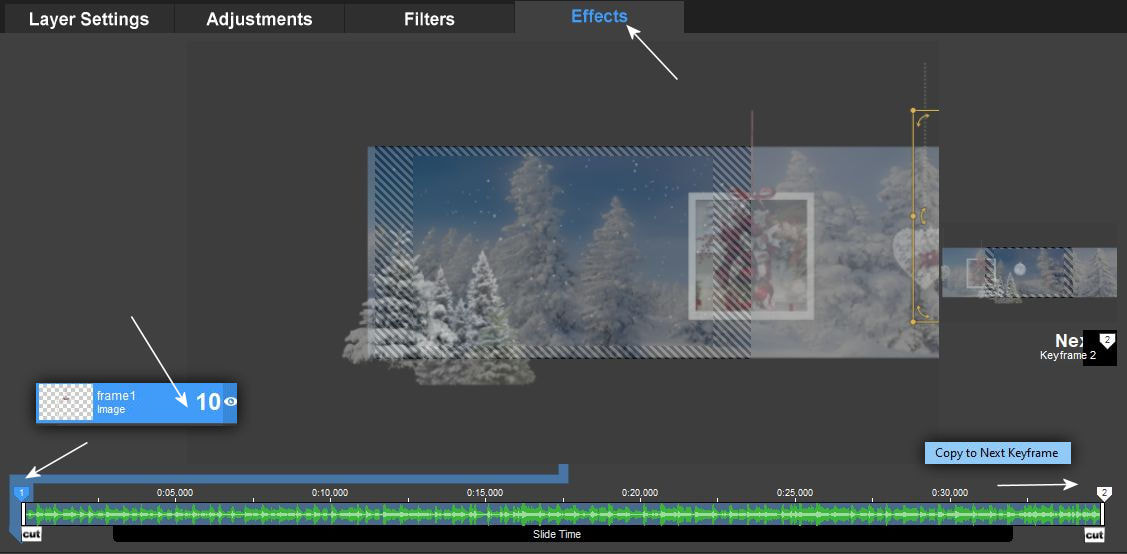
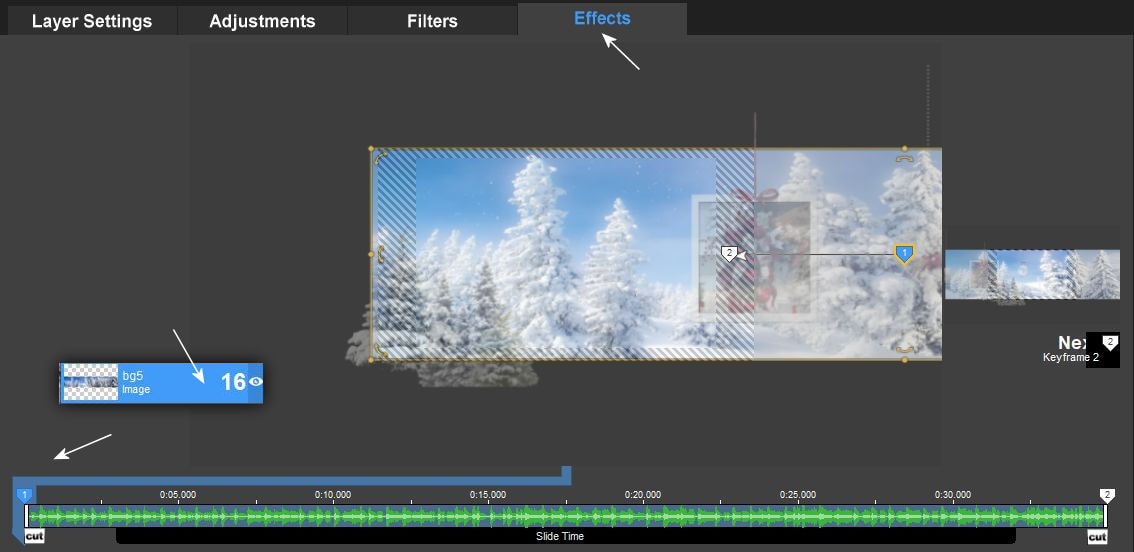
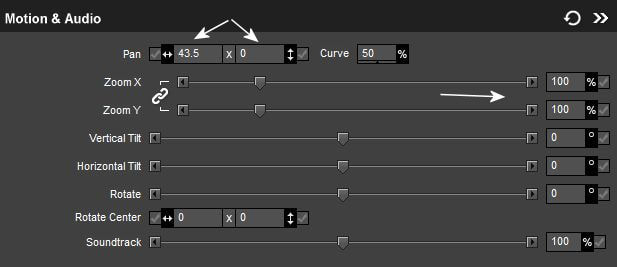
1. Keress két olyan a hátteredhez passzoló objektumot amely a képed bal alsó sarkában áll, hogy térhatást hozzunk létre. Ezeknek az zoom mérete és a pozíciója a te választásodtól függ.
Find two objects matching your background that are in the lower left corner of your image to create a spatial effect. Their zoom size and position depends on your choice.
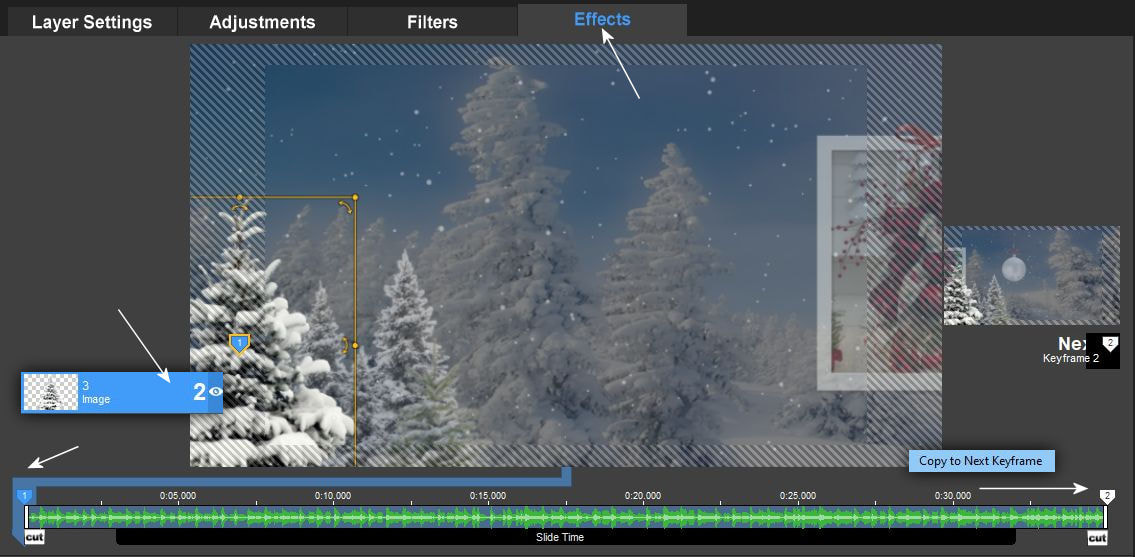
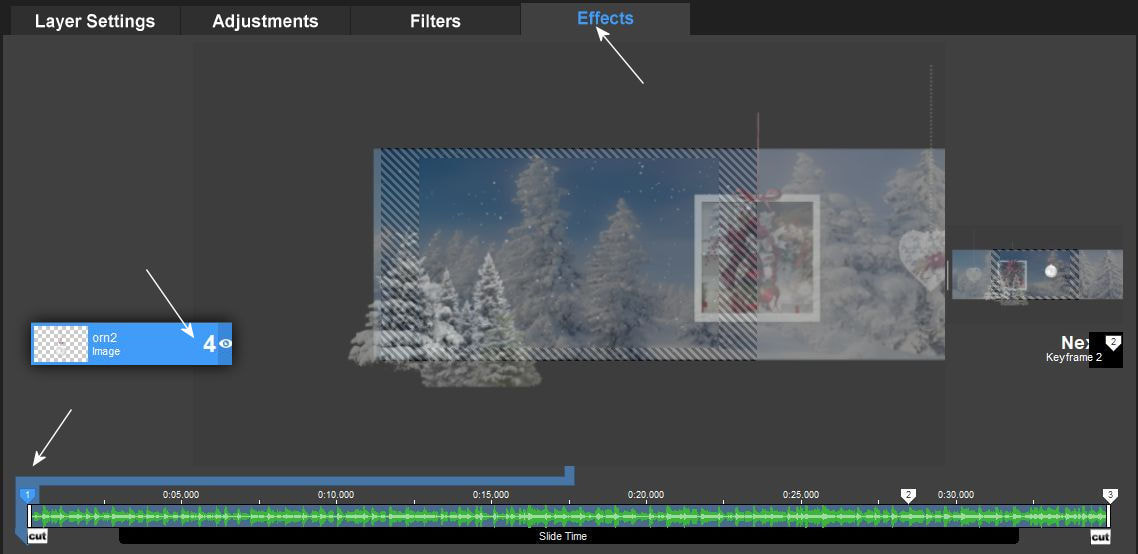
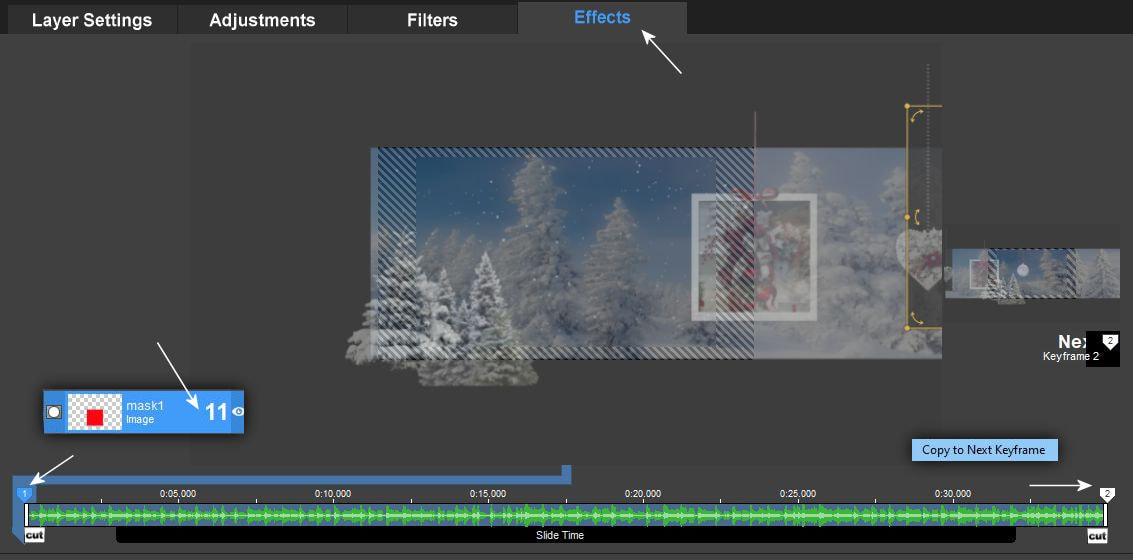
2. Helyezd el a második objektumot is.
Place the second object as well.
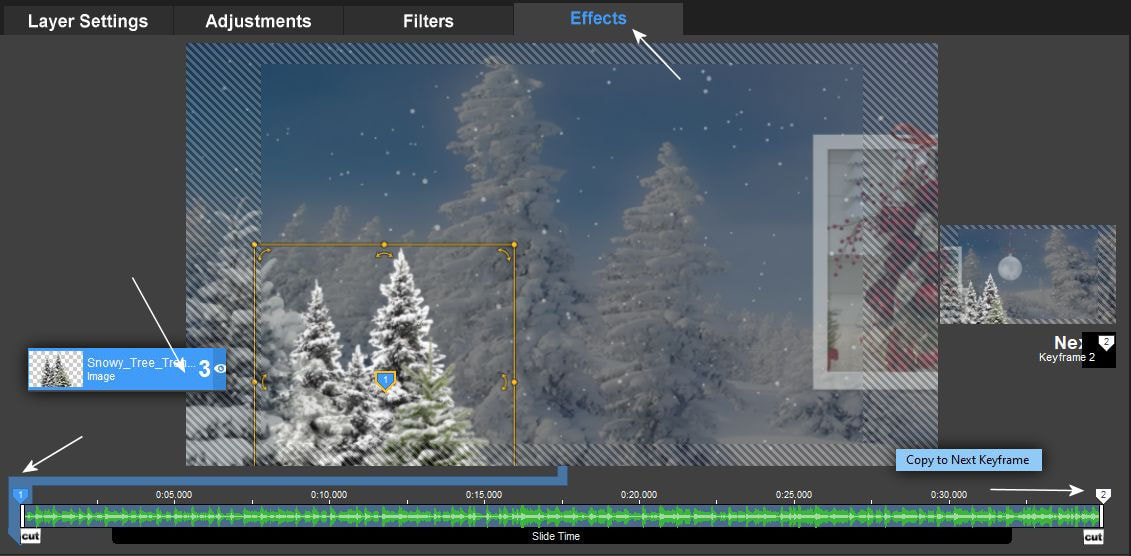
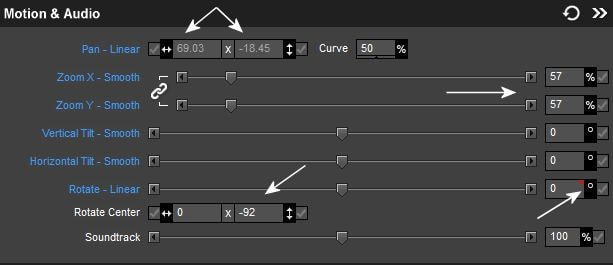
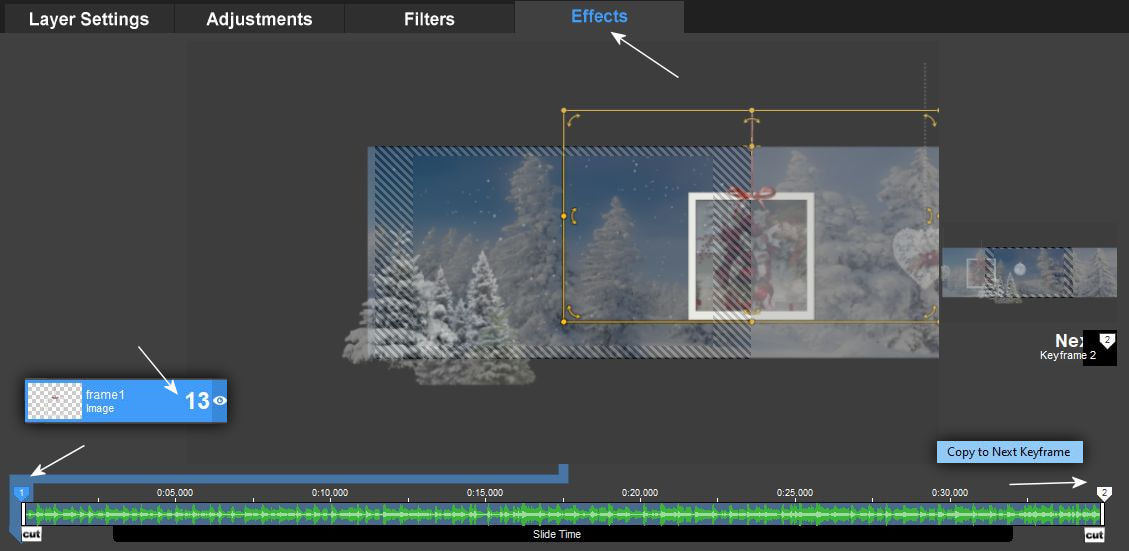
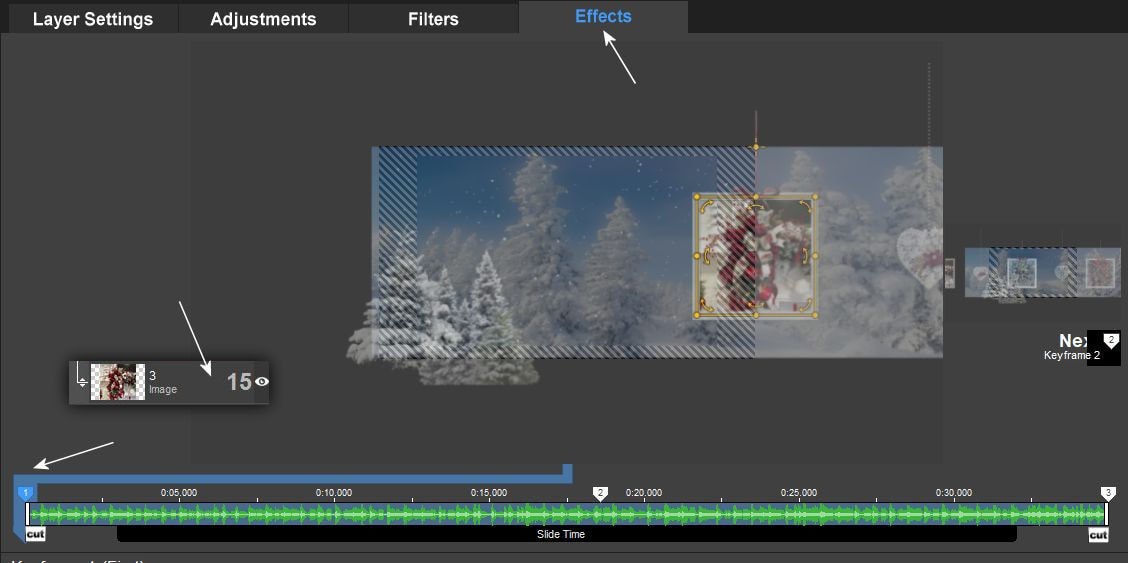
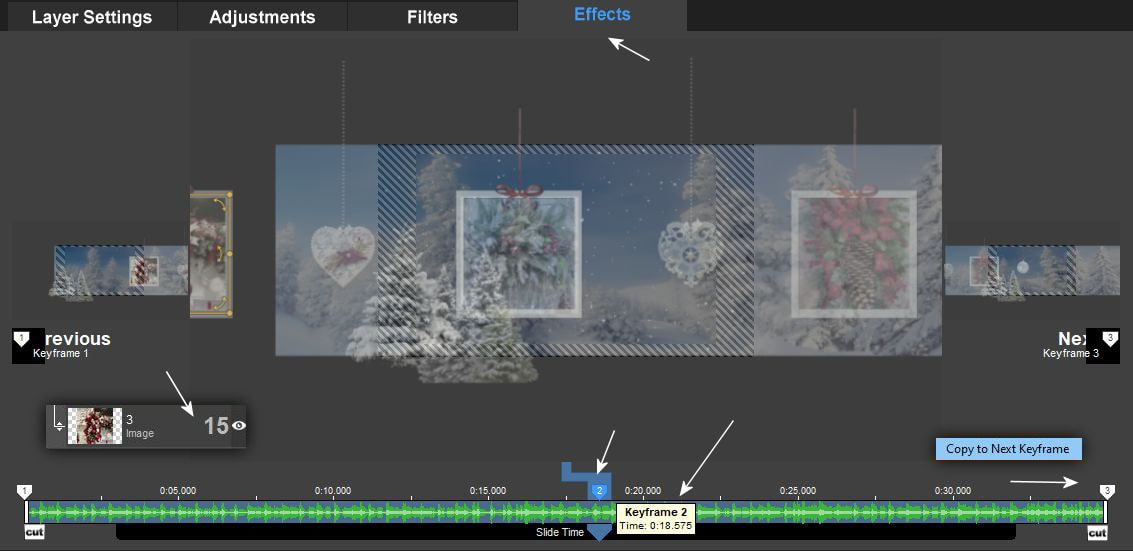
3. A 4-es rétegtöl a 15-ig a pozíciója a képeknek ugyanazok lesznek egyéb más értékek változhatnak. A legjobb ha leírod ezt a két értéket egy papírra, hogy könnyebb legyen fejben tartani. Itt most sokmindent kell állítanod.
From layer 4 to 15, the position of the images will be the same, other values may change. It is best to write these two values down on a piece of paper to make it easier to remember. You have a lot to say here.
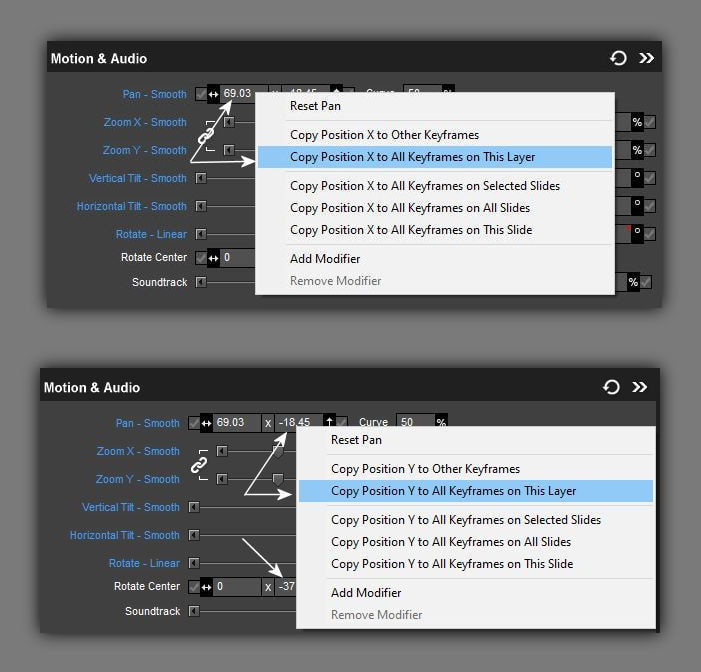
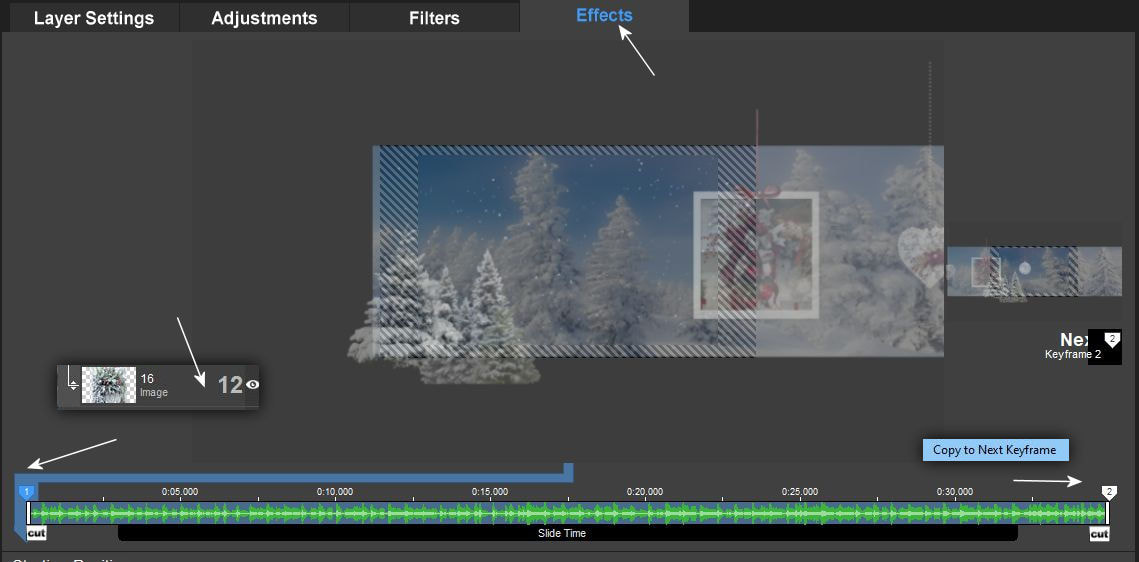
Ezért a gyorsabb munka érdekében a beírt pozíciókat másolhatod is ha akarod ott ahol pl. 3 keyframe pont is van. Jobb klikk a kockára és a legördülöben válaszd a kékkel jelölt menüpontot. Mindkét kockában levö adatot tudod másolni így minden keyframe ponton ezen a rétegen egyszerre ugyanazok az értékek jelennek meg.
Therefore, in order to work faster, you can copy the entered positions if you want, where e.g. There are also 3 keyframe points. Right-click on the cube and select the menu item marked in blue in the drop-down menu. You can copy the data in both cubes so that the same values are displayed at every keyframe point on this layer at the same time.
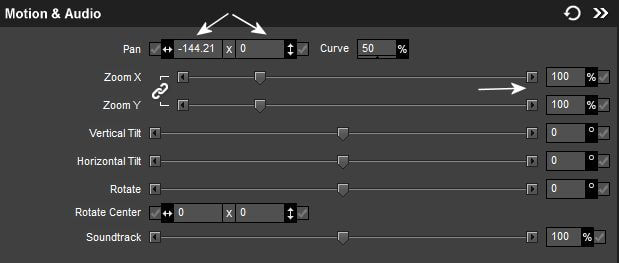
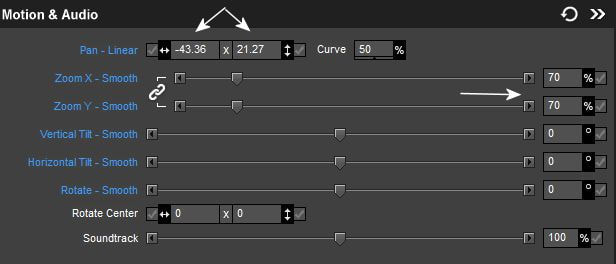
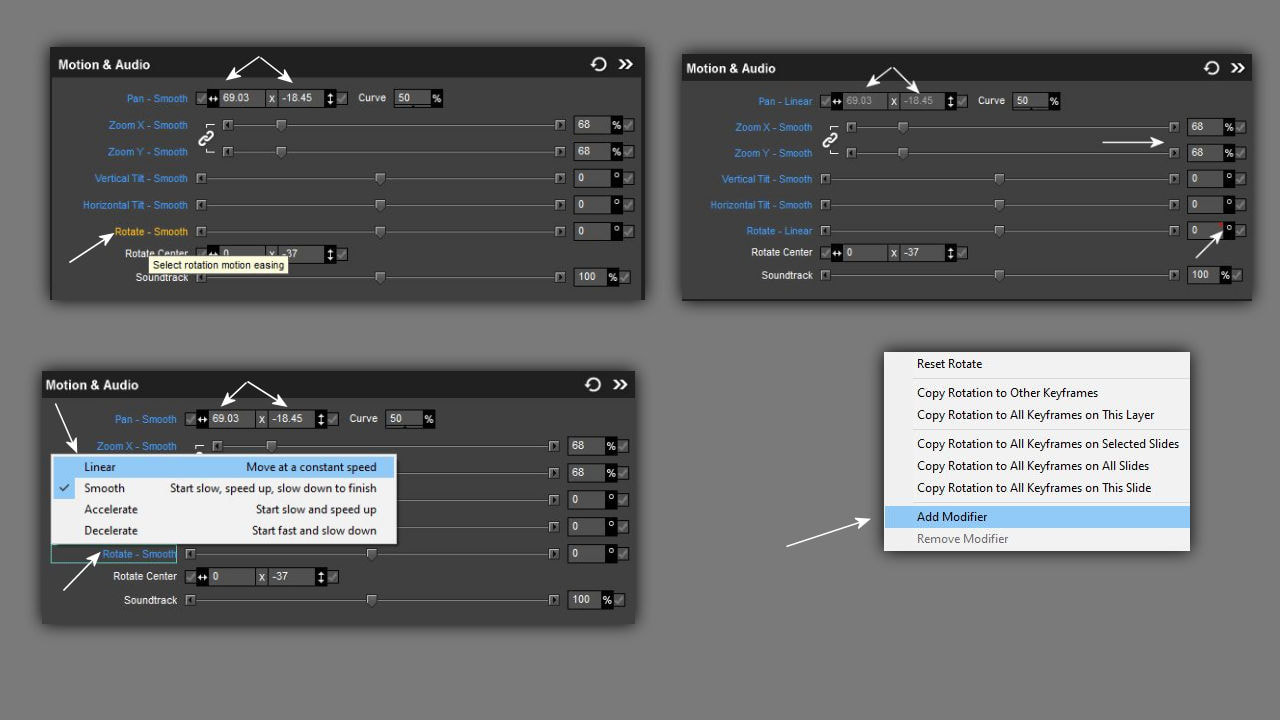
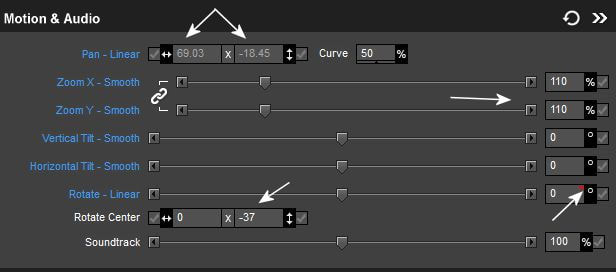
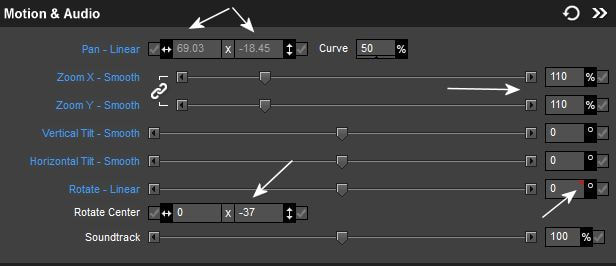
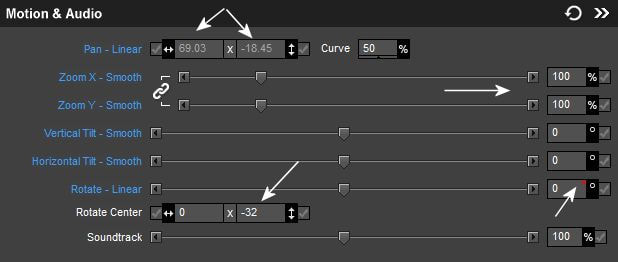
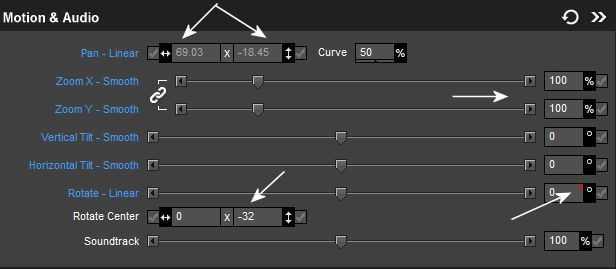
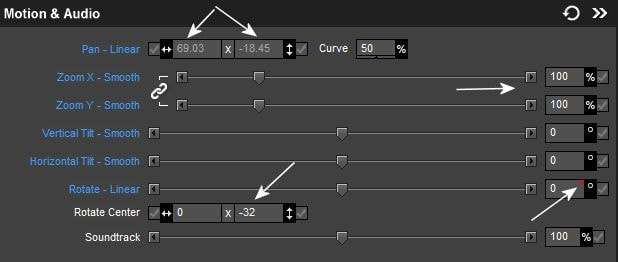
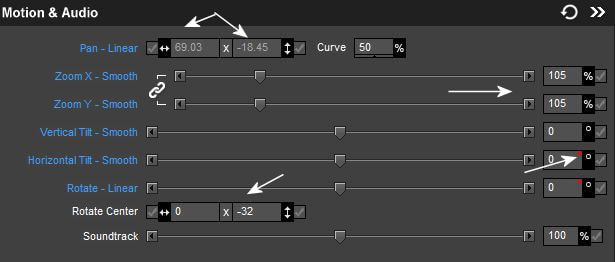
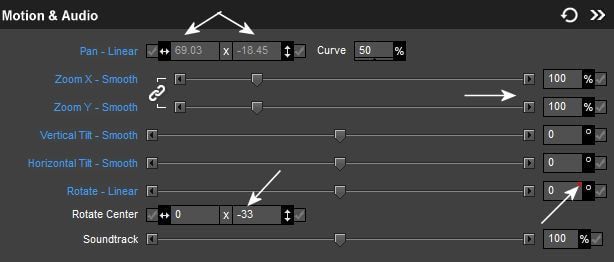
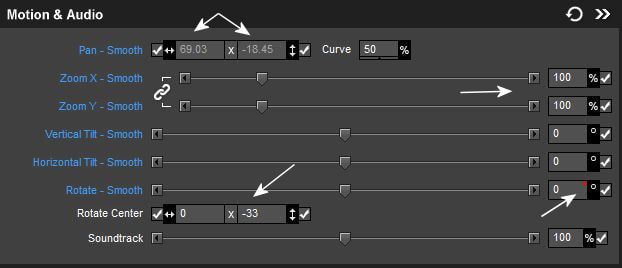
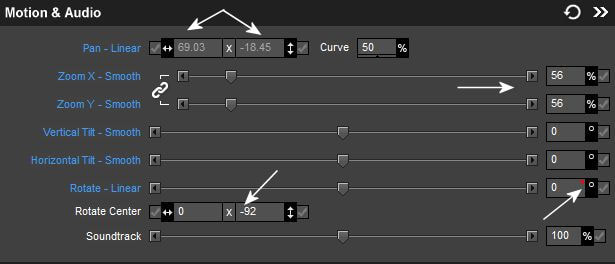
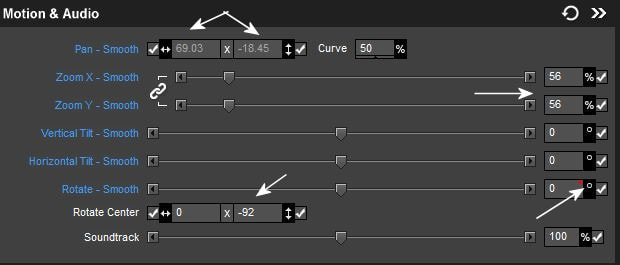
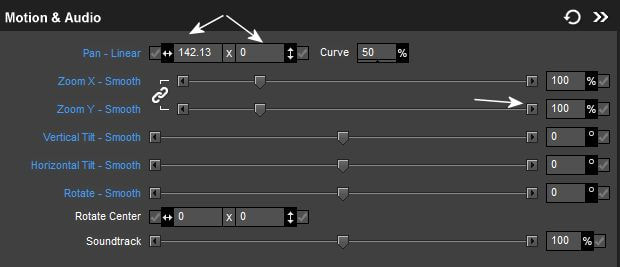
Nagyon fontos még hogy itt a 4-es rétegen elkezdened ezeket a beállításokat.Elöször kattints a rotate smooth kék feliratra és állítsd át rotate Linear-ra. Majd a rotate Linear kocka sarkára kattint a jobb füllel és add modifier.
It is also very important that you start these settings here on layer 4. First, click on the blue label rotate smooth and change it to rotate linear. Then click on the corner of the rotate Linear cube with the right tab and add modifier.
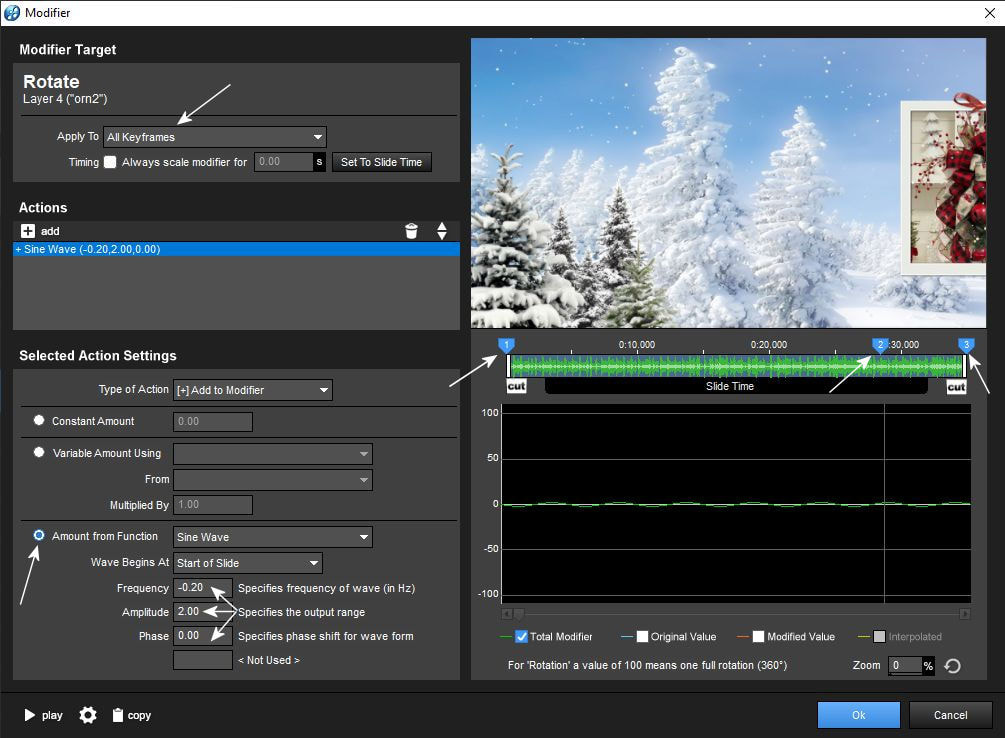
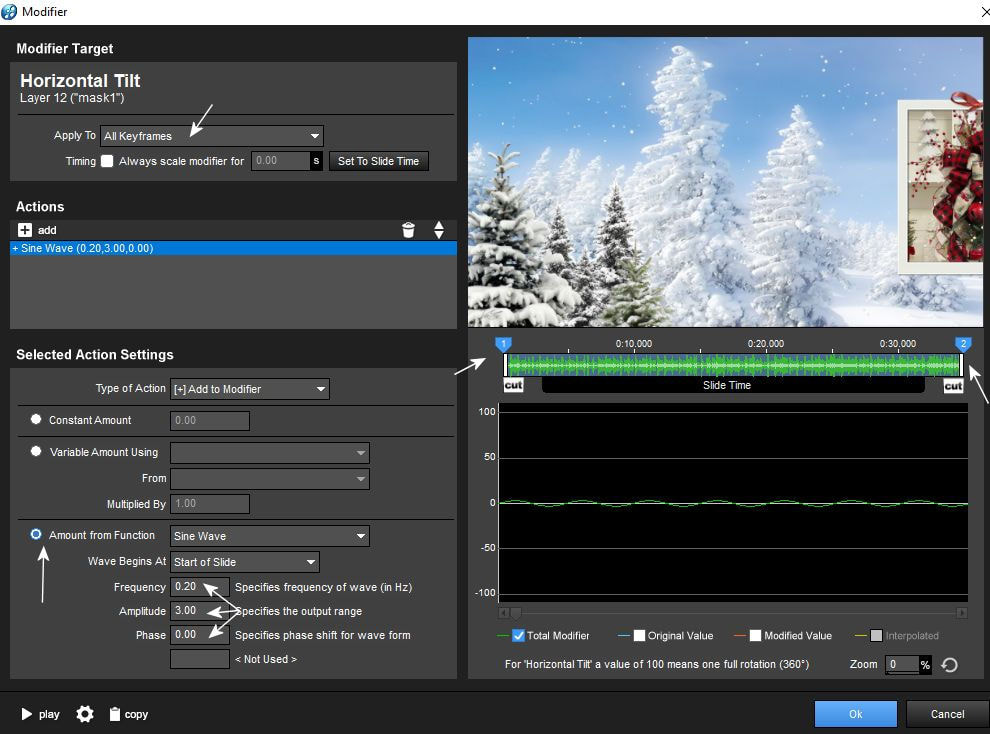
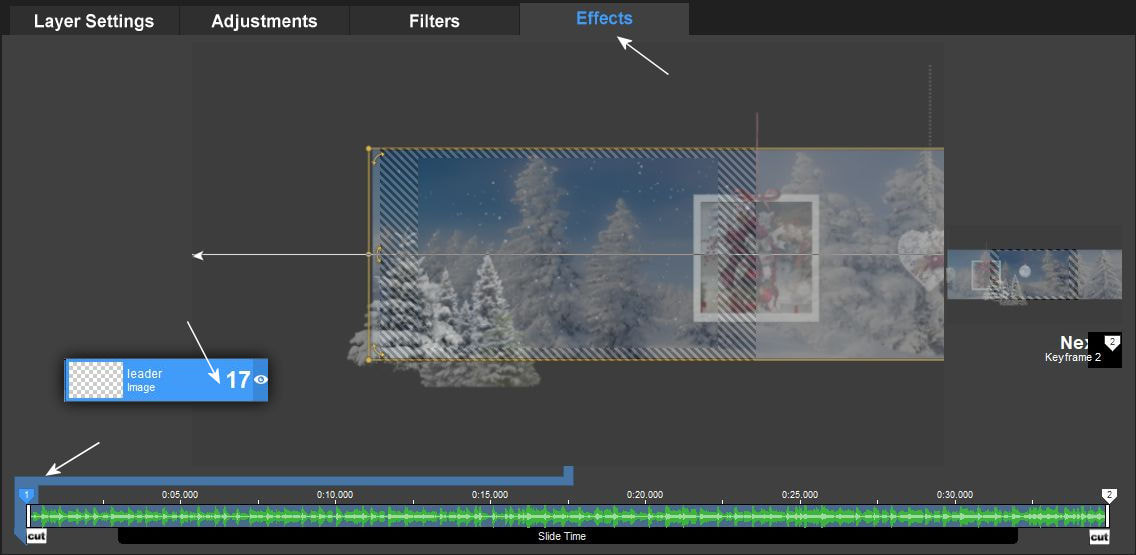
A legördülö ablakban végezd el az alábbi beállításokat. Az all keyframes beállításal minden keyframe ponton ezen a rétegen egyszerre tudod beállítani a mozgást. Ezt a mozgást minden olyan rotate Linear pontra be kell tenned minden rétegen ahol kis piros jelet látsz a rotate Linear kockában.
Make the following settings in the drop-down window. With the all keyframes setting, you can set the movement at every keyframe point on this layer at the same time. You have to apply this movement to every rotate linear point on every layer where you see a small red mark in the rotate linear cube.
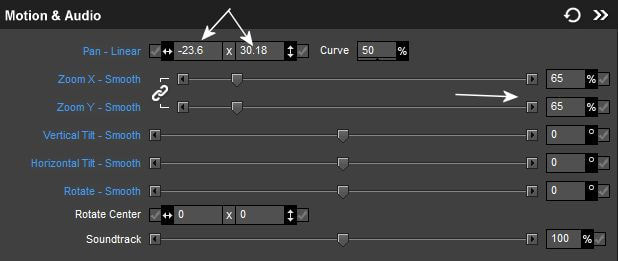
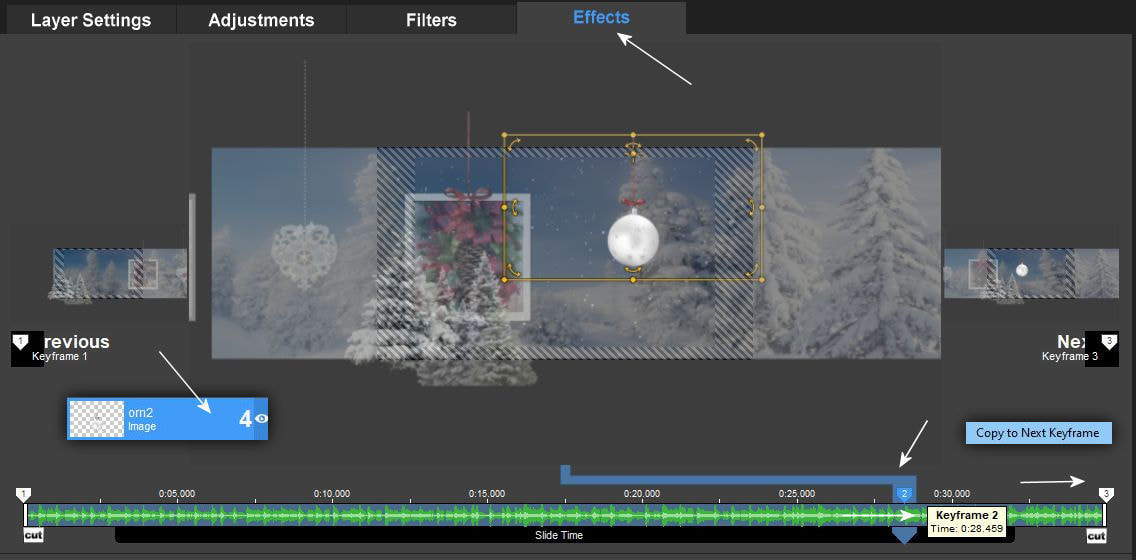
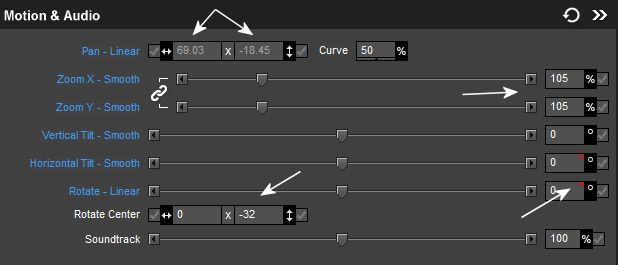
4. A 2-es keyframe pont value: 28,459 Figyelem a zoom értékek változóak lehetnek attól függnek, hogy te milyen dekorációkat mozgatsz a videódban.
Keyframe point 2 value: 28,459 Attention, the zoom values may vary depending on the decorations you move in your video.
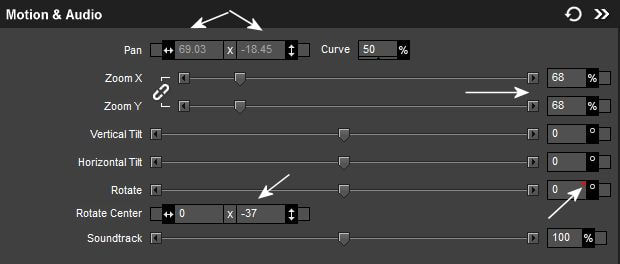
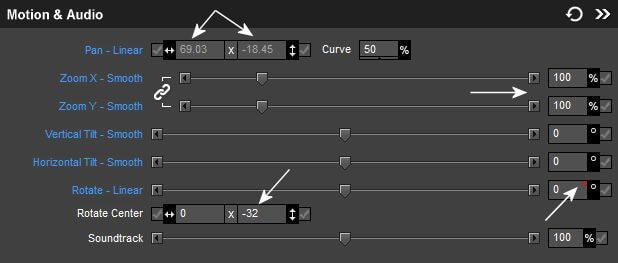
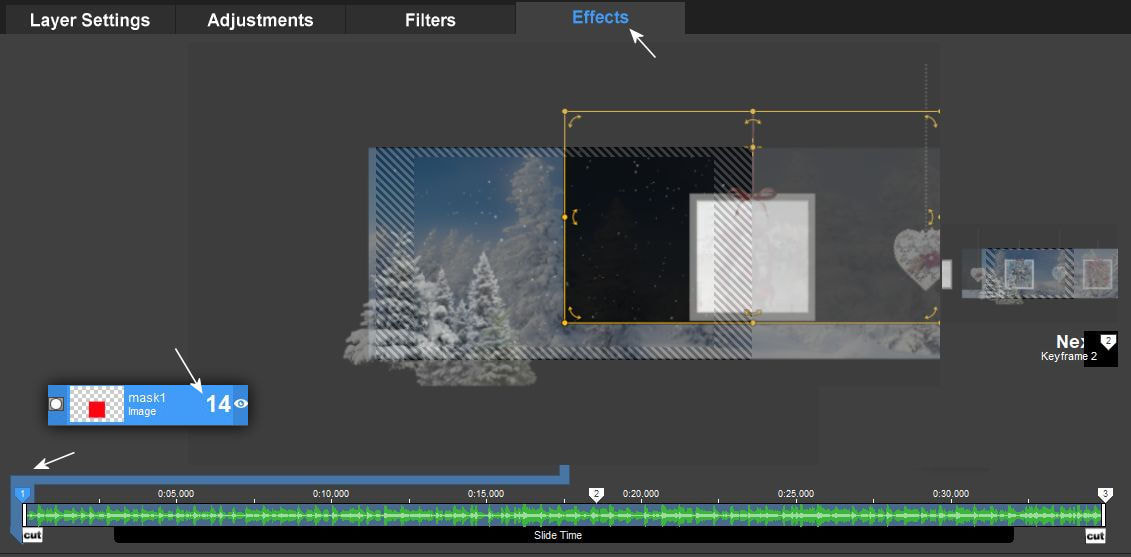
5. Figyelj meg minden fehér nyilat és a kis piros jelekröl sem feledkezz meg ott alkalmaznod kell a Modifier beállítást!!!
Pay attention to all the white arrows and don't forget about the little red signs, you have to apply the Modifier setting there!!!
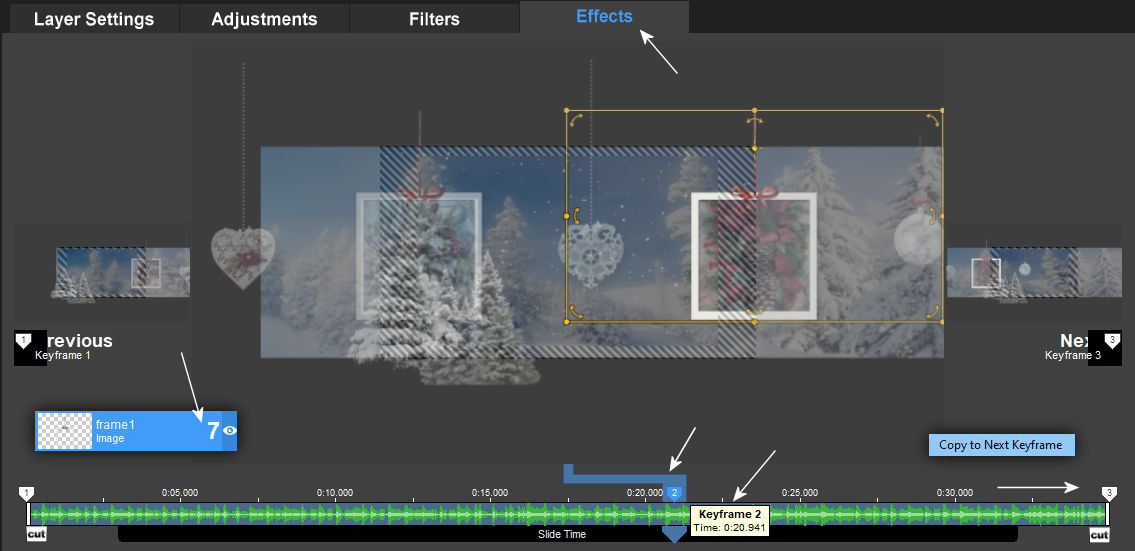
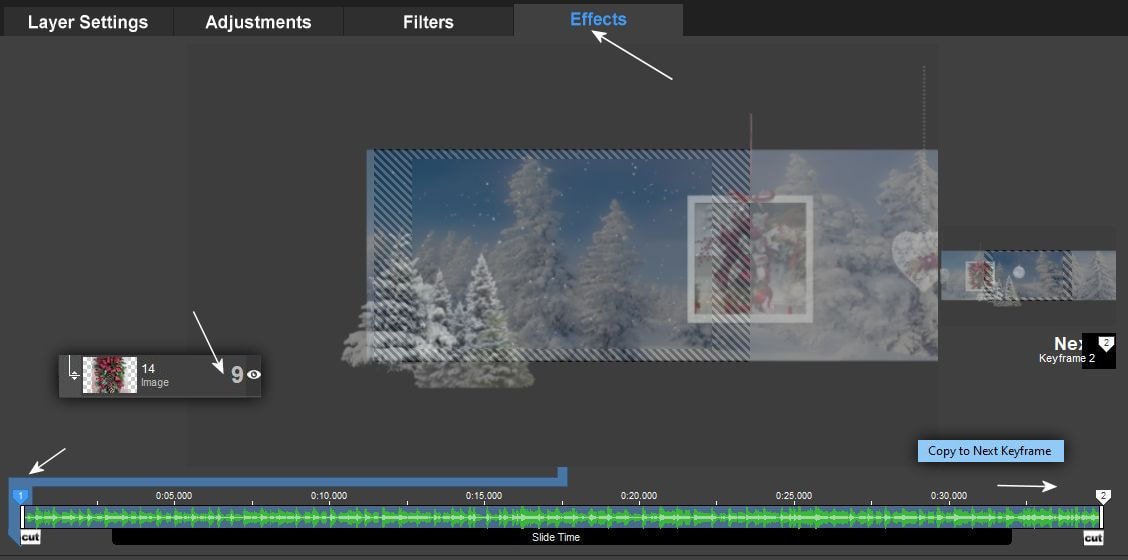
6. Kövesd a képeken látottakat.
Follow what you see in the pictures.

7.
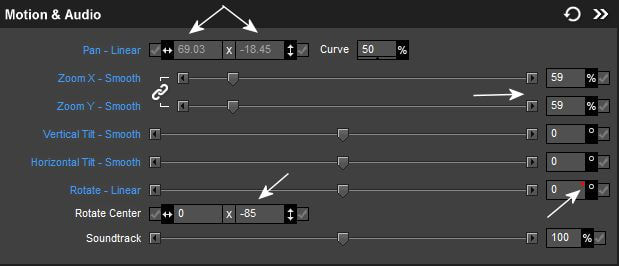
8. A 2-es keyframe point value: 20,941
Point value of keyframe 2: 20,941
10.
11.
12.
13.
14. Itt egy második helyre is kell Modifier. Katt a horizontal tiltre.
Modifier is also needed for a second place here. Click on horizontal tilt.
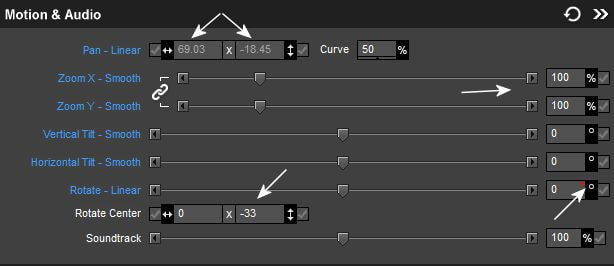
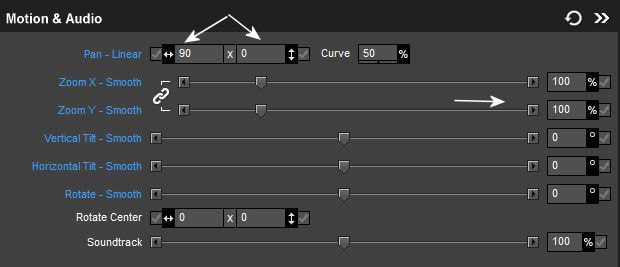
Állítsd be ezeket az értékeket.
Sets up these values.
15.
16.
17.
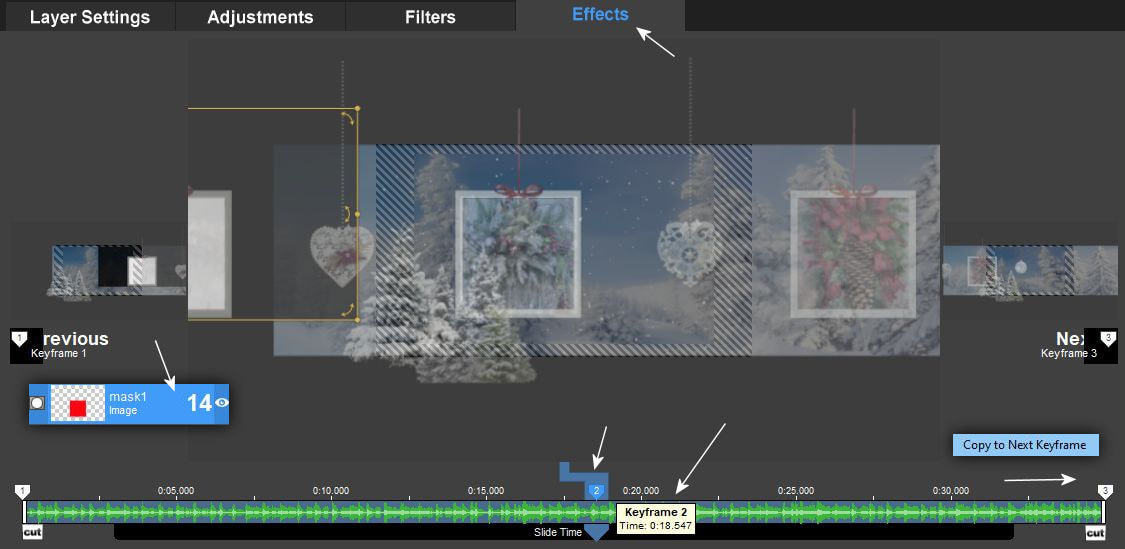
18. A 2-es keyframe point value: 18,547
Point value of keyframe 2: 18,547
19.
20. A 2-es Keyframe point value: 18,575
Point value of keyframe 2: 18,575
21.
22.

23.
24.