Ez a bemutató szintén a gyakorlott Pro Show Producer felhasználók számára készült. Mindannyian tudjuk, hogy a különleges videók elkészítéséhez nagy foku ismeretre van szükség ebben a programban a keyframe pontok számának, azok elhelyezésére az aktív lejátszó fekete csíkon a effectek létrehozása szempontjából. Fontos hogy megértsük azok müködési elvét amely az egyik legnehezebb pontja ennek a programnak a használatánál.
Ez a feladat ennek a megértésén alapszik és a siker is attól függ ki mennyire értette meg a keyframe pontok közöti mozgásait annak az objektumnak vagy képnek amit a látványban mozgatunk. Ez most ennek az effectnek a lényege amelynek a neve
Before And Behind ( Elötte és Mögötte ).
This tutorial is also intended for experienced Pro Show Producer users. We all know that making special videos requires a high degree of knowledge of the number of keyframe points in this program, their placement on the black strip of the active player in terms of creating effects. It is important to understand their operating principle, which is one of the most difficult points when using this program. This task is based on understanding this, and the success depends on how well you understood the movements between the keyframe points of the object or image that you are moving in the view. This is now the essence of this effect, whose name it is Before And Behind.

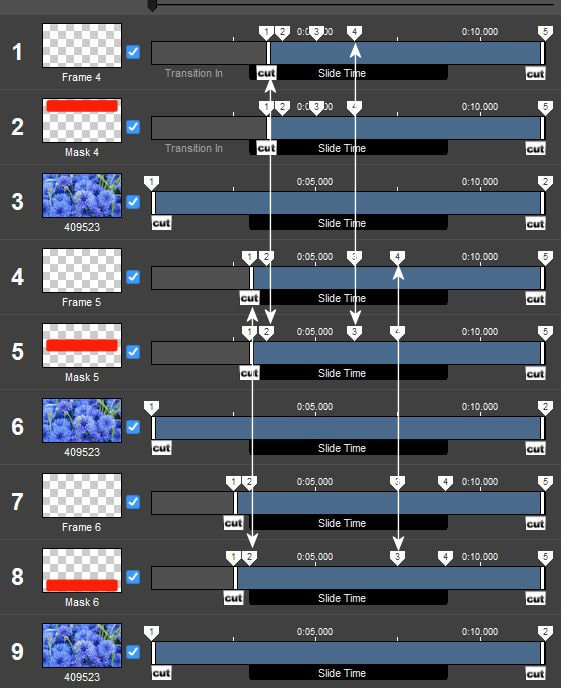
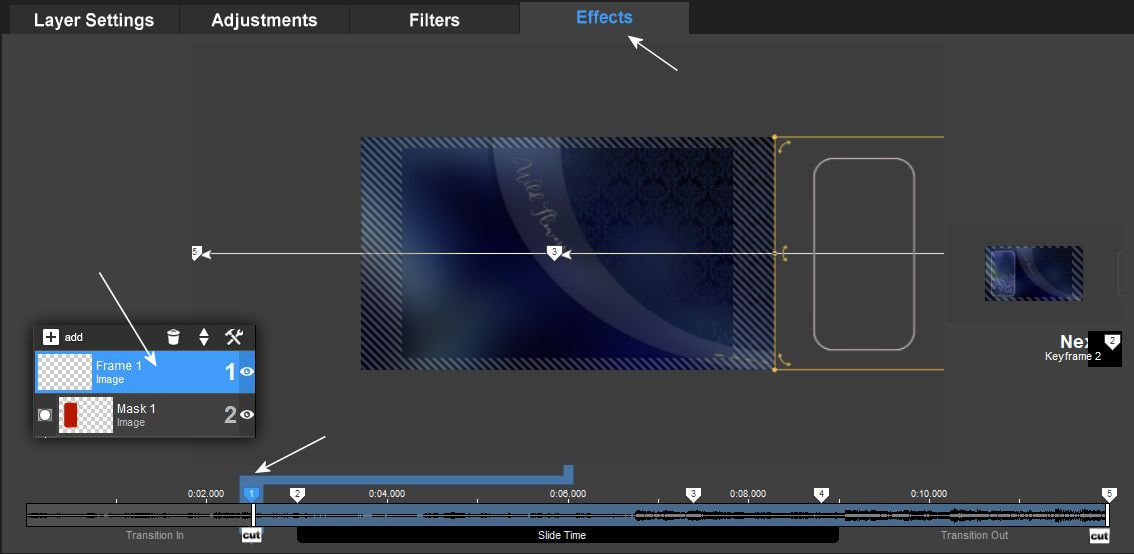
Itt egy alap mozgáshoz leggyakoribban használt keyframe pont elhelyezést láttok.
Az elsö lapon a keyframe pontok fentröl lefelé vannak sorban elhelyezve vagyis az alsok vannak leghátrább. a másodikon ezt fordítva csináltam meg. Vagyis az egyik esetben a ProShow a felsö rétegen levö képet kezdi elöször lejátszani és az alsón levöket utoljára. A második képen levö pontoknál ez fordítva van.Ezt azért nehéz megtanulni, mert a lejátszó az aktív lécünkön balról jobbra játszik le horizontálisan, a keyframe pontokat pedig ehhez a mozgáshoz képest vertikálisan kell azt nekünk elhelyezgetni.
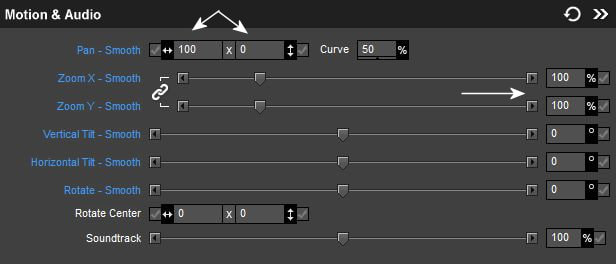
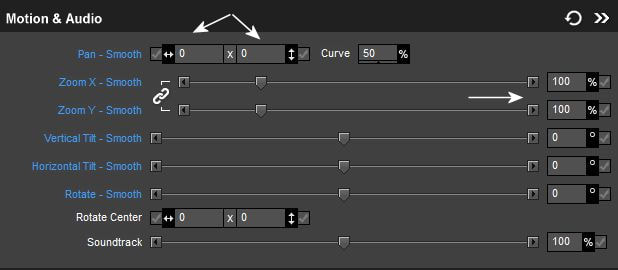
Fontos a mozgáshoz, hogy melyik keyframe pontnak mi a szerepe. Itt az egyesen megjelenik a képünk a kettesen megáll a hármas pontig ott elindul kifele a négyes pontig.Tehát addig tartózkodik a screen-en amilyen távolságra ven a 2-es és a 3-as pont egymástól. Ez a kép csak a szisztéma megértéséhez készült nincs szükség erre a beállításra ehhez az effecthez.
Here you see a keyframe point placement most often used for basic movement. On the first page, the keyframe points are placed in a row from top to bottom, that is, the bottom ones are at the back. on the second one I did it the other way around. That is, in one case, ProShow starts playing the image on the upper layer first and the images on the lower layer last. It is the other way around for the points on the second image. This is difficult to learn because the player plays horizontally from left to right on our active bar, and we have to place the keyframe points vertically in relation to this movement. It is important for movement which keyframe point has which role. Here, our image appears on the one, on the two it stops until the point three, then it starts out until the point four. So it stays on the screen as long as the distance between the points 2 and 3 is from each other. This image is only for understanding the system, this setting is not required for this effect.
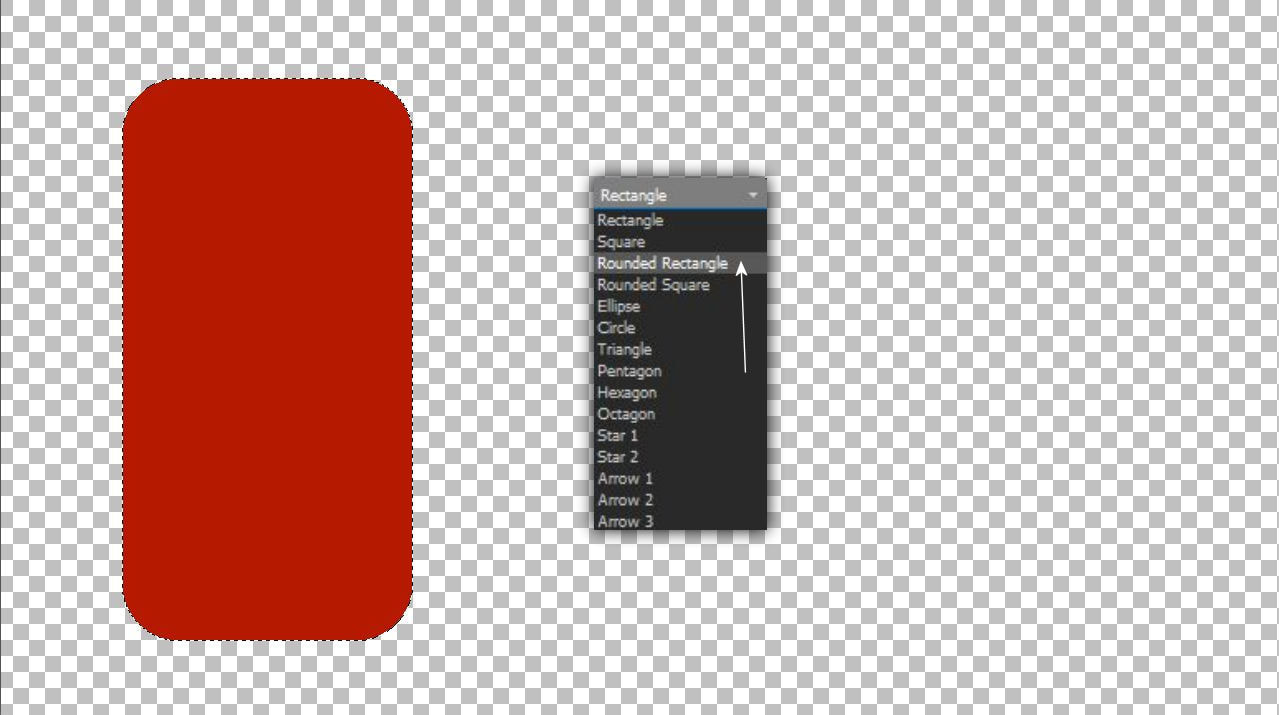
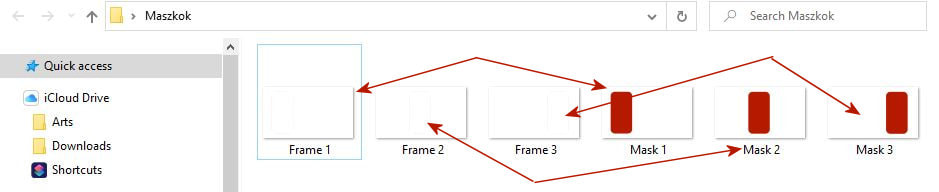
1. Kezdjük a munkát az elökészülettel szintén a Photoshop programban.
Hozz be egy üres lapot készíts egy kijelölést ezzel az alakzattal ötsd ki piros színnel.
Let's start the work with the preparation, also in the Photoshop program Load in an empty sheet, make a selection with this shape, fill it with red color.
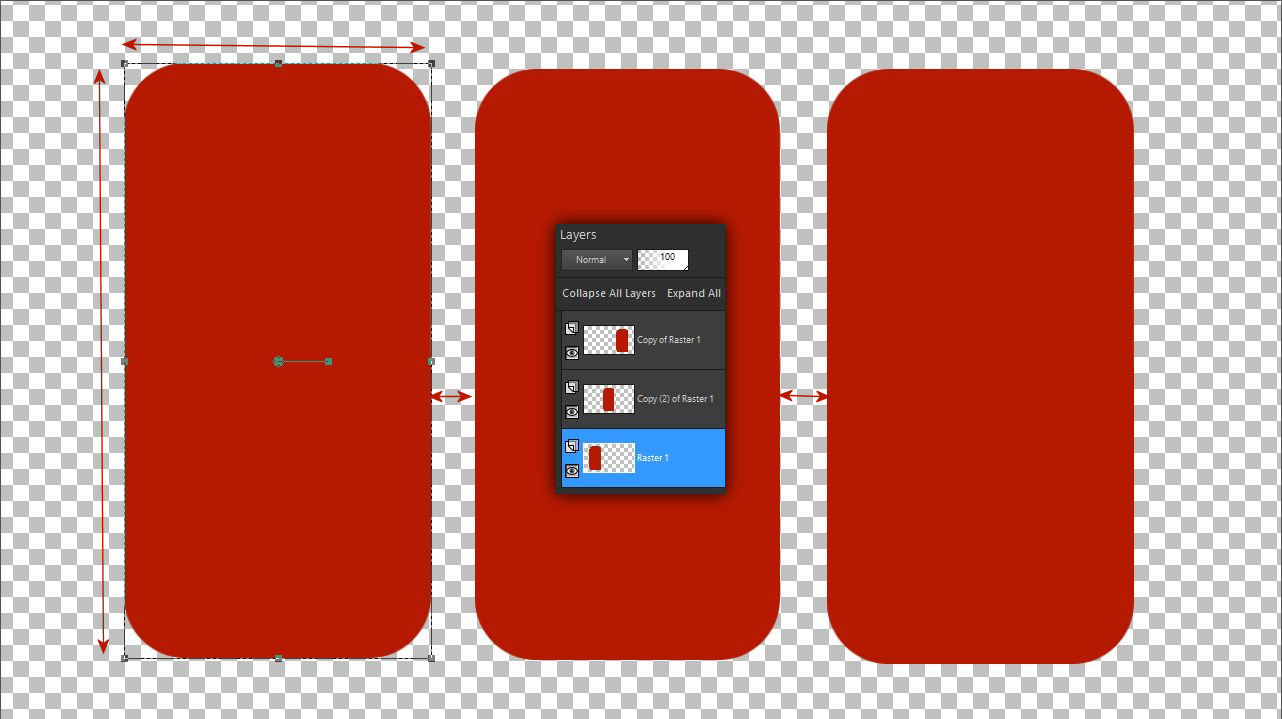
2. Duplázd meg a réteget kétszer és helyezd el a lapodon a pick toollal egymás mellé.
Nagyon pontosan dolgozz használd a háttéren levö szürke-fehér kiskockákat a pontos méretezéshez.
Duplicate the layer twice and place it side by side with the pick tool. Work very precisely, use the small gray and white cubes on the background for accurate sizing.
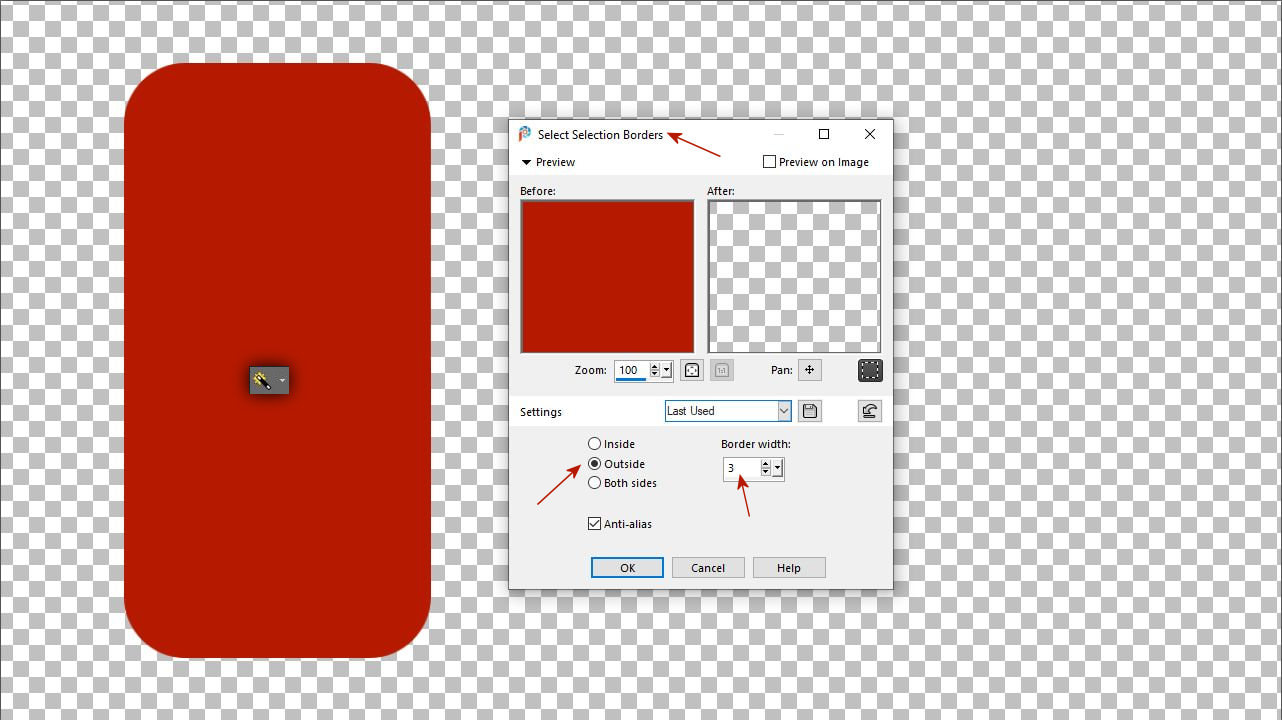
3. Most állj az alsó rétegre és kattint a piros részre a varázspálcával hogy kijelöld azt. Majd menj erre a menüpontra Selection - Modify - Select Selction Borders
Stay on the bottom layer and click on the red part with the magic wand to select it. Then go to this menu item Selection - Modify - Select Selection Borders
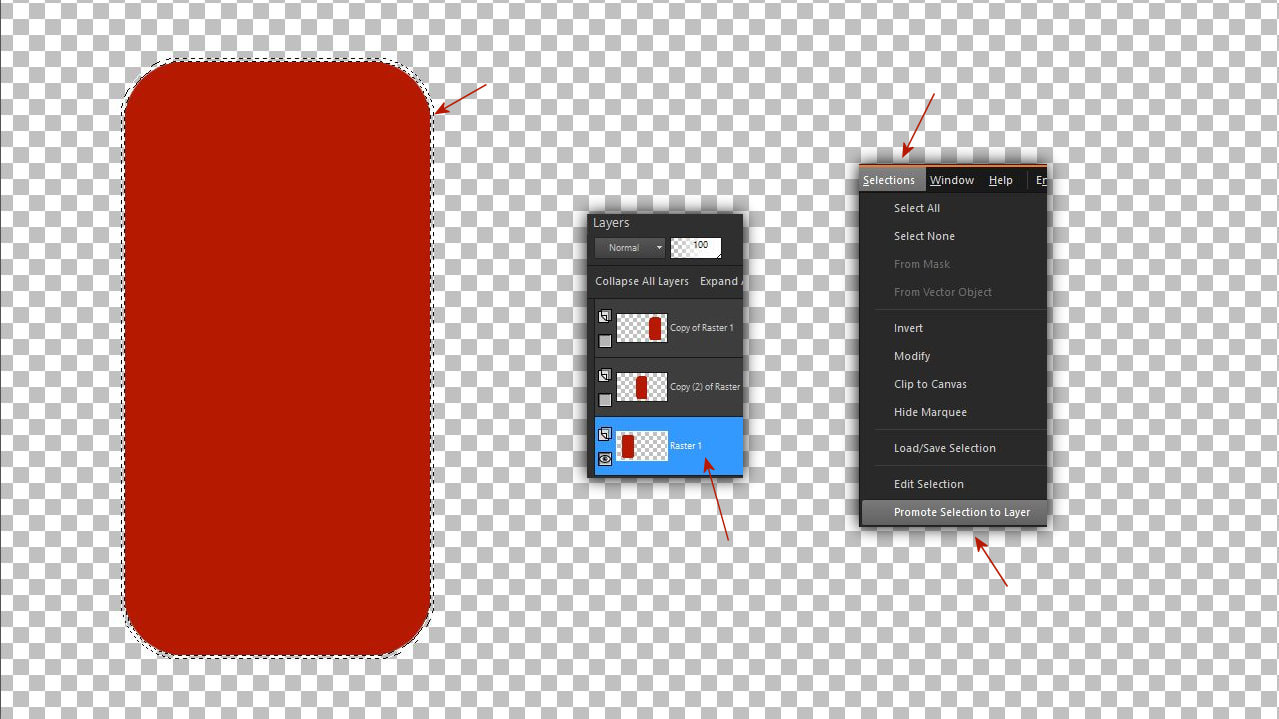
4. Promótáld a kijelölést egy új rétegként
Promote the selection as a new layer
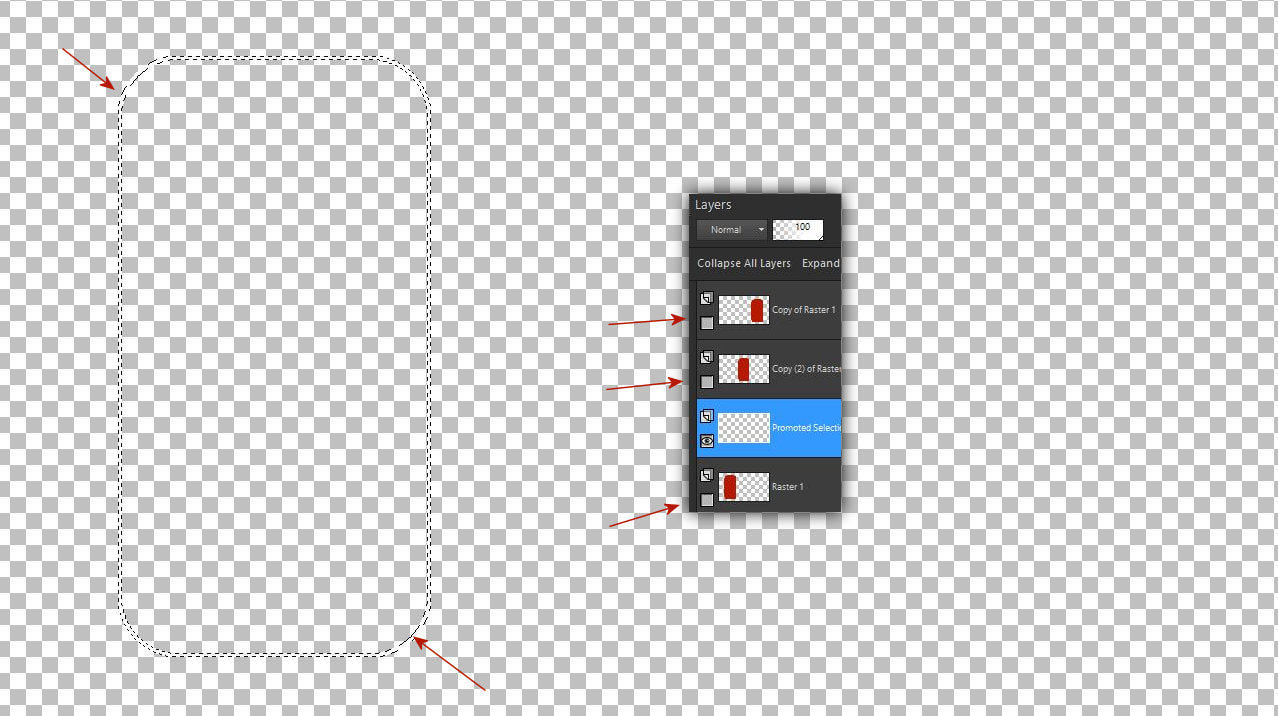
5. Csukd be az összes rétegszemet és állj a promótált rétegedre. Öntsd ki a kijelölést fehér színnel majd szüntesd meg a kijelölést.
Close all eye of layers and stay on your promoted layer. Fill the selection with white color and then selection none.
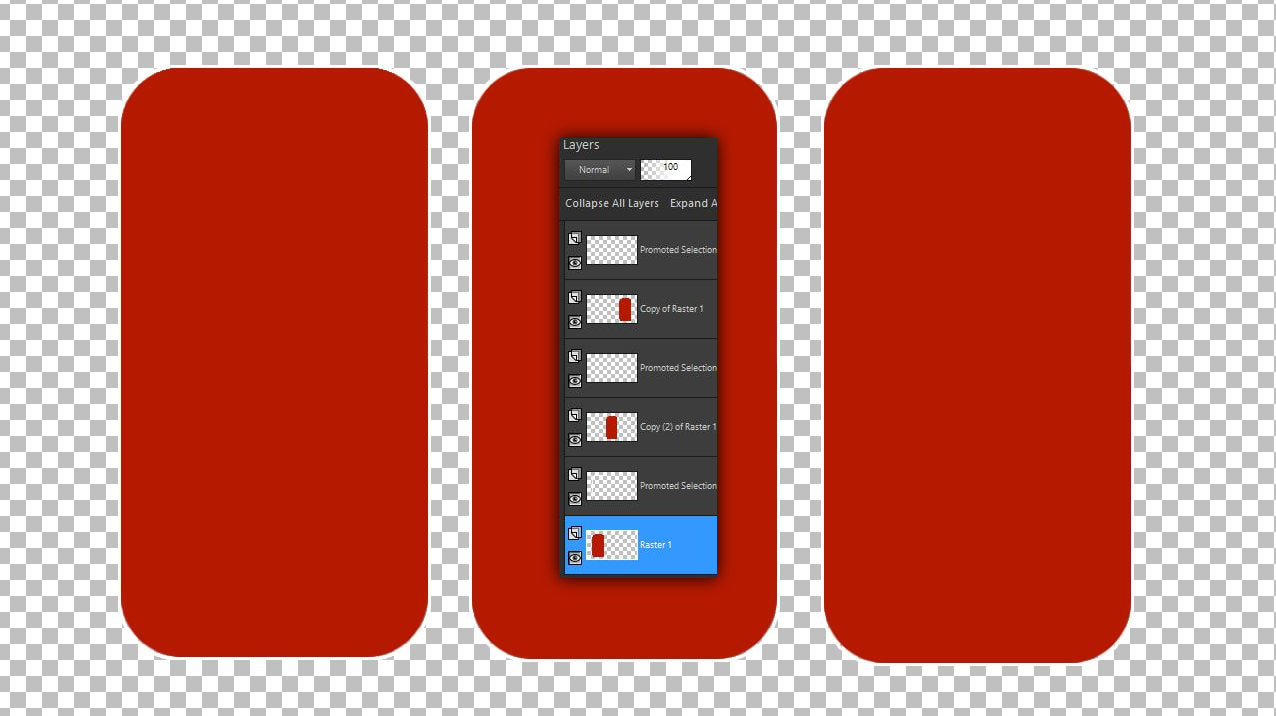
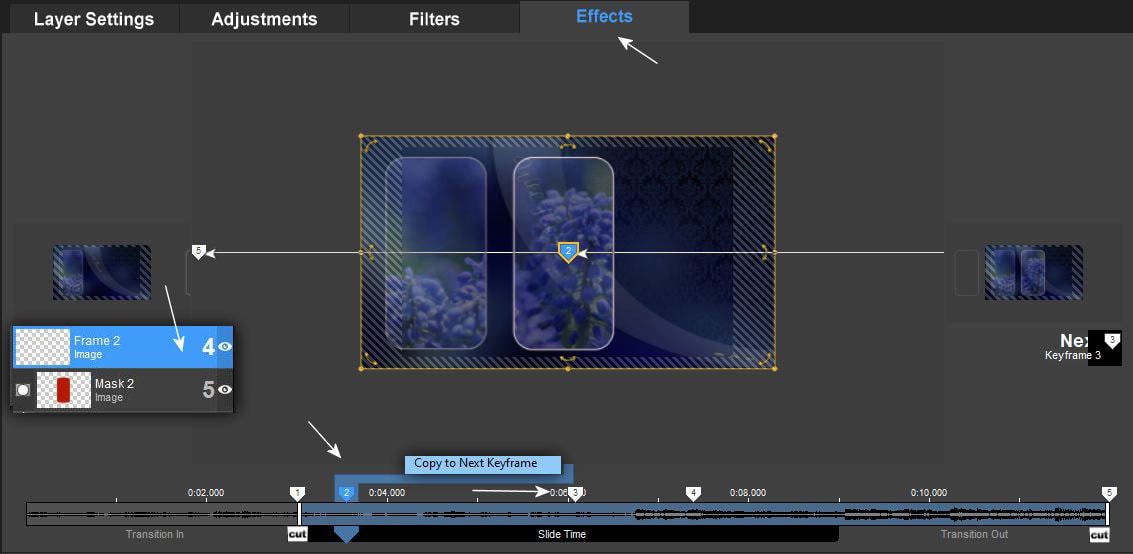
6. Csináld meg ezt a folyamatot az összes rétegeden. Vagyis mindegyik piros részhez készíts fehér kereteket.Igy hat rétegednek kell lenni. Egyenként kell elmentened a rétegeken lévö kertet és a hozzájuk tartozó maszkokat png formában.
Do this process on all your layers. In other words, make white frames for each red part. You should have six layers. You have to save the frame on the layers and the corresponding masks individually in png format.
7. Minden maszkodnak ugyanolyan sorszámmal rendelkezö keretednek kell lennie a könyvtáradban ahhoz, hogy a ProShowban fel tudd használni azokat.
All your masks must have frames with the same serial number in your library in order to use them in ProShow.
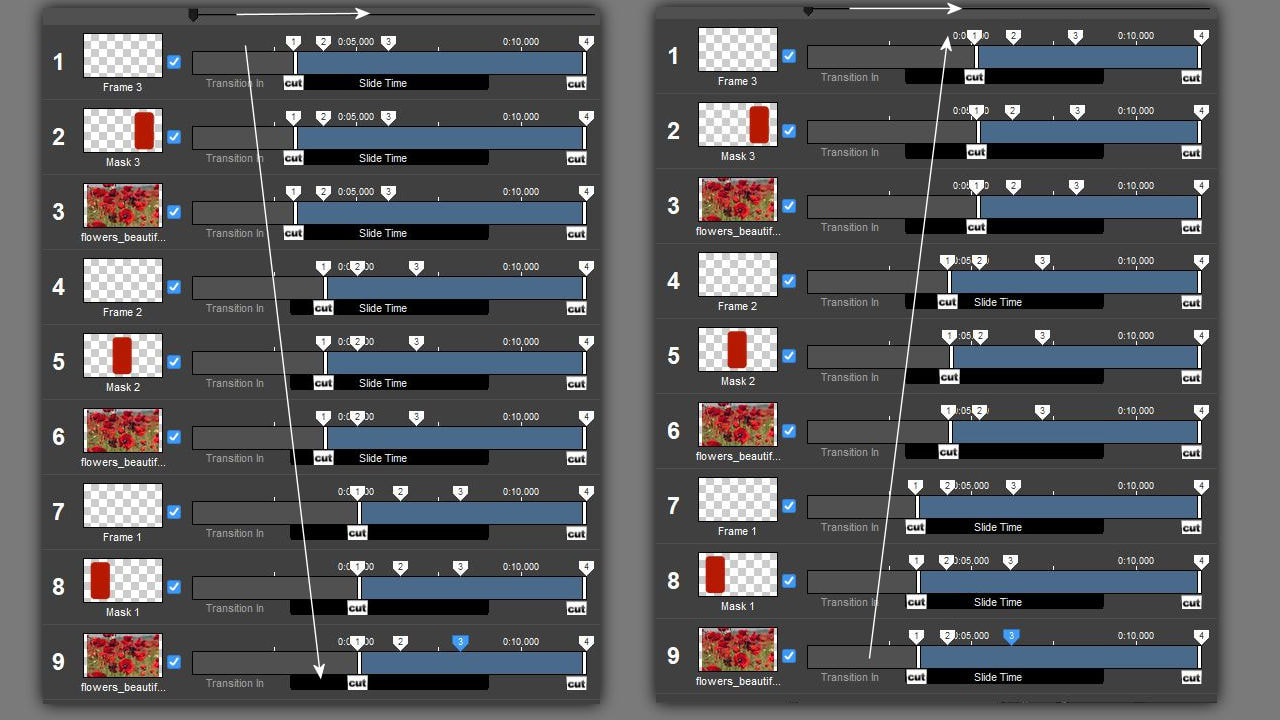
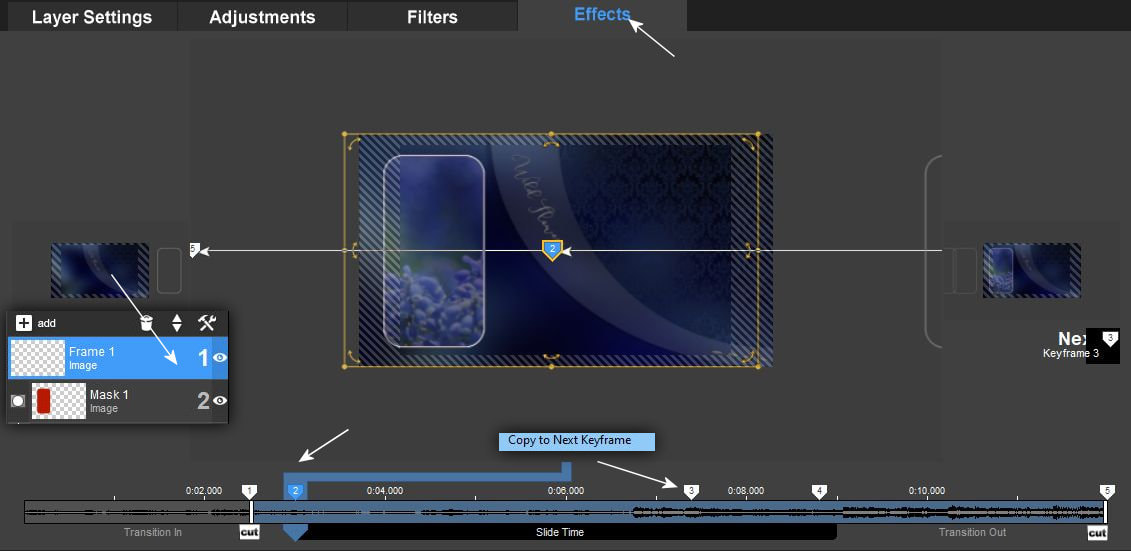
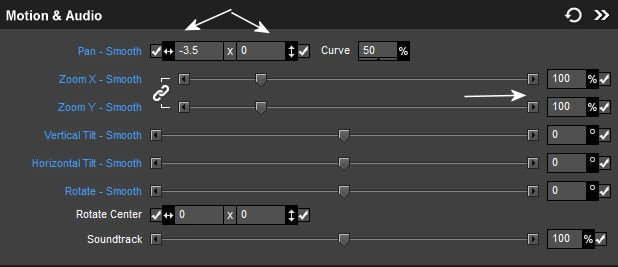
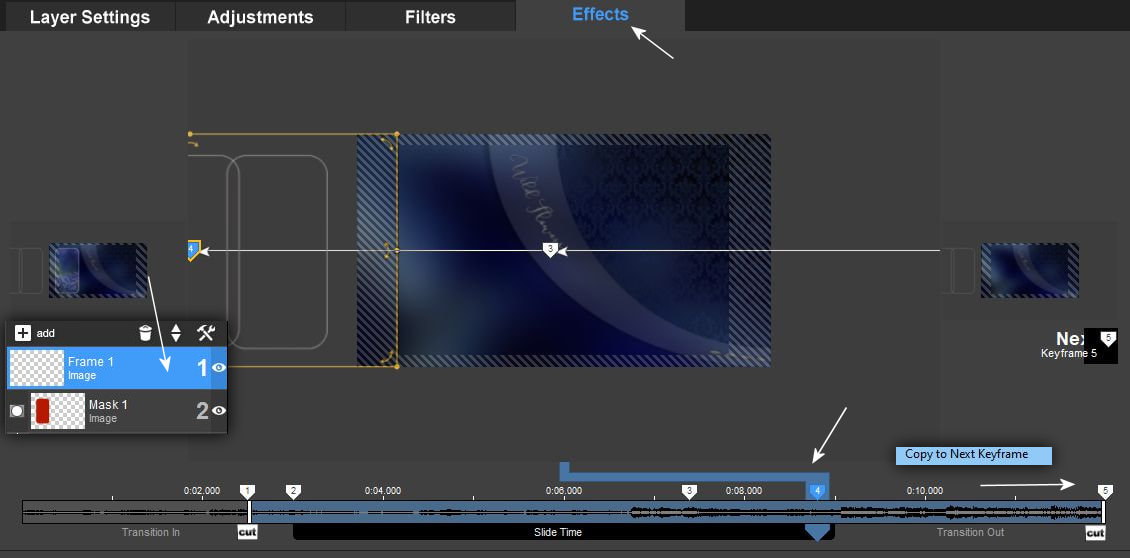
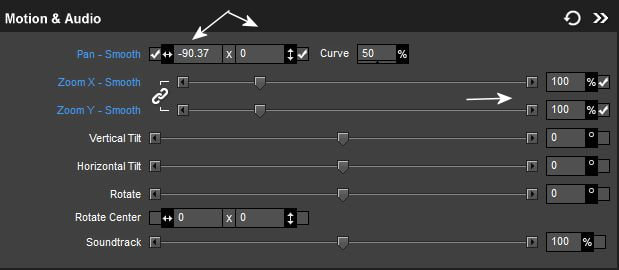
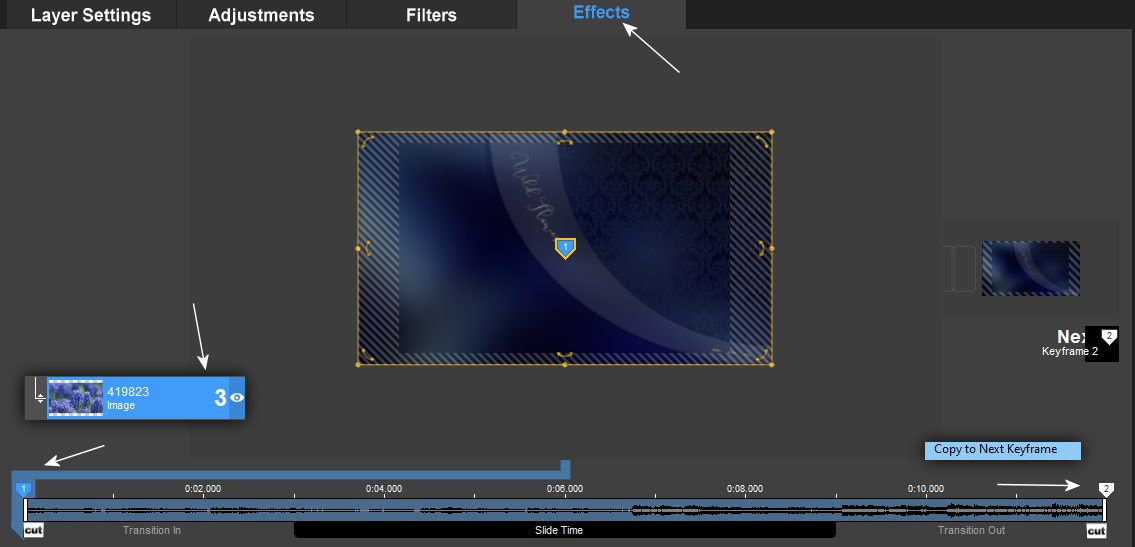
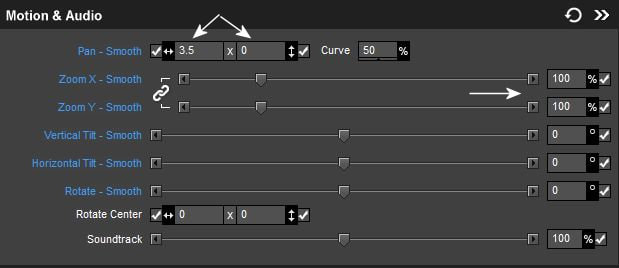
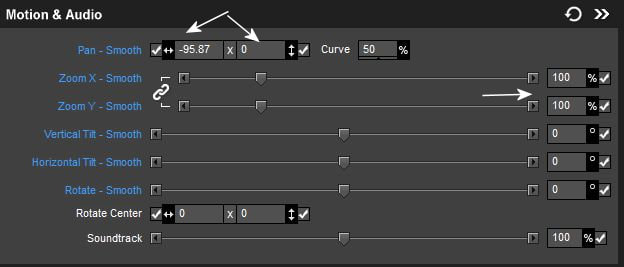
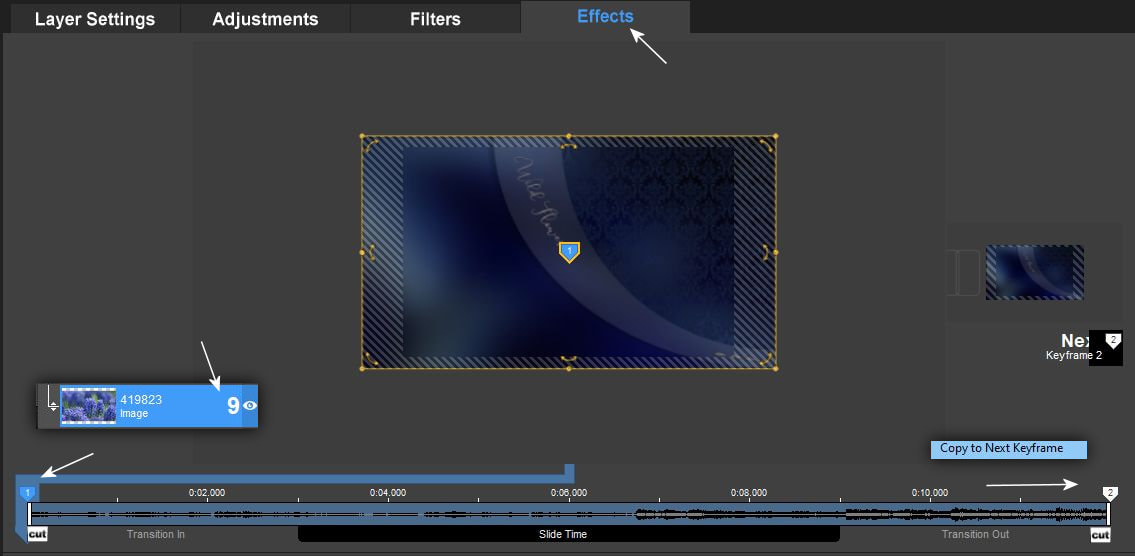
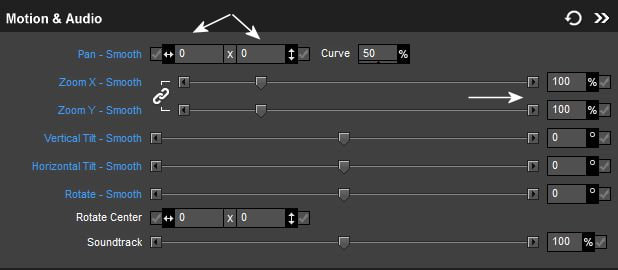
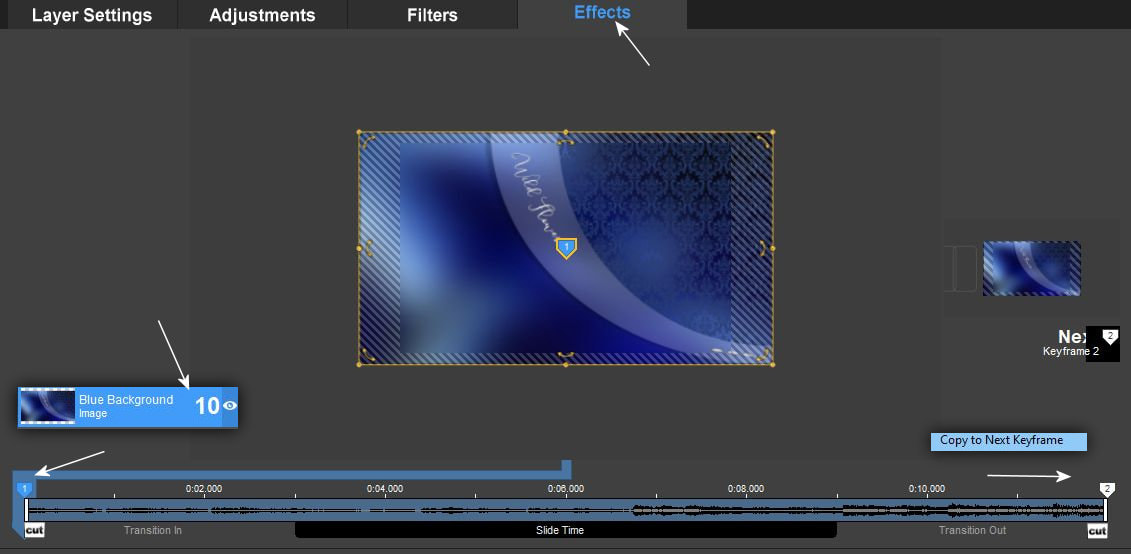
8. Az elsö slide van csak fotózva ehhez a feladathoz a többit nektek kell kitalálni. A keyframe pontokhoz sincsenek adatok csak azt látjátok, hogy függölegesen kb. hol helyezkednek el a pontok és melyeknek kell teljesen azonos helyen állnia vertikálisan. Magatoktól kell azokat elhelyezni most hiszen ez a feladat erröl szól.
The first slide is only photographed for this task, you have to figure out the rest. There is no data for the keyframe points either, you only see that vertically approx. where the points are located and which must be exactly the same vertically. You have to place them yourself now, as this task is about that.
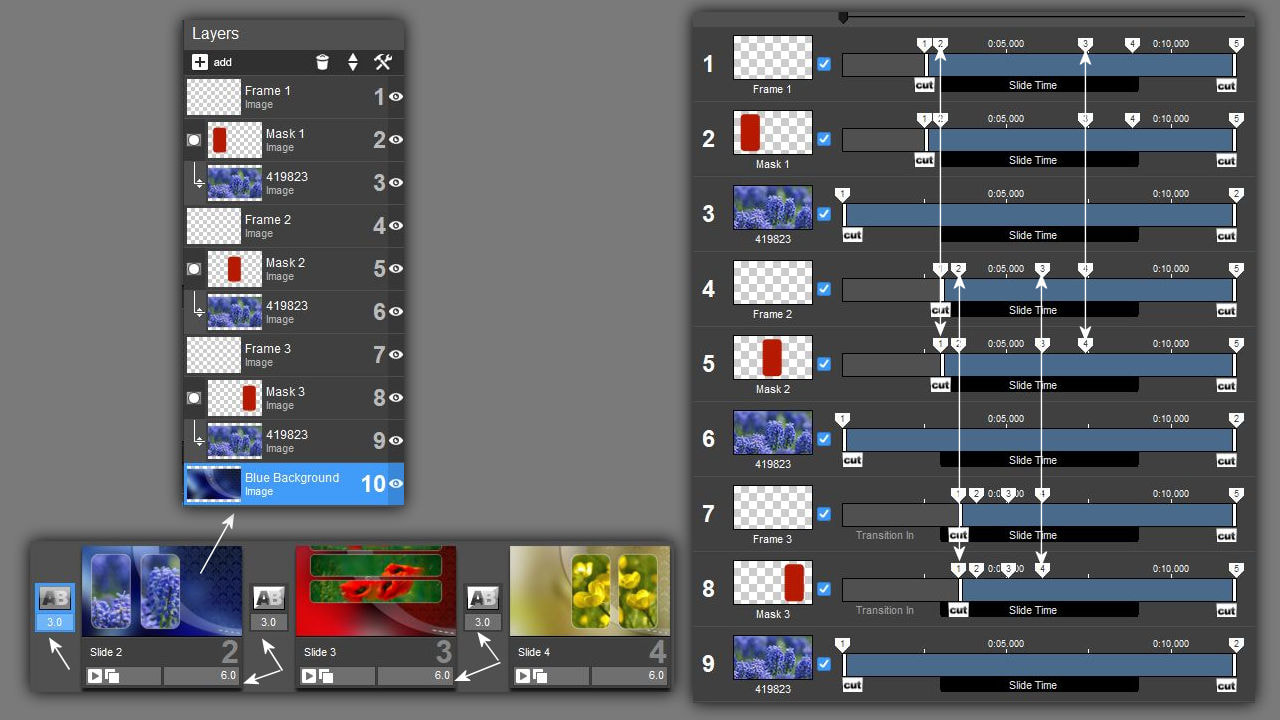
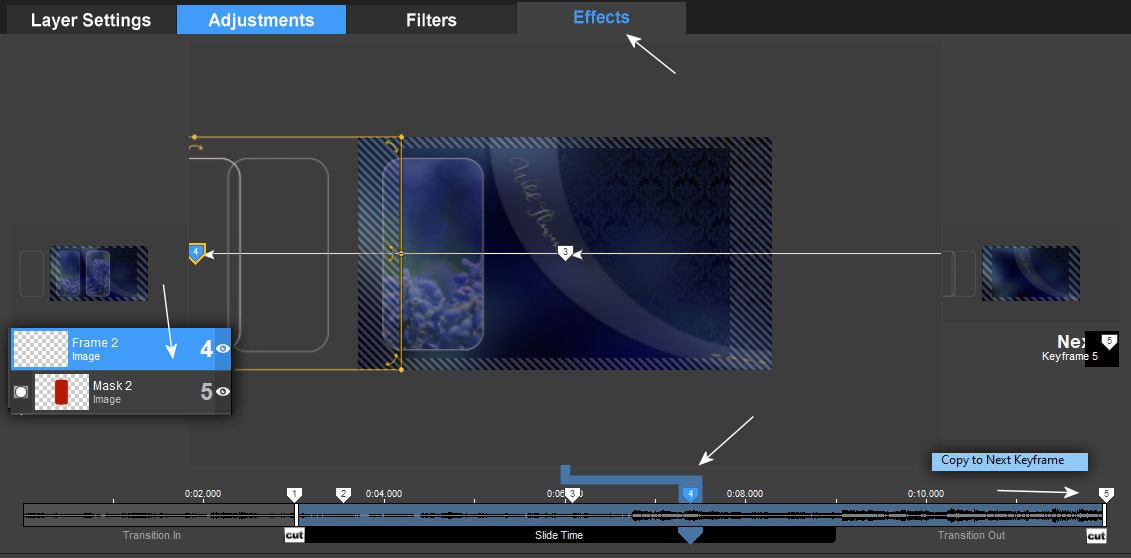
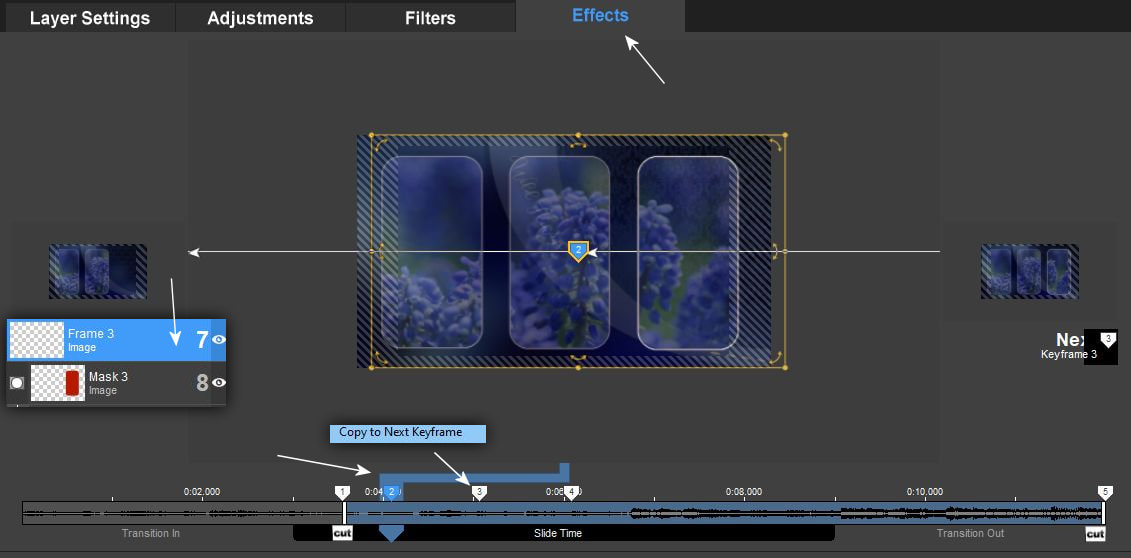
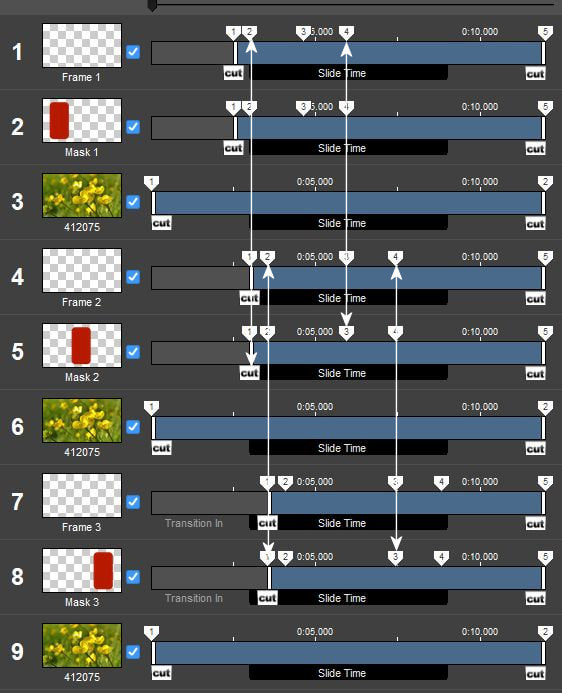
9. Itt talán jobban látjátok azt is, hogy valójában az egyes és a kettes rétegen hol vannak a keyframe pontok.
Here you can perhaps see better where the keyframe points are actually on layers one and two.
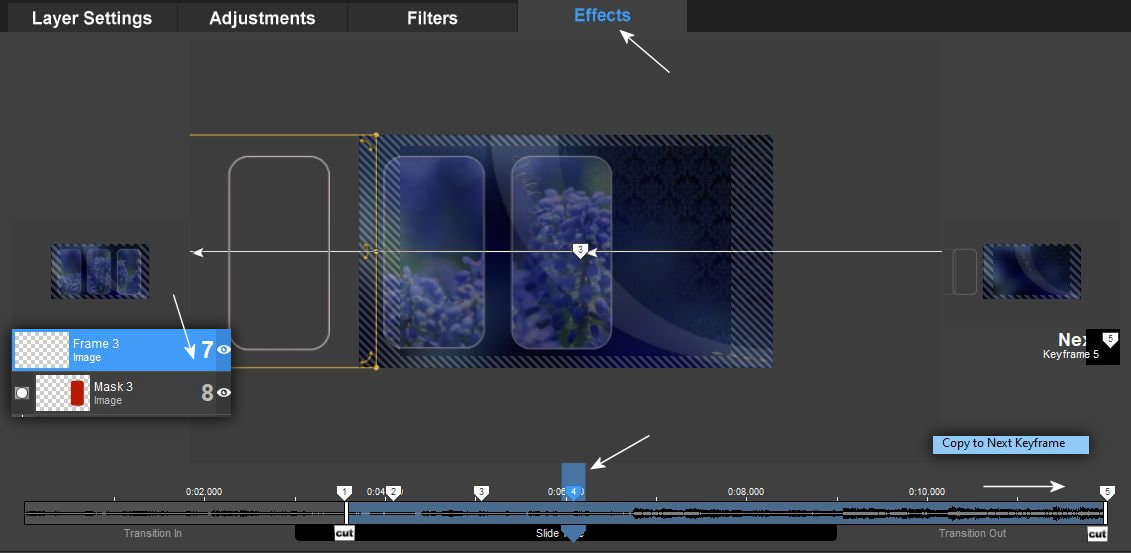
10.A továbbiakban kövesd a képeken látottakat és figyelmesen dolgozz.
In the future, follow what you see in the pictures and work carefully.
11.
12.
13.

14.
15.

16.

17.
18.
19.
20.
21.
22. A bemutatóban látható második slide keyframe pontjainak az elhelyezkedése
The location of the keyframe points of the second slide shown in the presentation
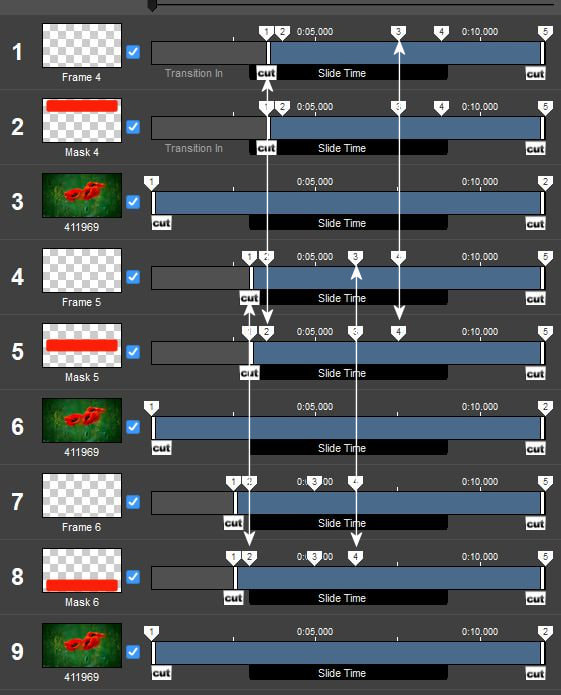
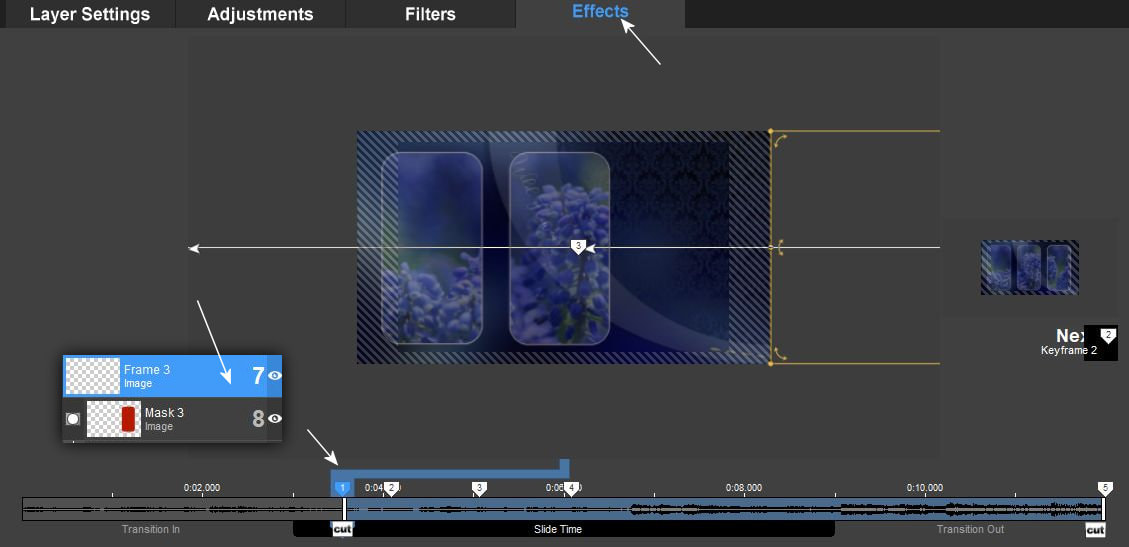
23. A bemutatóban látható harmadik slide keyframe pontjainak az elhelyezkedése
The location of the keyframe points of the third slide shown in the presentation
24. A bemutatóban látható negyedik slide keyframe pontjainak az elhelyezkedése
The location of the keyframe points of the fourth slide shown in the presentation