Folytassuk a munkát a speciális keret elkészítésével.
Let's continue the work by making the special frame.

Töltsd le ezt a csomagot ahhoz ,hogy elkezdhesd a munkát.
Download this package to get started.

| frame_pack.rar |
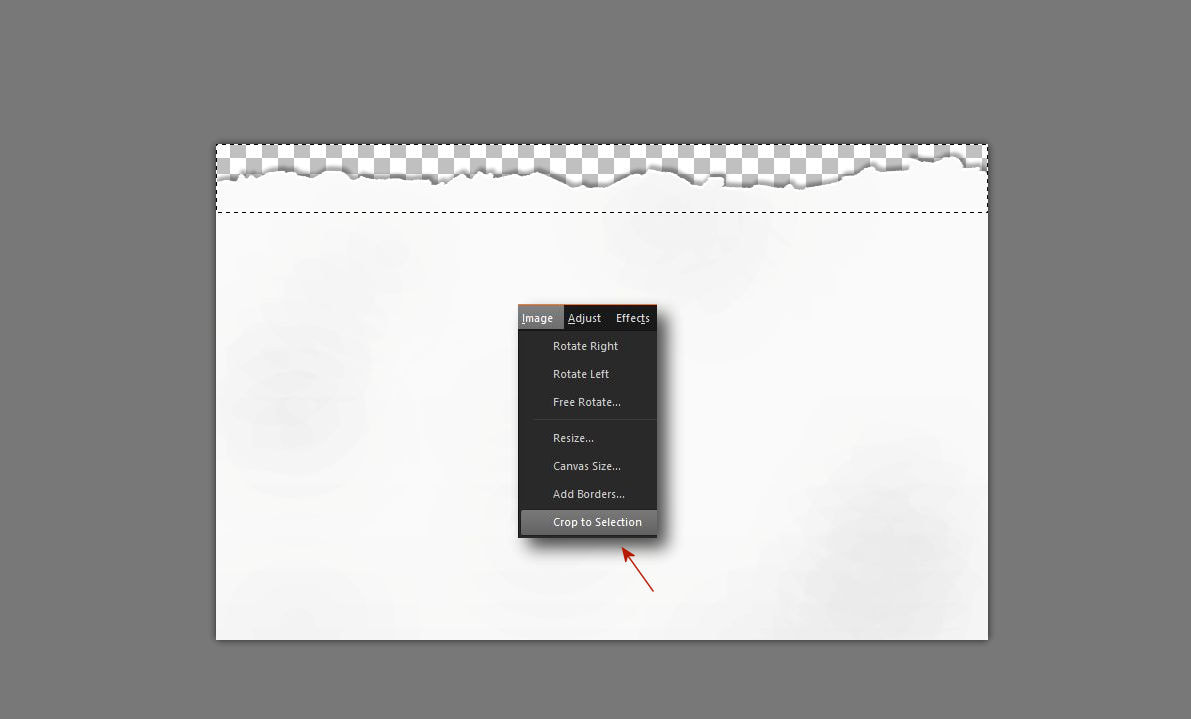
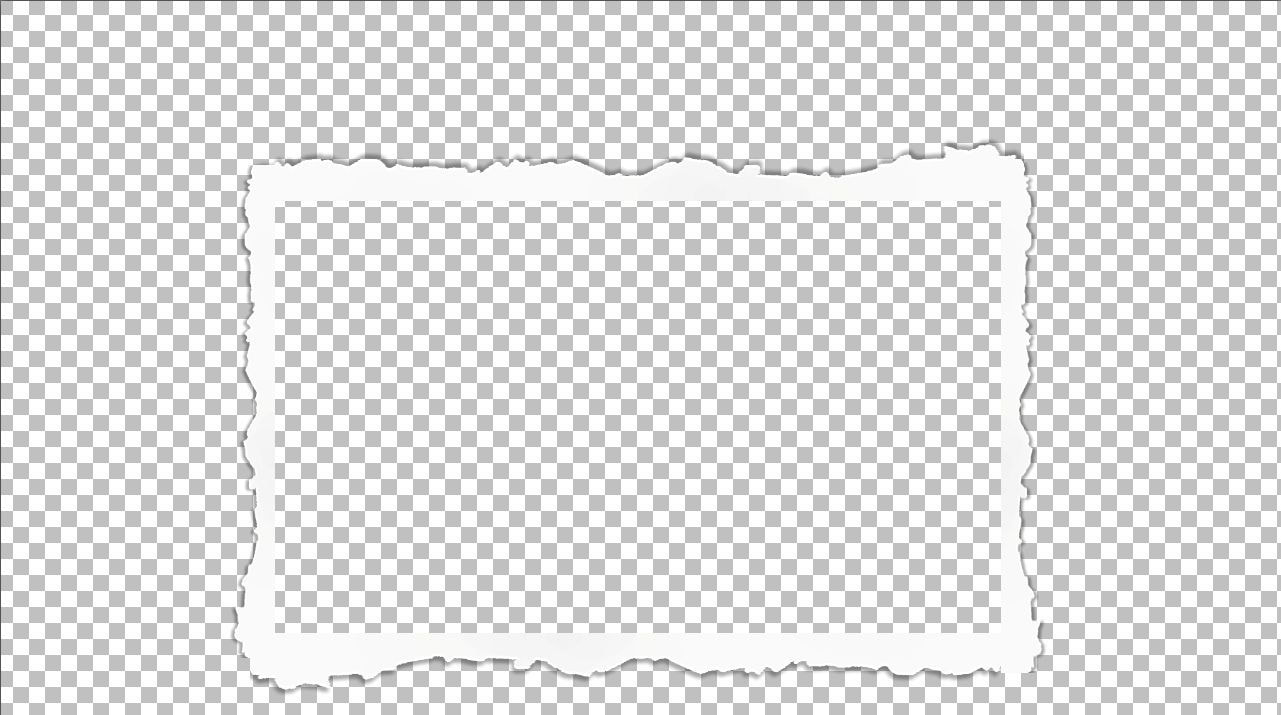
1. Vágd le a szélét a thorn papírnak amelyböl a kereted lesz.
Cut off the edge of the thorn paper that will be your frame.
2. Tölts be egy transparent 1280 x 720-as hátteret. Másold be új rétegként a kivágott darabodat.
Load a transparent 1280 x 720 background. Copy your cut piece as a new layer.
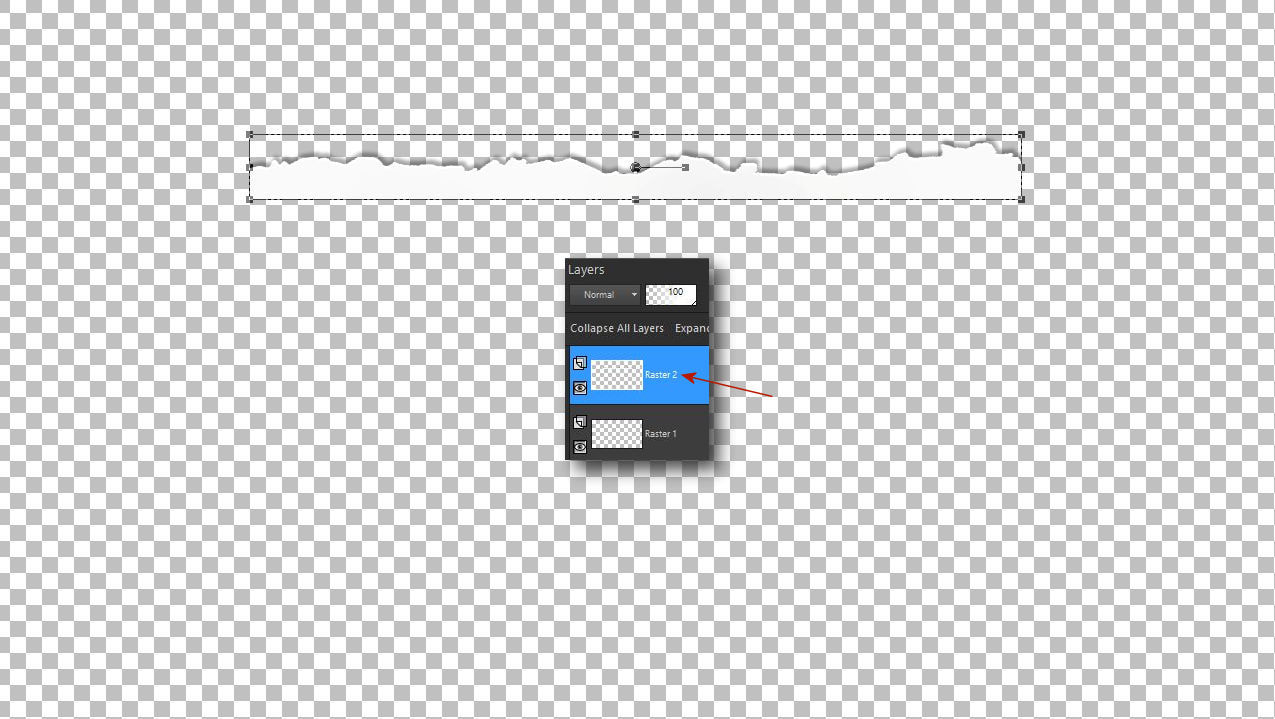
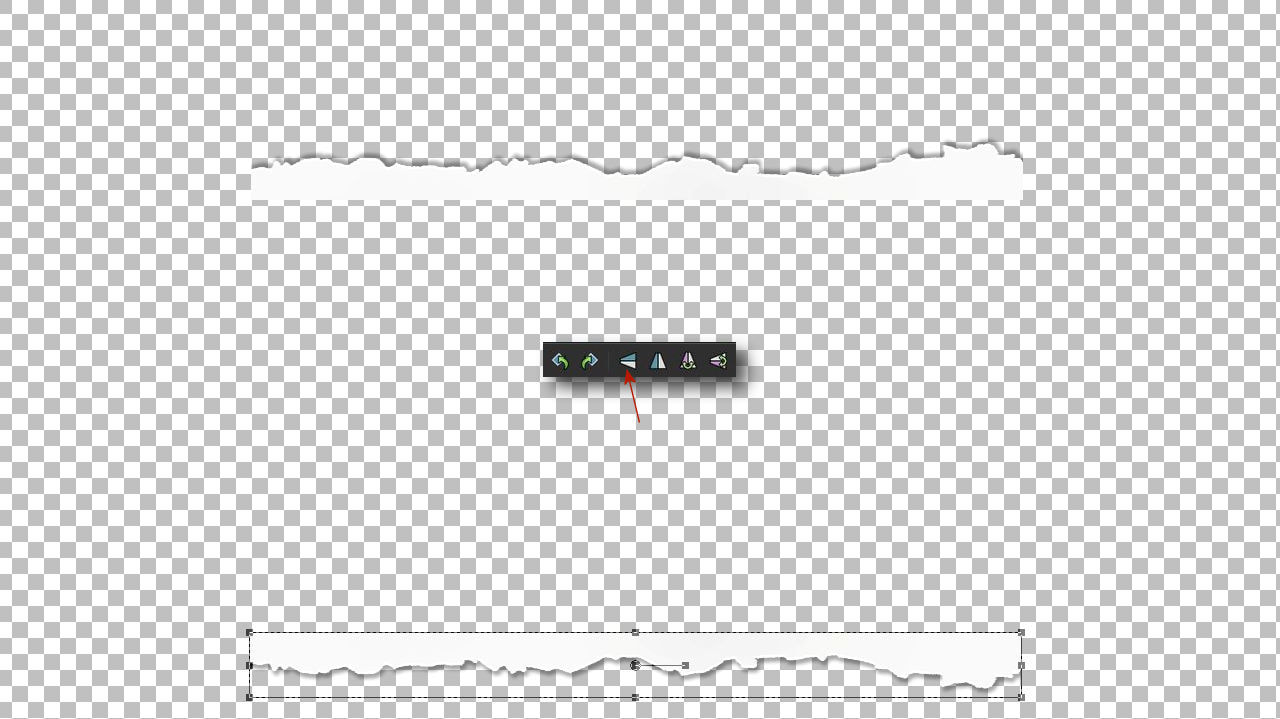
3. Duplázd meg a réteget és tükrözd át alulra.
Duplicate the layer and mirror down.
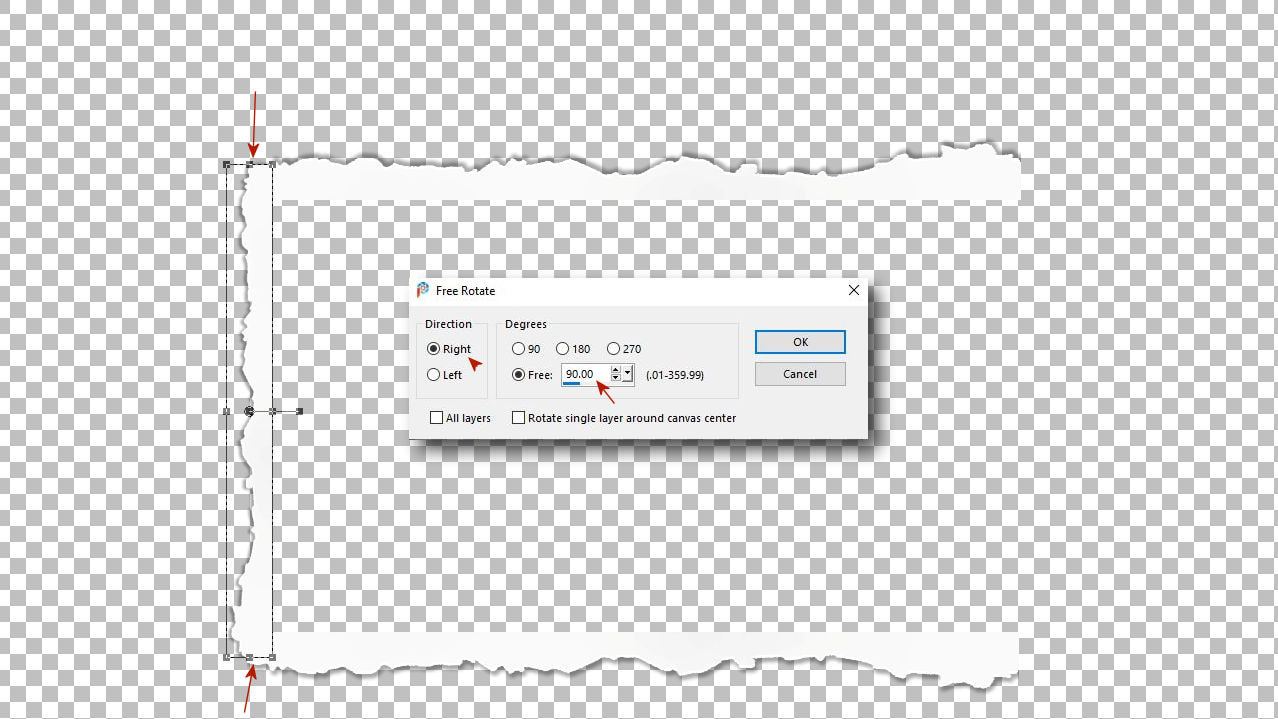
4. Aztán ismét duplázd meg a réteget és forgasd el
Then double the layer again and rotate it
5. Duplázd meg ezt a réteget is és helyezd a jobboldalra átfordítva
Duplicate this layer as well and place it on the right side

6. Add össze a rétegeket
Merge down the layers together
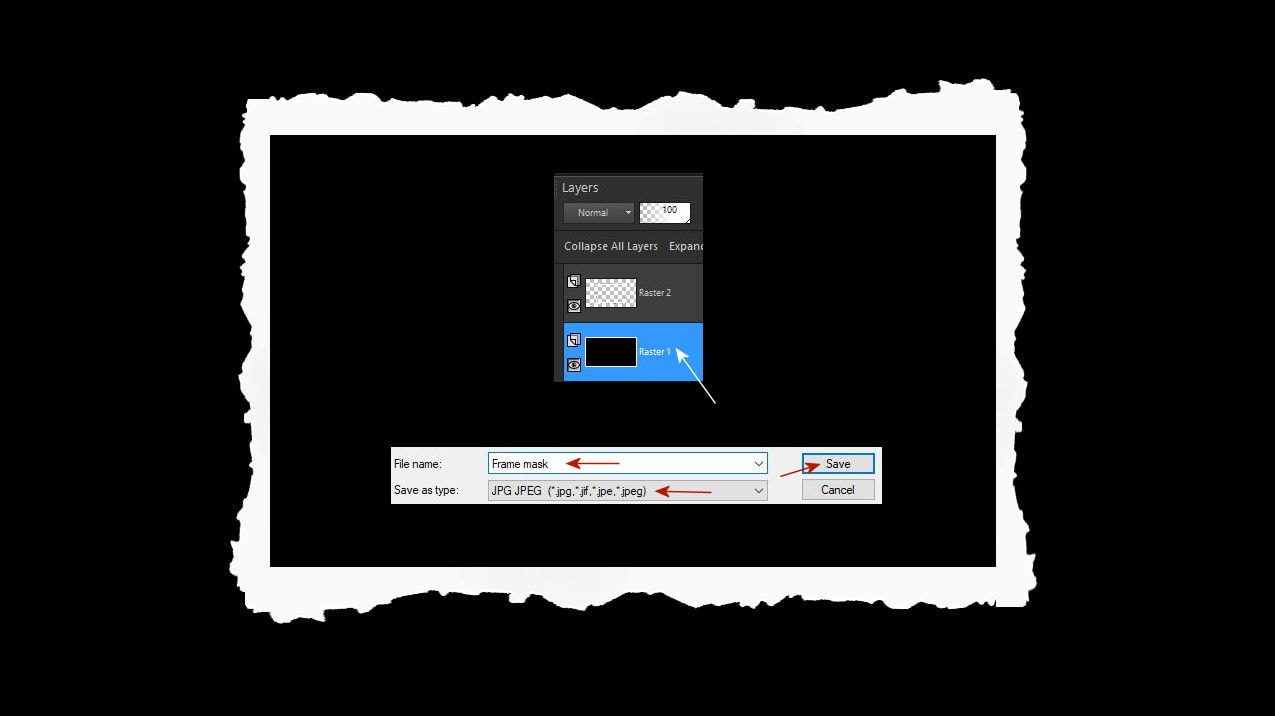
7. Az alsó réteget öntsd ki fekete színnel add össze a rétegeket és mentsd el Jpg formátumban keret maszk néven.
Fill up the bottom layer with black color, merge the layers and save in Jpg format as frame mask.
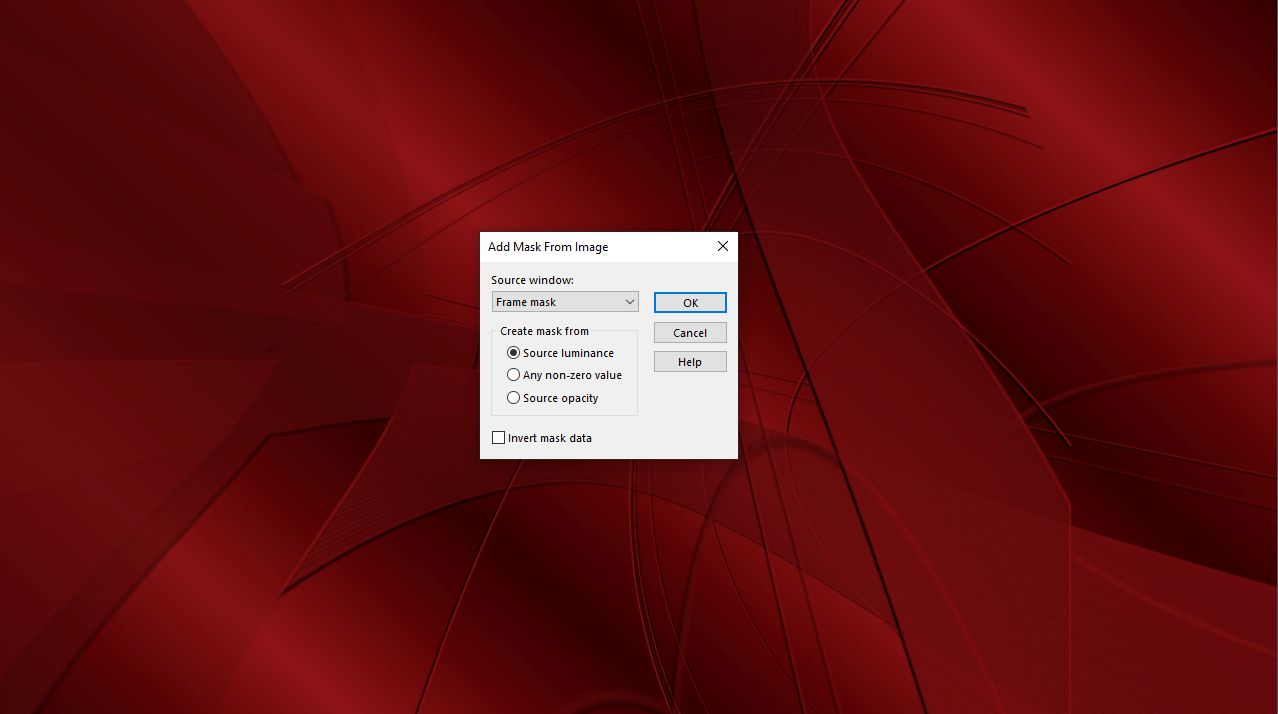
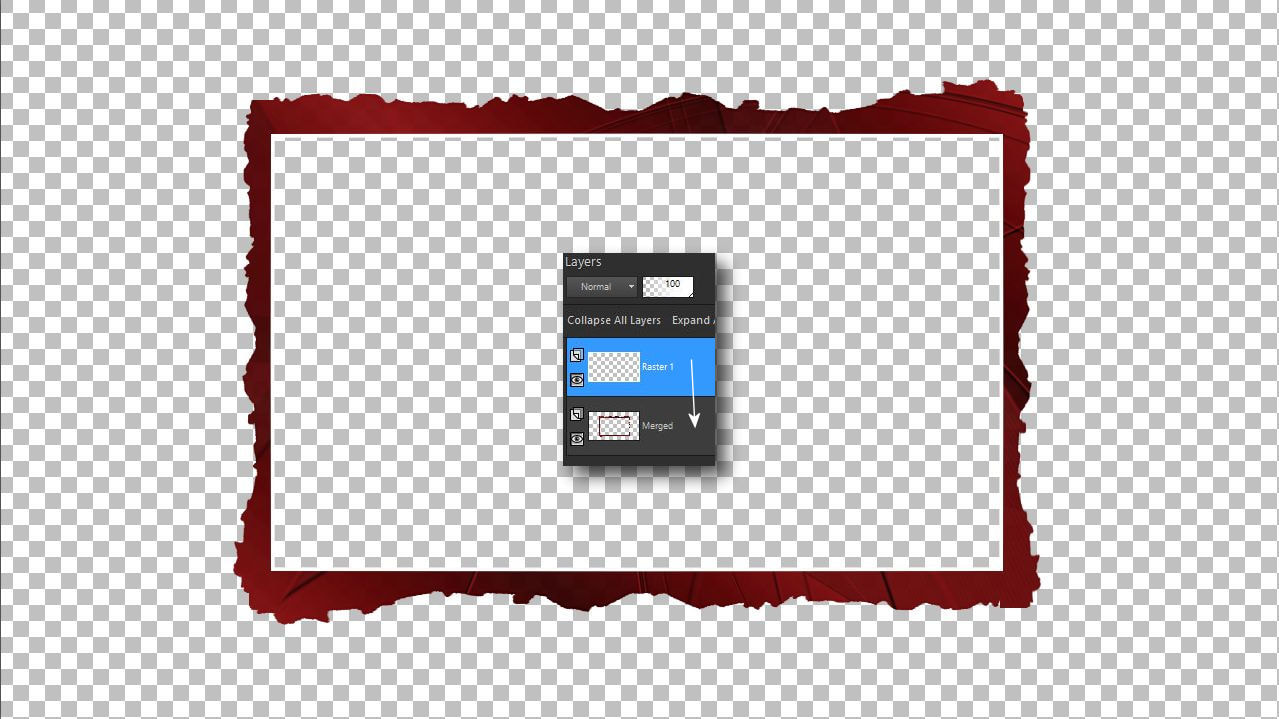
8. Hozd be a piros háttérképet és maszkot majd végezd el a maszkolást.
Load in the red wallpaper and mask too and perform the masking.
9. Hozz be egy új raster réteget és jelölj körbe egy vékony keretet az ój rétegen.
Selection - Modify - Select Selection Borders
Bring in a new raster layer and mark a thin border around the old layer. Selection - Modify - Select Selection Borders
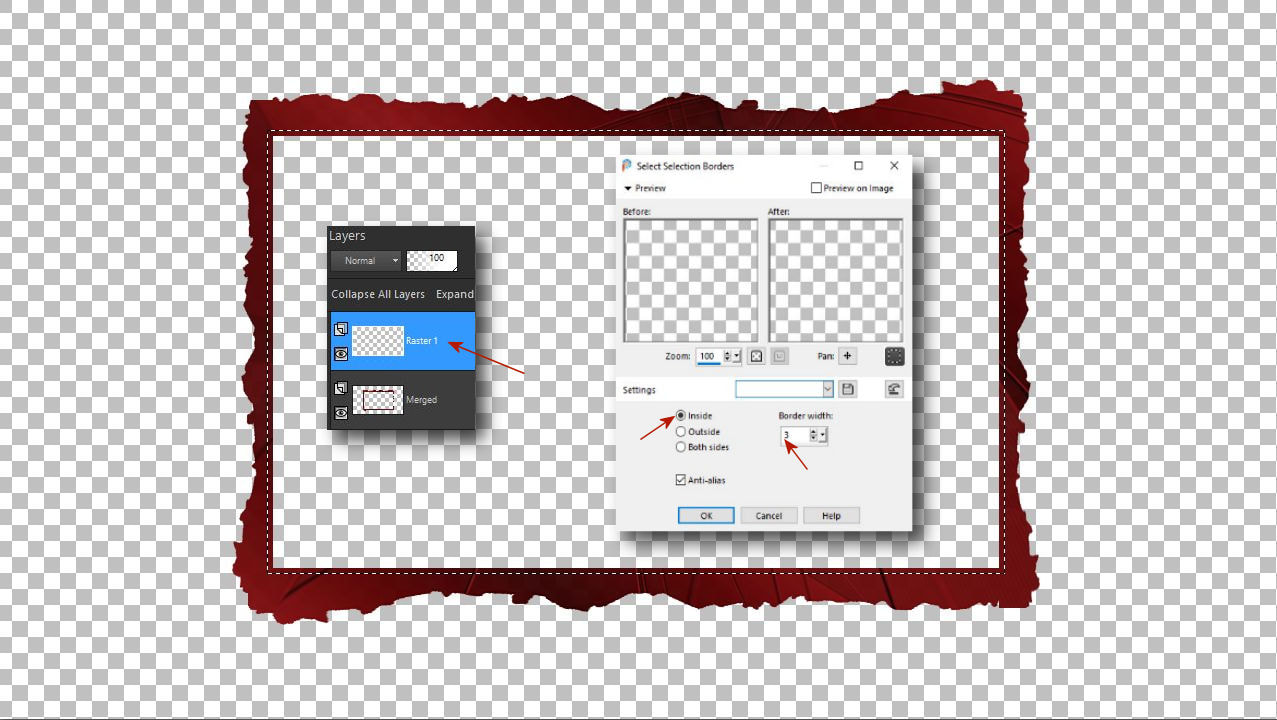
10. Csukd be az alsó réteg szemét. Állj a felsö rétegre és öntsd ki a kijelölésd fehér színnel.
Close the eyes of the bottom layer. Stay on the top layer and fill up your selection with white color.
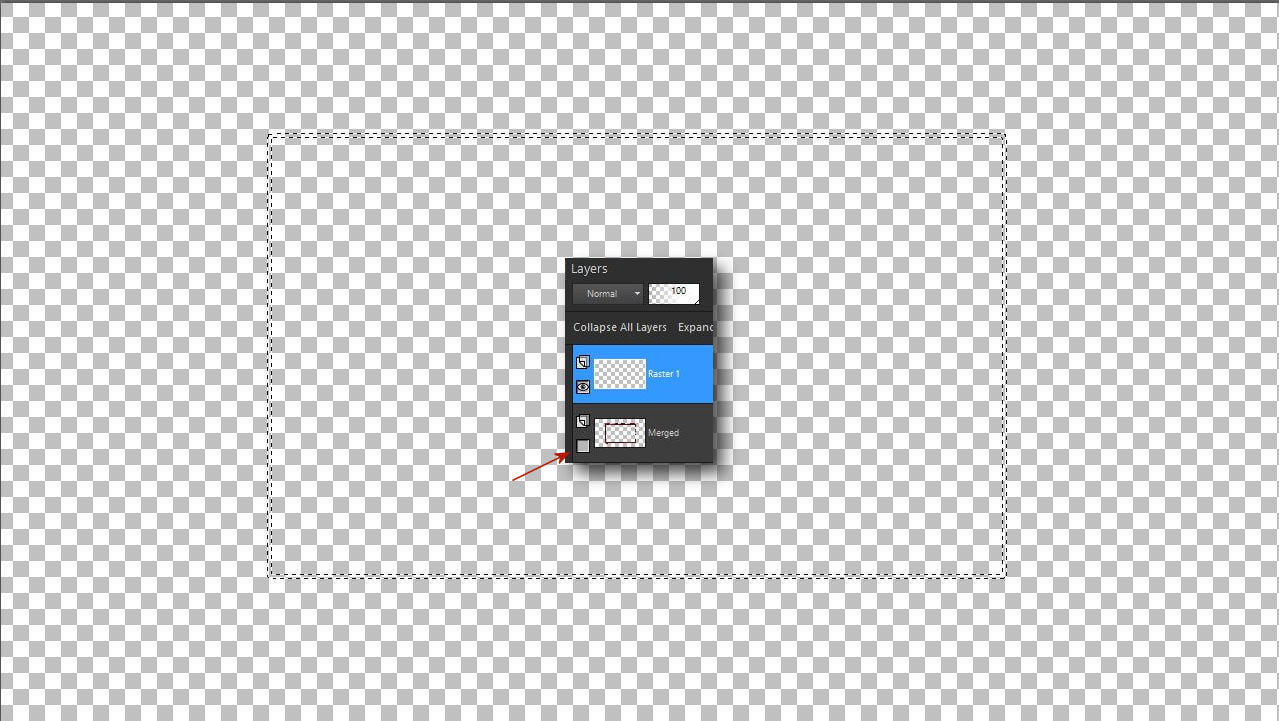
11. Nyisd ki az alsó rétegszemet és add össze a rétegeket.
Open the lower layer mesh and add the layers together.
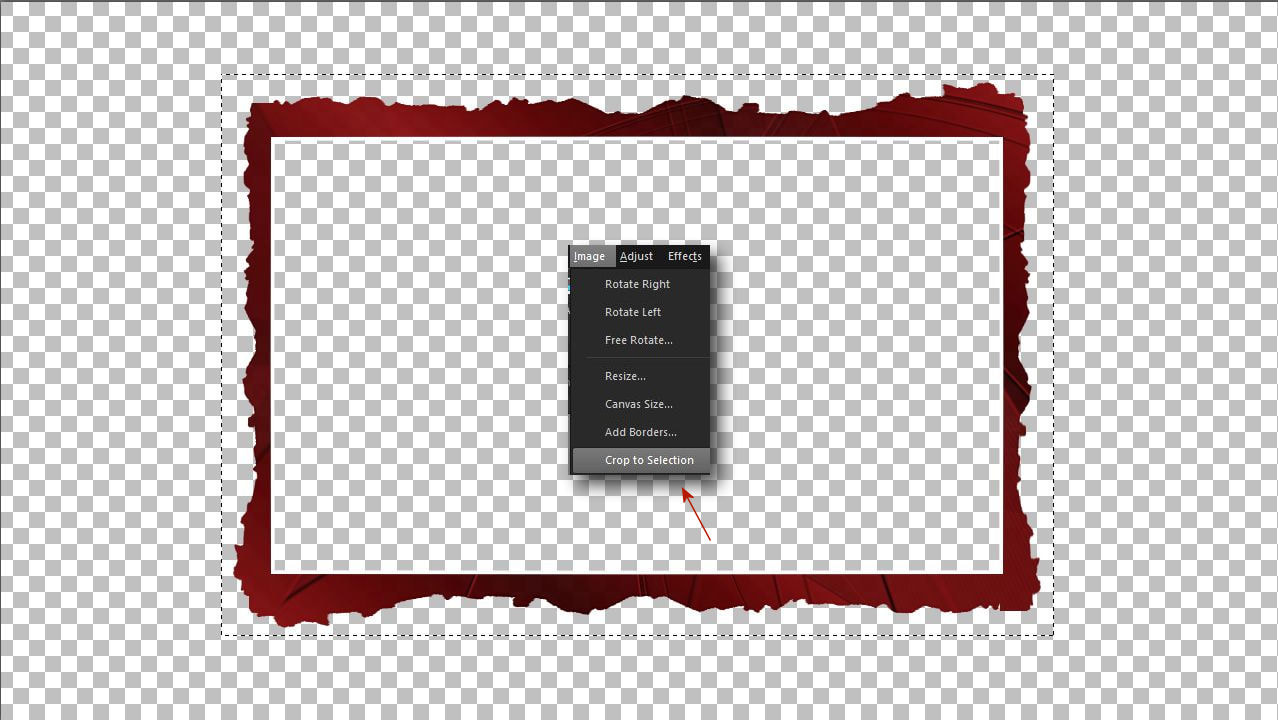
12. Jelöld ki a keretedet és vágd ki majd mentsd el png formátumban.
Select your frame and cut it out and save it in png format.
13. Ha jól dolgoztál készen vagy az egyedi csokordekoroddal és a keretettel a videódhoz. A látvány nagyon szépen néz ki.
If you have worked well, you are ready with your unique bouquet decor and the frame for your video. The view looks very nice.
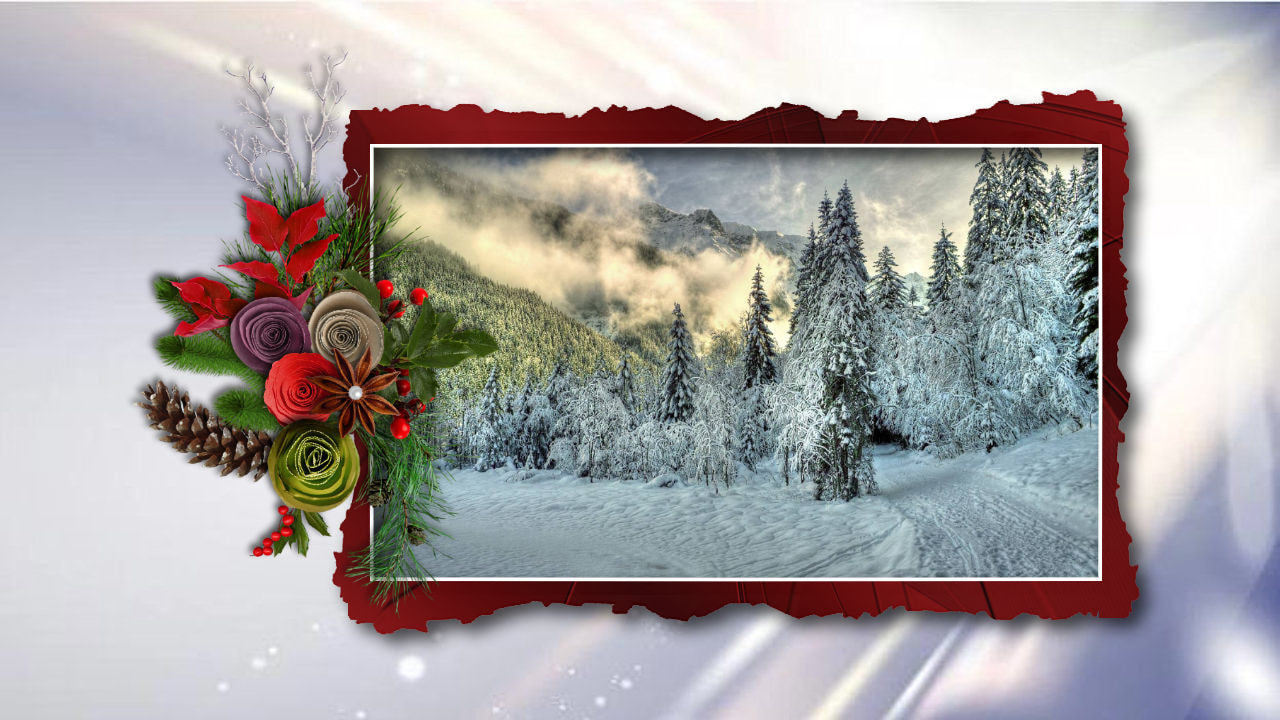
Mostmár csak a Pro Show Producerben kell dolgoznod, hogy ezeket a szép dekorokat fel tudd használni egy szép karácsonyi videóhoz.
Now you only have to work in Pro Show Producer to be able to use these beautiful decorations for a beautiful Christmas video.
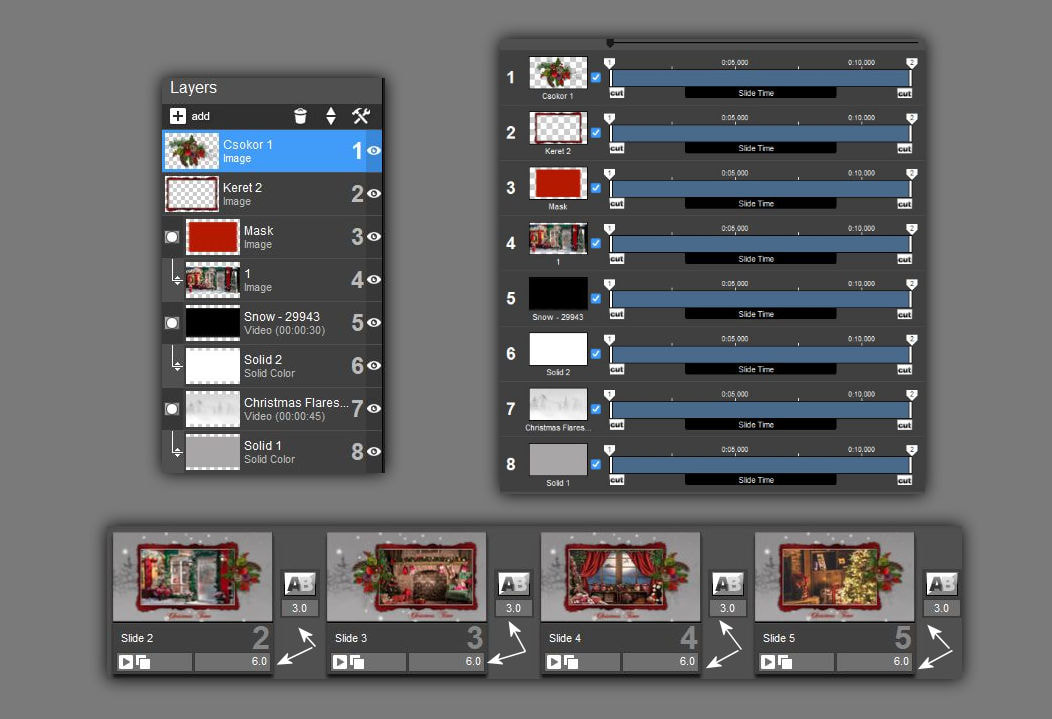
14. Igy dolgozz a ProShowban. A rétegeket így rakd össze a csempeidök pedig 6 és 3 másodpercen állnak. Mint az látható nincsenek plusz keyrfame pontok használva. Az 5-ös és a 7-es réteghez szükséges videófájlokat itt a kép alatt letölthetitek. Mindegyiket maszkolnotok kell a havat fehér színnel én a másikhoz kicsit szürkésebb színt maszkoltam.
That's how you work in ProShow. Put the layers together like this, and your tiles will stand at 6 and 3 seconds. As you can see, no extra keyrfame points are used. The video files required for layers 5 and 7 can be downloaded here under the image. You have to mask each of them with the snow white color, I masked the other a slightly grayer color.
15. Töltsd le a videó file-kat.
Download the video files.
| video_file_pack.rar |
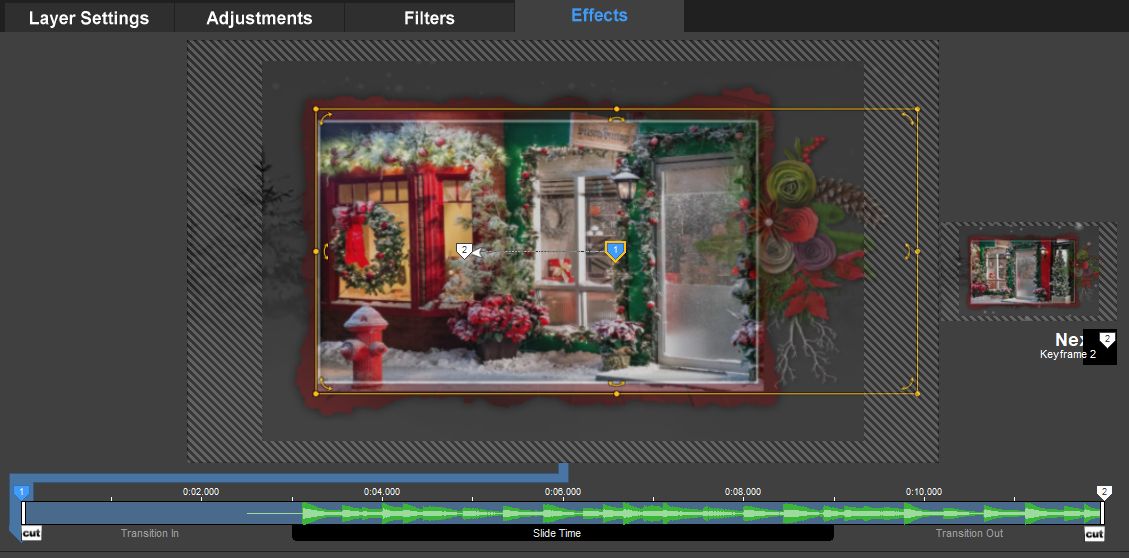
16. Mivel a képeinket csak jobbra, balra mozgatjuk valamint zoomoljuk a képeidet ehhez a videóhoz 1003 x 475 -re méretezd. Ha a képedet balra szeretnéd mozgatni akkor az egyes keyframe ponton így helyezd el. Itt nekem a képméretem a kerethez 80%-on van.
Since we only move our images to the right, left and zoom, please resize your images to 1003 x 475 for this video. If you want to move your image to the left, place it this way at each keyframe point. Here, my image size for the frame is at 80%.
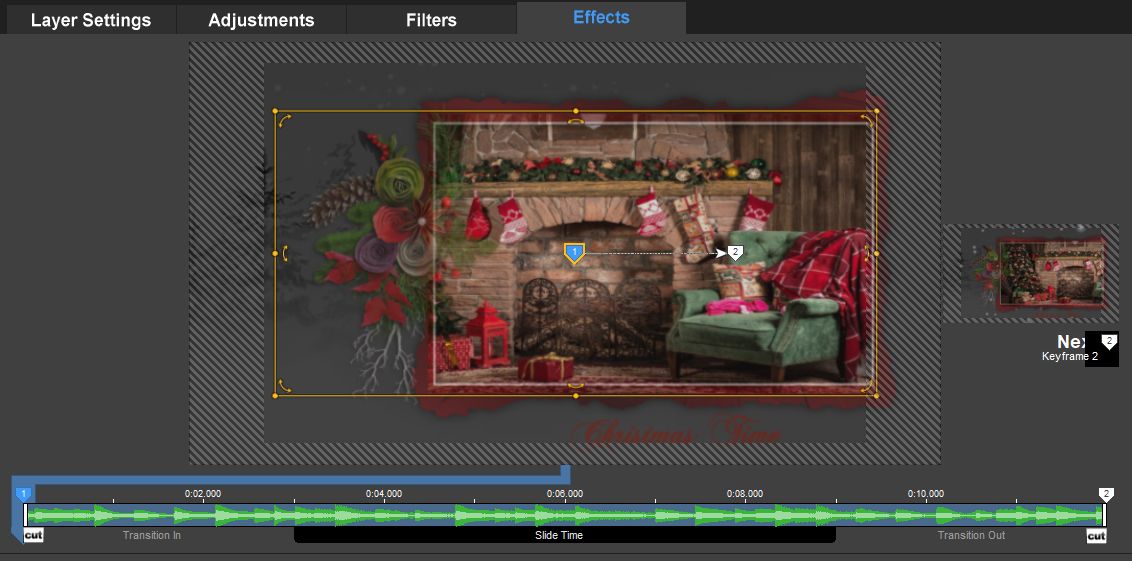
17. Ha jobbra szeretnéd mozgatni akkor a képed helyzete az 1-es keyframe ponton ilyen.
If you want to move it to the right, the position of your image at keyframe point 1 is like this.
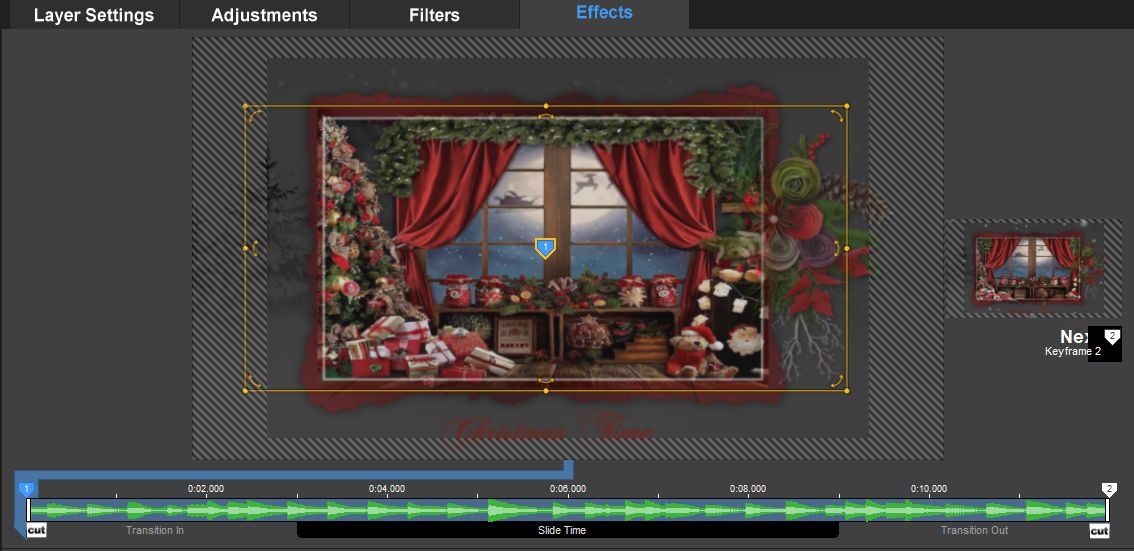
18. Ha zoomolni szeretnél akkor a képedet középen helyezd el.
If you want to zoom, place your image in the middle.
19. A videódban helyezheted a kereted éa vele együtt a maszkodat is kicsit jobboldalra így a csokrod is szépen elfér a baloldalon.
In your video, you can place your frame and, together with it, your mask a little to the right, so that your bouquet also fits nicely on the left.
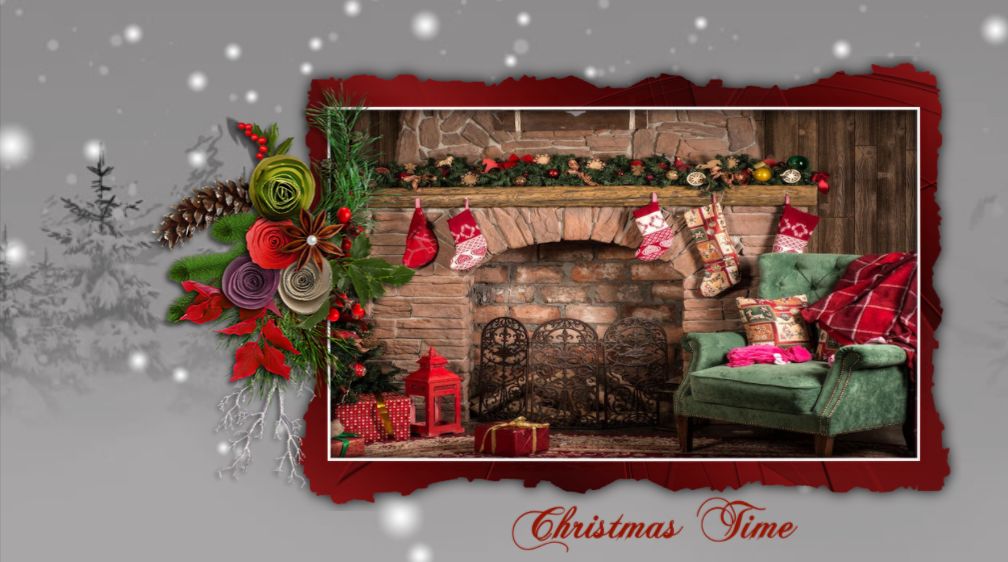
20. A másik csempén viszont csinálhatod fordítva. A látványa ennek a videónak igazán csodálatos.
You can do the opposite on the other tile. The visuals of this video are truly amazing.