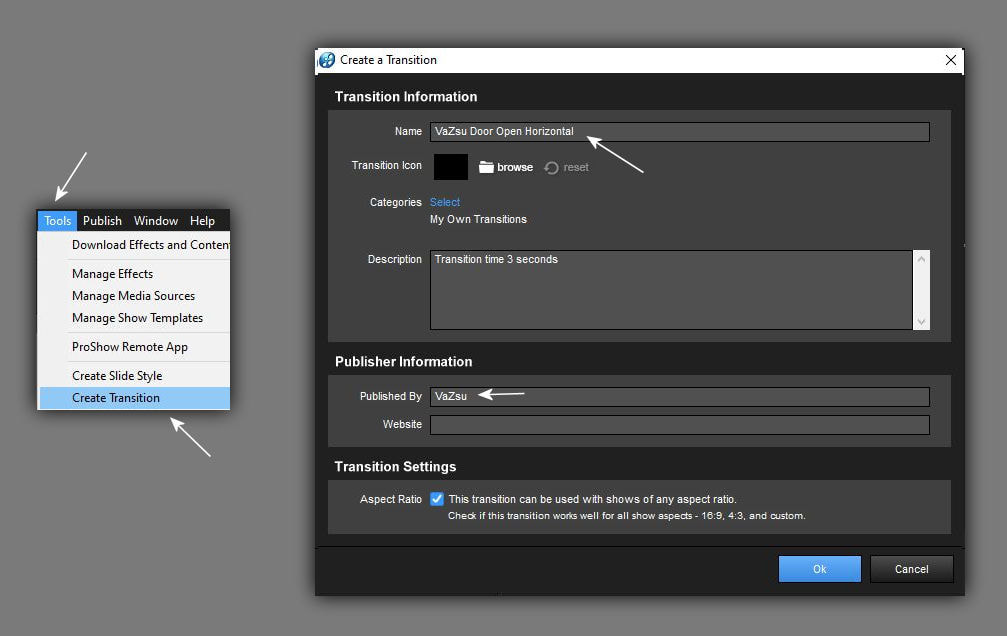
Ebben a bemutatóban kezdjük az Ajtó típusú áttünések elkészítését. Mindegyik áttünés 7 rétegböl áll. Az elsö 11 lépésekben az rétegek kialakítása mindegyik típusnál ugyanaz ezért csak itt az elsö leírásban mutatom azt meg a többinél csak jelezni fogom melyek azok a képek amelyeket itt kell használni majd.
In this tutorial, we'll start creating Door Style transitions. Each transition consists of 7 layers. In the first 11 steps, the design of the layers is the same for each type, so I will only show it here in the first description, and for the others I will only indicate which images will be used here.

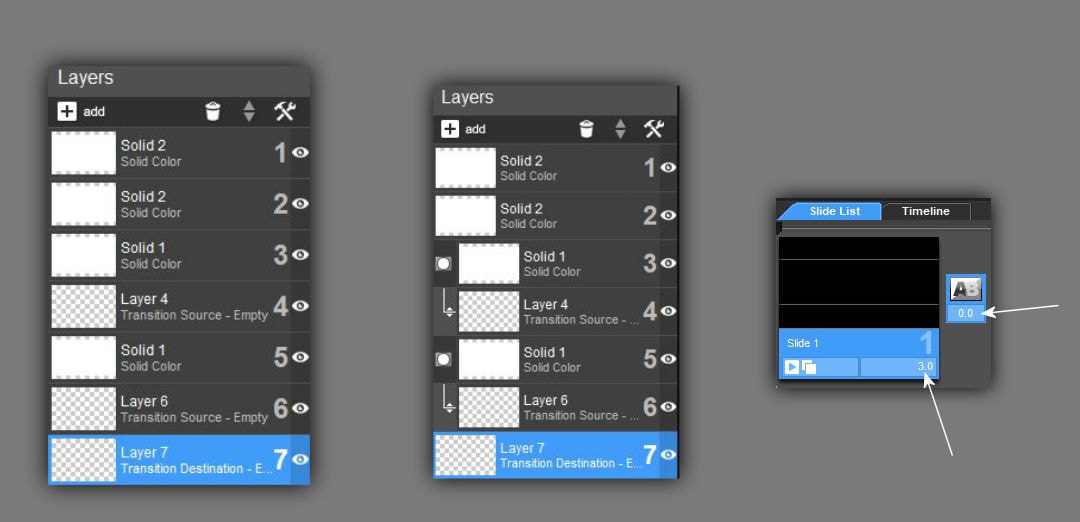
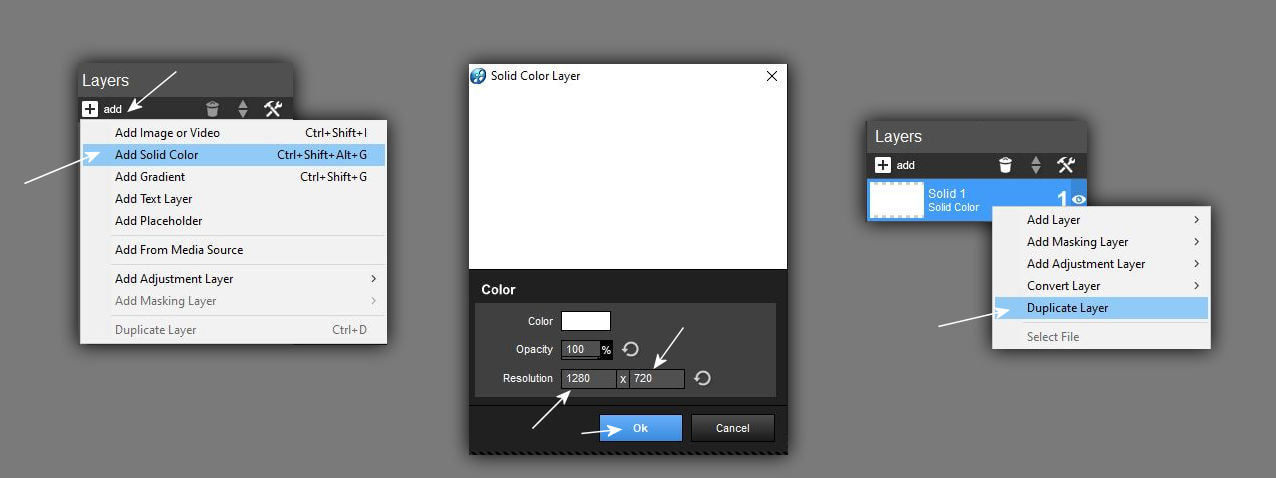
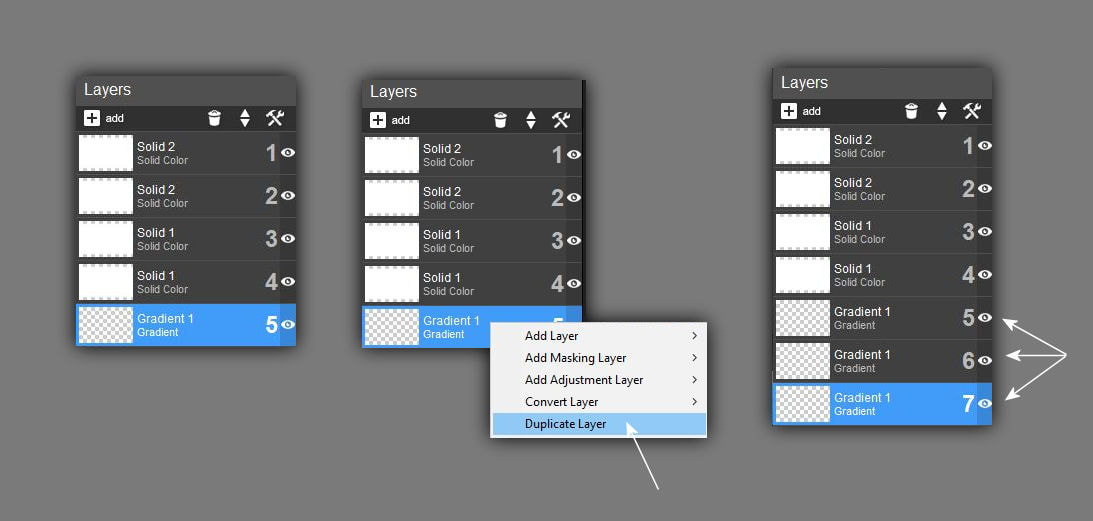
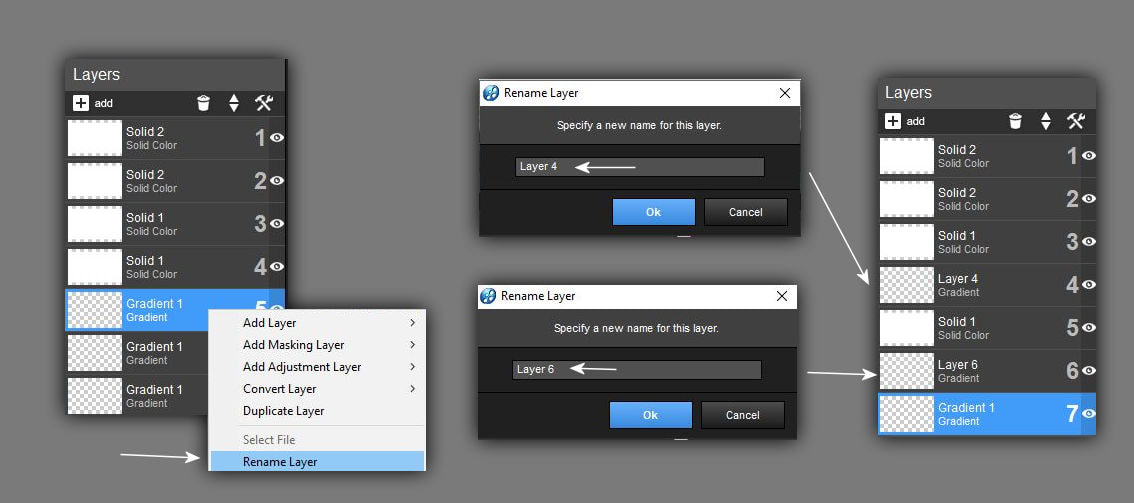
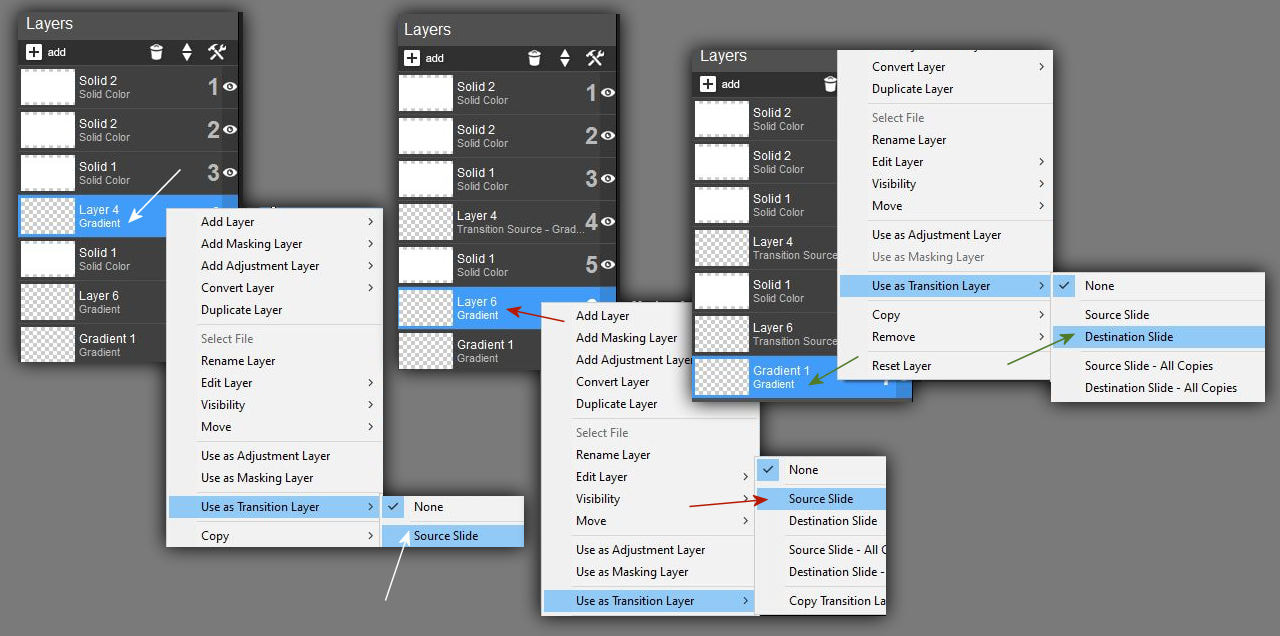
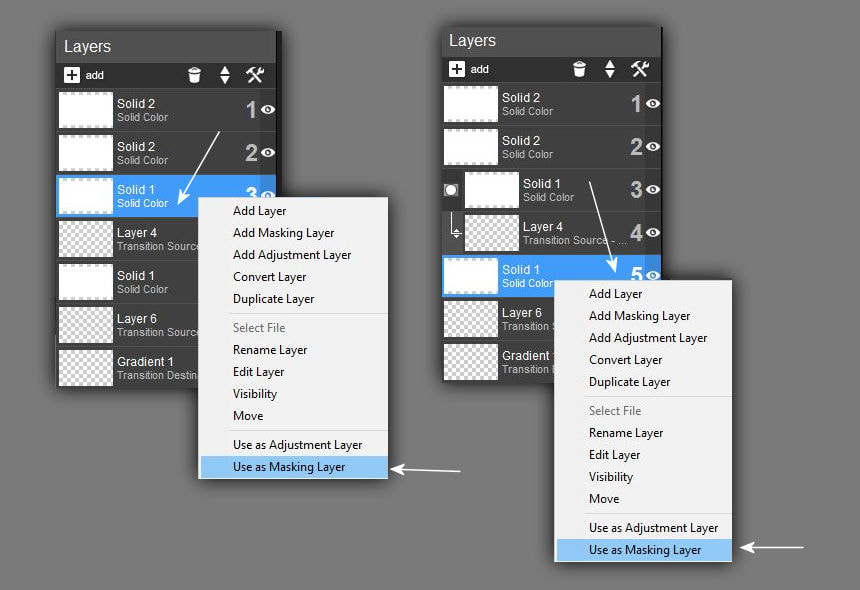
1. A rétegeket így kell kialakítani. Lássuk, hogyan kell ezt csinálnunk a következö lépésekben. Kövesd a képeken látottakat.
Layers should be created like this. Let's see how to do this in the following steps. Follow what you see in the pictures.
2.
3.
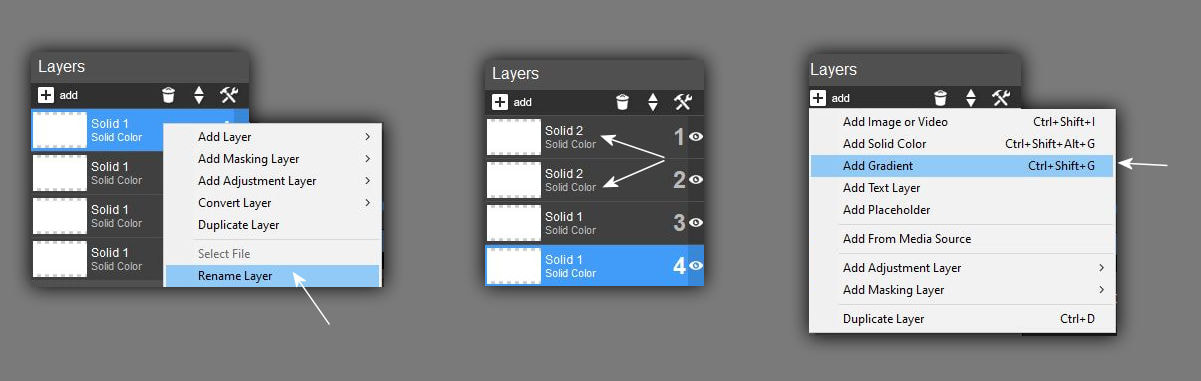
4. Válaszd a Semi gradient típust.
Choose the Semi gradient type.
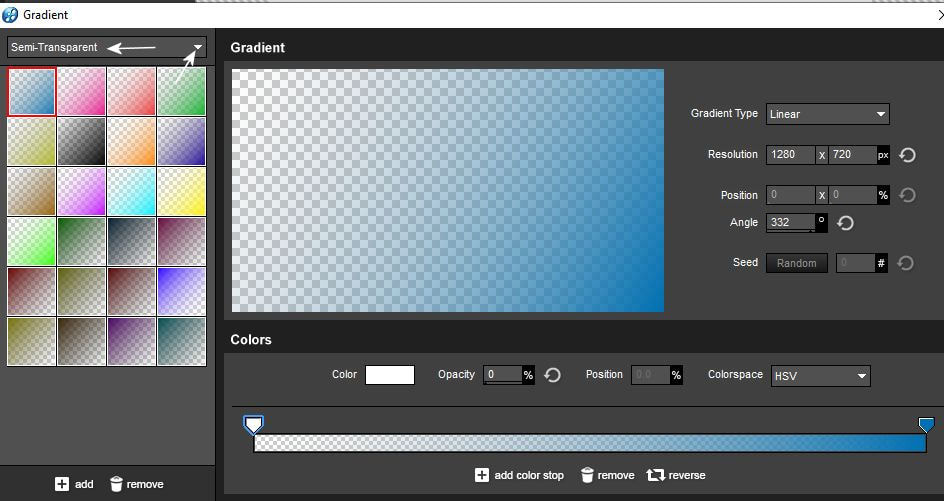
5. Kattints a lécre közvetlenül az elsö tab mögé.
Click on the bar directly behind the first tab.

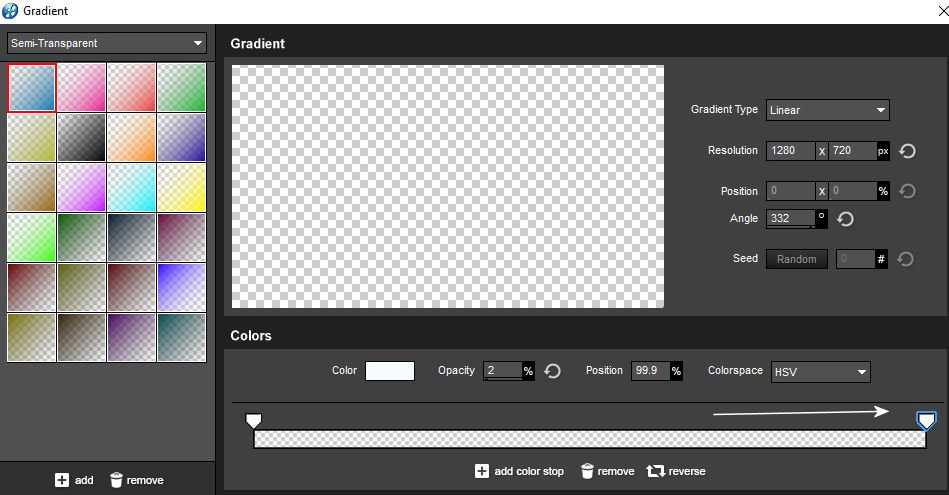
6. Húzd azt a tab-ot a léc legvégére
Drag that tab to the very end of the bar
7.
8.
9.
10.
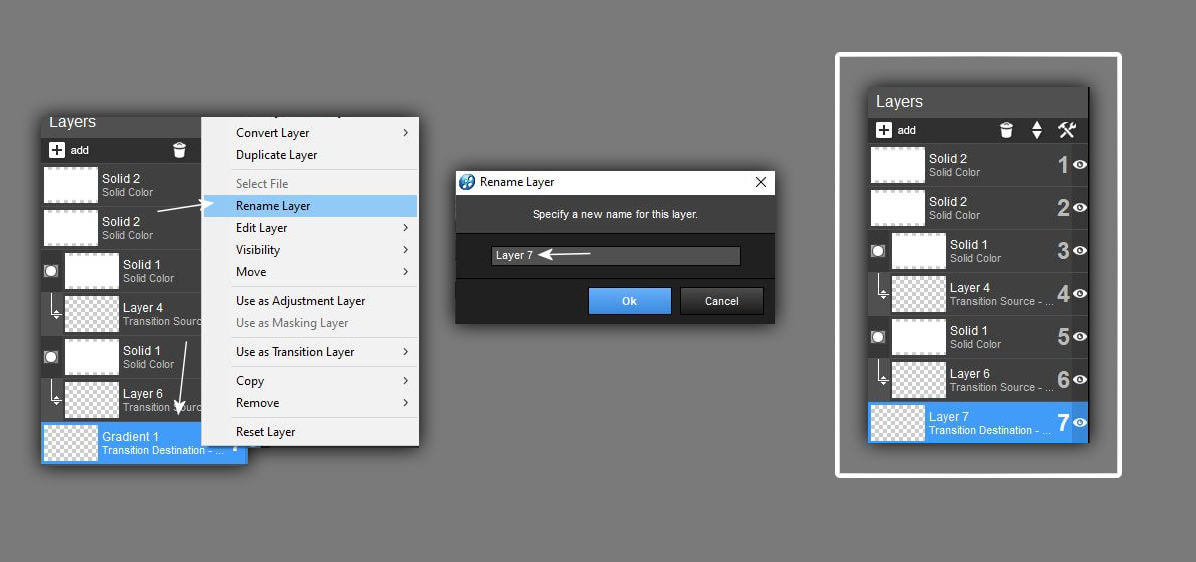
11. A végeredménynek úgy kell kinéznie ahogy azt a bekeretezett részben látod.
Ha adhatok egy ötletet akkor szeretném tudatni, hogy ezt én elmentettem psh
formátumban mert akkor nem kell újra kialakítani amikor a többi idetartozó
áttünést csinálod majd.
The end result should look like you see in the framed part. If I can give you an idea, I would like to let you know that I saved this in psh format because then you don't have to create it again when you do the other transitions that belong to it.
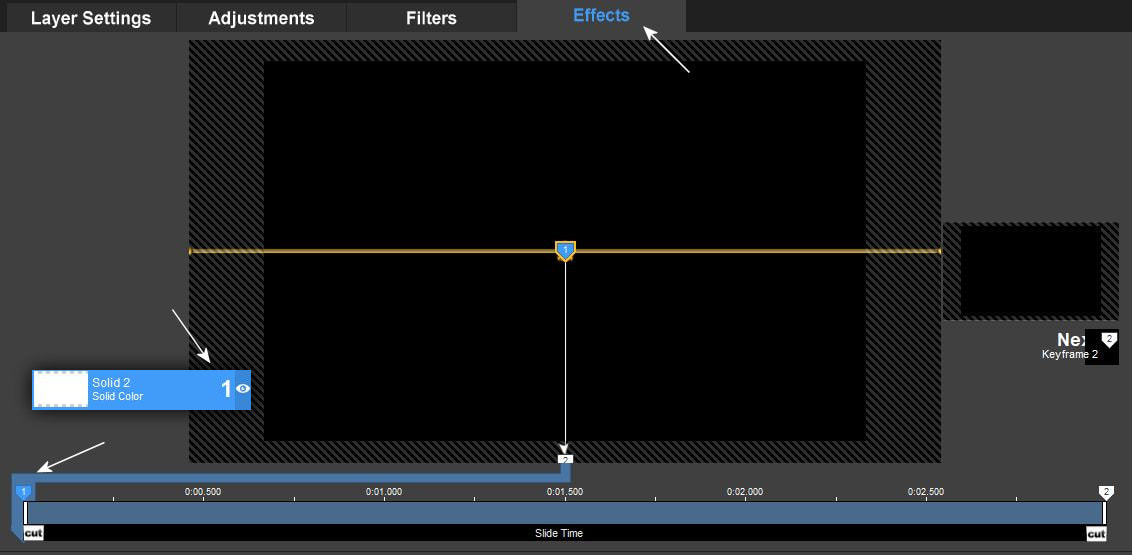
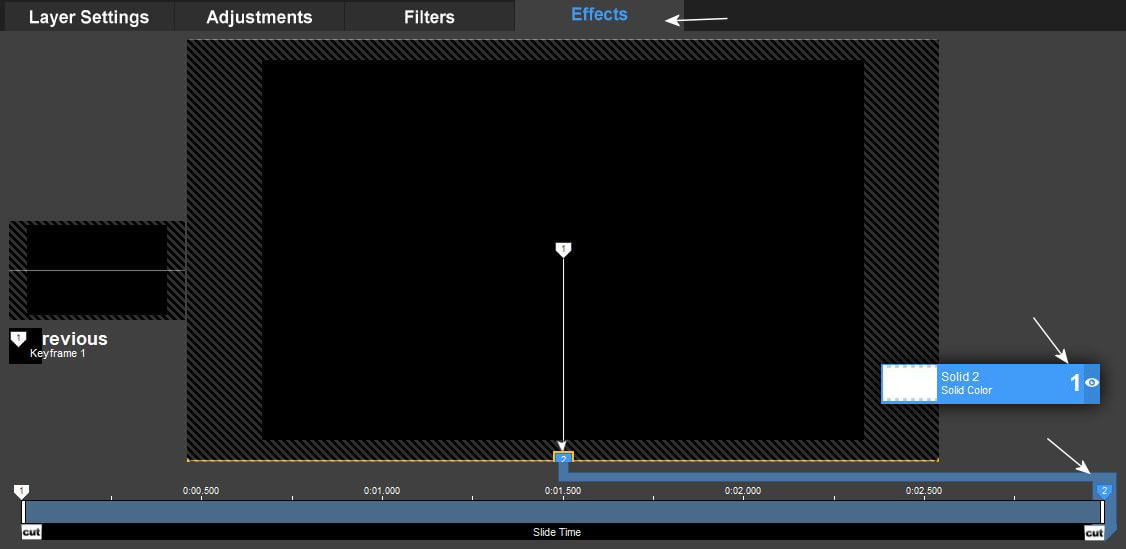
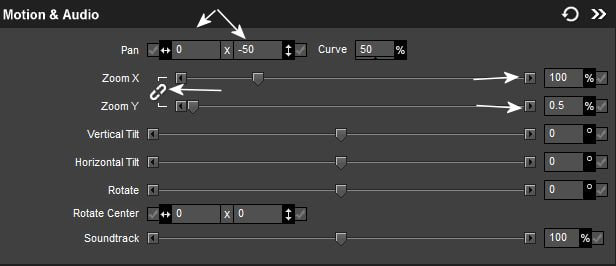
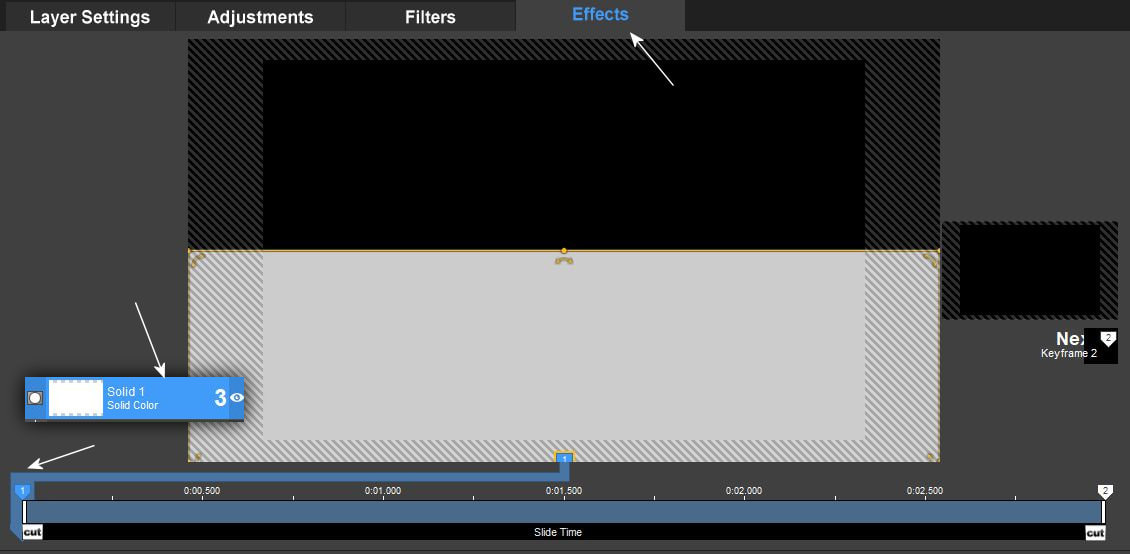
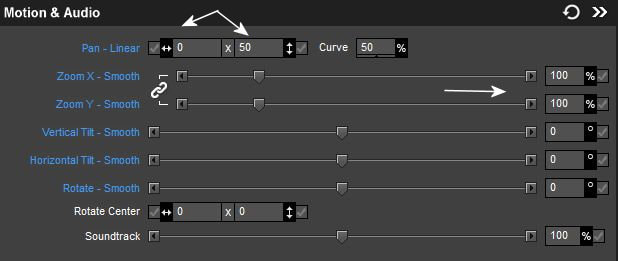
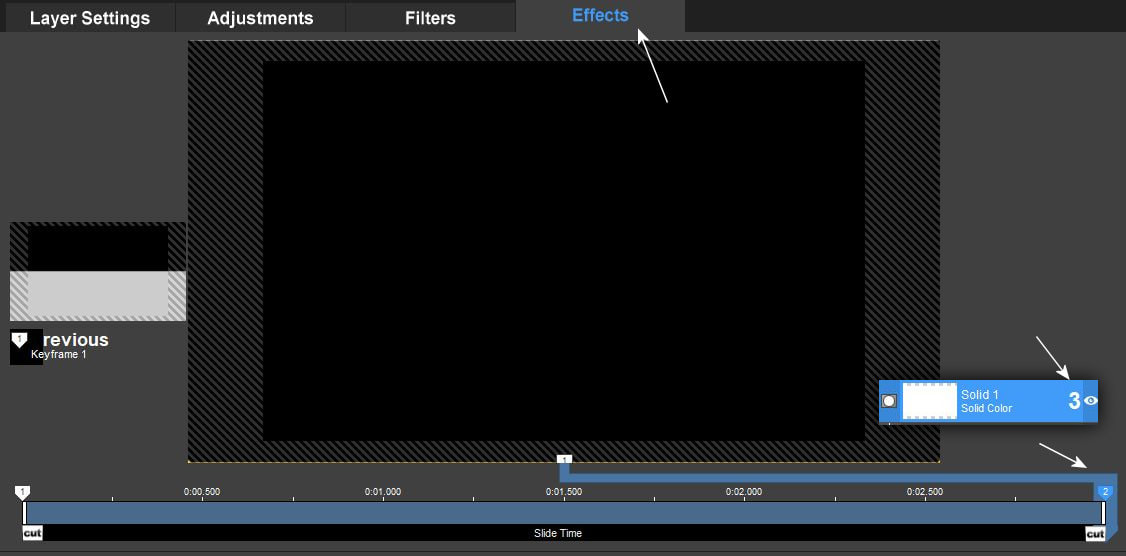
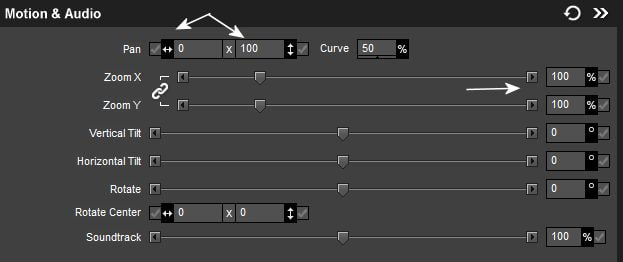
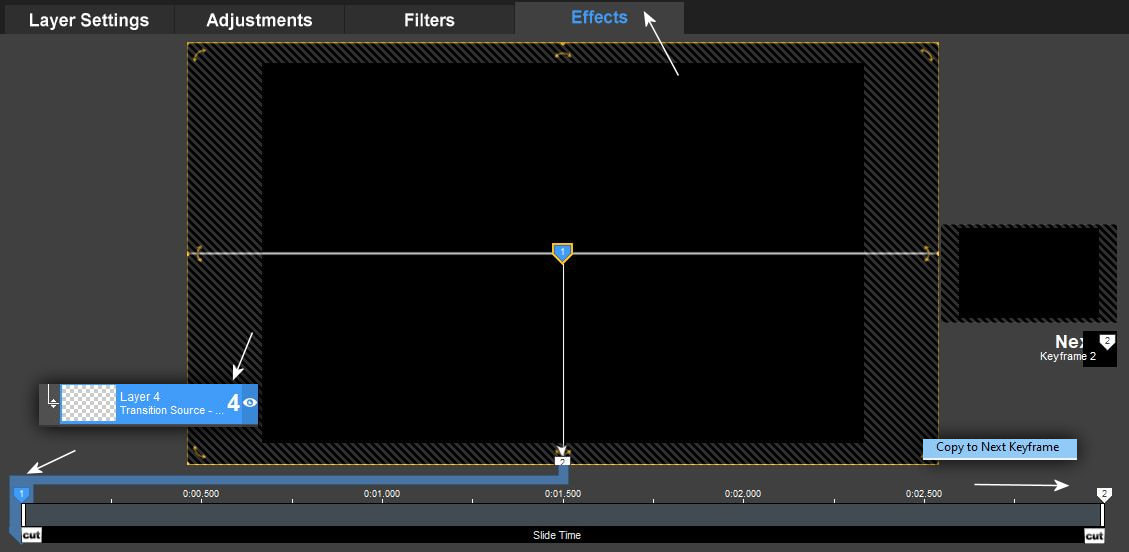
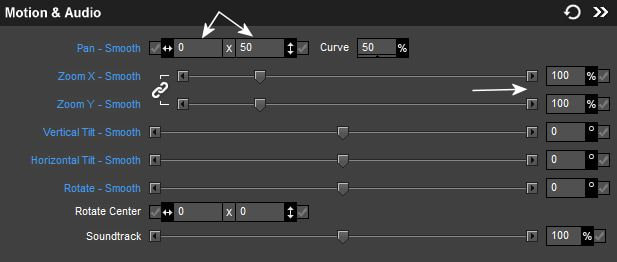
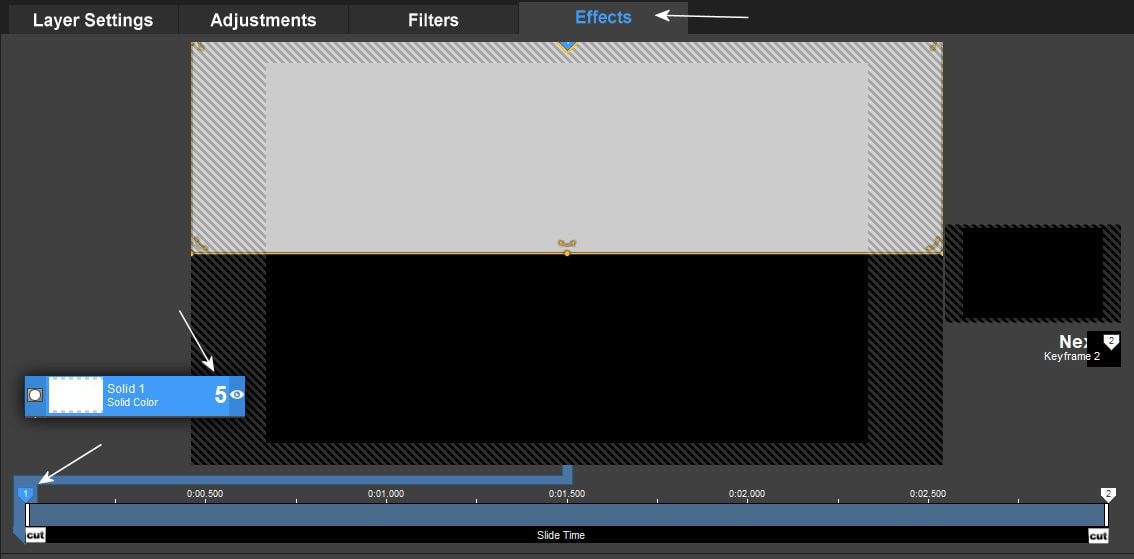
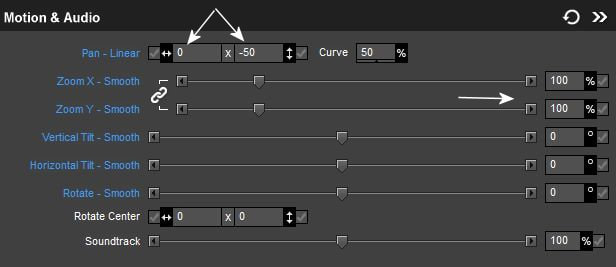
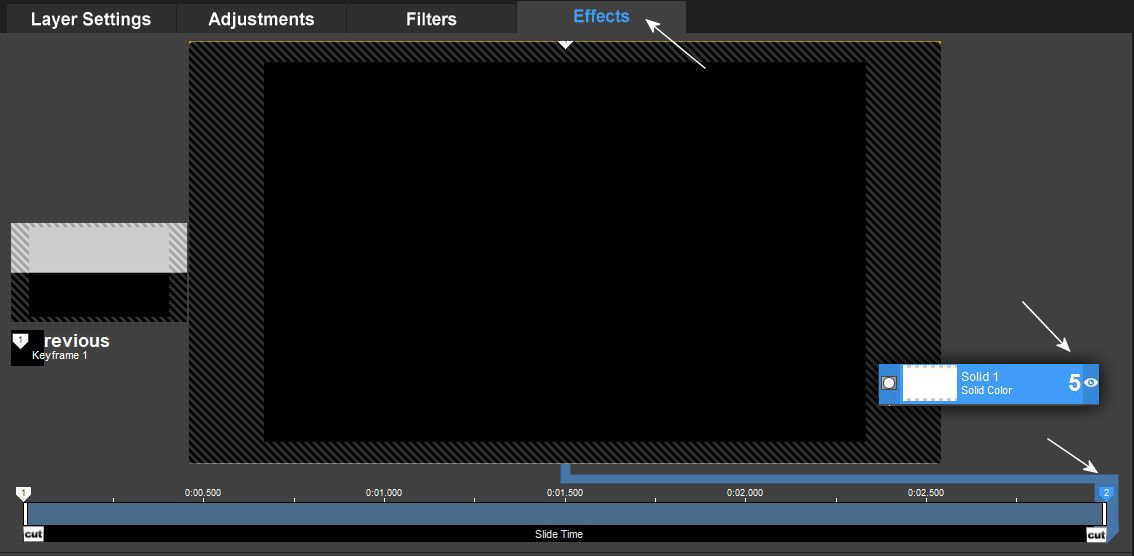
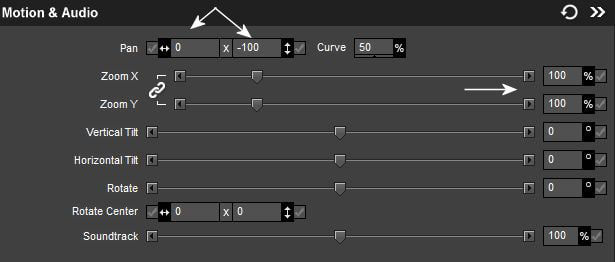
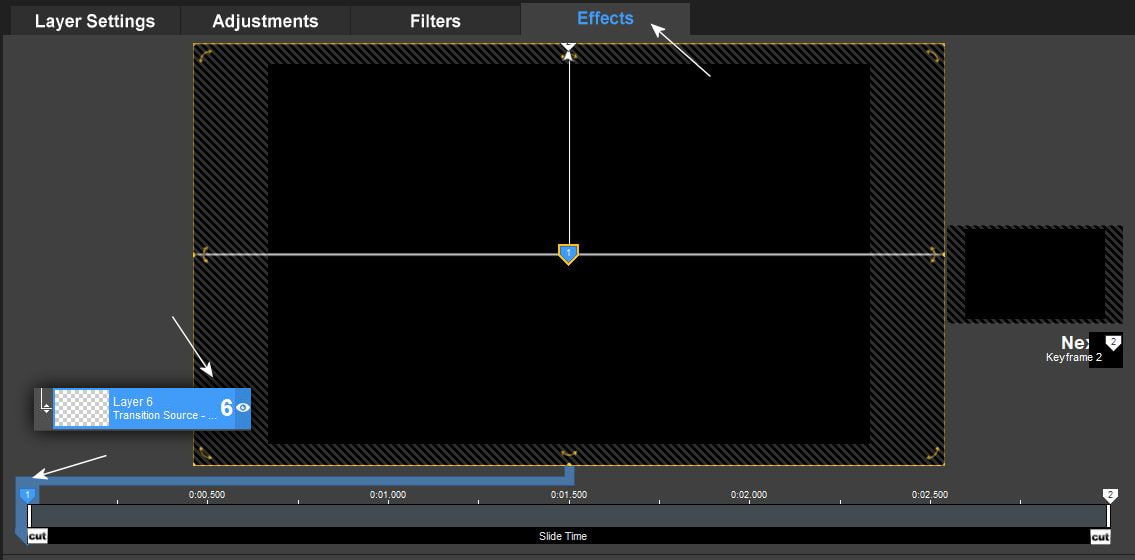
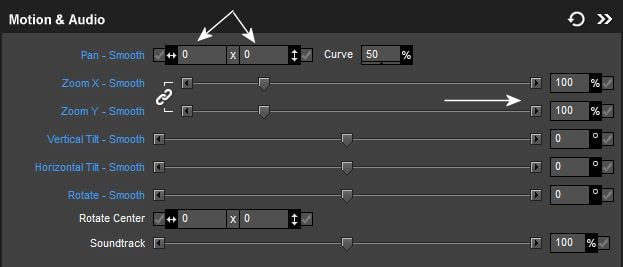
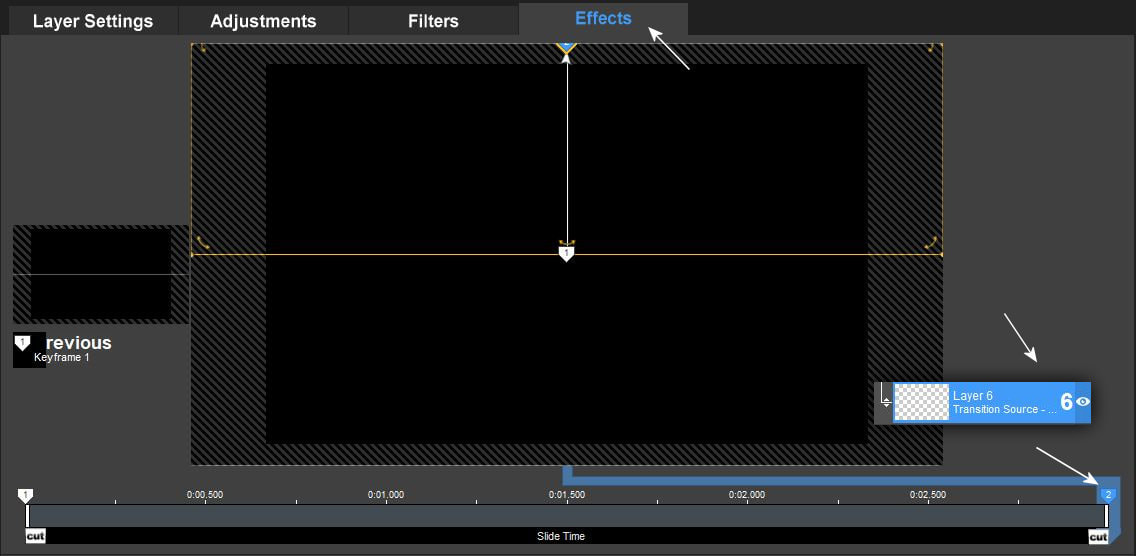
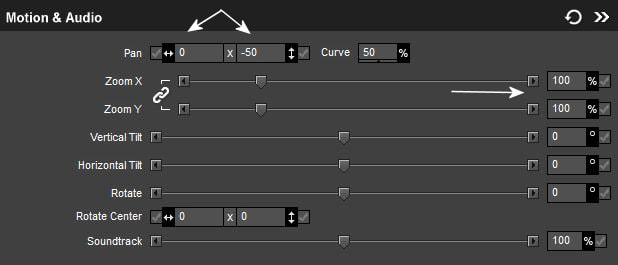
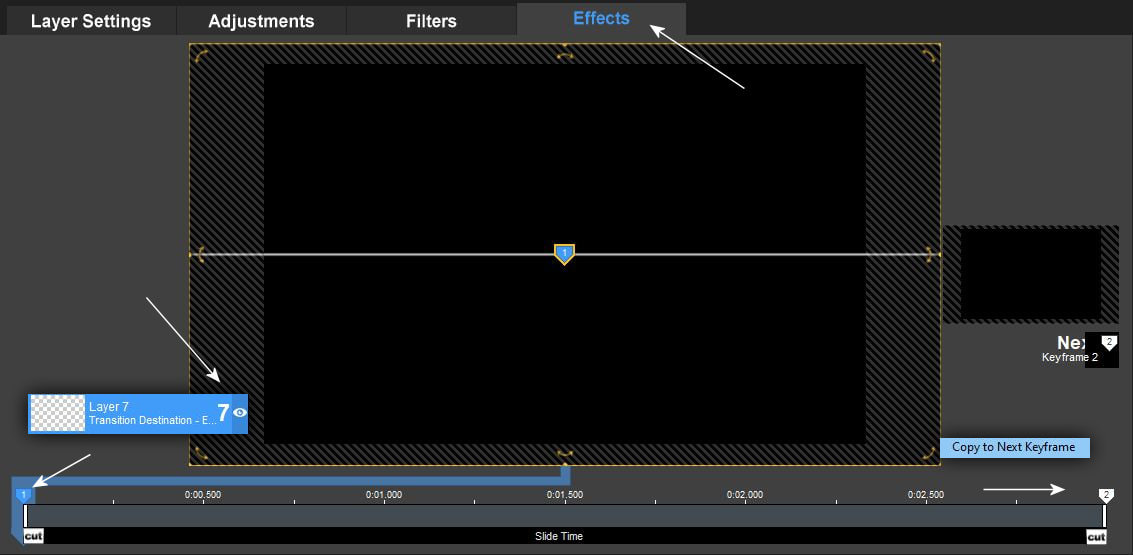
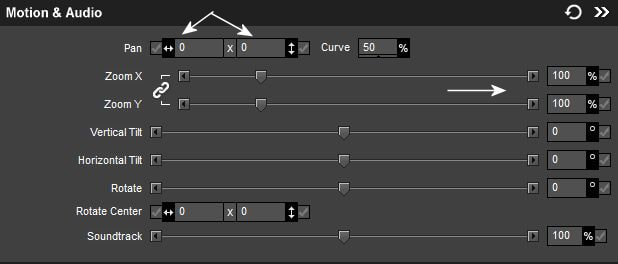
12. Kezdjük az effectálást készíteni. Nagyon figyelmesen dolgozz és kövesd a képeken látottakat.
Let's start making the effect. Work very carefully and follow what you see in the pictures.

13.
14.
15.

16.
17.
18.
19.
20.
21.
22.
23.
24.