Ebben a bemutatóban szintén egy "Egyszerü de nagyszerü' kategóriás effectet láttok. Nem kell mindig nagyon bonyolult mozgatásokkal és sok réteggel dolgozni ahhoz, hogy szép , elegáns videót készítsünk. Elég ha az alapmozgatásokat használjuk, de ahhoz hogy ne legyen a termékünk unalmas , szép látványterv kell. Színharmónia a témához egyszerü és szép dekorációk. Ehhez mutatok be egy példát amelyel most tényleg nem kell sokat dolgozni de a végeredmény mégis remek lesz.
In this presentation, you can also see a "Simple but great" category effect. You don't always have to work with very complicated movements and many layers to make a beautiful, elegant video. It's enough to use the basic movements, but in order for our product not to be boring, a beautiful visual design. Color harmony for the theme, simple and beautiful decorations. For this, I will present an example with which you really don't have to work much, but the end result will still be great.

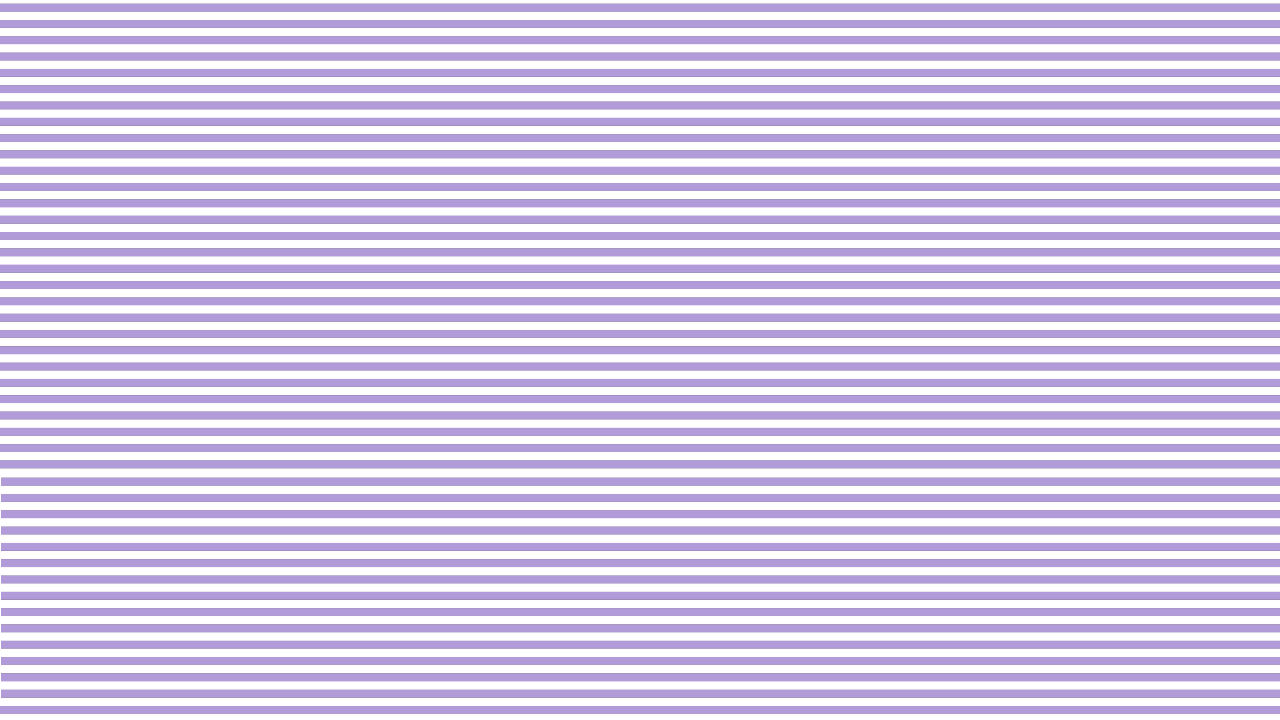
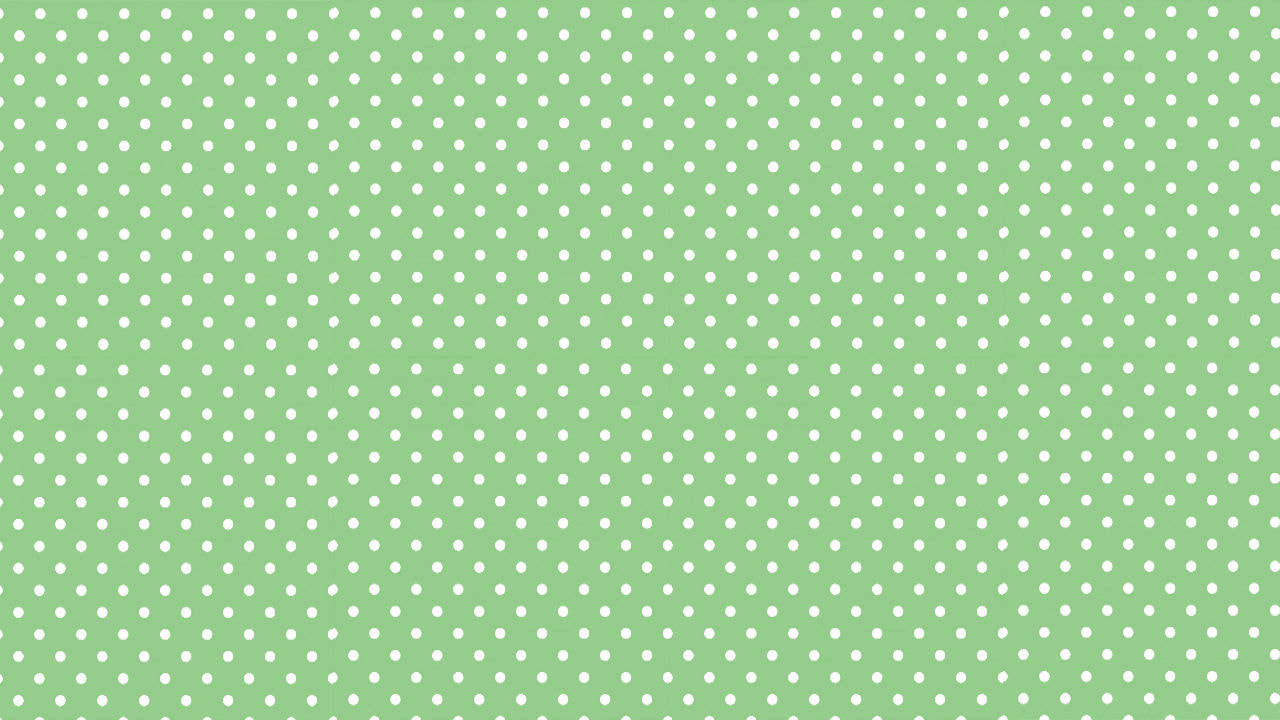
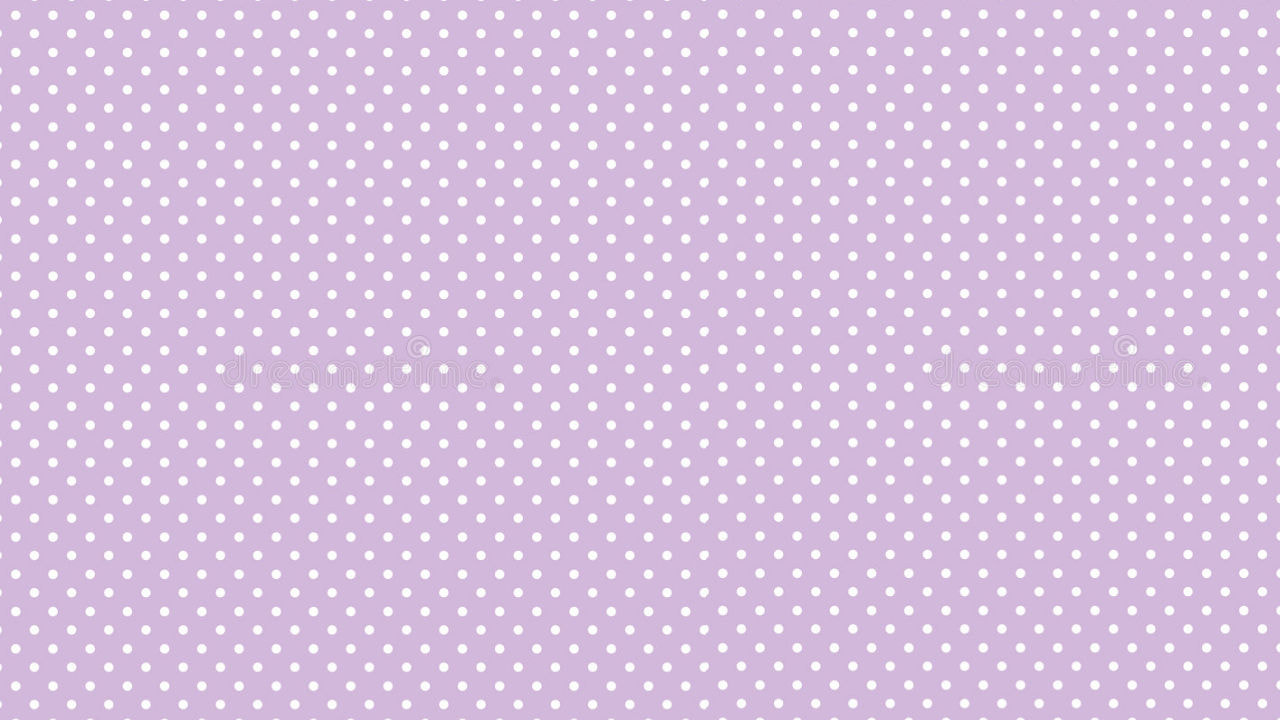
1. Keress az Interneten a dekorációhoz színben megfelelö csíkos és pöttyös vagy egyéb dekorációs háttér képeket a témádhoz. Ezeknek a mérete és a képeké is amelyet ehhez a videóhoz használunk 1280x720.
Search on the Internet for striped and polka-dot or other decorative background images that match the color of your theme. Their size and the images used for this video are 1280x720.
|

|
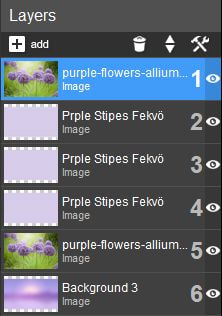
2. Igy rakd össze a rétegeidet. A lementett dekorációs háttereket annyiszor duplázd meg ahány dekor szeretnél vele létrehozni maszkolással. Én itt 3 dekor réteggel dolgozok majd. ( Layers 2,3,4 )
So put your layers together. Double the saved decorative backgrounds as many times as you want to create with them by masking. I will work with 3 decor layers here. ( Layers 2,3,4 )
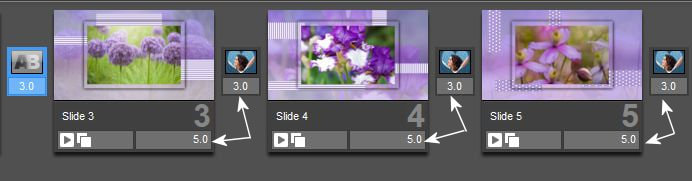
3. A csempéid idejét ezekre az értékekre állítsd.
Set the time of your tiles to these values.
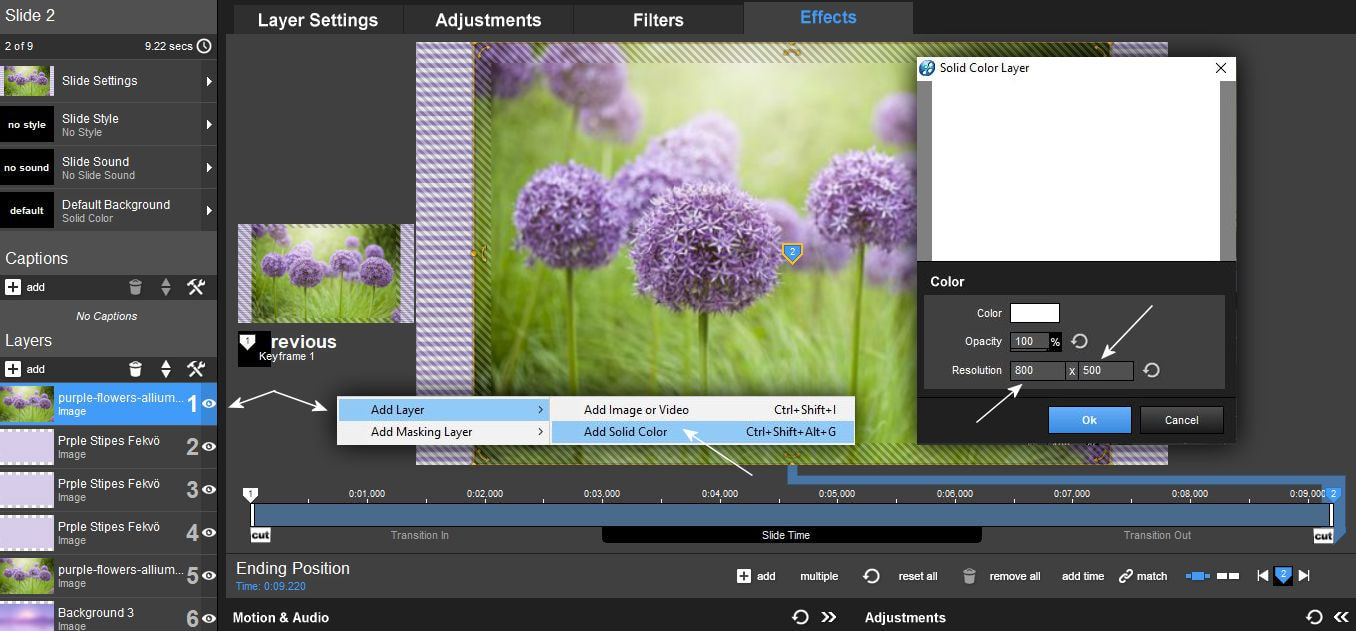
4. Állj az elsö képrétegedre. Jobb füllel kattints a rétegre és
Add Layer - Add solid color
Majd a legördülöben a méretet állítsd 800 x 500-ra ez a kép maszkunk lesz.
Stand on your first image layer. Right click on the layer and
Add Layer - Add solid color
Then set the size to 800 x 500 in the drop-down menu, this image will be our mask.
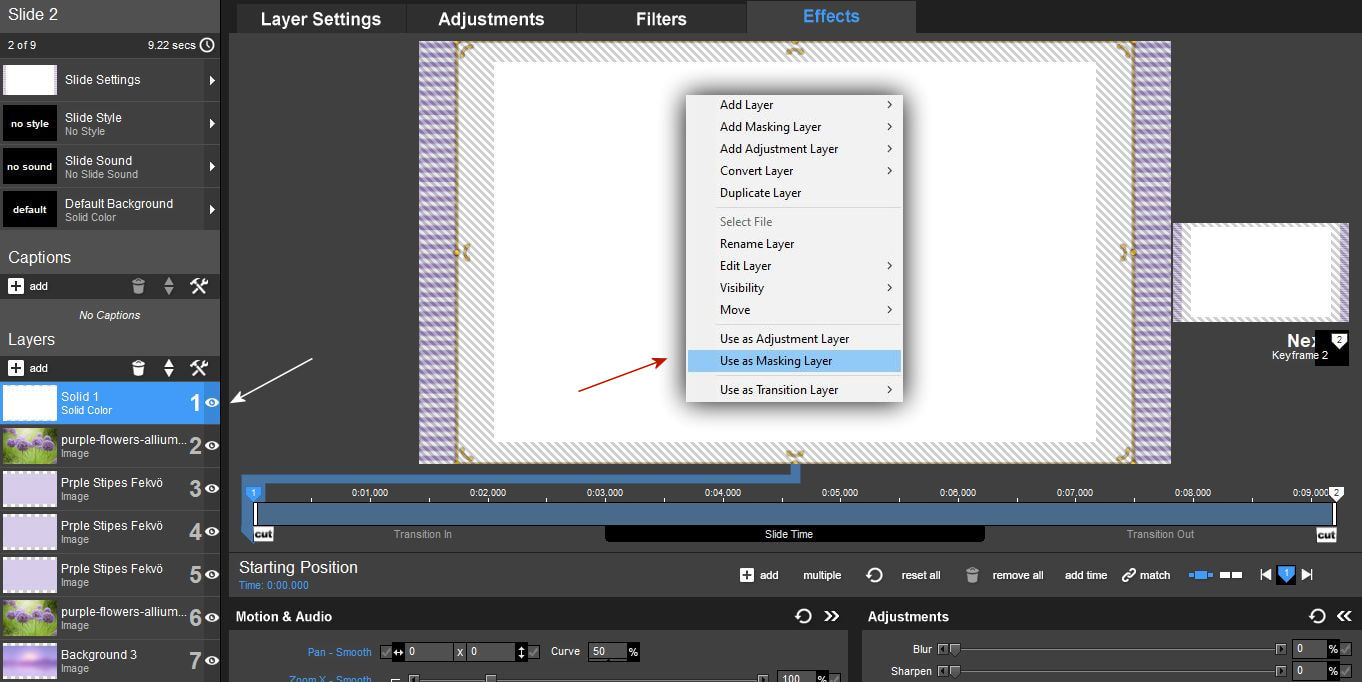
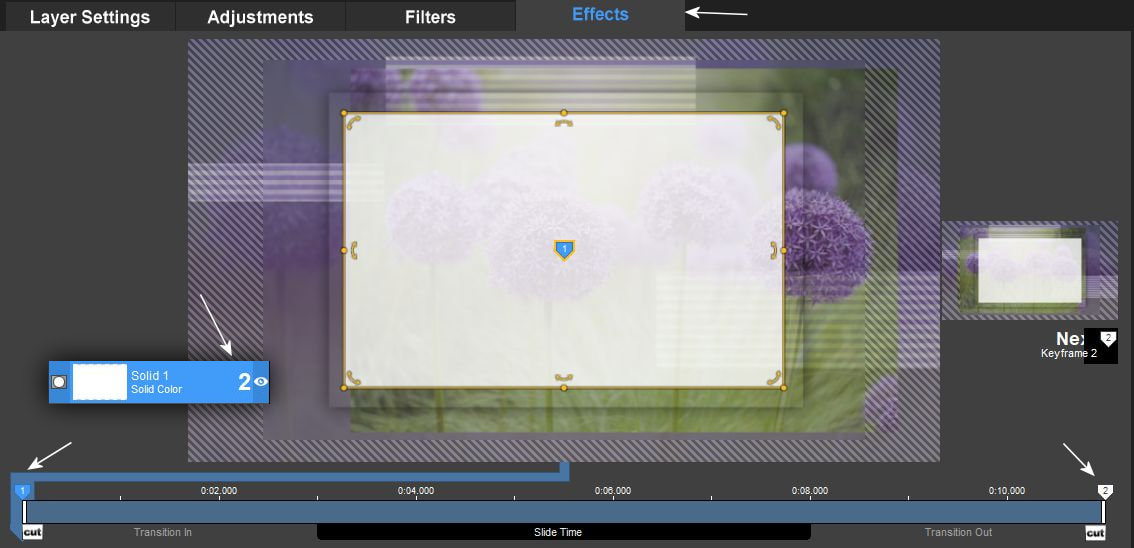
5. Most jobb klikk a fehér rétegen és Use as Masking Layer
Now right click on the white layer and Use as Masking Layer
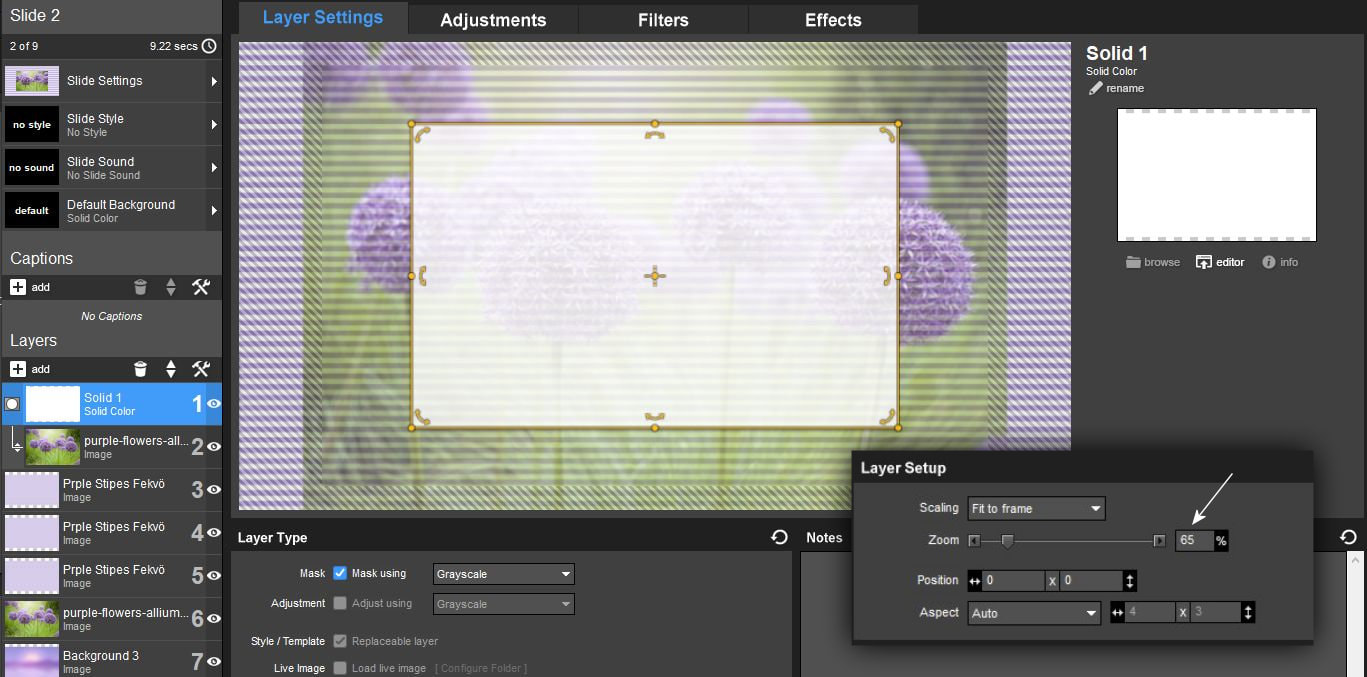
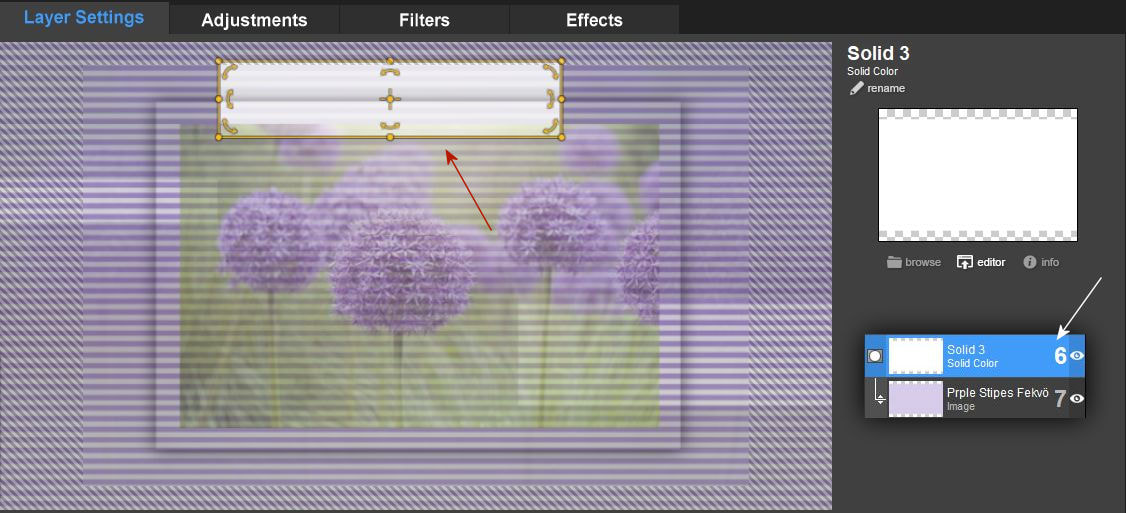
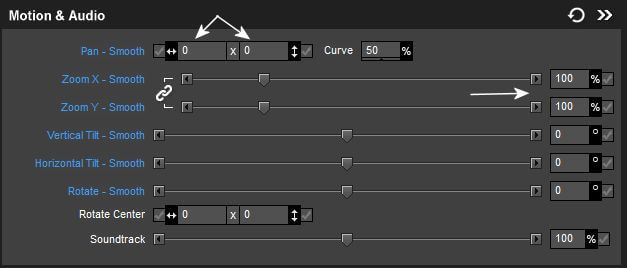
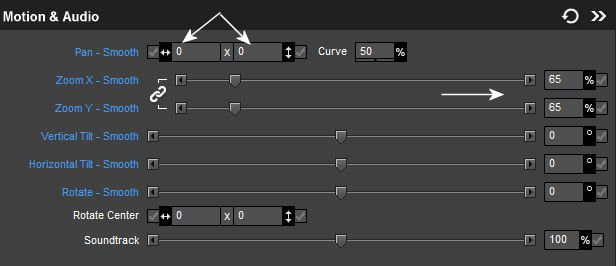
6. Ezen a réteget a zoom-ot állítsd 65-re. A maszk teljesen a kép közepén áll mindkét keyframe ponton és nem fog mozogni
Set the zoom on this layer to 65. The mask is completely in the center of the image at both keyframe points and will not move
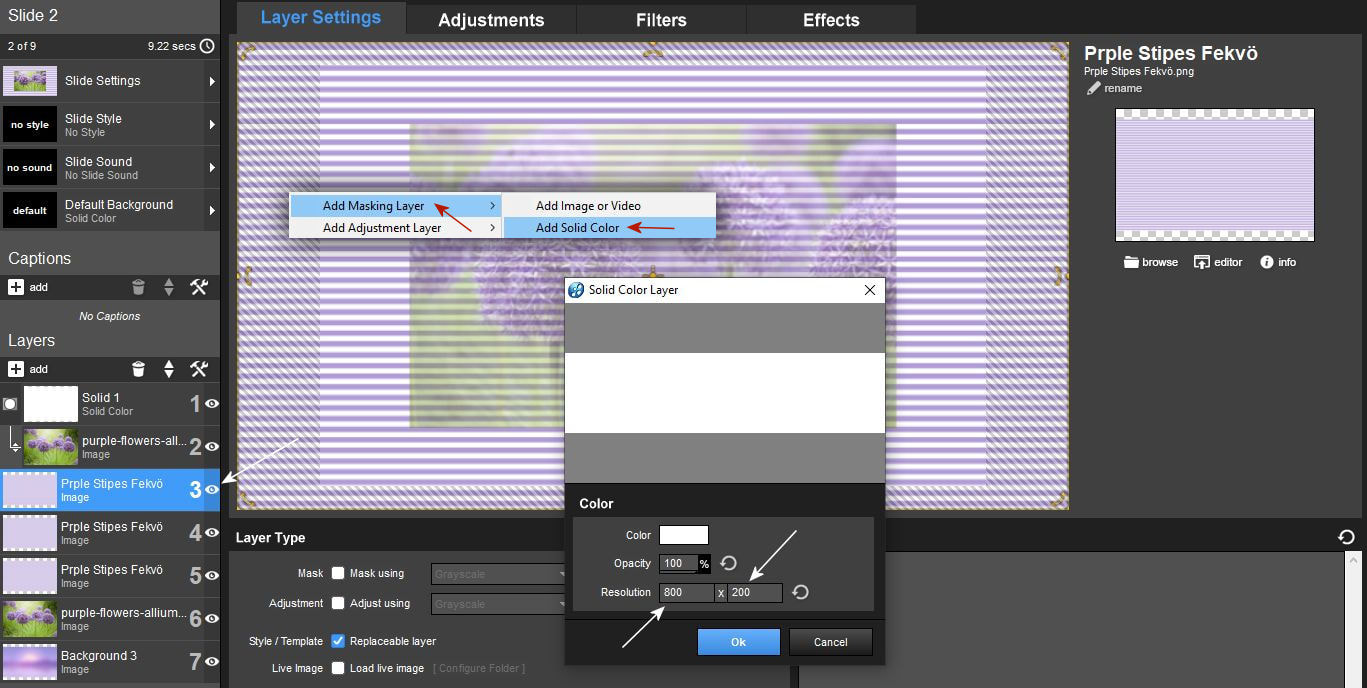
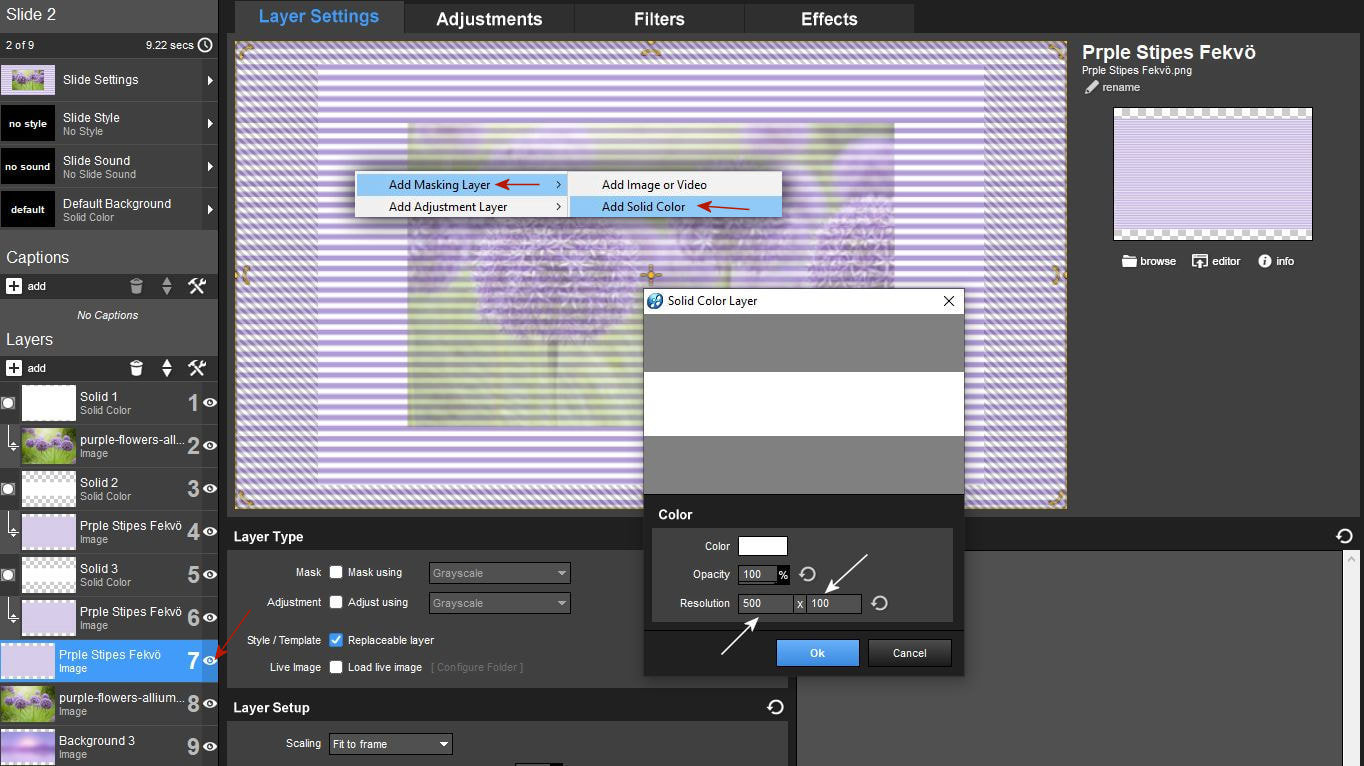
7.Állj az elsö dekor rétegre és készítsd el annak a maszkját. Jobb füllel klikk a rétegre. Itt fontos, hogy most maszk layert hozz be mert ezt mozgatni tudod minden irányban.
Add Maskin Layer - Add Solid Color
A legördülö menüben a méretet állítsd 800x200-ra.
Stand on the first decor layer and make its mask. Right click on the layer. Here it is important to bring in a mask layer because you can move it in all directions. Add Masking Layer - Add Solid Color
In the drop-down menu, set the size to 800x200.
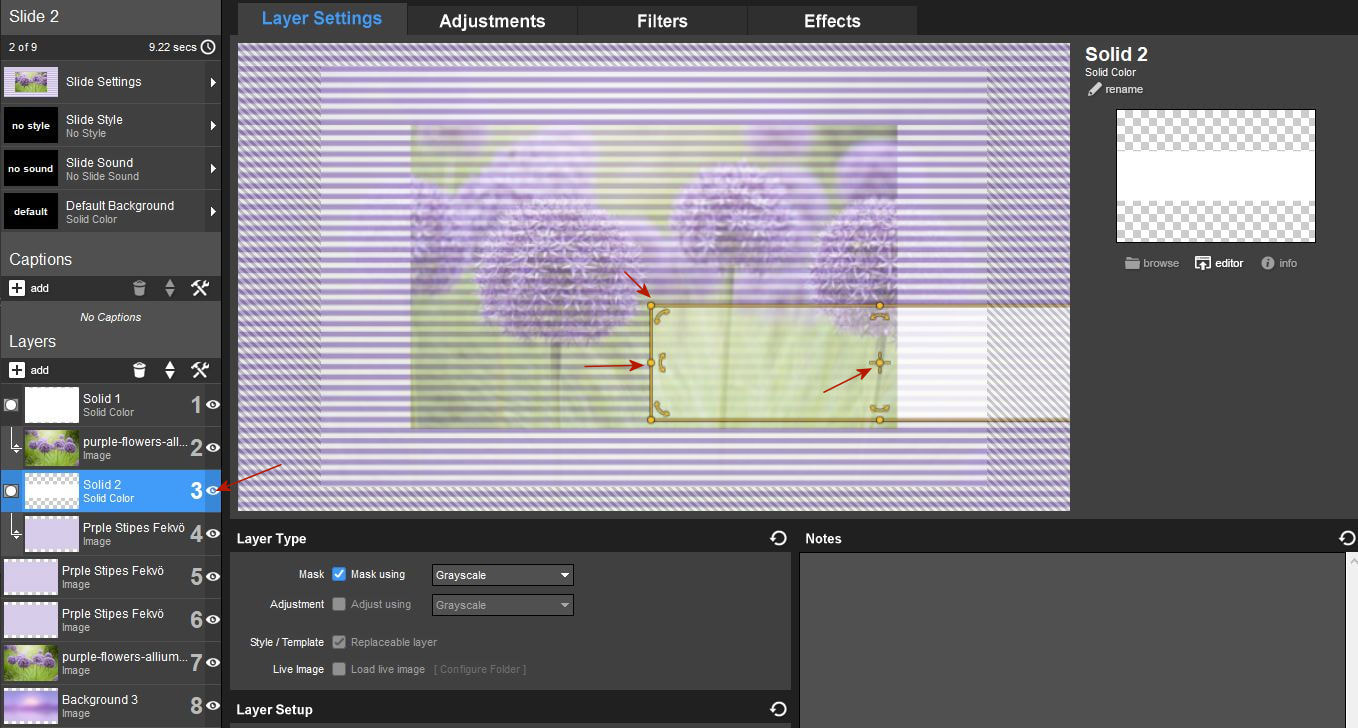
8. Ezt a maszkot helyezheted ahova szeretnéd méretezheted a sárga fogógombokkal, ahogy neked jó.
You can place this mask where you want and scale it as you like with the yellow grip buttons.
9. Csináld meg ugyanezt a müveletet a következö réteghez is és helyezd a maszkodat egy másik pontra a képen. A méretet szintén alakíthatod.
Do the same operation for the next layer and place your mask on another point in the image. You can also change the size.
10. Majd a harmadik dekorációs háttérhez is csináld meg a maszkolást. Vagy méretet váltasz a legördülöben vagy a sárga fogógombok mozgatásával méretezel.
Then do the masking for the third decorative background as well. You can either change the size in the drop-down menu or resize by moving the yellow handles.
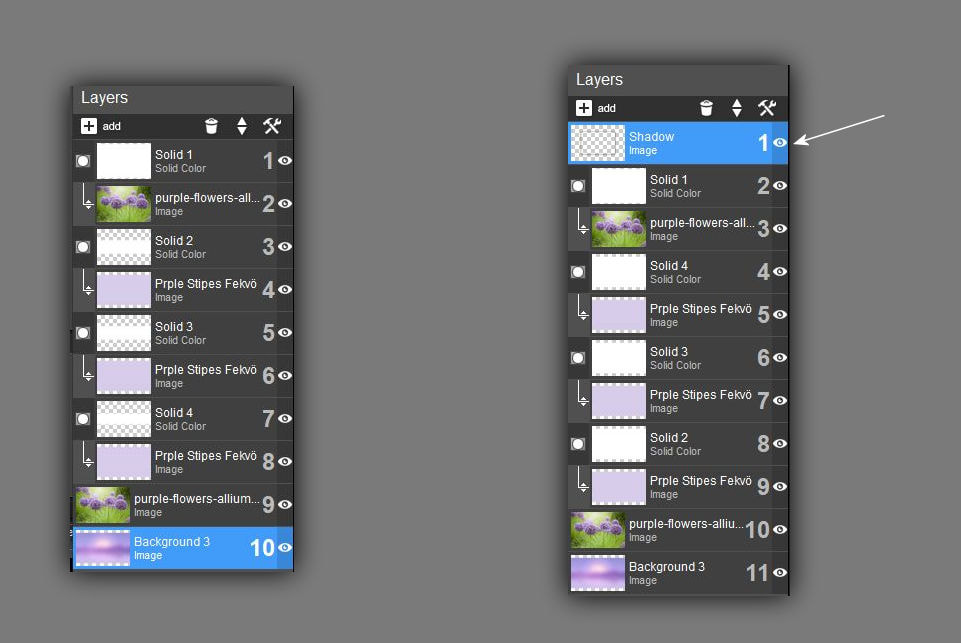
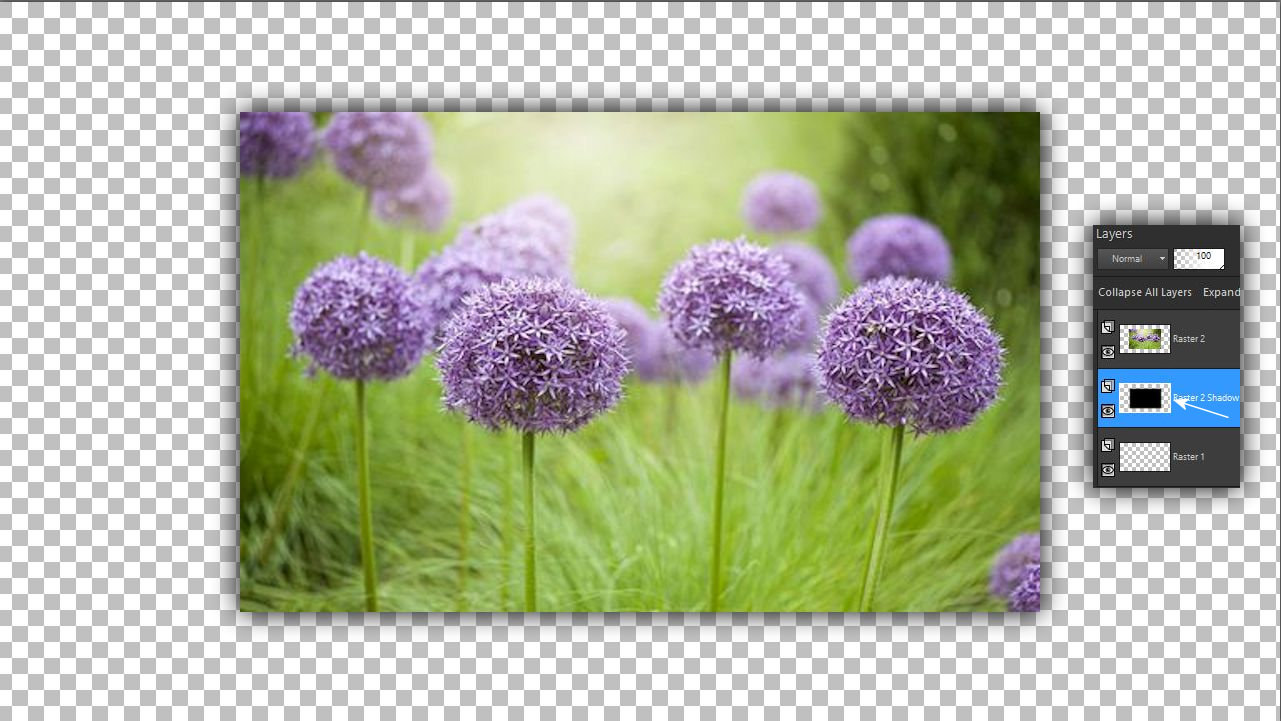
11. Ha jól dolgoztál akkor a baloldali ábrán látod hogyan kell kinéznie a rétegeidnek.
A jobboldali ábrán egy újabb árnyék réteget látsz felül. a következö képeken megnézzük, hogyan is kell ezt elkészíteni. Azért csináljuk ezt, mert az egyszerü szimpla mozgást amely unalmas lenne a látvánnyal tudjuk kompenzálni. Ez az árnyék egy üveg keret hatást tud létrehozni amely remekül mutat a képeink körül.
If you worked well, you can see how your layers should look in the image on the left. In the figure on the right, you can see another shadow layer on top. in the following pictures we will see how this should be done. We do this because we can compensate for the simple movement that would be boring visually. This shade can create a glass frame effect that looks great around our pictures.
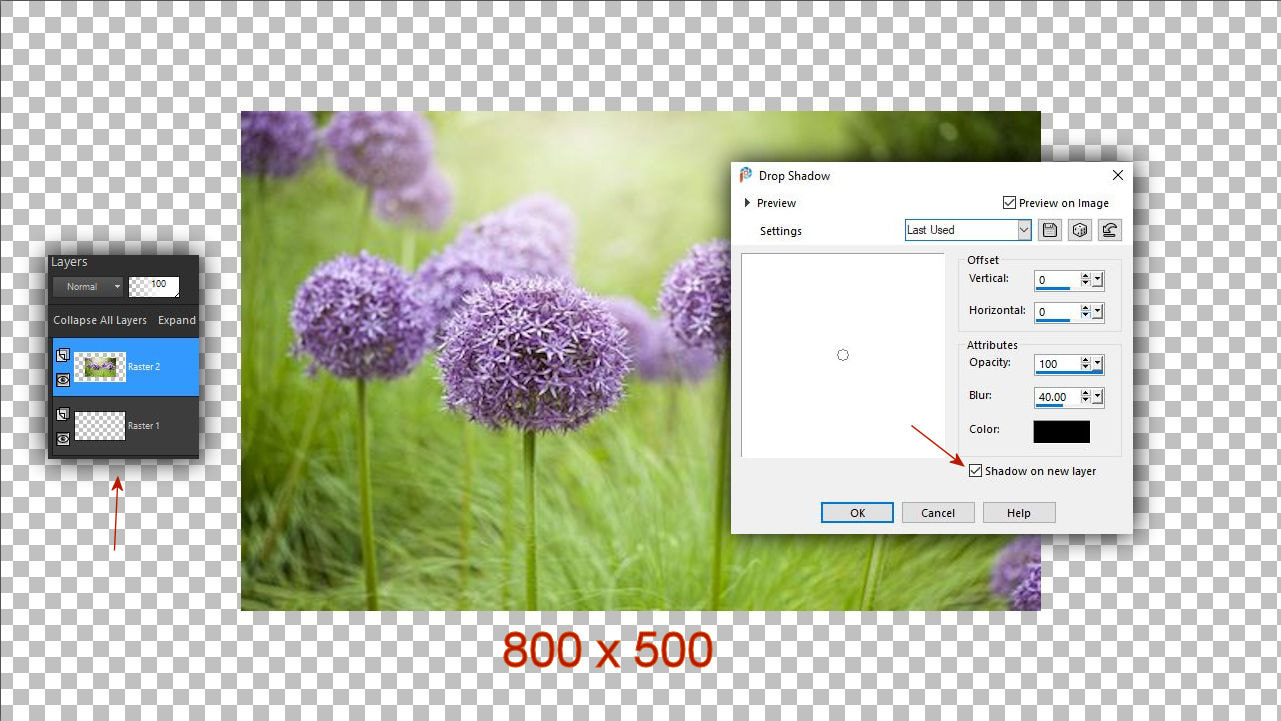
12. Hozz be egy áttetszö hátteret Majd tegyél rá egy 800x500-as képréteget, mert a maszkunk is ekkora a ProShow-ban a képekhez.
Effect - 3D Effect - Drop Shadow
Nagyon fontos, hogy bejelöld a Shadow on new layer kockát !
Bring in a transparent background. Then put an 800x500 image layer on it, because our mask is also that size in ProShow for the images.
Effect - 3D Effect - Drop Shadow
It is very important to check the Shadow on new layer box!
13. Igy most az árnyékolásod különrétegre került. Maradj ezen a rétegen.
So now your shading is on a separate layer. Stay on this layer.
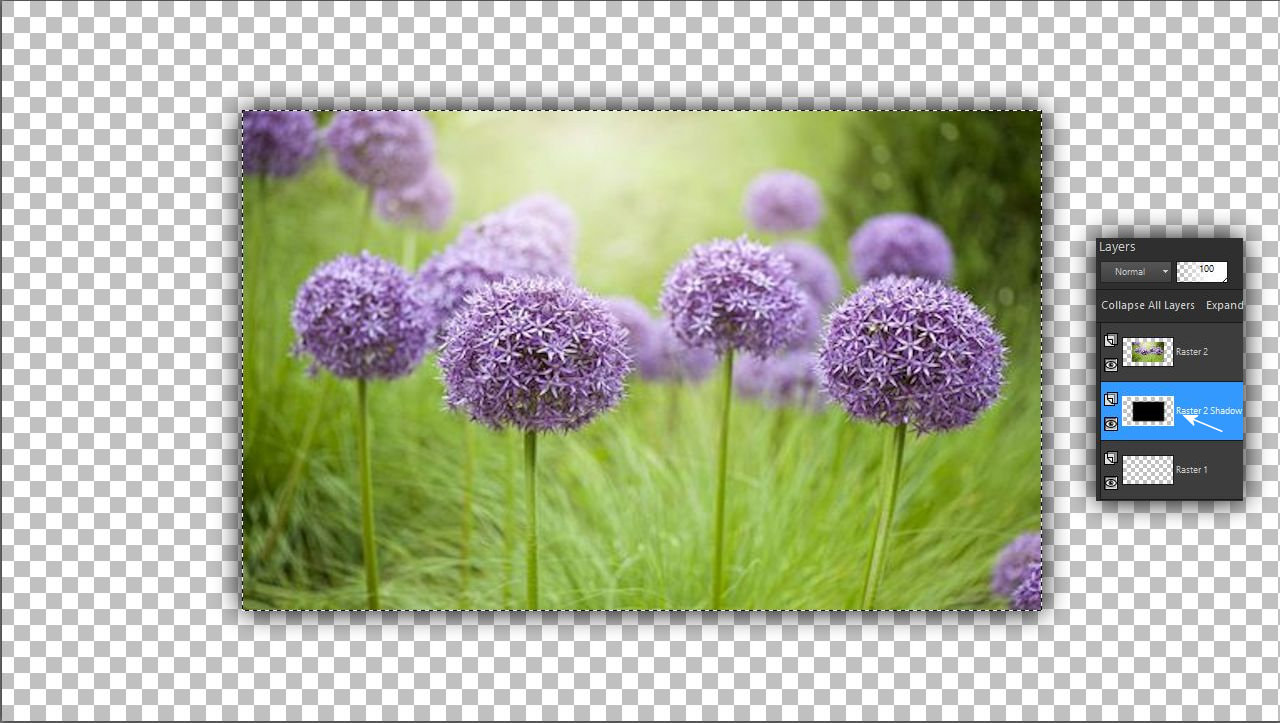
14. Jelöld körbe a képet nagyon pontosan. Az árnyék rétegen állj!
Nyomd meg a klaviatúrádon a delete gombot.
Circle the image very precisely. Stand on the shadow layer!
Press the delete key on your keyboard.
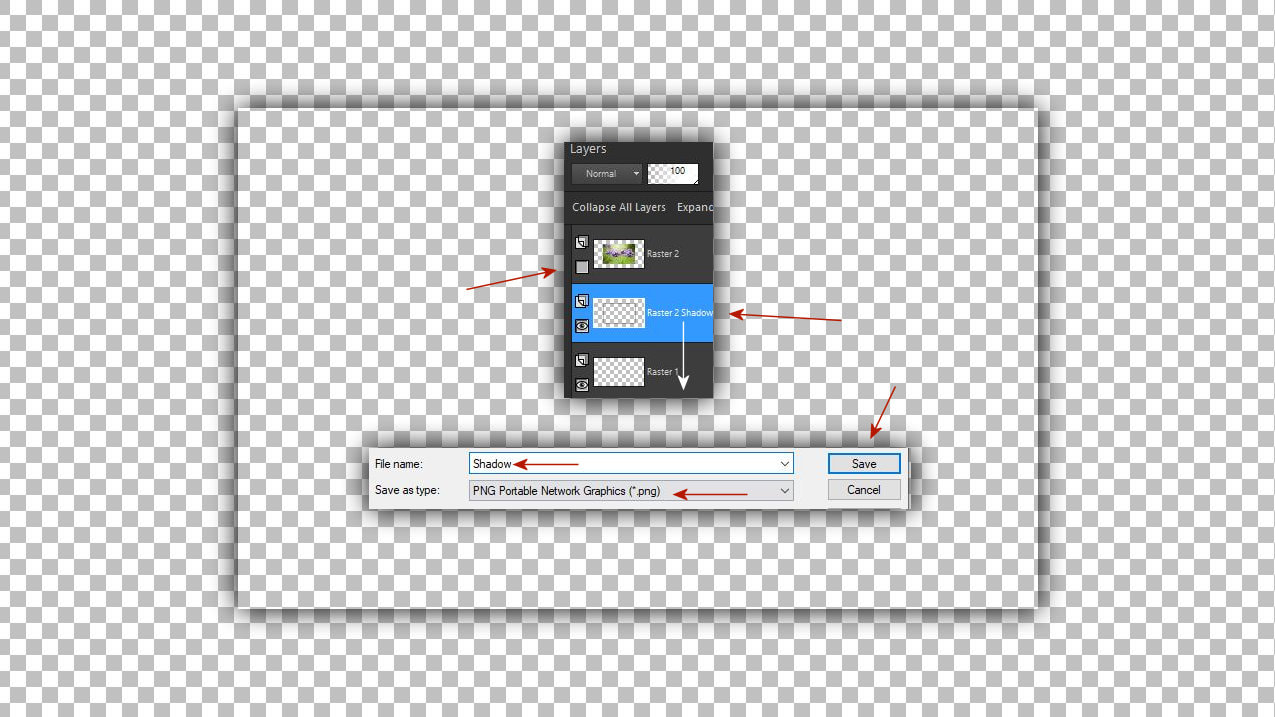
15. Csukd be a felsö réteg szemet. Add össze a két réteget majd mentsd el png formátumban, Majd vidd be a Pro Show Producerbe a legfelsö rétegként.
Close the top layer eye. Combine the two layers and save them in png format, then import them into Pro Show Producer as the top layer.
16.Remélhetöleg ha ezt a réteget beteszitek akkor ti is ezt látjátok, hogy nagyobb keret alakult ki a kép körül. Ha ez nem így lenne, akkor csakk a zoomot kell nagyobbra tennetek a 100% helyett. Az értékek mindkét keyframe pontok ugyanazok ez a réteg sem mozog.
Hopefully, if you add this layer, you will also see that a larger frame has formed around the image. If this is not the case, you only need to increase the zoom instead of 100%. The values of both keyframe points are the same, this layer does not move either.
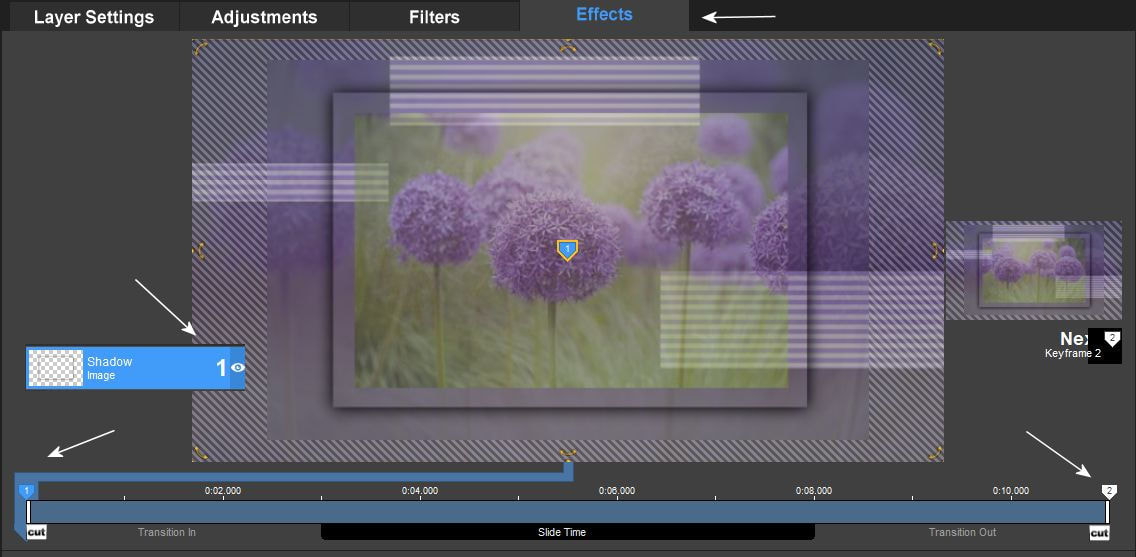
17. Ez a réteg is középen van nem mozog egyik keyframe ponton sem.
This layer is also in the middle and does not move at any keyframe point.
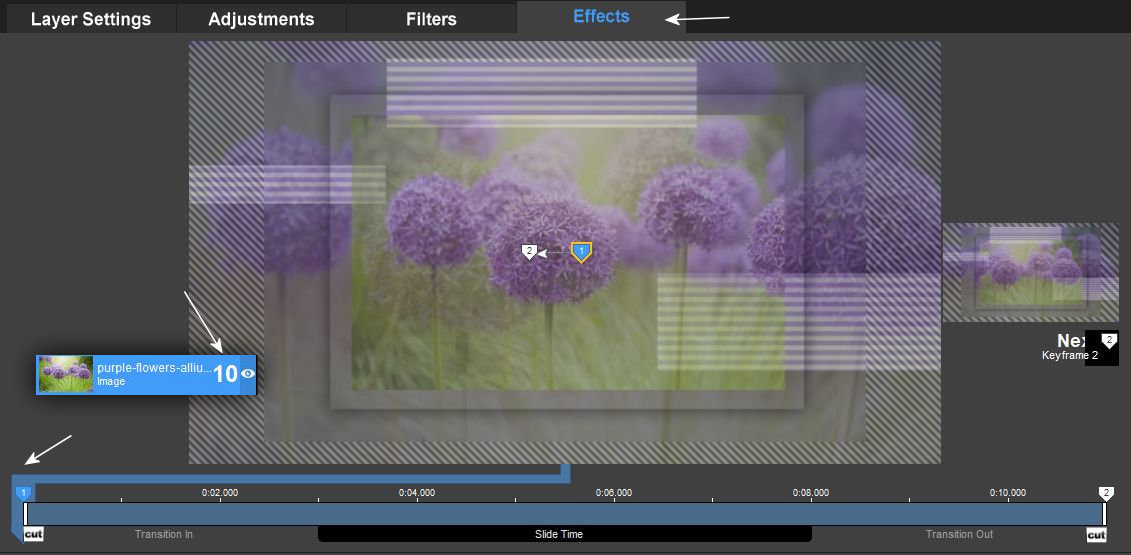
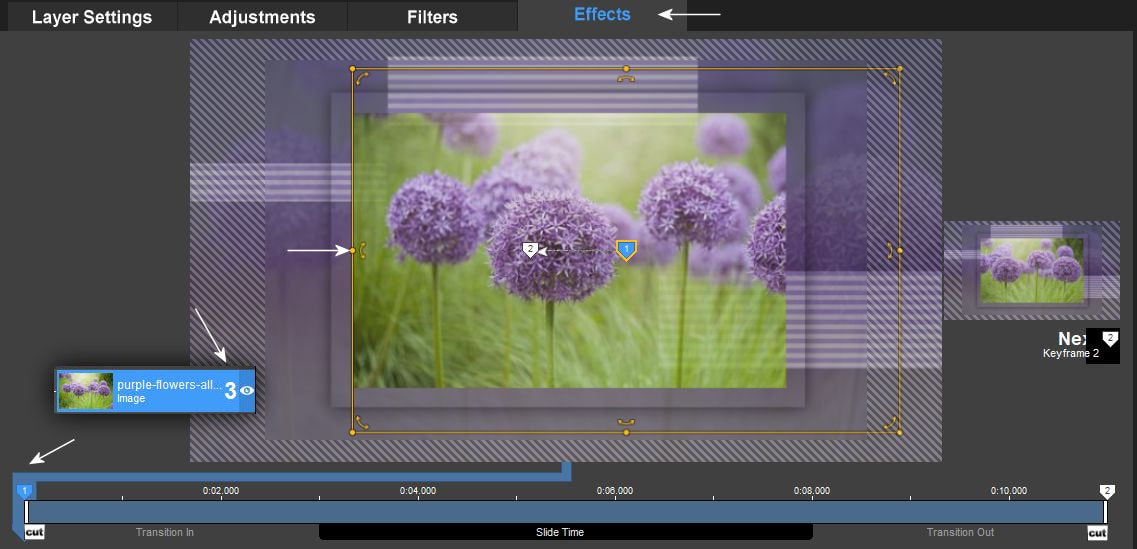
18. Ez a képrétegünk. Az 1-es keyframe ponton helyezd a képet jobboldalra mert balra fogjuk mozgatni. Figyeld meg a képen a sárga keret helyzetét. Azután fogd meg a képen majd a 2-es keyframe pontot és mozgasd el balra.
This is our image layer. At keyframe point 1, place the image on the right because we will move it to the left. Notice the position of the yellow frame in the picture. Then grab keyframe point 2 on the image and move it to the left.
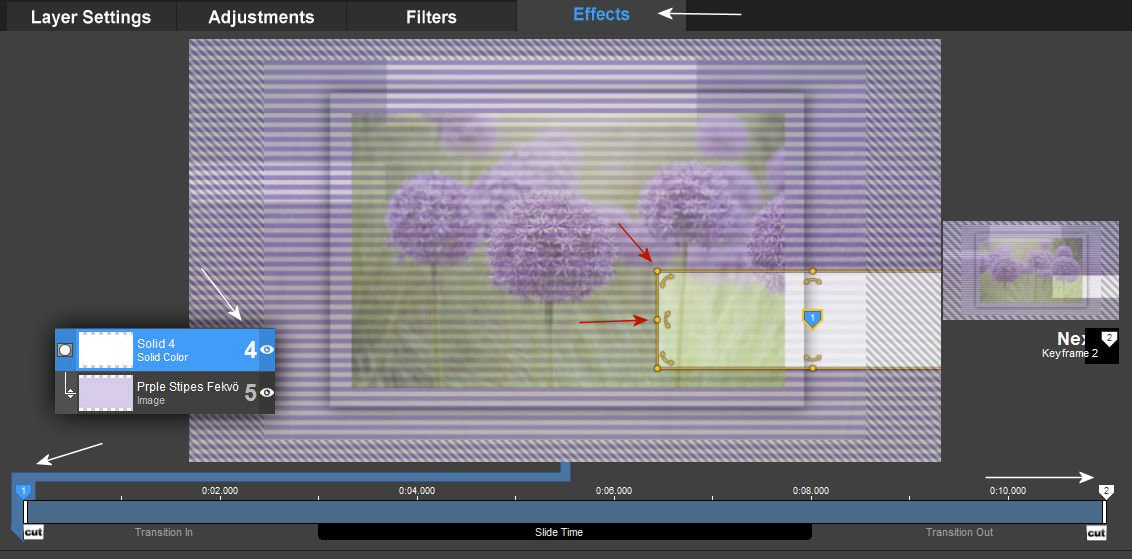
19. A 4-es réteg maszkját állítsd be ahova szeretnéd a rárga fogógombokat mozgathatod ahogy az neked jó. és másold át az 1-es keyframe pontot a 2-esre.
Set the mask of layer 4 where you want, you can move the yellow knobs as you like. and copy 1 keyframe point to 2.
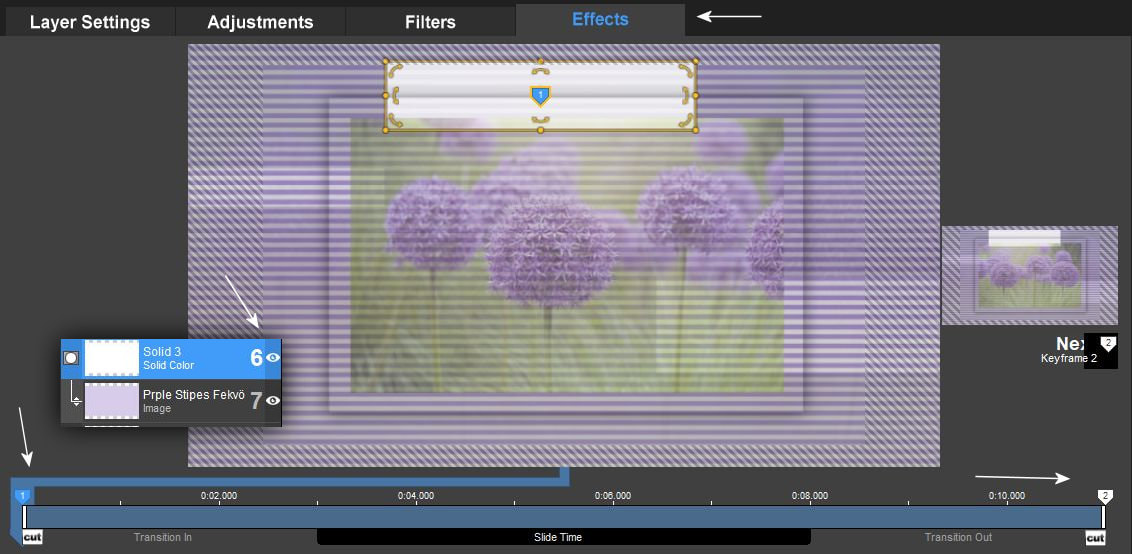
20. Helyezd el a 6-os rétegen levö maszkodat is. Másold át a másik keyframe pontra
Place your mask on layer 6 as well. Copy it to the other keyframe point
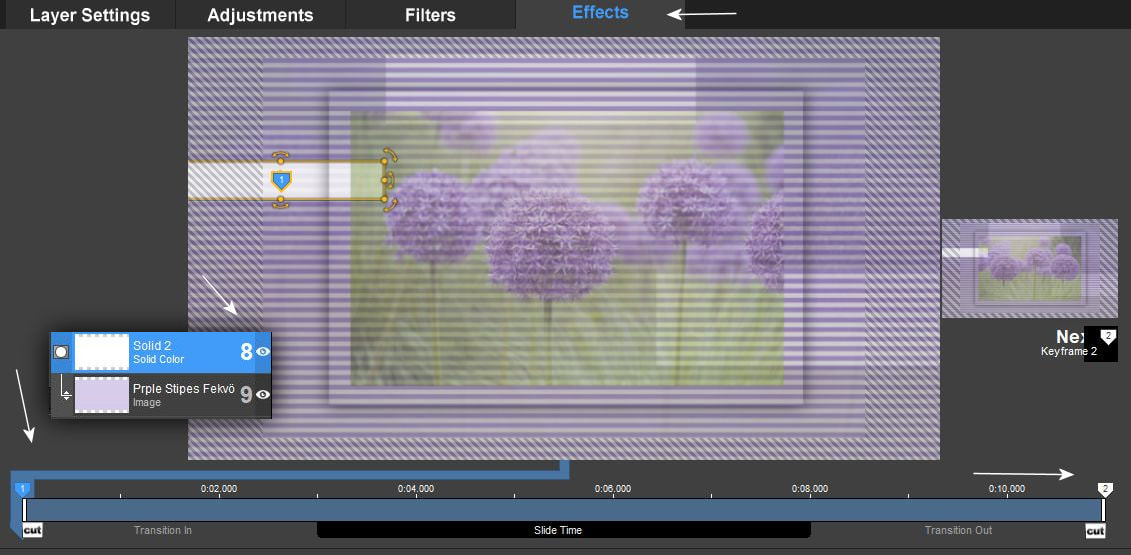
21. Csináld meg ezt a müveletet is.
Do this operation as well.
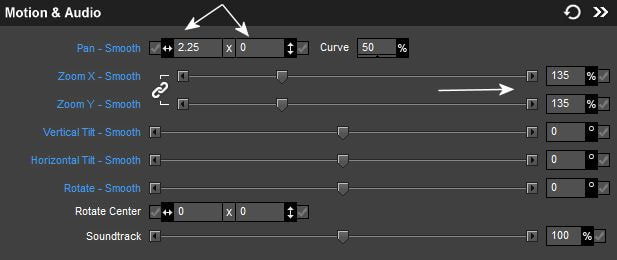
22. Ez a képréteg arra szolgál, hogy még szebbé tegyül a látványtervünket. Vagyis a háttérben egyidöben mozog ugyanazzal a képeddel. Mozgathatod másirányban is csak a zoom-ot tedd 135-re, hogy képernyö széltöl-szélig szabadon mozgathasd. Igy különleges látványt hozunk létre.
This image layer serves to make our visual design even more beautiful. In other words, it moves in the background at the same time as your image. You can move it in the other direction, just set the zoom to 135 so that you can move the screen freely from edge to edge. We create a special spectacle.