Folytassuk a munkát ehhez a csodás videóhoz itt ebben a legördülö menüben.
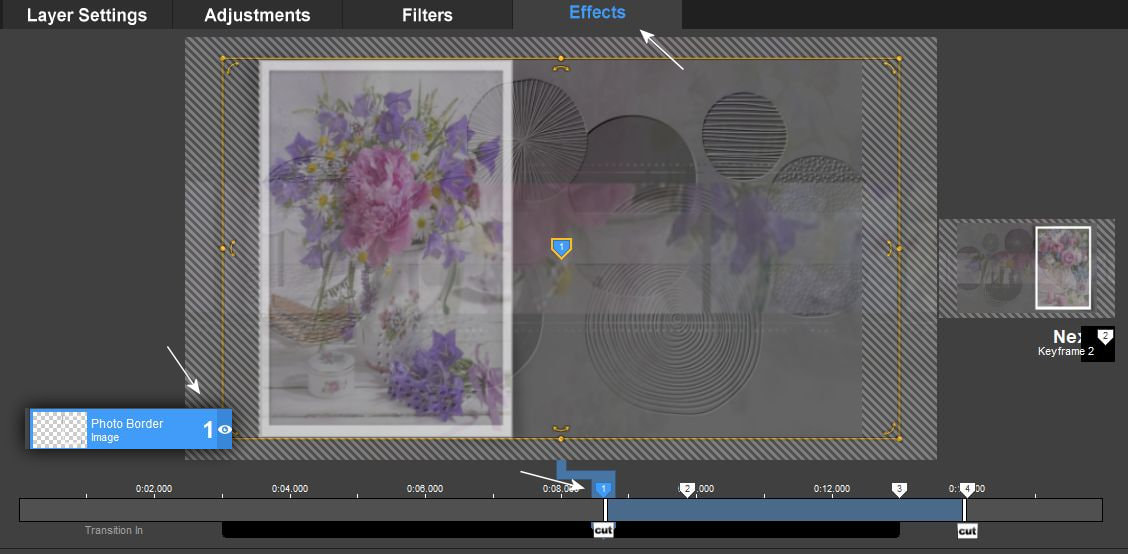
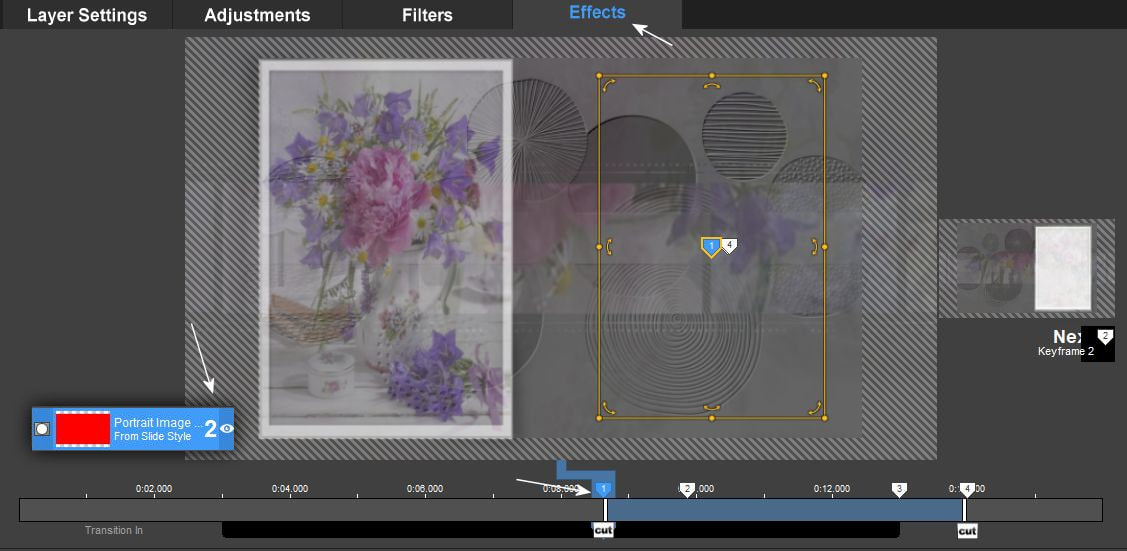
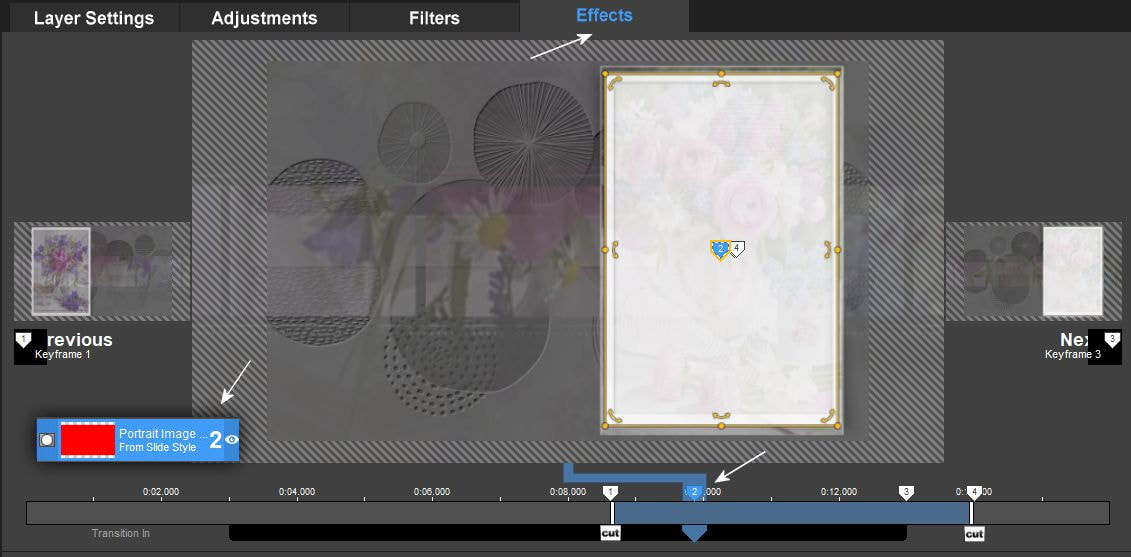
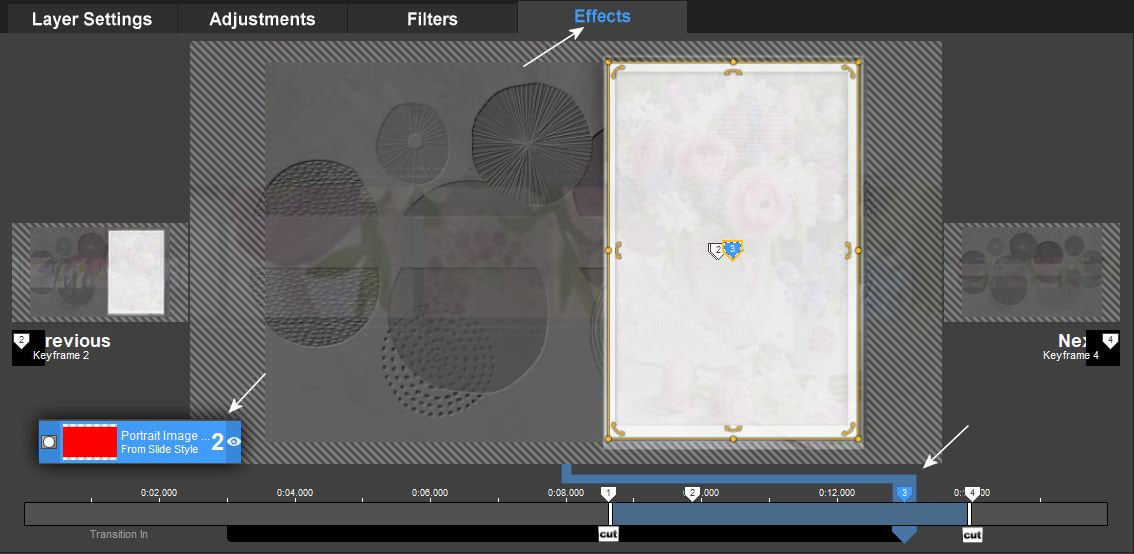
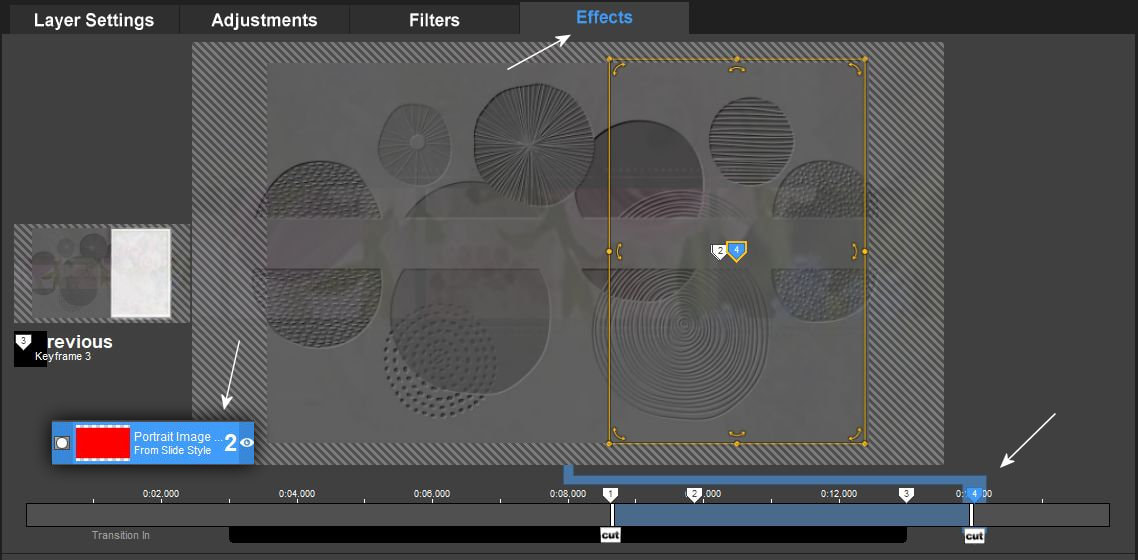
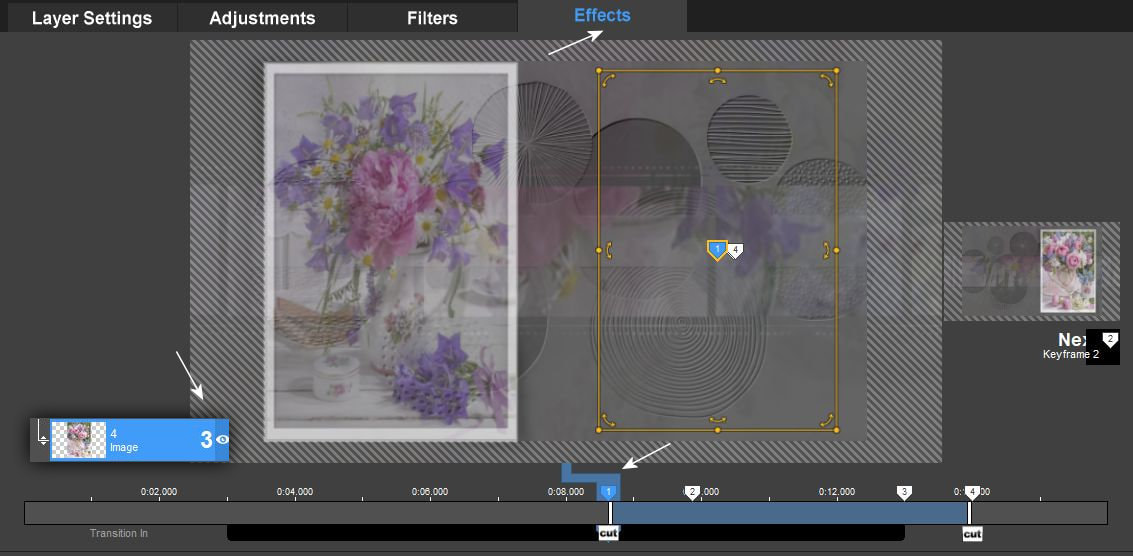
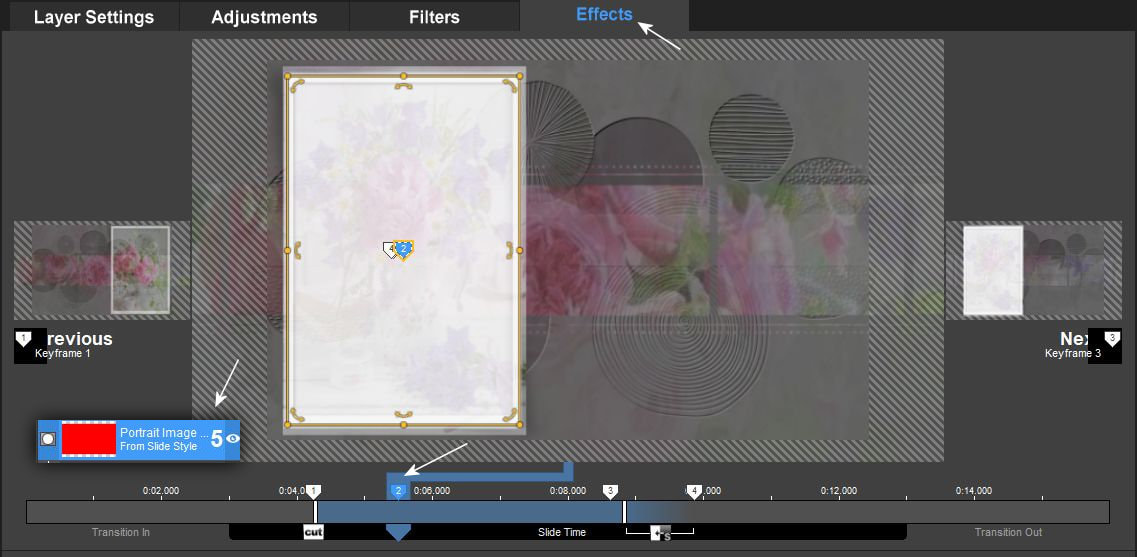
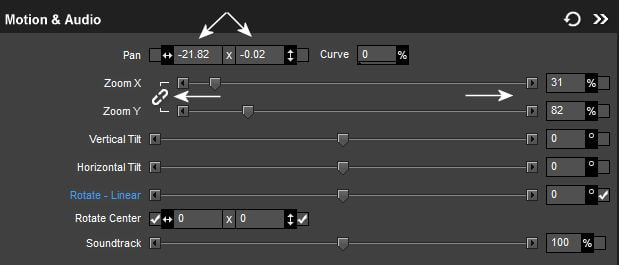
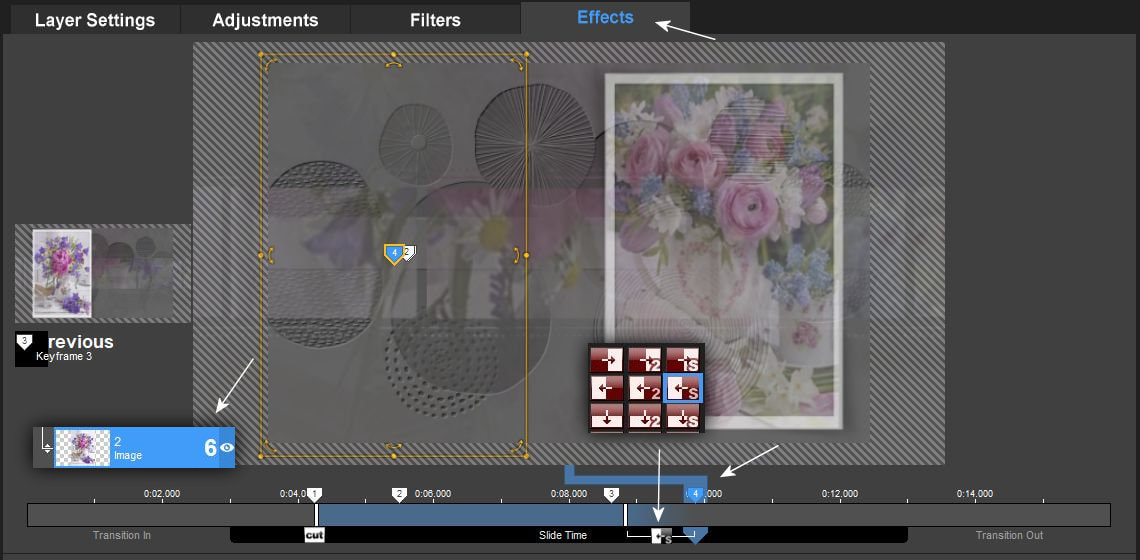
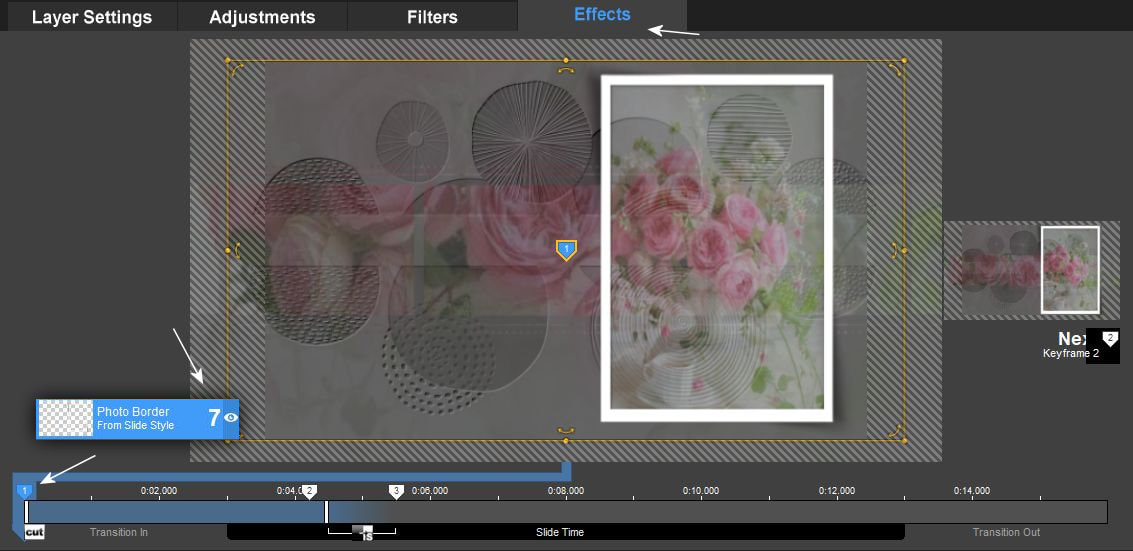
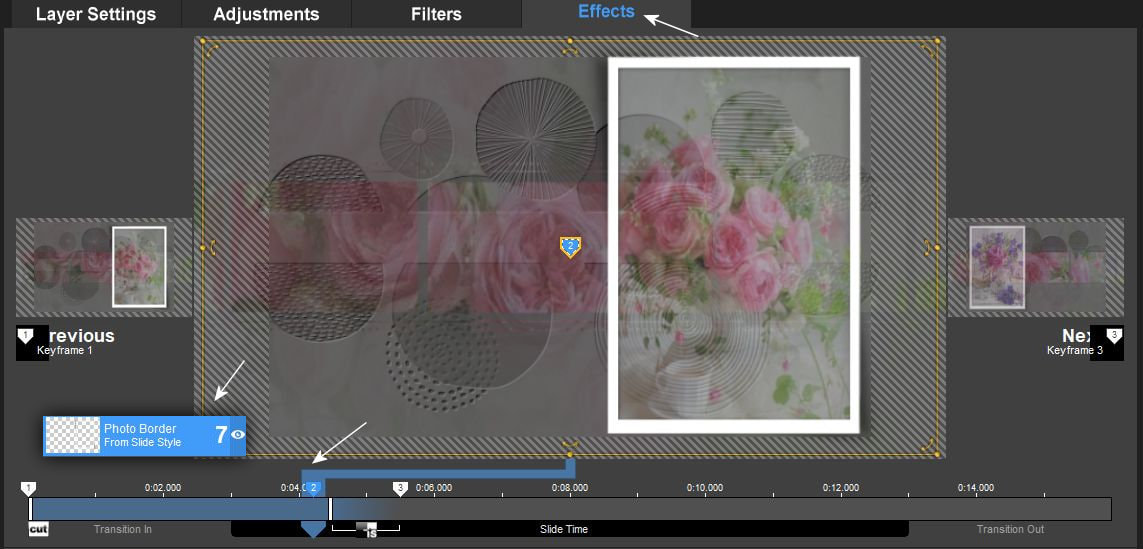
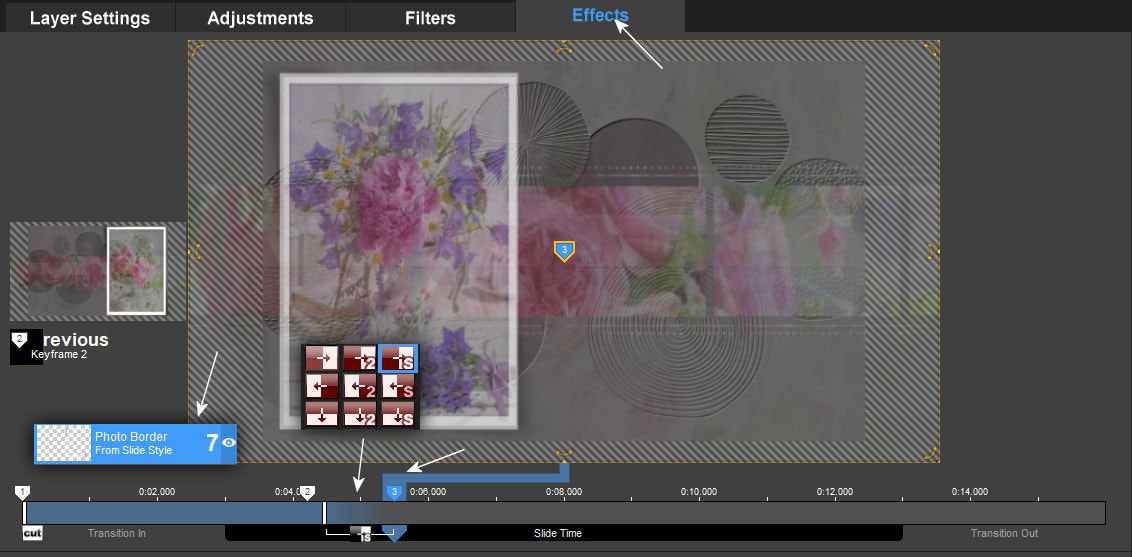
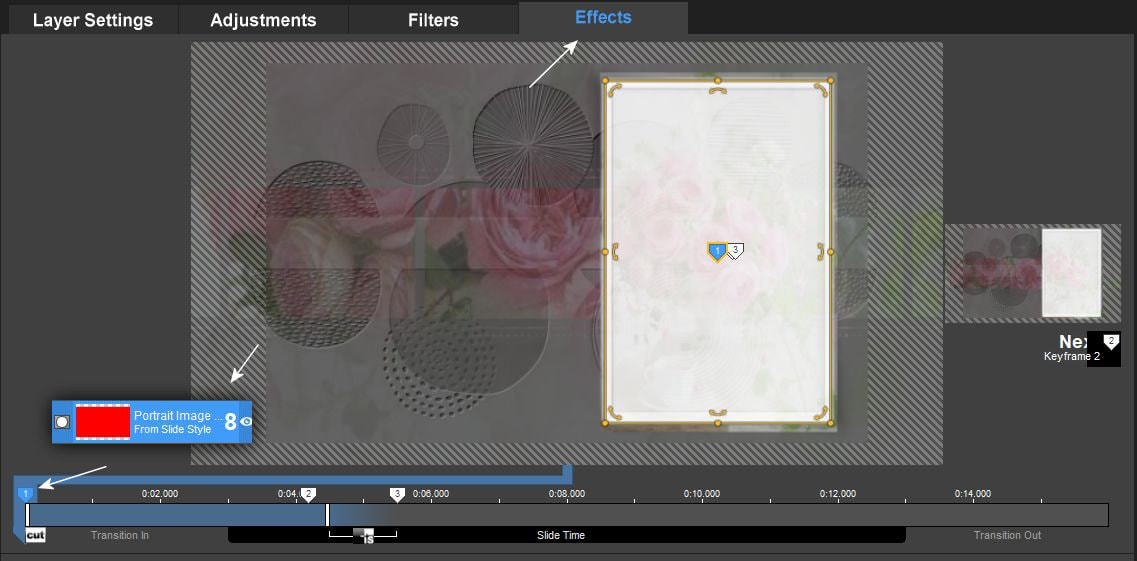
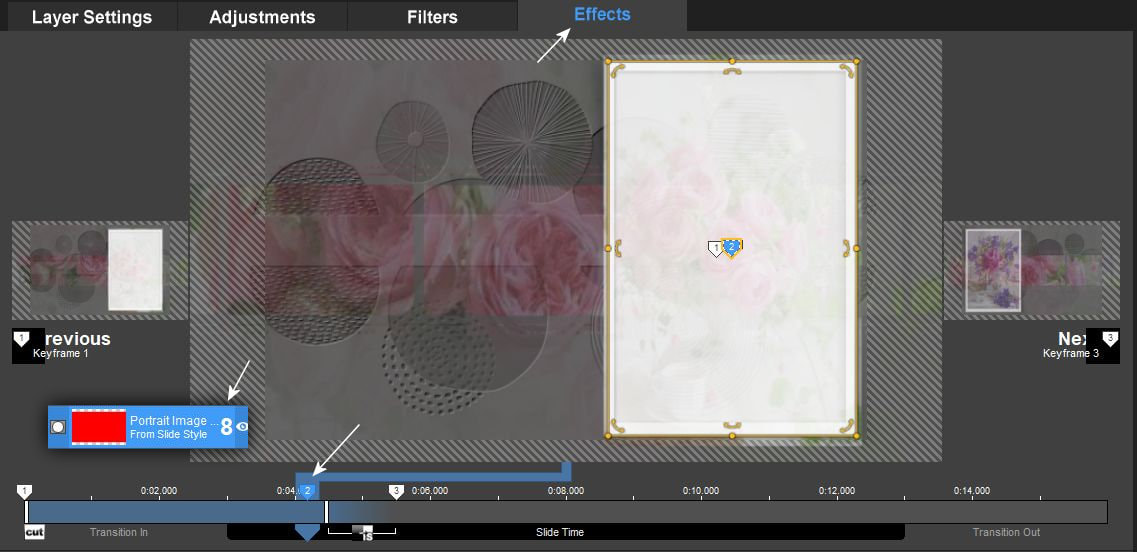
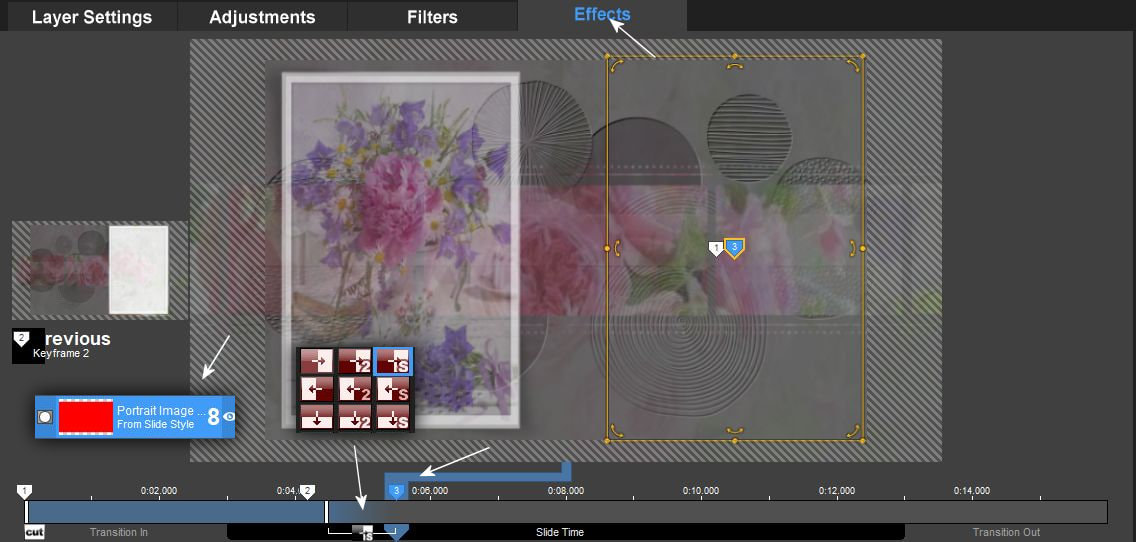
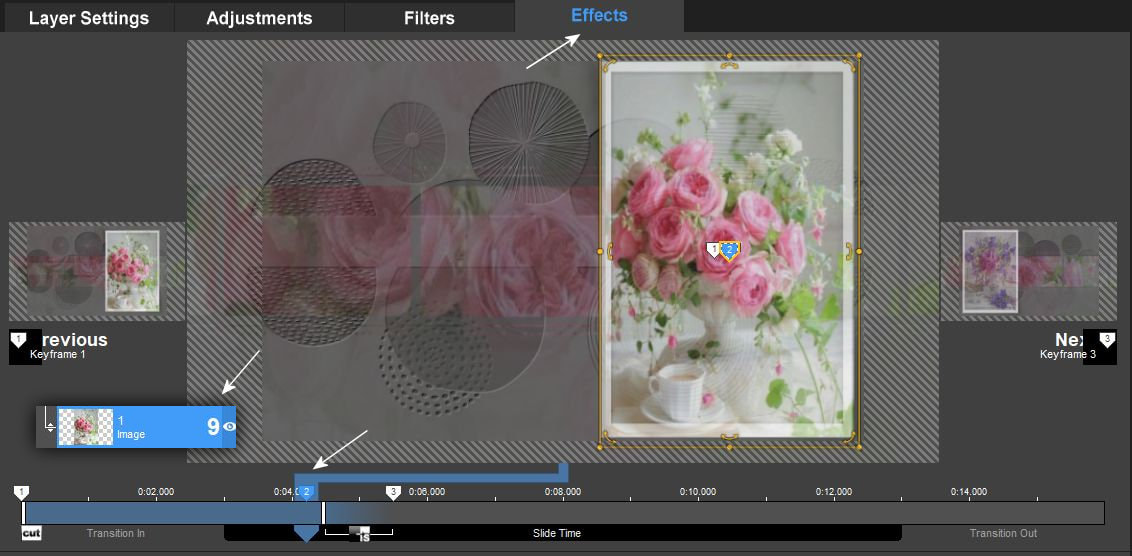
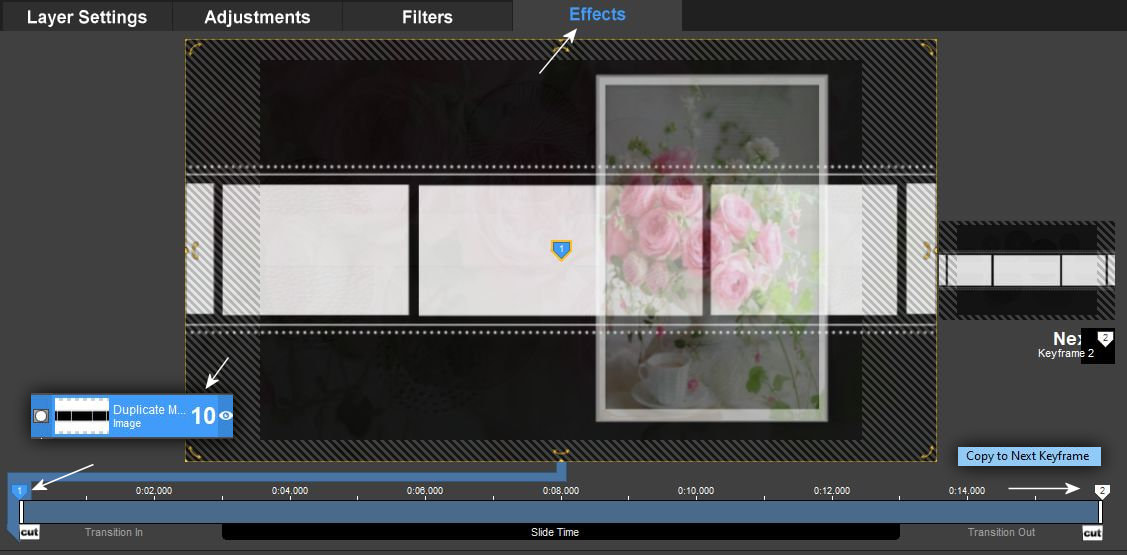
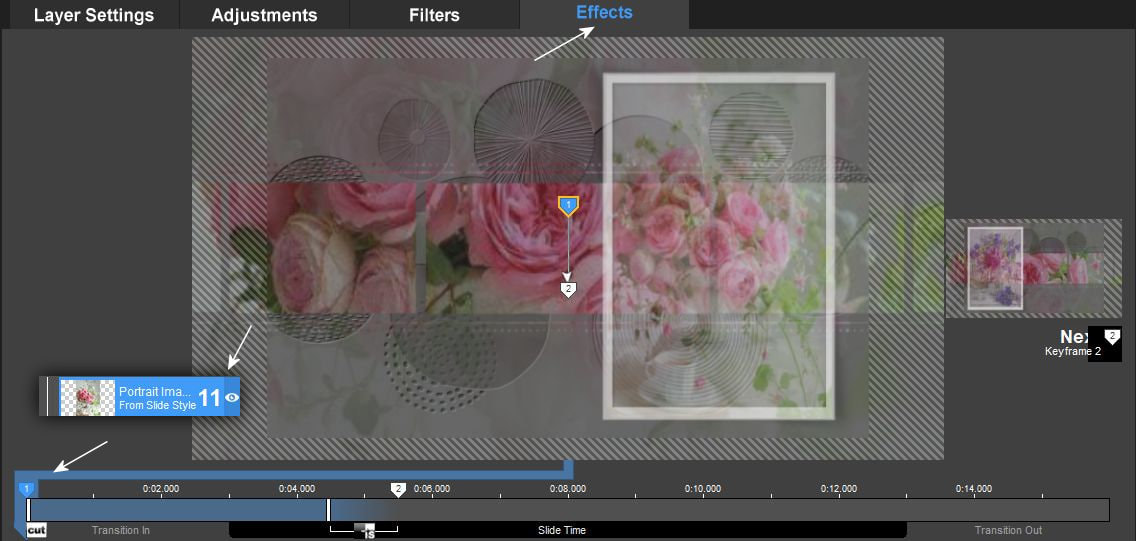
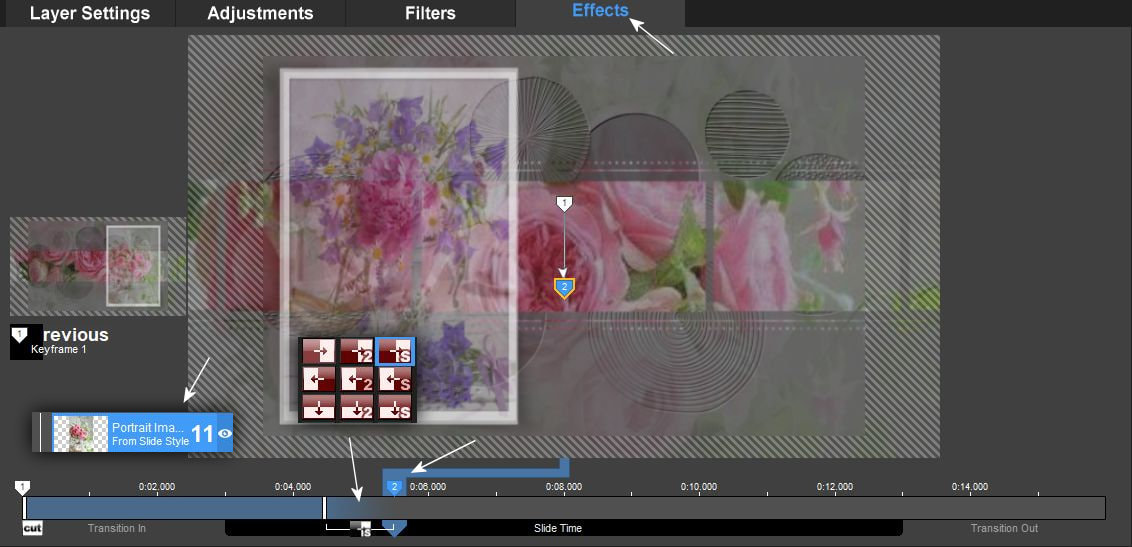
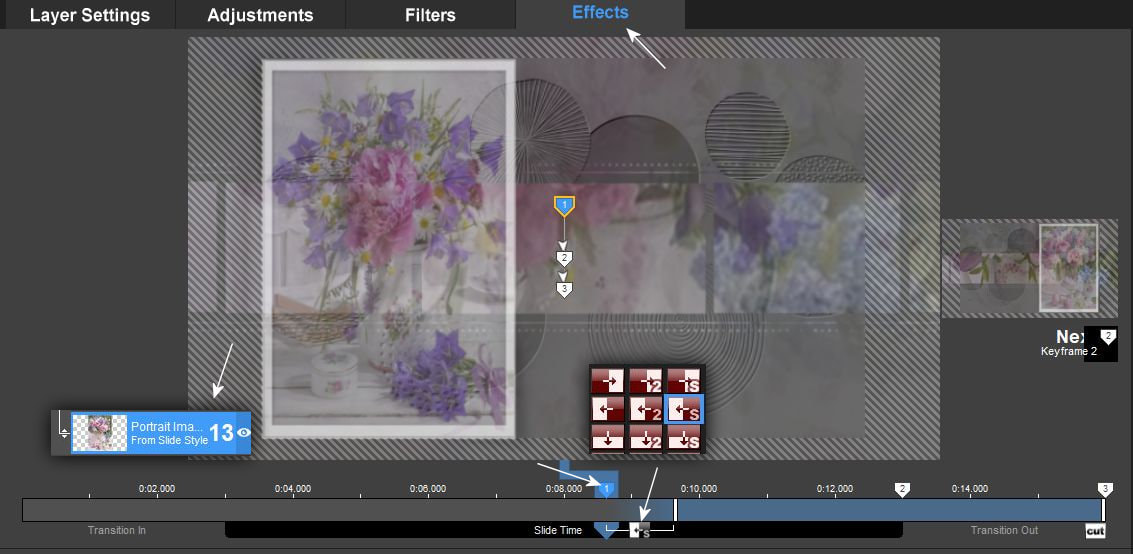
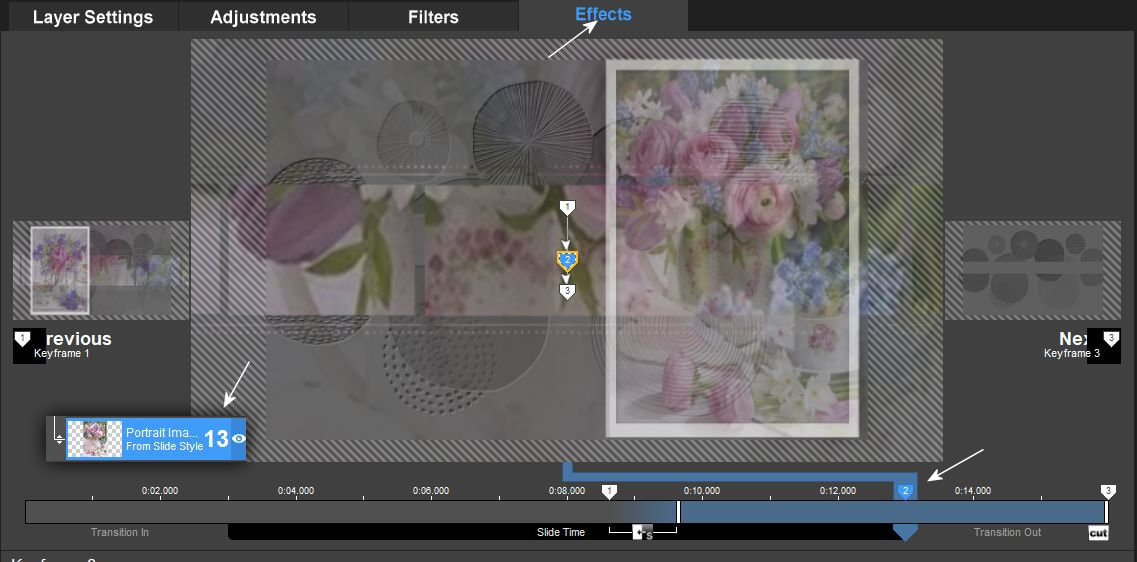
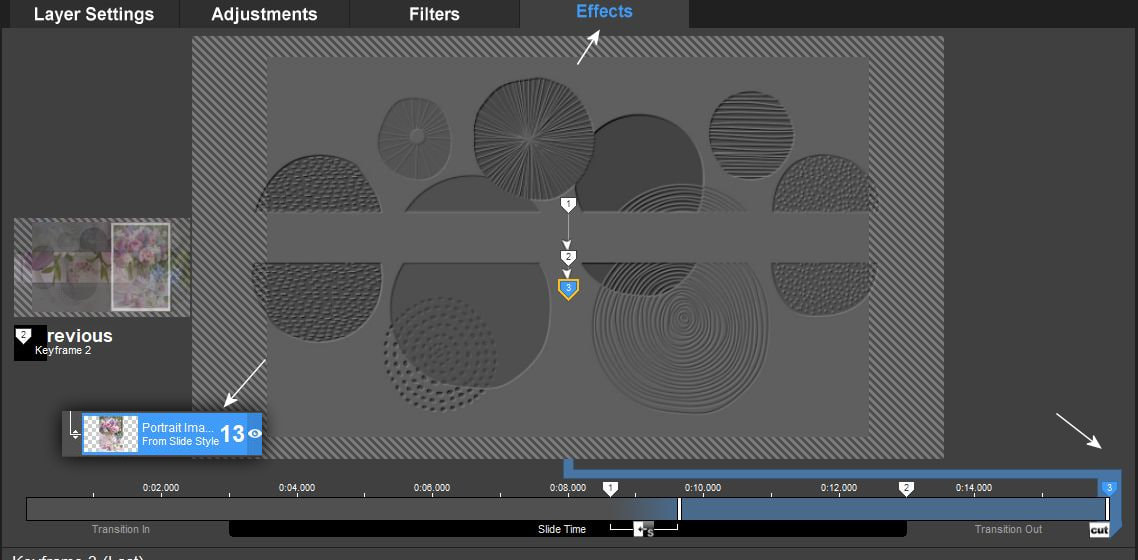
A keret és az ahhoz tartozó maskok pozíciója eltérhet kicsit a bemutatótól mert attól függnek, hogy az elökészületi elsö rész 10. pontjánál pontosan hogyan mentetted le a keret rétegedet. Ilyenkor csak egy kissebb korrekció szükséges a pozícióknál. A szélsöséges értékeken emiatt sem lehet csodálkozni mert sok esetben a keyframe pontokra állva elmozgatással alakultak ki a pozíciós értékek, hogy a kerethez a képek tökéletesen illeszkedjenek a maszkokkal.
Let's keep working on this wonderful video here in this drop down menu.
The position of the frame and the corresponding masks may be vary slightly from the presentation because they depend on how exactly you saved your frame layer at point 10 of the first part of the preparation. In this case, only a small correction of the positions is necessary. You can't be surprised at the extreme values, because in many cases the positional values were created by moving the keyframe points so that the images fit the frame perfectly with the masks.

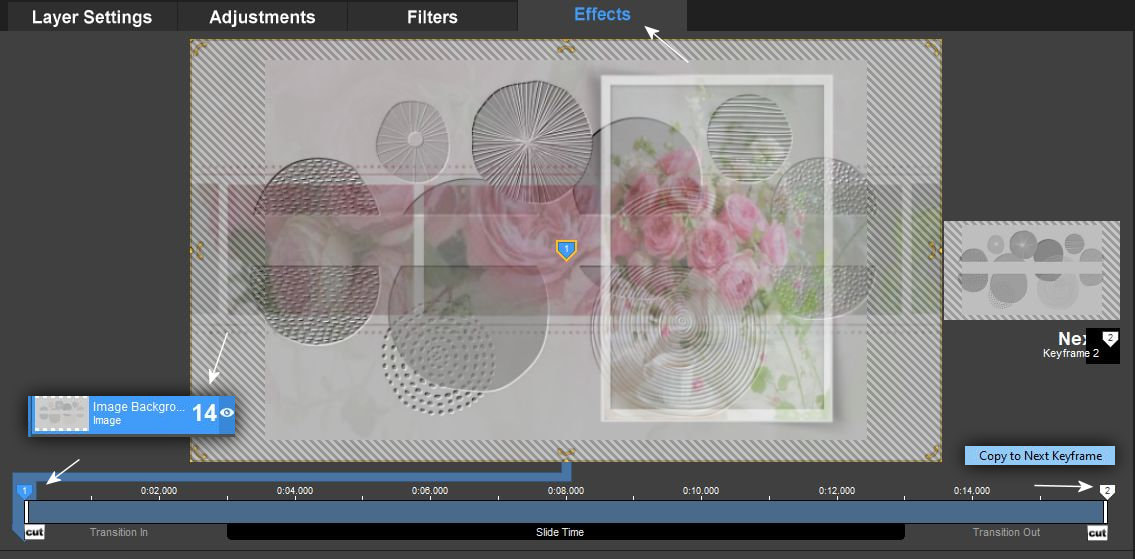
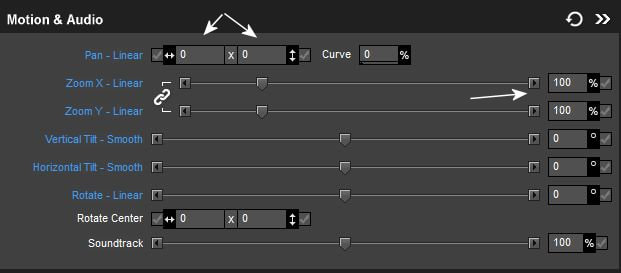
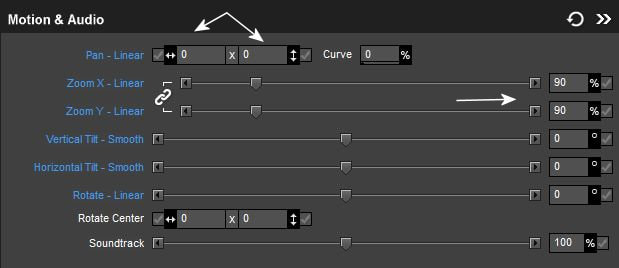
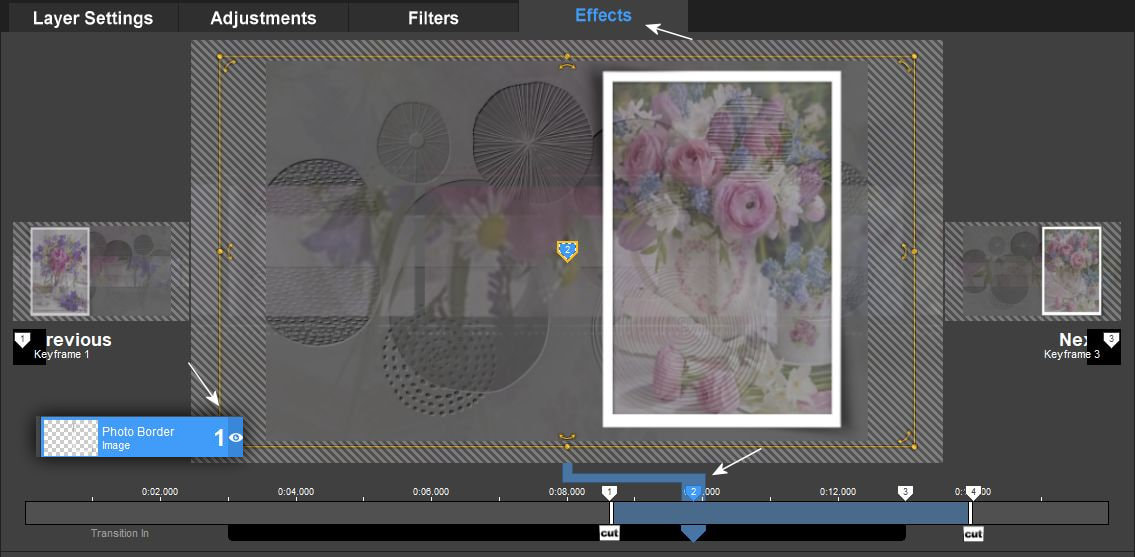
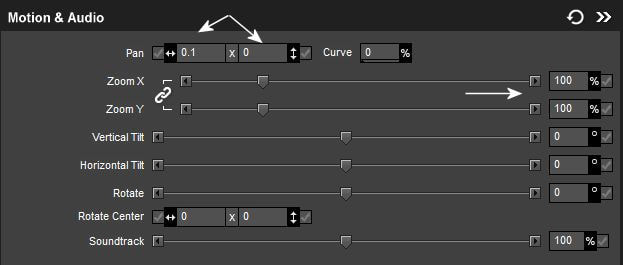
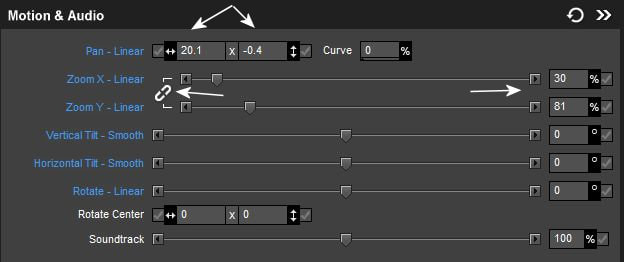
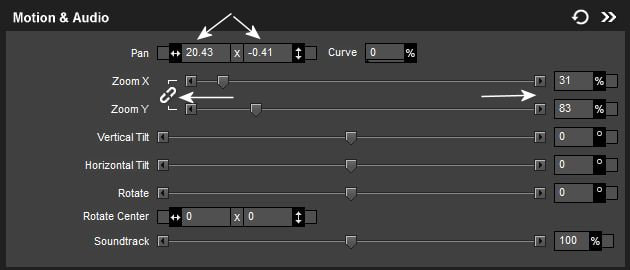
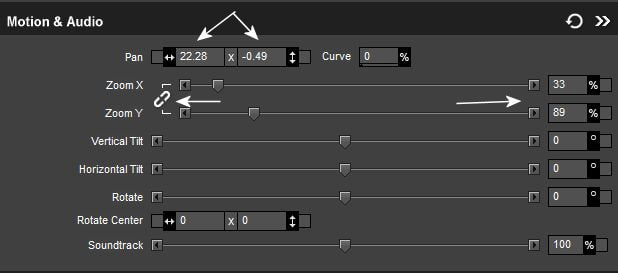
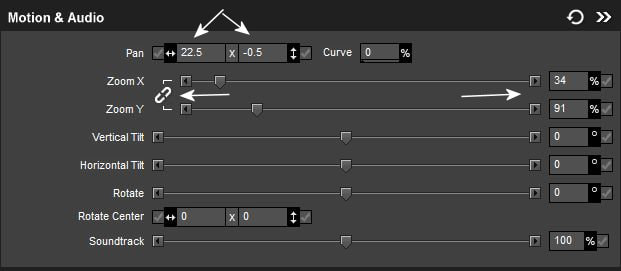
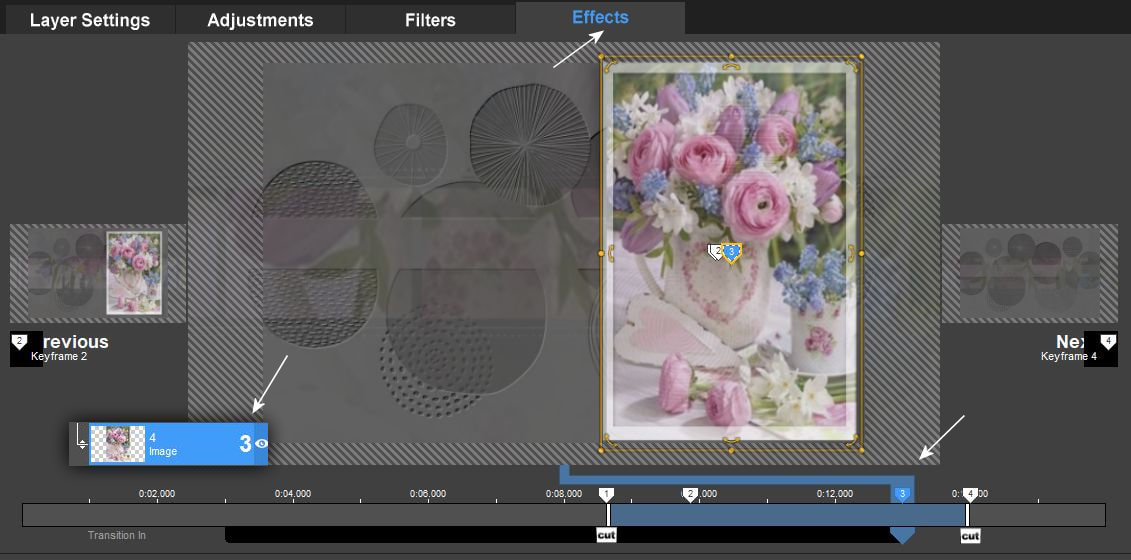
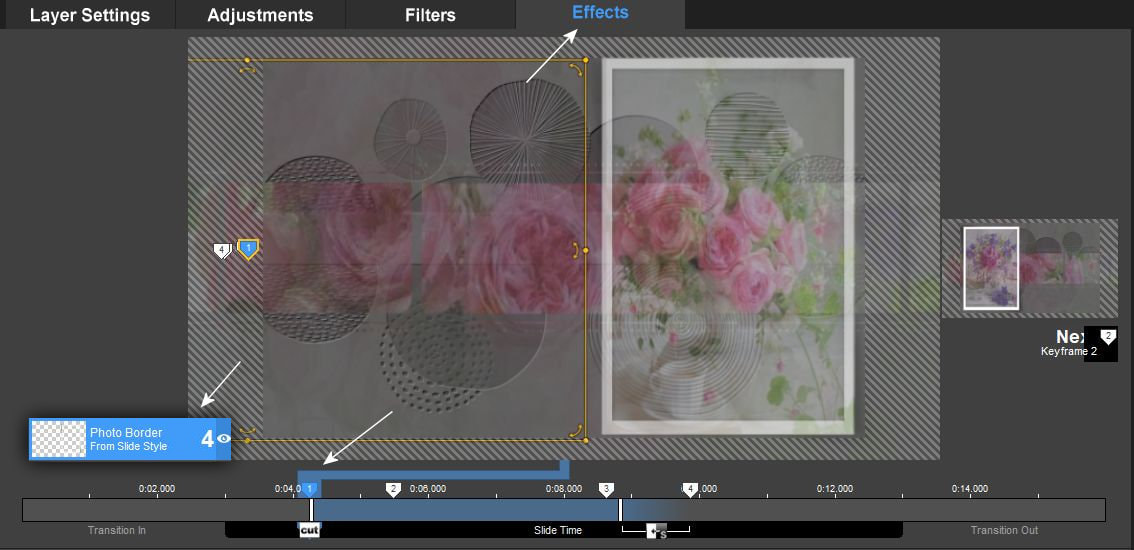
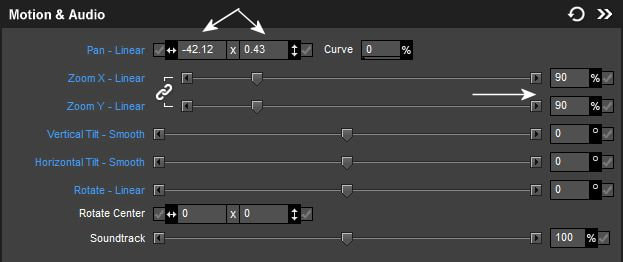
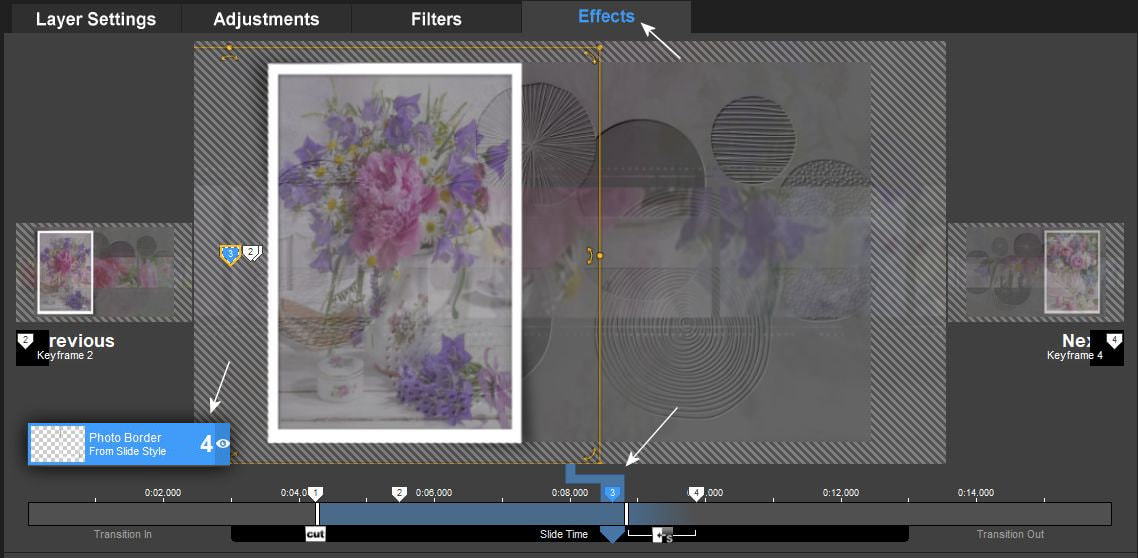
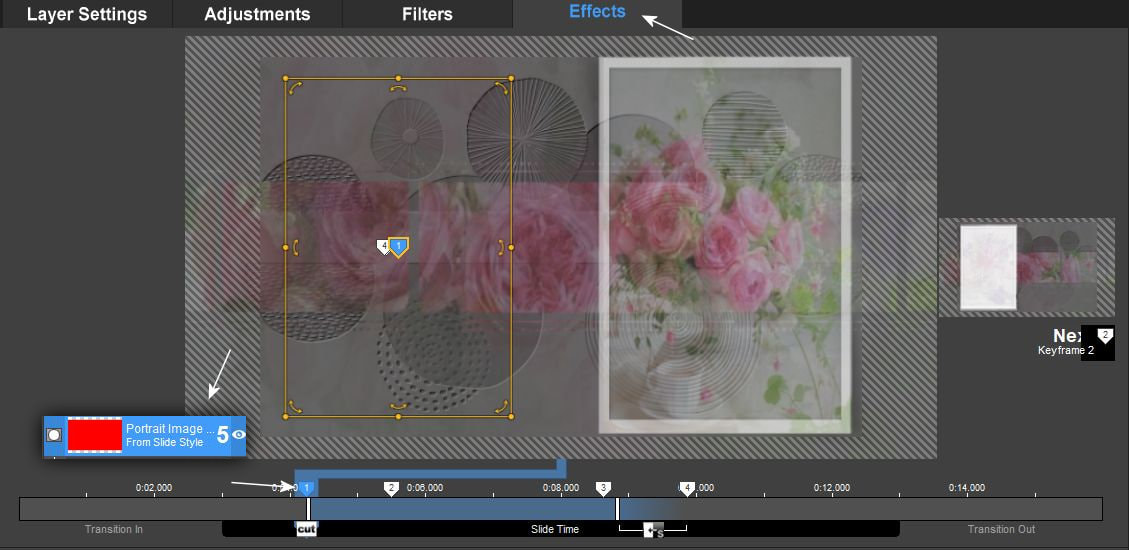
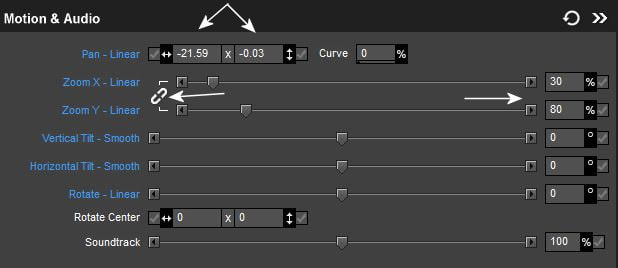
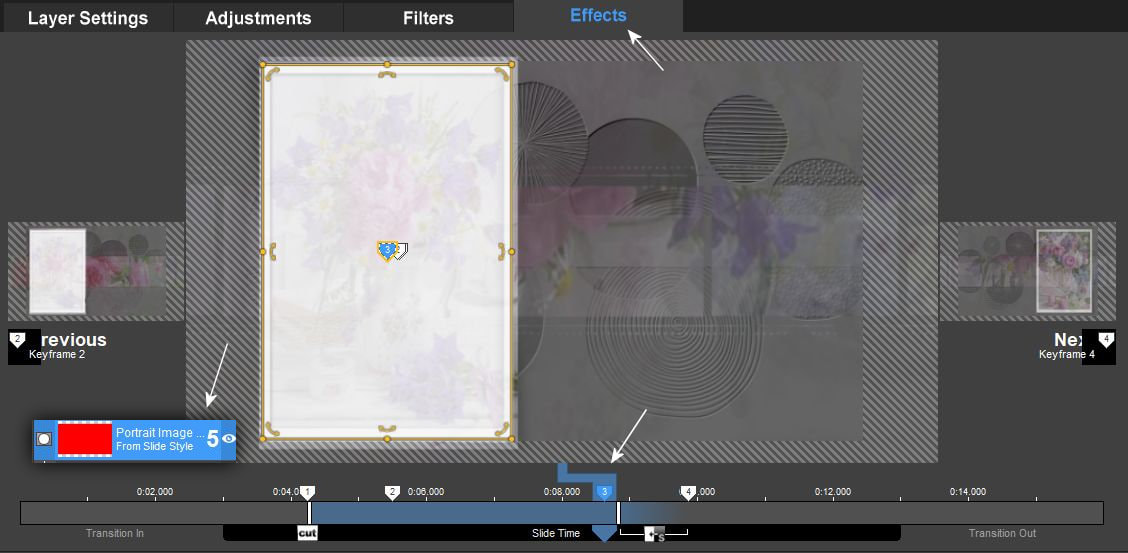
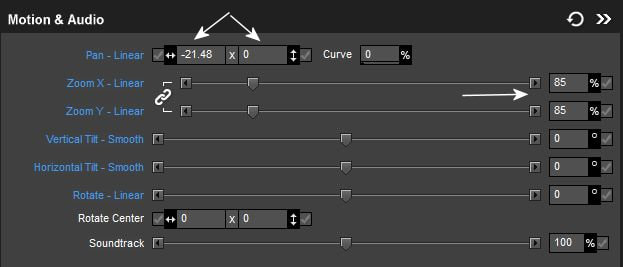
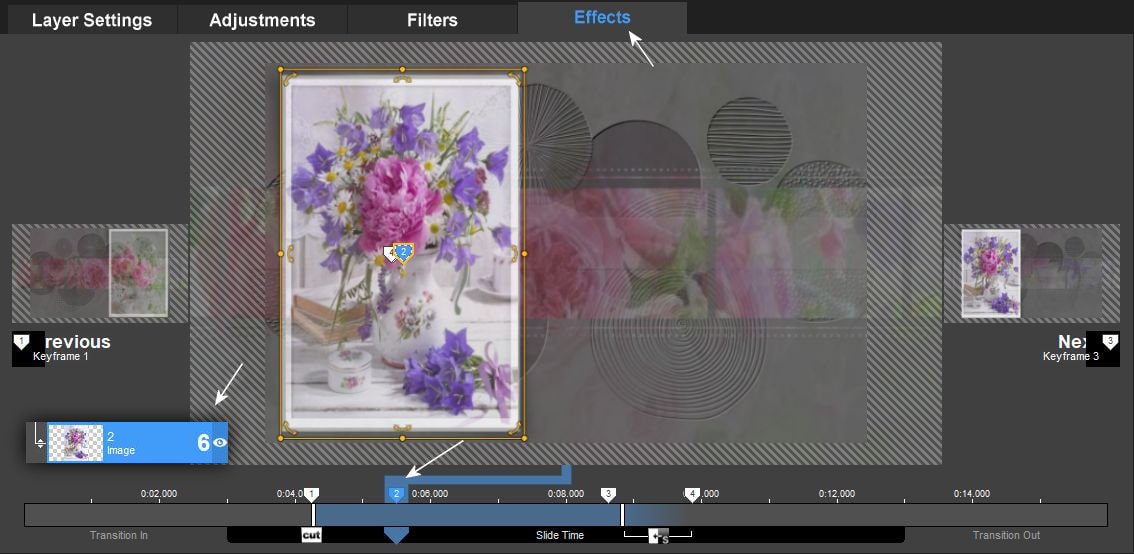
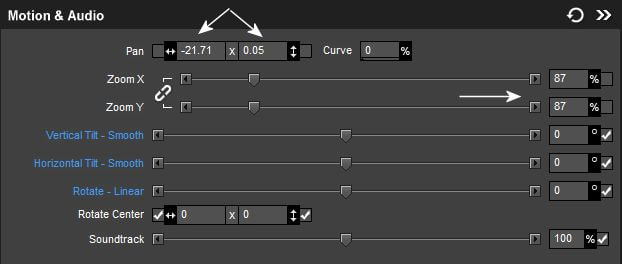
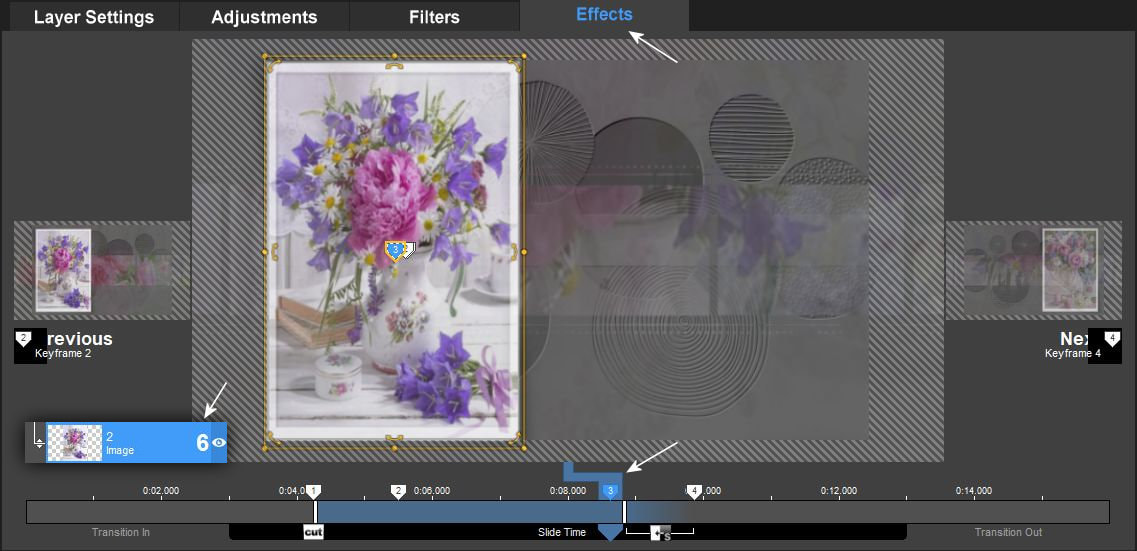
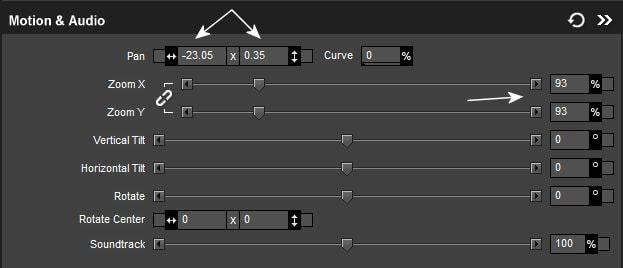
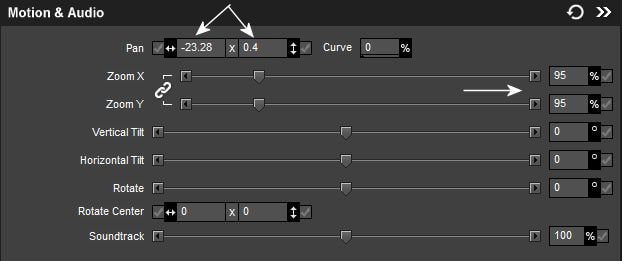
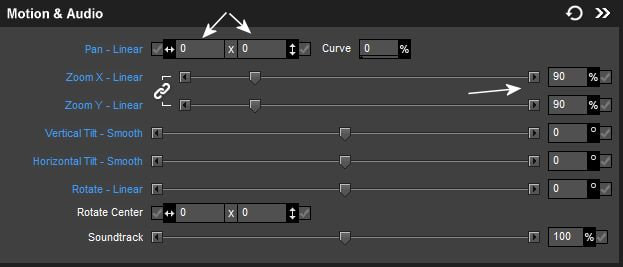
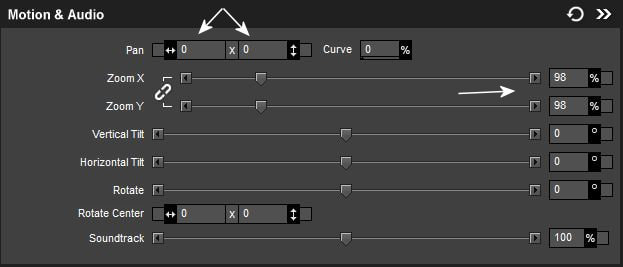
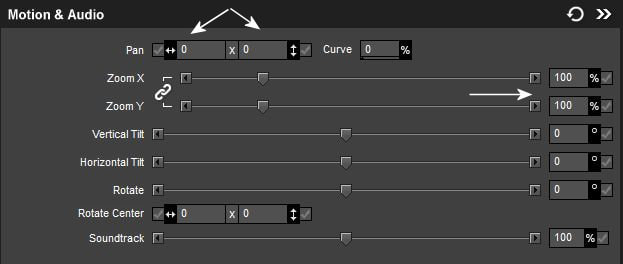
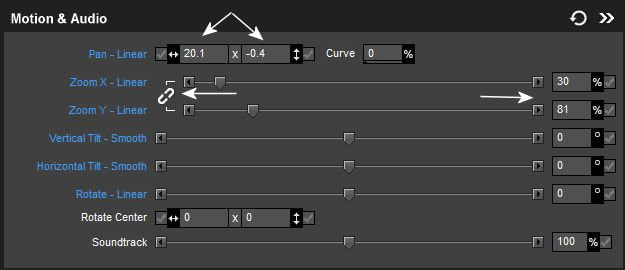
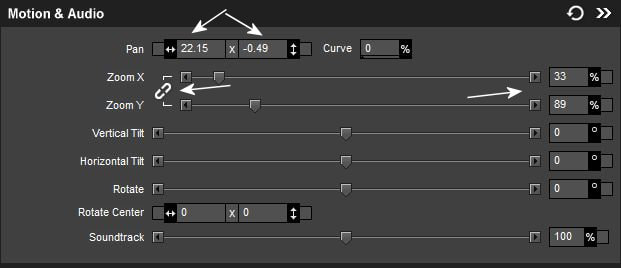
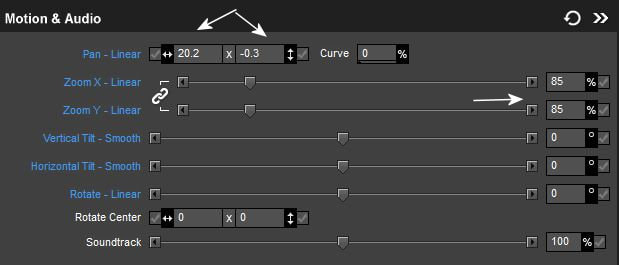
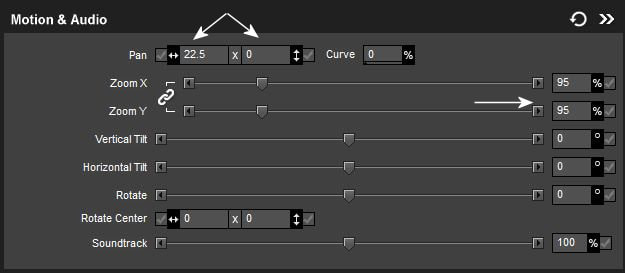
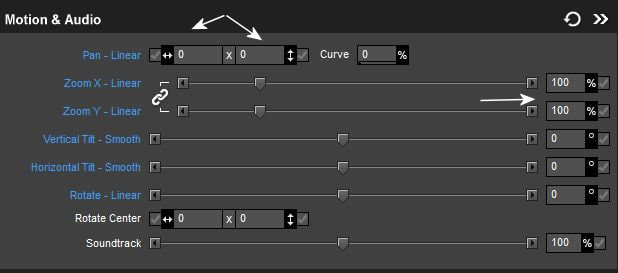
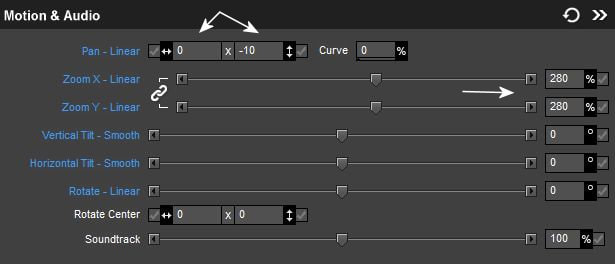
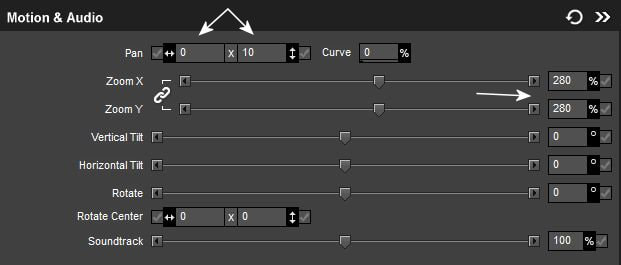
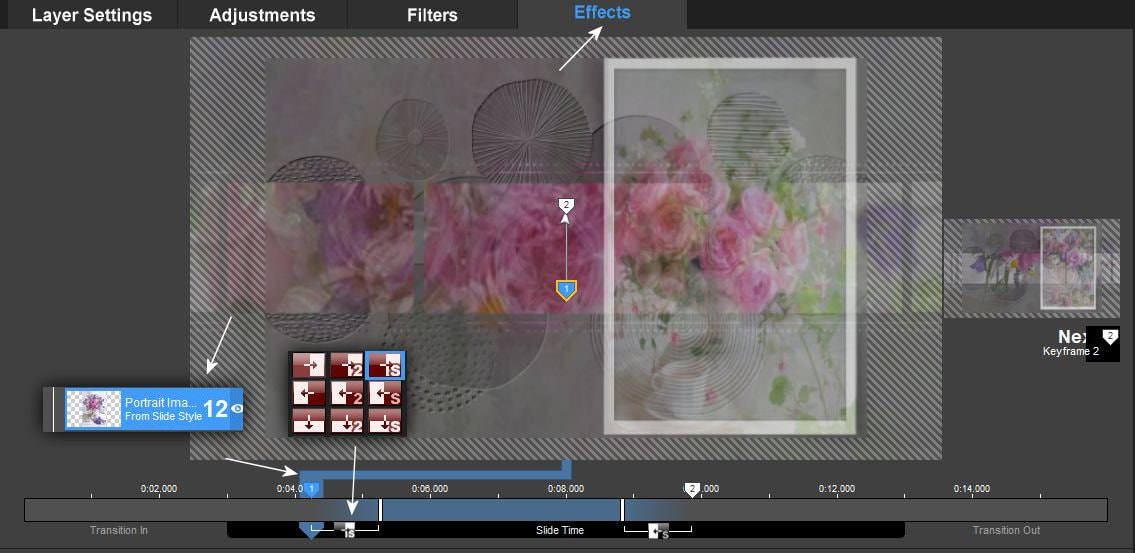
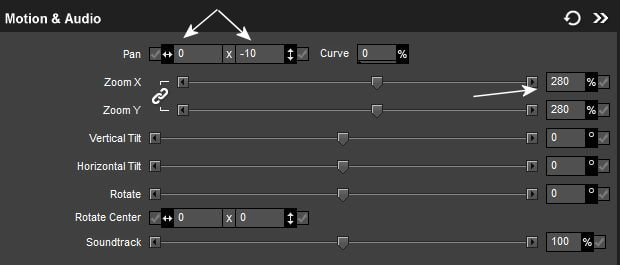
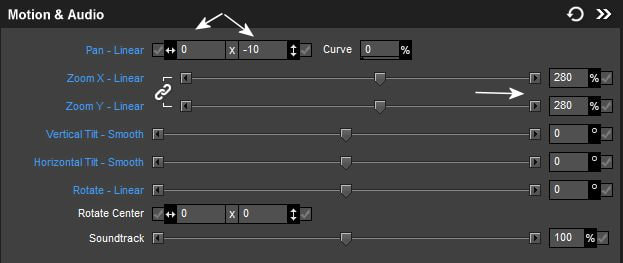
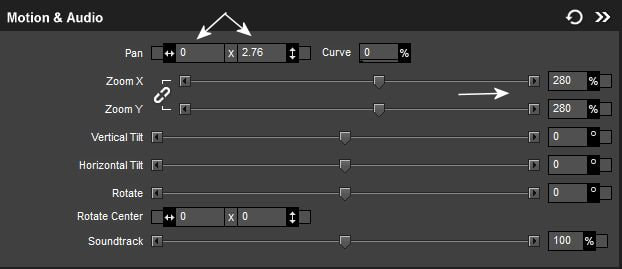
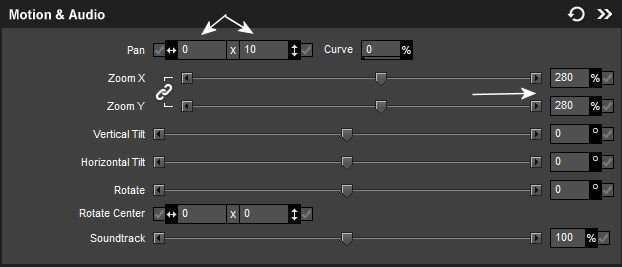
1.Kezdjük el az effectálást. Kövesd a képeken látottakat és nagyon figyelmesen dolgozz!!! Ha hibásan írsz be valamit akkor azt nagyon nehéz lesz megtalálni.Elöször írd be ezeket az értékeket és csak azután korrigálj ha nálad ez szükséges.Kell egy alapérték amin változtatni tudsz.
Let's start effecting. Follow what you see in the pictures and work very carefully!!! If you enter something incorrectly, it will be very difficult to find it. First enter these values and only then correct them if you need it. You need a default value that you can change.
2.
3.

4.
5.
6.
7.
8.
9.

10.
11.
12.
13.
14.
15.
16.
17.
18.
19.
20.

21.
22.
23.
24.
25.
26.
27.
28.
29.
30.
31.
32.
33.
34.
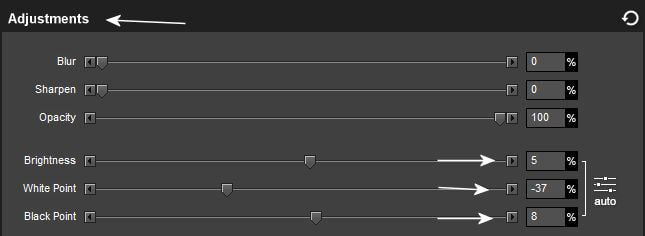
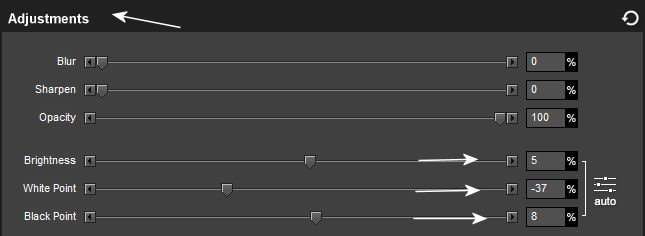
35. Az adjustment menüben állítsd be a képen látható értéket.
In the adjustment menu, set the value shown in the picture.
36.
37. Az adjustment menüben állítsd be a képen látható értéket.
In the adjustment menu, set the value shown in the picture.
38.
39.Az adjustment menüben állítsd be a képen látható értéket.
In the adjustment menu, set the value shown in the picture.
40.
41.
42.