
Folytatjuk a slant típusú áttünés elkészítését. Ebben a bemutatóban a vertikális slant transition készül. Amikor a munkafolyamatban vagytok ne törödjetek azzal, hogy a képeken nem ugyanazt látjátok ahogy dolgoztok. Csak pontosan írjátok be az értékeket amelyeket láttok. Ez azért van mert én már a beírt értékekkel elkészült áttünést fotóztam. Mindenkinek minden kialakul ha pontosan dolgozik.
We continue making the slant type transition. In this presentation, the vertical slant transition is created. When you are in the work process, don't worry that you don't see the same thing in the pictures as you work. Just enter the exact values you see. This is because I have already taken a photo of the completed transition with the entered values. Everything develops for everyone if you work precisely.

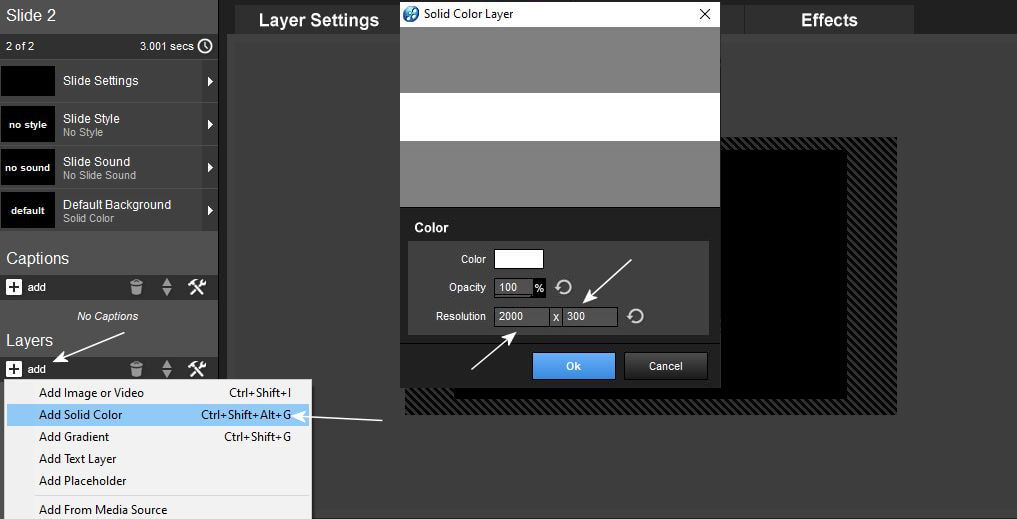
1. Kezdjük el a rétegek kialakítását.
Let's start creating the layers.
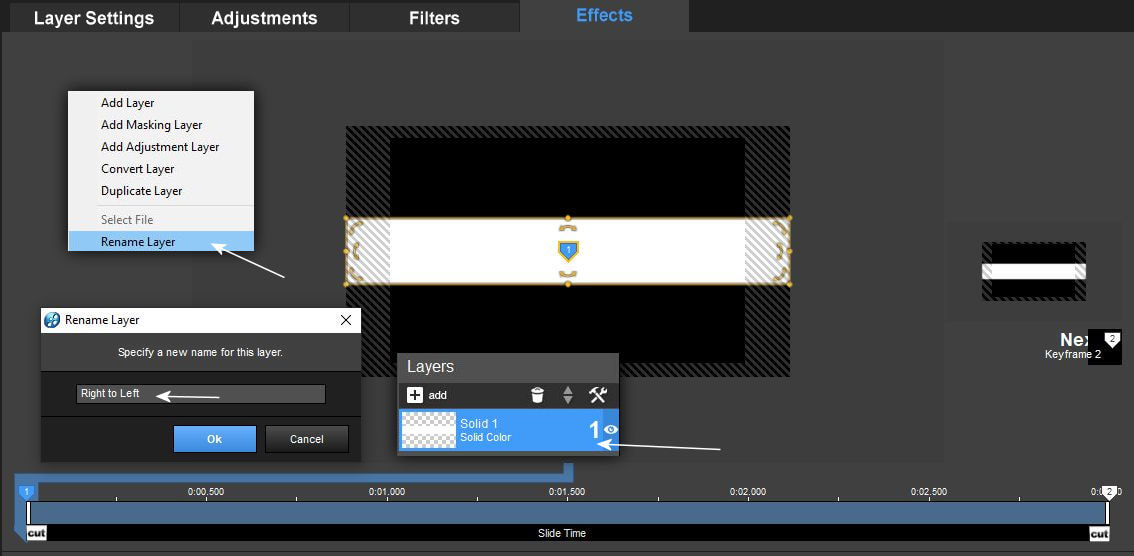
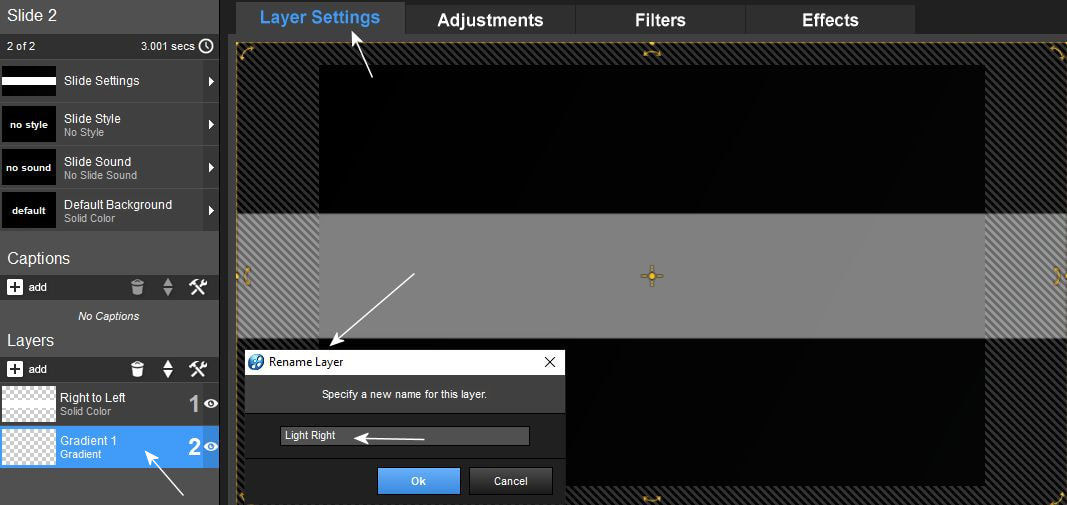
2. Nevezd át ezt a réteget. Szinte minden rétegen lesznek átnevezések ezért nagyon oda kell figyelned erre. Add ugyanazt a nevet amit itt a képen látsz
Rename this layer. Almost every layer will have renames, so you have to pay close attention to this. Give it the same name you see in the picture
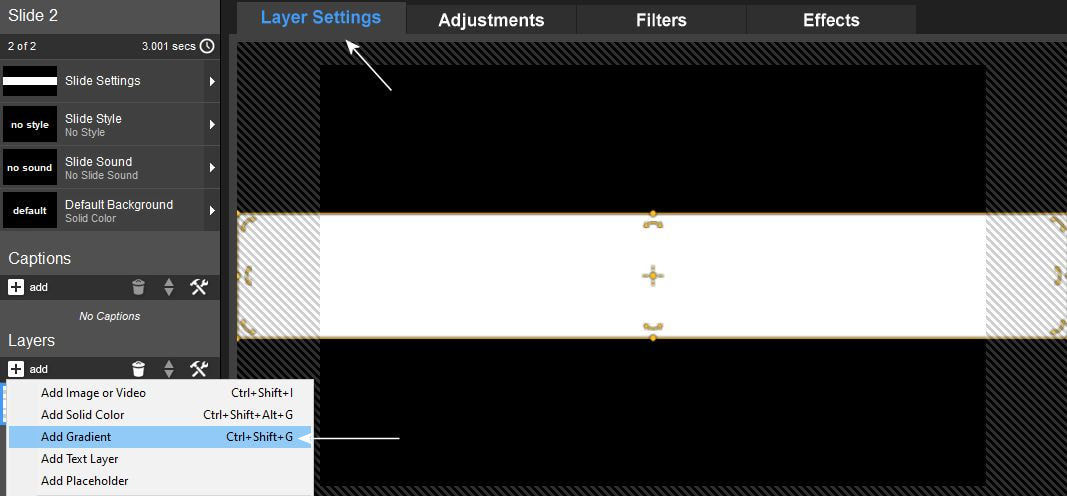
3. Most egy gradient réteget kell csinálni.
Now you need to make a gradient layer.
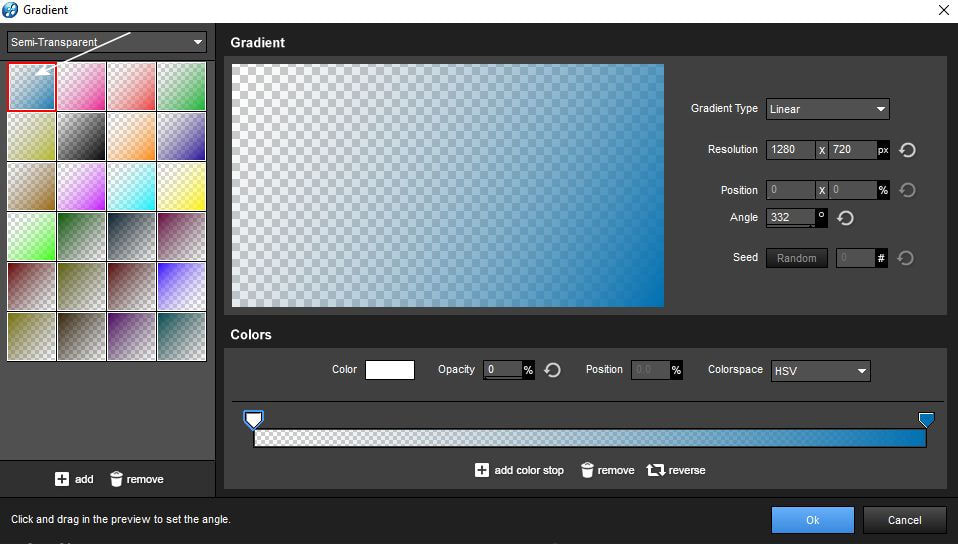
4. Válaszd a semi transparent menüt
Choose the semi transparent menu
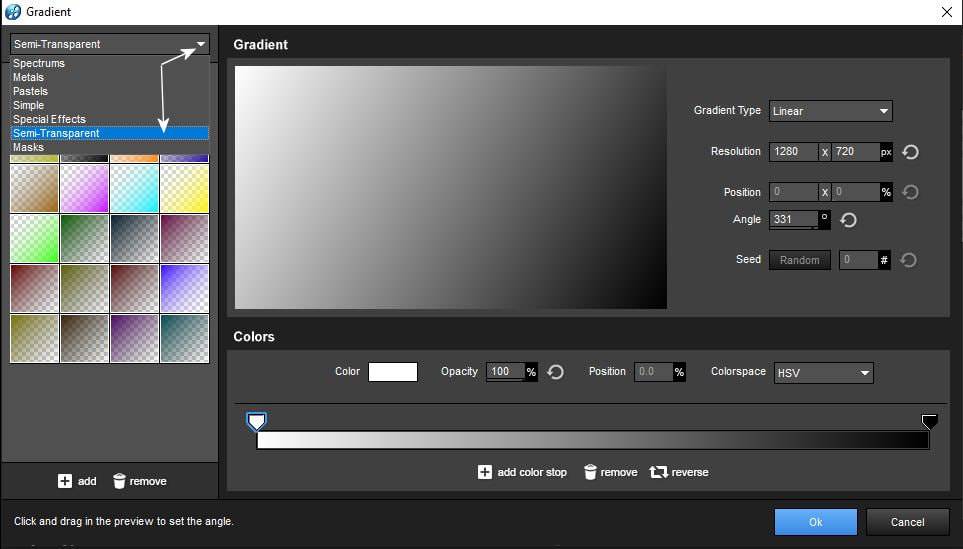
5. Kattints az elsö kockára
Click on the first gradient cube
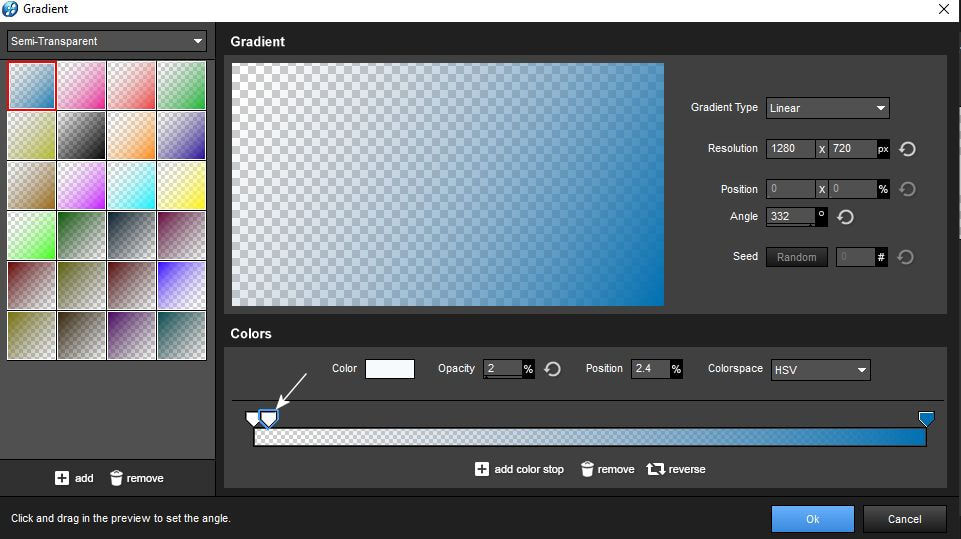
6. A lehetö legközelebb az elsö ponthoz kattints a lécre hogy legyen egy másik pont amivel tovább dolgozol.
Click on the bar as close as possible to the first point so that there is another point to continue working with.
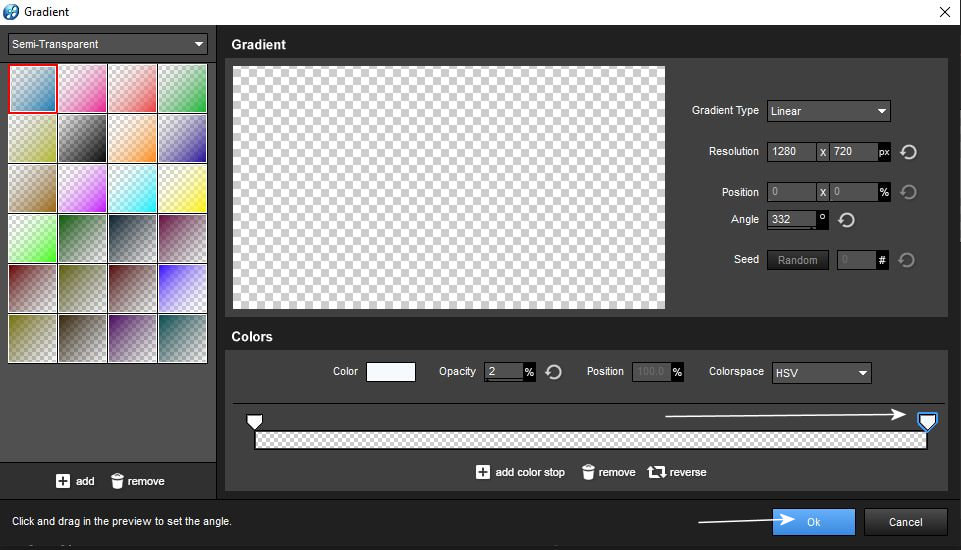
7. Húzd el ezt a pontot a legvégére a lécnek, hogy ne legyen szín sehol és egy teljesen átlátszó gradientet kapjunk.
Drag this point to the very end of the bar so that there is no color anywhere and we get a completely transparent gradient.
8. Ezt a réteget is át kell nevezned.
You must also rename this layer.
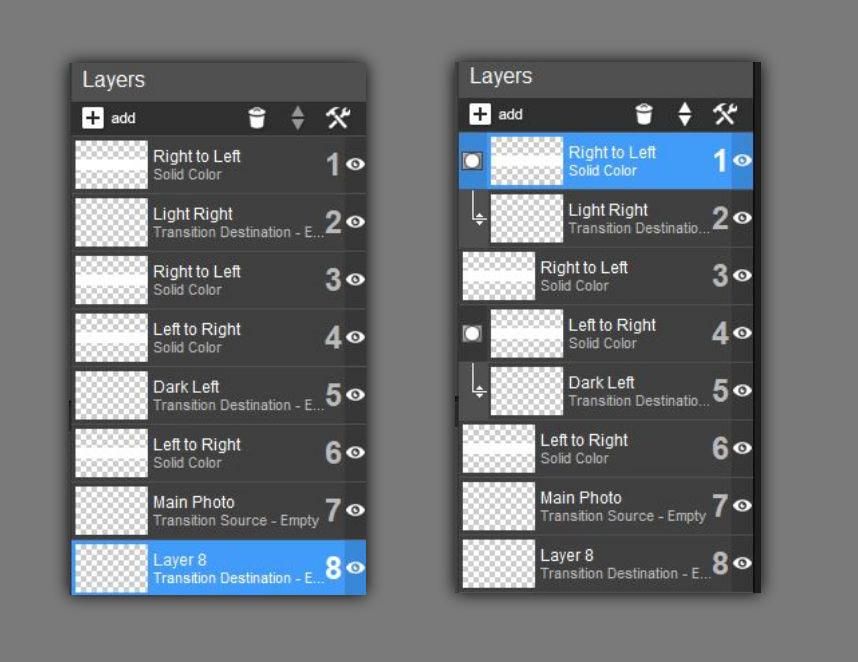
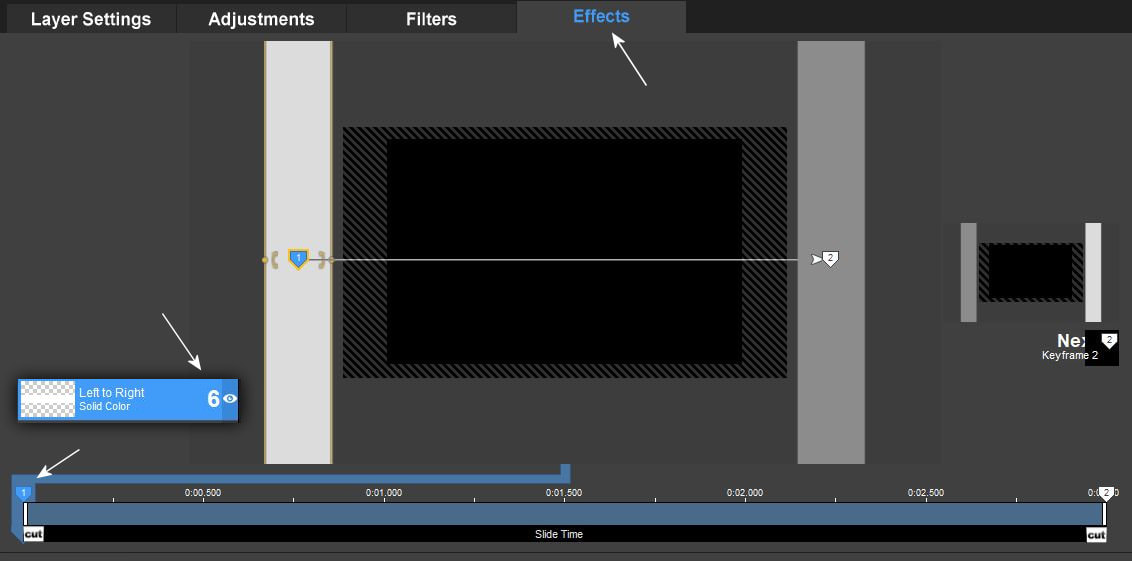
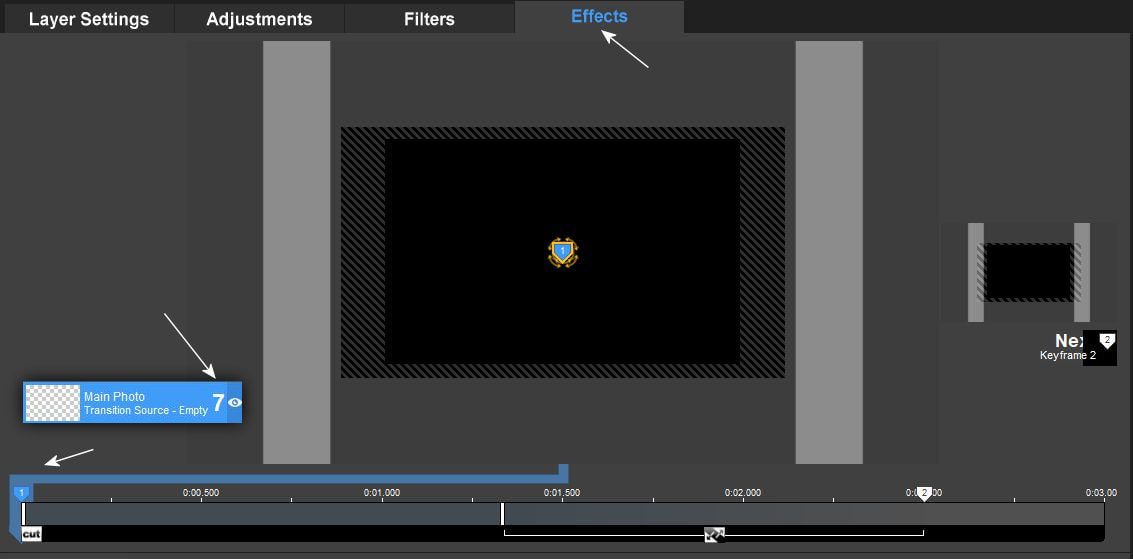
9. Nagyon fontos része jön a munkának. Az összes rétegünk ebböl a két fajta rétegböl áll össze. Meg kell duplázni öket , sorba kell raknod ahogy azt az elsö képen látod. Talán még fontosabb rész az , hogy minden réteget átnevezz a rétegekre kattintva a legördülö menüböl. Nagyon kell figyelned arra is, hogy a réteg nevek alatt levö kis betüs soroknak is nagy jelentösége van. Majd kösd össze a maskokat.
A very important part of the work is coming. All our layers consist of these two types of layers. You have to double them, you have to line them up as you can see in the first picture. Perhaps an even more important part is to rename each layer by clicking on the layers from the drop-down menu. You also have to pay close attention to the fact that the lines of small letters under the layer names are also very important. Then work on the second image.
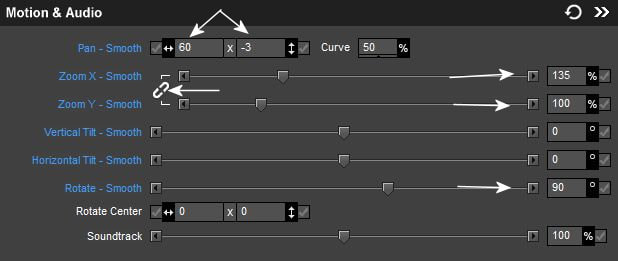
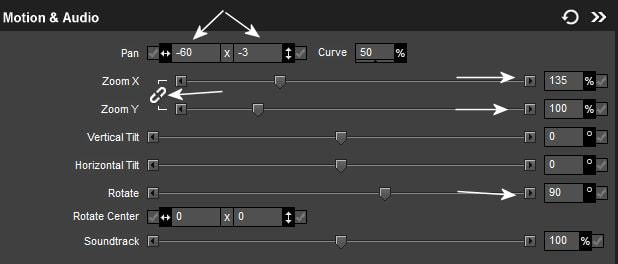
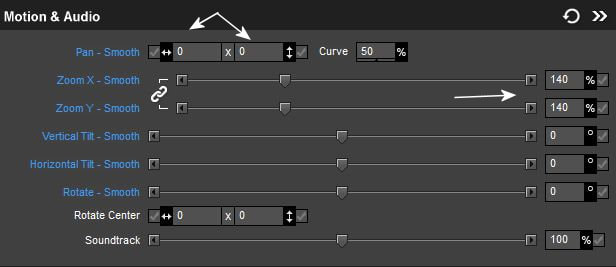
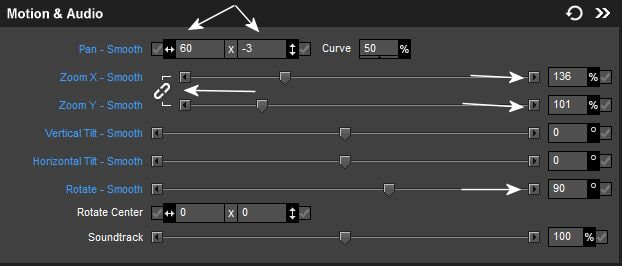
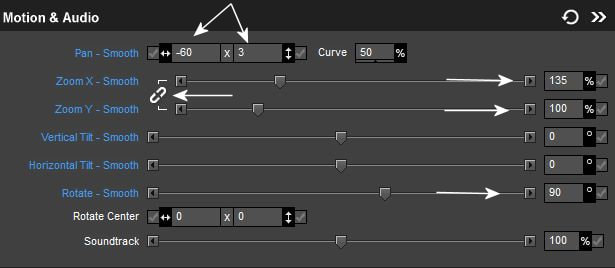
10.
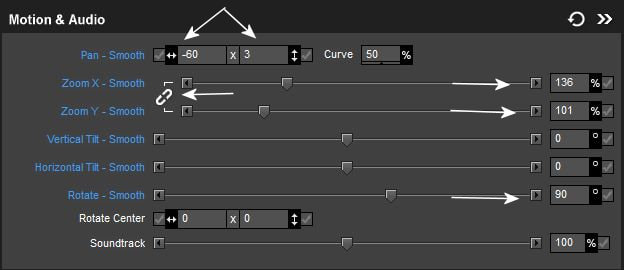
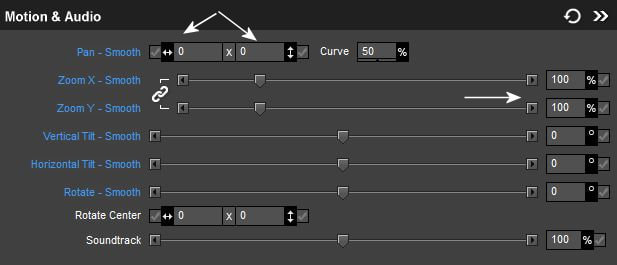
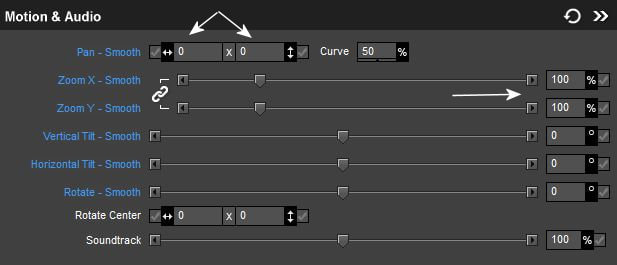
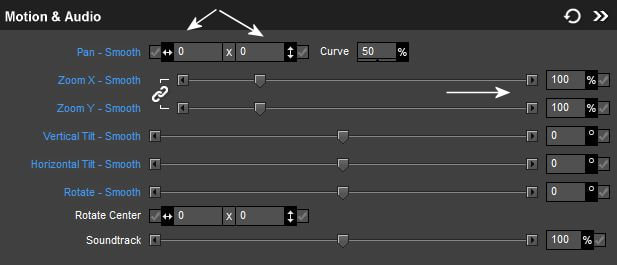
Figyelem, ahhoz hogy a zoom-hoz különbözö értékeket tudj írni mindig rá kell
kattintani a sor elején látható láncszem ikonra.!!!
Attention, in order to be able to write different values for the zoom, you must always click on the chain icon at the beginning of the row.!!!
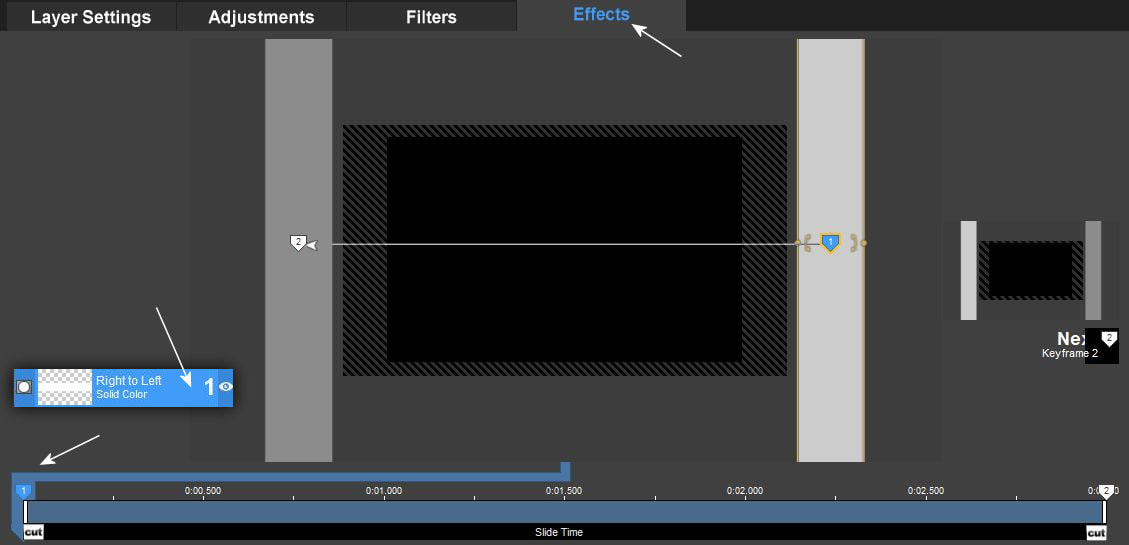
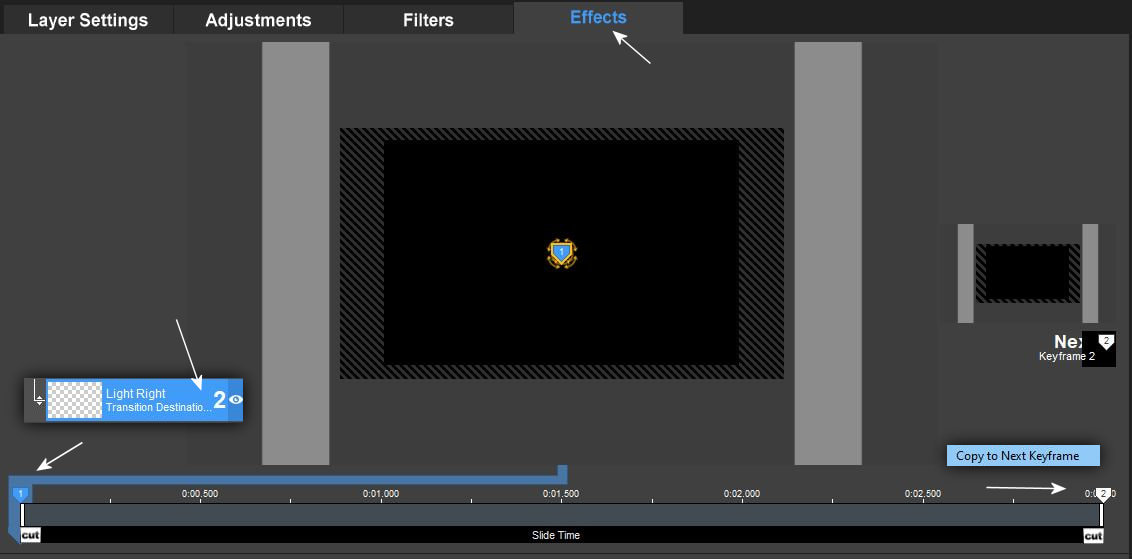
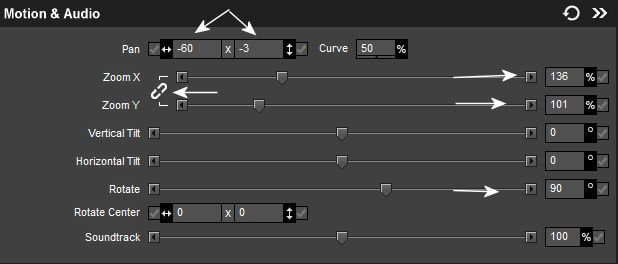
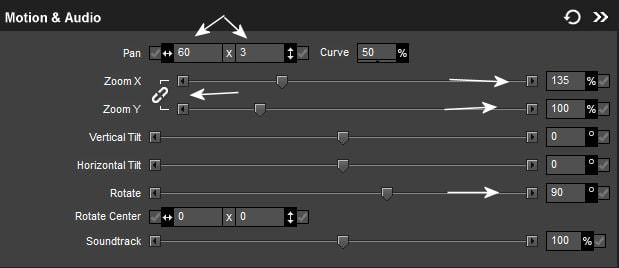
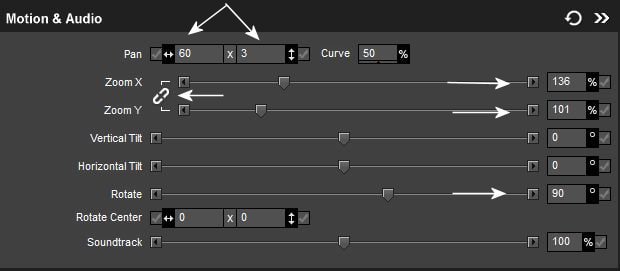
11. A továbbiakban figyelmesen dolgozz és kövesd a képeken látottakat.
From now, work carefully and follow what you see in the pictures.
12.
13.
14.
15.
16.
17.

18.
19.
20.
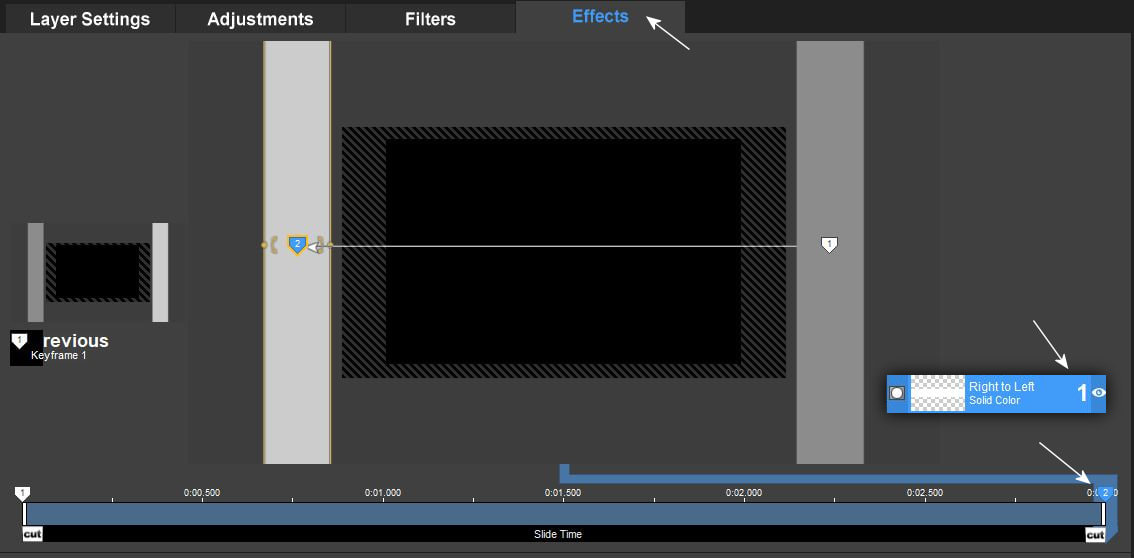
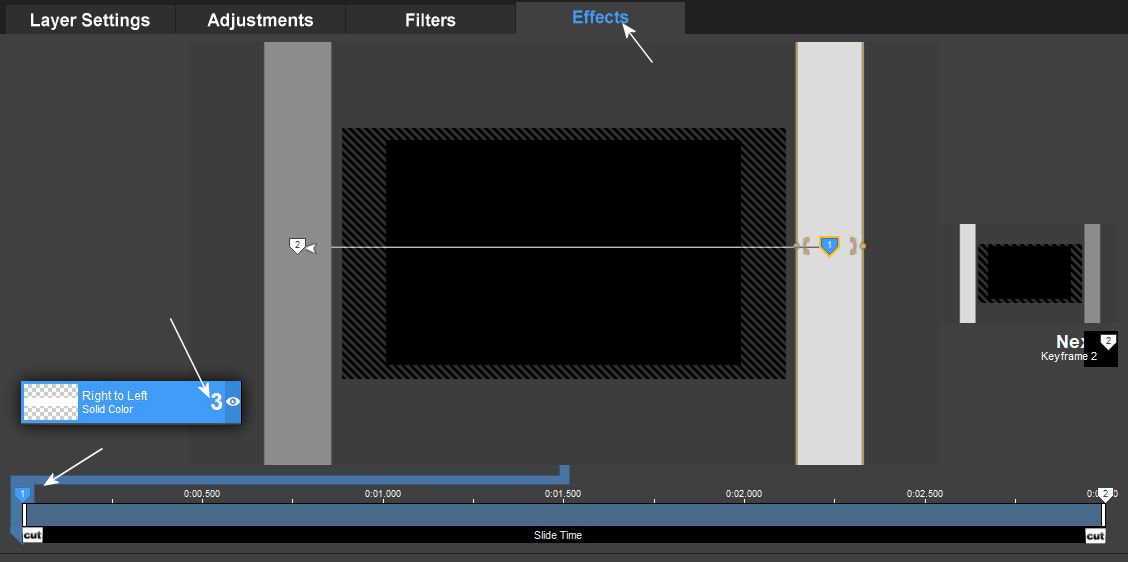
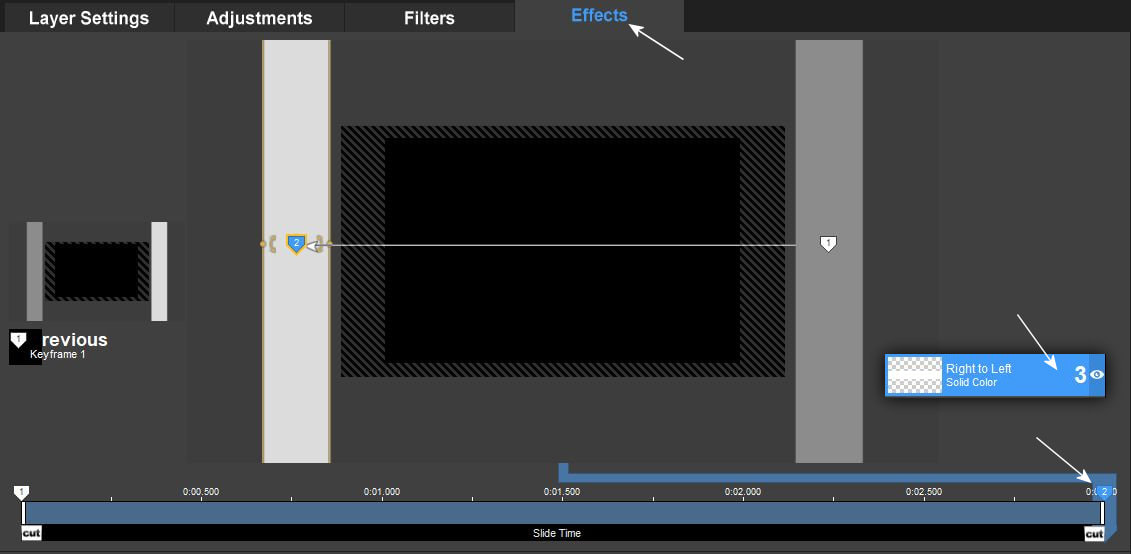
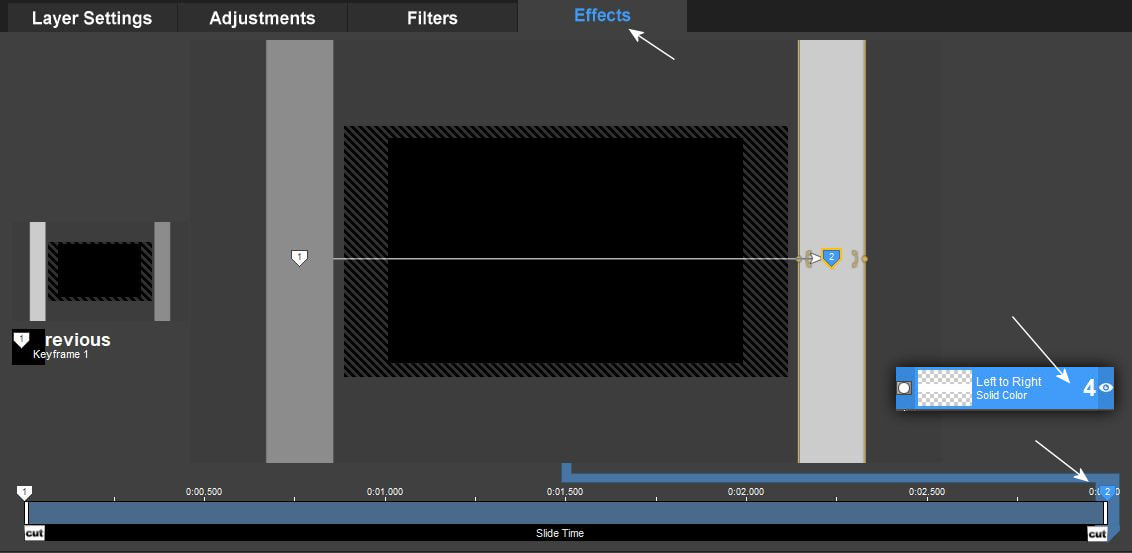
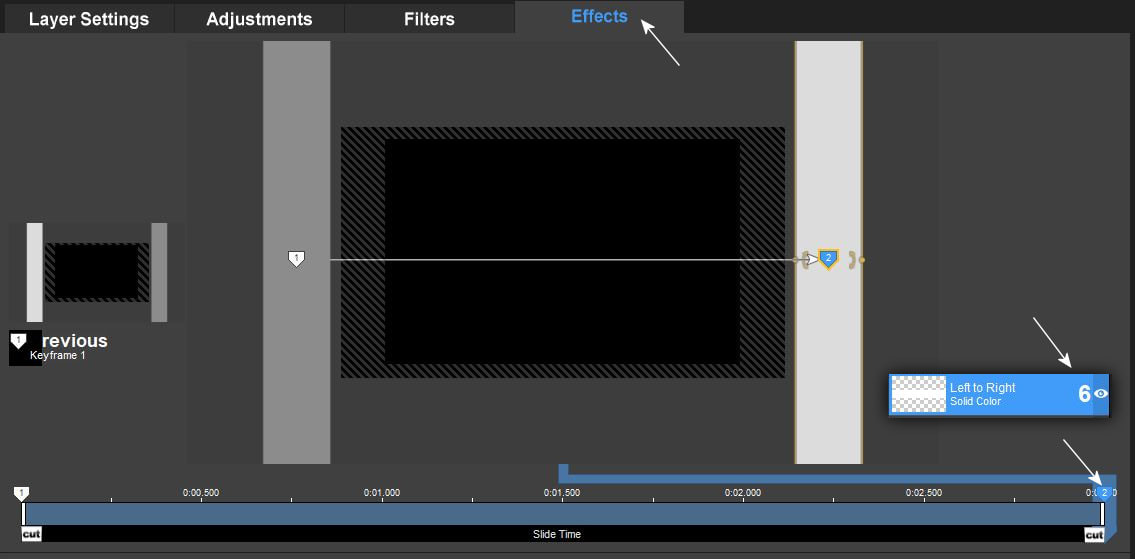
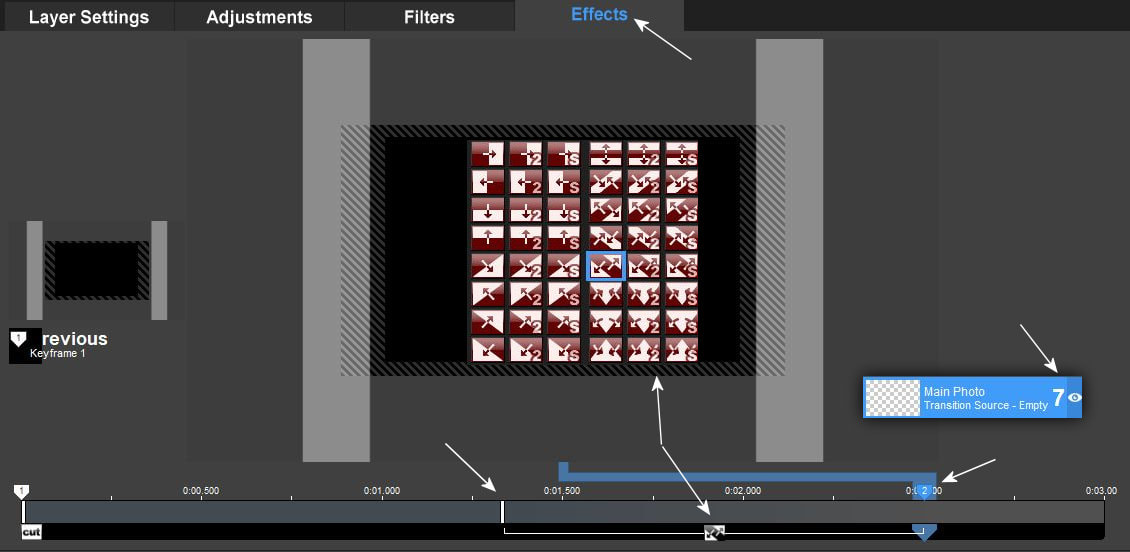
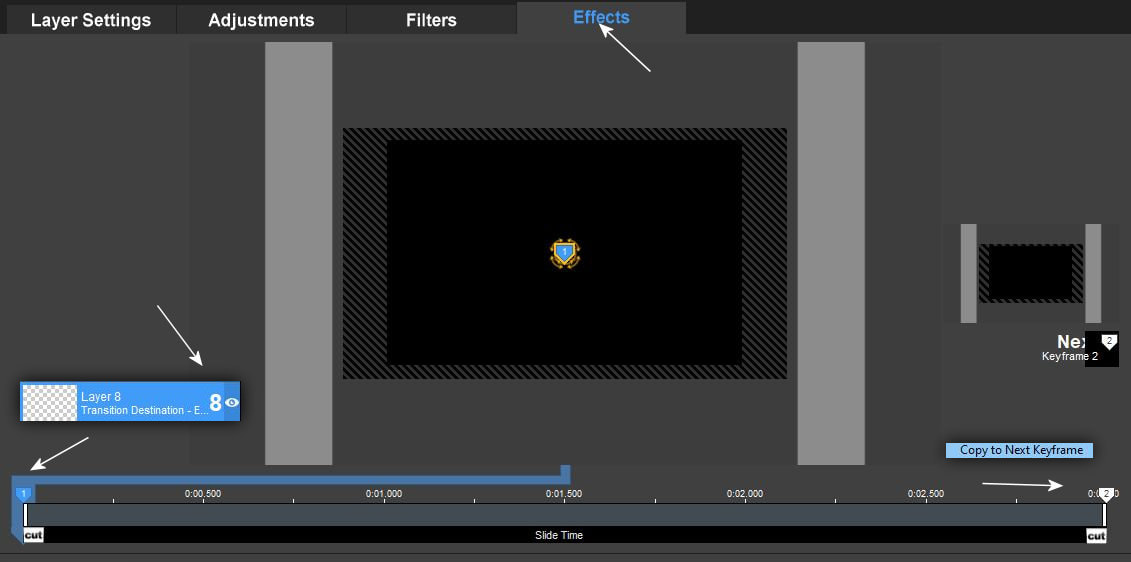
21. Ezen a képen nagyon sok információ van, figyelj meg mindent alaposan különösen a képen látható transition típust, hogy mit kell a 2-es keyframe pontra tenned.
There is a lot of information in this picture, pay close attention to everything, especially the transition type shown in the picture, what you need to do at keyframe point 2.
22.
|
|
23. Nevezd el a transitionodat úgy hogy a saját beceneved is elötte legyen valamint a Published By sorba is írd be a saját neved.
Name your transition so that your own nickname is in front of it and enter your own name in the Published By line.
