Ez a diamond transition kicsit más mint az elözö. A paralax stilusban átlátszó és halvány fehér csíkok váltakoznak vékony vonalakkal szegélyezve. Most egy ílyen áttünést készítünk.
This diamond transition is a little different from the previous one. In the parallax style, transparent and pale white stripes alternate, bordered by thin lines. Now we make a transition like this.

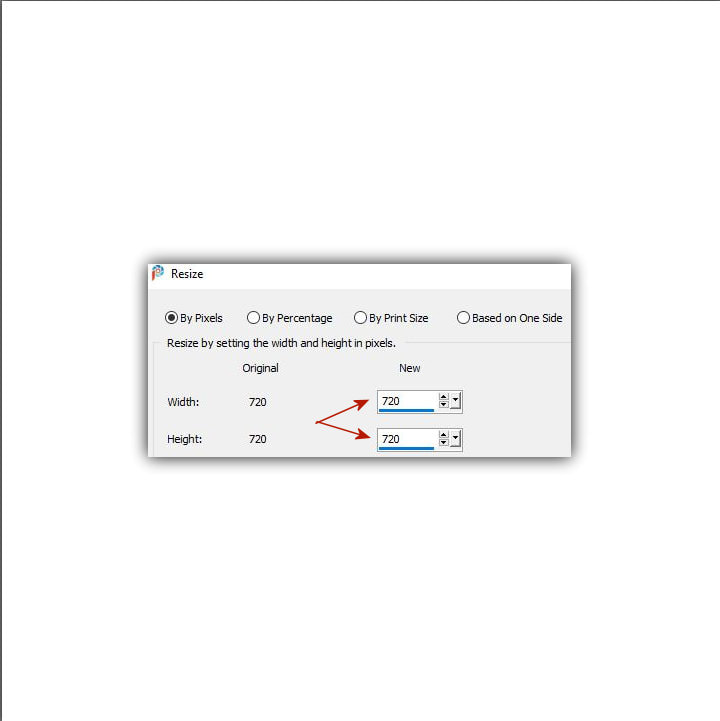
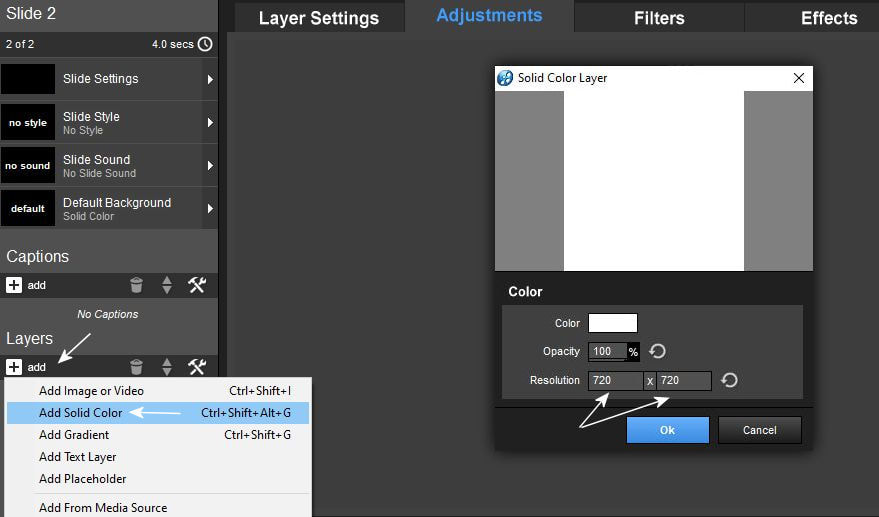
1. Elöször dolgoznunk kell a Photo Shpo programban. Nyiss egy új lapot méretezd át 720x720-ra öntsd ki fehér színnel.
First we need to work in Photoshop. Open a new sheet, resize it to 720x720, fill up with white color.
2.Jelöld körbe a lapot és használd ezt a menüt a Corelban.
Selection - Modify - Select Selection Border
Majd promótáld azt.
Select the sheet and use this menu in Corel.
Selection - Modify - Select Selection Border
Selection - Promote Selection to Layer

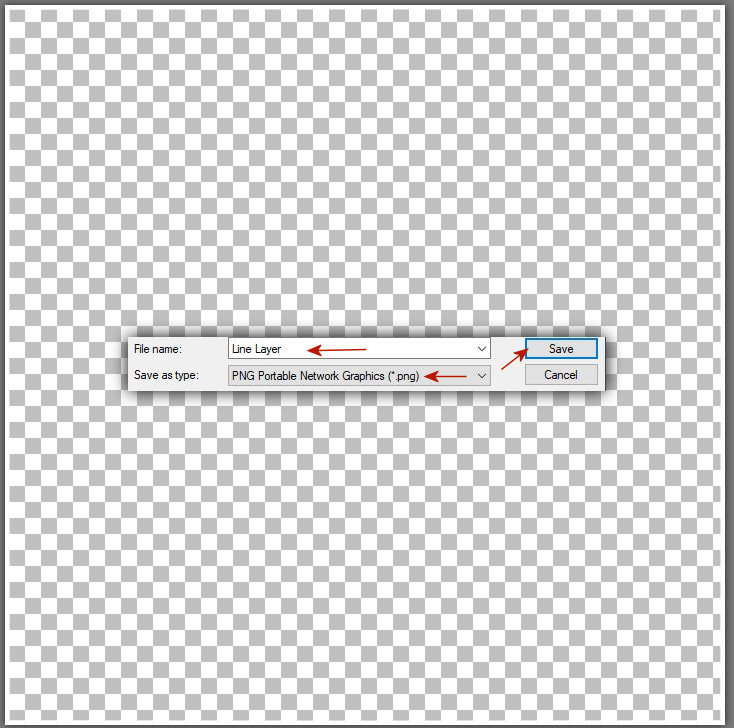
3. Állj a promótált rétegre és mentsd el a réteget png formában.
Go to the promoted layer and save the layer in png format.
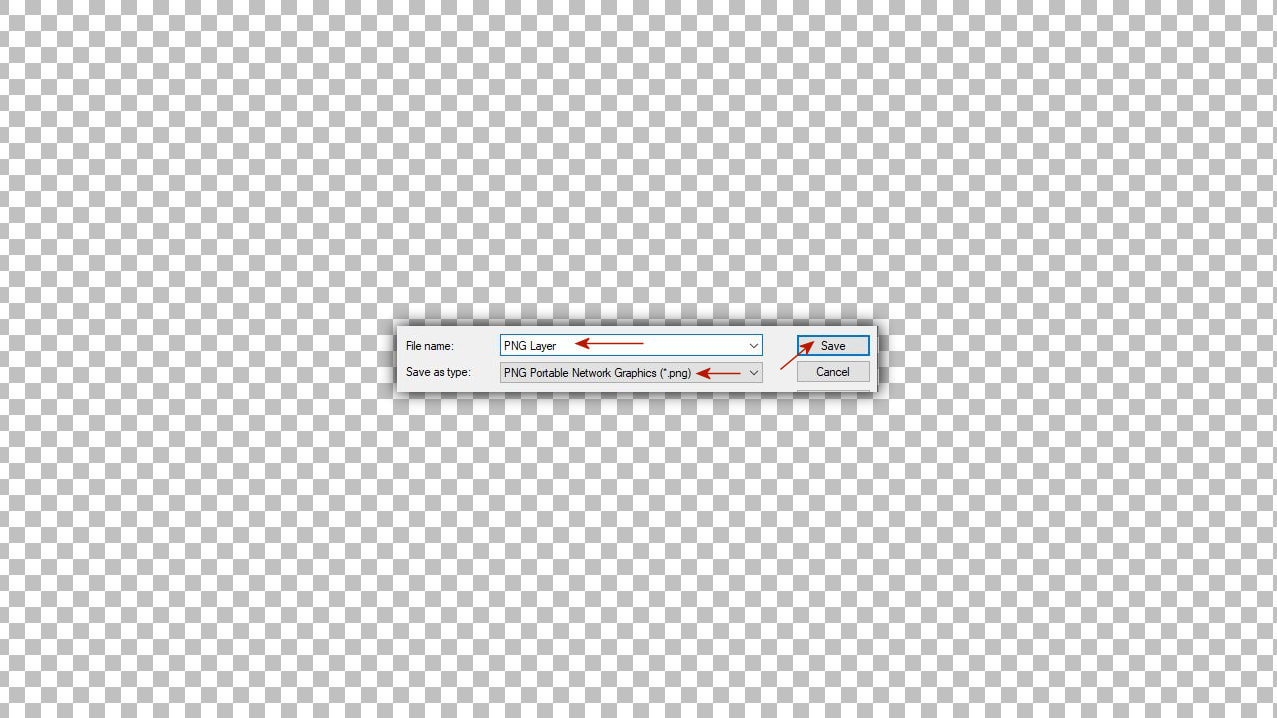
4. Ments el egy 1280x720-as alapot is png formában.
Also save a 1280x720 background in png format.
5. Kezdjünk dolgozni a Pro Show Producerben. Az elsö slidon nyiss egy solid colort 720 x720 as méretben.
Let's start working in Pro Show Producer. On the first slide, open a solid color in 720 x 720 size.
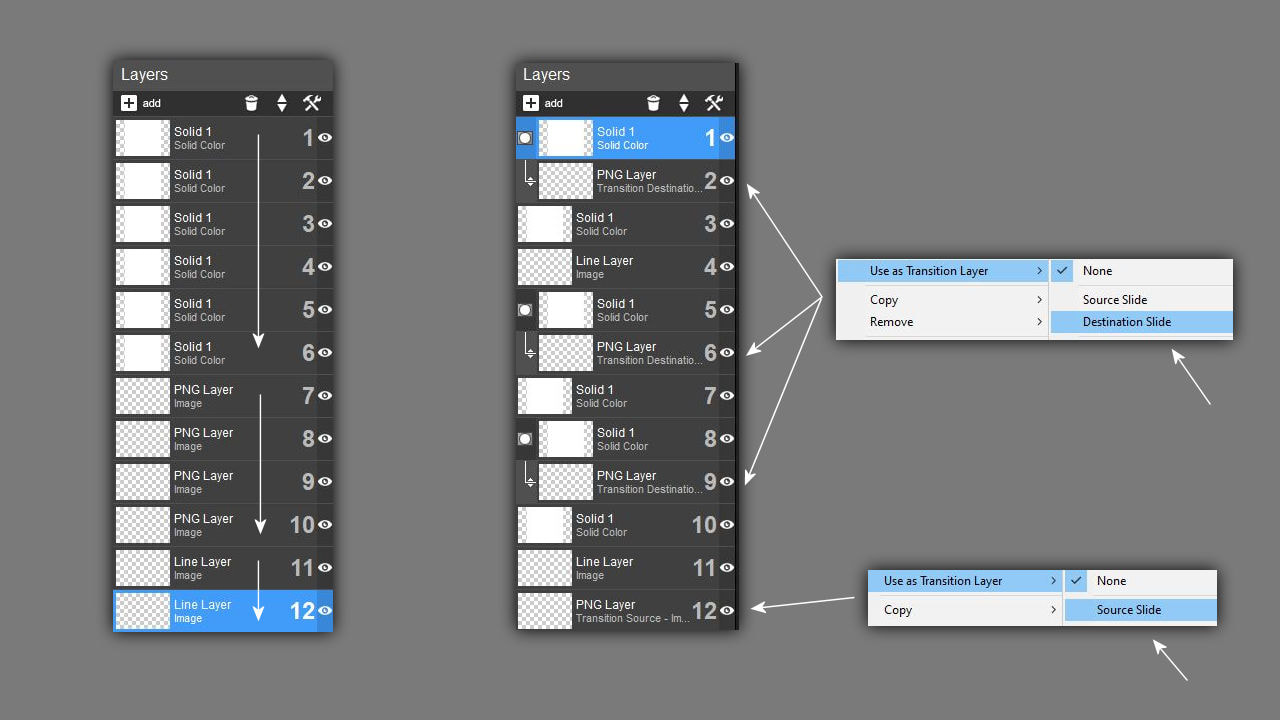
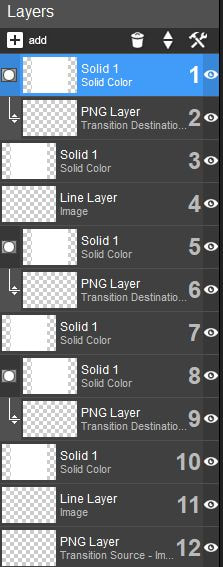
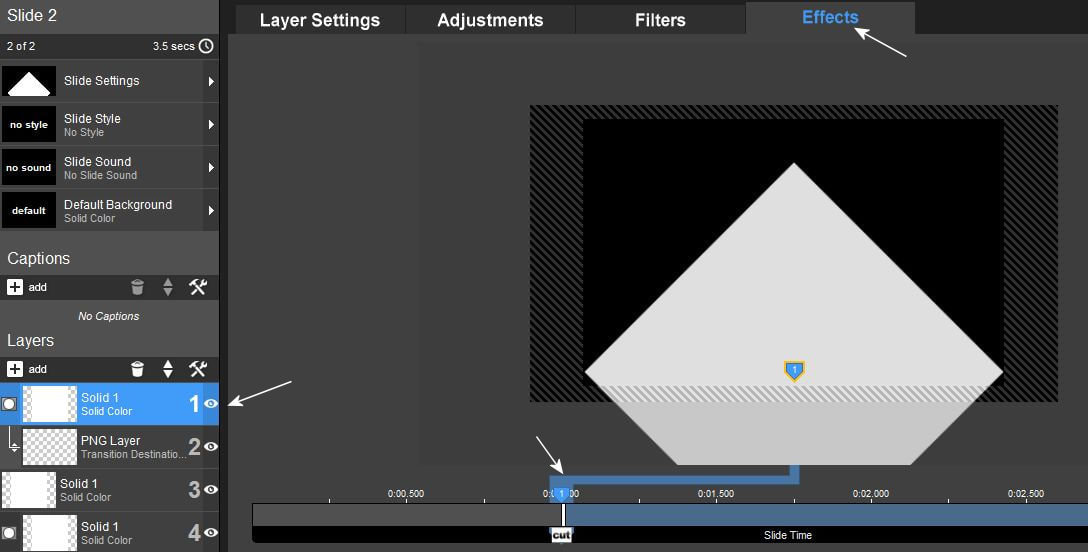
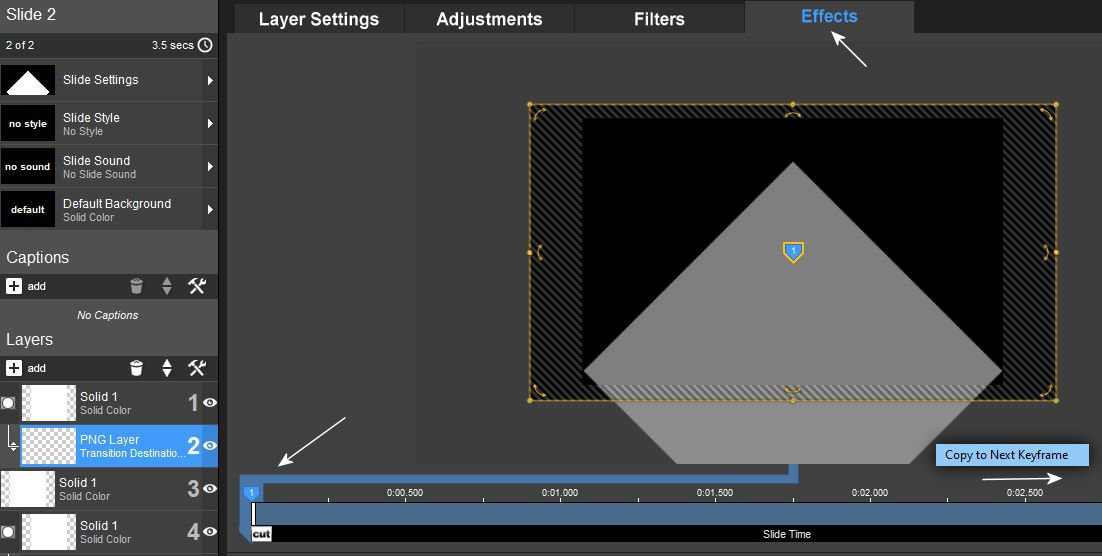
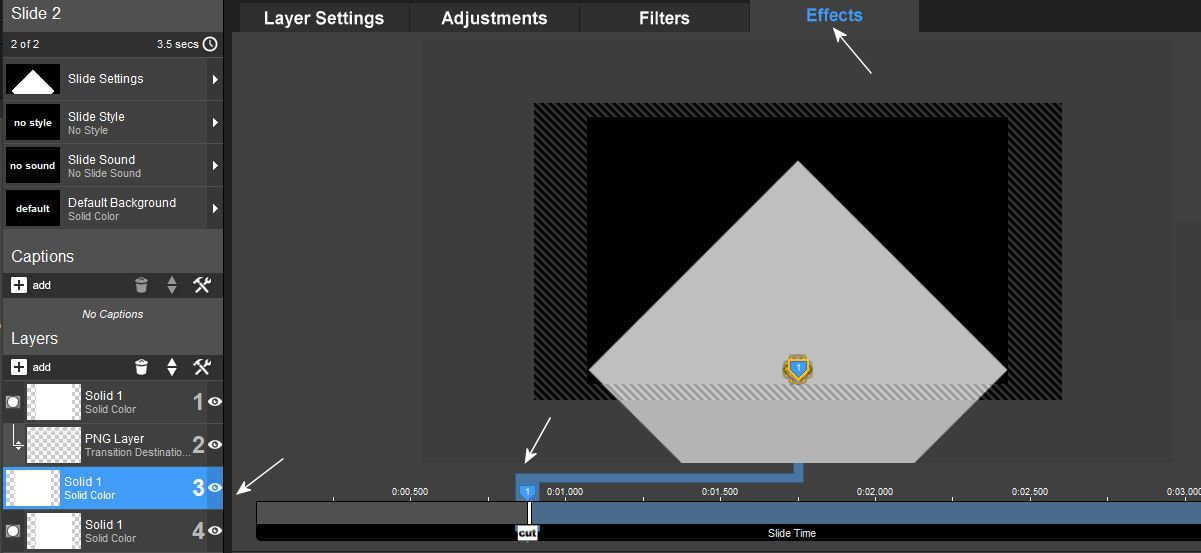
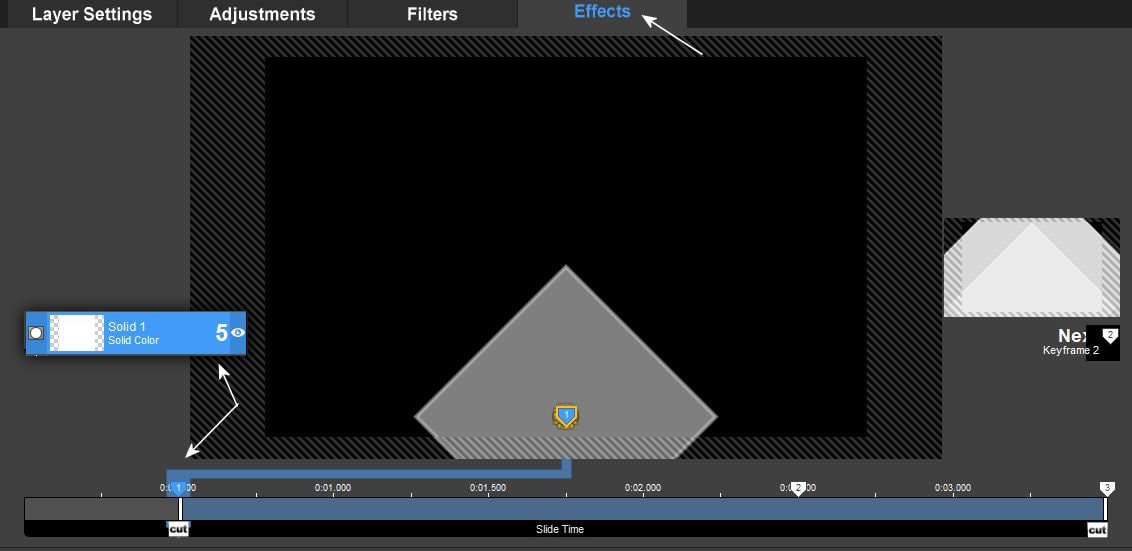
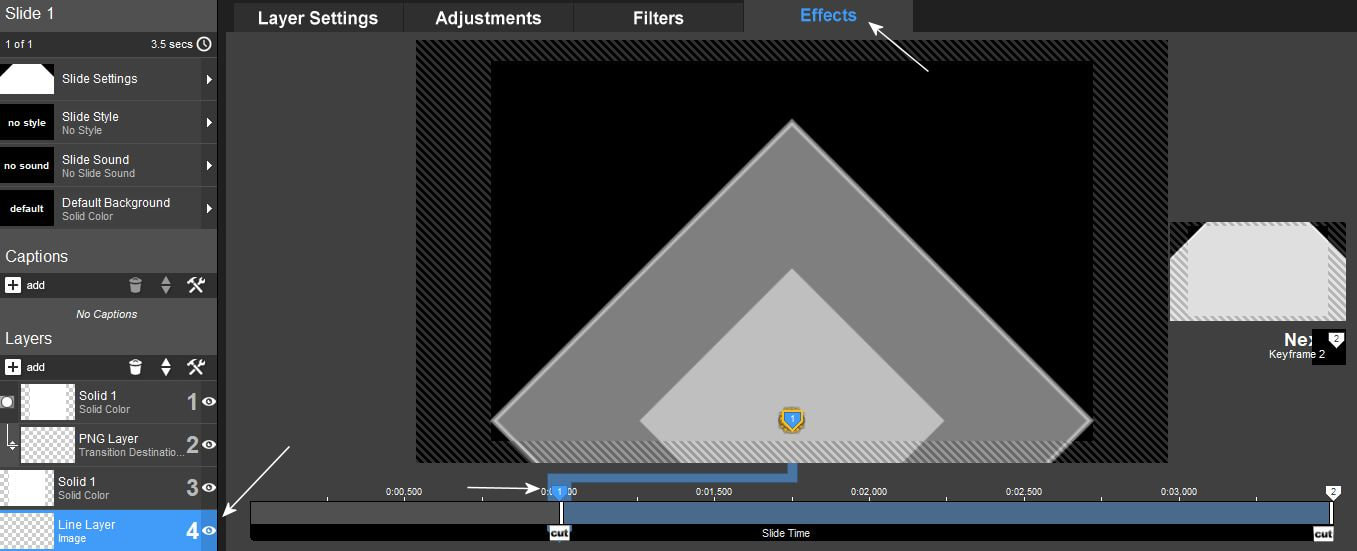
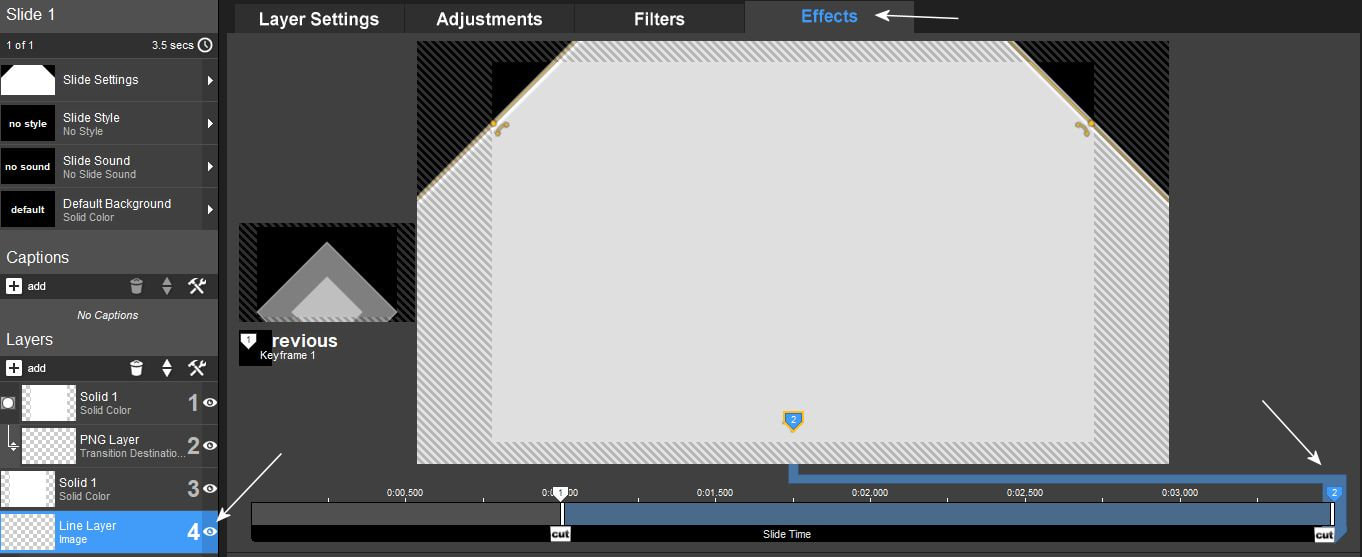
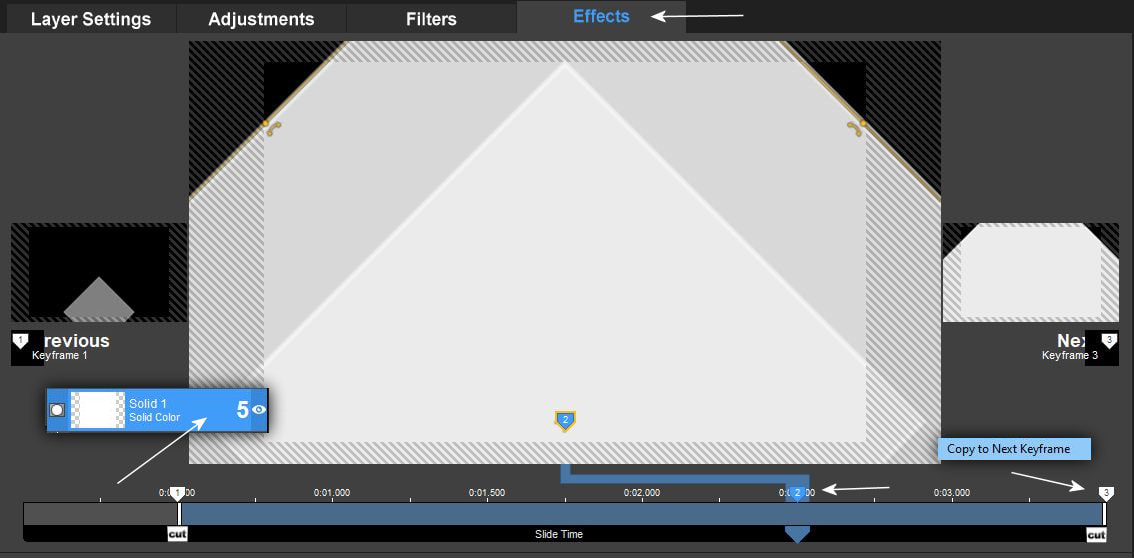
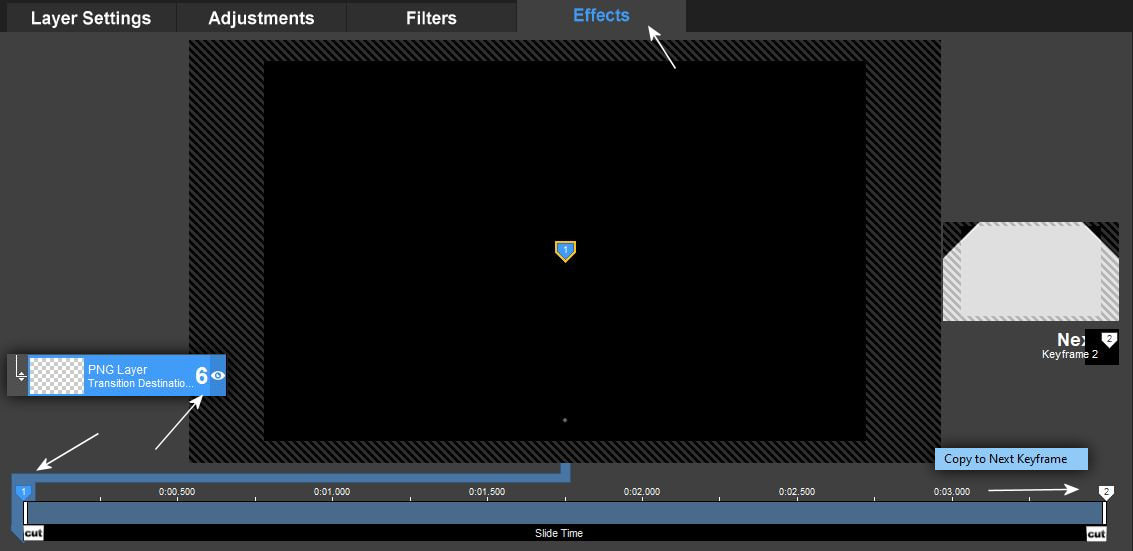
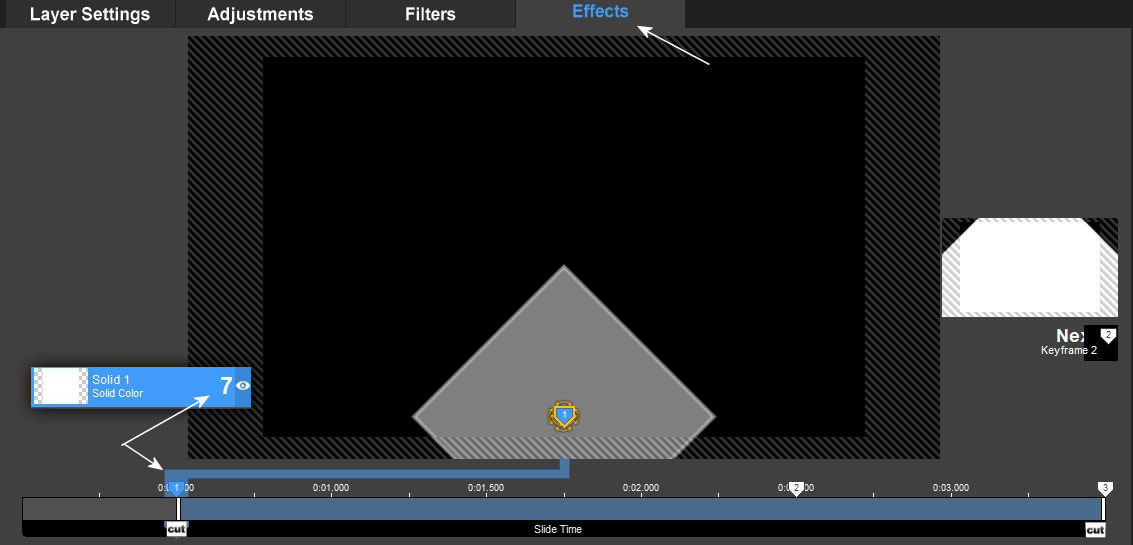
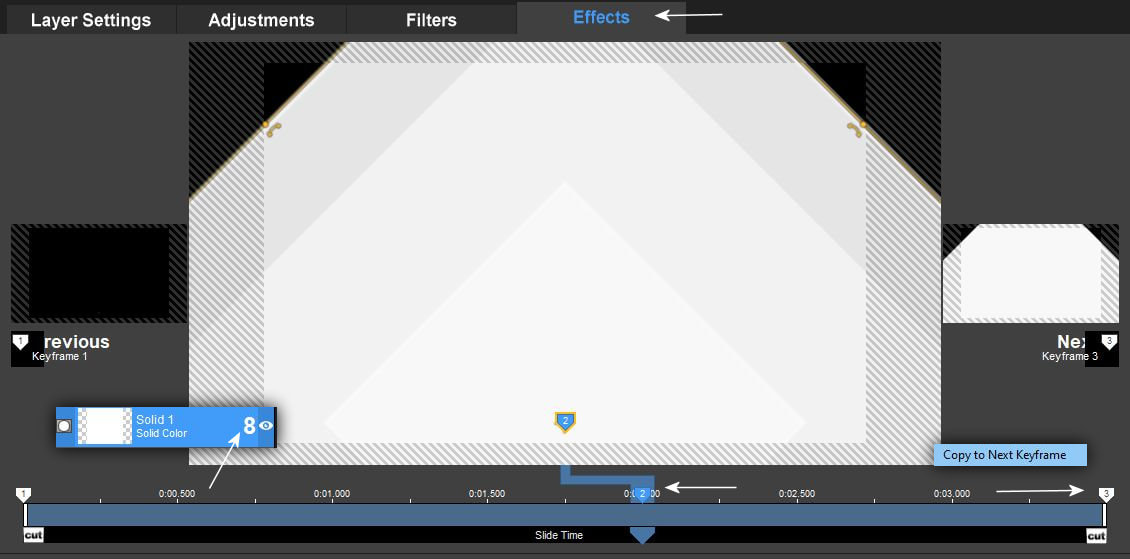
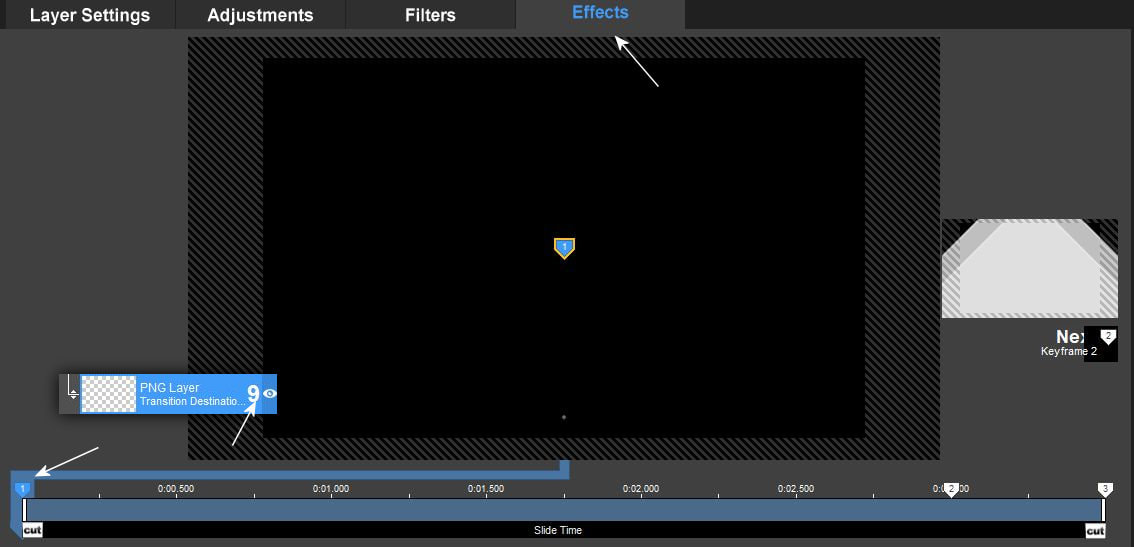
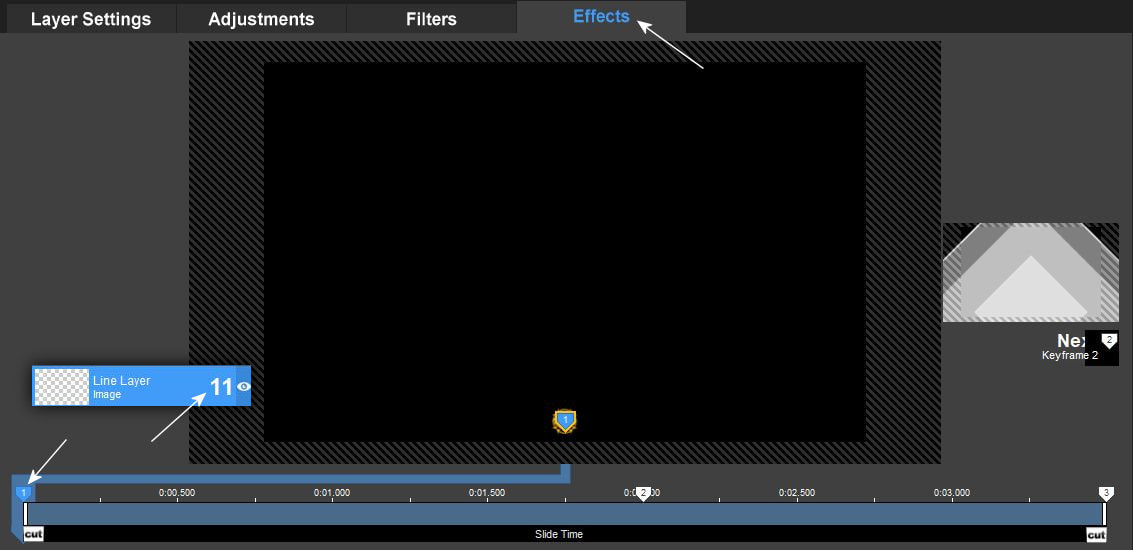
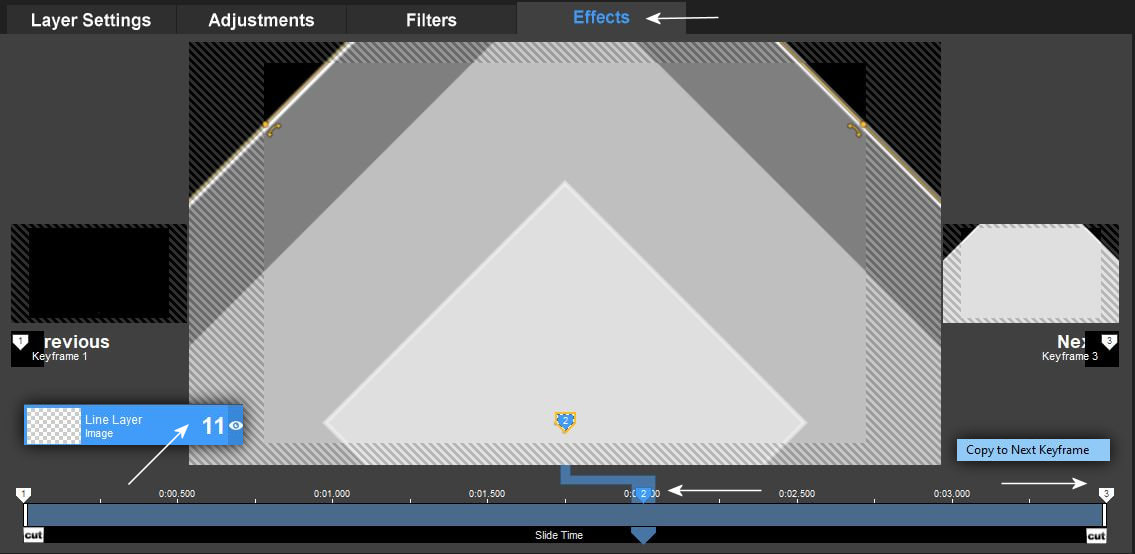
6. Aztán kettözd meg az elsö réteget annyiszor, hogy 6 db solid réteged legyen. Majd hozd be az általad elmentett 1200x720-as png réteget és azokat is duplázd meg hogy 4 db legyen. Majd az elsö lépésekben elkészített fehér keret line layert is hozd be és duplázd meg azt is. Igy 12 réteged van. Majd rakd össze öket ógy ahogy azt a jobboldalon látod. Katt a 2-es rétegre a jobb füllel és válaszd a transition layer destination menüt. Majd a 6 és 9-es rétegen is csináld meg ezt. A 12 -es rétegedre pedig válaszd a Source Slide menüt. Itt alul nagyban is látod, hogyan kell a rétegeidnek kinéznie.
Then double the first layer so many times that you have 6 solid layers. Then bring in the 1200x720 png layer you saved and double them to make 4 pieces. Then bring in the white frame line layer created in the first steps and double it as well. So you have 12 layers. Then put them together as you see on the right. Click on layer 2 with the right tab and select the transition layer destination menu. Then do this on layers 6 and 9. For layer 12, choose the Source Slide menu. Below you can see how your layers should look.
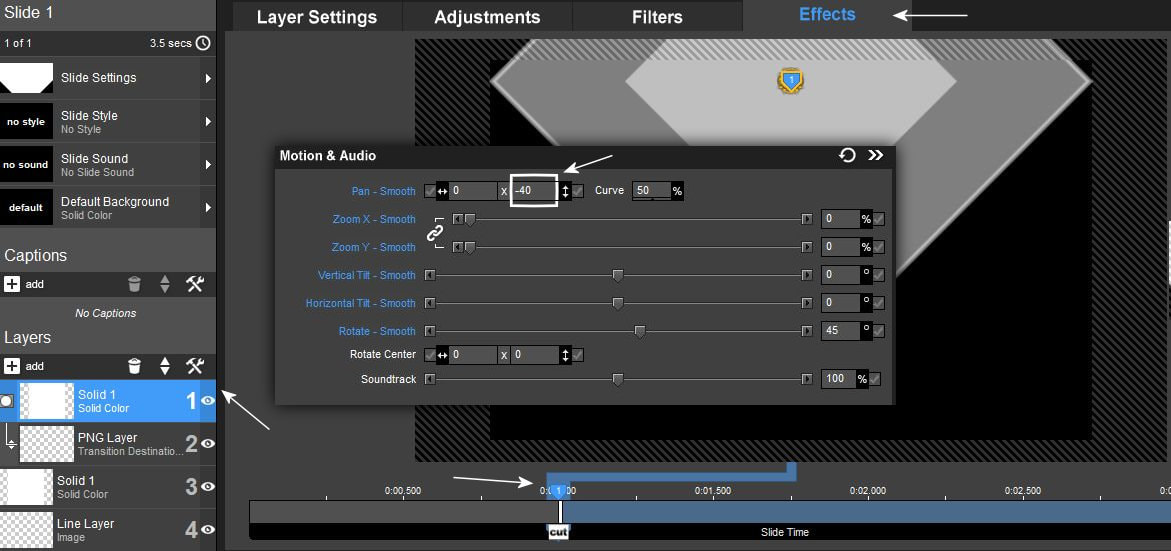
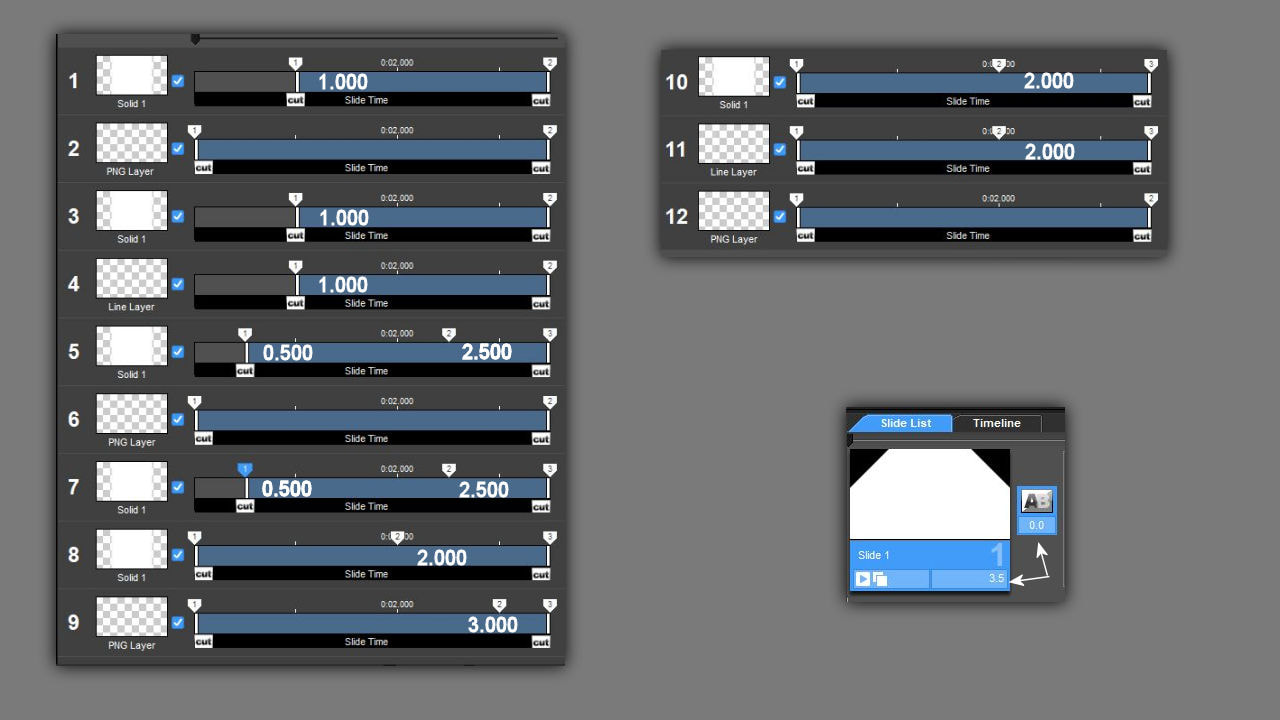
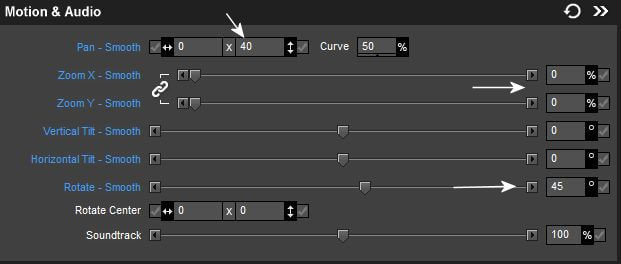
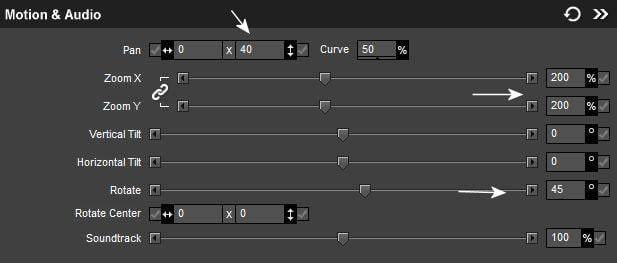
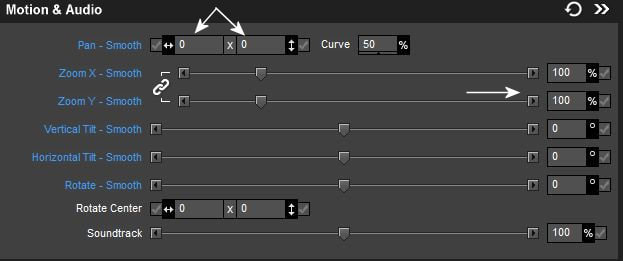
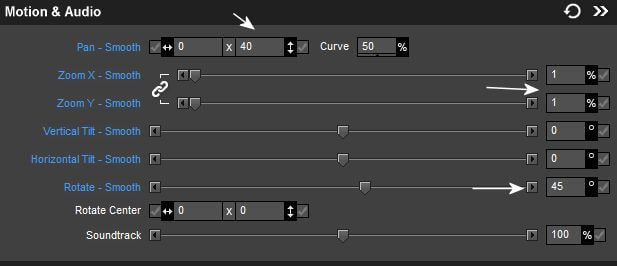
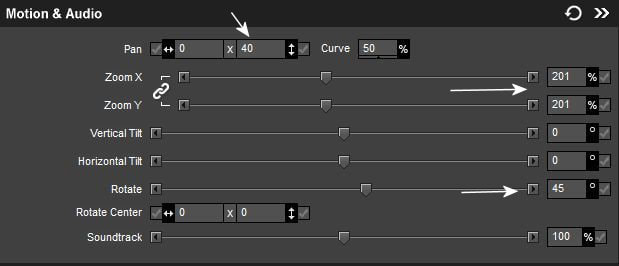
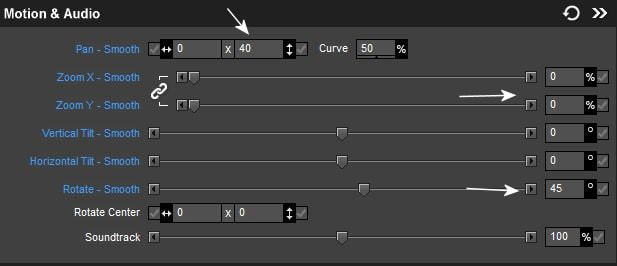
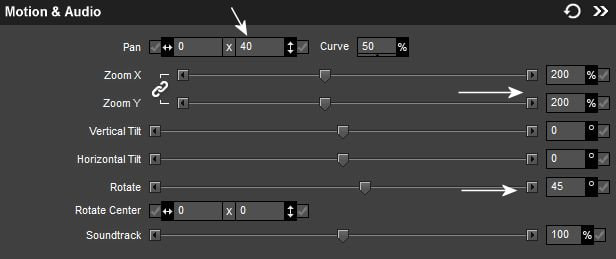
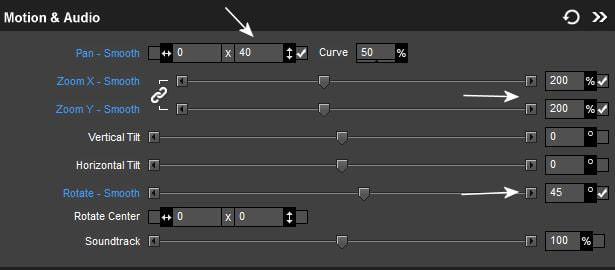
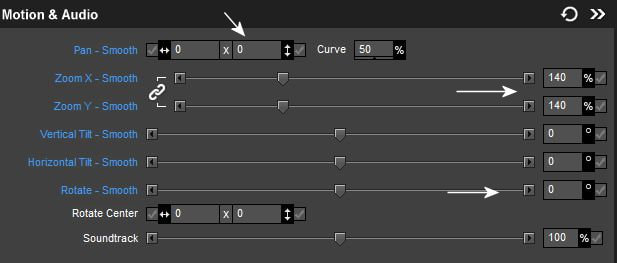
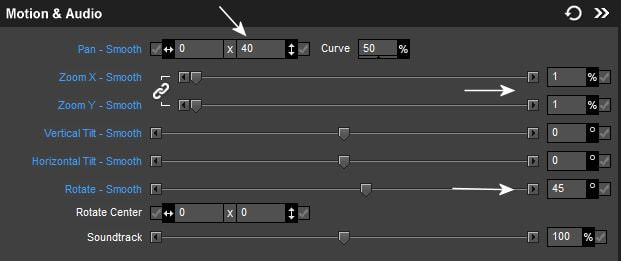
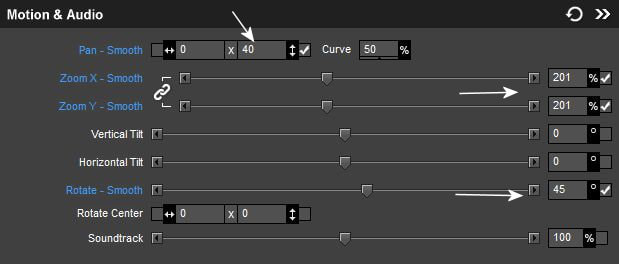
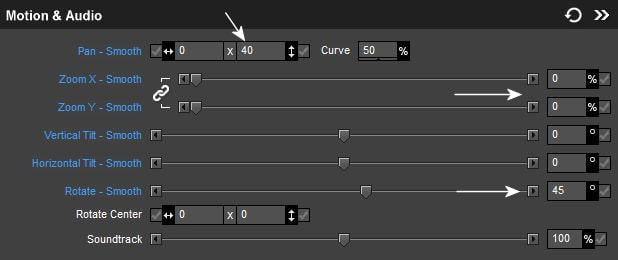
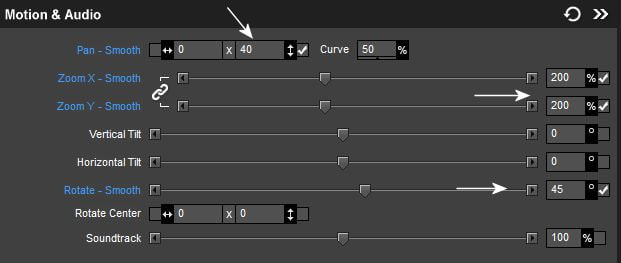
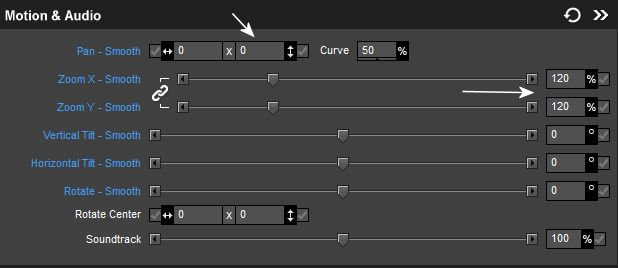
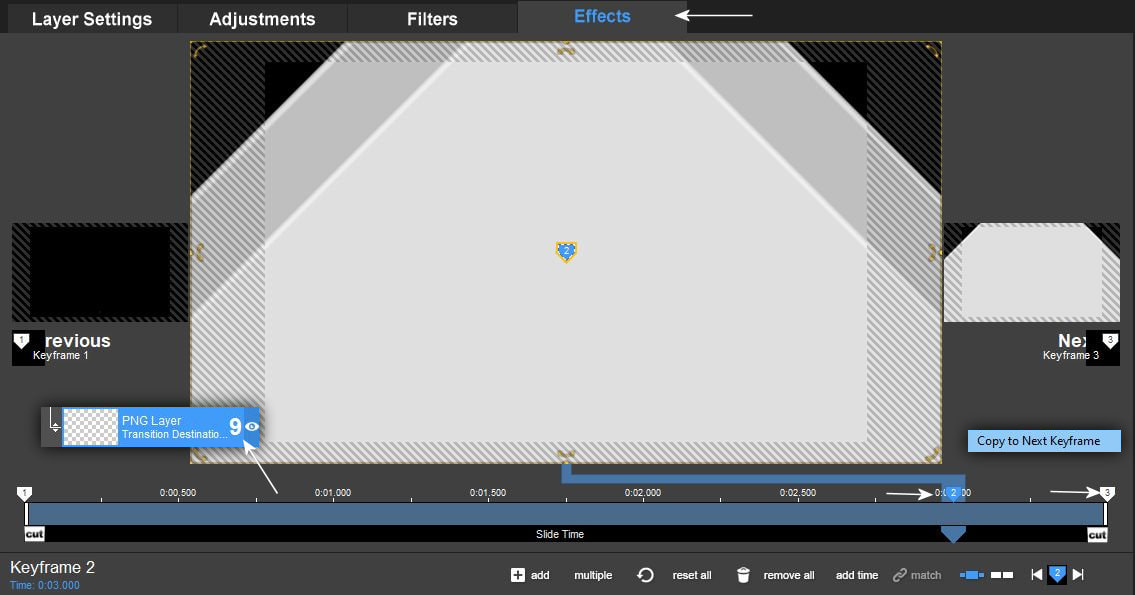
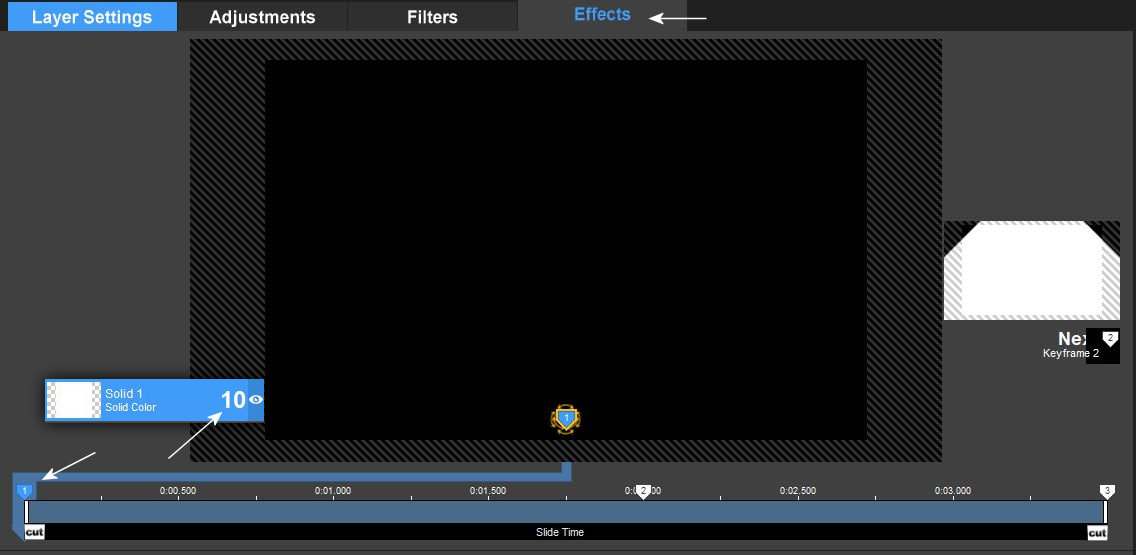
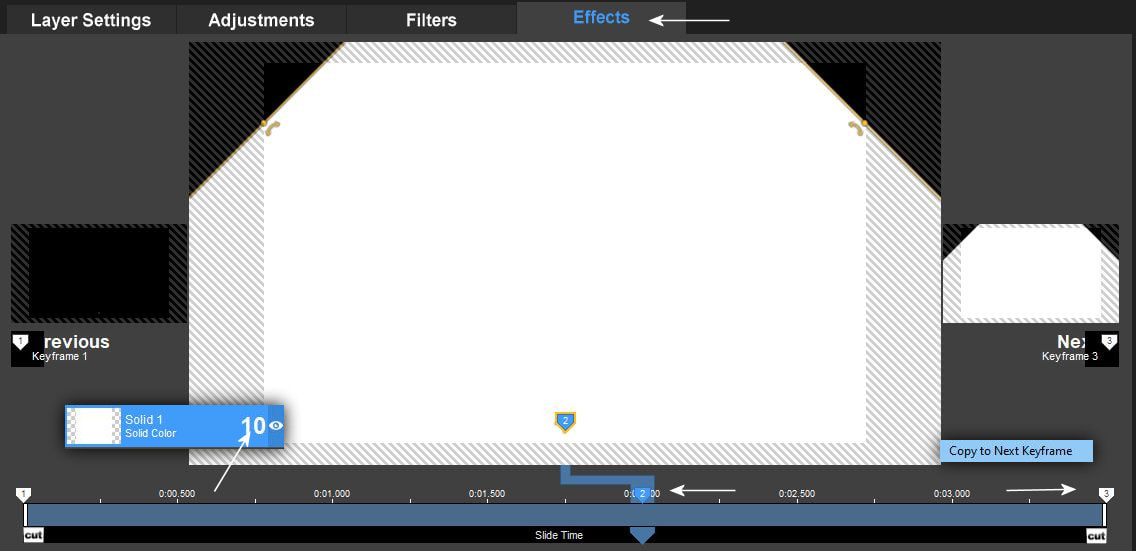
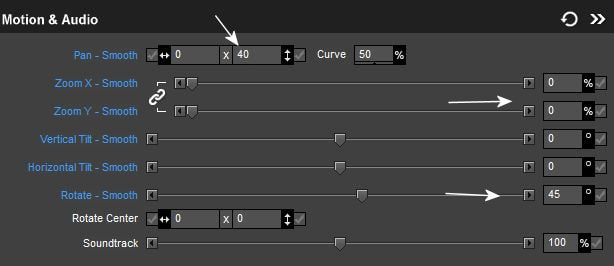
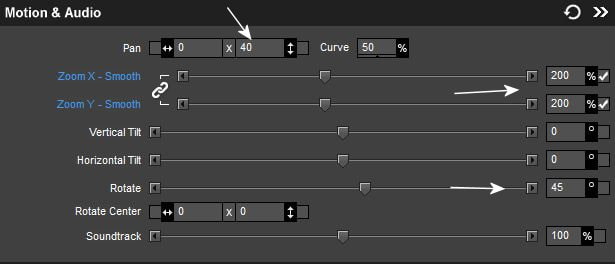
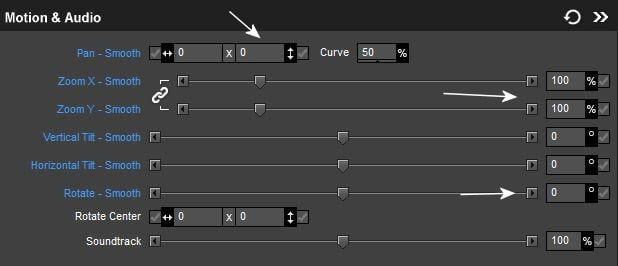
7. Rakd be a keyframe pontokat is az itt látható értekekre. A slide ideje 3,5 másodperc a transition slide 0.0
Also put the keyframe points on the values shown here. The time of the slide is 3.5 seconds, the transition slide is 0.0
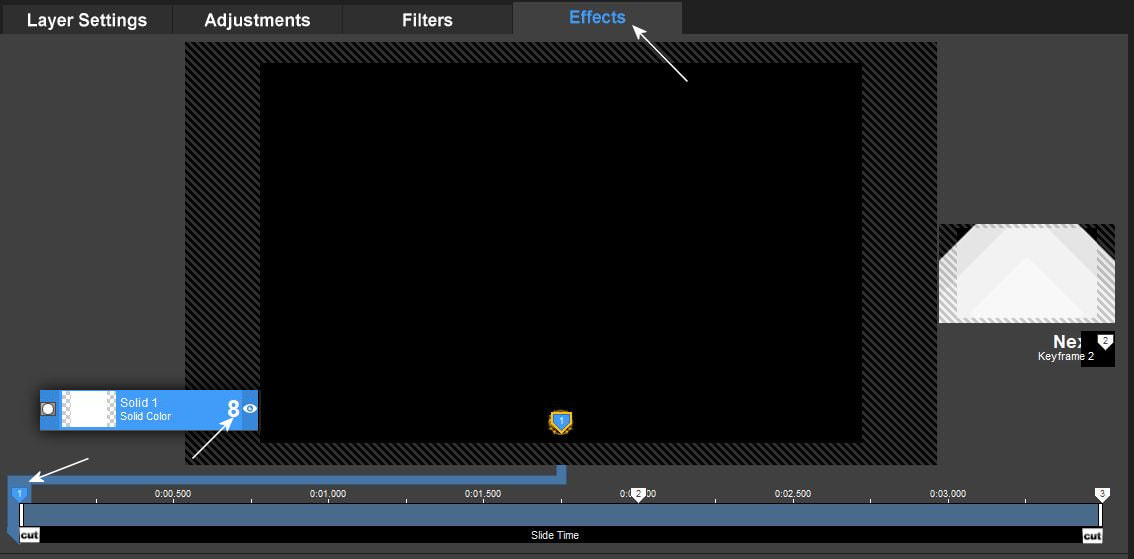
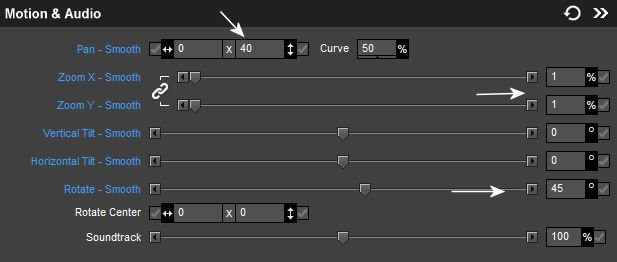
8. Mostmár nagyon figyelmesen kell dolgoznod!!! Az értékeket pontosan írd be a keyframe pontokon. Ha nem azt a képet látod munkaközben a képernyödön ami a fotókon van, nem kell vele törödni. Ez azért van mert én már a kész effectet fotóztam, nálad meg akkor alakul ki a látvány amikor folyamatosan dolgozol.
Now you have to work very carefully!!! Enter the values exactly at the keyframe points. If you don't see the image on your screen during work that is in the photos, you don't have to worry about it. This is because I have already photographed the finished effect, and for you, the visual is formed when you work continuously.
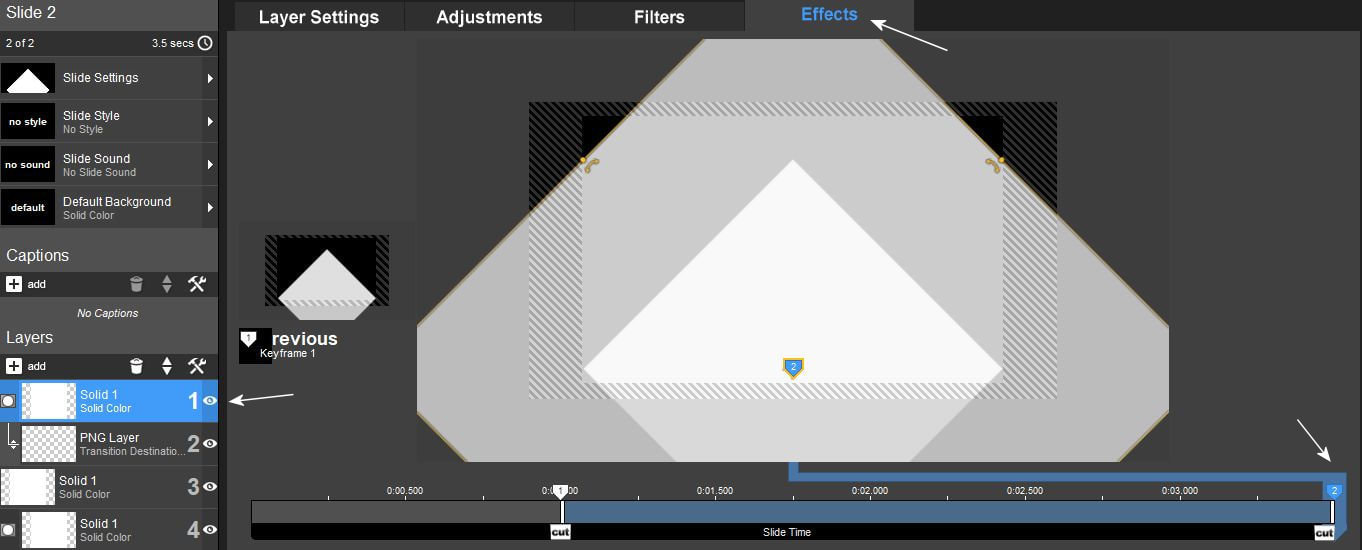
9. Tehát kövesd a képeken látottakat.
So follow what you see in the pictures.
10.
11.
12.

13.
14.
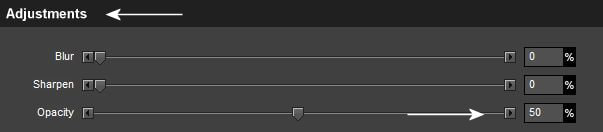
15. Figyelem !!! Ezen a rétegen az Adjustment menüben is van egy értékbeállítás.
Attention!!! This layer also has a value setting in the Adjustment menu.

16.
17.
18.
19.

20.
21.
22.
23.

24.
25.

26.
27.
28.

29. Mentsd el a kész transitionodat.
Save your finished transition.
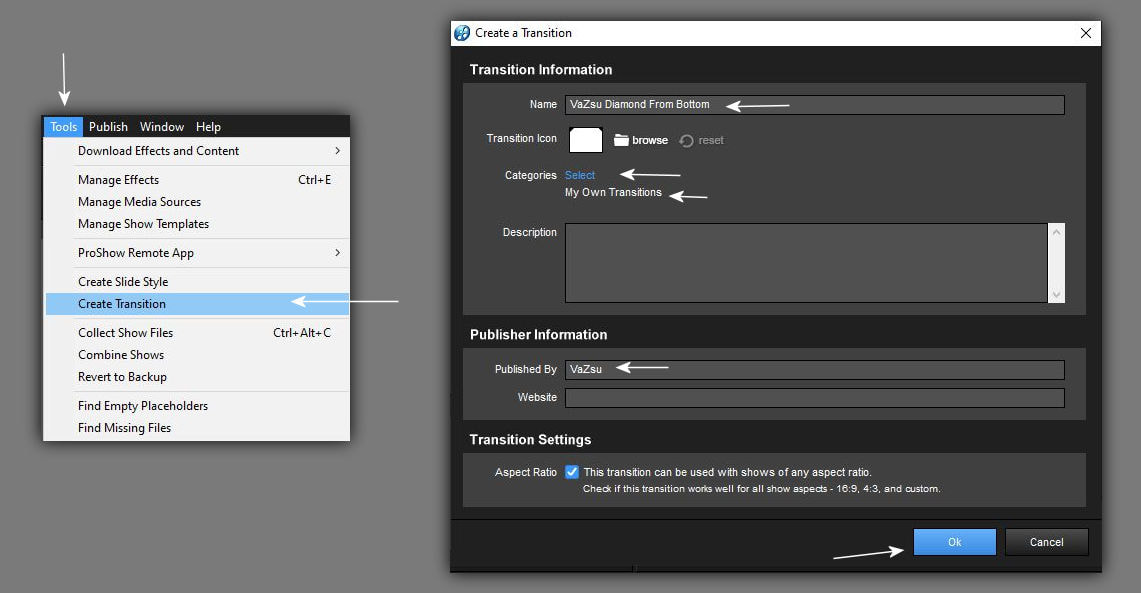
30. Itt hívom fel a figyelmet, hogy a kész transitionodat mentsd el psh formában is.
Ez nagyon fontos hiszen ez a másik irányú mozgás alapja és egyszer már sokat dolgoztál vele. Amikor ezt a mozgást amely jelenleg alulról megy felfelé megcsinálhatod fentröl lefelé is egy másik transitionnak. Csak annyit kell tenned, hogy az összes keyframe ponton a 40-et a pozíciónál mínusz 40-re kell átírnod és elmentened más néven.
I would like to point out here that you should also save your finished transition in psh format. This is very important because it is the basis of movement in the other direction and you have already worked with it a lot. When this movement, which is currently going from bottom to top, you can also do it from top to bottom for another transition. All you have to do is to change the 40 at the position to minus 40 at all keyframe points and save it under a different name.