Az elözö bemutató után most egy hasonló effectet tanulunk meg elkészíteni. Ennek az effectnek a neve a Duality Effect. Ugyanaz a kép mozog kétféle módon egy egy csempén. Az effect igen egyszerü de mégis látványos tud lenni ha ehhez egy szép világos alapot is tervezünk mert a túl sötét háttéren a fekete fehér képek is túl sötétek lesznek.
After the previous presentation, we will now learn how to create a similar effect. The name of this effect is the Duality Effect. The same image moves in two ways on one tile. The effect is very simple, but it can still be spectacular if we also plan a nice light background for it, because the black and white images will also be too dark on a too dark background.

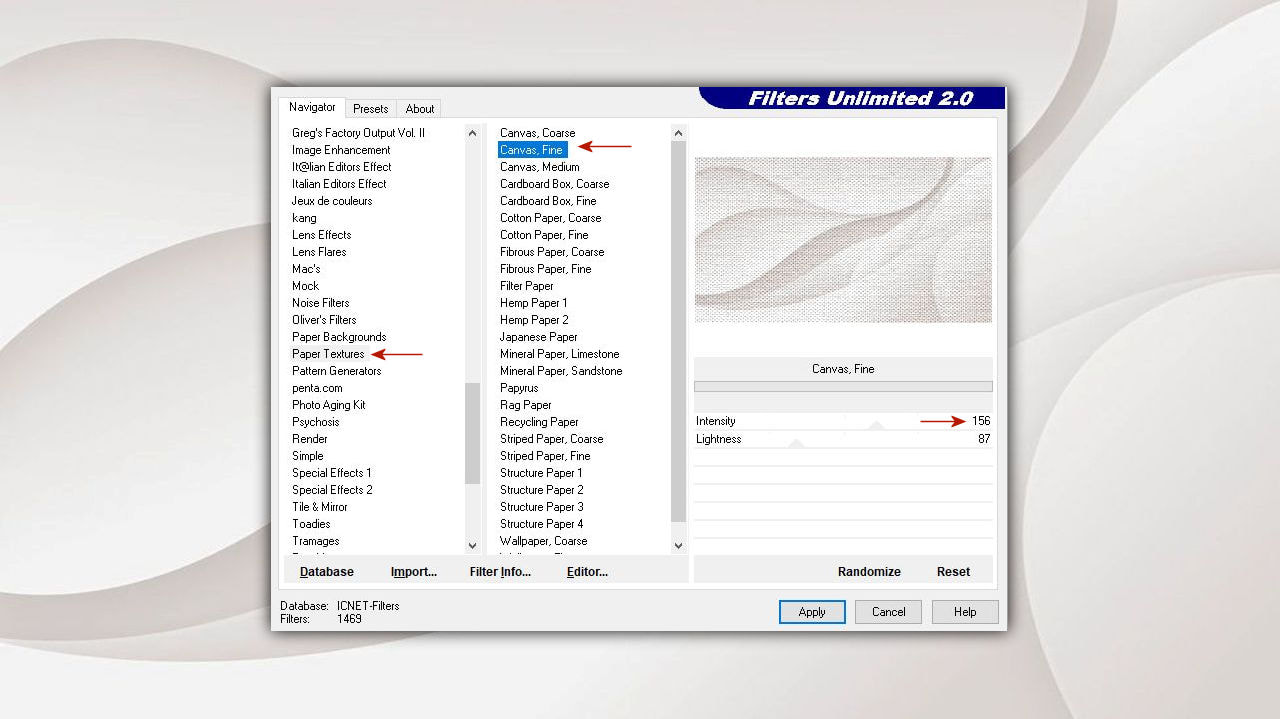
1. Keress egy szép világos háttér képet. Én itt az én elképzelésemet mutatom be az alapomra egy vászon effectet tettem a Corel programban.
Effects - Plugins - Filters Unlimited - Paper Textures Canvas Fine
Find a nice light background image. Here I present my idea, based on a canvas effect in the Corel program.
Effects - Plugins - Filters Unlimited - Paper Textures Canvas Fine
You can work with similar filters or plugins in other PhotoShop programs.
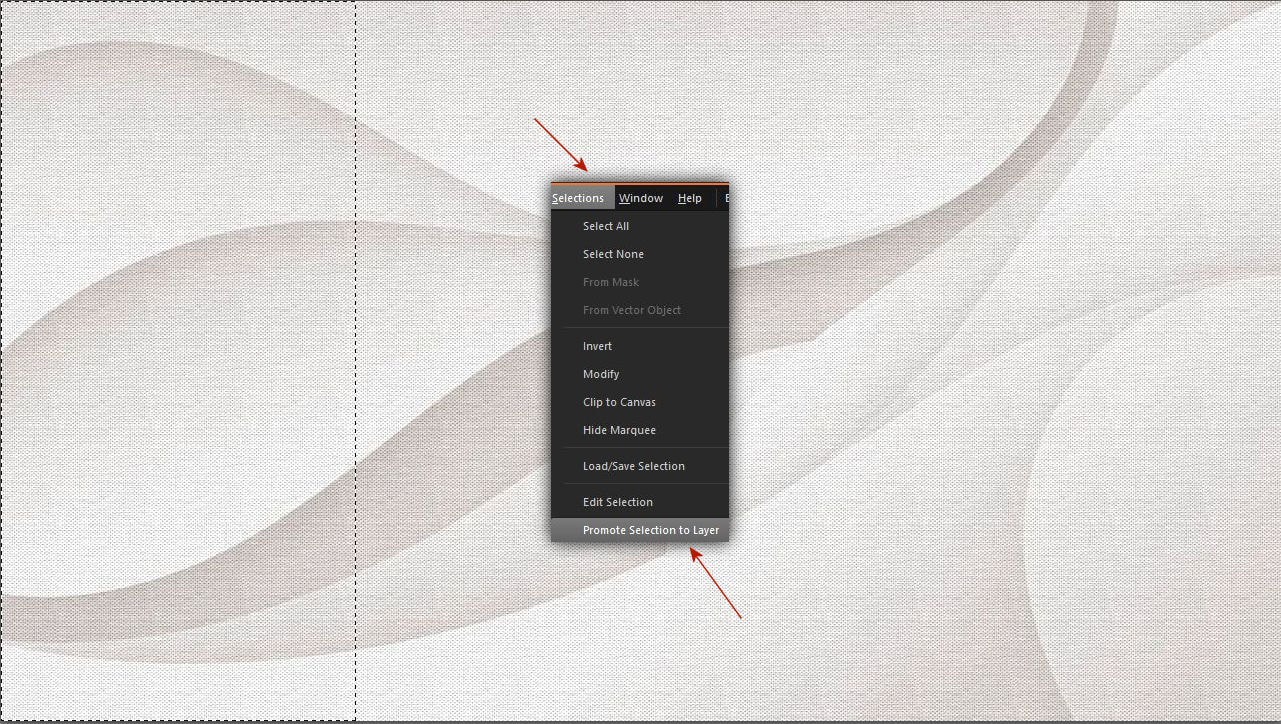
2. A bal oldalról egy bizonyos részt promótálj az alapodból hogy majd az alatt tudjon futni a fekete fehér képed.
From the left side, promote a certain part of your base so that your black and white image can run under it.
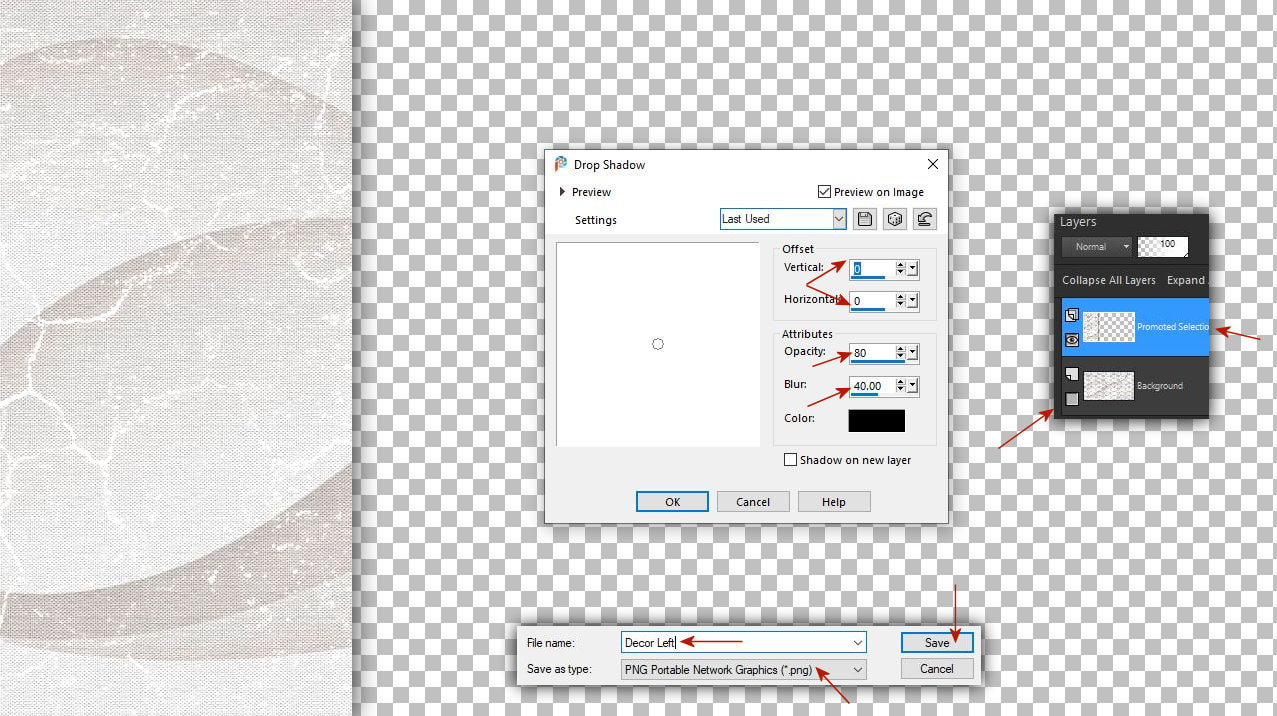
3. Erre a promótált részre én még további szüröt tettem.
Effects - Plugins - Filters Unlimited - Photo Aging Kit - Cracked Paper
I added an additional filter to this promoted section.

4. Árnyékold meg ezt a részt és mentsd el png formában bal oldali dekornak.
Shade this part and save it as png for left side decor.
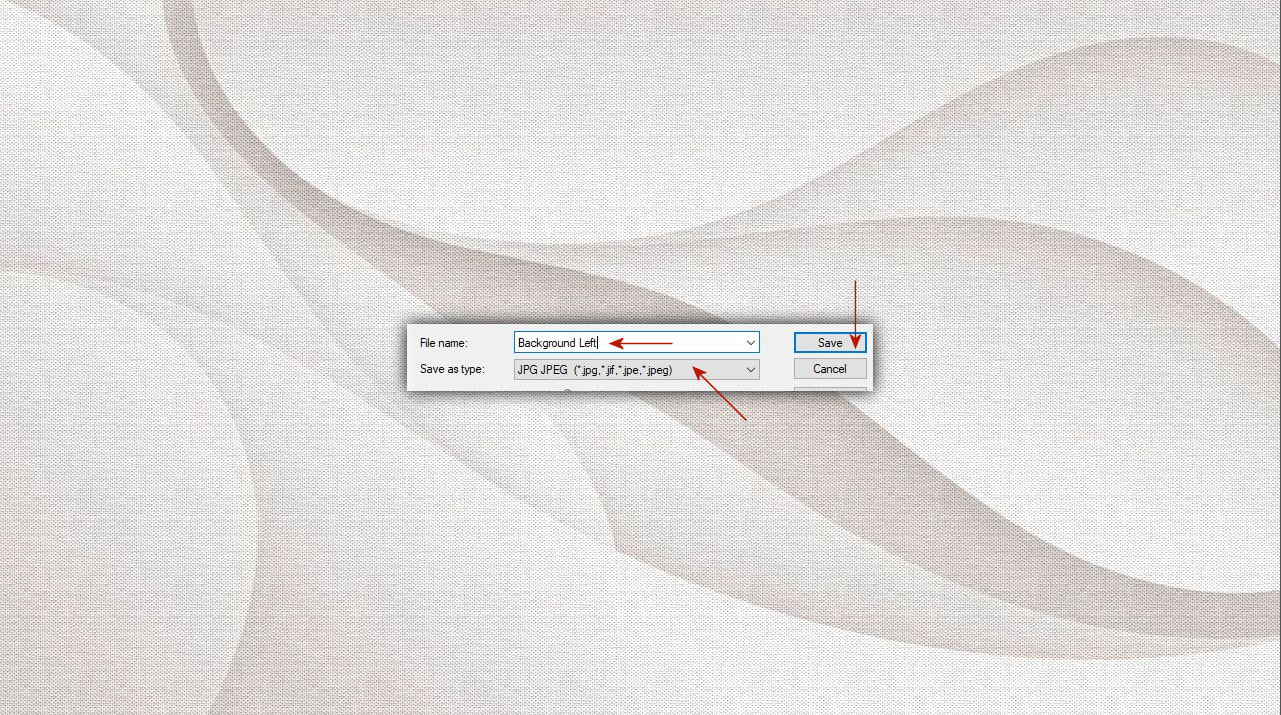
5. Majd mentsd el az alapot is baloldali háttérként. A mentésnél fontos, hogy az oldalakat is megjelöld mert ha mintás az alapod amikor a videó rétegeket rakod össze akkor a mintáknak passzolnia kell.
Then save the base as the left background. When saving, it is important to mark the pages as well, because if your base is patterned, when you assemble the video layers, the patterns must match.
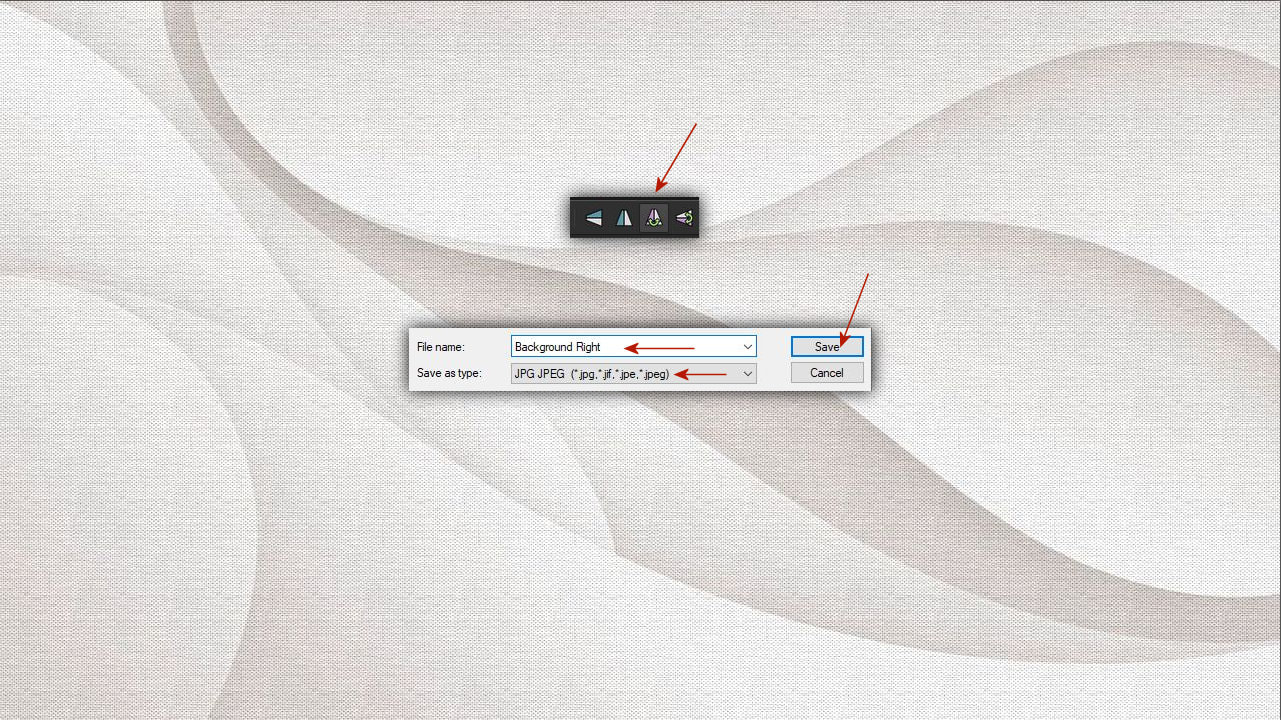
6. Fordítsd át az alapodat és mentsd el újra jobboldali háttérként.
Flip your base over and save it again as the right background.
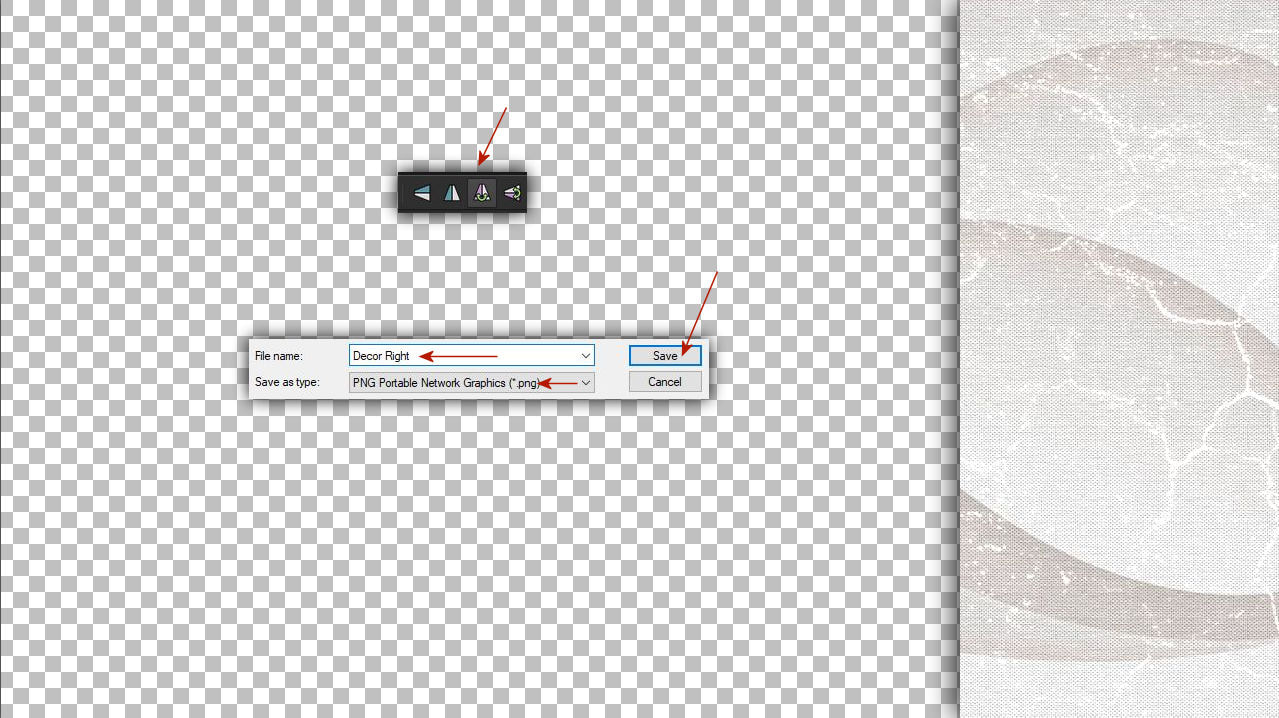
7. Ugyanígy járj el a promótált dekorral is png formában.
Do the same with the promoted decor in png format.
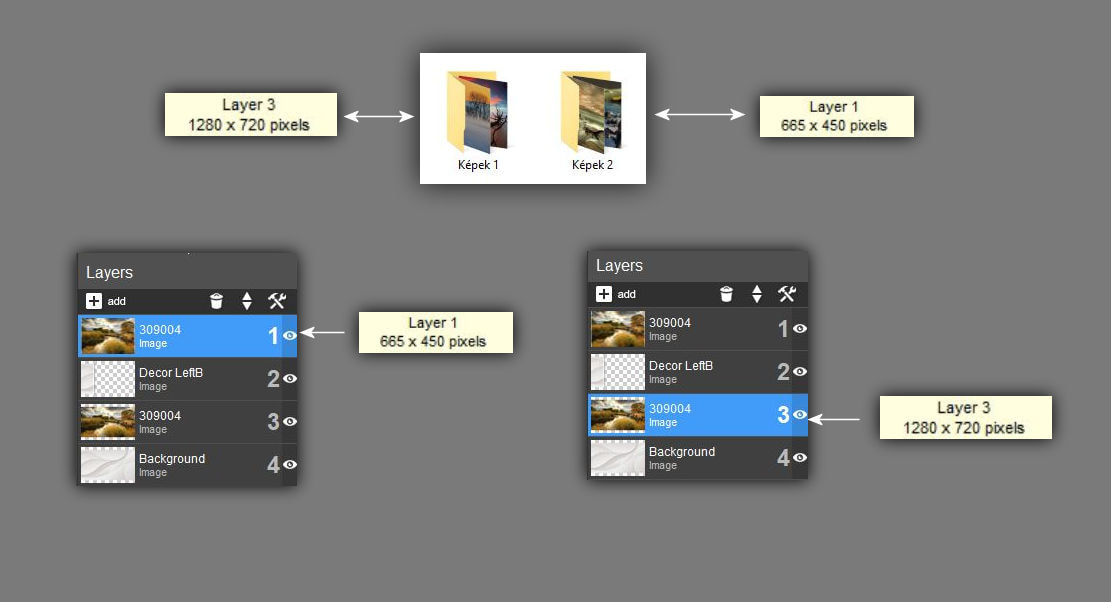
8. A képeidnek kettö könyvtárat kell létrehoznod ugyanazokkal a képekkel. Itt a képen azt látod, hogy melyikben mekkora méreteket kell csinálnod belölük.Valamint azt is látod, hogy a Pro Show Producerben hogyan rakd össze a rétegeket és melyik méretü kép melyik rétegre kell kerüljön.
For your images, you need to create two directories with the same images. Here in the picture you can see which size you have to make them. You can also see how to put the layers together in Pro Show Producer and which size image should be placed on which layer.
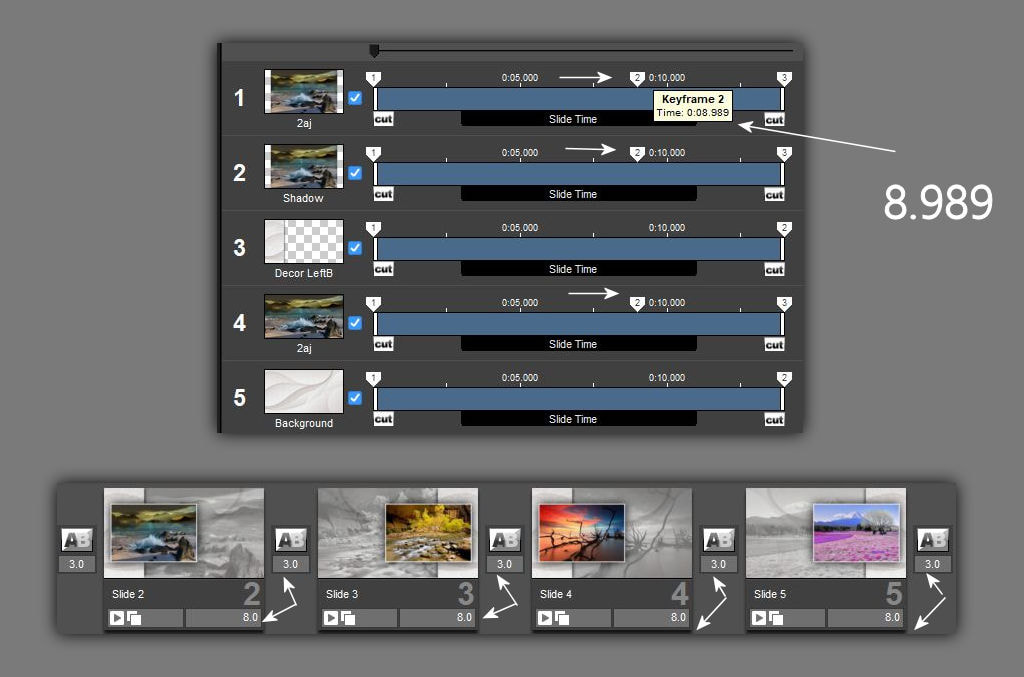
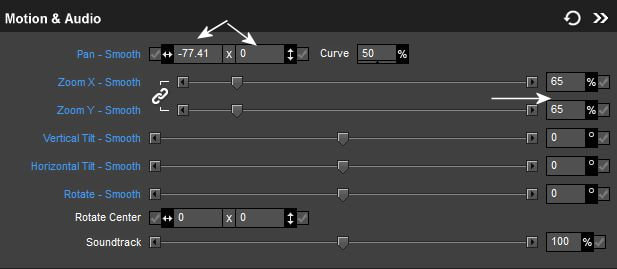
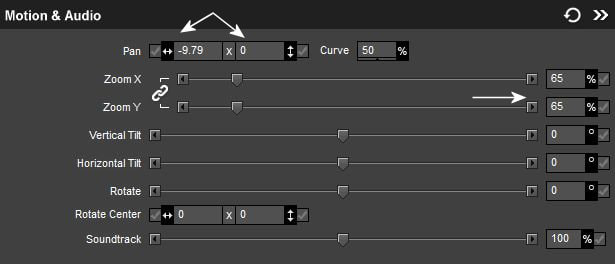
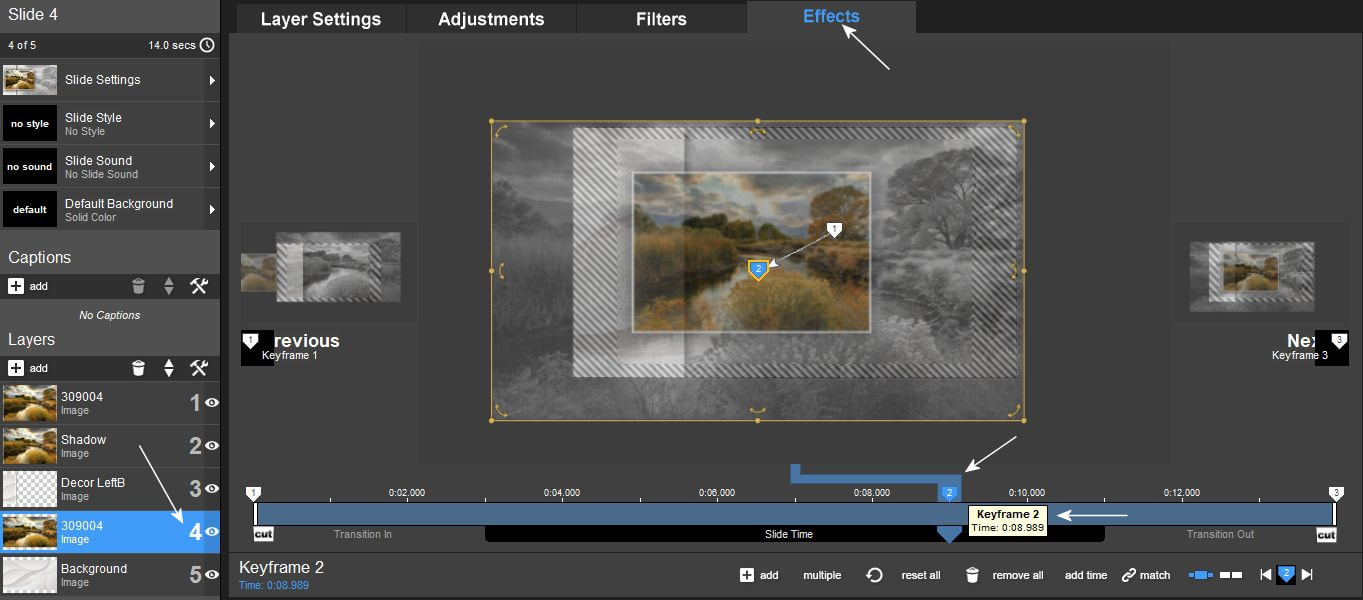
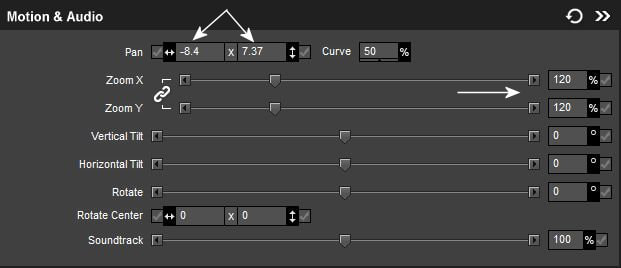
9. Ha össze raktad a rétegeket kezdj el az effectálást a keyframe pontokon.
Once you have assembled the layers, start the effects on the keyframe points.
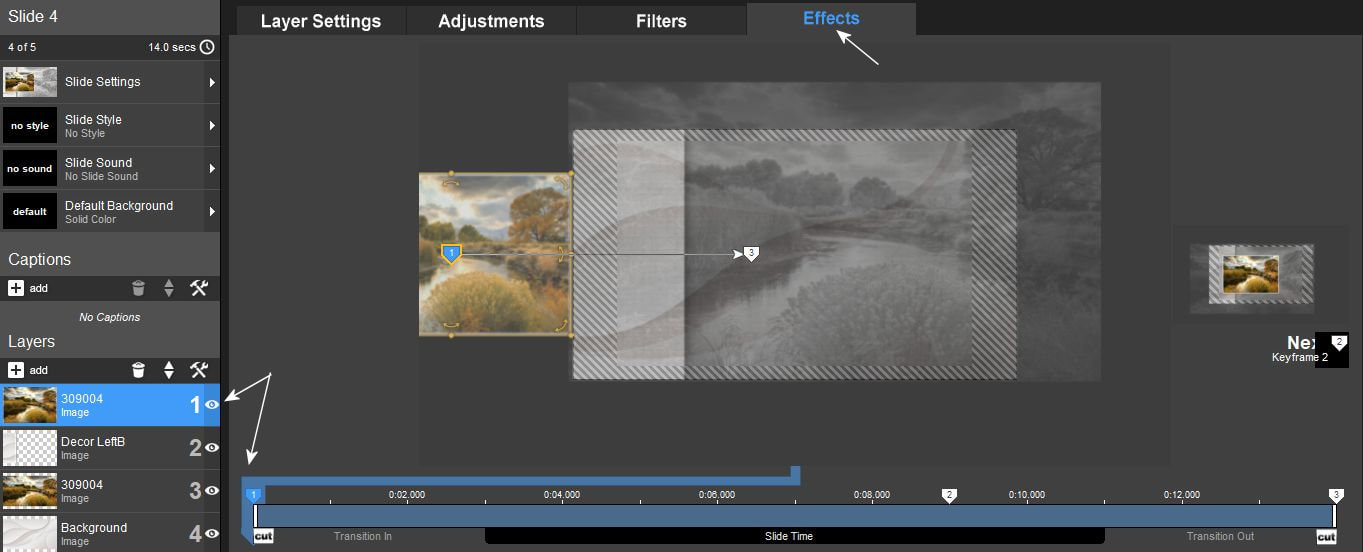
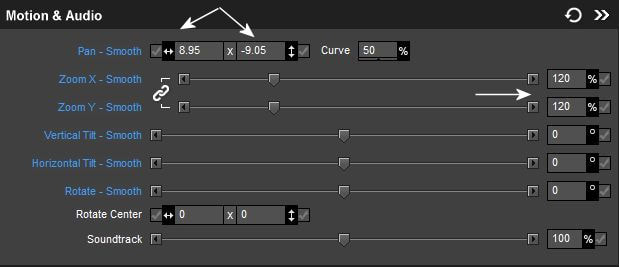
10. Keyframe point : 8.989
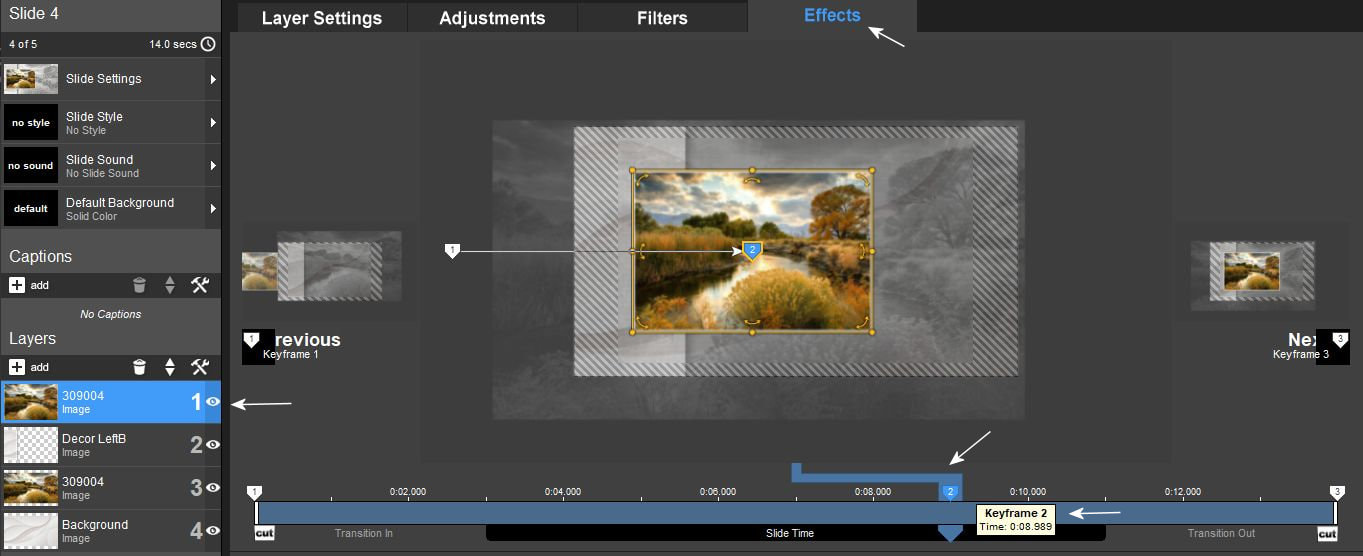
11.
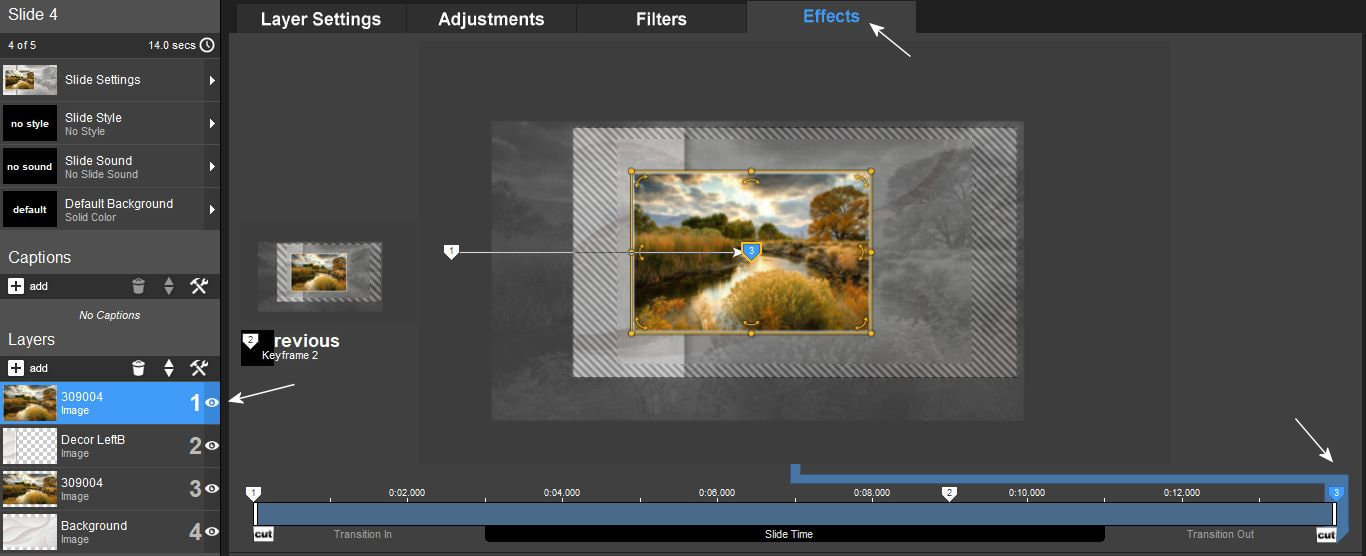
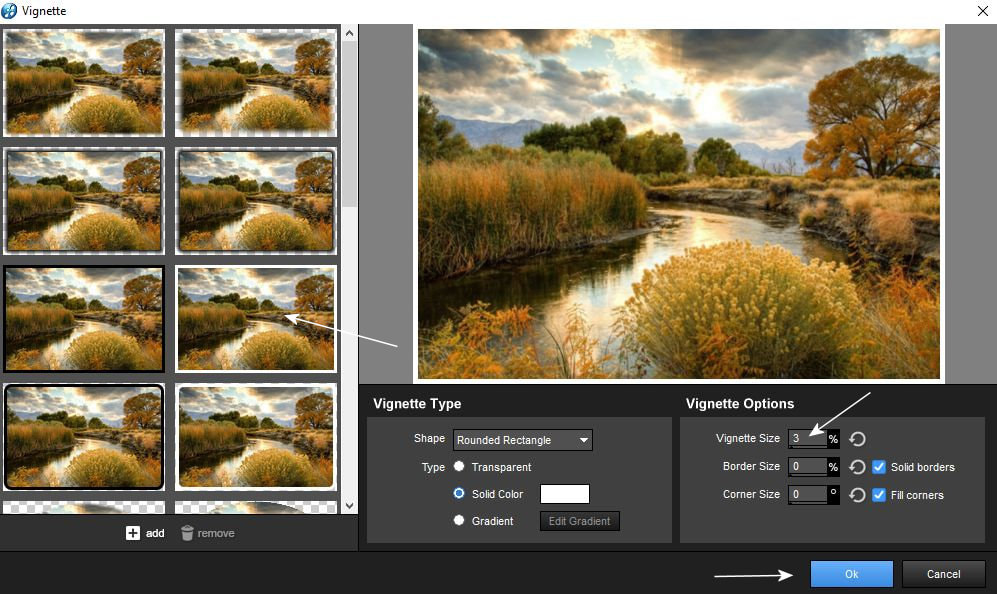
12. Keretezd be az elsö rétegen levö képedet.
Frame the pictures on the first layer.
13. Majd duplázd meg ezt a réteget.
Then duplicate this layer.
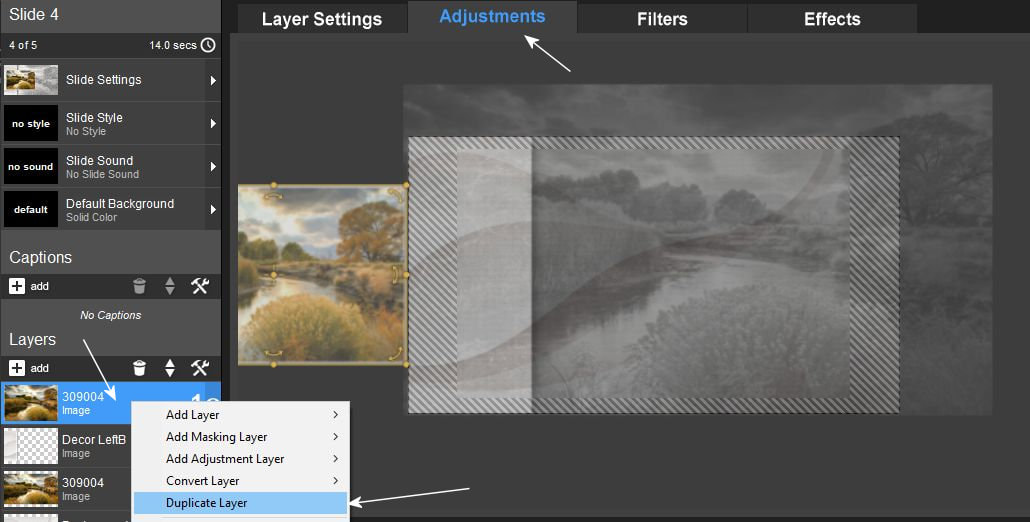
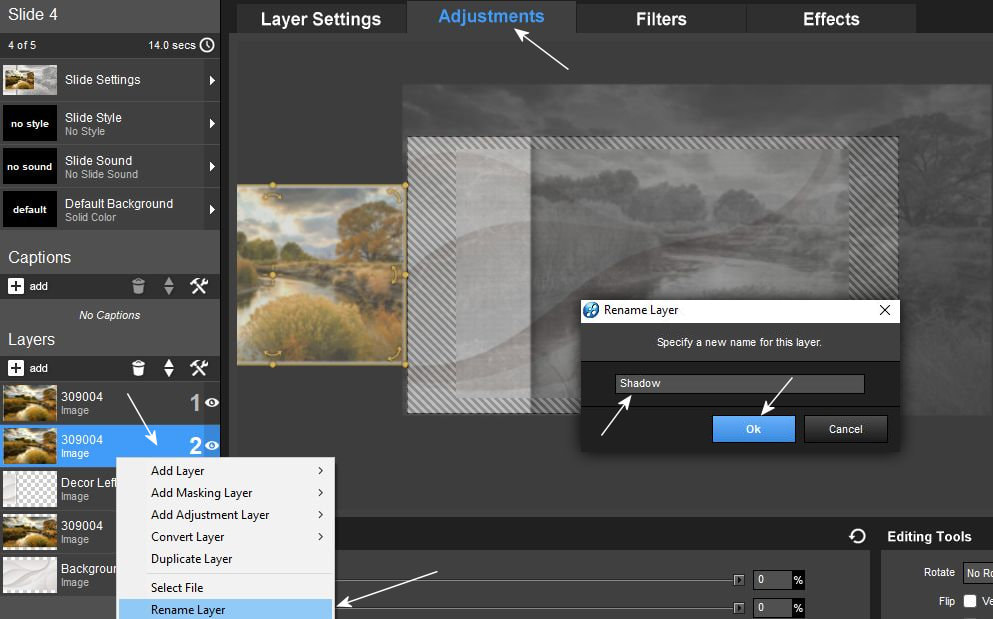
14. Nevezd át ezt a réteget árnyék rétegnek.
Rename this layer the shadow layer.
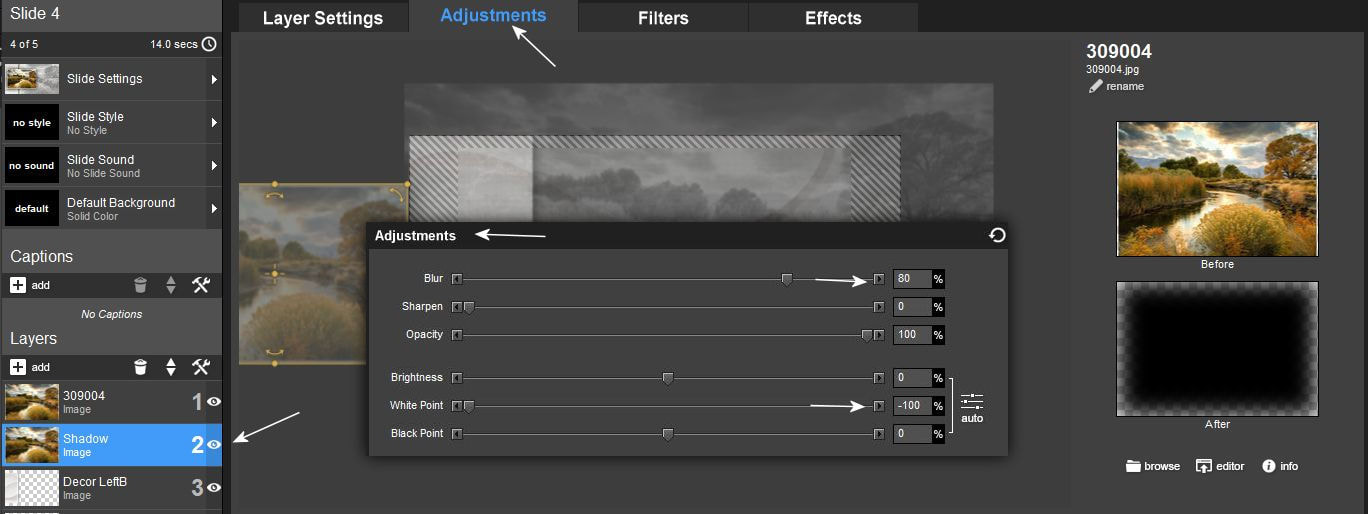
15. Az adjustment menüben állítsd be az árnyék értékeket.
Set the shadow values in the adjustment menu.
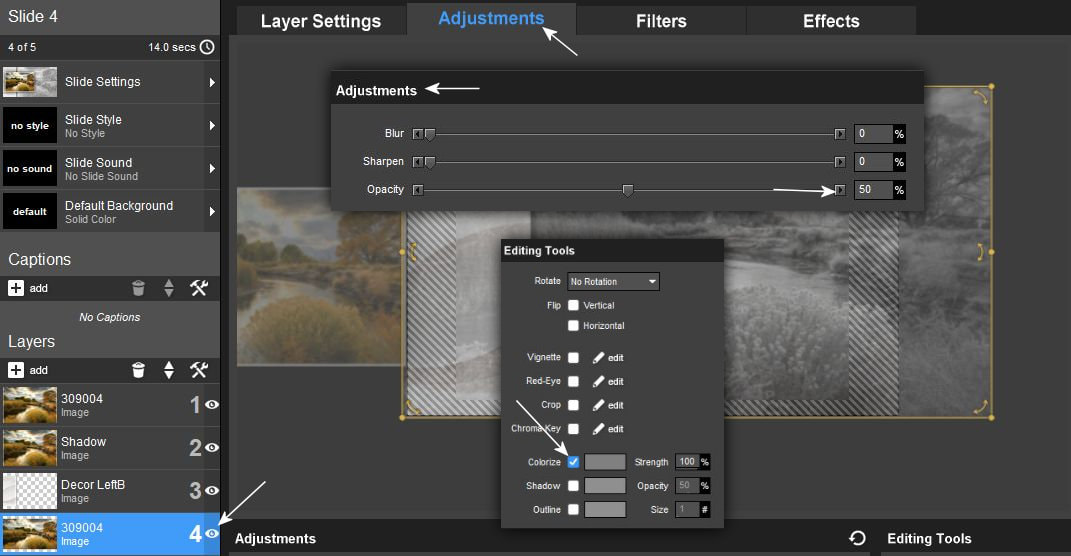
16. A hármas réteg helyén a promótált és elmentett baloldali dekorod van effect nélkül
A negyedik rétegeden szintén az adjustment menüben állítsd az opacity 50%-ra és kapcsold be a colorize menüt is.
Instead of the third layer, you have the promoted and saved decor on the left without effect. On the fourth layer, also in the adjustment menu, set the opacity to 50% and turn on the colorize menu.
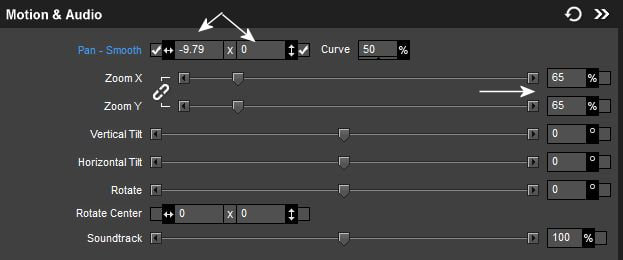
17. Csináld meg ennek a rétegnek az effectálását is.
Do the effects of this layer as well.
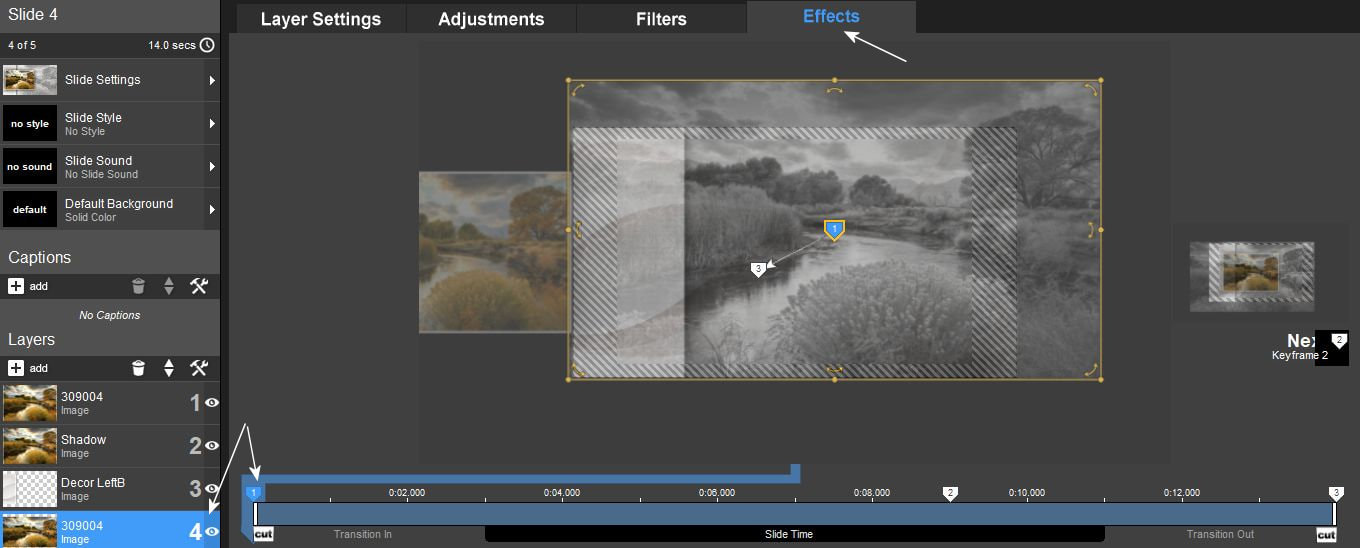
18. Keyframe point : 8.989
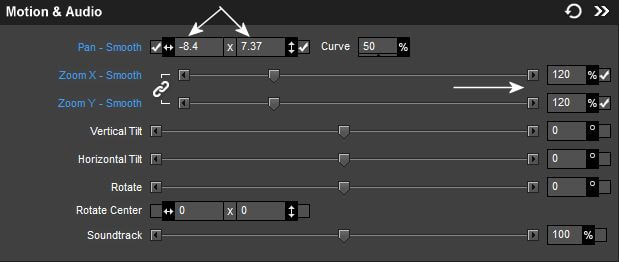
19.
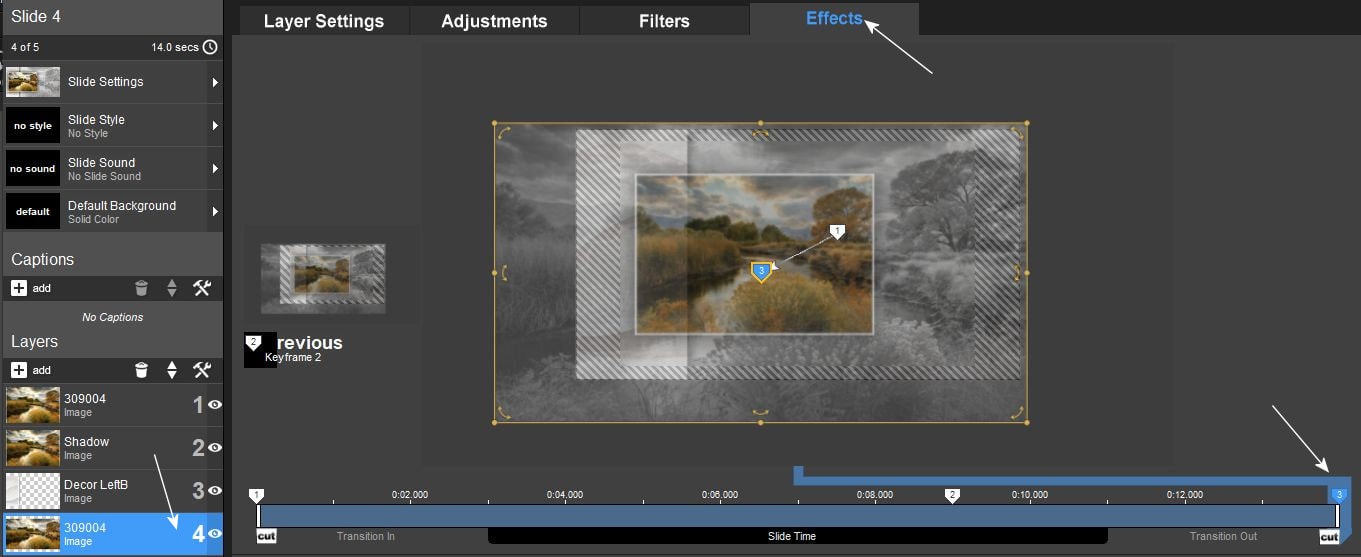
20. A slide idö pontokat állítsd 8 és 3 másodpercre. Ha jól dolgoztál a Keyframe editorodban ezt kell látnod.
Set the slide time points to 8 and 3 seconds. If you worked well in your Keyframe editor, you should see this.