Ebben a bemutatóban egy úgynevezett " Flipping Frame " effect "lapozott keret" elkészítését tanuljuk meg. Egyszer a baloldalról fordul át 3 keret a jobboldalra majd középröl mindkét oldalra. Az ügyes ProShow felhasználók meg tudják csinálni a jobboldalról nyílást is az itt látható tutorial alapján.
In this tutorial, we will learn how to create a so-called "Flipping Frame" effect. Once, 3 frames turn from the left to the right, then from the center to both sides. Skilled ProShow users can also make the opening from the right side based on the tutorial shown here.

1. Az elsö dolgod ehhez a bemutatóhoz az legyen, hogy készíts egy olyan keretet amely a látványterved hátteréhez is passzol mind stílusban mind színharmóniában. De a neten is kereshetsz ha találsz megfelelöt. Sok keretkészítést tanultunk már itt a lapon is.
Én ezt a keretet és hátteret csináltam ehhez a videóhoz.
The first thing you should do for this presentation is to create a frame that matches the background of your visual design, both in terms of style and color harmony. But you can also search online if you find something suitable. We have already learned a lot about frame making here on the page. I made this frame and background for this video.

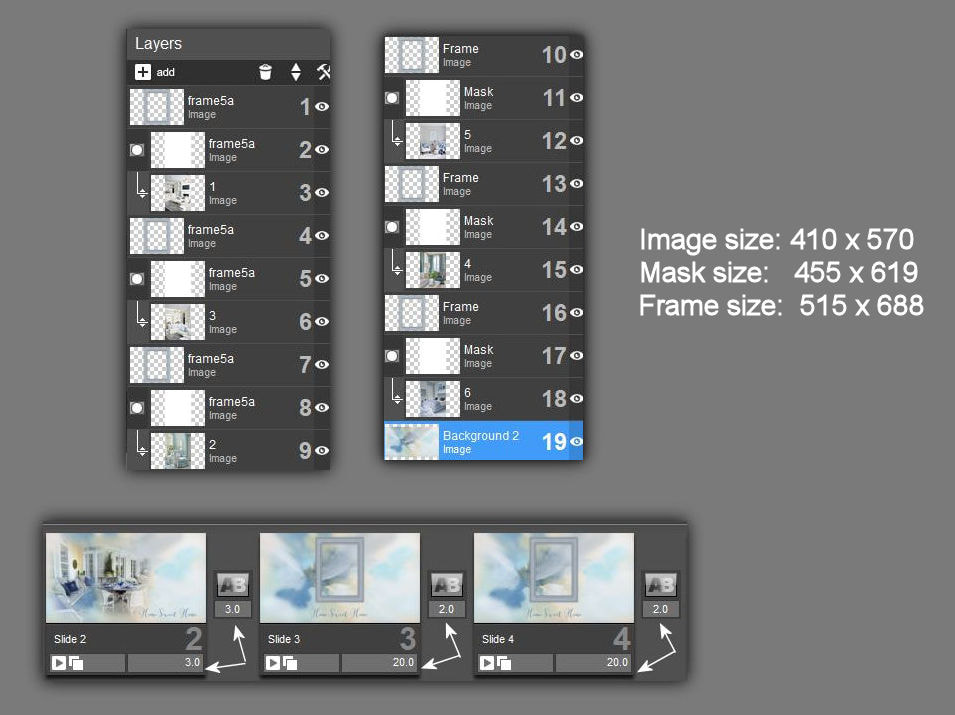
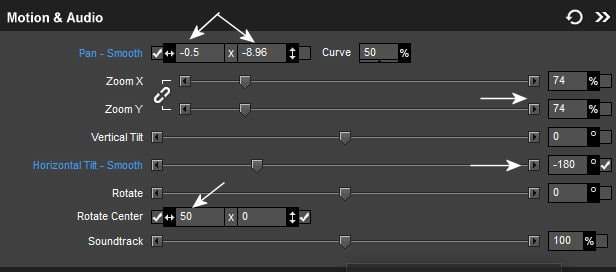
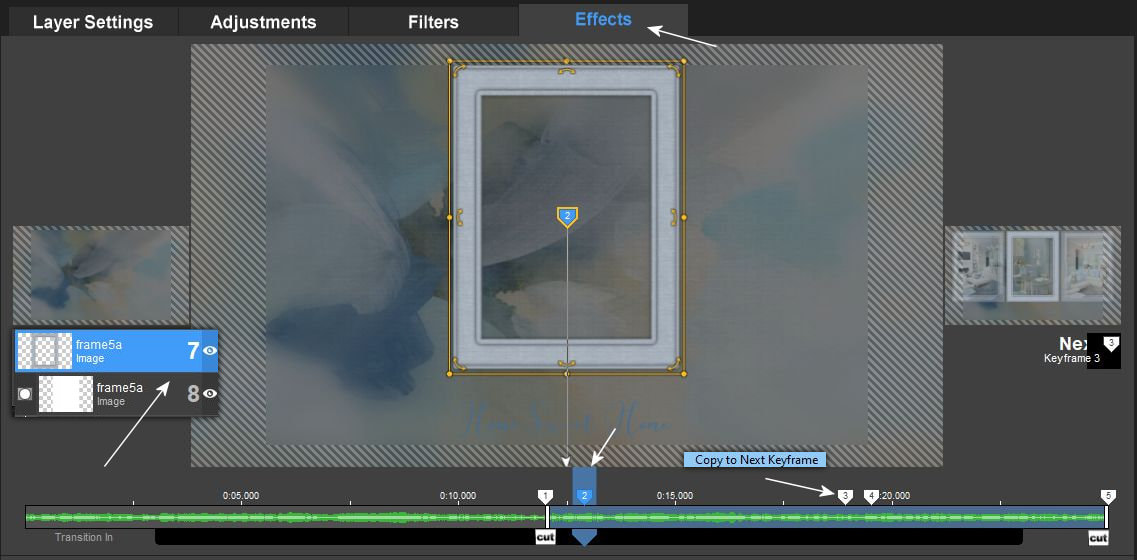
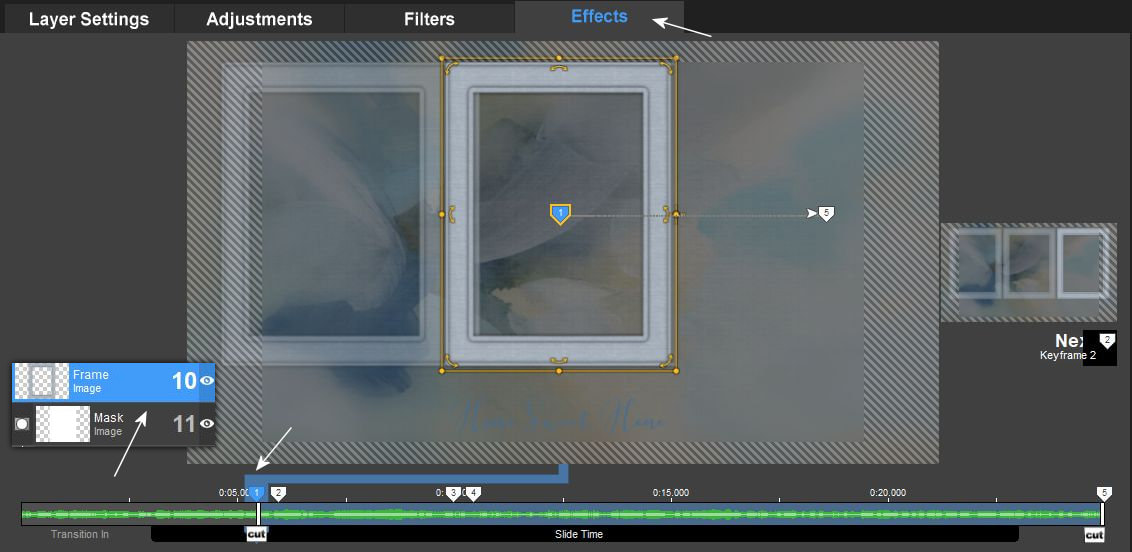
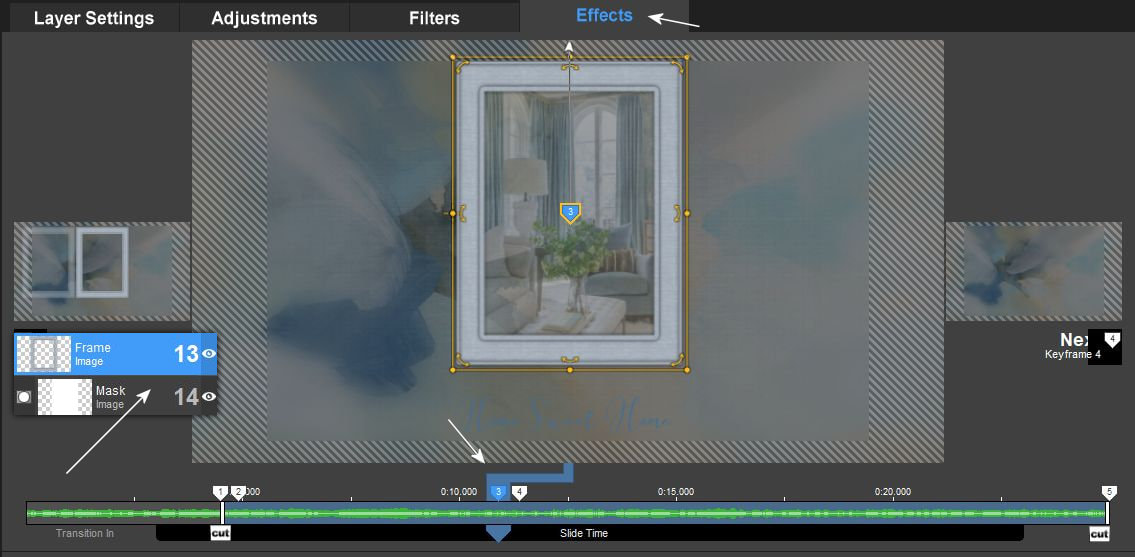
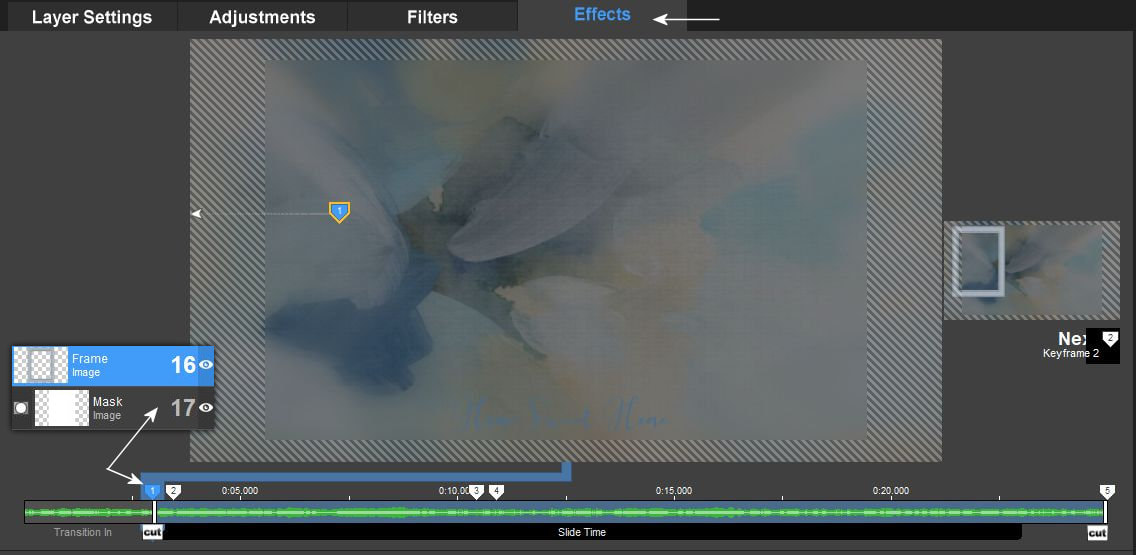
2. A ProShowban így rakd össze a rétegeidet a slide idejét így állítsd be és a mask, frame valamint a képeket is méretezd az itt látottak szerint. Itt jegyzem meg, hogy a folyamat képeken látható pozíciók kicsit eltérhetnek a te munkádban mert a programok egyes computereken nem dolgoznak pontosan egyformán. A lényeg hogy a kereteitek a megfelelö távolságra legyenek elhelyezve a layer settingsben a forduláshoz. Ez adja meg az azt fedö maszk és kép pzíciót is.
In ProShow, put your layers together like this, set the time of the slide like this and resize the mask, frame and images as shown here. I note here that the positions shown in the process images may be different slightly in your work because the programs do not work exactly the same on some computers. The point is that your frames are placed at the right distance in the layer settings for turning. This also specifies the position of the mask and image that covers it.
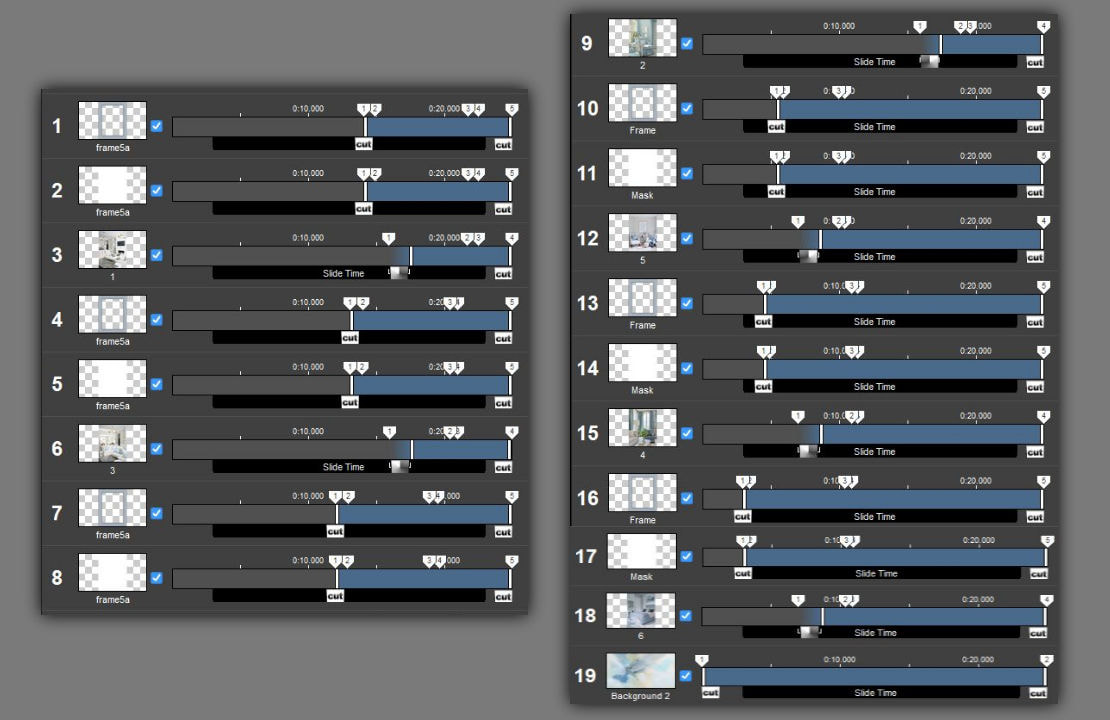
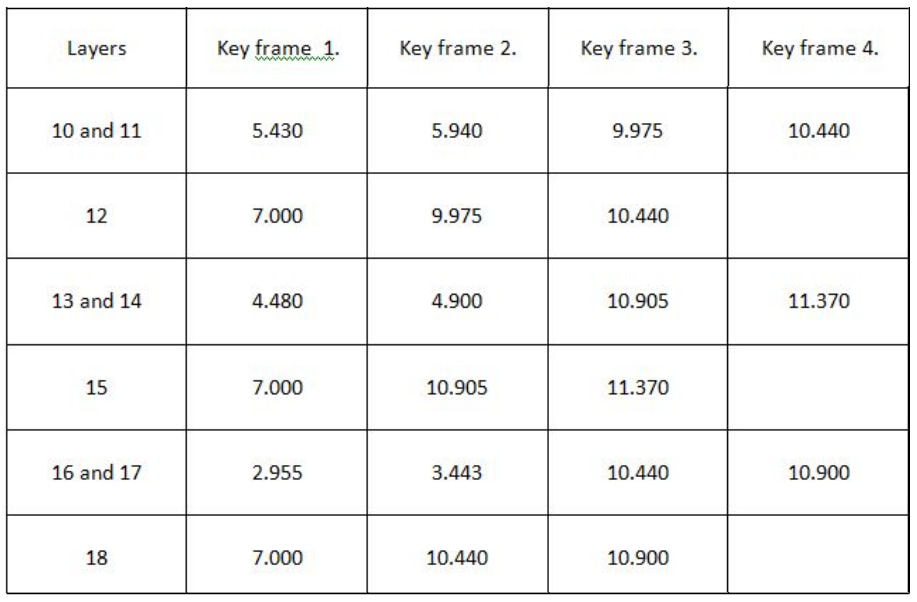
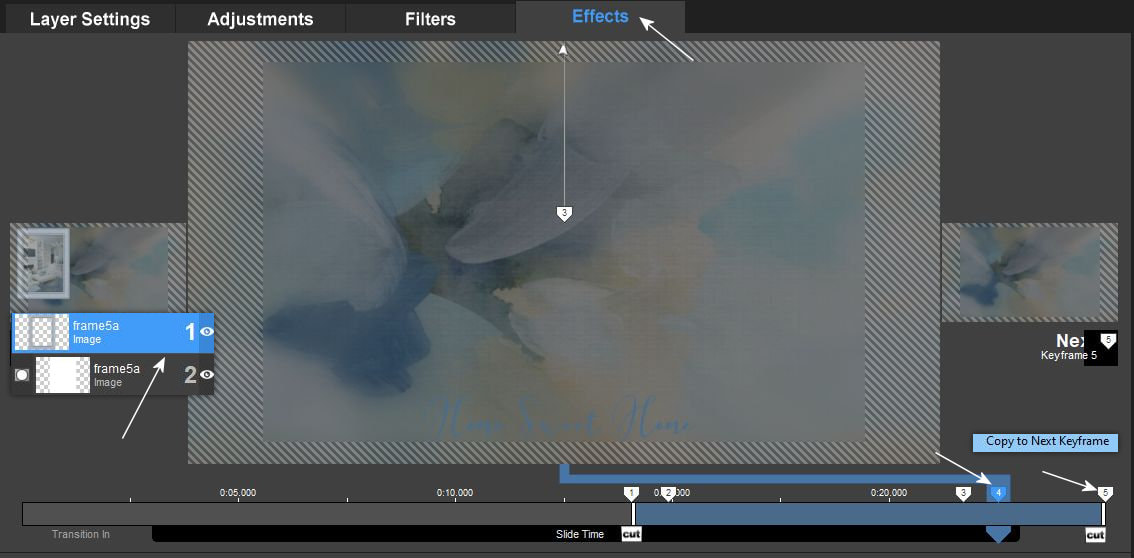
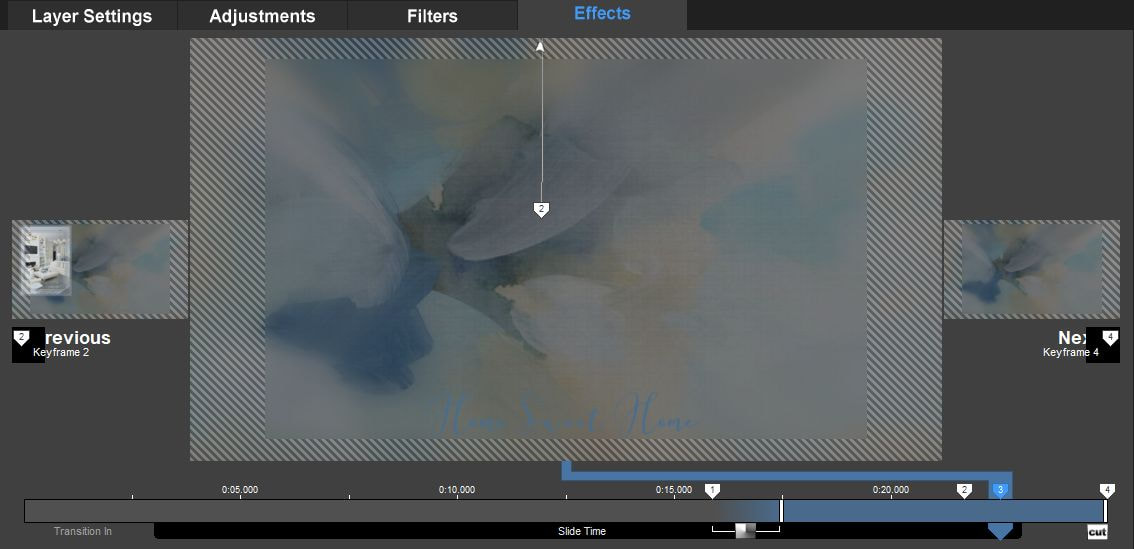
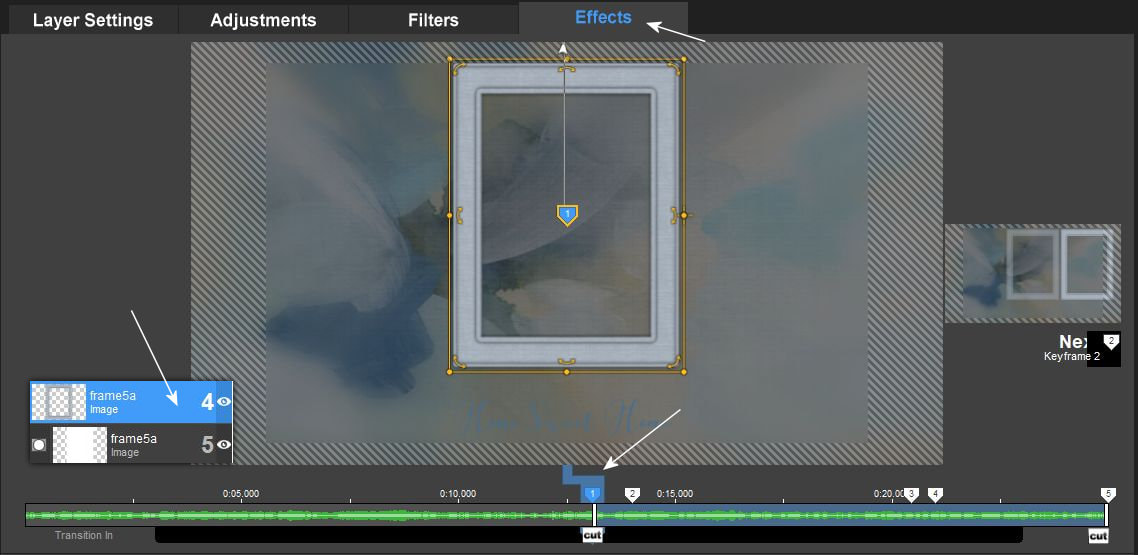
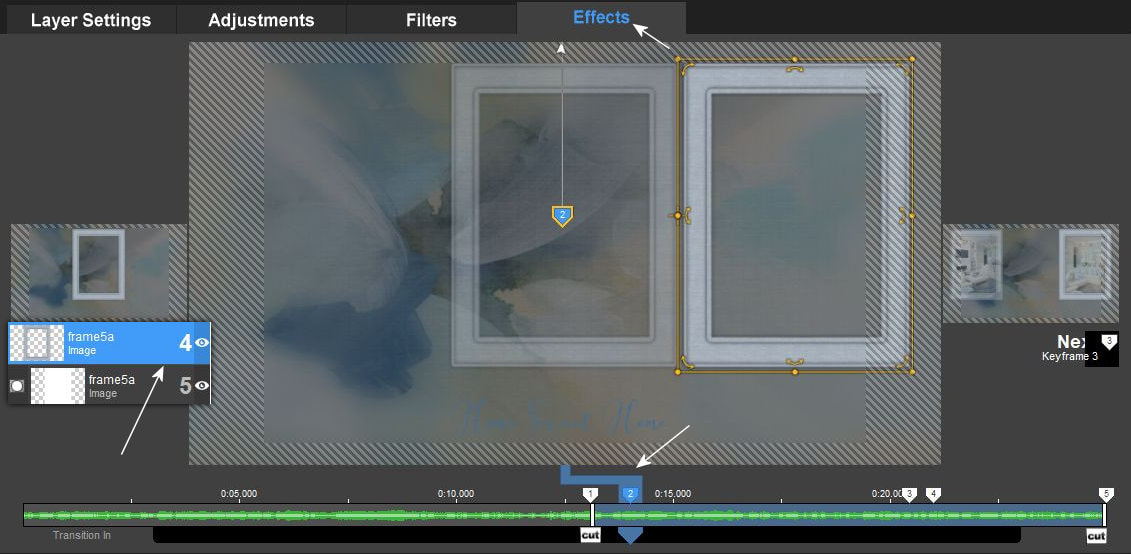
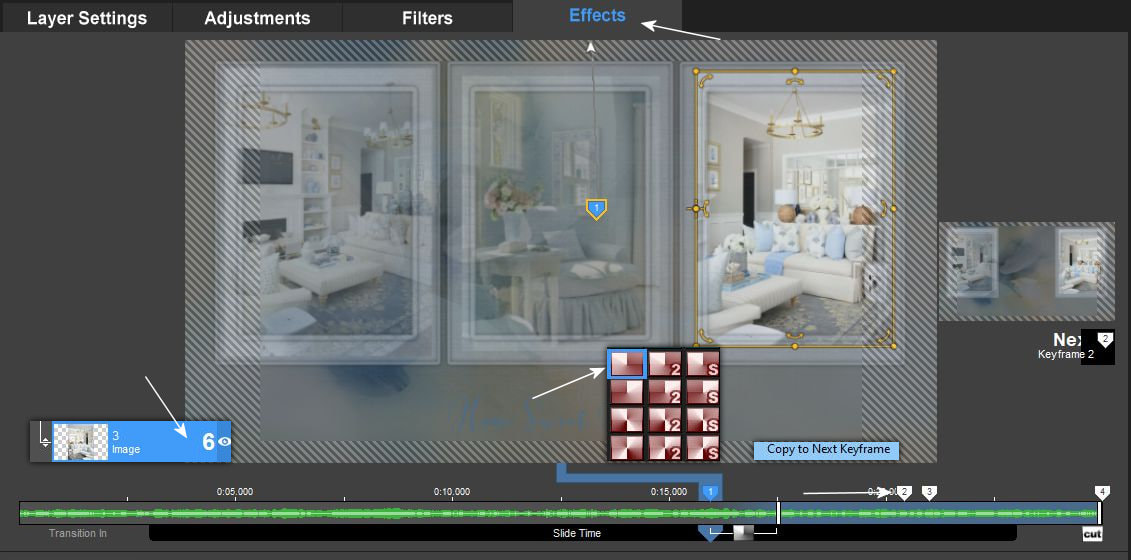
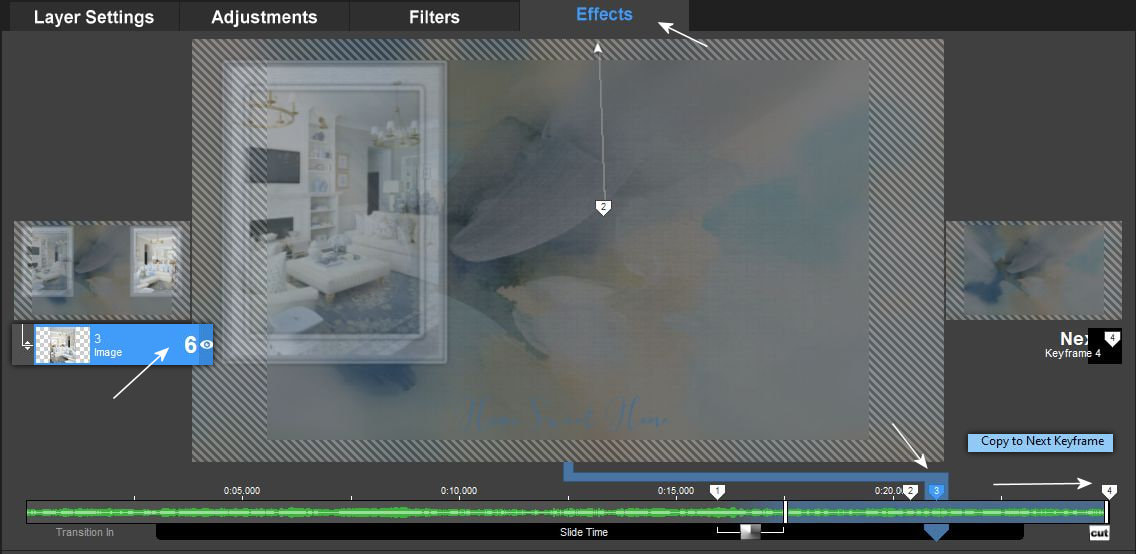
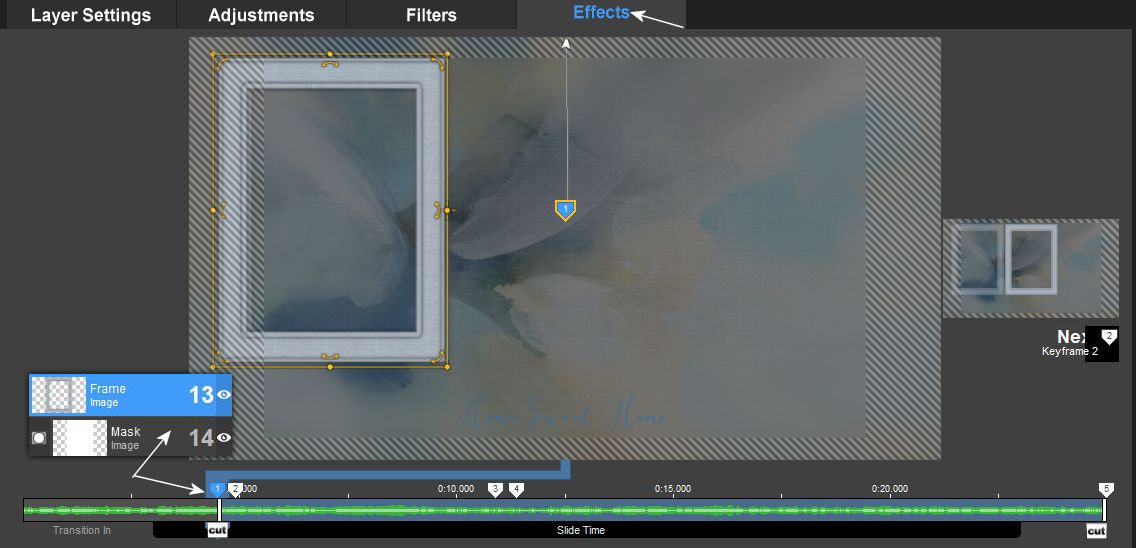
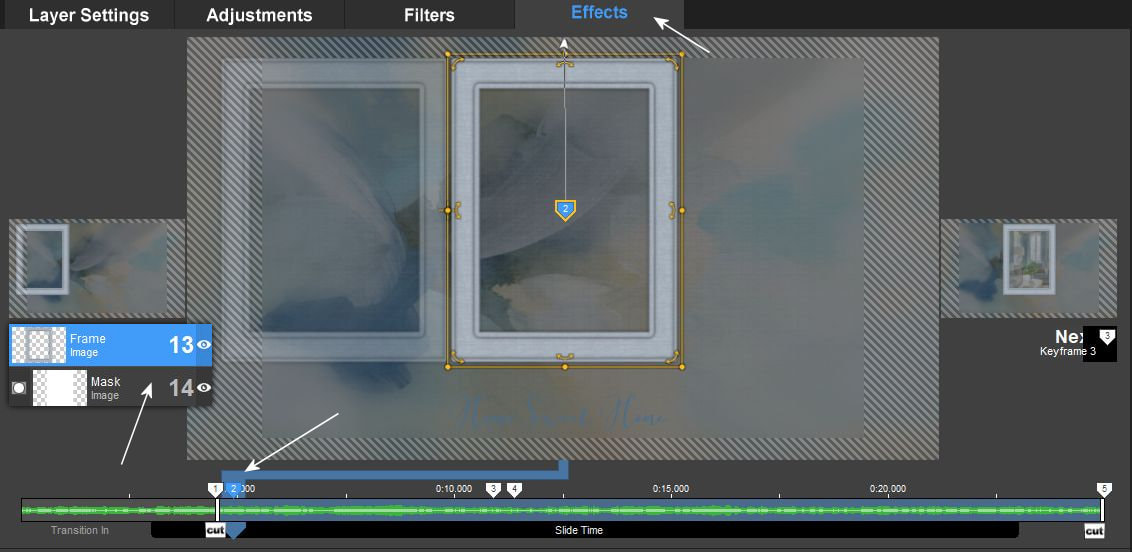
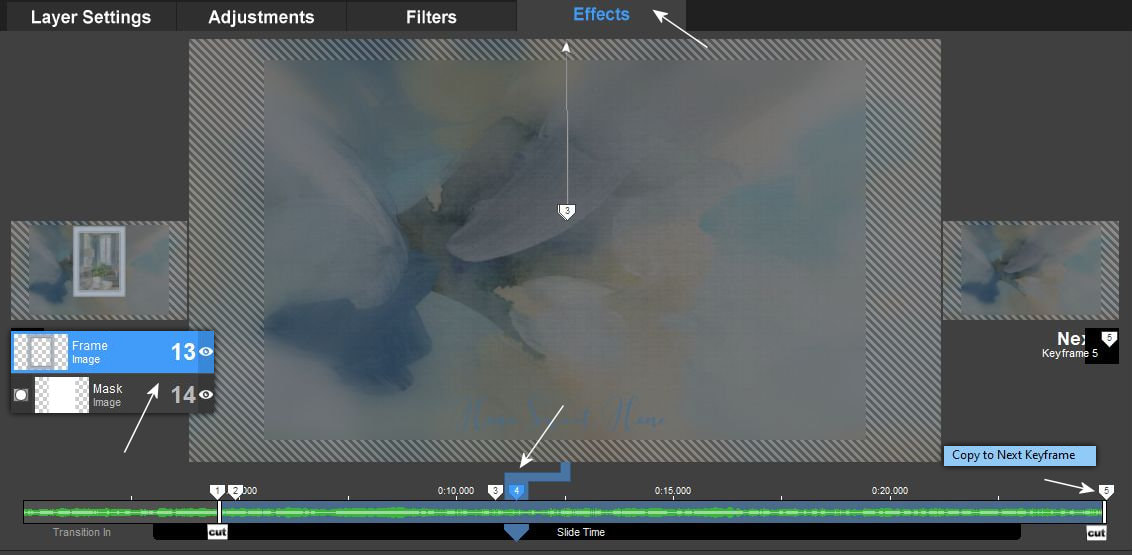
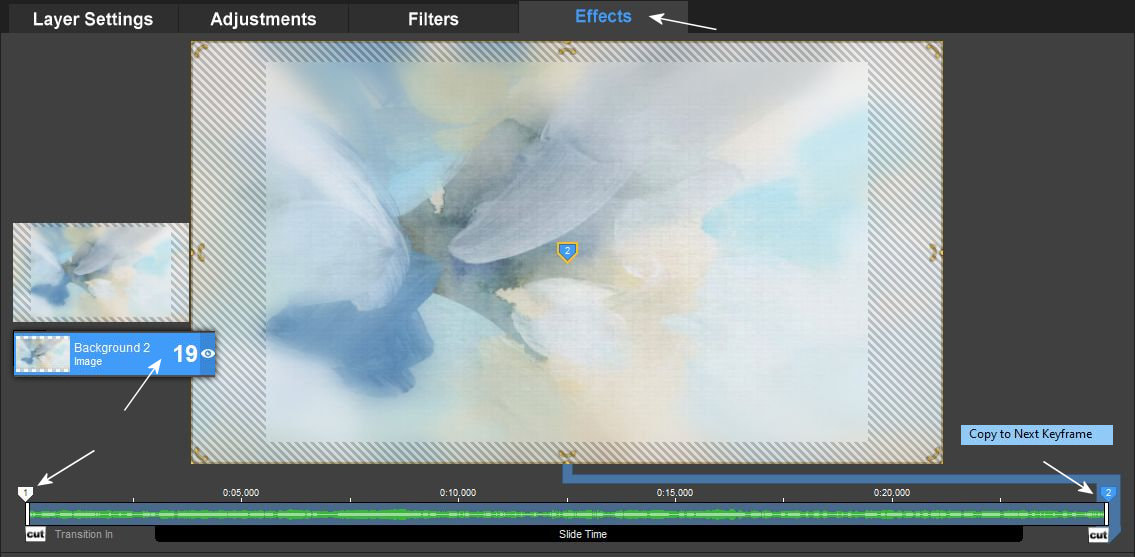
3. Nagyon sok keyframe pontot kell használnunk ehhez a forgatáshoz.
Igy helyezd el öket. Itt nagyon figyelmesen kell dolgoznod mert ha pontok nem jó helyen vannak a keretek fodulása sem müködik jól és nehéz a hibát megtalálni.
We need to use a lot of keyframe points for this rotation. So place them like this. You have to work very carefully here, because if the points are not in the right place, the folding of the frames will not work well and it is difficult to find the fault.
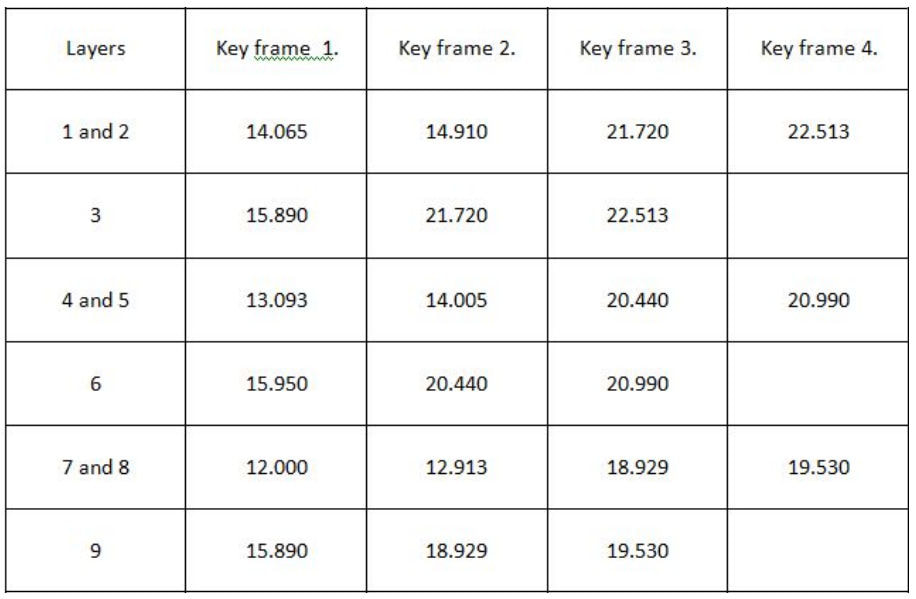
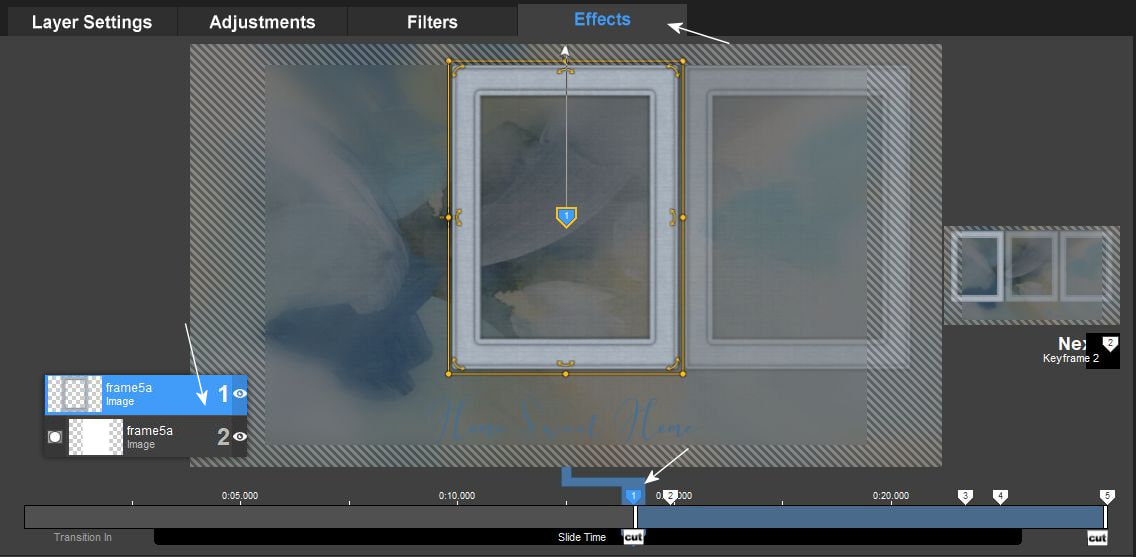
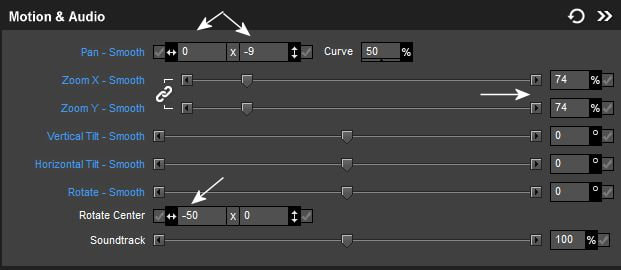
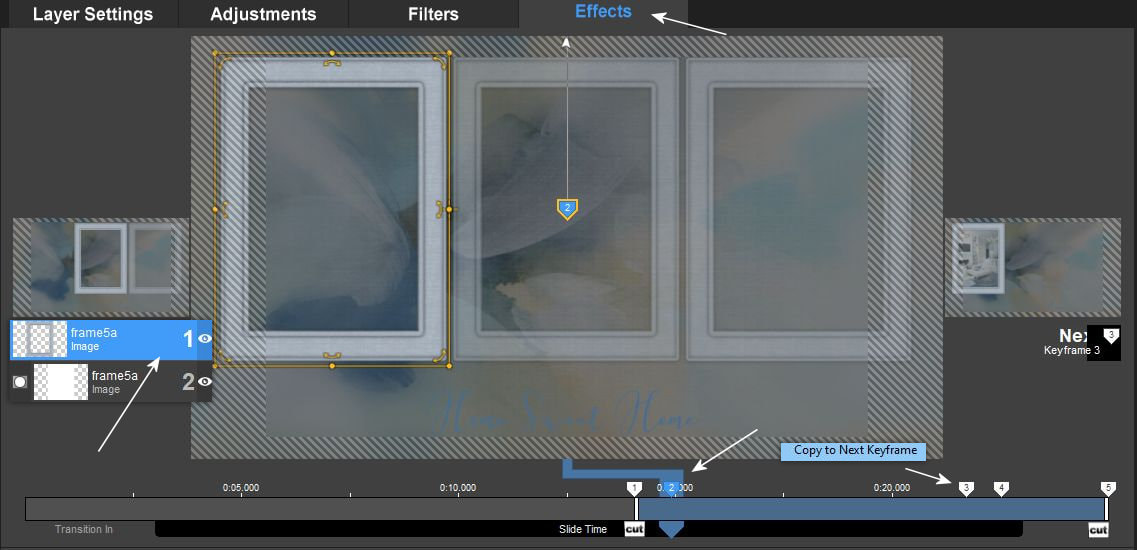
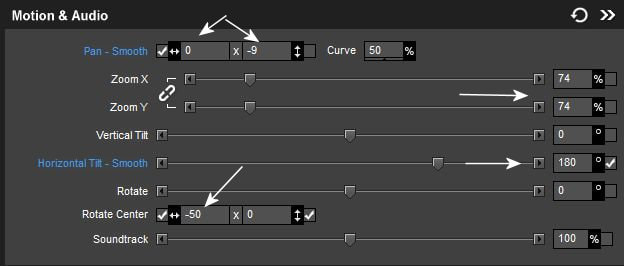
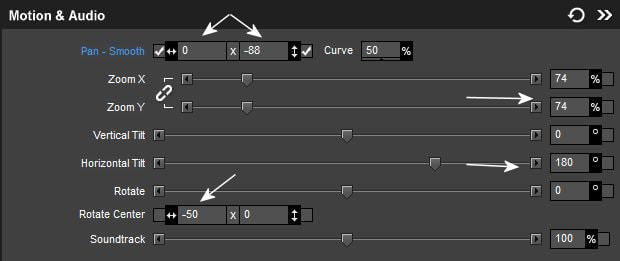
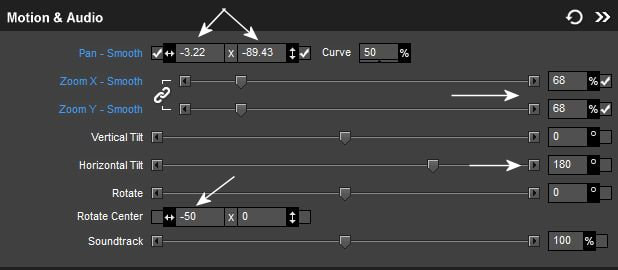
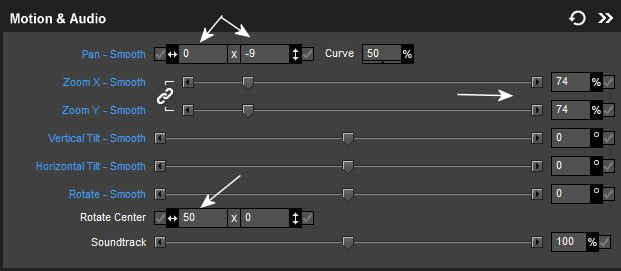
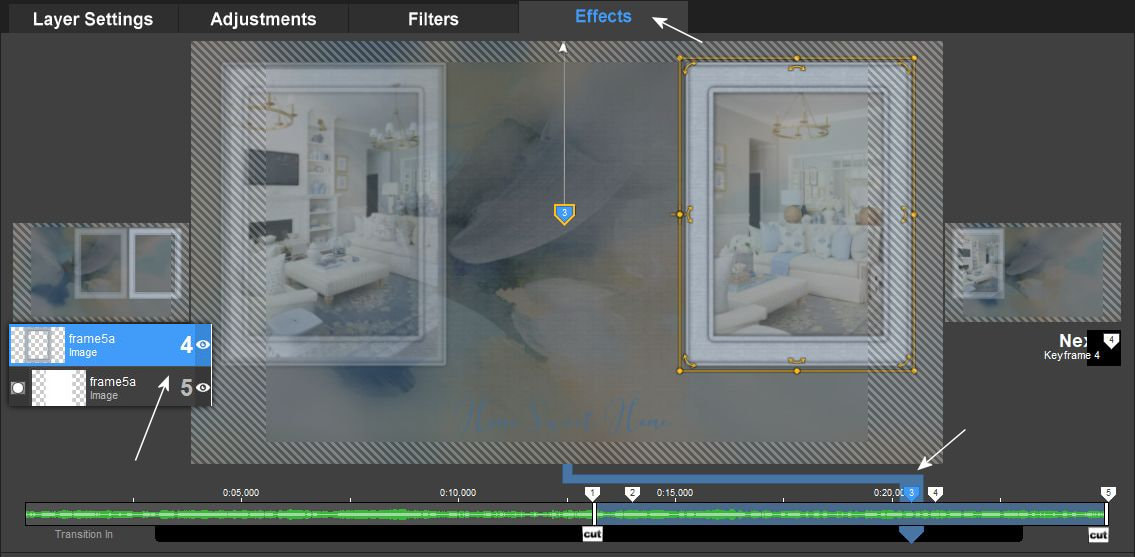
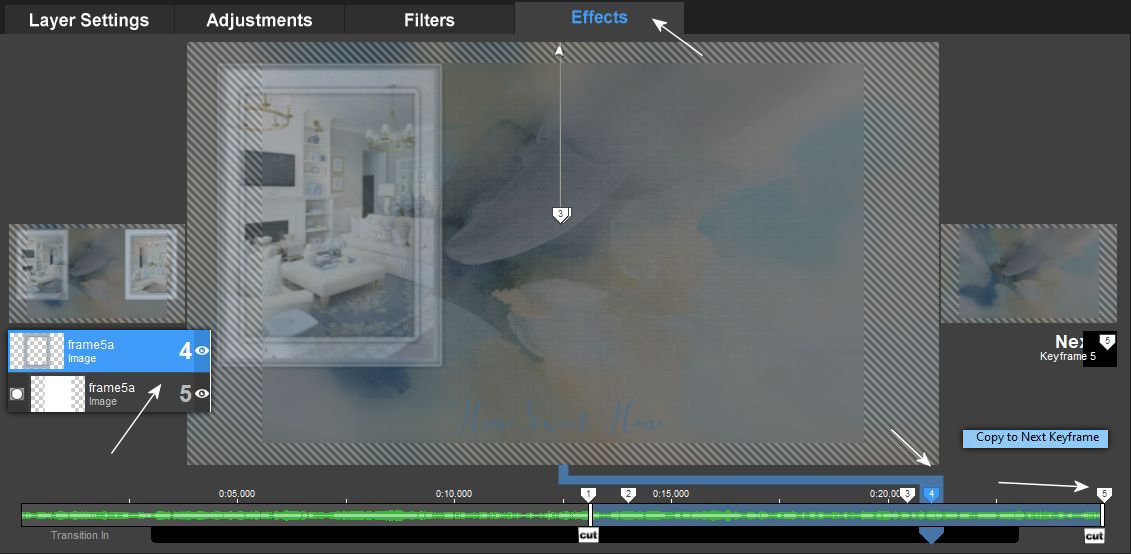
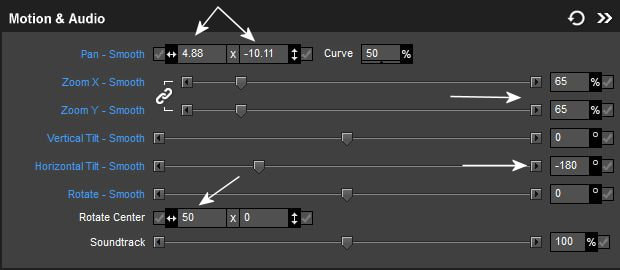
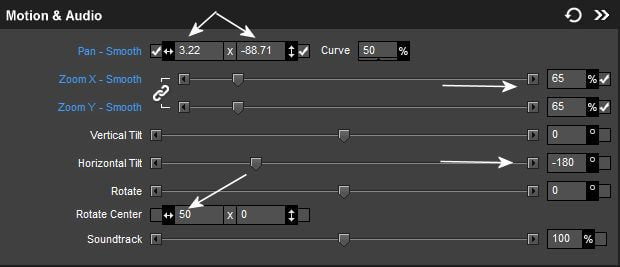
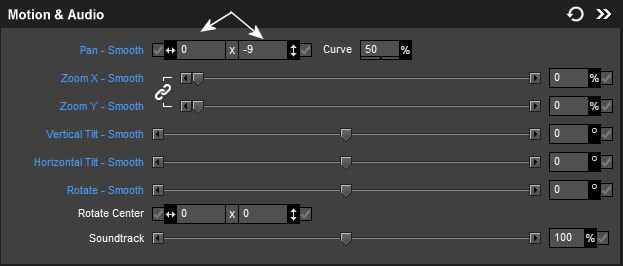
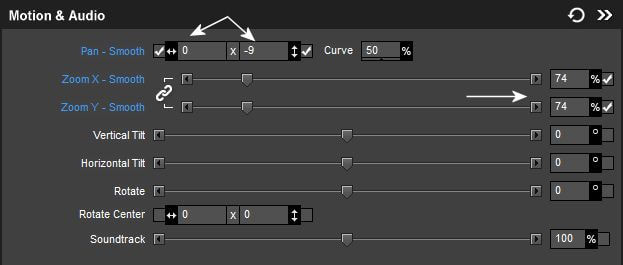
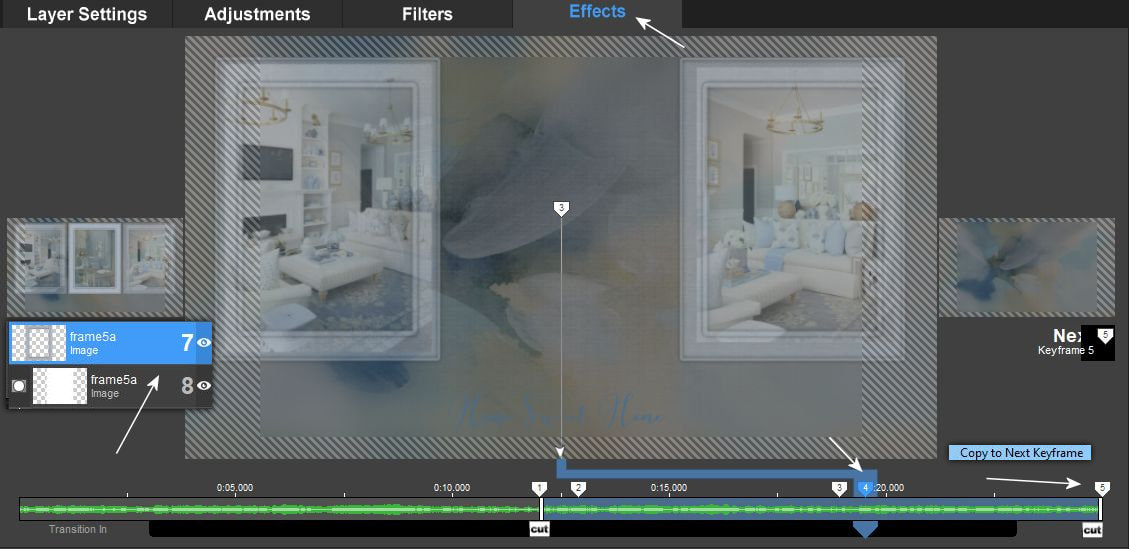
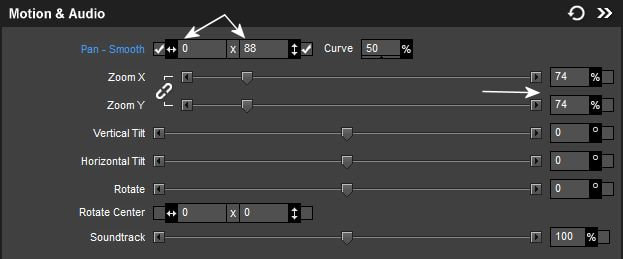
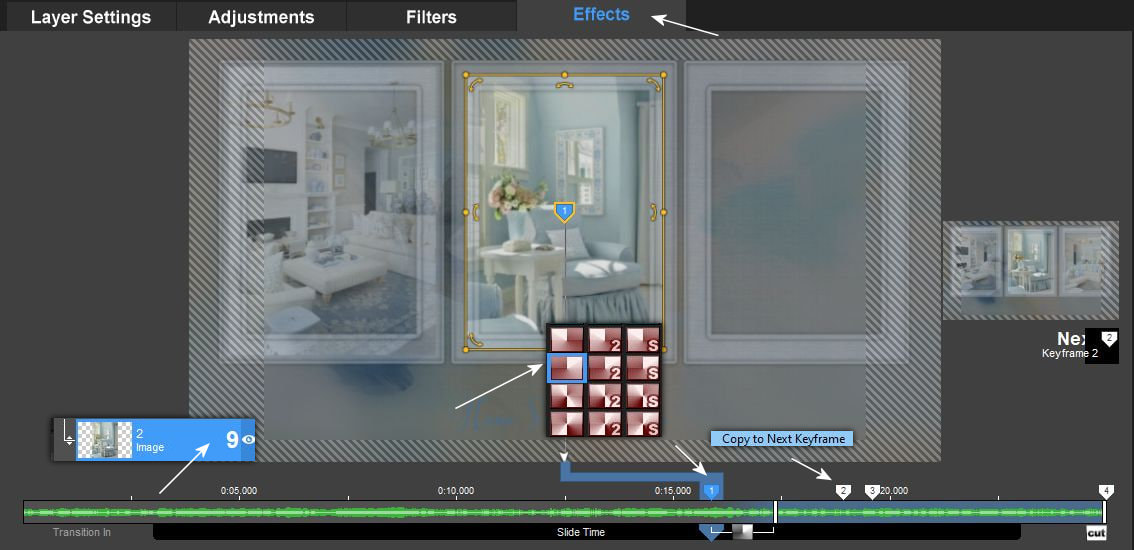
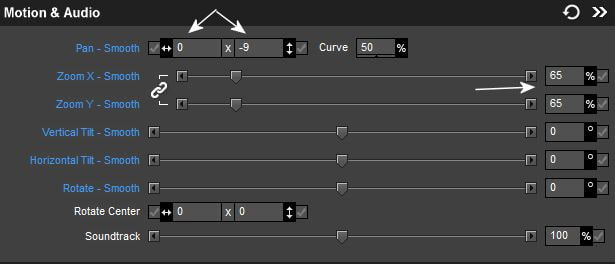
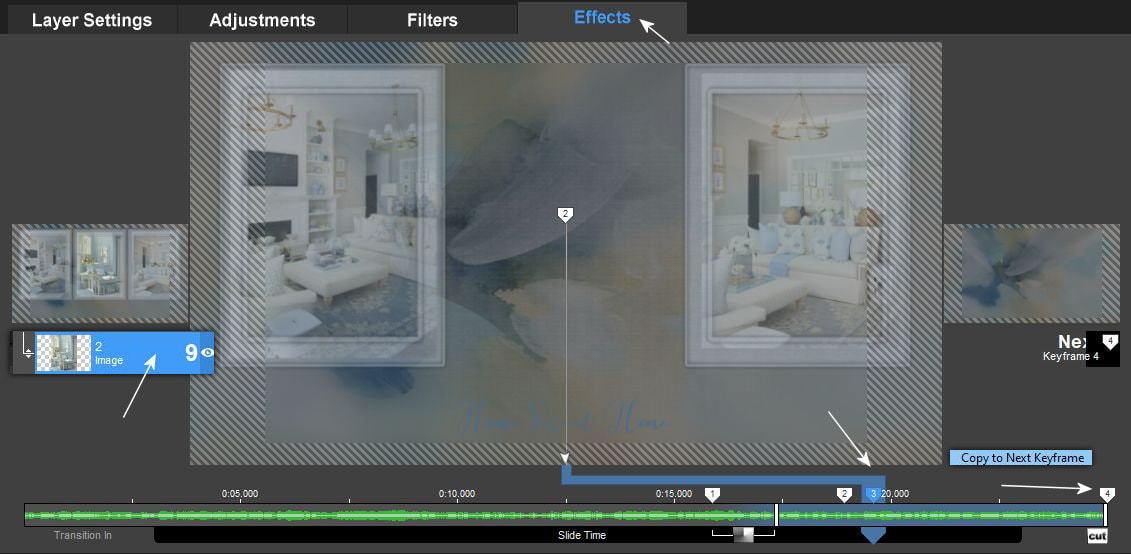
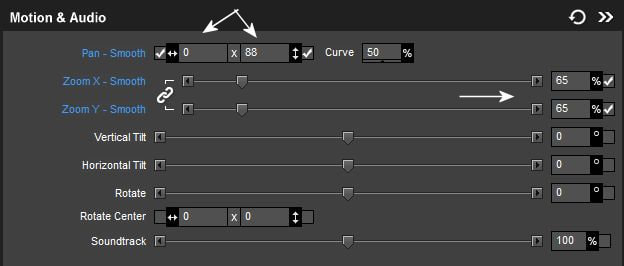
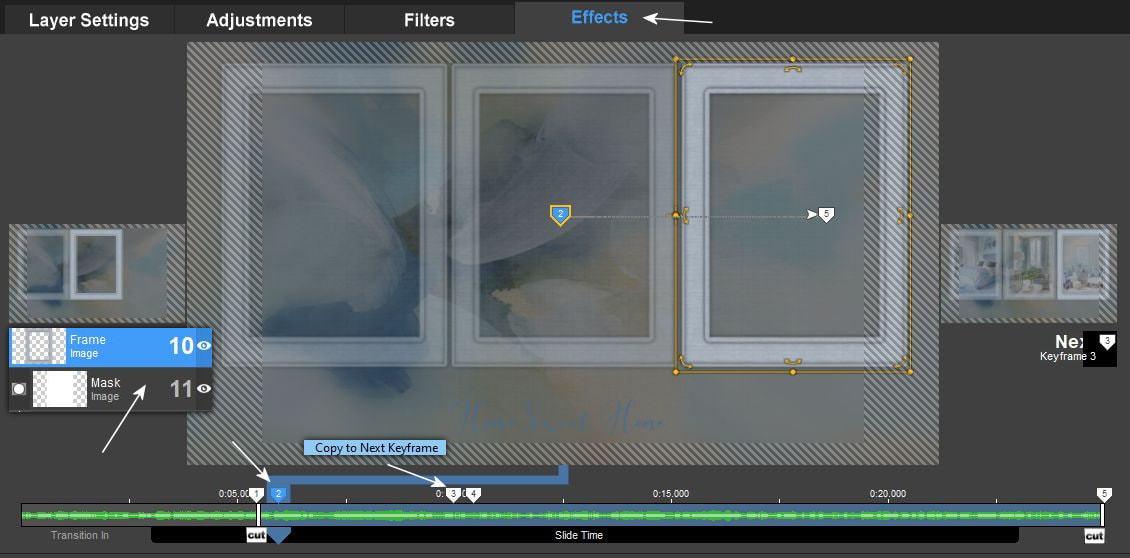
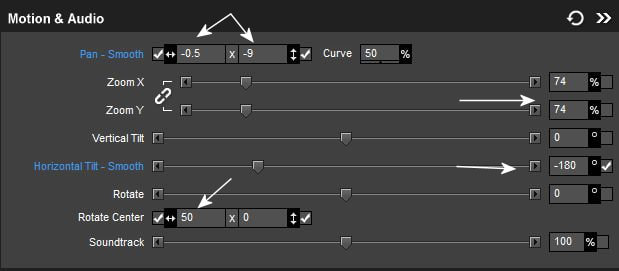
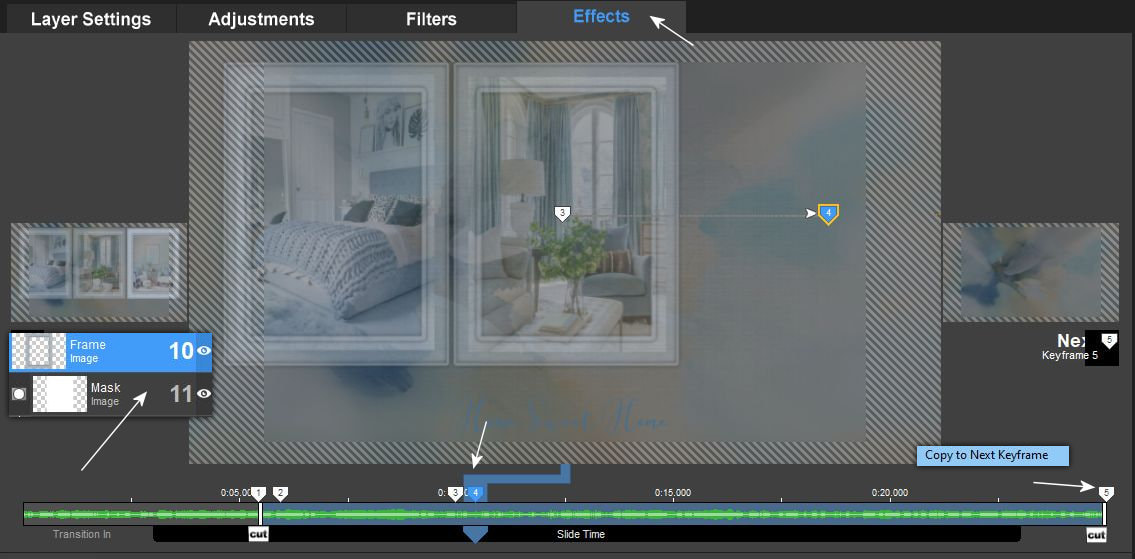
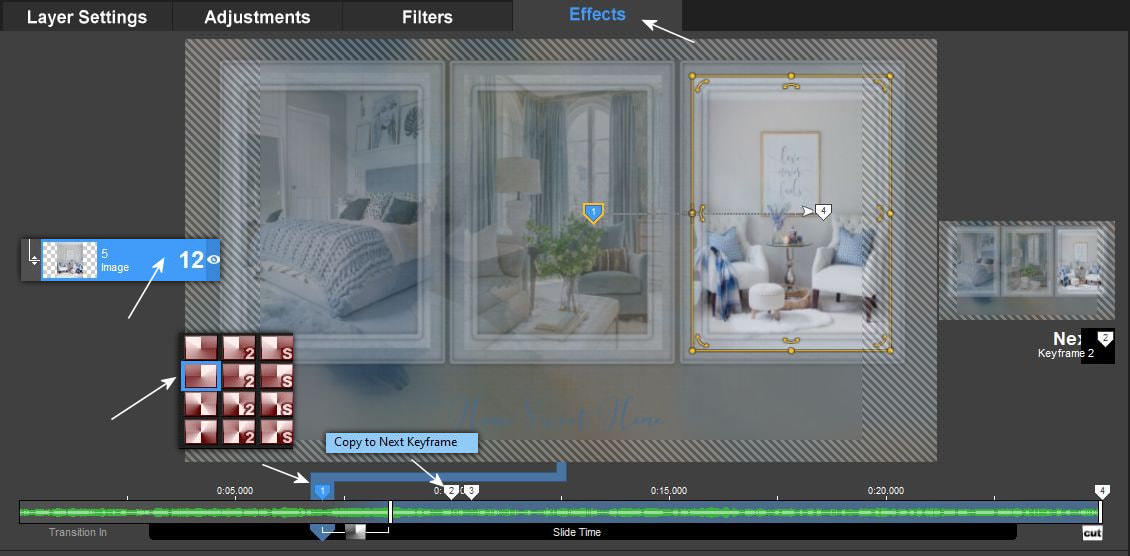
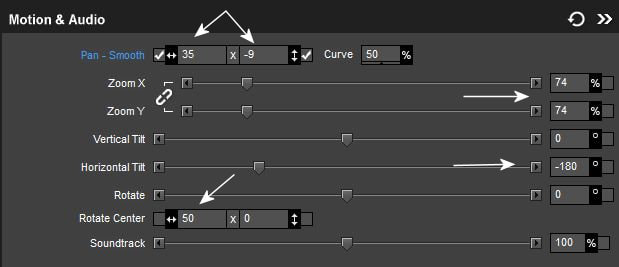
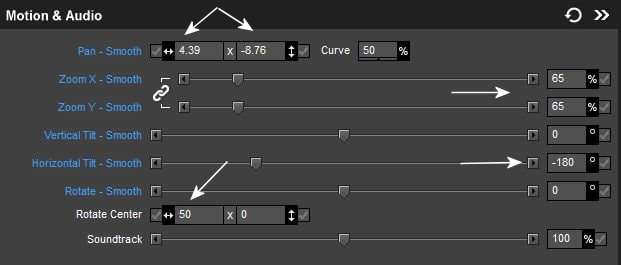
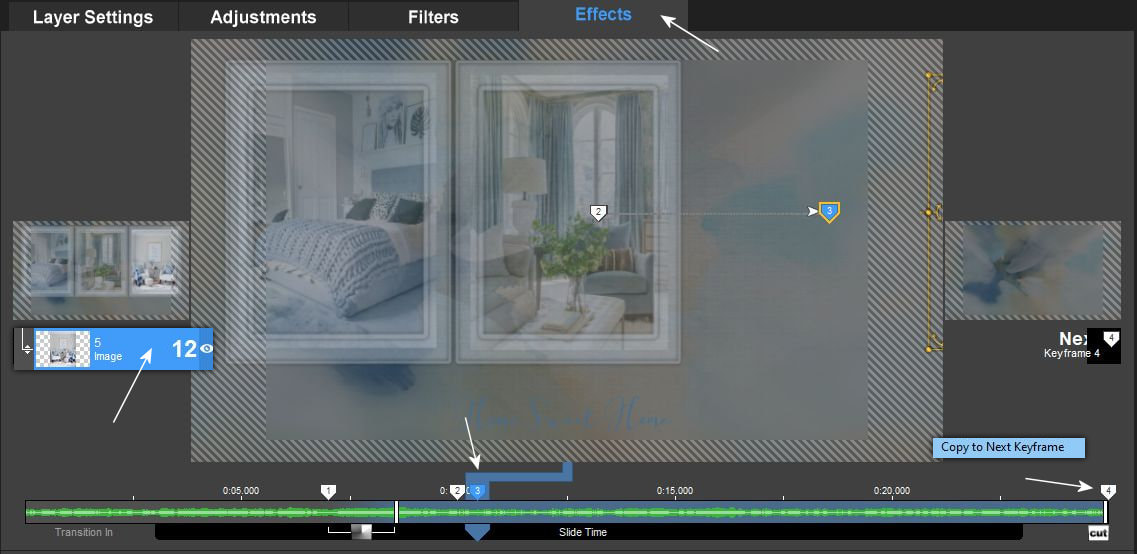
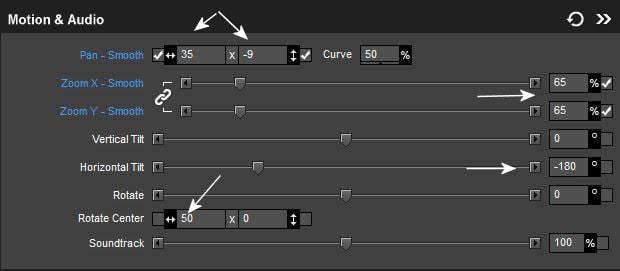
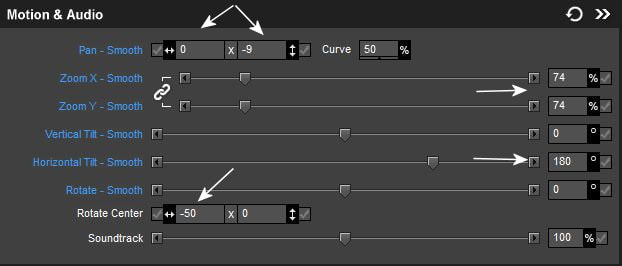
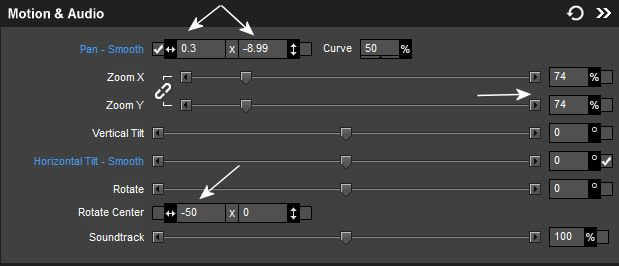
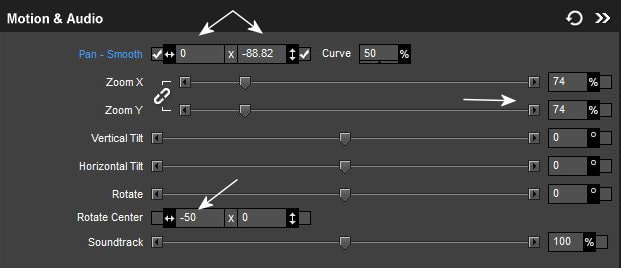
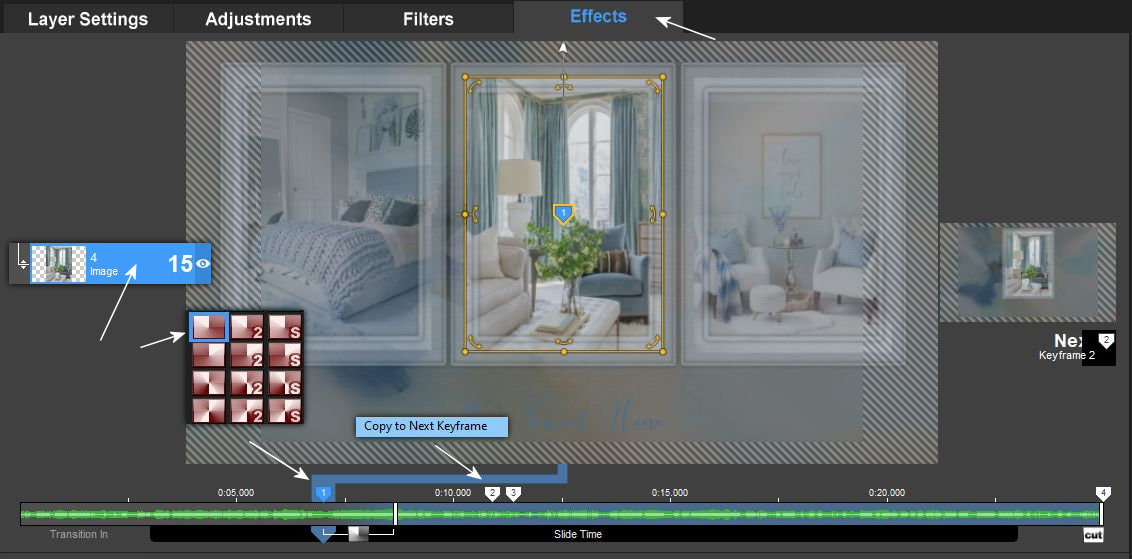
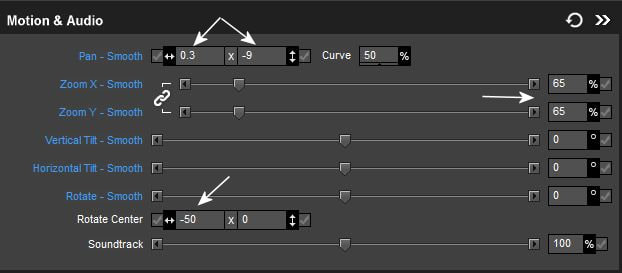
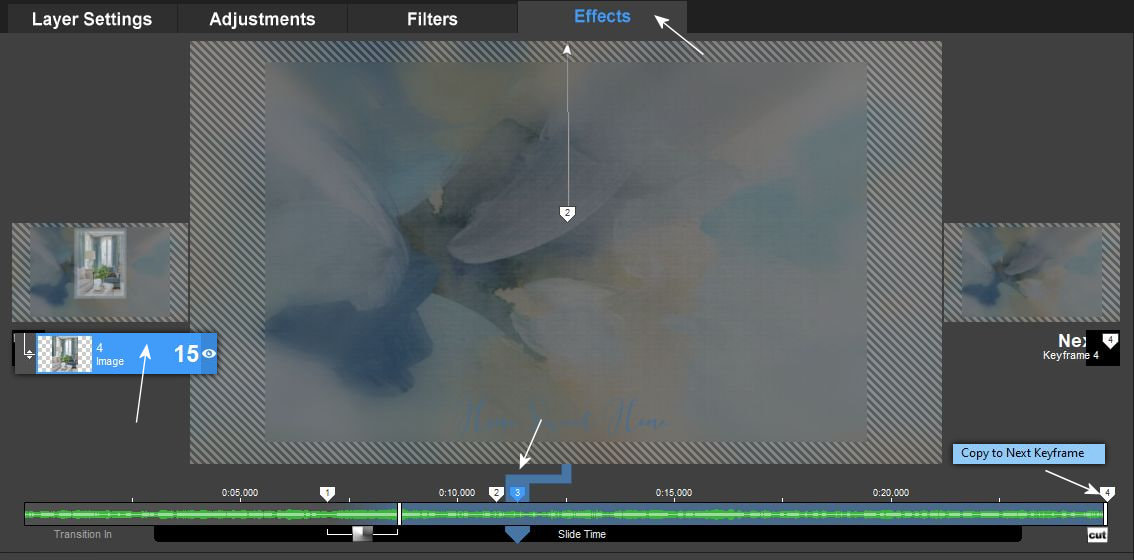
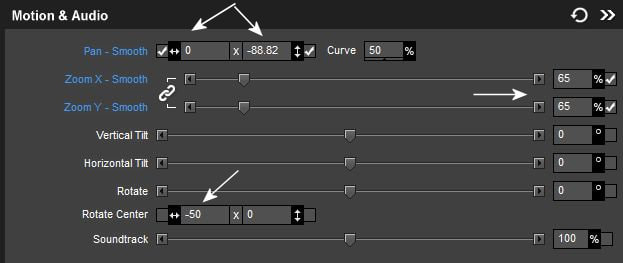
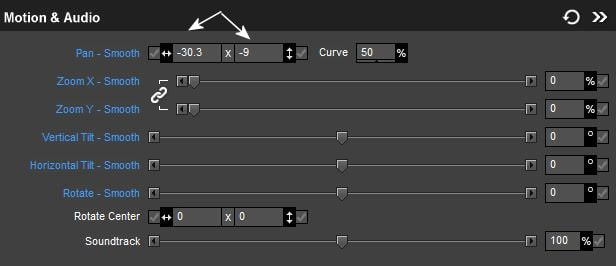
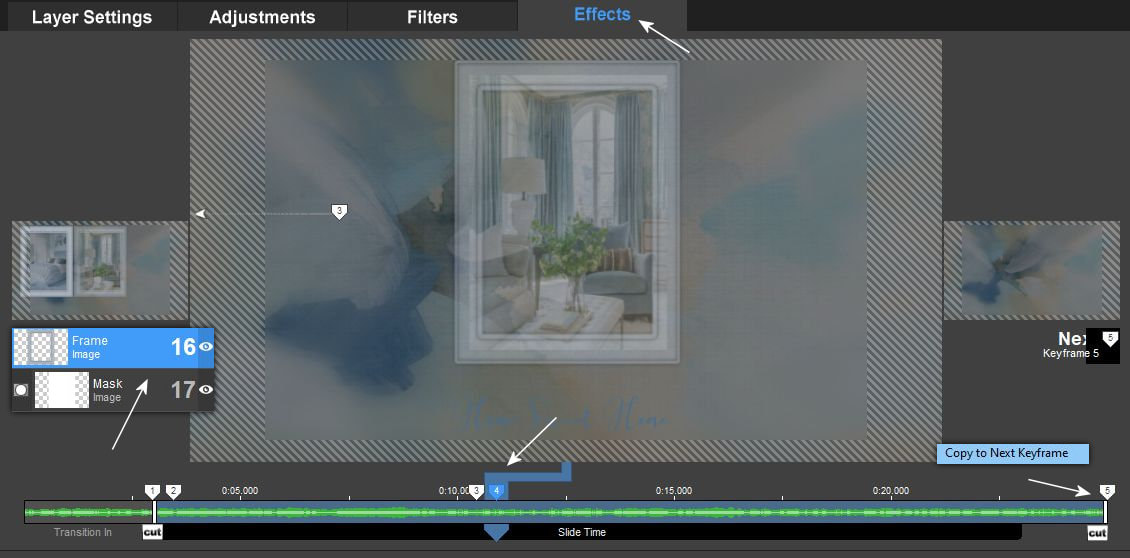
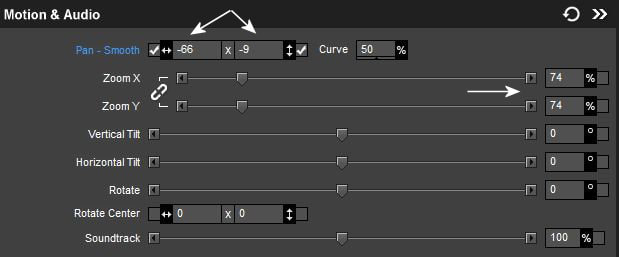
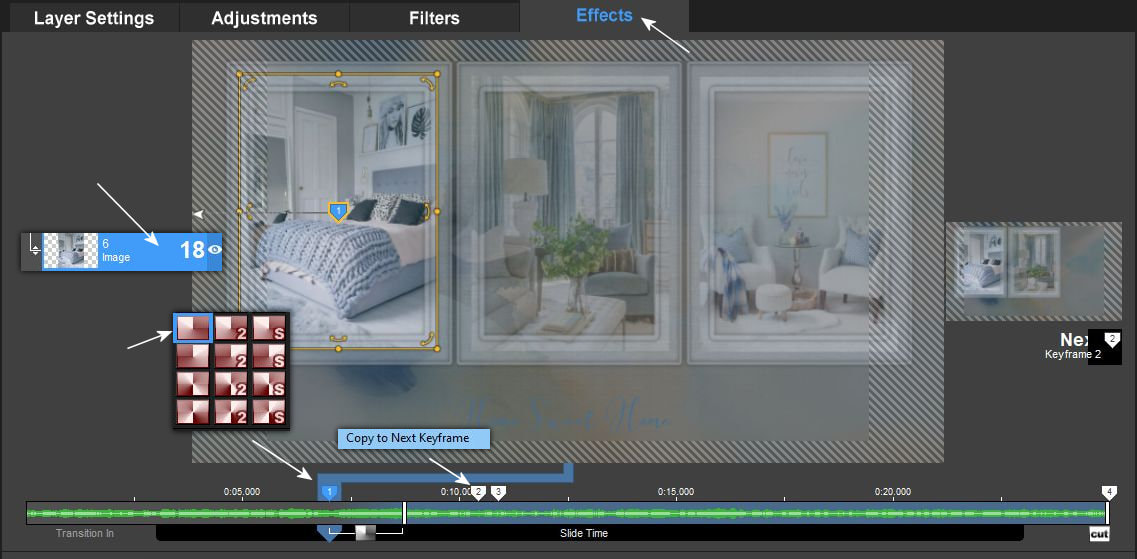
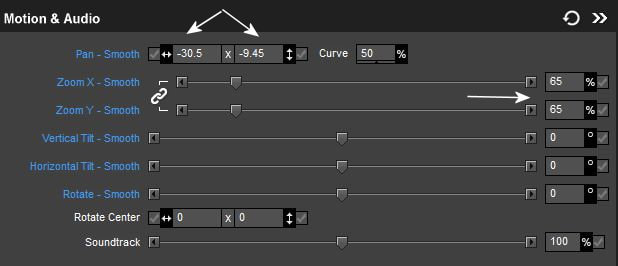
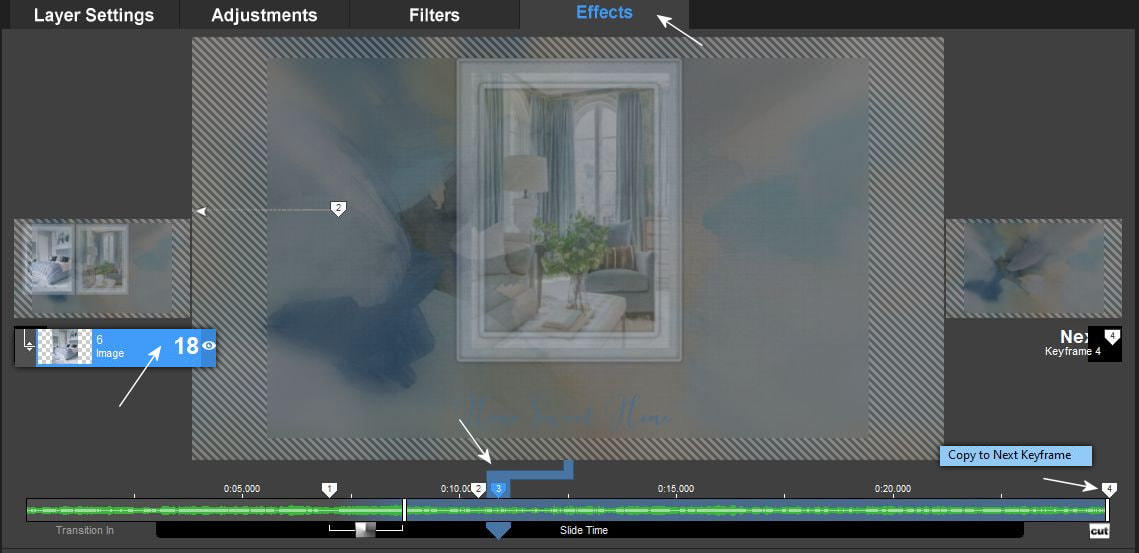
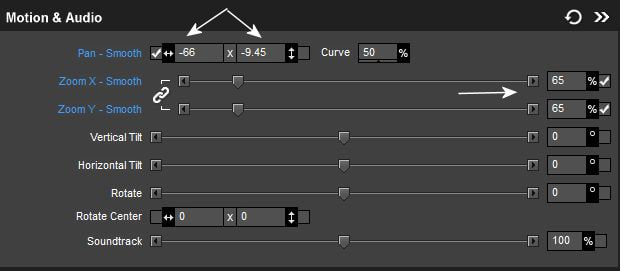
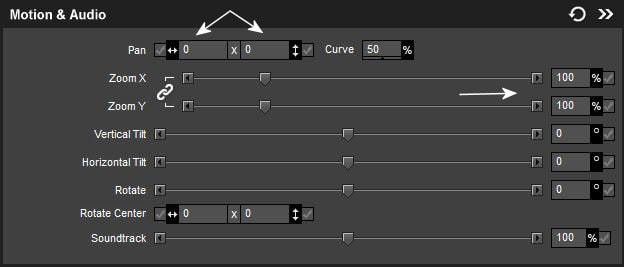
4. Kezdjük el az effectálást a keyframe pontokon. Kövesd a képeken látottakat.
Nagyon figyelmesen dolgozz. !!!!
Let's start effecting at the keyframe points. Follow what you see in the pictures.
Work very carefully. !!!!
5. Egy tanács.
A munka sok és ha elfáradsz a folyamatban mindig írd fel melyik sorszámú képeknél tartottál, hogy késöbb pontosan ott tudd folytatni ahol abbahagytad.
A good advice.
There is a lot of work and if you get tired during the process, always write down which numbered pictures you stopped at, so that later you can continue exactly where you left off.
6.
7.


8.
9.
10.
11.

12.

13.
14.
15.

16.
17.
18.
19.
20.

21.
22.
23.
24.
25.
26.
27.

28.
29.
30.
31.
32.

33.
34.
35.
36.
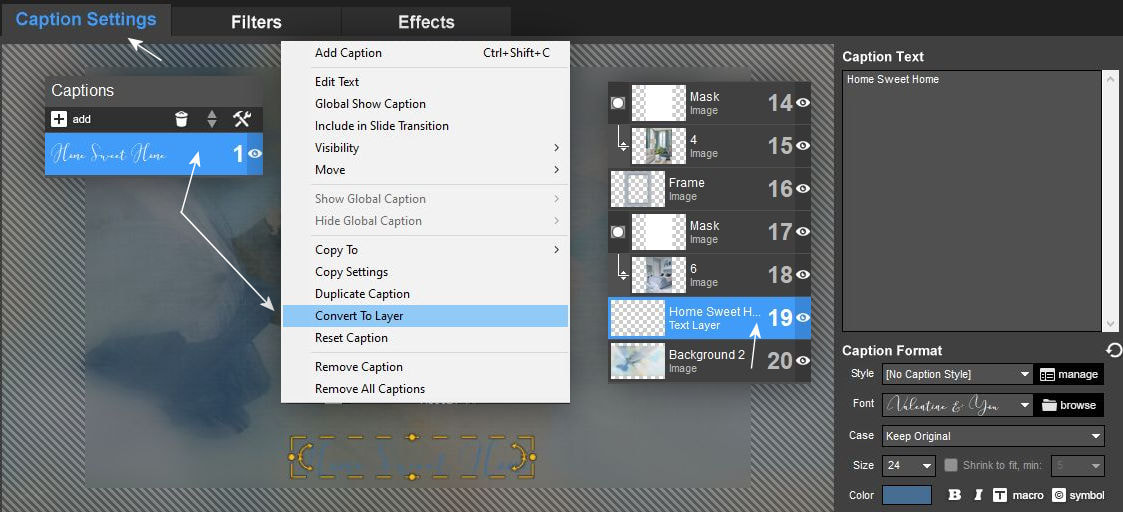
37. Még egy ötlet ehhez a bemutatóhoz. Mivel itt a keretek le és felfele mennek ki a képböl nem néz ki jól, hogy a felirat a keretek elött látszik. tehát ha ezt a feliratot itt a ProShow program Caption settingjében szeretnéd megcsinálni és azt rétegként szeretnéd használni akkor az alábbi módon csináld. Kattints a jobb egérfüllel a feliratodra és válaszd a Convert to layer menüt. Majd vidd le ezt a réteget a background réteged fölé.
One more idea for this tutorial. Since the frames here go up and down out of the screen, it does not look good that the inscription is visible in front of the frames. so if you want to make this caption here in the Caption setting of the ProShow program and use it as a layer, do it as follows.Right-click on your layer and select the Convert to layer menu. Then bring this layer down above your background layer.