A forgatásos ( Rotation ) effectnek sokféle megoldása van. Itt most azt mutatom meg amikor alulról jönnek a képek forgó mozgással és felül távoznak miközben a saját tengelyük körül is forognak valamelyest. 2 csempén dolgoztam 2 mozgásiránnyal.
Ez a mozgatás is nagyon látványos tud lenni egy videóban, ha kreatív módon készítjük el.
The rotation effect has many solutions. Here I will show you when the images come from below with a rotating movement and leave at the top while also rotating somewhat around their own axis. I worked on 2 tiles with 2 directions of movement. This movement can also be very spectacular in a video if it is created in a creative way.

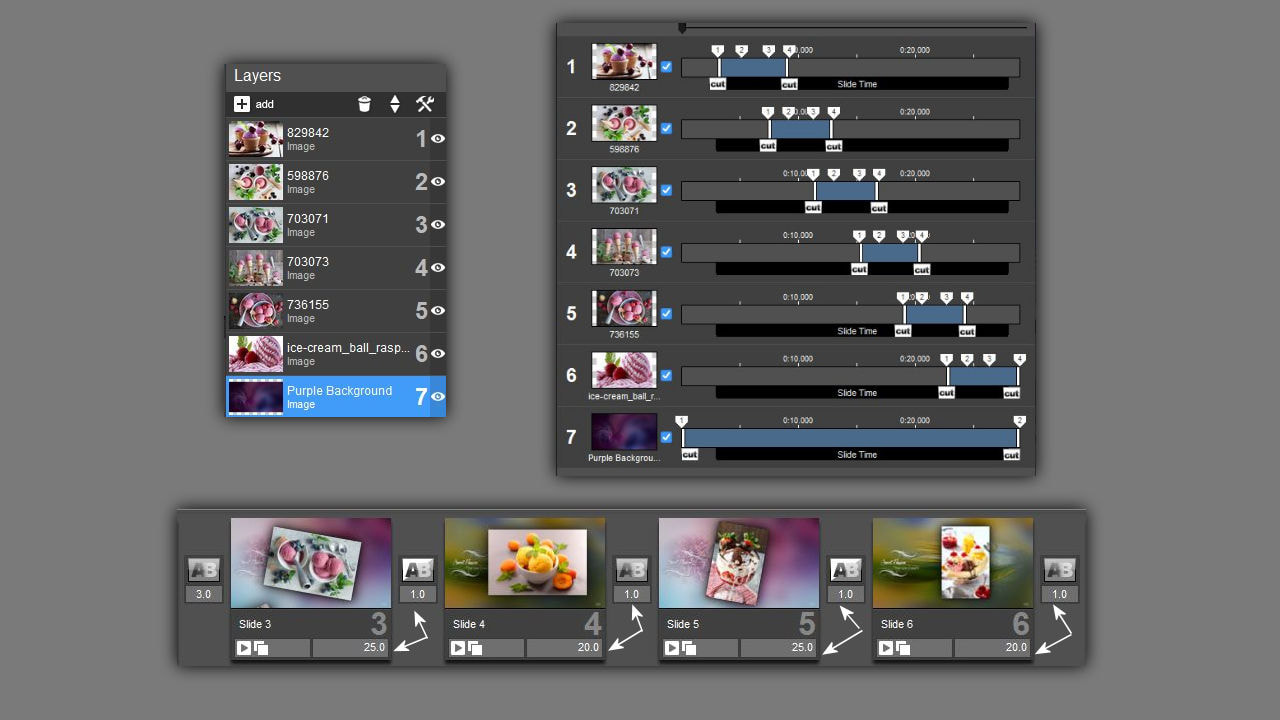
1. A csempéidet így kell összeraknod. Az elsö csempén 6 db képpel és egy backgrounddal dolgozunk. A keyframe pontok így néznek ki a keyframe editorban. A csempeidök hosszóak mert idö kell a képek megjelenítéséhez. Az egyik csempén 25.másodperc van a másikon 20. Köztük a transition csempéken pedig 1,0 mp.
Az állóképek mérete 564 x 847 a fekvö képek mérete 900 x 600
This is how you have to put your tiles together. On the first tile, we work with 6 images and a background. This is what keyframe points look like in the keyframe editor. Your tiles are long because it takes time to display the images. One tile has 25 seconds, the other has 20. Between them, the transition tiles have 1.0 seconds.
The size of portrait images is 564 x 847, the size of landscape images is
900 x 600
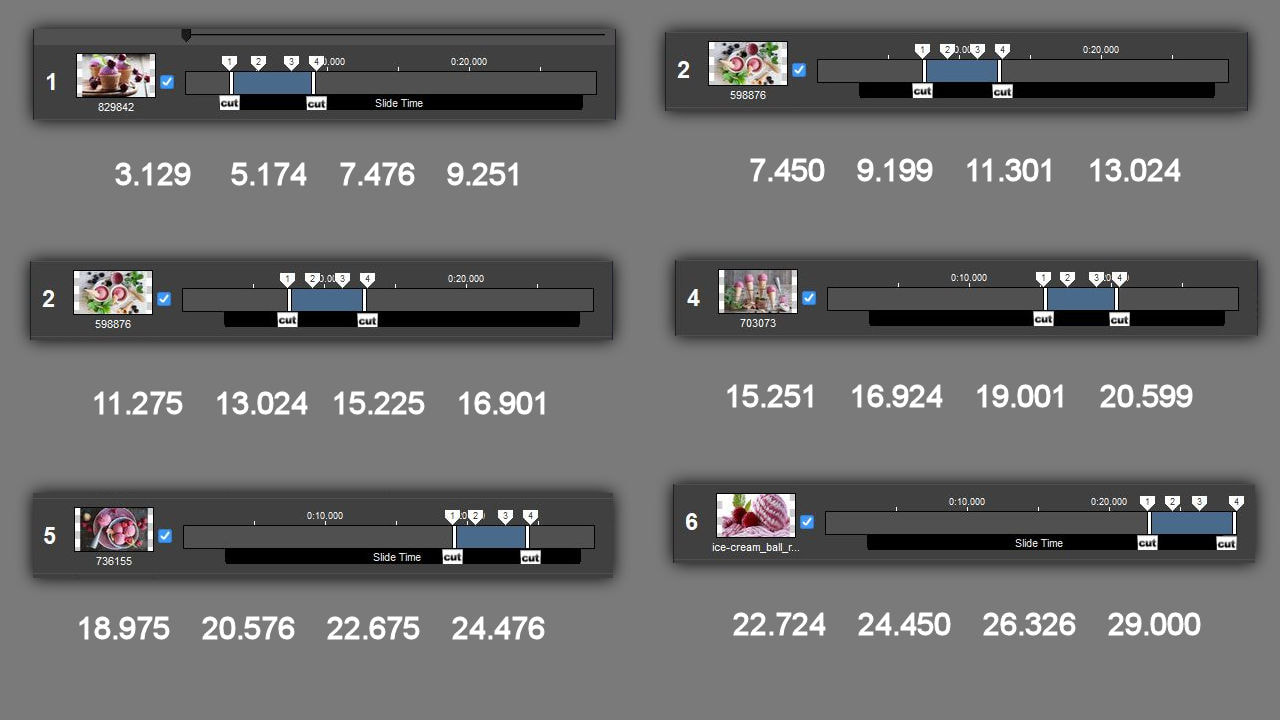
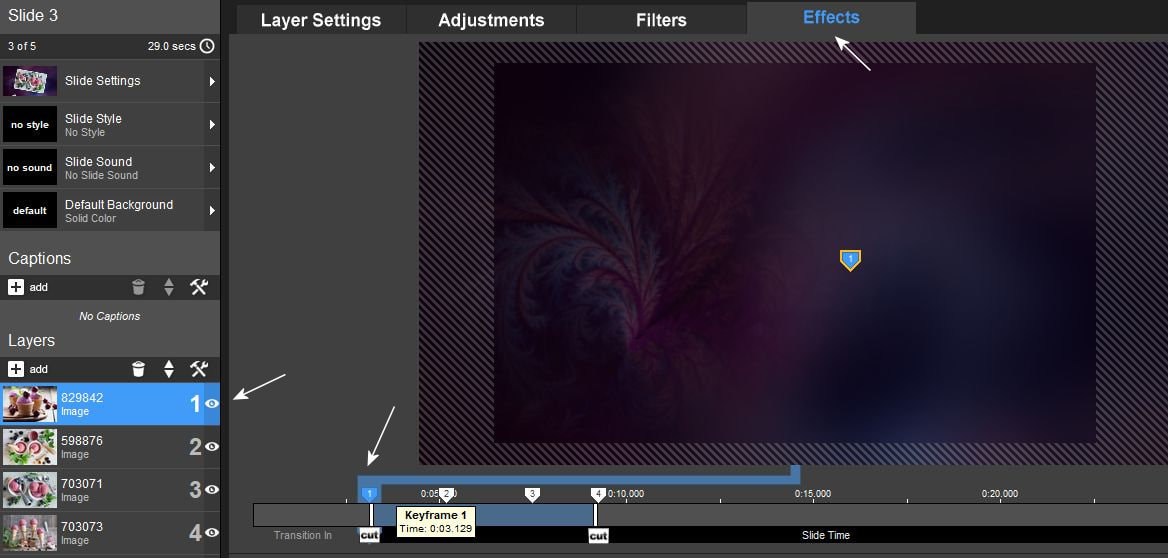
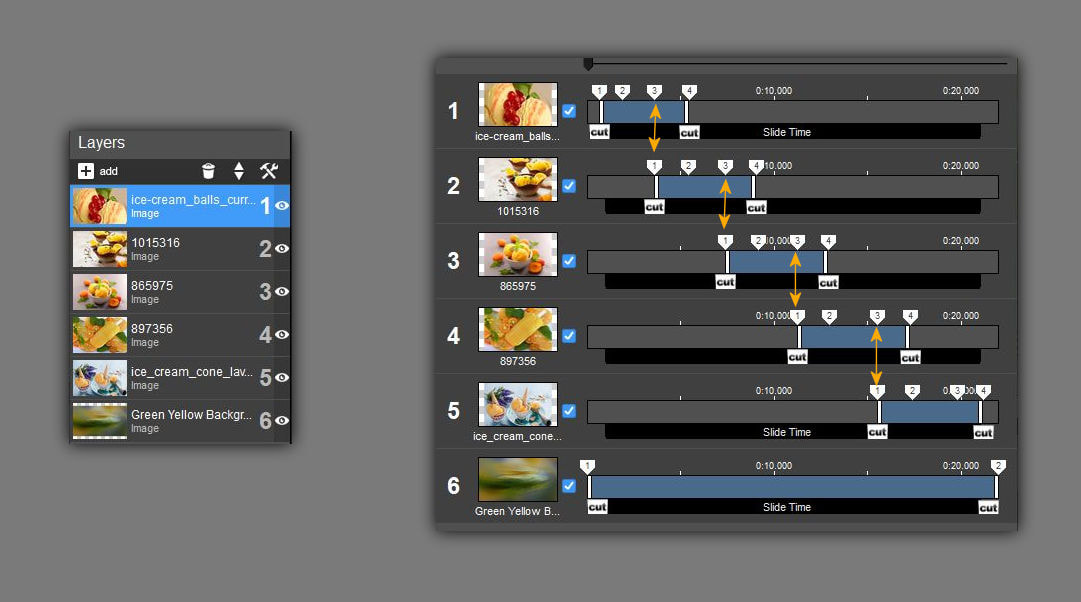
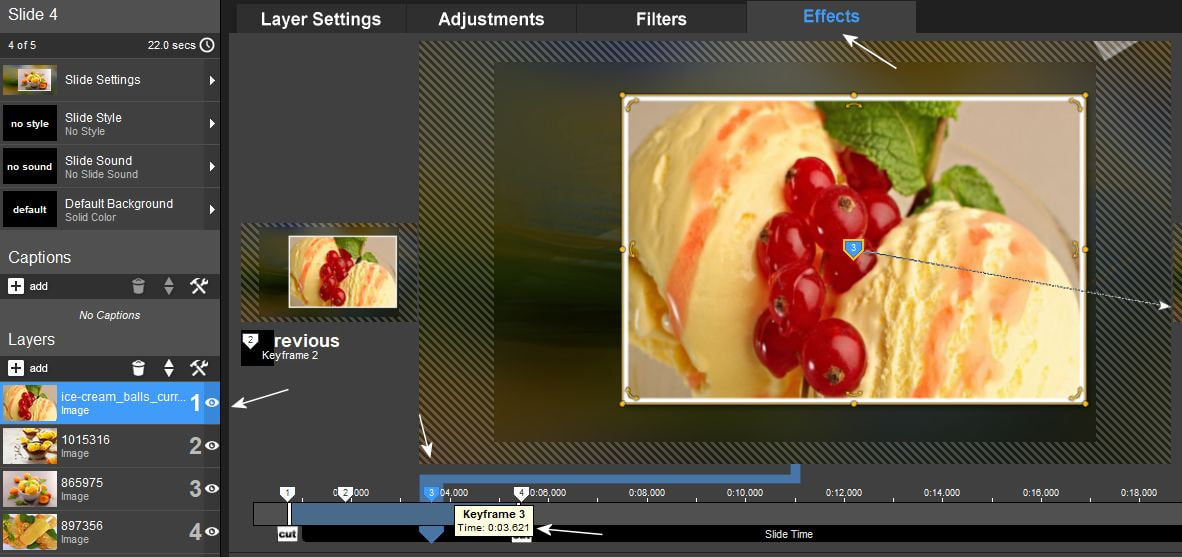
2. Itt a pontos számszerü helyzetüket látod a keyframe pontoknak. Ilyen elosztásban helyezd el öket az itt látható rétegeken. Ez a 25 másodperces csempe.
Here you can see the exact numerical position of the keyframe points. Place them in this distribution on the layers shown here. This is the 25 second tile.
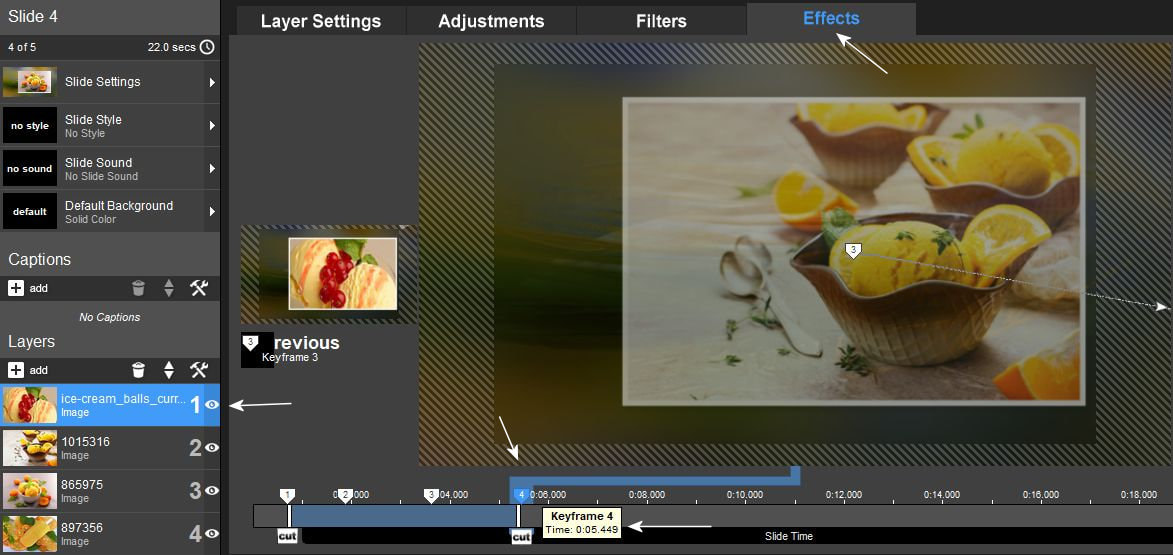
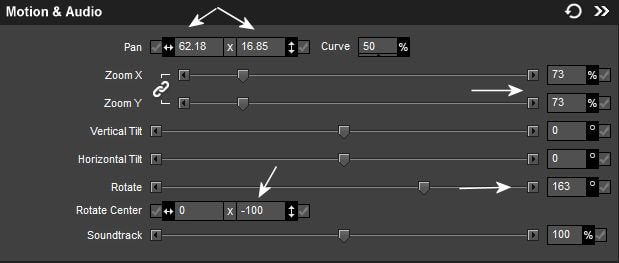
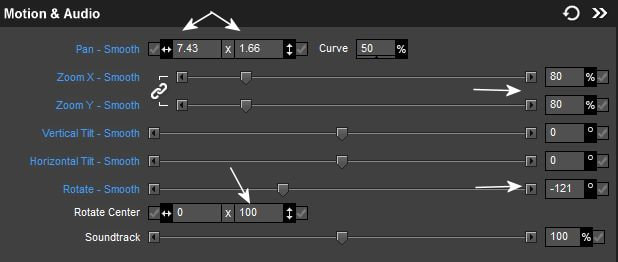
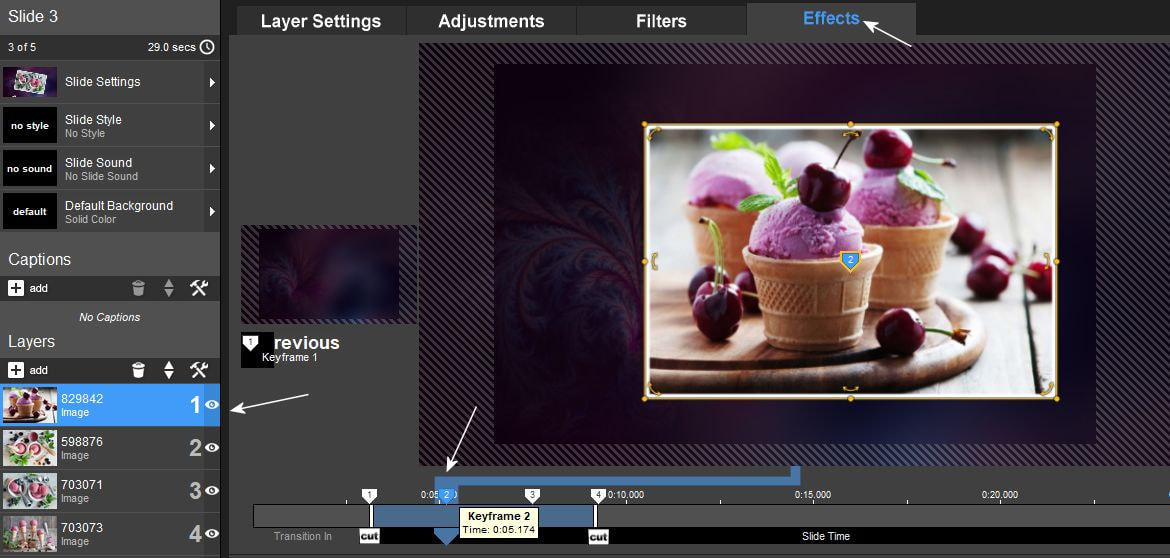
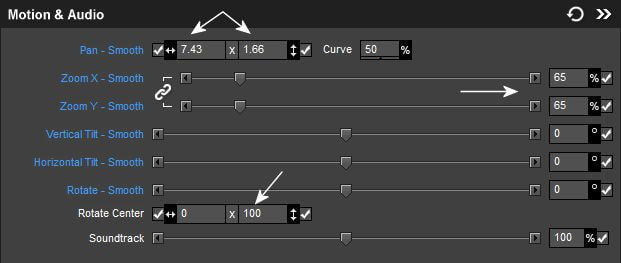
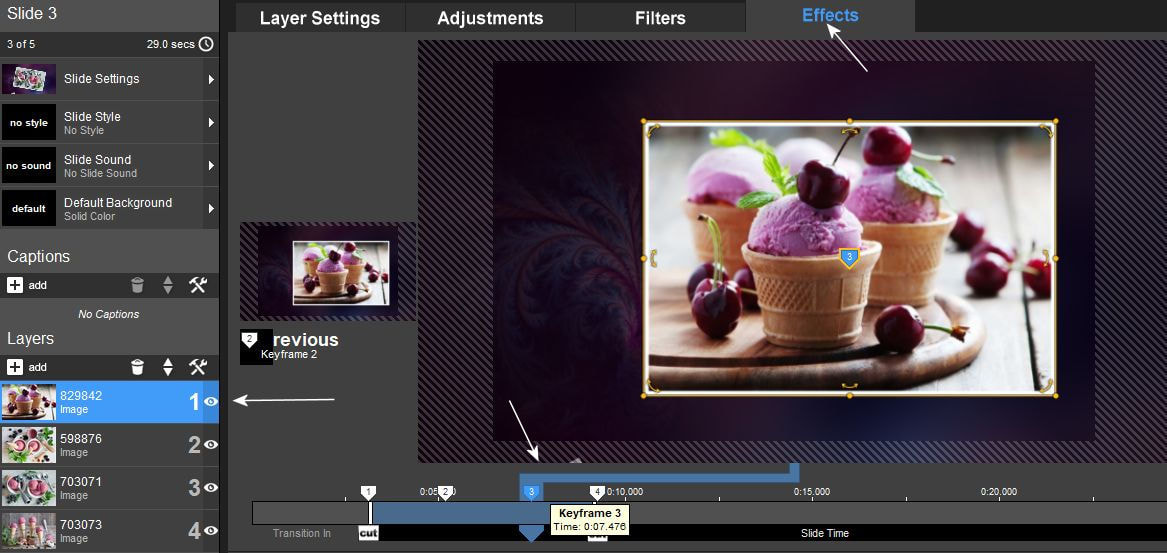
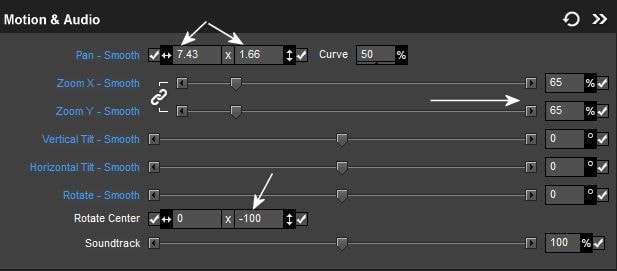
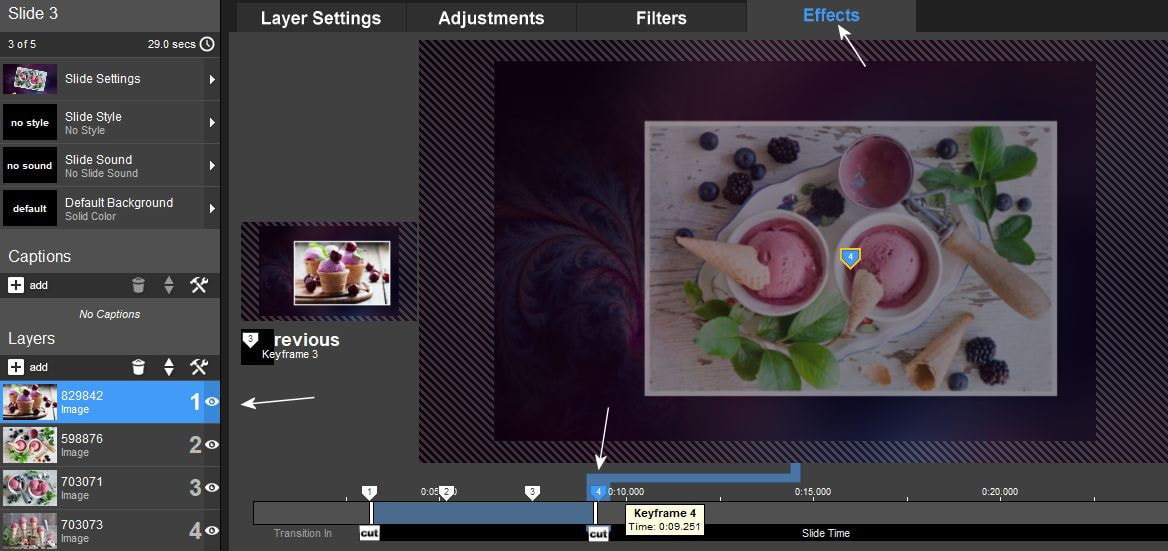
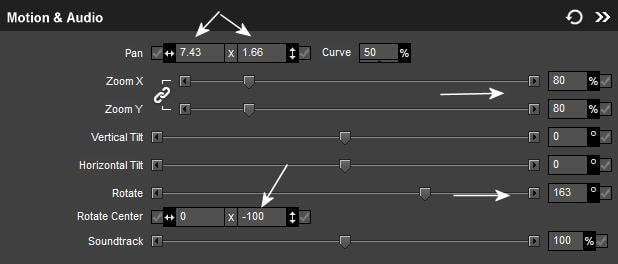
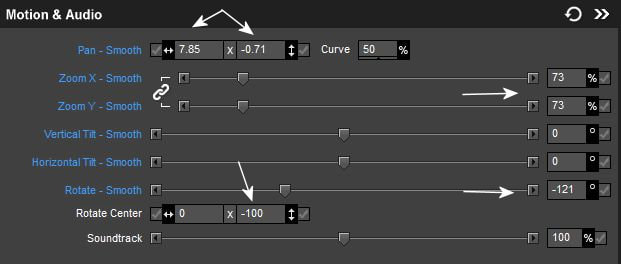
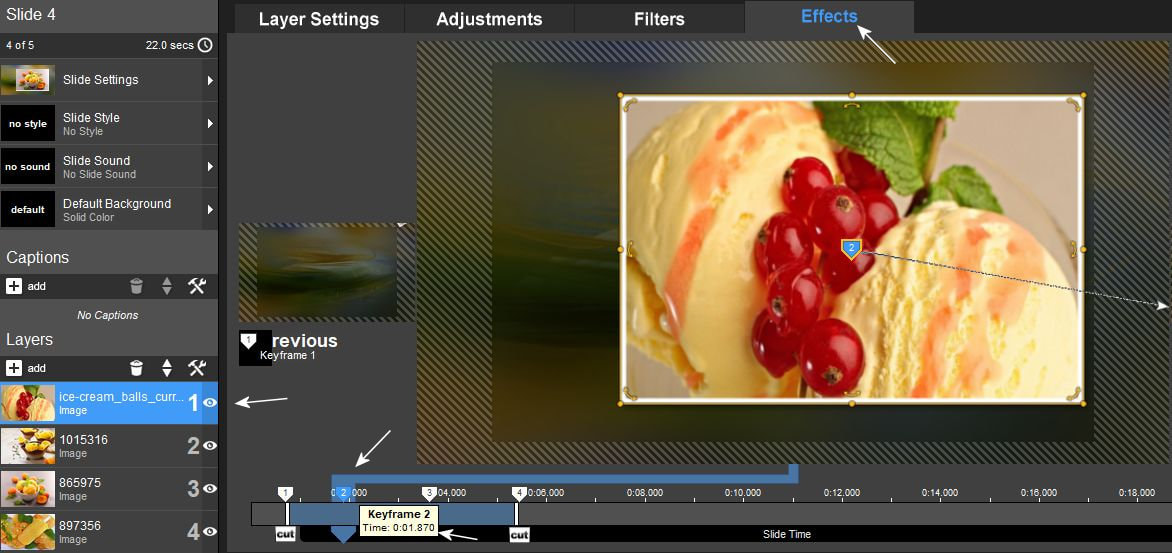
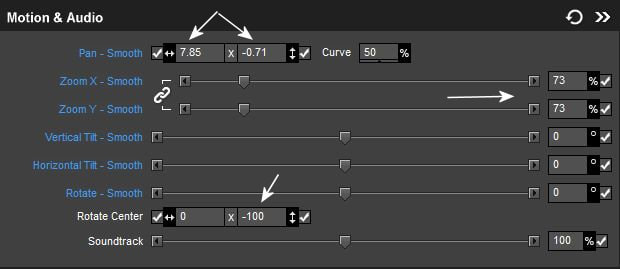
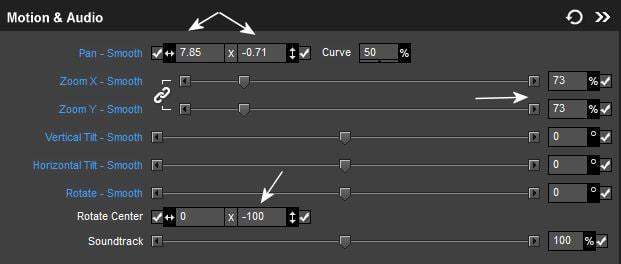
3. Kövesd a képeken látott beállításokat sorban a keyframe pontokon.
Follow the settings shown in the pictures in order at the keyframe points.
4.
5.
6.
Figyelem!!! Itt állj meg és mindegyik képrétegen ugyanezek a beállítási értékek vannak minden keyframe ponton. Csak az a különbség, hogy a keyframe pontok máshol helyezkednek el. Tehát mind a 6. képrétegre ugyanezeket az értékeket kell beírnod.
Ha valaki azt szeretné, hogy egy képen ezt megcsinálja és utánna duplázza a képet még 5x az is megoldás. Csak akkor ne felejtse a keyframe pontok helyzetét is átírni majd képet cserélni az Adjustmen menüben.
Attention!!! Stop here and each image layer has the same adjustment values at each keyframe point. The only difference is that the keyframe points are located elsewhere. So you have to enter the same values for all 6 image layers. If someone wants to do this on an image and then double the image 5 times, that is also a solution. Only then do not forget to rewrite the position of the keyframe points and change the image in the Adjustmen menu.
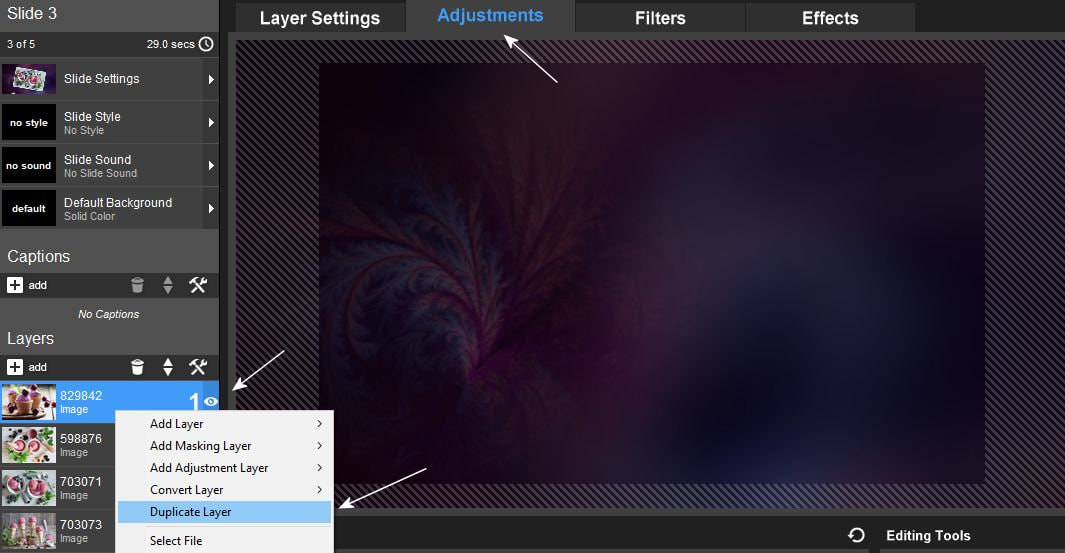
7. Ha készen vagy mind a 6 kép réteggel és árnyékolni szeretnéd a képeidet akkor azt most megteheted amikor már minden érték a helyén van. Amikor duplázzuk a rétegeket az értékek is rajta lesznek az árnyékkal ellátott rétegen is így követni tudják a képek mozgását. Tehát jobb klikk az elsö rétegen és duplicate.
If you are ready with all 6 image layers and want to shade your images, you can do it now when all the values are in done. When you double the layers, the values will also be on the layer with the shadow, so the shadows can follow the movement of the images. So right click on the first layer and duplicate.
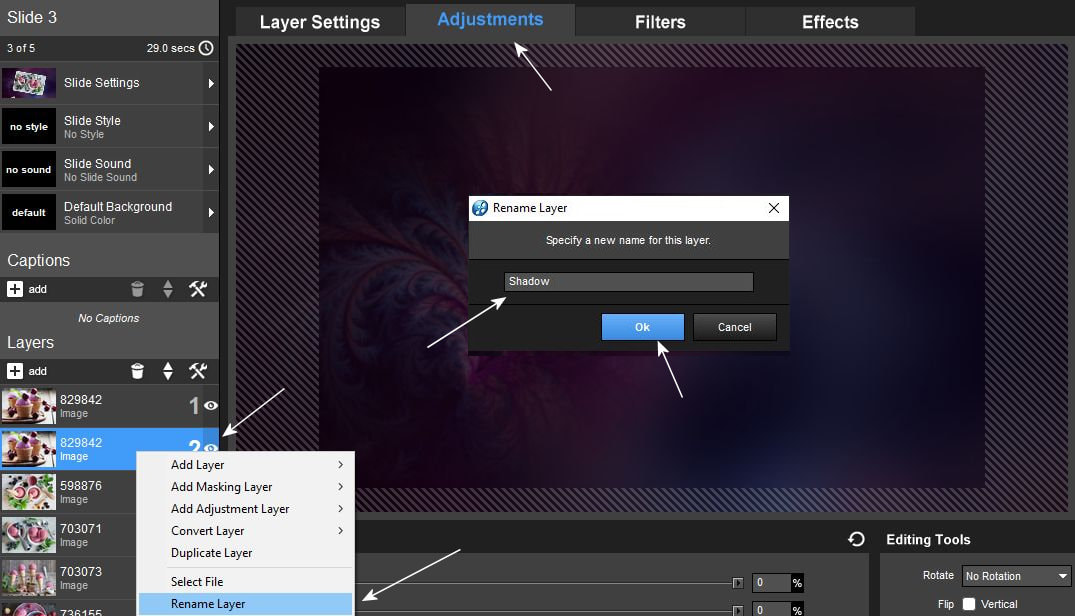
8. Jobb klikk az új rétegen és rename layer. Át kell nevezd ezt a réteget árnyéknak, hogy tudd mindig melyik lesz az árnyék képed és melyik az eredeti. Amikor a csempédet másolod hogy tovább csináld képcserével a videódat az árnyék képedet soha nem kell cserélned az adjustmentben csak mindig a felette levö rétegen levöt.
Right click on the new layer and rename layer. You have to rename this layer to shadow so that you always know which will be your shadow image and which is the original. When you copy your tile to continue making your video with image replacement, you never have to replace your shadow image in the adjustment, only always on the layer above it.
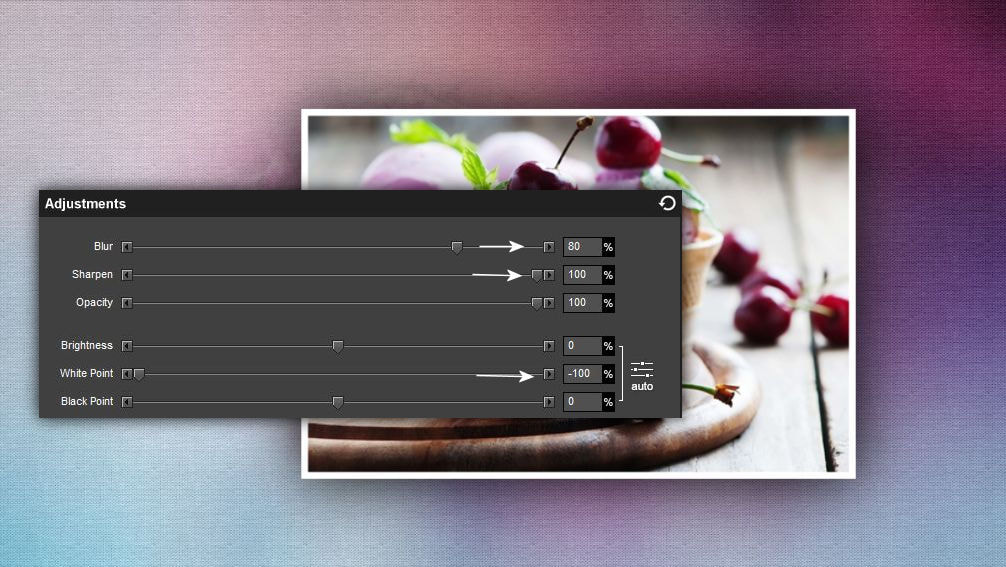
9. Az adjustment menüben ezeket az értékeket állítsd be az árnyék rétegeden.
In the adjustment menu, set these values on your shadow layer.
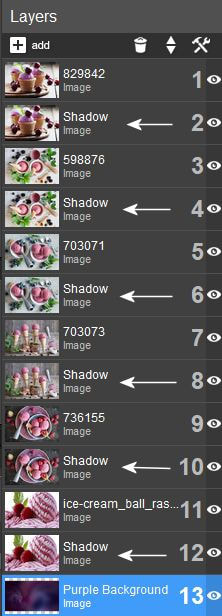
10. Ne feledd mindig a második a duplázott réteged az árnyék réteg! Ez fontos.
Ha jól dolgoztál mostmár 13 réteged van.
Always remember that the second layer you duplicate is the shadow layer! This is important. If you worked well, you now have 13 layers.
11. Kezdjünk dolgozni a második csempén ahol fentröl jönnek és felfele is mennek el a képek. Ennek sok varációja lehet.Mivel itt csak 5 kép réteg van így a csempe ideje is csak 20. mp. A keyframe pontokat hasonló módon helyezd el. Egy dologra figyelj ami fontos. Itt azt sárga nyilakkal jelöltem. a következö réteg 1-es keyframe pontja mindig az elözö réteg 3-as keyframe pontjával egyidöben kezdödjön. Ezeket a kép alapján is beállíthatod a megfelelö helyre.
Let's start working on the second tile, where the images come from above and also go up. There can be many variations of this. Since there are only 5 image layers here, the tile time is only 20 seconds. Place the keyframe points in a similar way. Pay attention to one thing that is important. Here I marked it with yellow arrows. keyframe point 1 of the next layer should always start at the same time as keyframe point 3 of the previous layer. You can also set them to the right place based on the picture.
12. Kövesd a képeken látott beállításokat sorban a keyframe pontokon.
Follow the settings shown in the pictures in order at the keyframe points.

13.
14.
15.