Folytassuk a munkát a Pro Show Producer programban. Ehhez az effecthez a használatos kép méretek váltóak lehetnek hiszen mindenkinél attóll függ hogy mekkora álló és fekvö maszkot készített a leírás alapján. Én 736x521 fekvö és 470x620 álló képeket használtam. Emiatt a képek zoom értékei is eltérhetnek kissé az itt láthatóaktól. Az a lényeg hogy a maszkoknak alapon takarnia kell a felhasználandó képeiteket.
Let's continue working in the Pro Show Producer program. The image sizes used for this effect can vary, as it depends on how big a vertical and horizontal mask you made based on the description. I used 736x521 landscape and 470x620 portrait images. For this reason, the zoom values of the images may differ slightly from those shown here. The point is that the masks should basically cover the images to be used.

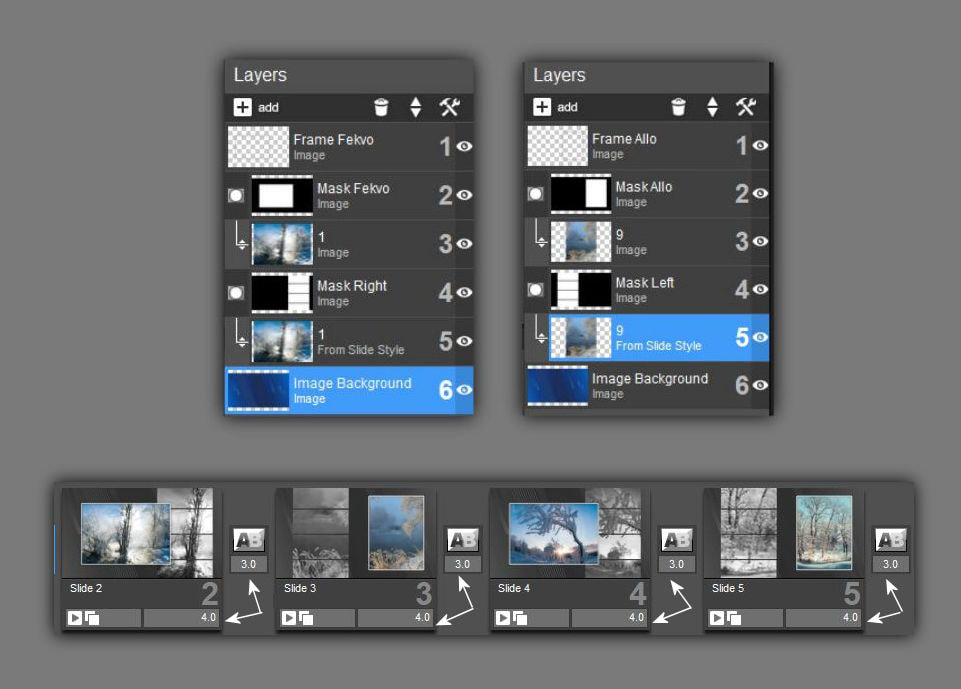
1. Ebben a bemutatóban én csak a fekvö slide-on levö rétegeket fotóztam le, de egy gyakorlott felhasználó már az álló slide-ot is meg tudja csinálni az itt látható képek alapján. Az elsö részben minden réteget megcsináltunk ahhoz is.
Igy rakd össze a rétegeket mind az álló és fekvö slidera. Minimum 4 és 3 másodperces idöre van szükség ehhez az effecthez.
In this presentation, I only photographed the layers on the horizontal slide, but an experienced user can also make a vertical slide based on the images shown here. In the first part, we did all the layers for that as well. Then stack the layers for both vertical and horizontal sliders. A minimum time of 4 and 3 seconds is required for this effect.
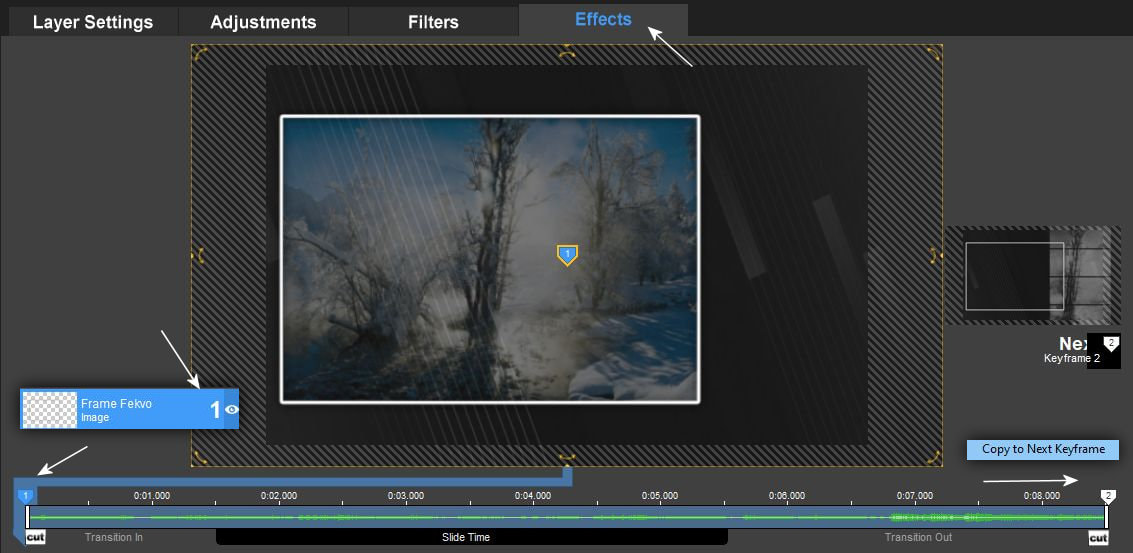
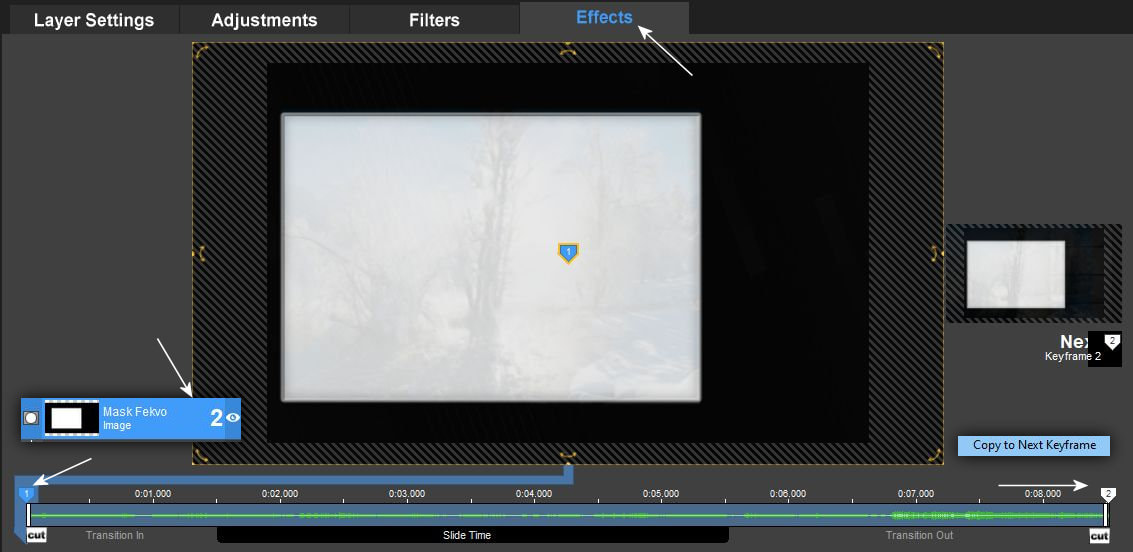
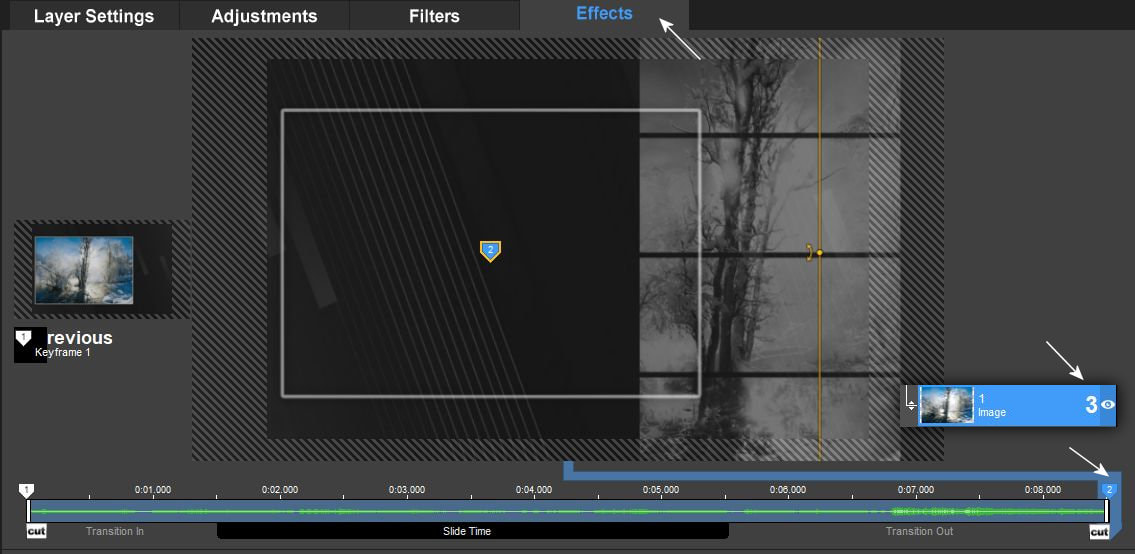
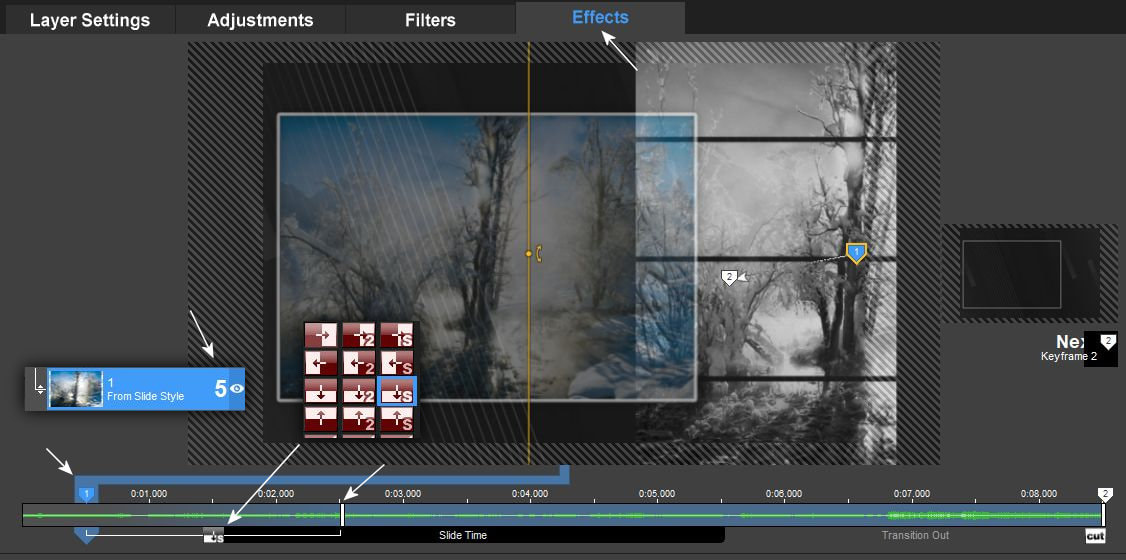
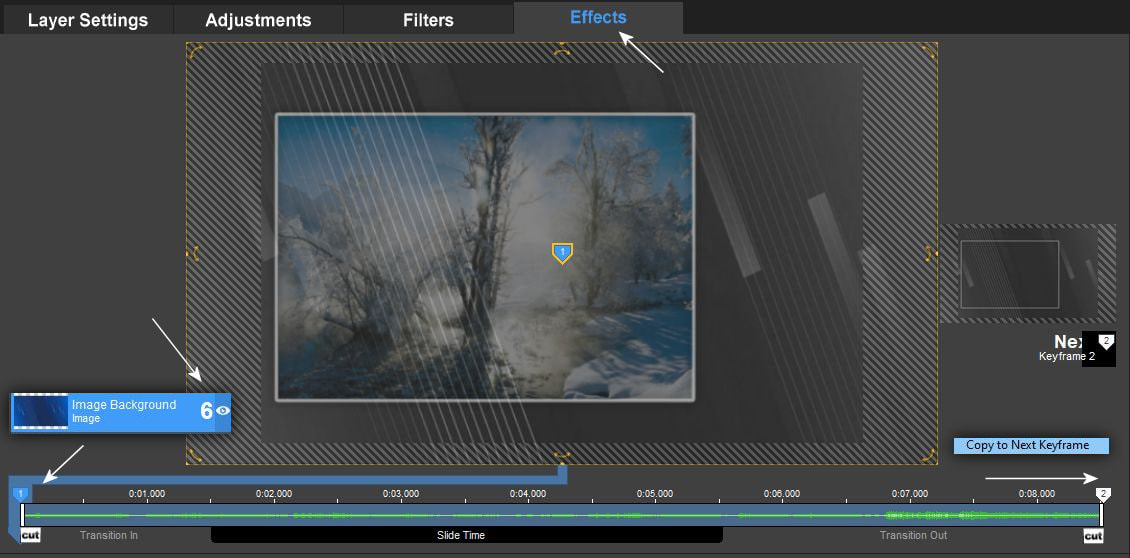
2. Mivel nincs köztes keyframe a munka nem annyira nehéz de mégis látványos eredményt hoz. Kövesd a képeken látottakat.
Since there is no intermediate keyframe, the work is not so difficult, but it still produces spectacular results. Follow what you see in the pictures.
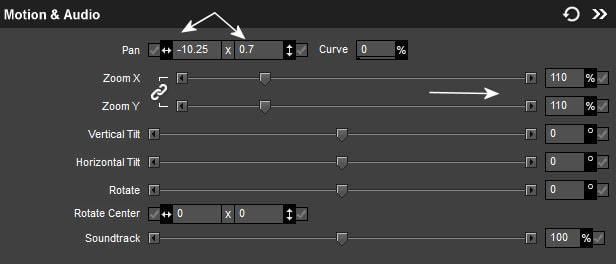
3.
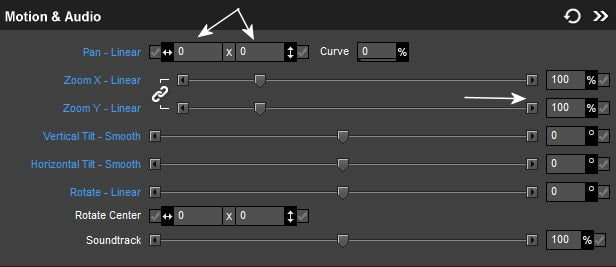
4.
5.
6.
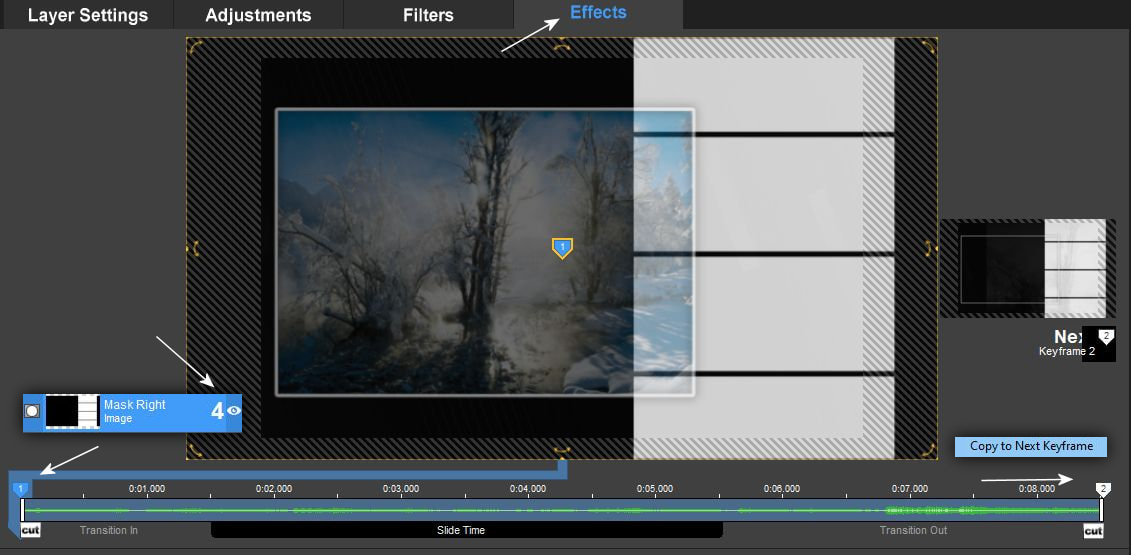
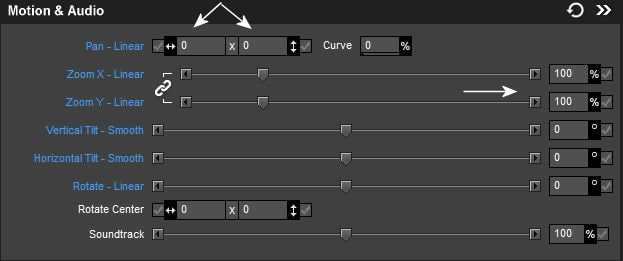
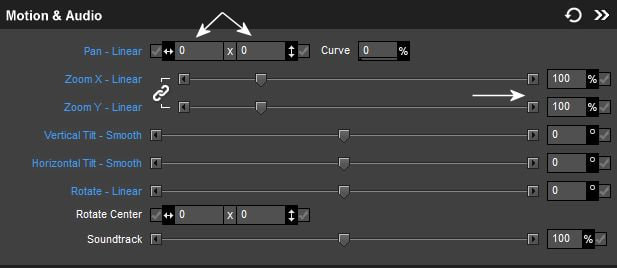
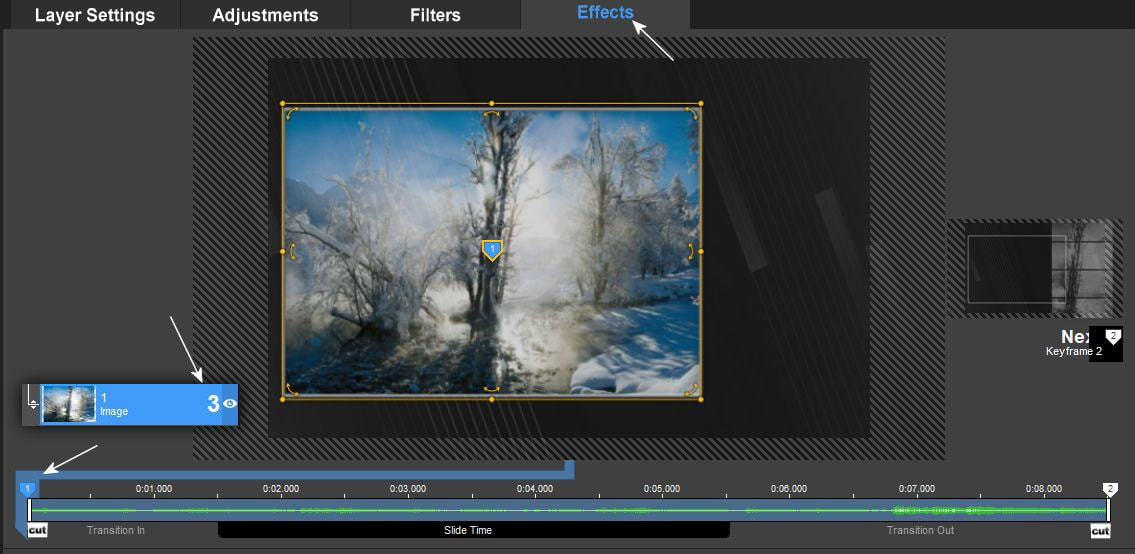
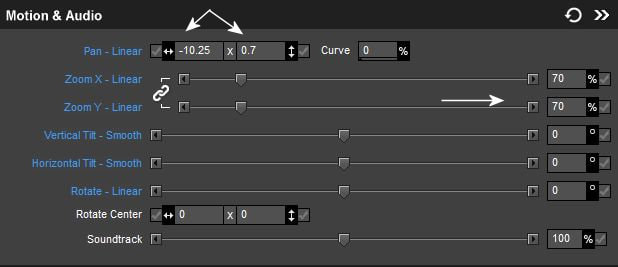
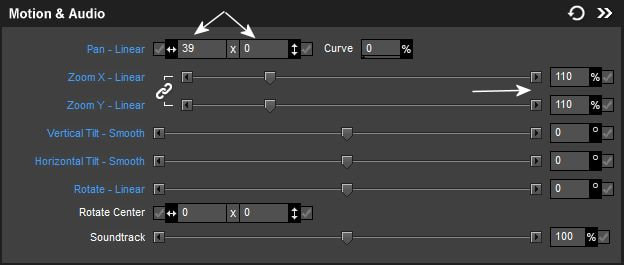
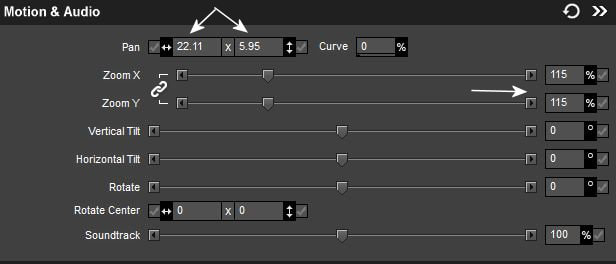
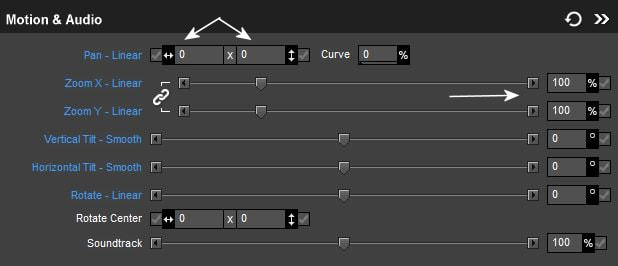
7. A jobb és balszélsö maszkok alatt nem zoom van hanem mozgatjuk a képeket valamilyen irányban az egyes és a kettes pont között. Valamint az egyes keyframe pontot egy kicsit beljebb kell hóznos amire egy áttünést teszünk, hogy az a kép látványosabban jelenjen meg.
There is no zoom under the right and leftmost masks, but we move the images in some direction between point one and point two. Also, each keyframe point needs to be moved a little further in, whereupon we apply a transition so that the image is displayed more visually.
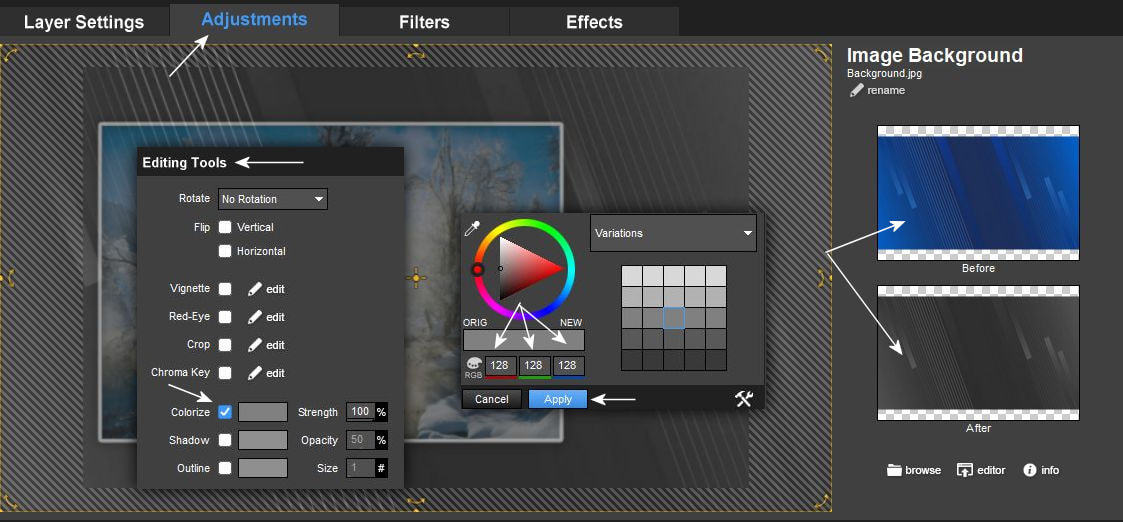
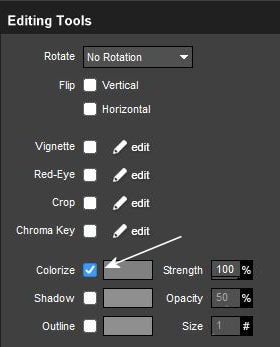
Az editing eszköznél tegyél pipát a colorize kockába hogy a képed fekete fehér legyen.
Check the colorize box of the editing tool to get a black and white image
8.
9.
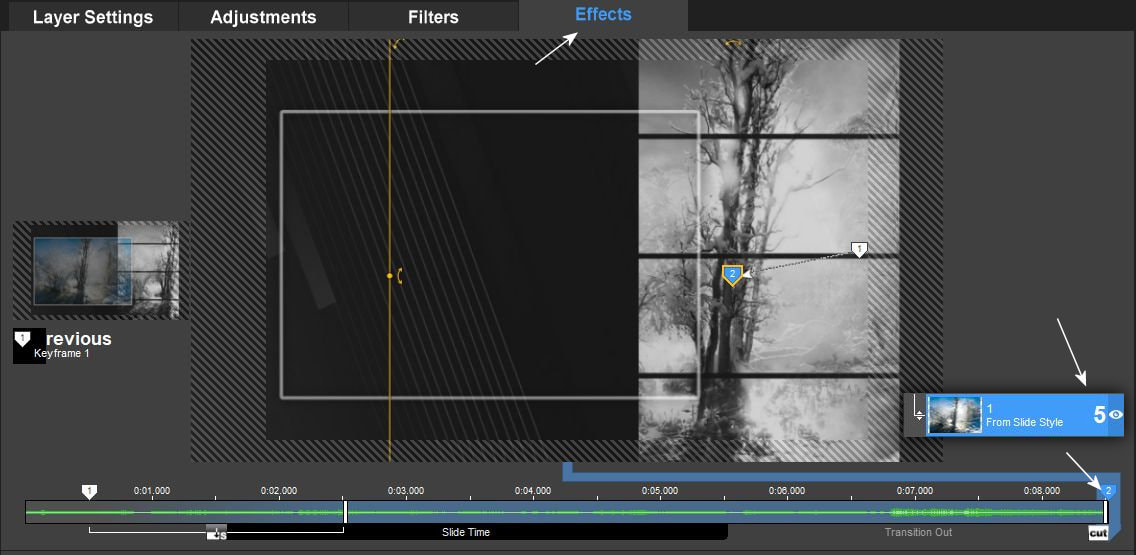
10. Itt a kiválasztott színes hátterünket tanuljuk meg fekete -fehérré tenni. Ha valaki szeretné ezt is alkalmazni. Én ezt azért csináltam mert a témámhoz tartozó színes képek elegánsabban néztek ki egy nem túl sötét háttéren . Ezt a lépést mindenki maga döntheti el, hogy alkalmazza e vagy sem.
Here we learn to turn our selected colored background into black and white. If anyone wants to use this as well. I did this because the color pictures belonging to my topic looked more elegant on a not too dark background. Everyone can decide for themselves whether to use this step or not.